If you have not connected a storage platform yet, start with Accessing the Library. For how changes in your storage appear inside CloudFiles, see Real-Time Sync.
This guide is divided into three main sections:
- Accessing the Content Library From HubSpot: all file and folder actions you can perform inside HubSpot using the Content Library, including opening them in storage platforms directly, downloading, renaming, uploading, associating with HubSpot records, or adding items to Datarooms.
- Accessing the Content Library From the CloudFiles for HubSpot App: all file and folder management features available in the CloudFiles for HubSpot app, such as previewing files, opening in storage, downloading, renaming, moving, deleting, sharing, adding to Datarooms, and replacing files (SharePoint only).
- Sharing a web page as a link: turning a web page into a trackable CloudFiles link.
1. Accessing The Content Library From HubSpot
When working inside HubSpot, you can access the Content Library through the "Select File/Folder" button in the App Card or through the "Add" button in the CloudFiles sidebar widget.
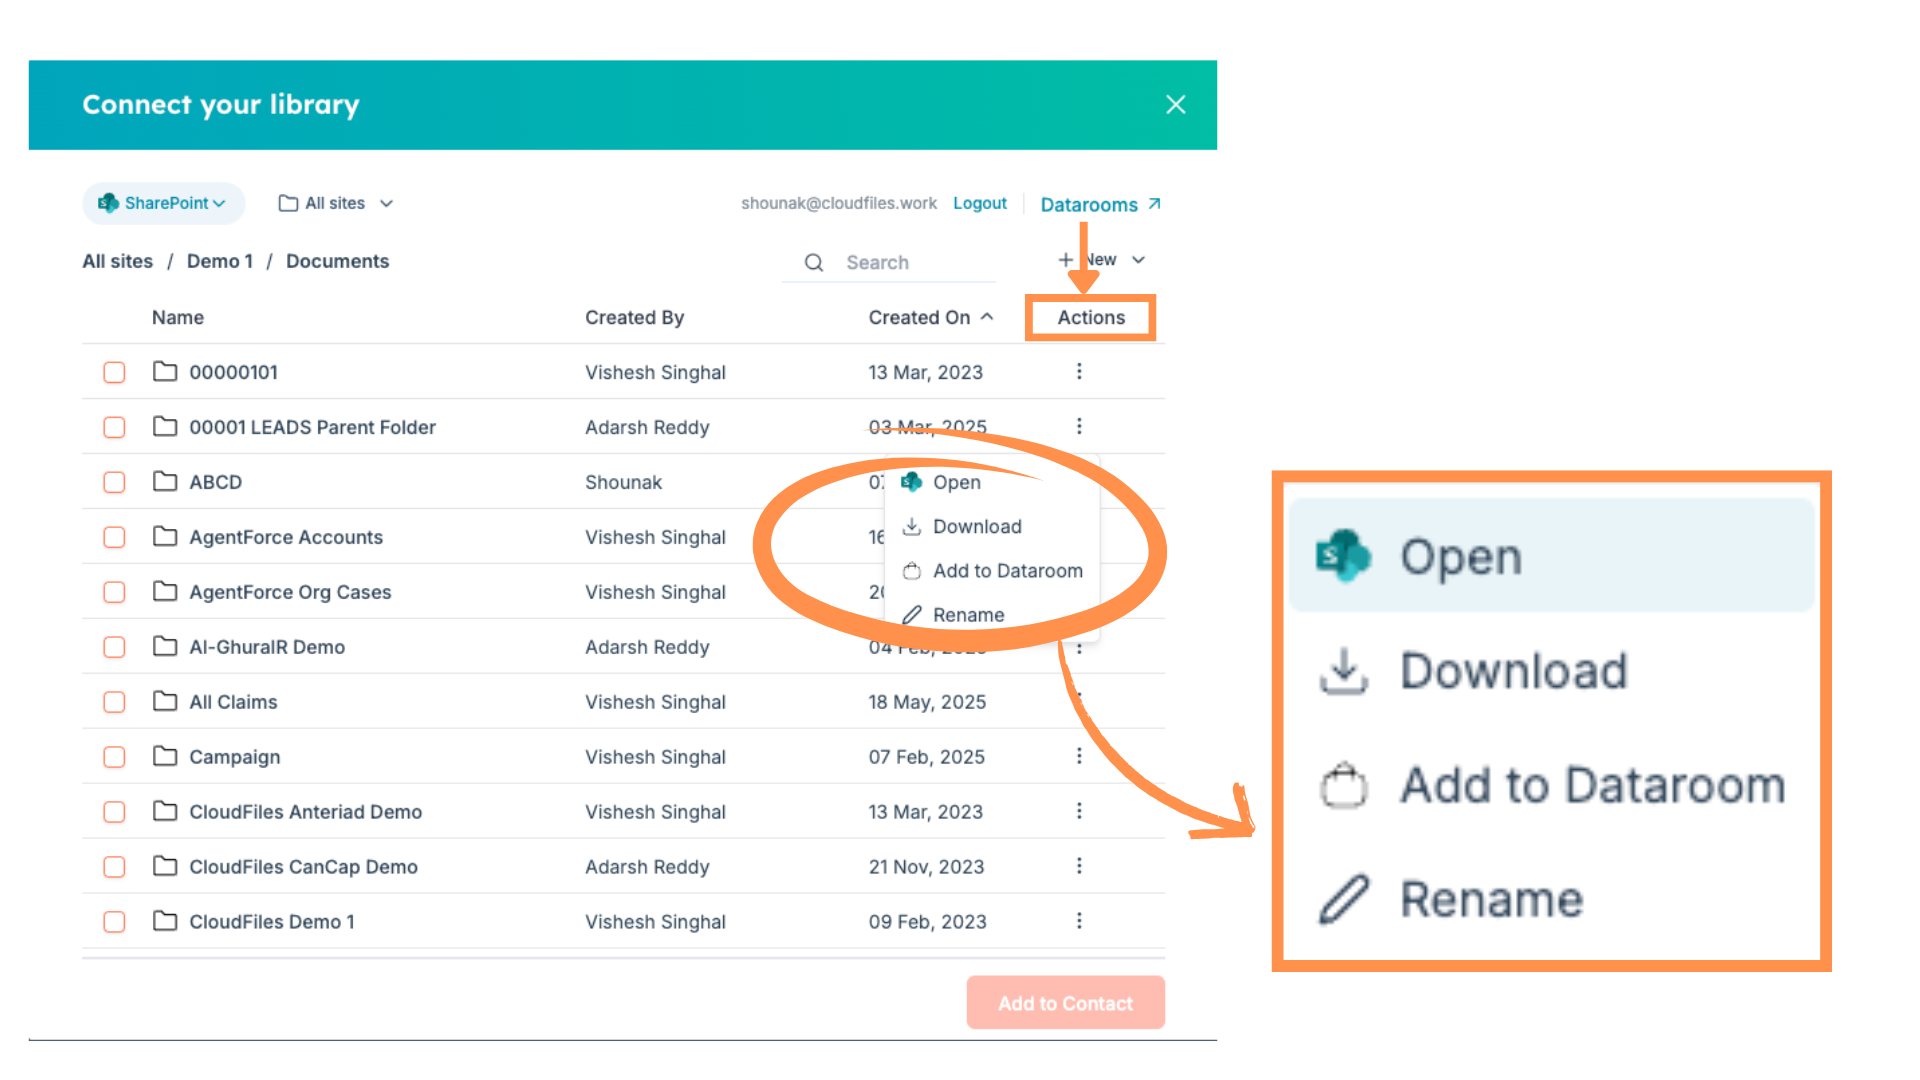
From either entry point, you can perform several actions on files and folders using the three-dot menu beside each item. The available actions include:
- Open in Cloud Storage: Opens the file or folder in its native editor, such as:
- Google Docs → opens in Google Docs Editor
- Microsoft Word (from SharePoint) → opens in Microsoft Online Editor
- CloudFiles documents → opens in CloudFiles document viewer
- Download: Saves the file or folder to your device. A PPTX file downloads as a PPTX file, a PDF downloads as a PDF, a DOCX downloads as a DOCX, and the same applies to Excel files.
- Rename: Edit the name of the file or folder if supported by the connected storage.
- Add to Dataroom: Adds the file or folder to a secure CloudFiles Dataroom for sharing and analytics.
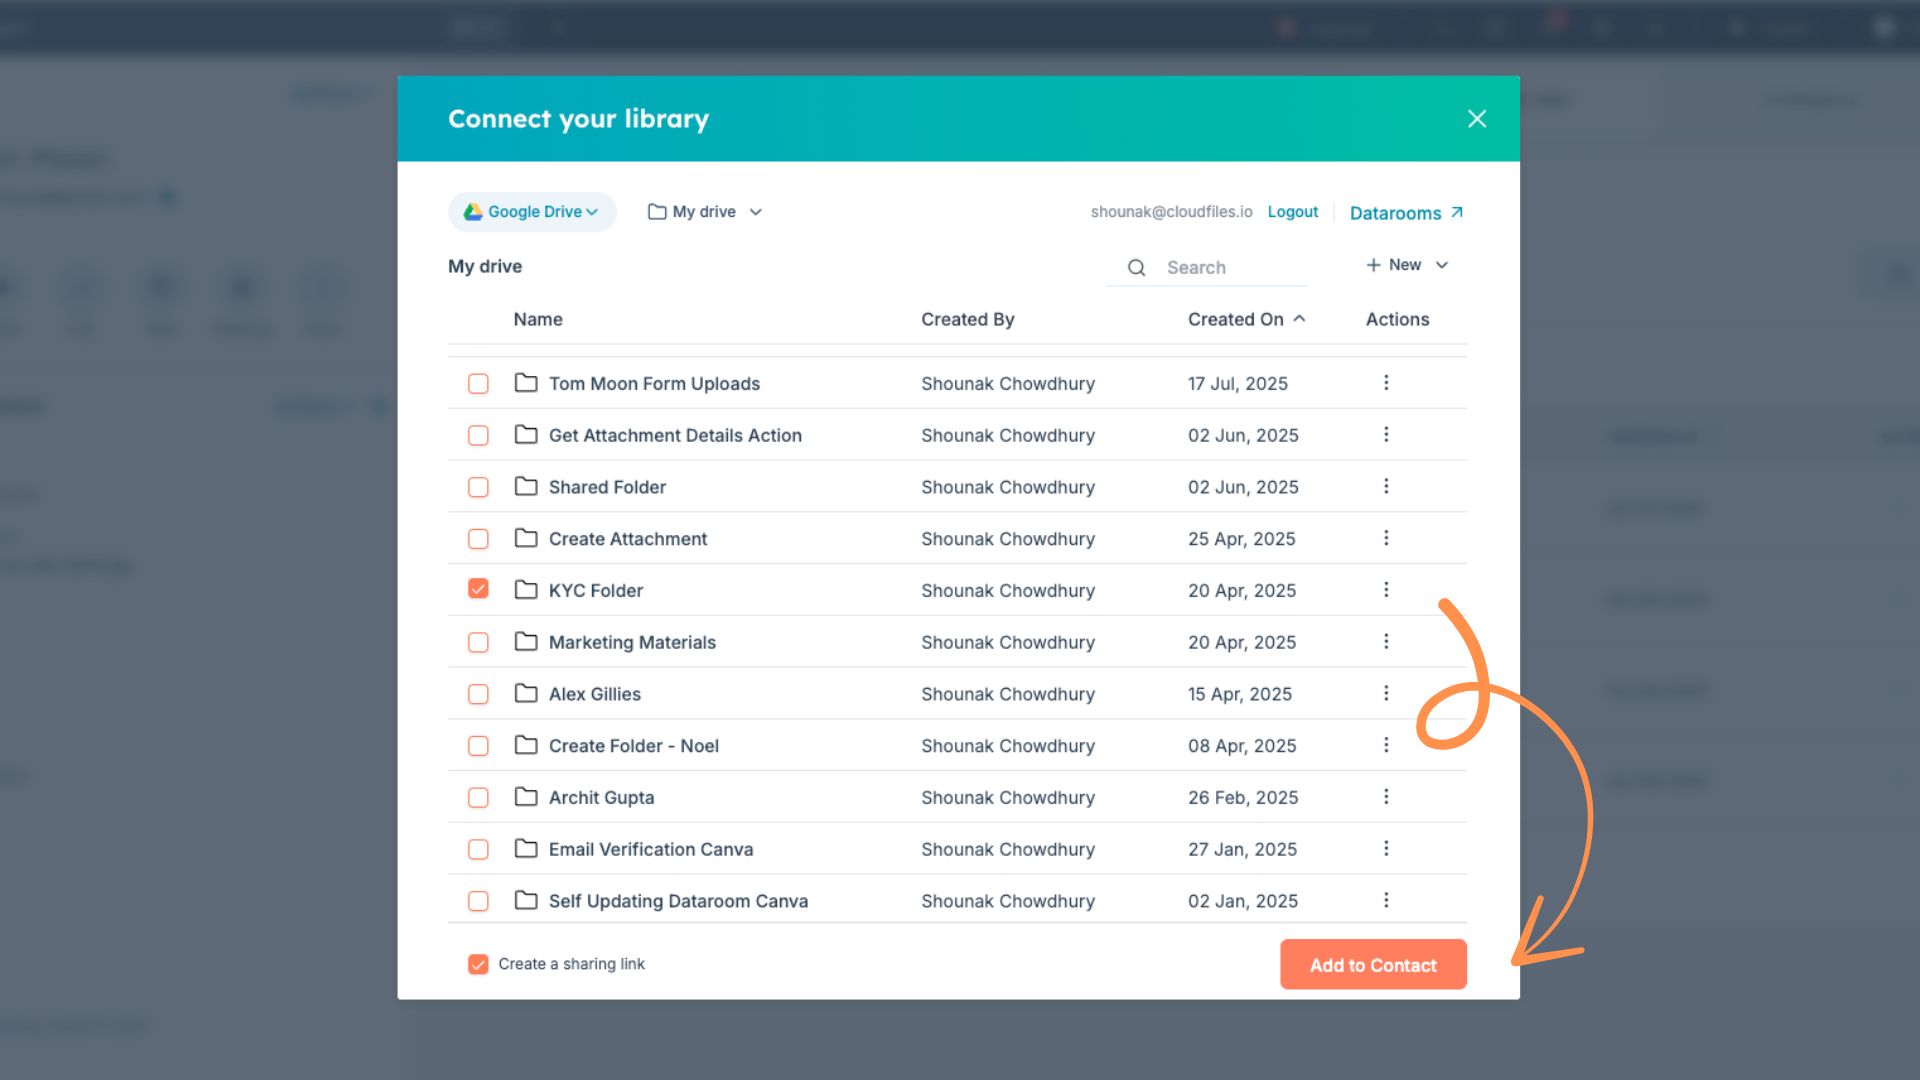
- Associate with HubSpot Record: Links the file to the current record by clicking "Add to (HubSpot Object)". It then appears in the CloudFiles app card on the record page, where it can be tracked and shared. For folders, you can browse their contents directly inside HubSpot and perform file operations.
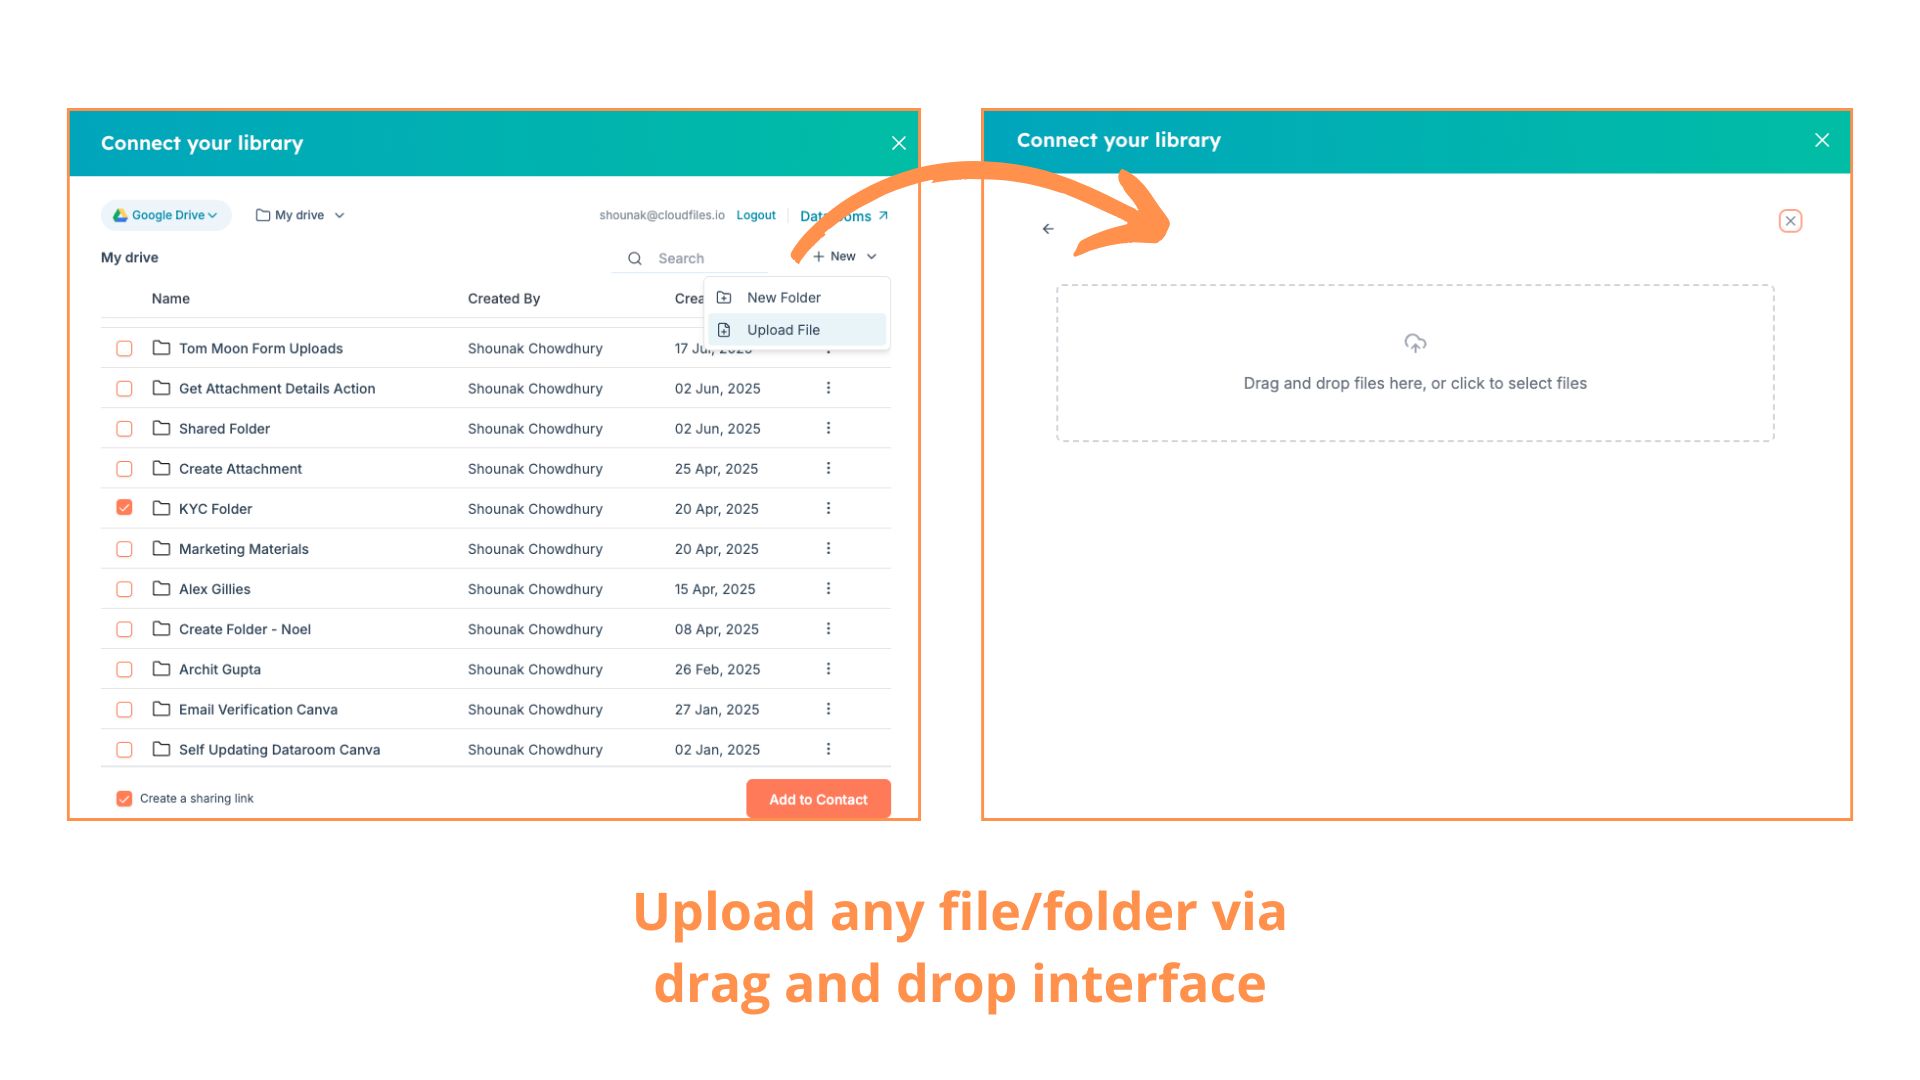
- Uploading Files: Upload files directly into your connected storage from within HubSpot. Open the desired folder, click the New button in the top-right corner, and choose Upload File, or drag and drop a file into the dialog box. Select a file from your computer and it is added to the chosen location.
2. Accessing The Content Library From The CloudFiles for HubSpot App
You can also access the Content Library by logging in with your HubSpot account at: https://hubspot.cloudfiles.io/
Once logged in, regardless of whether you are in Document Management or Document Sharing, selecting a library displays its full folder structure and files. Available operations depend on the storage platform selected.
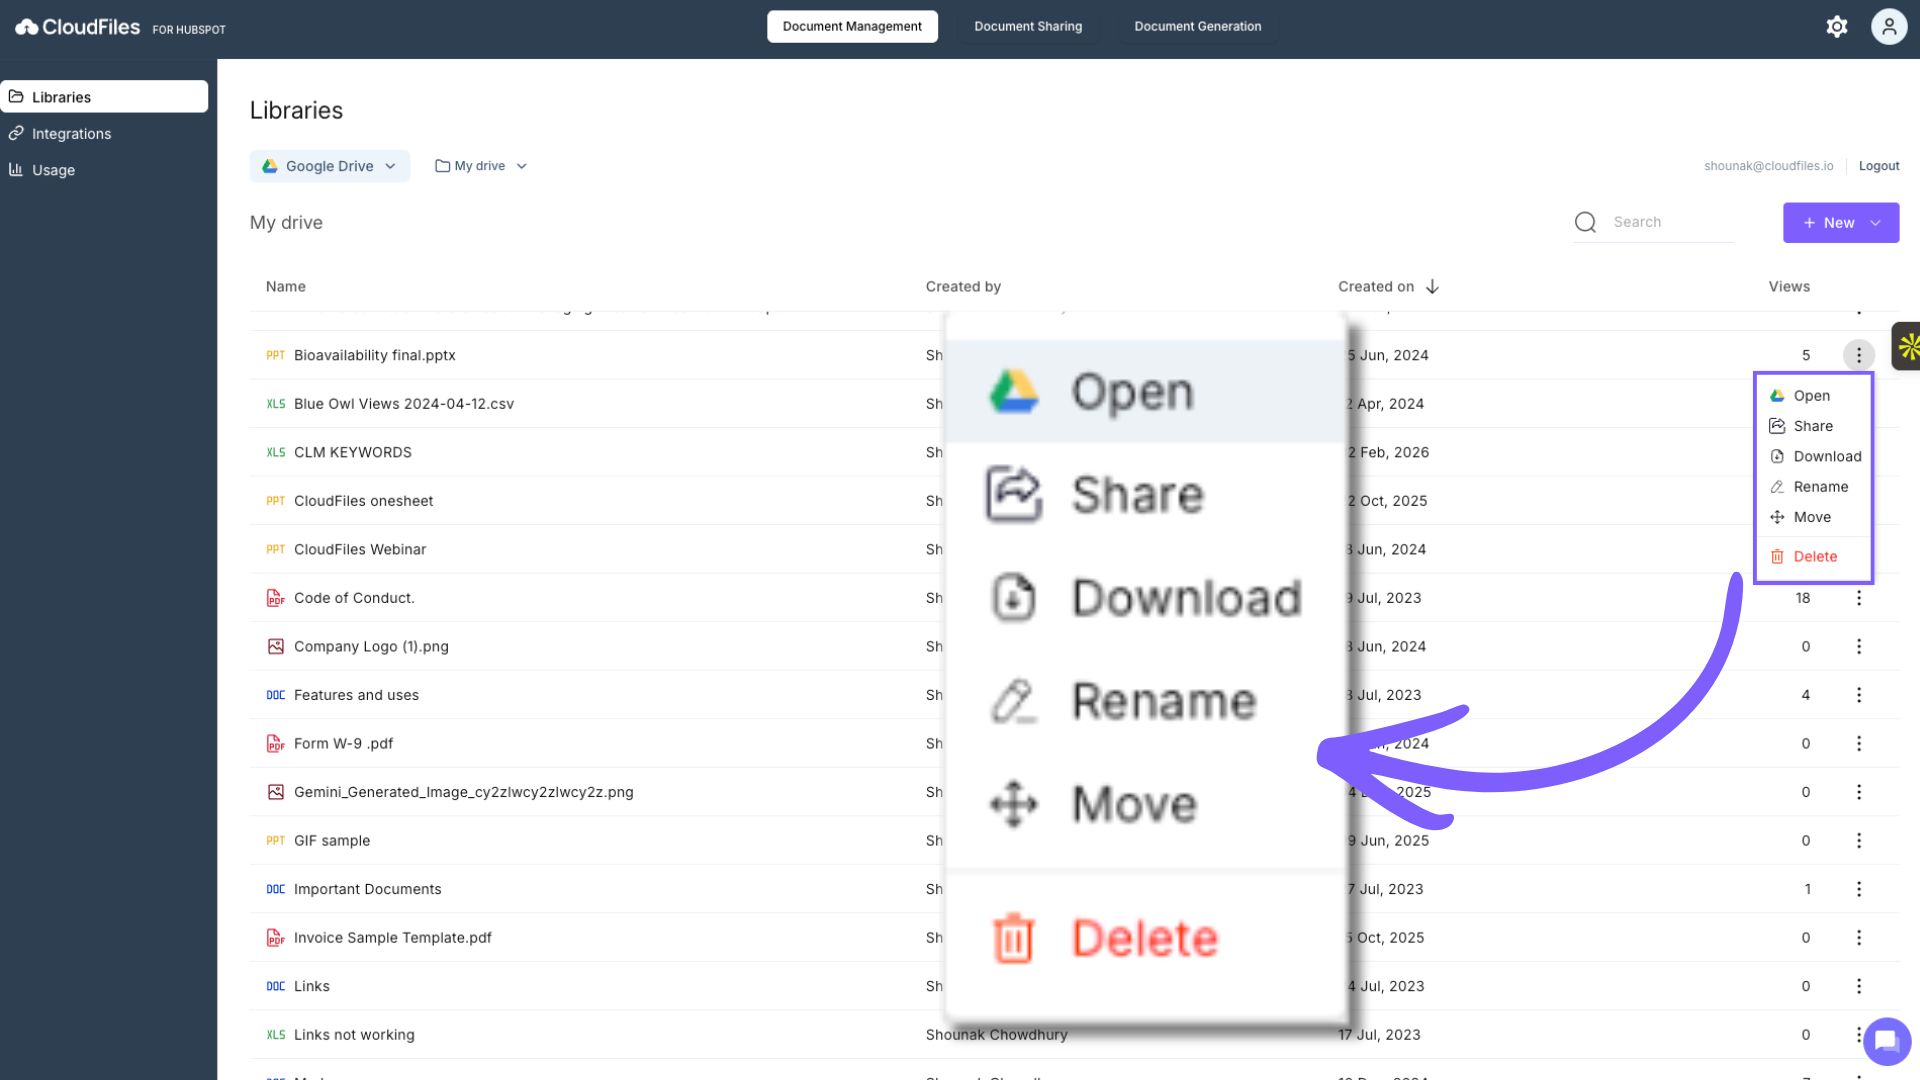
- Open in Storage Platform: Opens the selected file or folder directly in the respective platform:
- Google Drive files open in the relevant Google app (for example Google Docs, Sheets or Slides).
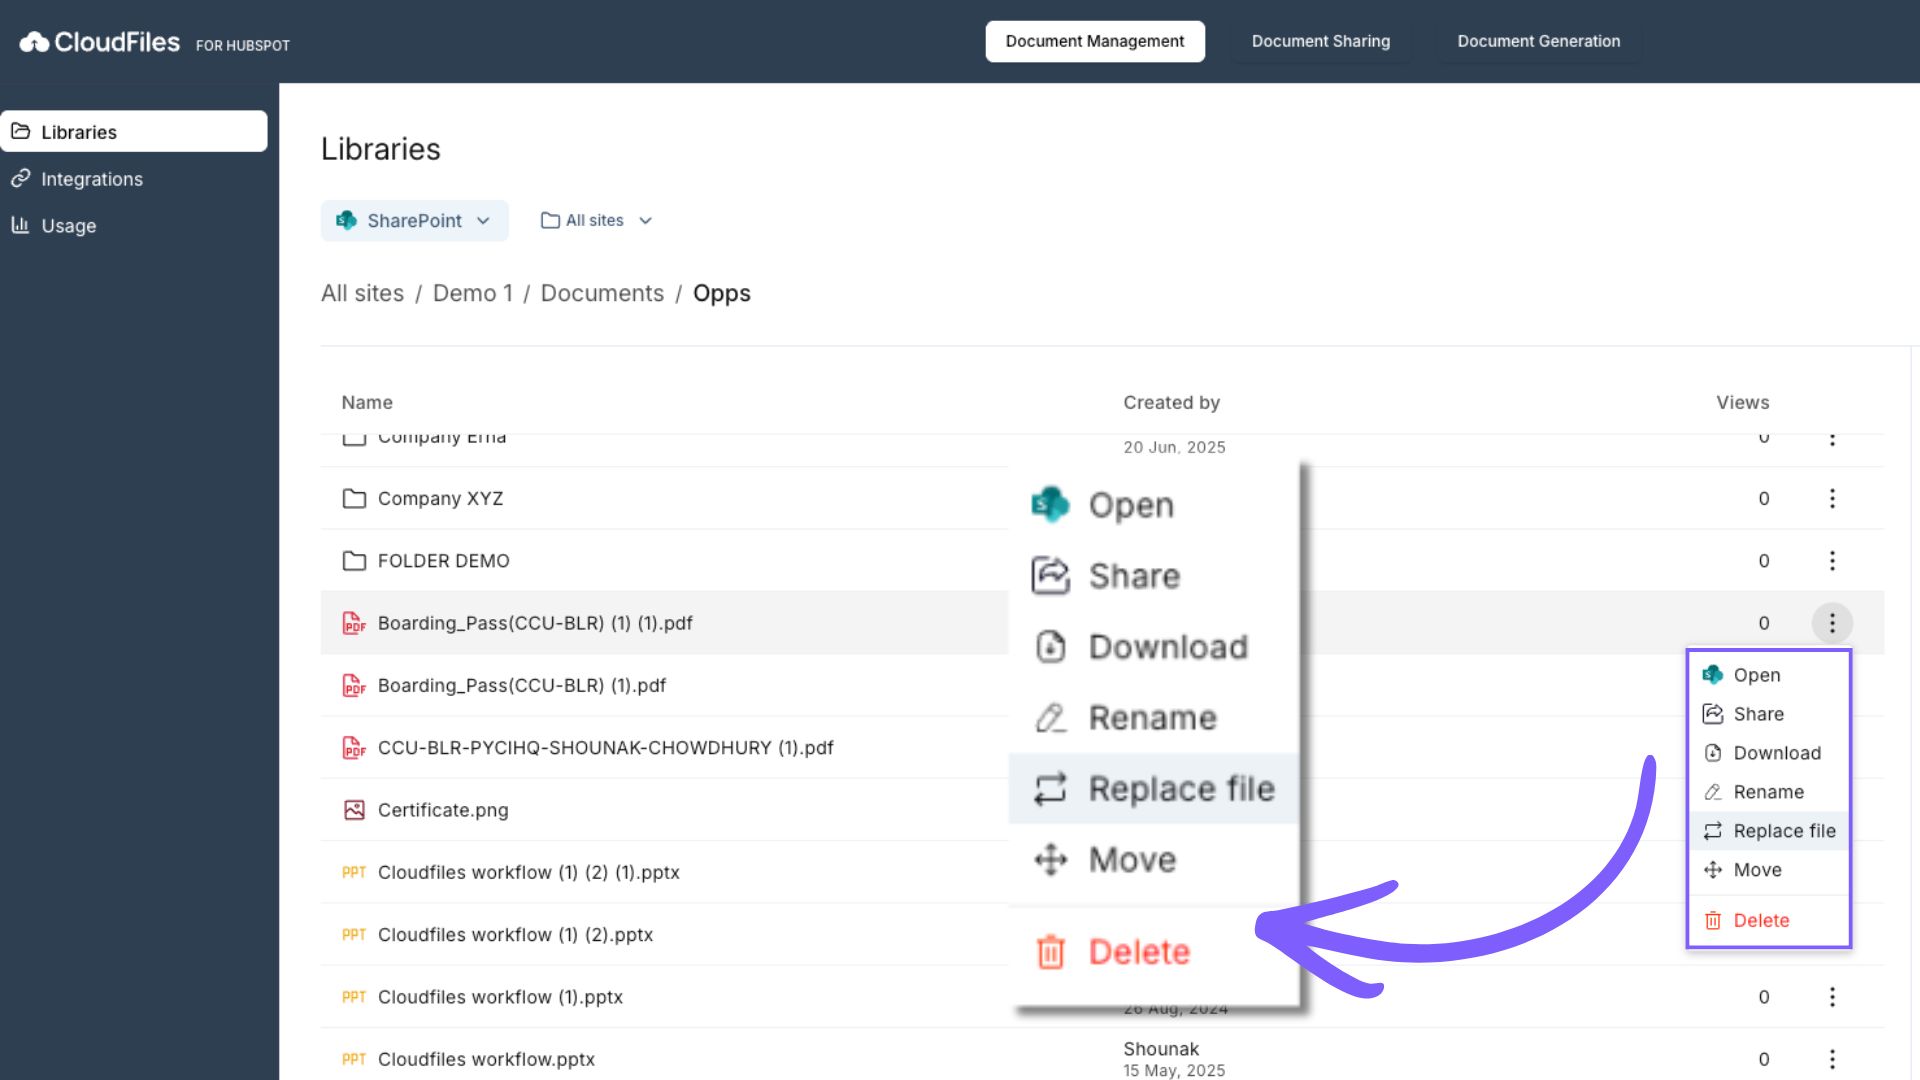
- SharePoint files open in the corresponding Microsoft 365 application (for example Word, Excel or PowerPoint online).
- Preview (Files Only): Clicking a file thumbnail shows an in-app preview when supported, so you can view file contents without leaving the CloudFiles interface. The preview shows the file exactly as an external recipient would see it through a CloudFiles link. If you have just replaced a file, the preview can take a short while to process. Refresh the preview screen if you see a processing message.
- Download: Downloads the selected file or folder to your local system. Folders are typically compressed into a ZIP file during download. A PPTX file downloads as a PPTX file, a PDF downloads as a PDF, a DOCX downloads as a DOCX, and the same applies to Excel files.
- Add to Dataroom: Adds the selected file or folder to a CloudFiles Dataroom. This helps organize resources for secure sharing and tracking.
- Share / Create Sharing Link: Generates a CloudFiles shareable link. You may set permissions and preferences depending on your Dataroom or sharing configuration.
- Rename: Renames the selected file or folder within the storage platform. The updated name reflects across both CloudFiles and the storage provider.
- Move: Moves the selected item to another folder within the same storage library. This does not change existing shareable links unless the storage platform enforces path-based restrictions.
- Delete: Deletes the selected file or folder from the storage platform. Deleted items follow the native recycle or trash behavior of Google Drive or SharePoint. Deleting a file also breaks any CloudFiles links you have already shared for it: anyone opening an old link sees a file not found error, so check for active links before you delete.
- Replace (SharePoint Files Only): For SharePoint files, this option lets you upload a newer version of a file while keeping its existing metadata, links and associations intact. This is useful when updating documents that have already been shared. Replacing updates the content on every link already shared for that file, so recipients holding an old link see the new version without you resending anything. Replacing does not change the file name; use Rename for that.
3. Sharing a web page as a link

You can turn a web page into a trackable CloudFiles link, so blog posts and articles sit in the same analytics as your documents. Choose Upload File, open the URL tab, paste the address, give it a name and upload. Each link tracks its own clicks and visits.