This article is divided into the following sections -
- Insert Doc Generation Card: Quickly insert on standard or custom HubSpot objects to generate documents.
- Install CloudFiles Word Add-in: The add-in allows you to create and manage document templates directly within Microsoft / Google editors.
- Create Template: Leverage HubSpot properties to build templates in Microsoft / Google editors.
- Publish Template: Understand the process of publishing your templates within HubSpot, making them available for document generation.
- Generate Documents: Learn how to manually generate documents using your published templates.
- Coming Soon: This section talks about what else we are gonna be adding in our doc generation product soon.
Let's look into each section one by one -
1 - Insert Doc Generation Card
The Doc Generation App Card is integrated into HubSpot across all standard or custom object records. It allows you to see a list of all your templates and generate & download documents manually from HubSpot records. The card appears in the middle section of the HubSpot record, either in the standard tabs or in any custom tabs.
The CloudFiles card is not added by default on the record pages. To add the card, go to any record, click on the customize button on the top right, open the default view and add the card to an existing tab / new tab.
2 - Install CloudFiles Word add-in
The CloudFiles Word add-in facilitates the integration of CloudFiles with your Hubspot instance, enabling you to create and design templates that incorporate HubSpot properties. This powerful tool streamlines the process of merging HubSpot data into documents, making it easier to generate consistent and accurate templates directly from Microsoft Word.
To add the CloudFiles Word add-in to your Microsoft Word application, start by launching Microsoft Word on your PC. The follow the steps below -
- Navigate to the "Home" tab and click on "Add-ins" to explore available options.
- In the Add-ins window, select "+ More Add-ins" to open the "Office Add-ins" window, then click on "Microsoft AppSource" to be redirected to appsource.microsoft.com.
- In the search bar, type "CloudFiles" and browse the results to locate the CloudFiles Add-in.
- Click "Get it now" to install the add-in. Once the installation is complete, open Word to check the new add-in.
- In the "New Office Add-in" sidebar, click "Allow and Continue" to launch the CloudFiles Word add-in, ensuring it's ready for use with your HubSpot data.
Refer to the video below to have a visual understanding of these steps -
3 - Create Template
You can create a template for any HubSpot object. Using various actions, you can insert object properties, related data, and custom resources. Additionally, you can add pictures, tables, and set conditions for content insertion, as well as specify the title of the generated documents.
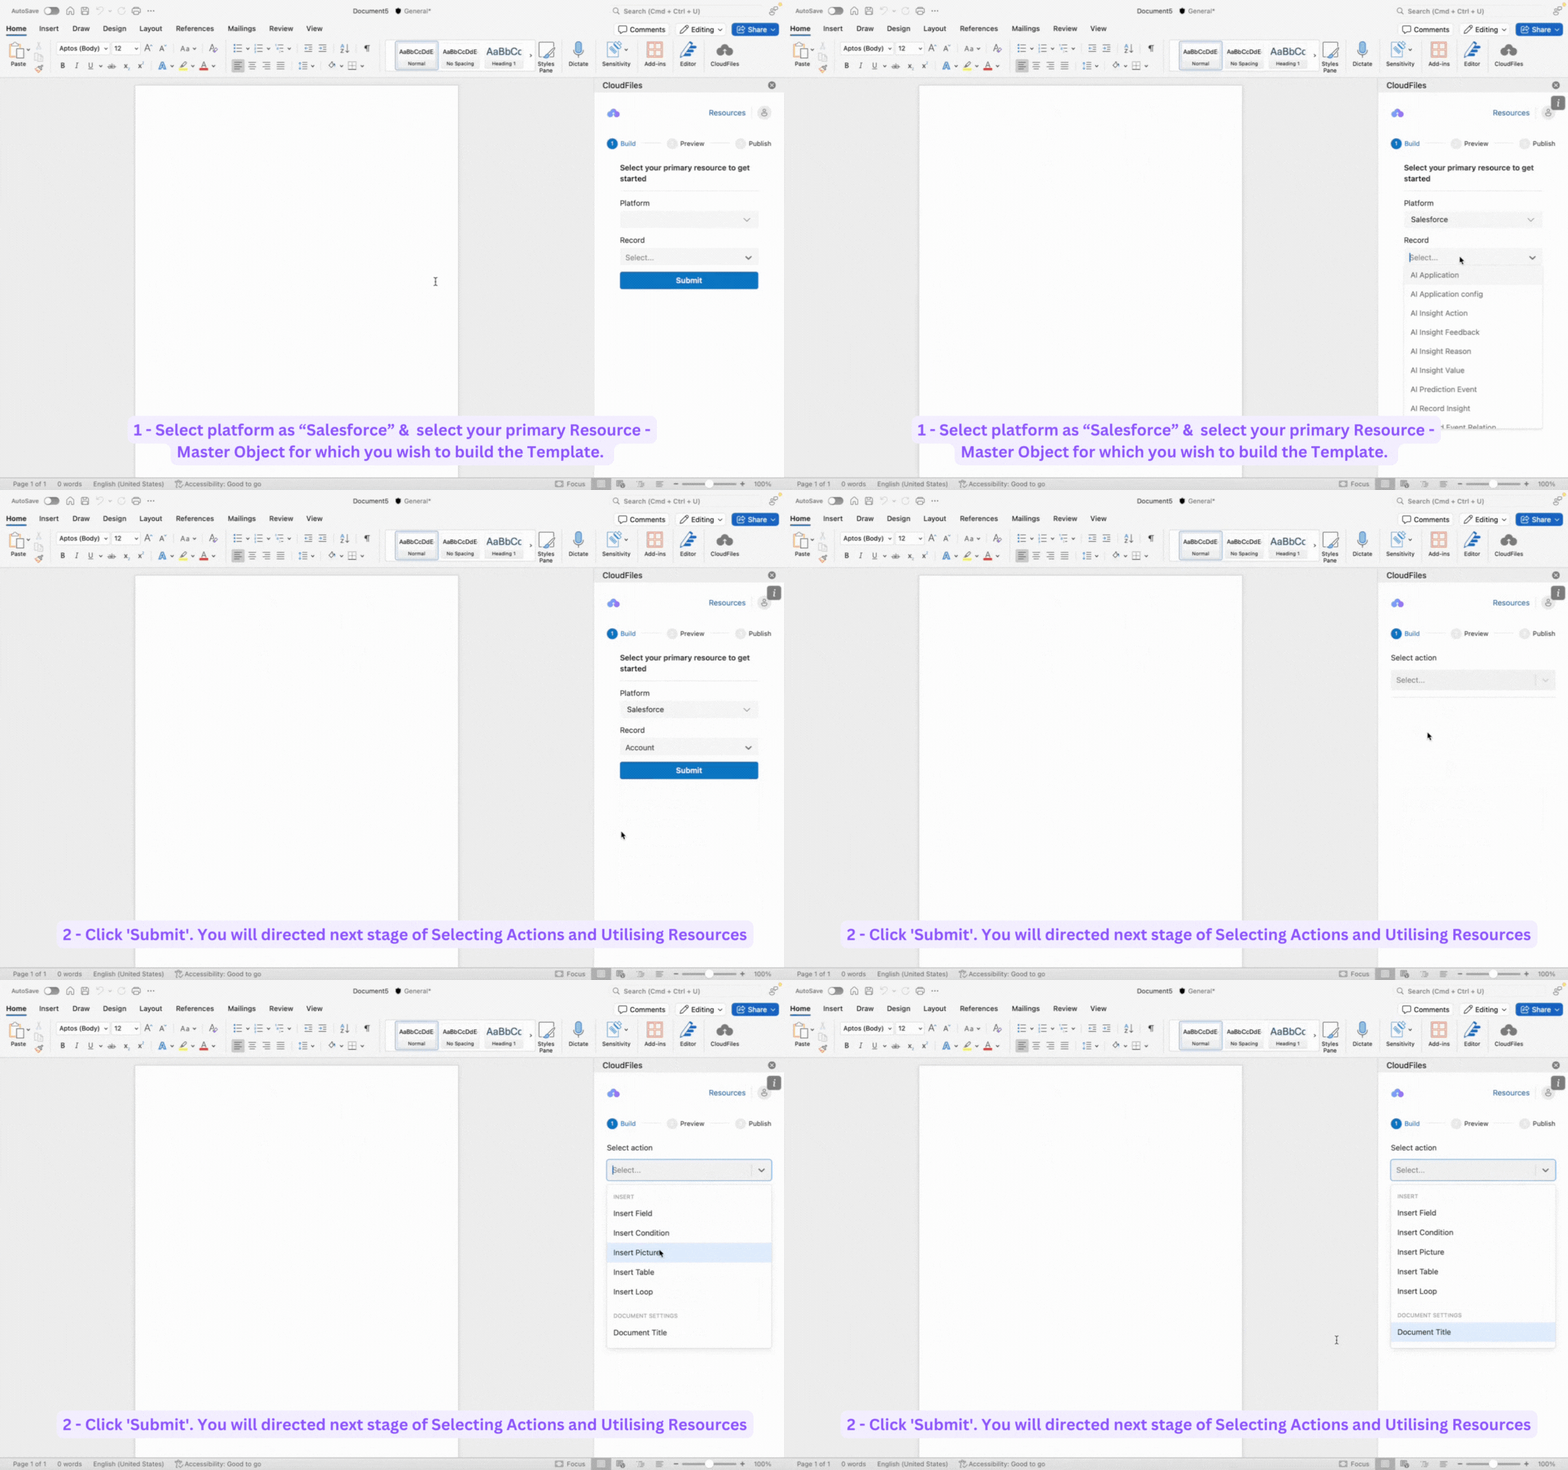
Once the CloudFiles Word Add-in is installed and the HubSpot instance is connected, you can start building a template for a selected object. To get started, you must select your primary resource, i.e., the Master Object for which you wish to build the template. In the CloudFiles Add-in sidebar, select HubSpot as the platform and the HubSpot Object as the Master Resource. After clicking 'Submit,' you will be directed to the next stage of selecting actions and utilizing resources.
Refer to the GIF below to have a visual understanding of this process -
4 - Publish Template
After building a template and reviewing it, the final step is to publish the template. Publishing makes the template available in your HubSpot instance for document generation on the specified object. To begin, navigate to the 'Publish' stage by clicking on 'Publish' in the 'Stage Progress Bar'. You will then need to choose your publishing option: either check the 'Publish as a New Template' checkbox to publish it as a new template for the object, or check the 'Select an existing template' checkbox and choose an existing template from the drop-down to update an existing one.
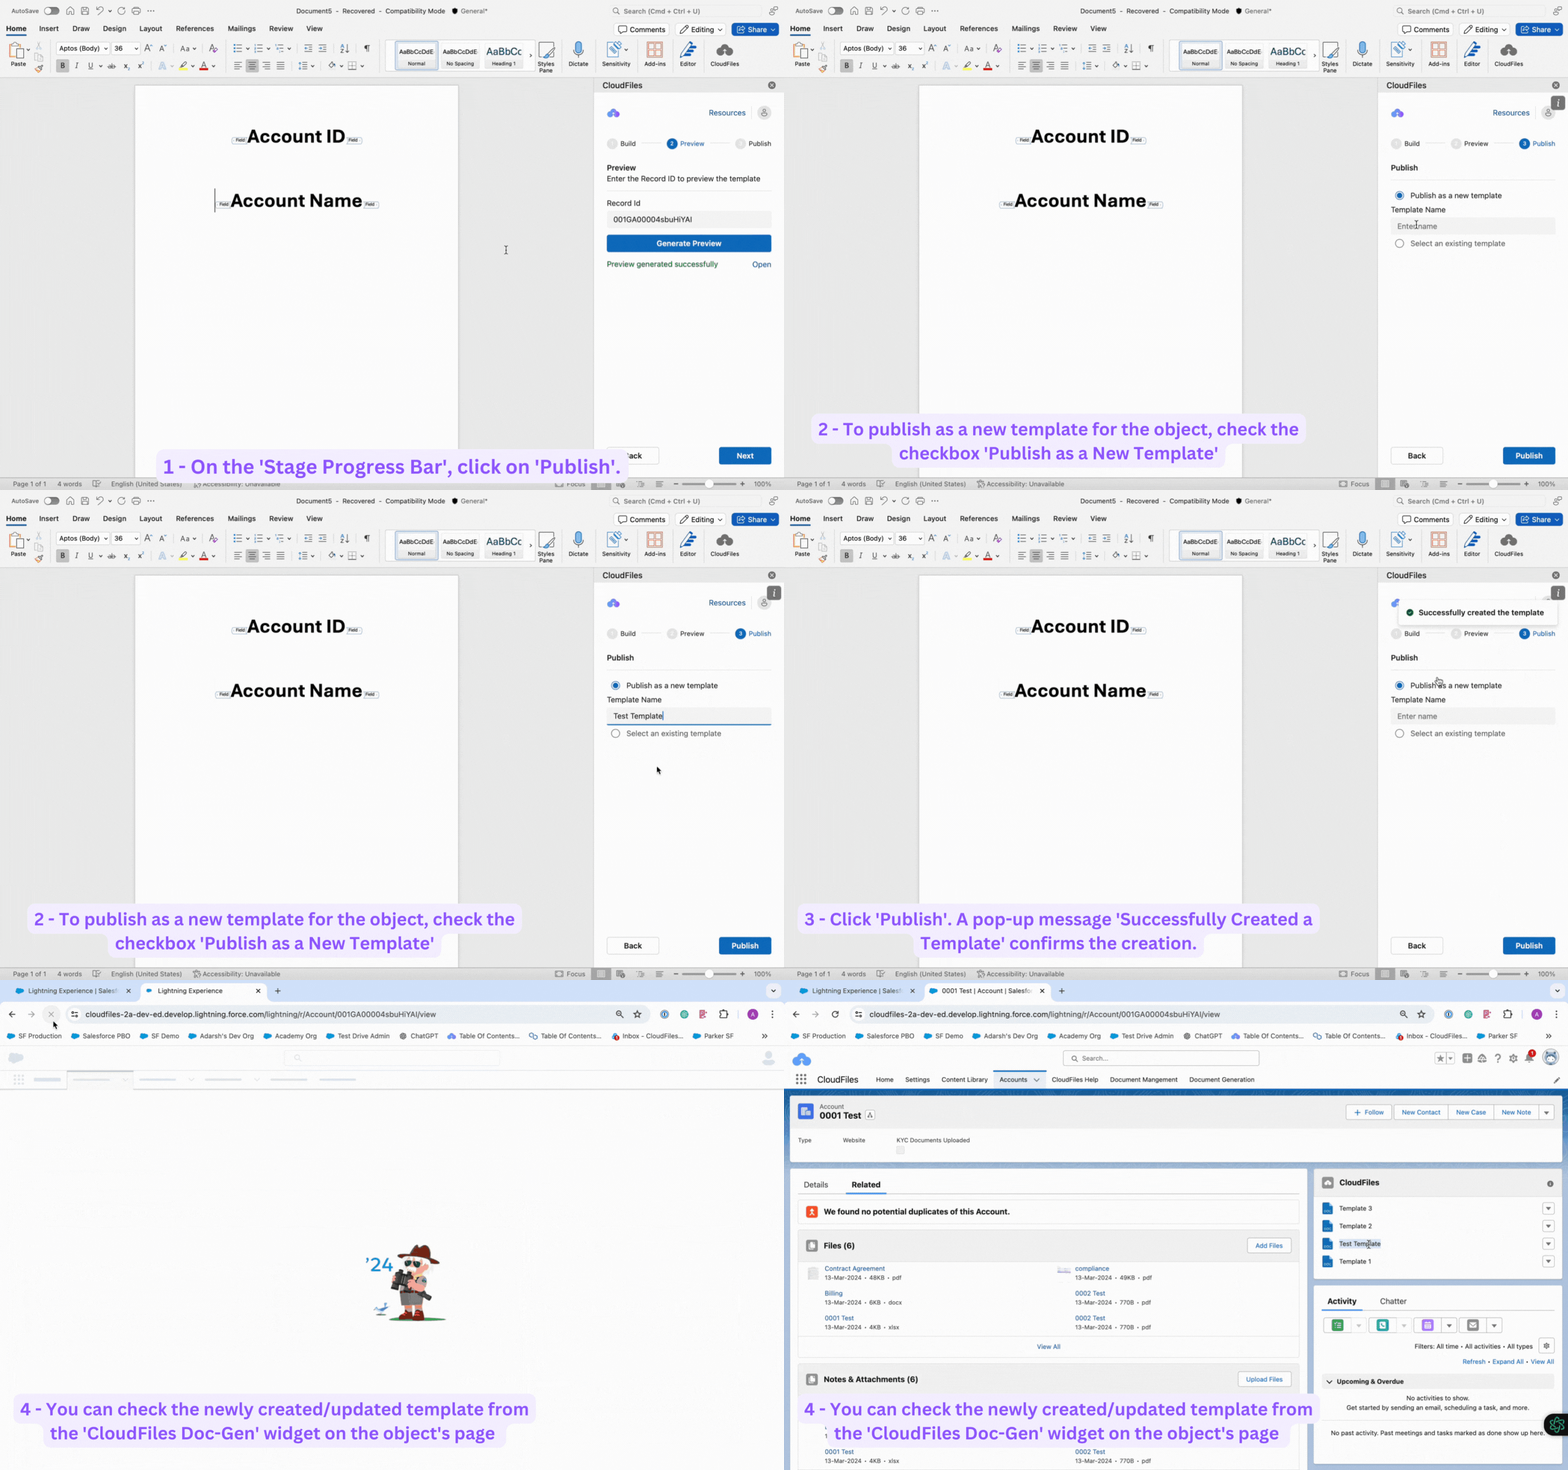
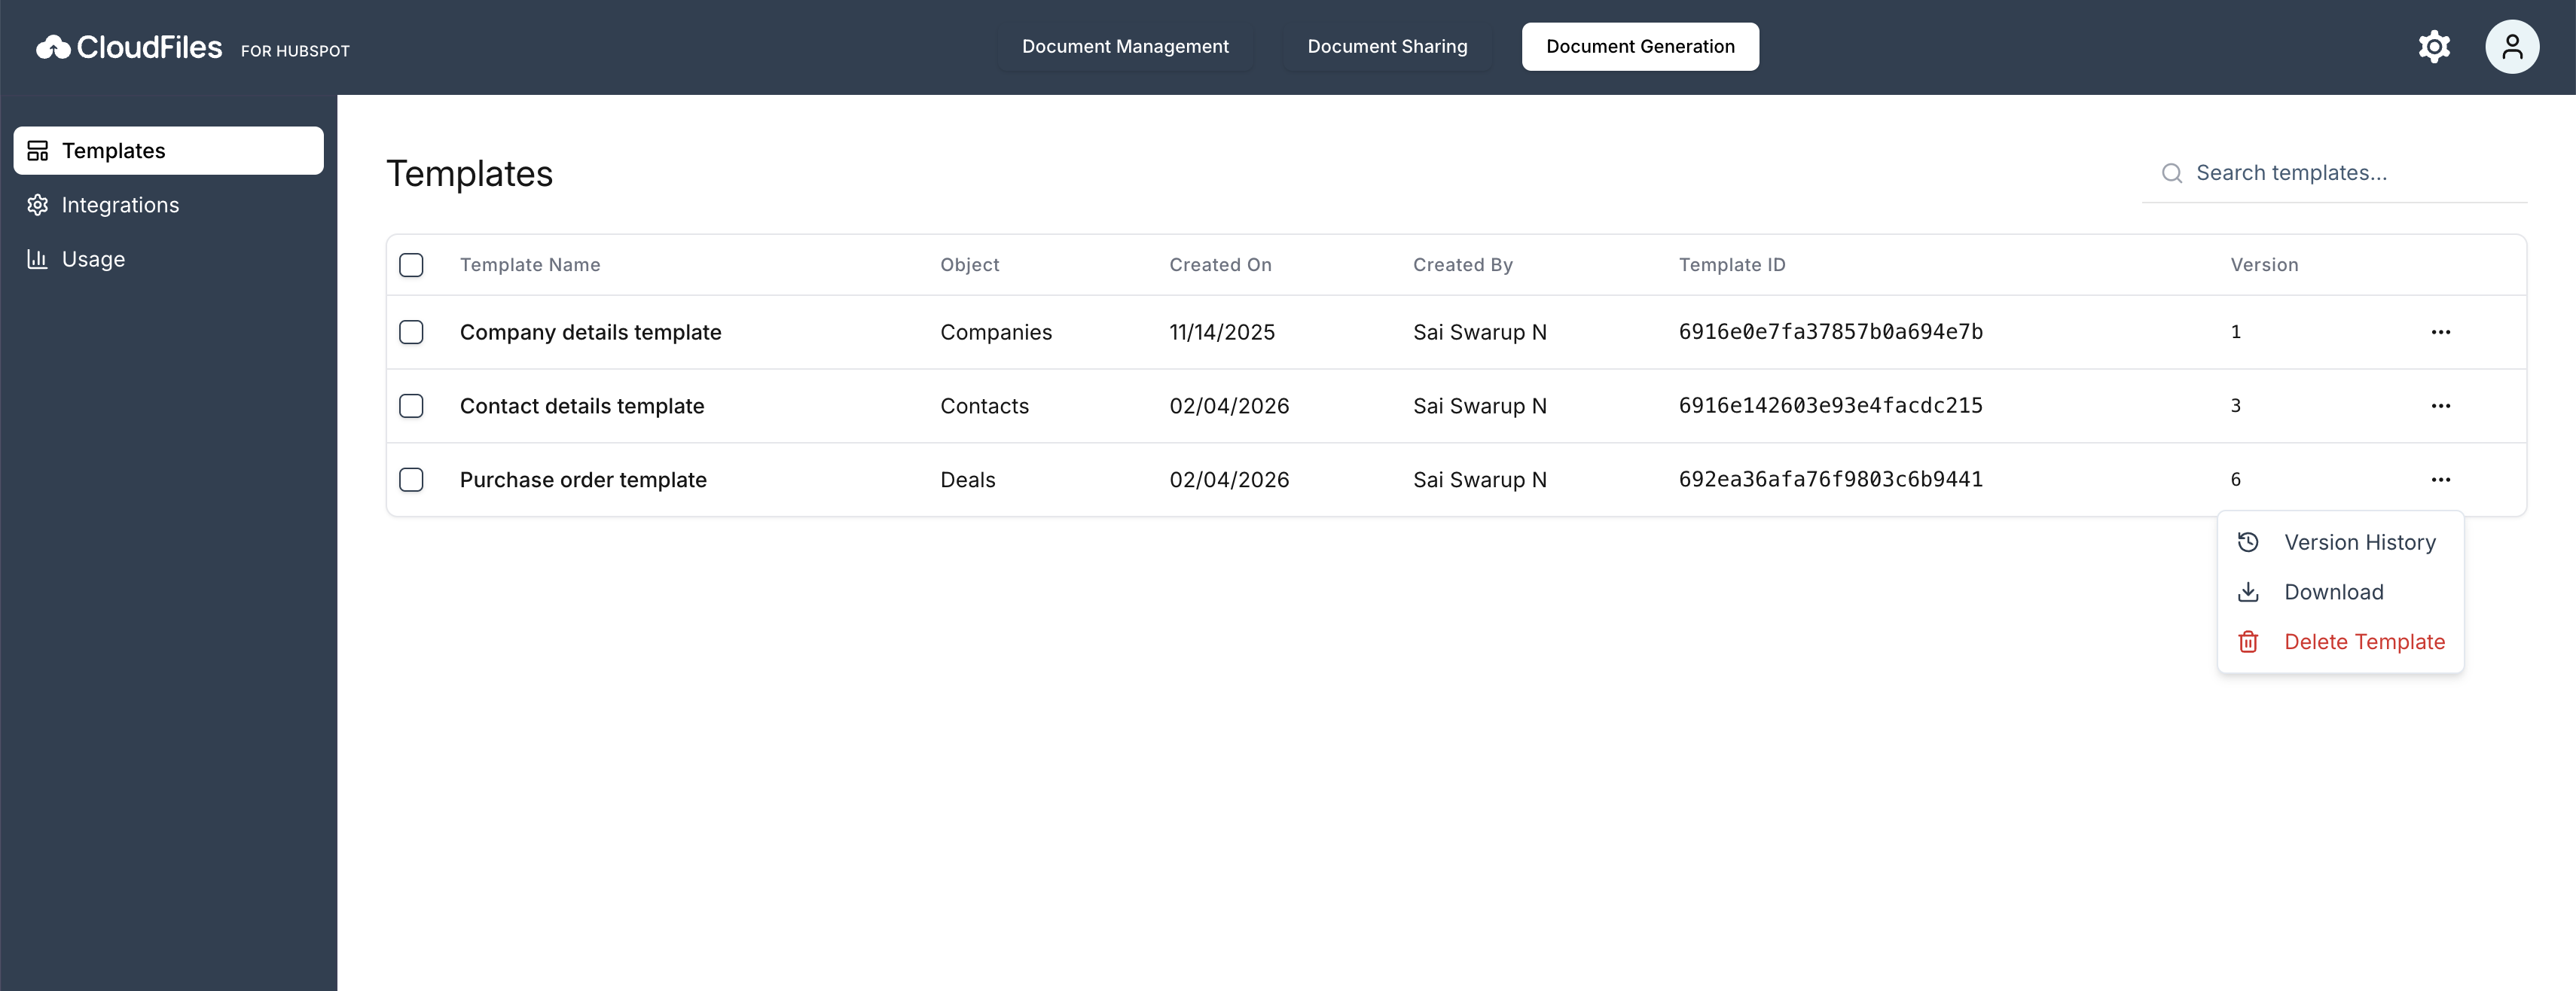
Once you've made your selection, click 'Publish'. A pop-up message confirming 'Successfully Created a Template' will appear, indicating the template has been created. To verify the template, you can check the newly created or updated template from the 'CloudFiles Doc-Gen' app card on the object's page or from the 'Document Generation' tab of the CloudFiles app.
5 - Generate Documents from Doc Gen Card
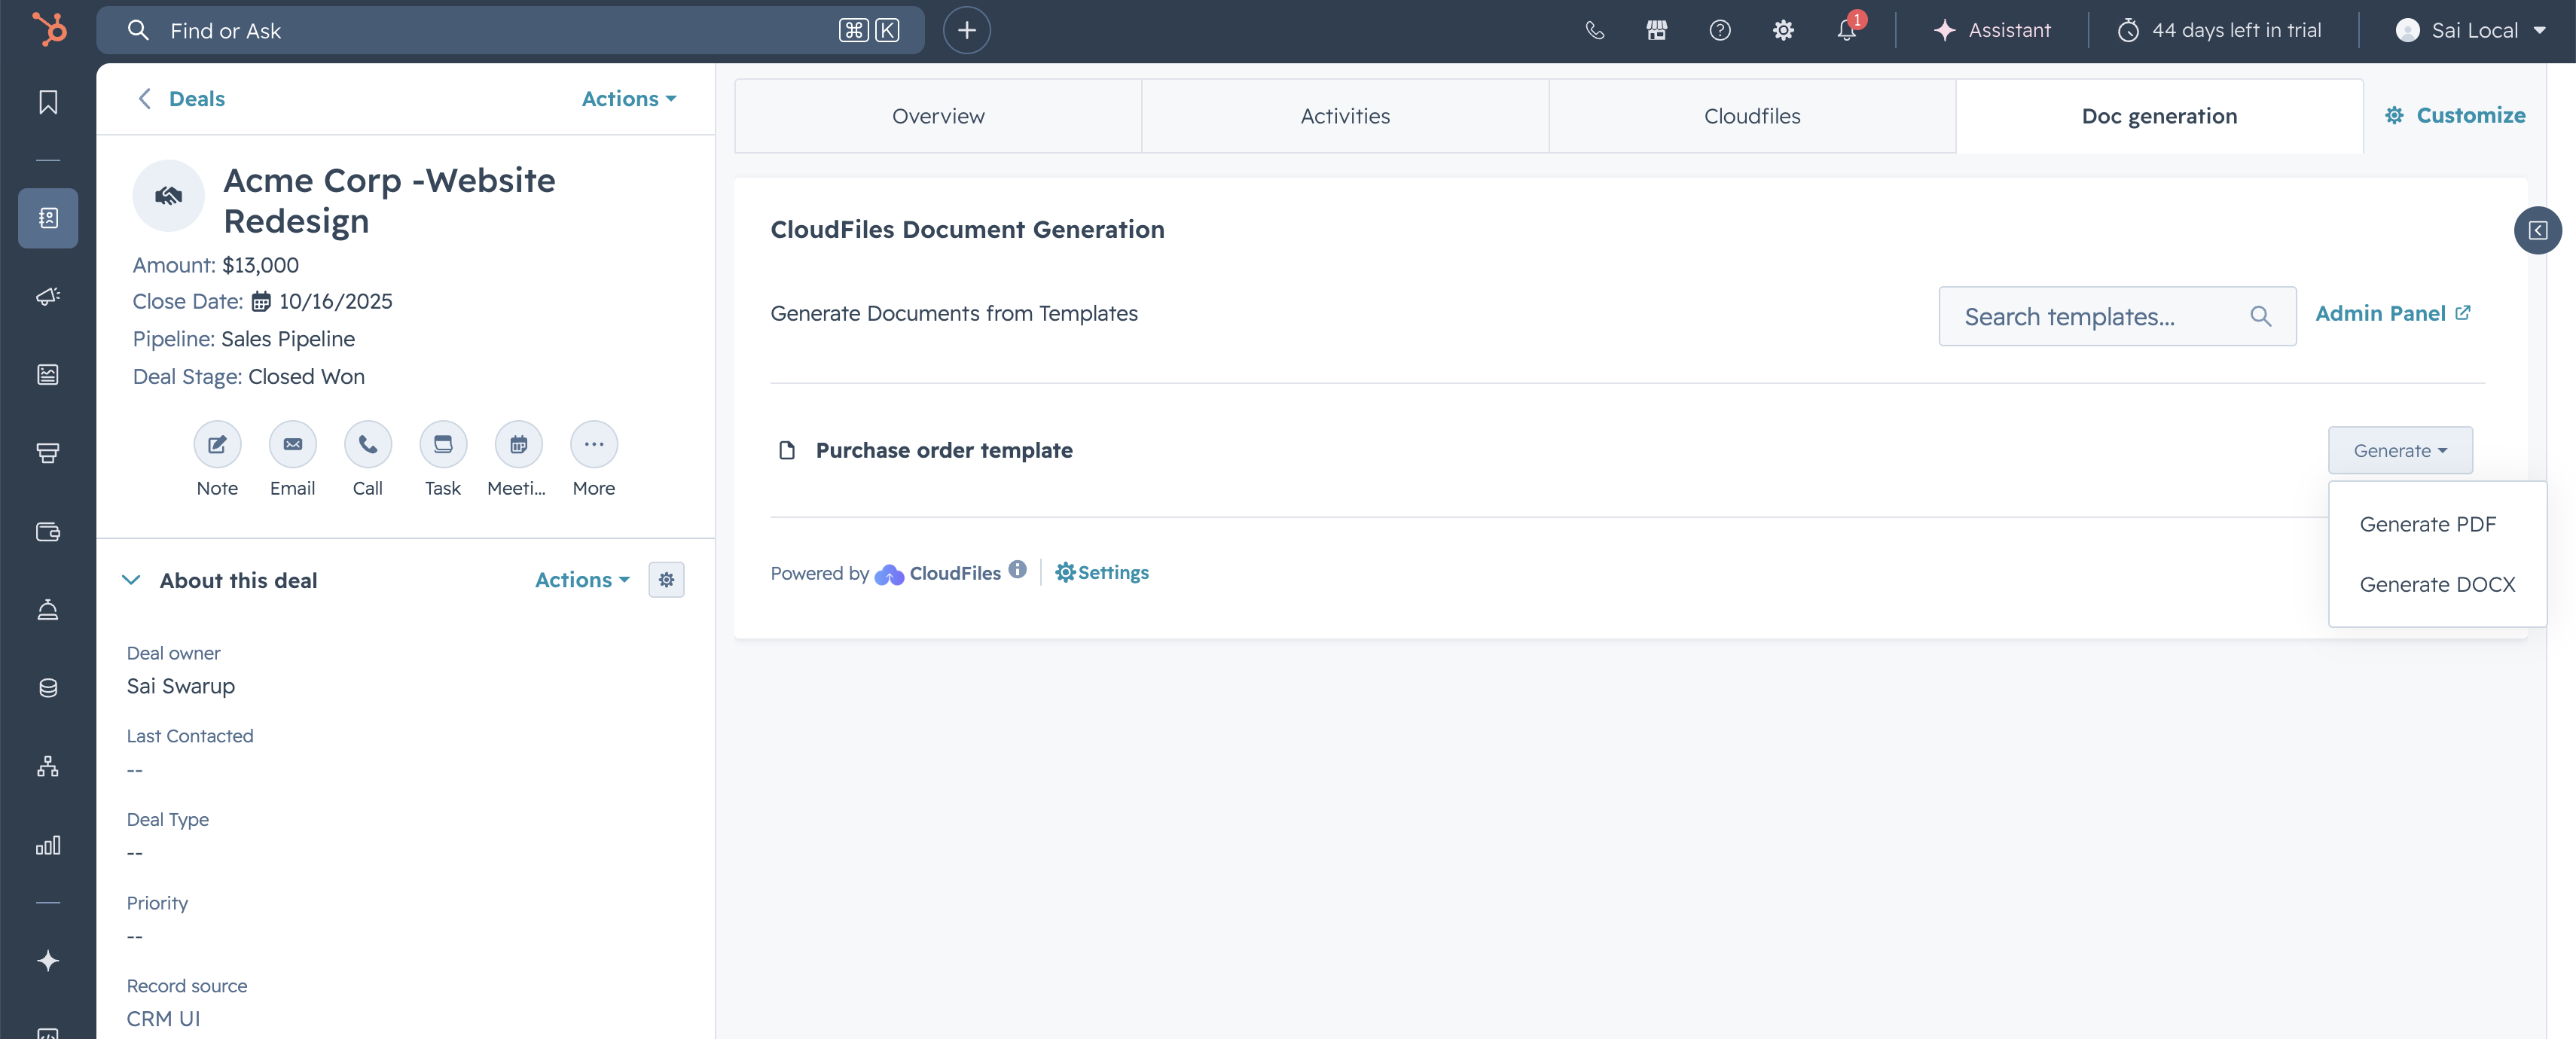
Once the CloudFiles Doc Gen card is added to the record page and the template has been published, you can start generating documents in either DOCX or PDF format, which will be automatically downloaded upon generation.
To manually generate a document, navigate to any HubSpot record of the specified object type and locate the app card. Click the drop-down menu next to the template you want to use and select either 'Generate DOCX' or 'Generate PDF' for the desired document format. The document generation process takes a moment. Once completed, you can download the generated document.
6 - Coming Soon
Doc Generation has been launched recently by CloudFiles. Following things are coming soon -
- More help resources - We wil be adding many articles to illustrate how to use this product.
- Automations - Generate documents automatically and in bulk using HubSpot workflows.
- Better templating - Support for HubSpot products, better data addition options.
- Doc Management Integration - Store your generated documents neatly in external storages.
- Doc Sharing Integration - Share your generated documents using CloudFiles links and collect useful analytics.
- Template Library - Use pre-built templates. Just download, connect & use.
What's Next ?
You can go back to the Quick Starts article and check out our other quick starts on doc sharing, doc automations etc... or the role wise quick starts. You can also go to the Features section explore the features in detail or head over to the Tutorials section to learn how to build various use cases using CloudFiles.