About this use-case
CloudFiles offers a cool feature to personalise the file link using a URL parameter. This, when combined with HubSpot's personalisation tokens for marketing & sales email templates, offers a neat way to collect personalised analytics on any CloudFiles link, without gating it.
This means you can collect precise and detailed file, folder and dataroom analytics right on the HubSpot record, by simply changing a link in your email templates.
In the section below, we detail the elements used to make this use case possible. We then detail each of the elements so you can edit your own campaigns and collect personalized ungated analytics on your collateral.
Elements of the use-case
This use-case utilizes a couple of features from HubSpot & CloudFiles. It also utilises the power of the deep integration between CloudFiles & HubSpot, which makes all the information available back in HubSpot.
We talk about link creation, personalisation, analytics collection and sending it to HubSpot in the steps below. Refer to the sections below for more detailed information on these steps.
- Creating a CloudFiles Link - In this step, we create a singular CloudFiles link for our asset that we will use for this specific campaign.
- Link Personalisation in HubSpot Email Templates - In this step, we use HubSpot's personalisation token feature in marketing and sales email templates to create a personalised hyperlink out of our CloudFiles link.
- Sending test email - In this step, we send a test email to make sure that the personalisation parameter was added correctly in the generated email.
- Collecting Analytics in CloudFiles - We access the link from the email above and see the personalised analytics collected in the CloudFiles dashboard.
- Collecting Analytics in HubSpot - We see how the analytics get automatically pushed to HubSpot and can be accessed from the record itself.
1 - Creating a CloudFiles Link
CloudFiles links are secure & publicly shareable links that can collect detailed and drill-down analytics. There are multiple ways of creating this link from within, and outside of HubSpot. Since email campaigns are usually run by marketers, we recommend using our CloudFiles Webapp Dashboard (https://app.cloudfiles.io) to maintain your content library and manage the links of your files.
Once on the dashboard, you can follow the simple steps given below to create a CloudFiles link for your asset(s).
Creating a CloudFiles Link
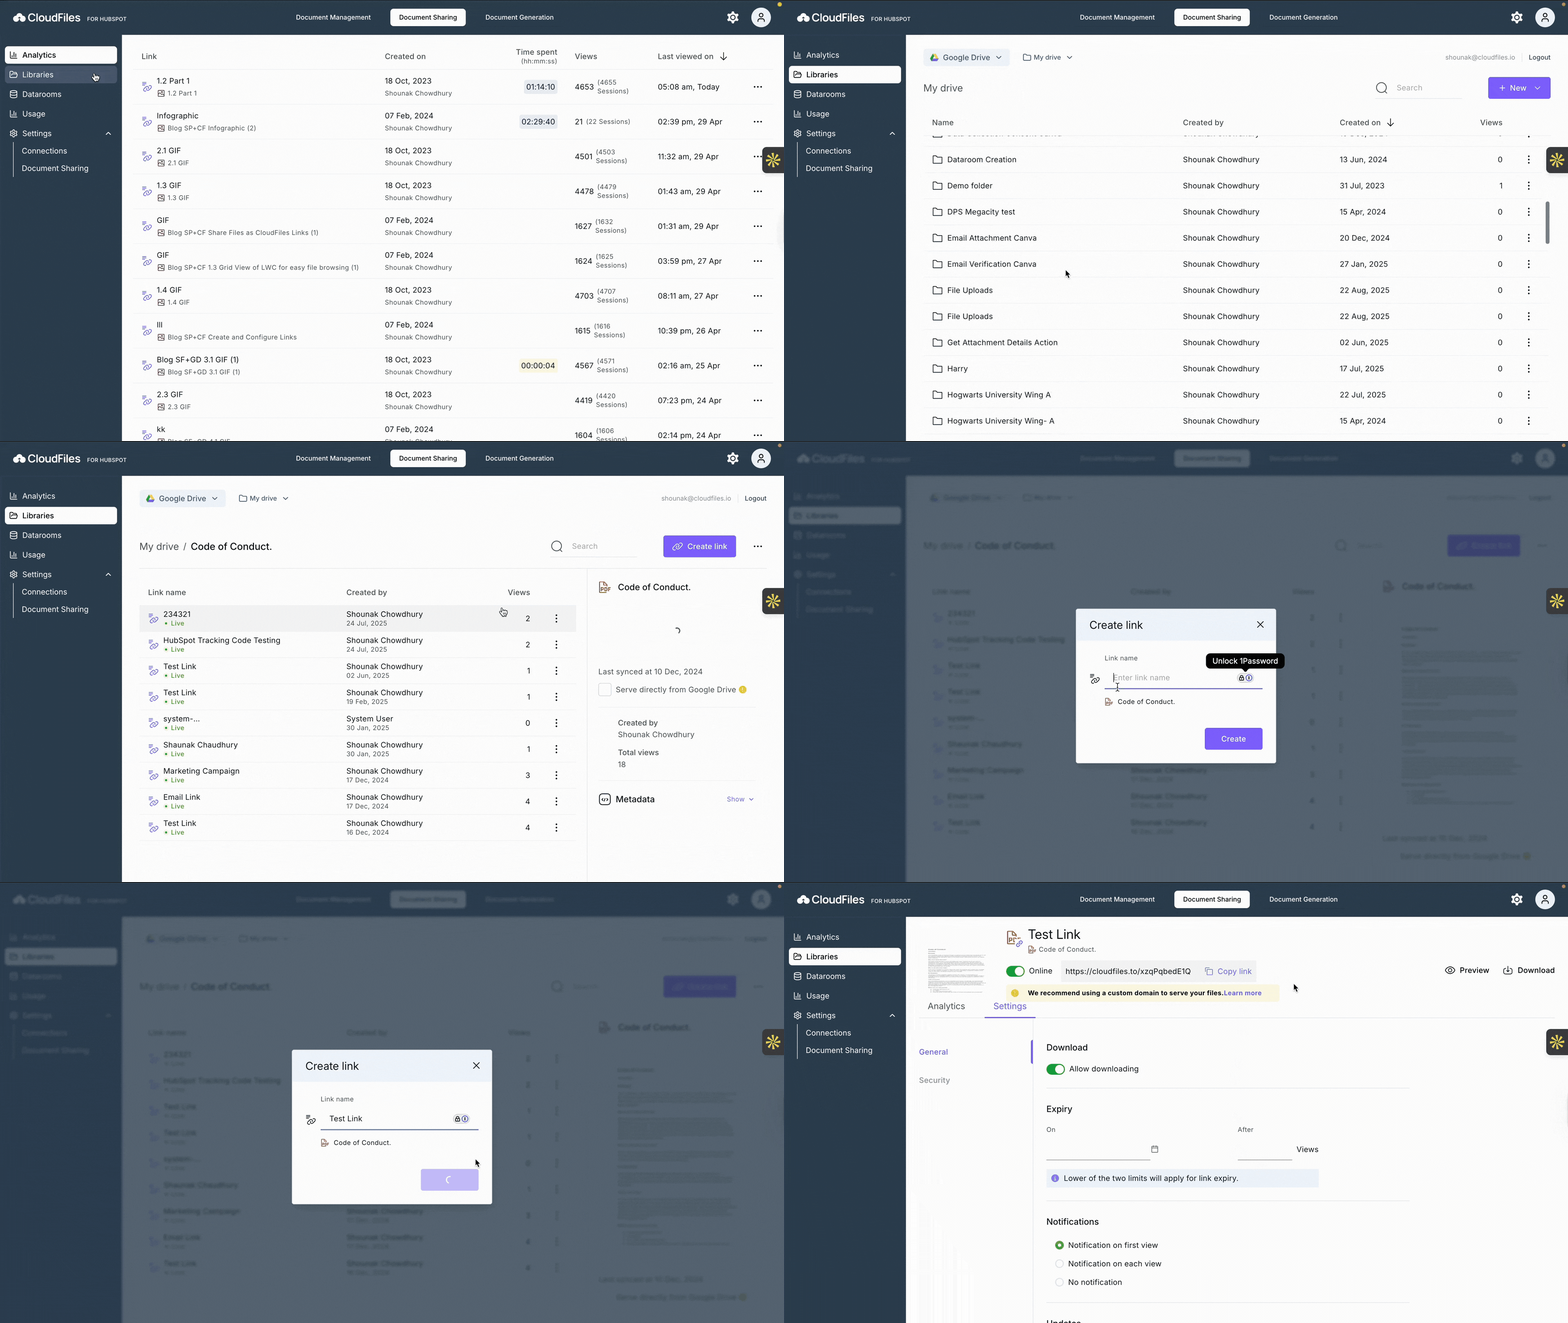
Using CloudFiles, you can easily create shareable links for files, folders, and data rooms directly from the dashboard under the Document Sharing Tab.
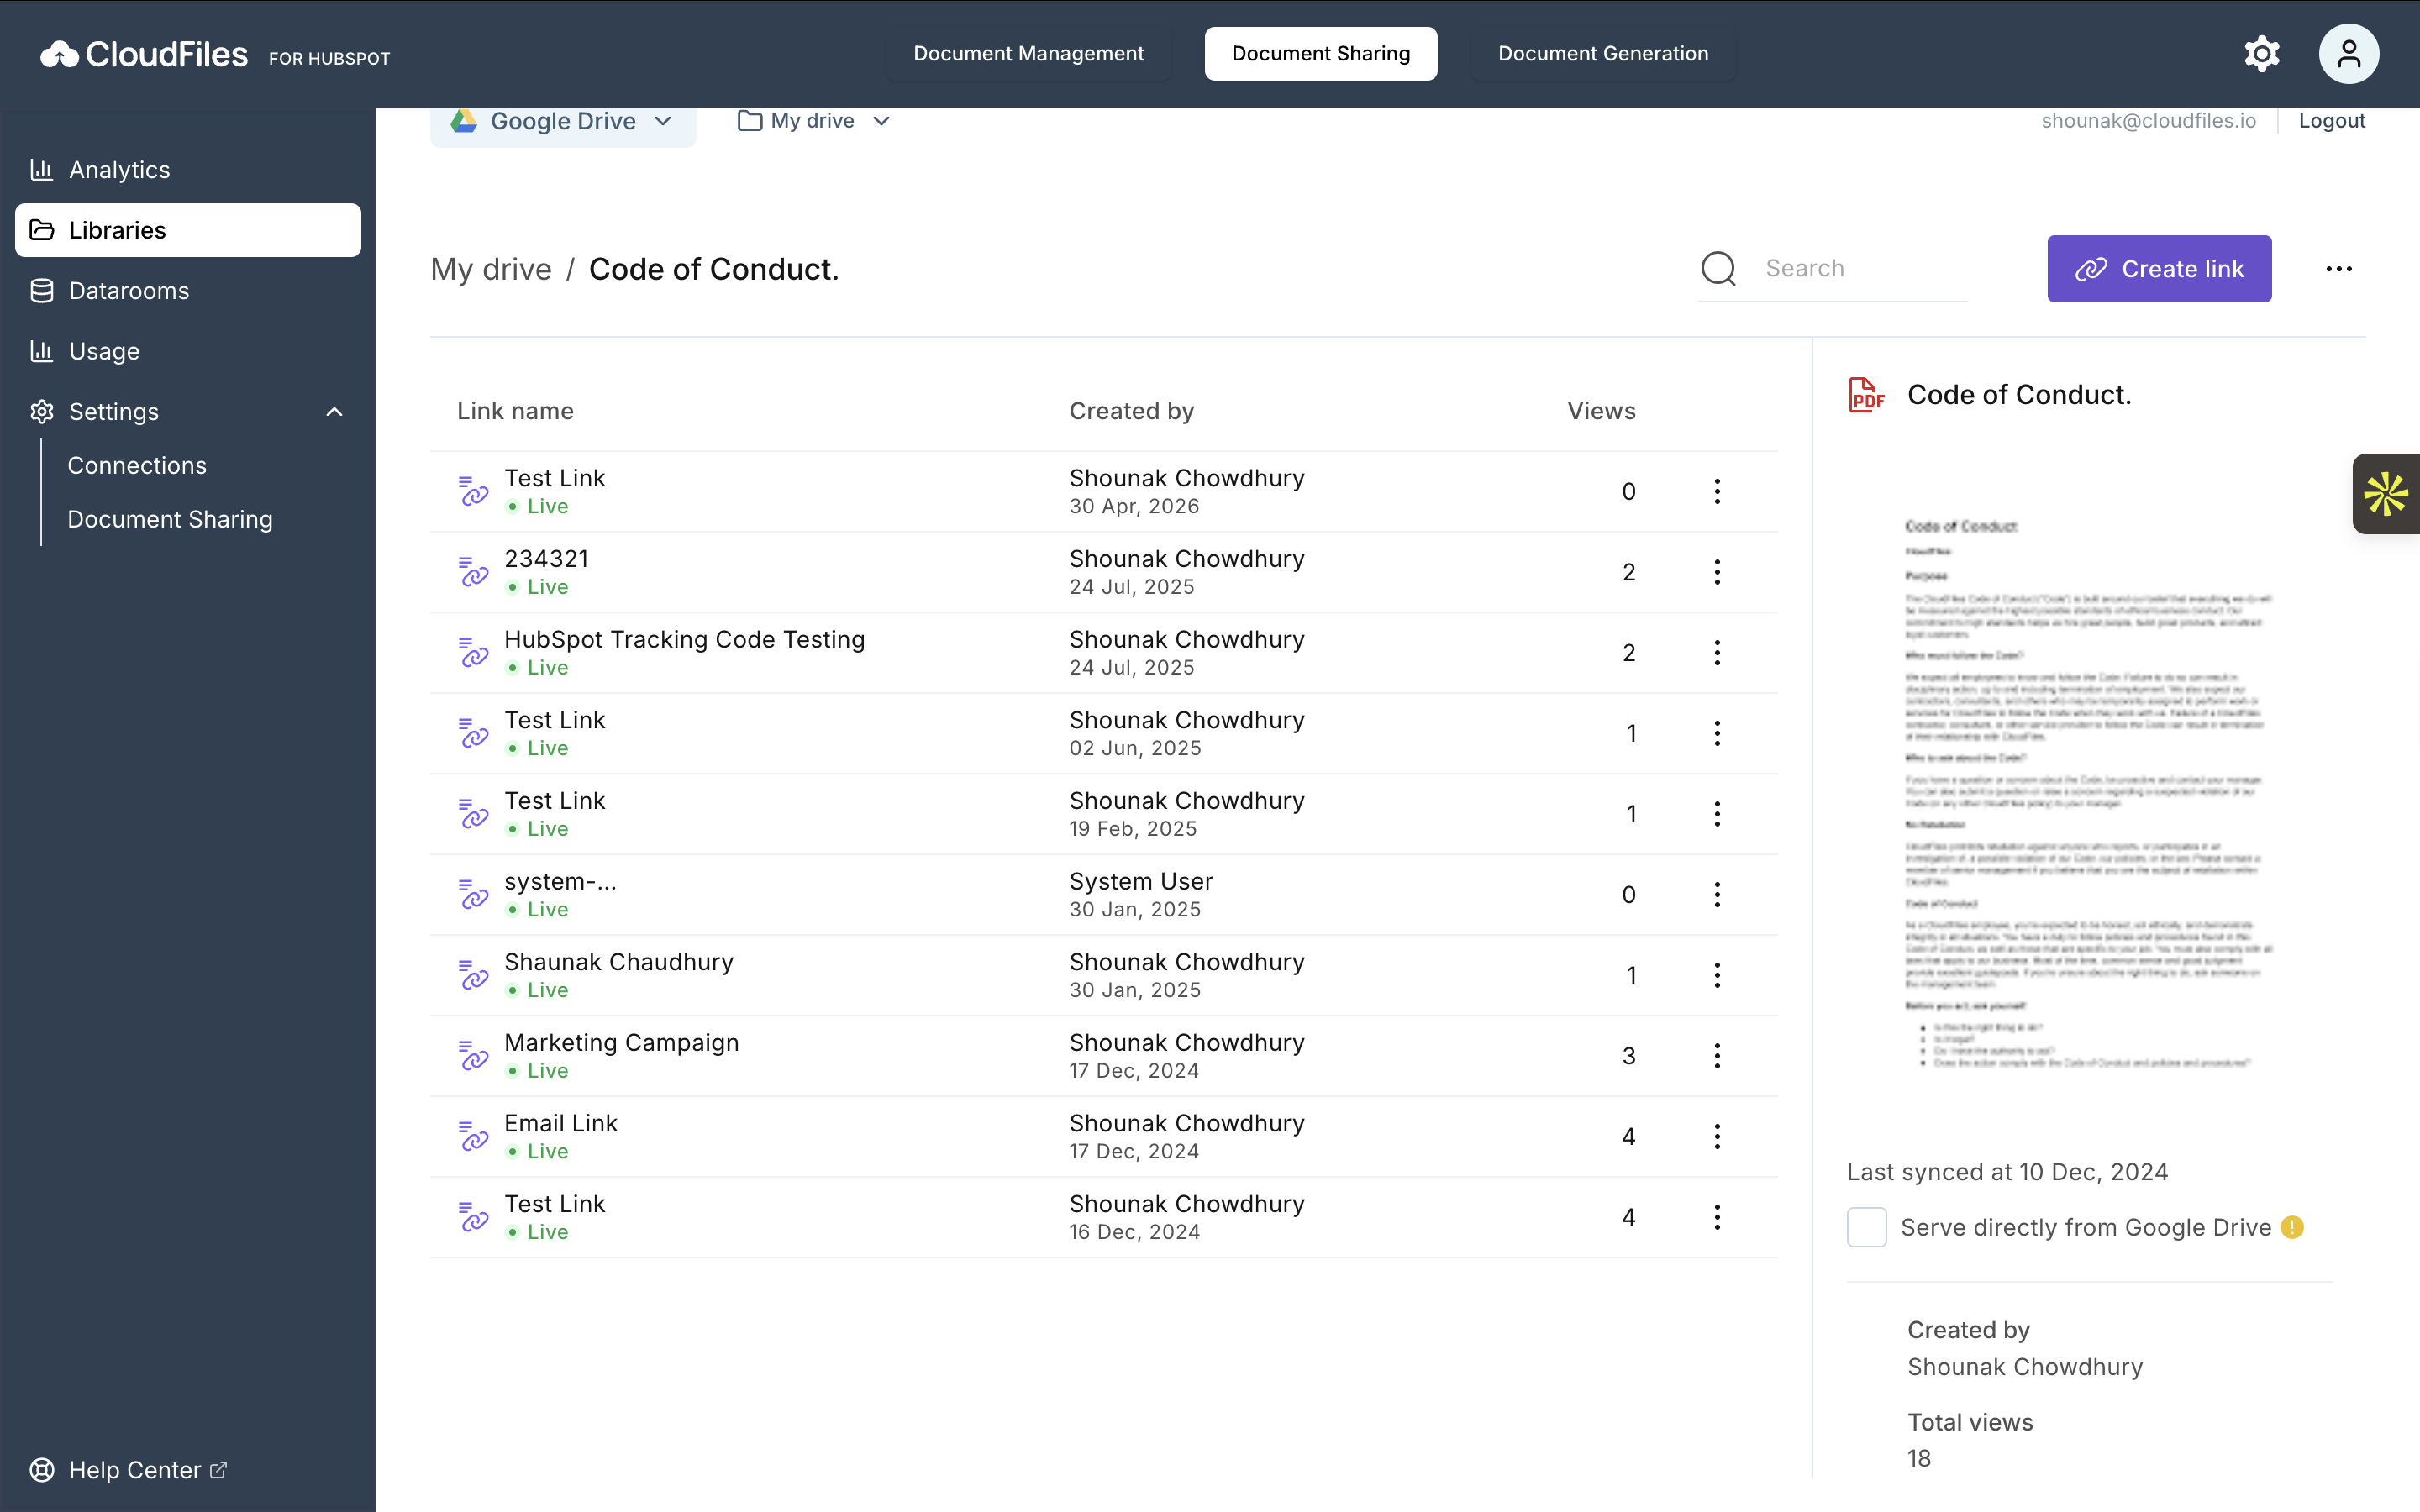
- From a file Navigate to the file from the libraries section from the left-hand side and use the “Create Link” option available on the file details screen. Once the link is named, it is instantly generated and ready to share.
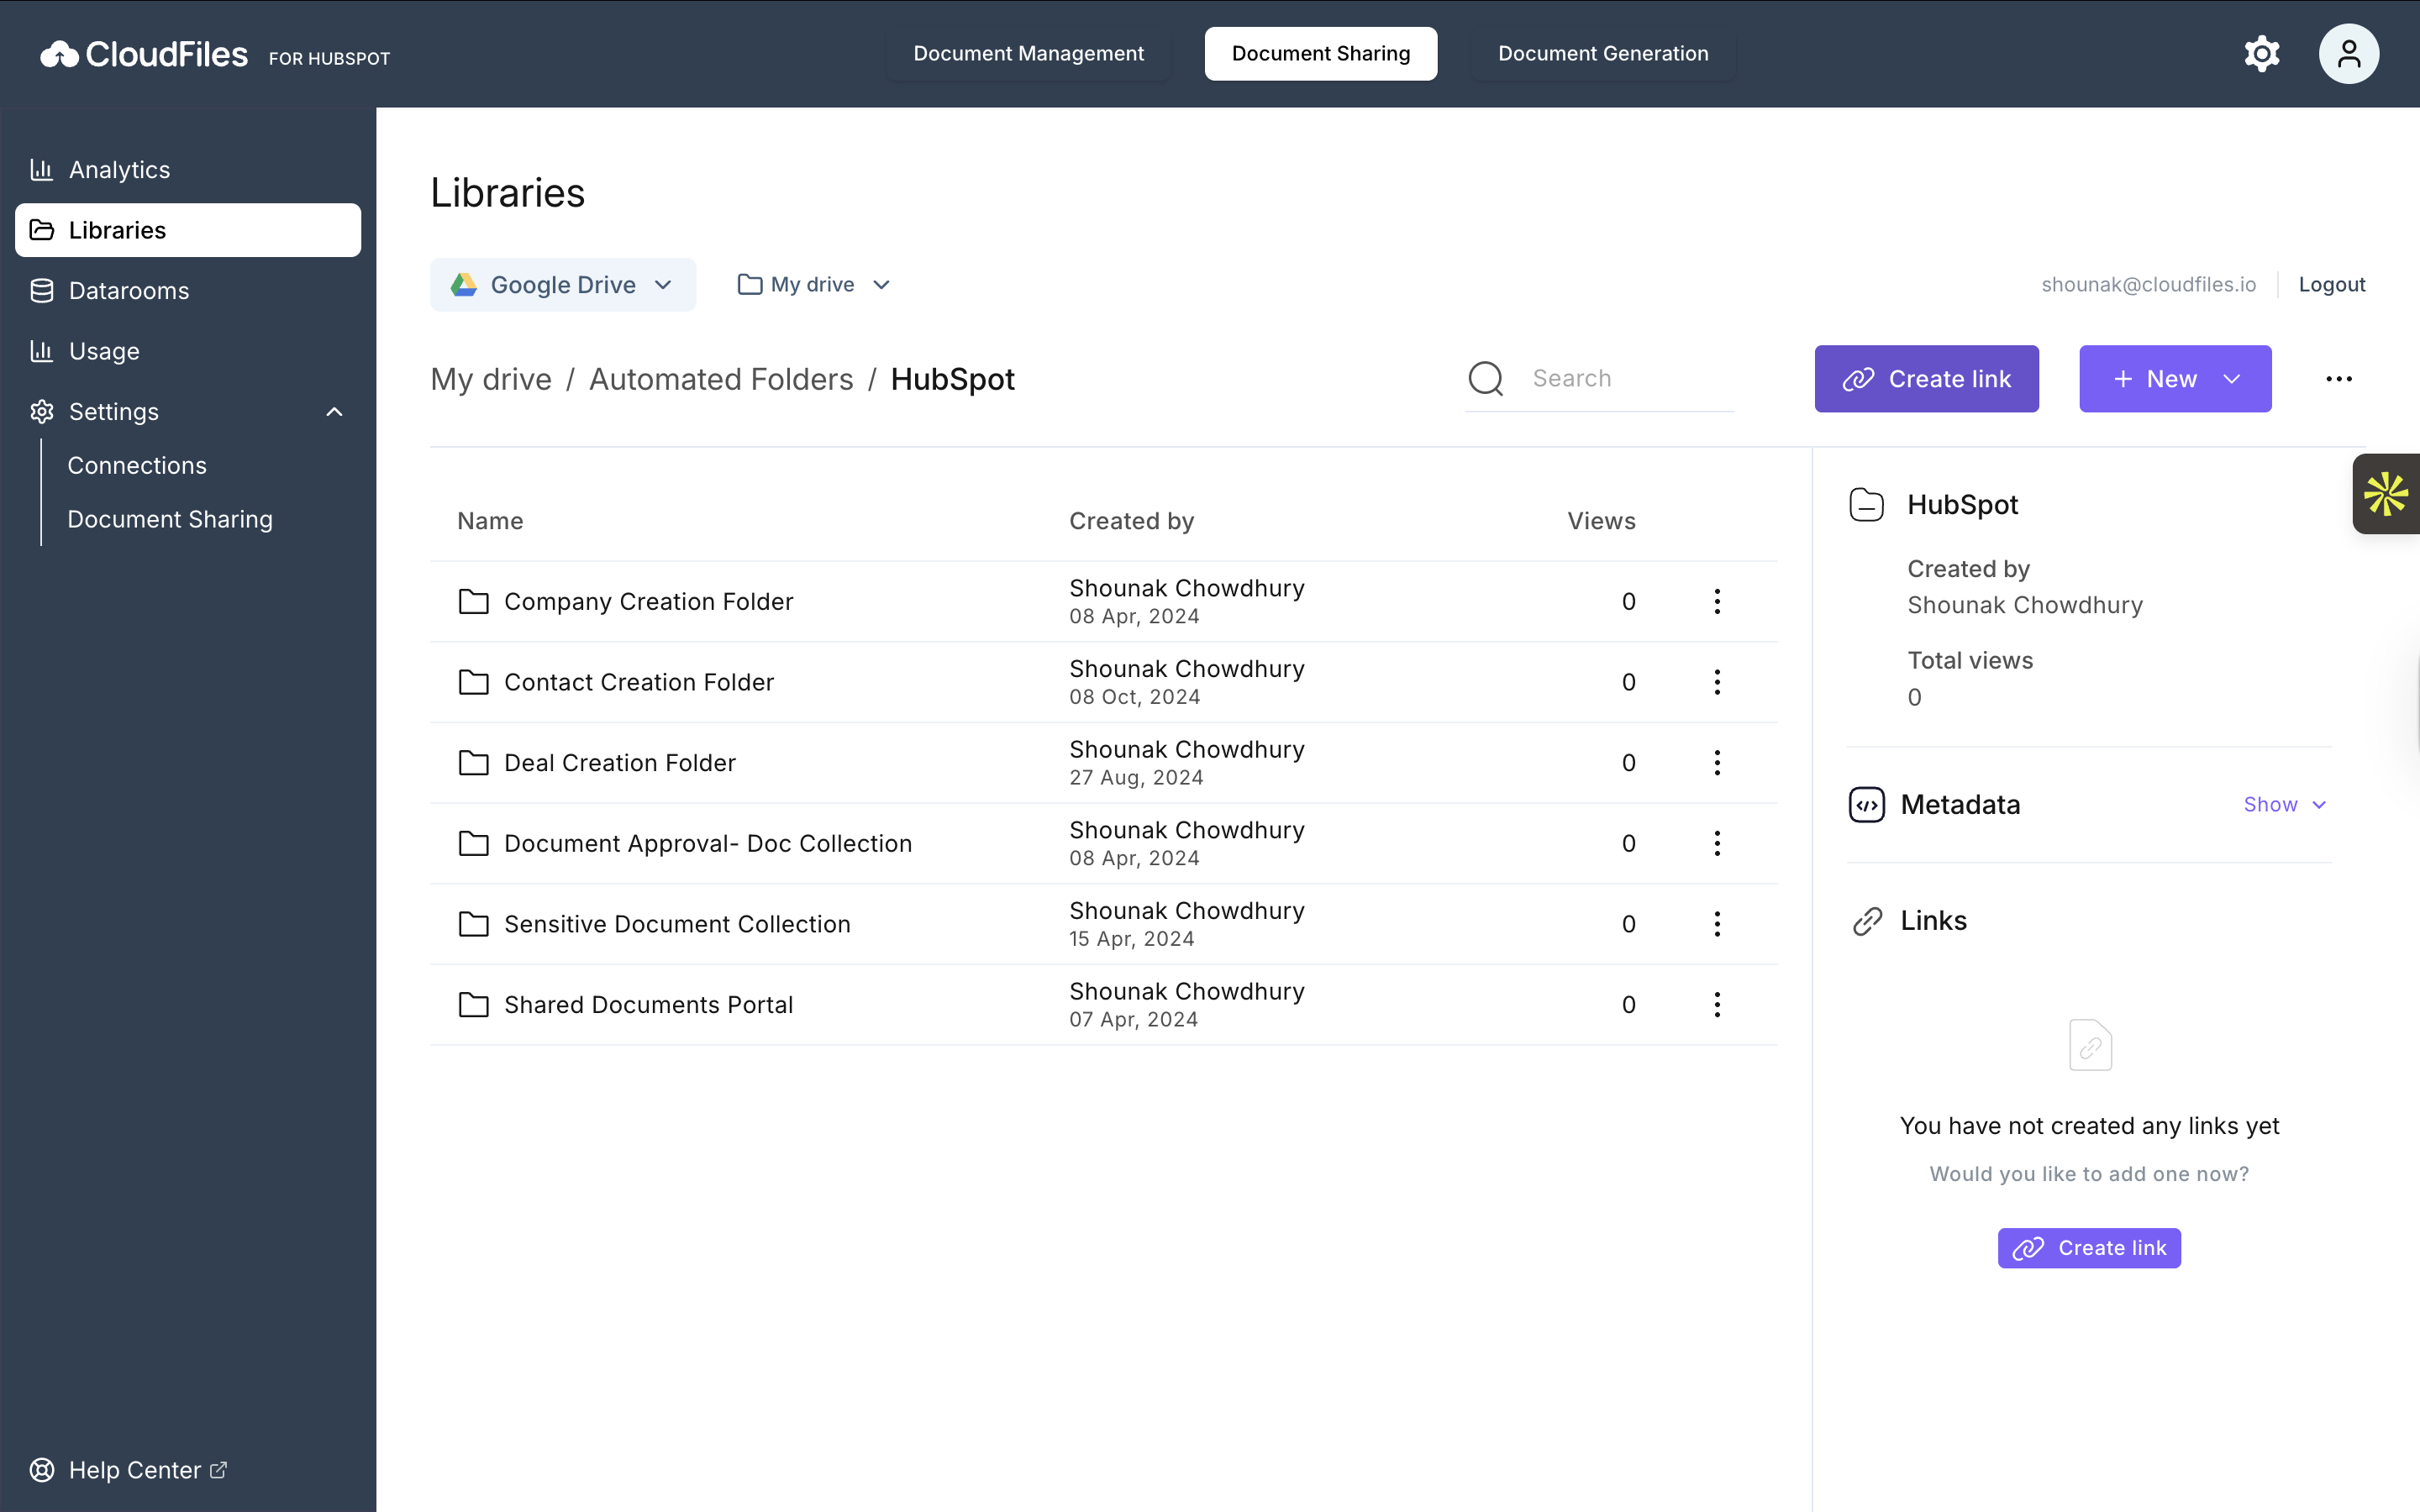
- From a folder Navigate to the desired folder, open it and click on "Create Link". From there, you can create a new link, name it, and configure any required settings.
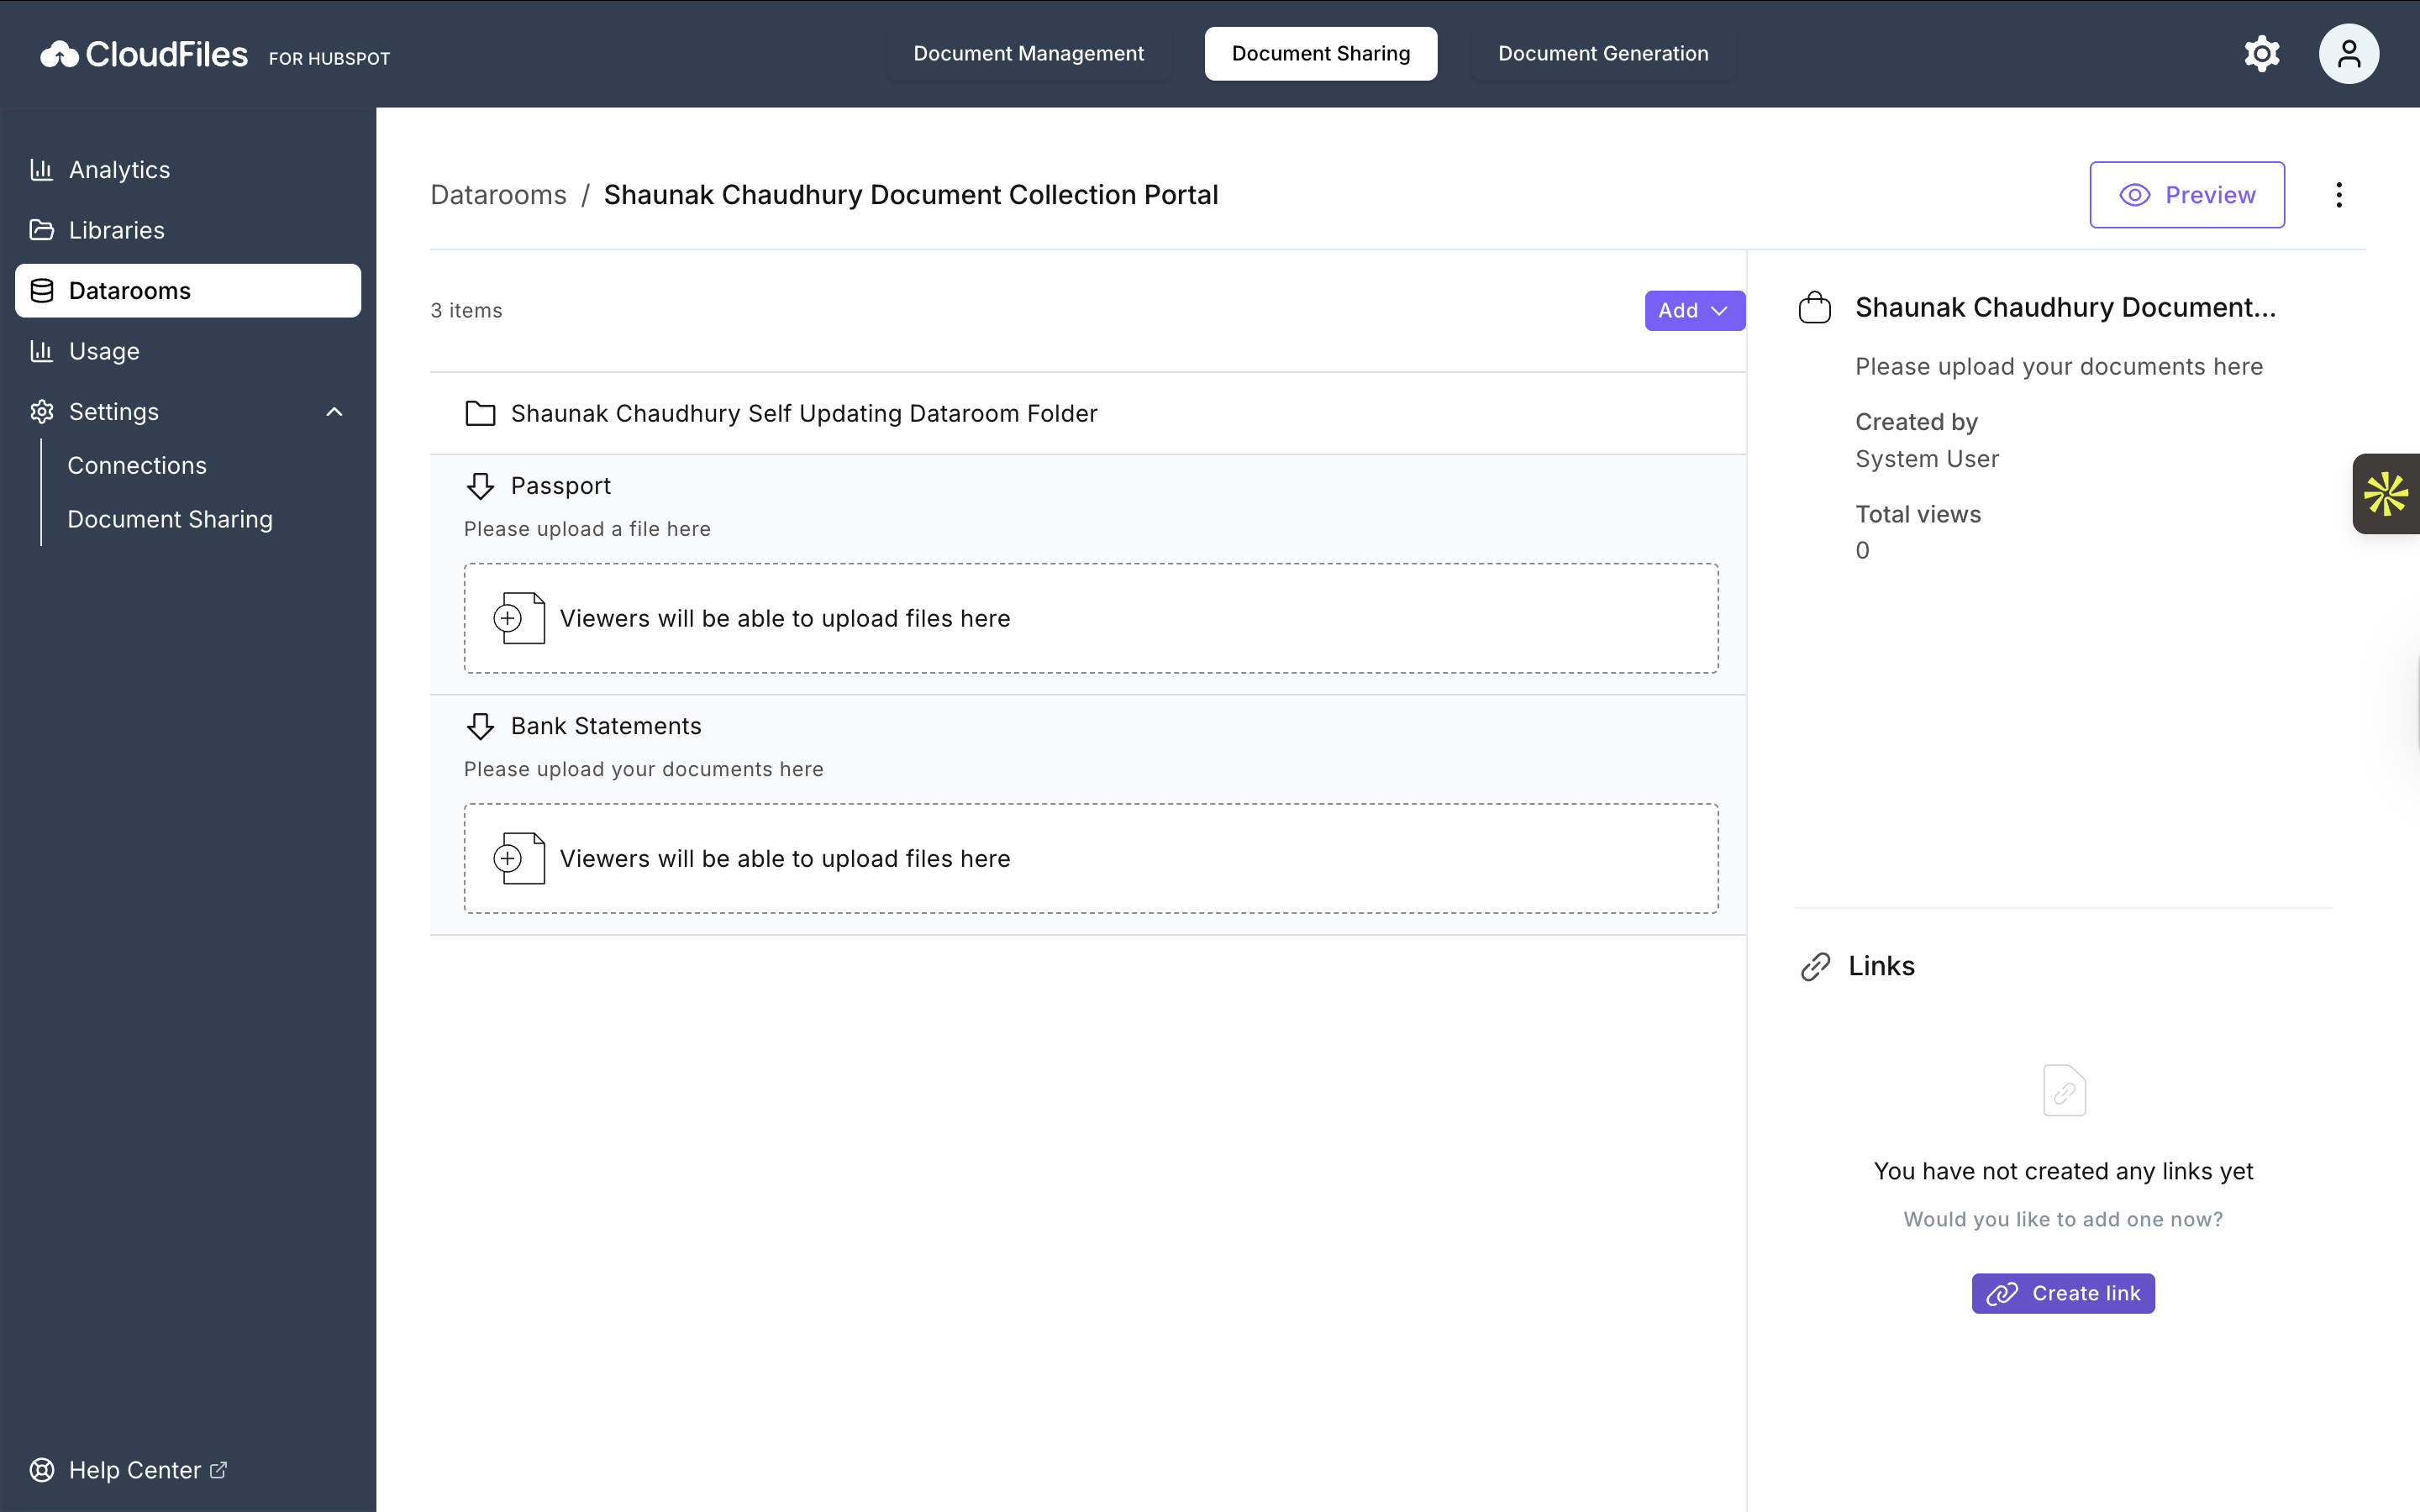
- From a data room Select the Dataroom tab from the left-hand side, and open any specific Dataroom. Use the "Create link" option to generate a secure shareable link. You can define settings such as security and expiry while creating the link, ensuring controlled access to your content.
While you don't need to update any settings for this use-case, you can choose to configure something on this step if you'd like.
2 - Link Personalization in HubSpot Email Templates
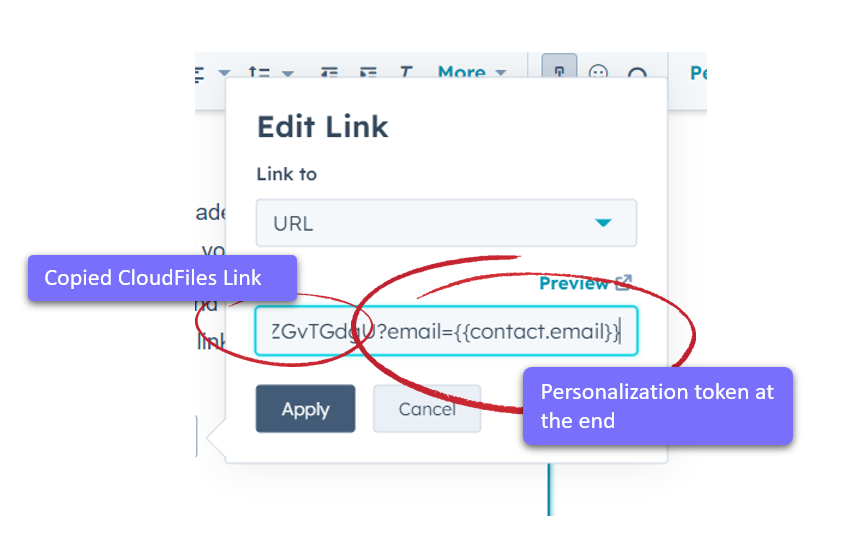
Once you have the link ready, go back to HubSpot and edit one of your marketing or sales email templates. Locate the hyperlink that you'd like to update and add the copied CloudFiles link here. Then, add a personalization parameter as shown below at the end of the link.
3 - Sending test email
You can use HubSpot's test email functionality to send a test email to yourself and see if the link was personalized correctly. The link in the email inbox should have your email appended to it at the end. The format is shown in the graphic below -

4 - Collecting Analytics in CloudFiles
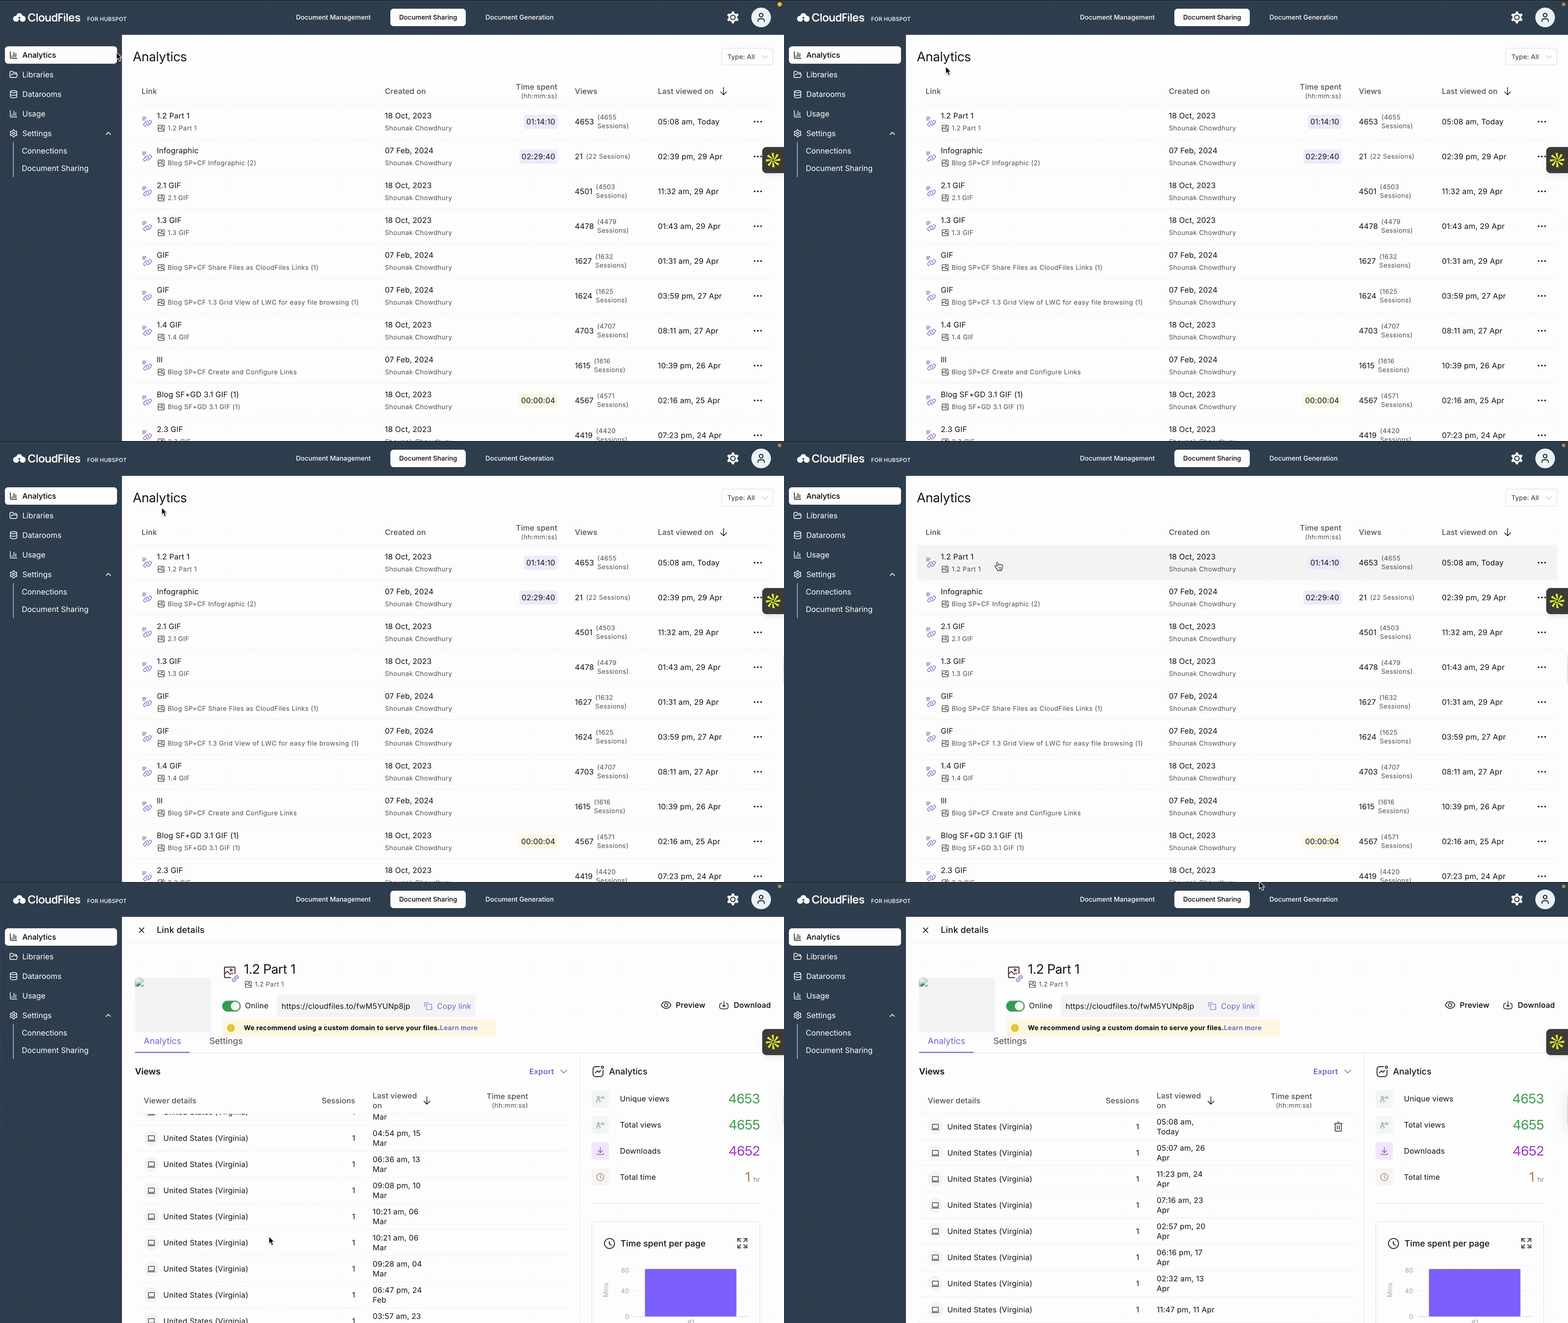
Click on the link that was sent in the email. When you access this link, CloudFiles will not show any email wall but will still collect personalised analytics. Spend a few seconds on your asset for the analytics to build up. Then come back to the CloudFiles interface and view the analytics section of the link details page, as shown below.
5 - Collecting Analytics in HubSpot
Since CloudFiles integrates deeply with HubSpot, all of this analytics information is also pushed on the contact associated with that email. If CloudFiles does not find a contact in your HubSpot, it will create a new one and push the analytics on that record.
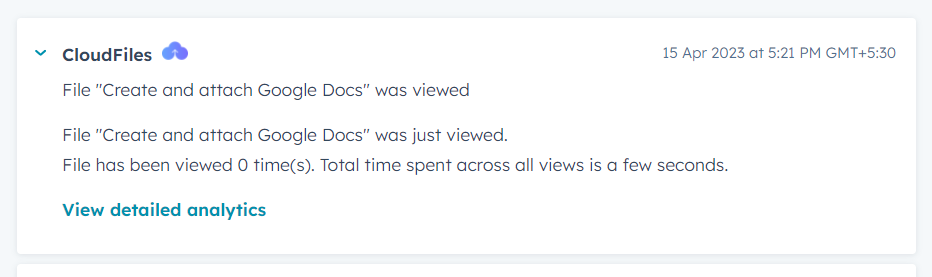
The analytics can be accessed using the timeline event. The graphic below shows the Timeline event posted by CloudFiles on the record when view happens.
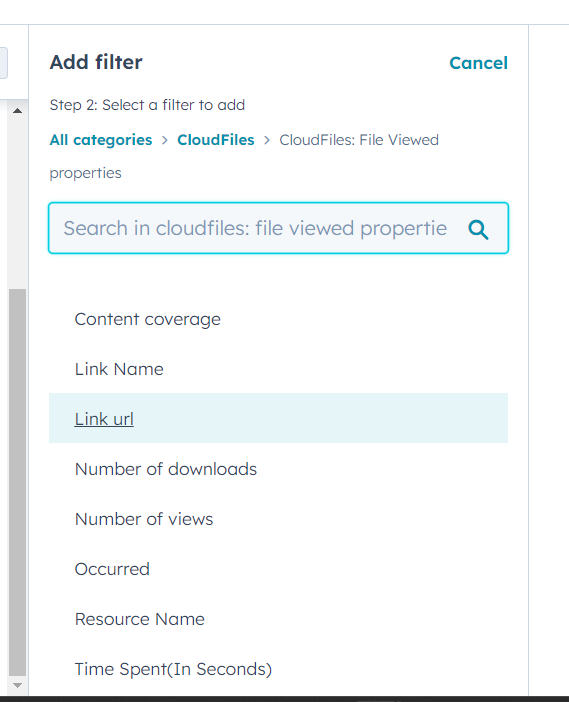
It can also be used in your list filters and workflow triggers to segment your lists based on engagement. The graphic below shows the CloudFiles File Viewed Event that can be used for this purpose.