1 - Enter bucket name in CloudFiles
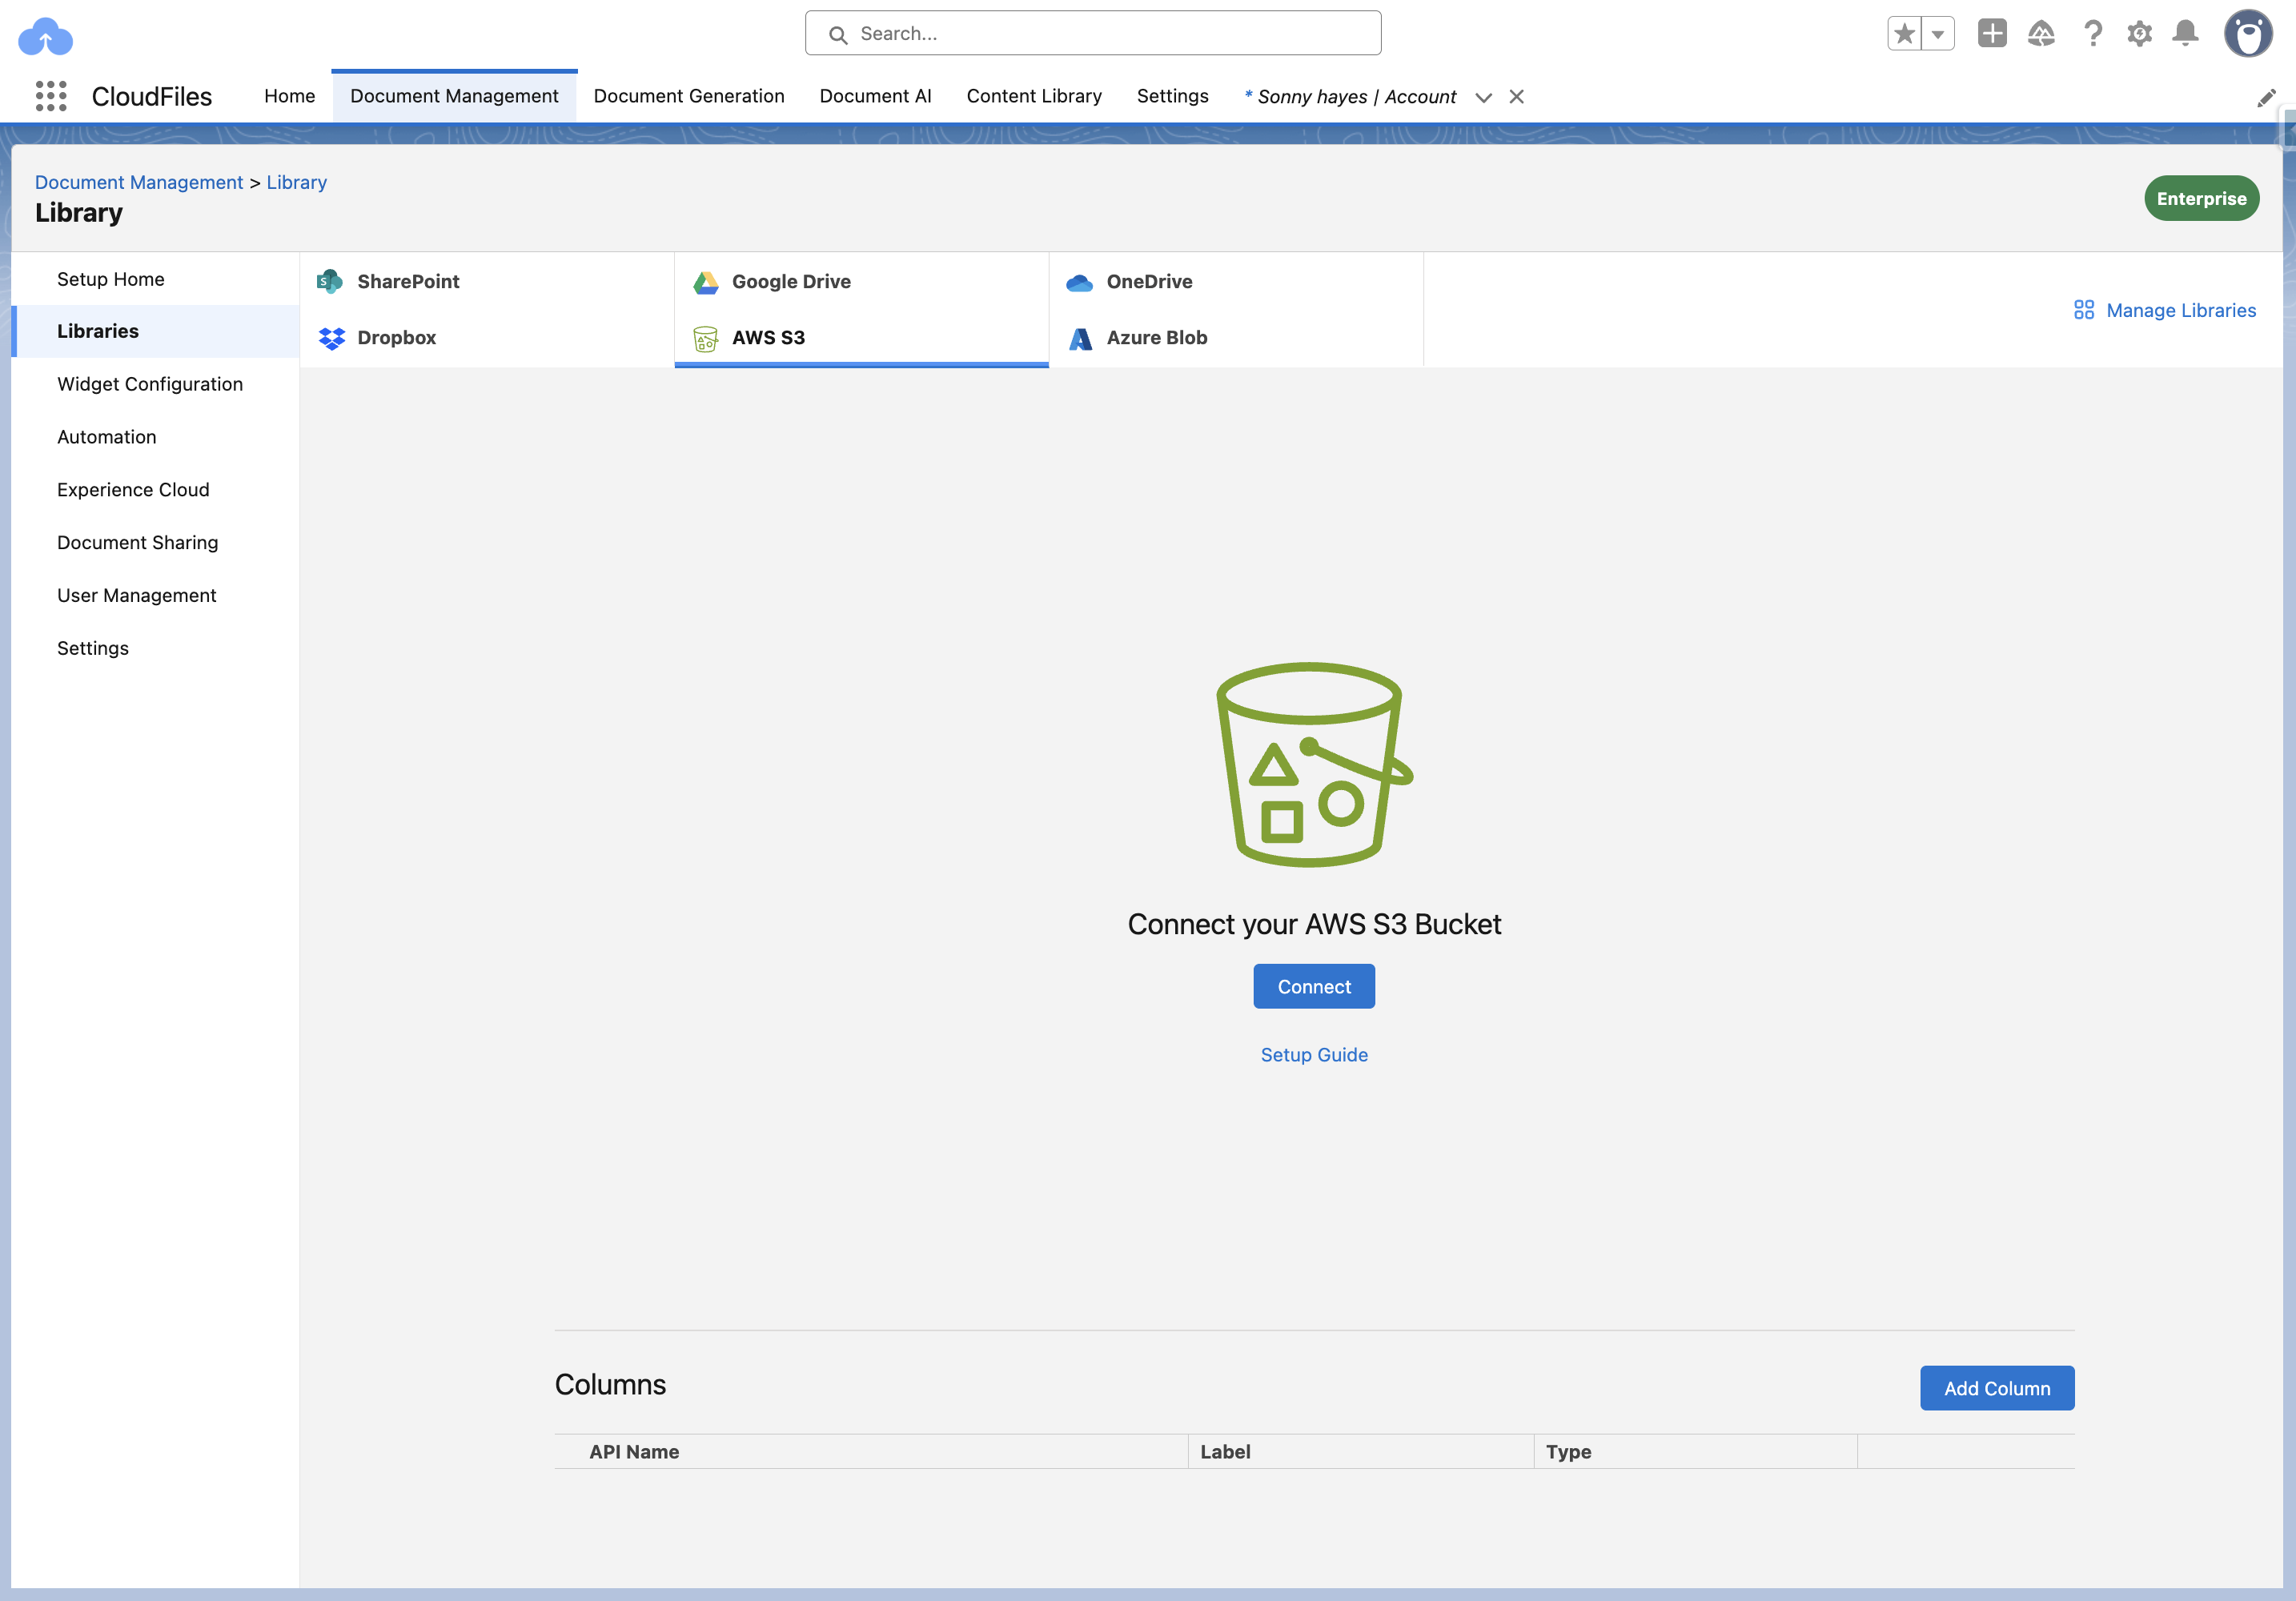
- Head over to the CloudFiles app in Salesforce and navigate to the Document Management tab -> Libraries, and click on AWS S3. If you don't see the AWS S3 option at the top of the page, click on 'Manage Libraries' and add the library.
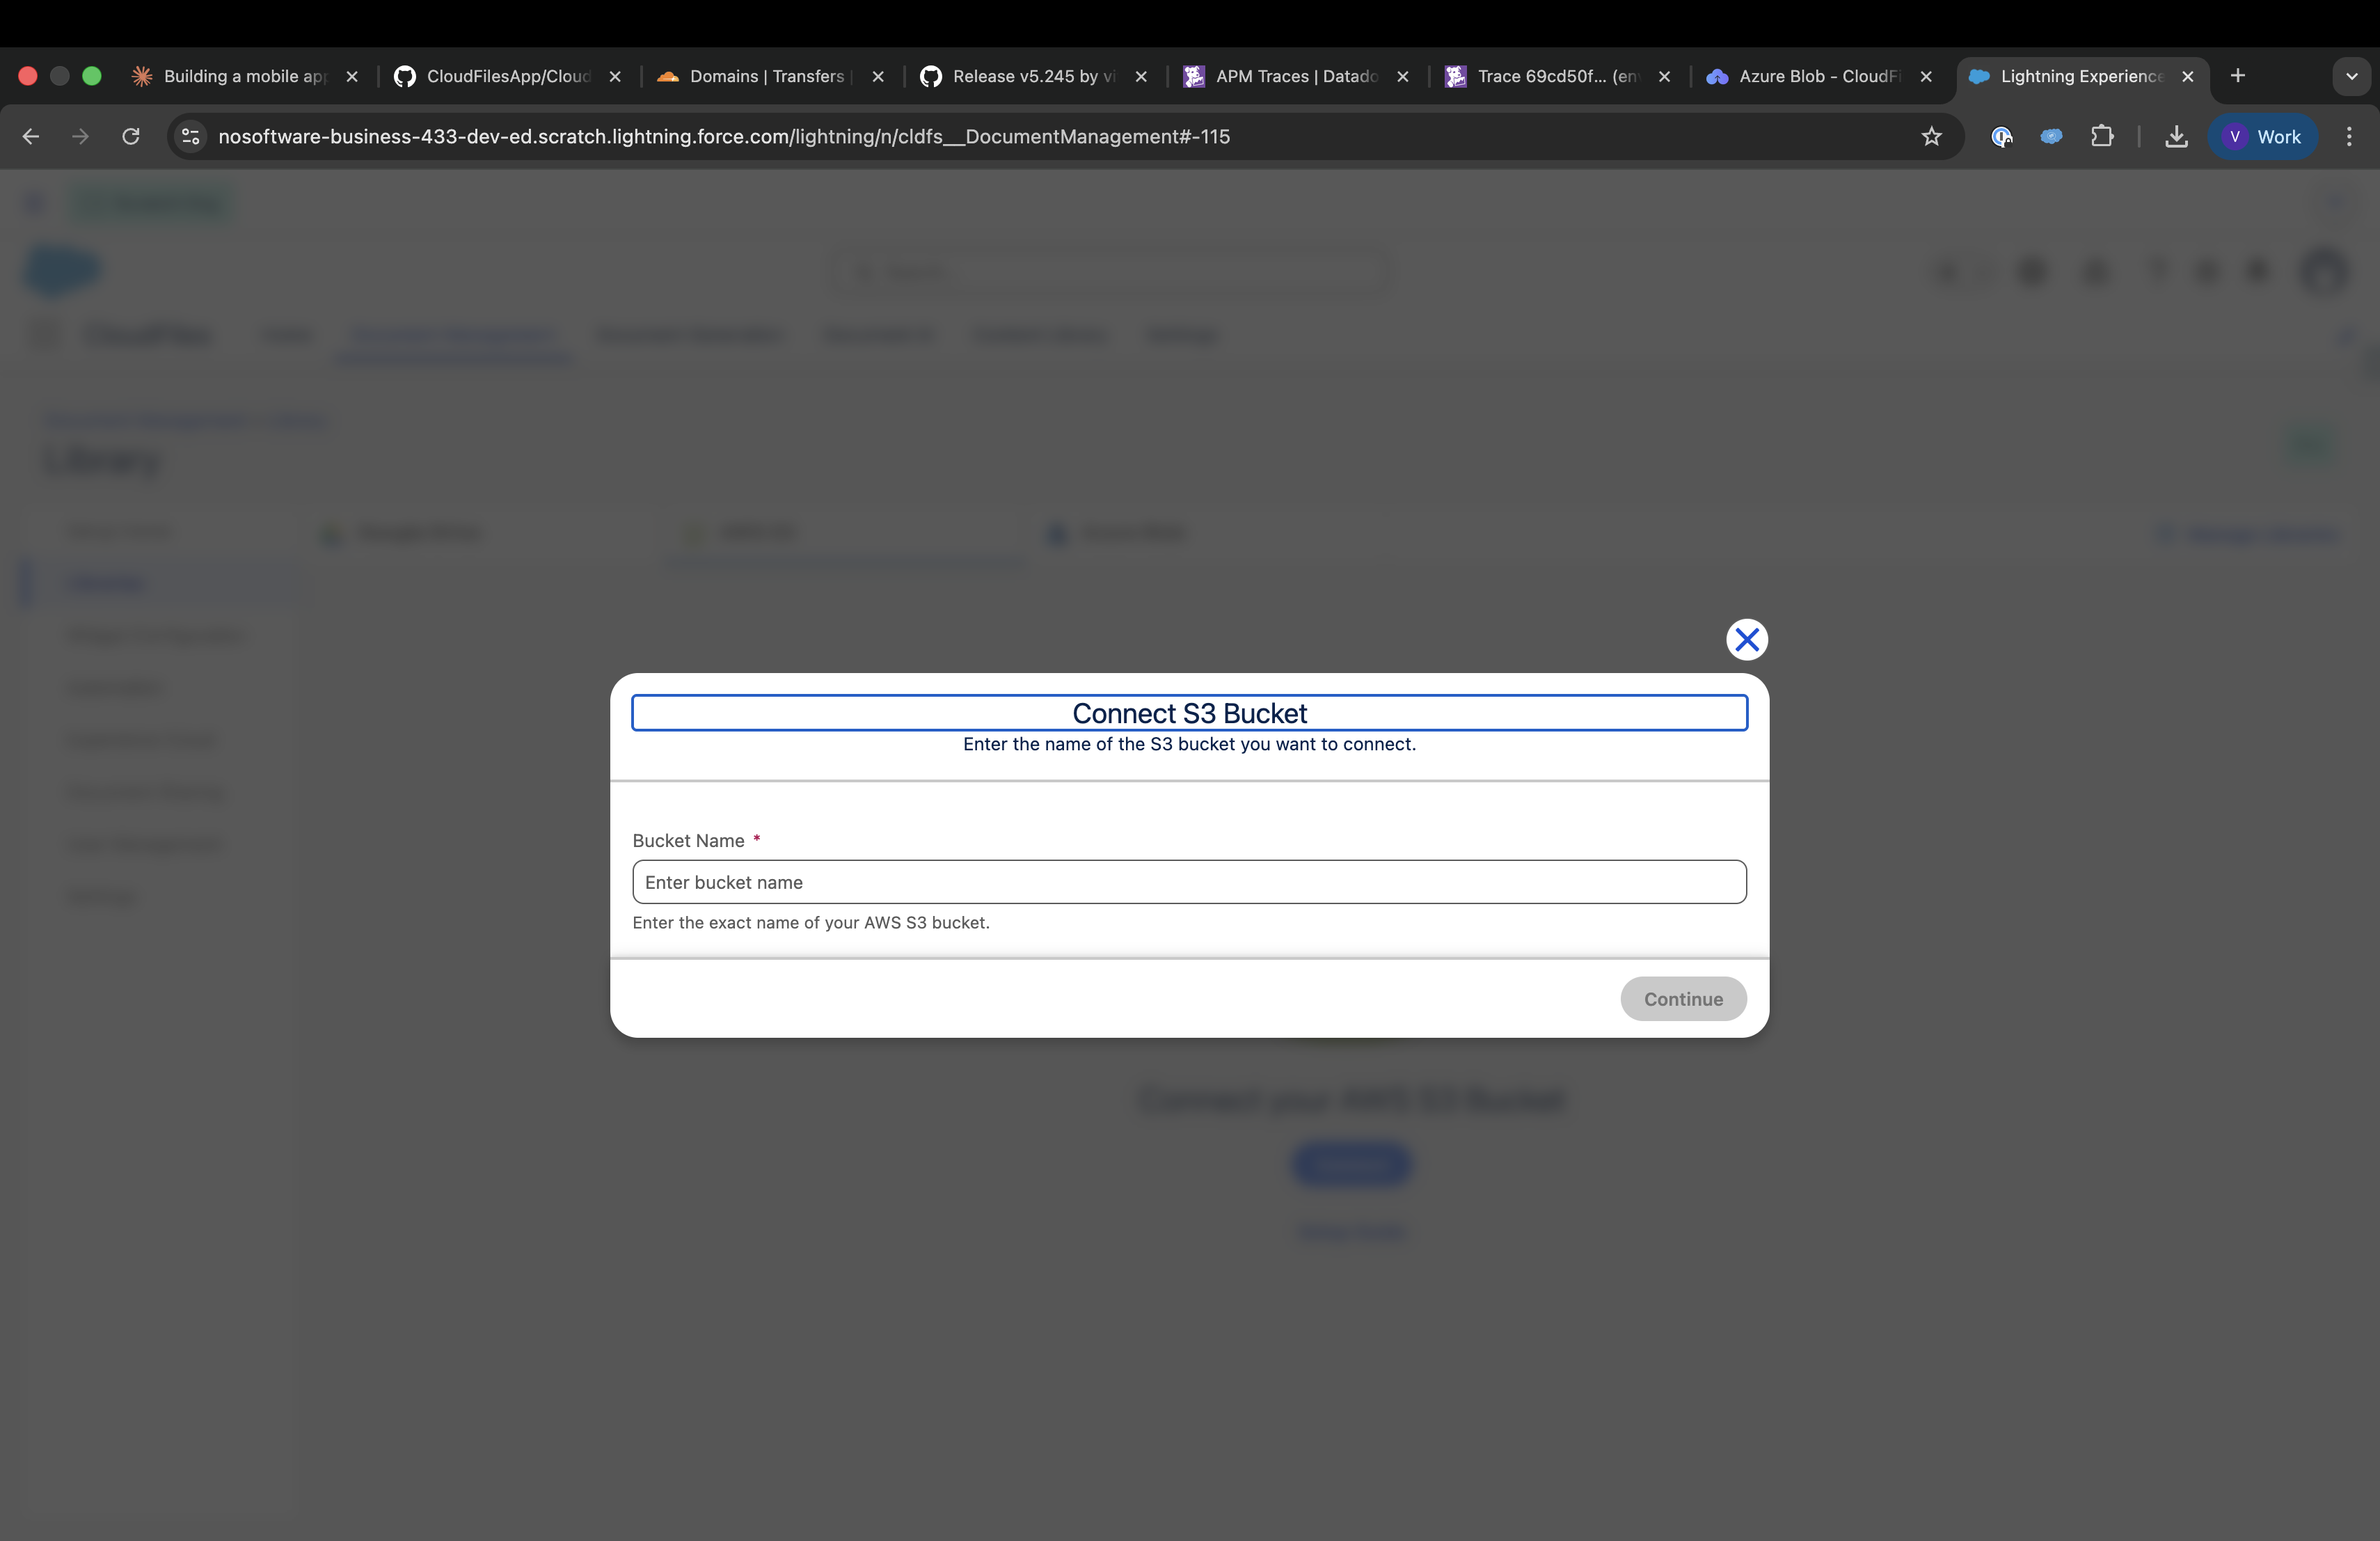
- Click on 'Connect' and enter your S3 bucket name, and continue.
2- Download the CloudFormation Template
- Note down the External ID and download the CloudFormation template that is generated. Head over to the AWS Management Console after this step.
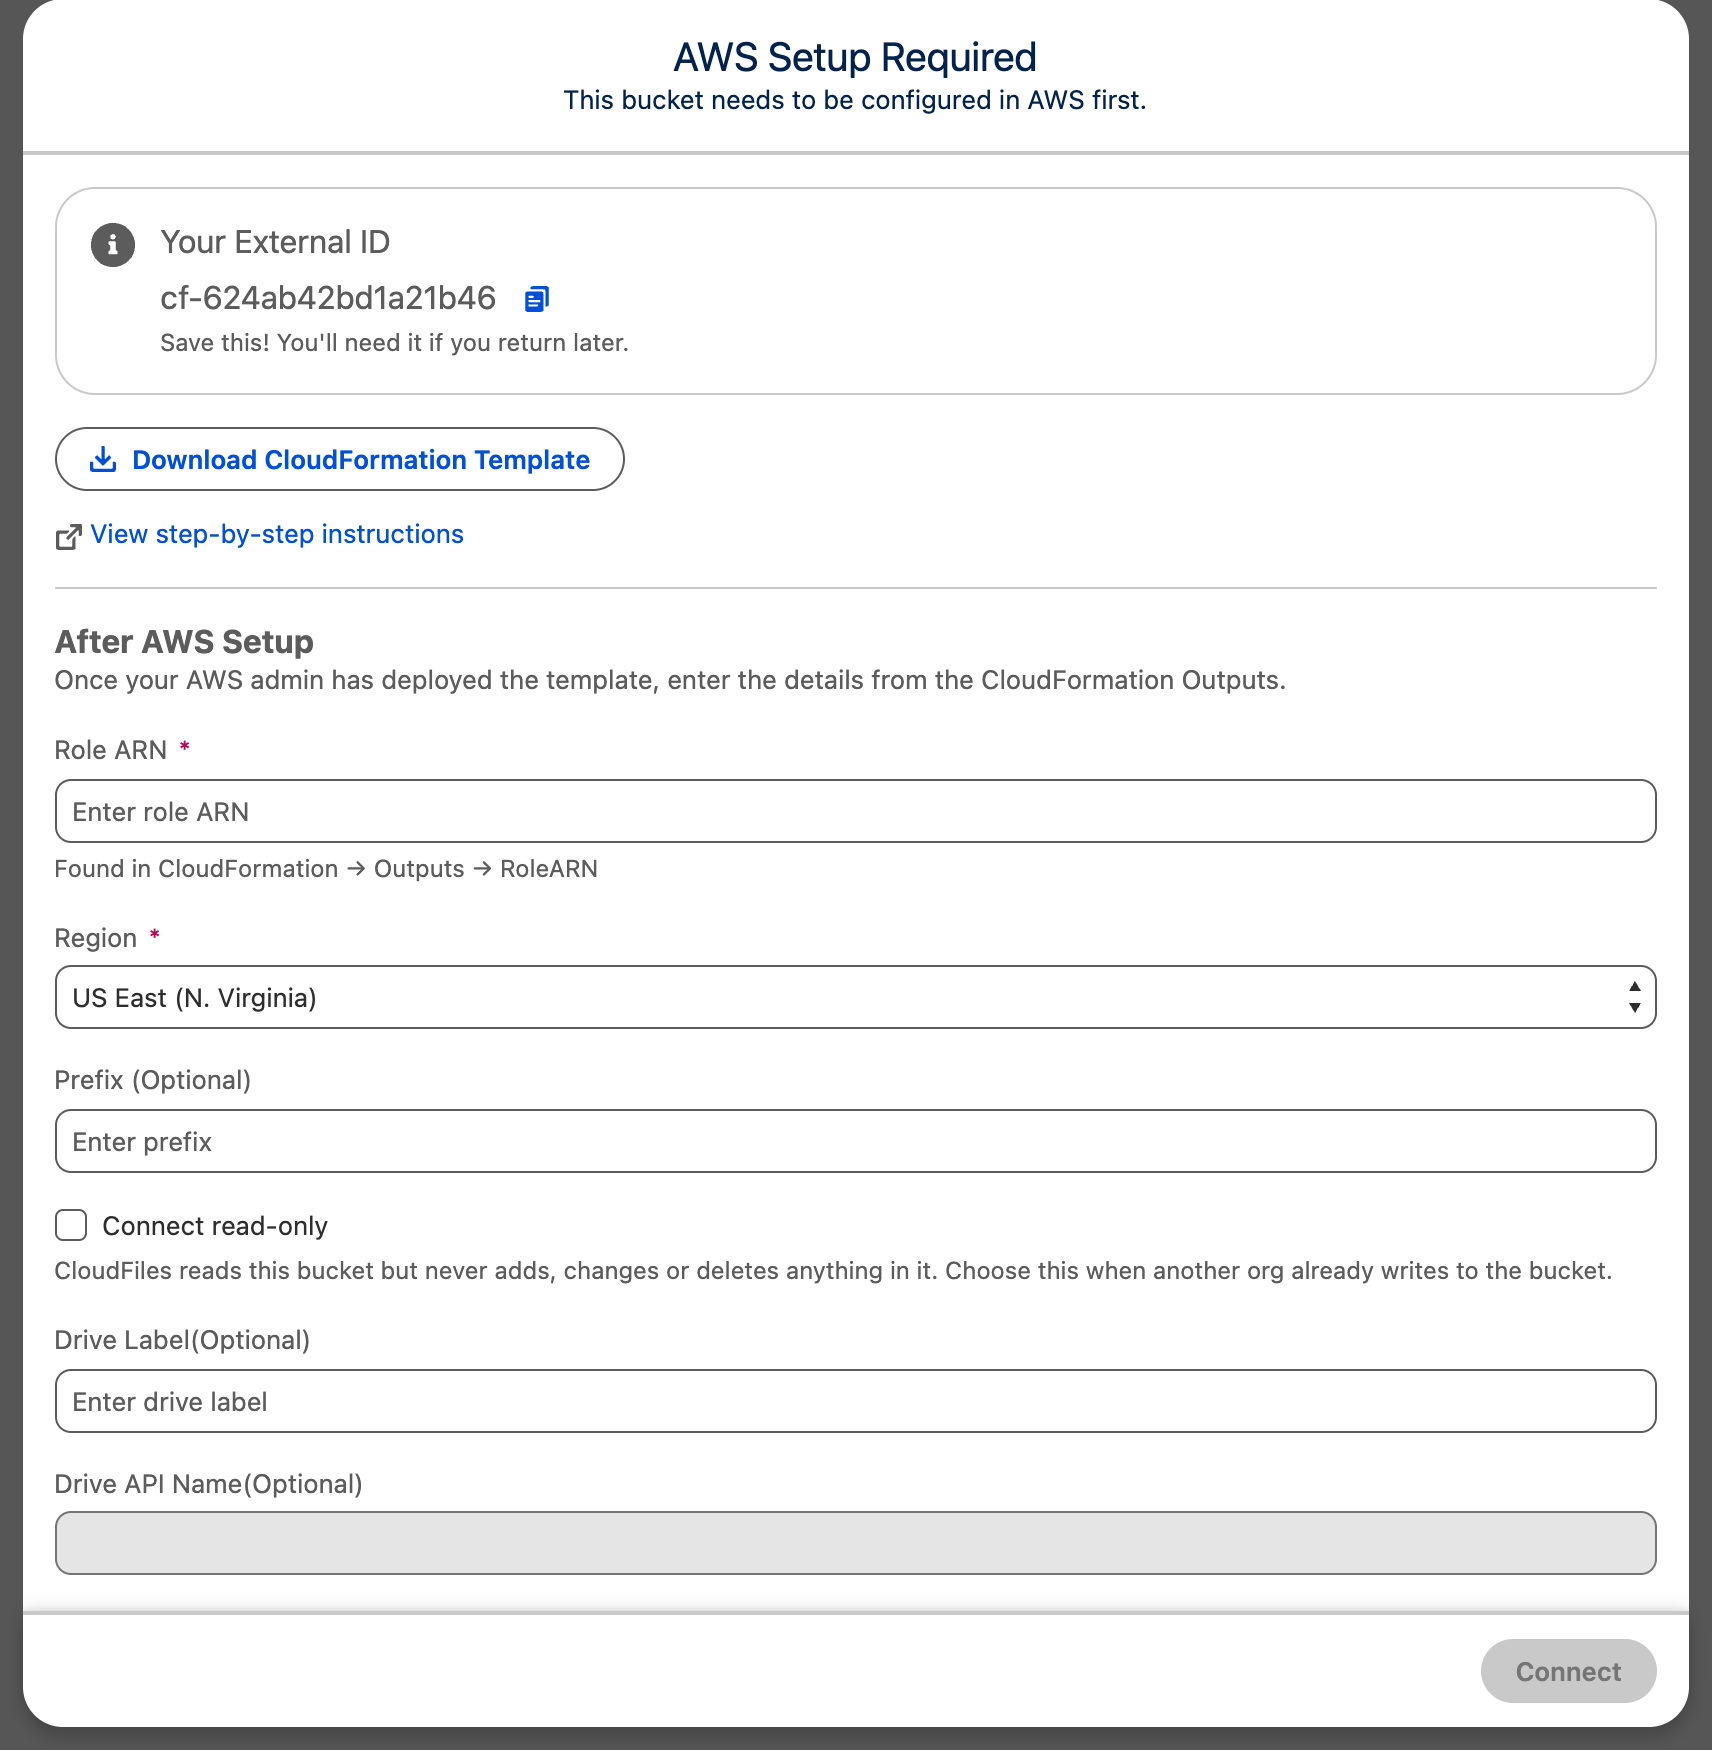
3 - Access AWS CloudFormation
- In the AWS Management Console, search for and select 'CloudFormation'.
4 - Create a New Stack
- Click on “Create stack” and select “With new resources (standard)”.
- Choose “Template is ready” under the “Prepare template” options.
5 - Upload the CloudFormation Template
- Select “Upload a template file”.
- Click on “Choose file” and upload the CloudFormation template that you downloaded in step 2.
- Click “Next”.
6 - Specify Stack Details
- Enter a name for your stack. For example, “CloudFilesS3Integration”.
- Fill in any parameters required by the template, if applicable.
- Click “Next”.
7 - Configure Stack Options (Optional)
- Configure any additional options like tags or permissions if necessary.
- Click “Next”.
8 - Review and Create the Stack
- Review all settings and details. Make sure everything is correct.
- Acknowledge that AWS CloudFormation might create IAM resources.
- Click “Create stack”.
9 - Wait for Stack Creation
- The stack creation process might take a few minutes. Wait until the status changes to “CREATE_COMPLETE”.
10 - Obtain the Outputs
- Once the stack creation is complete, go to the “Outputs” tab of your stack.
- Note down the ‘Role ARN’ value. This will be essential for connecting your S3 bucket to CloudFiles.
11 - Enter Details in CloudFiles
- Head back to the libraries screen in CloudFiles app (where you left off in step 2) to enter the rest of the details.
- Enter the ‘Role ARN’ you noted down in the previous step.
- (Optional) Enter a 'Prefix': The Prefix defines the folder path within your S3 bucket that CloudFiles will use. This allows you to organize data within a single section of the bucket instead of using the entire bucket. Leave it empty to connect the whole bucket.
- (Optional) Select 'Connect read-only' if CloudFiles should only read this bucket. See Read-only connections below.
- Enter the Drive Label: The Drive Label is the display name for the storage connection in CloudFiles. This label is what users will see in the UI when accessing or selecting a storage location, making it easier to identify and distinguish between multiple connected drives. It is optional for the first bucket connected in the org but required for any additional connections to ensure each drive can be easily identified.
- Save your settings.
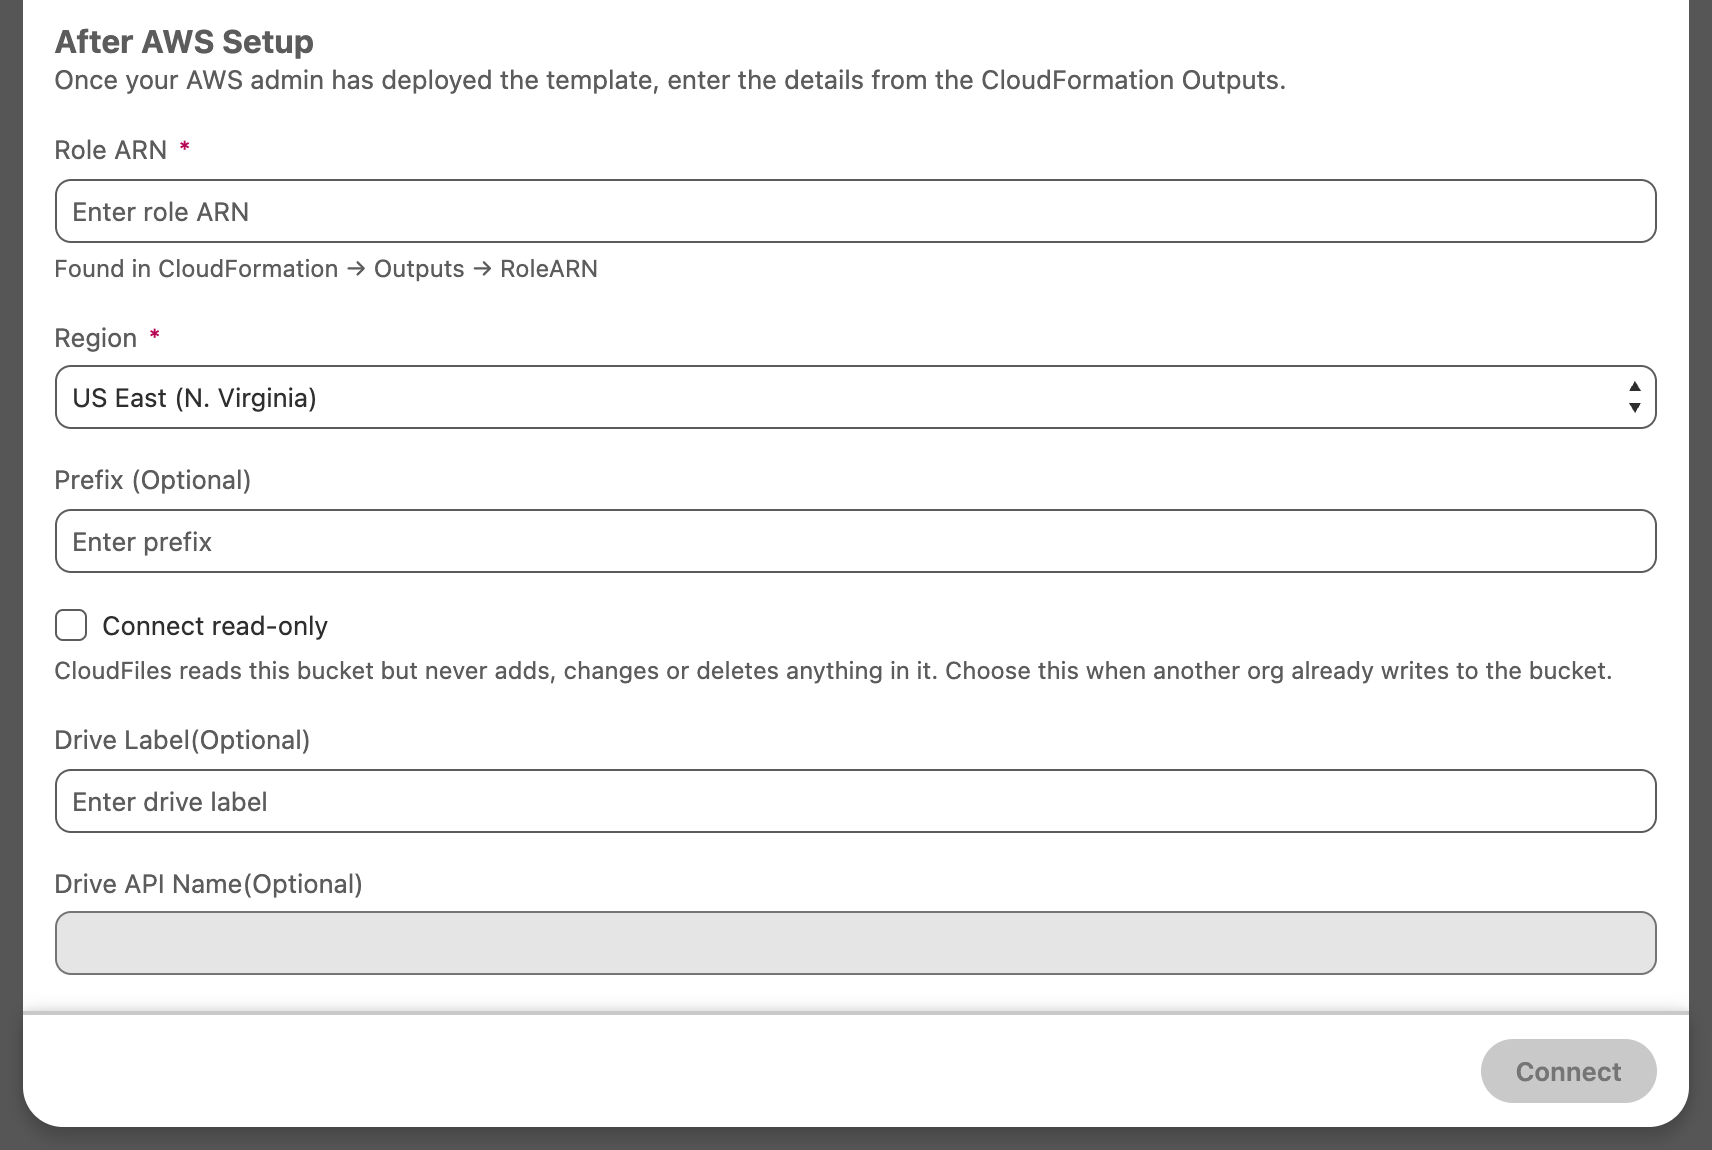
After entering the details in CloudFiles, your S3 bucket should now be successfully connected to your CloudFiles account. You can start managing and accessing your S3 files directly through CloudFiles.
If the bucket is already connected in this org or a related org, you see the 'Reuse Existing Connection' step instead, and no AWS setup is needed. Enter a prefix, or leave it empty to connect the whole bucket, and select 'Connect read-only' if needed.
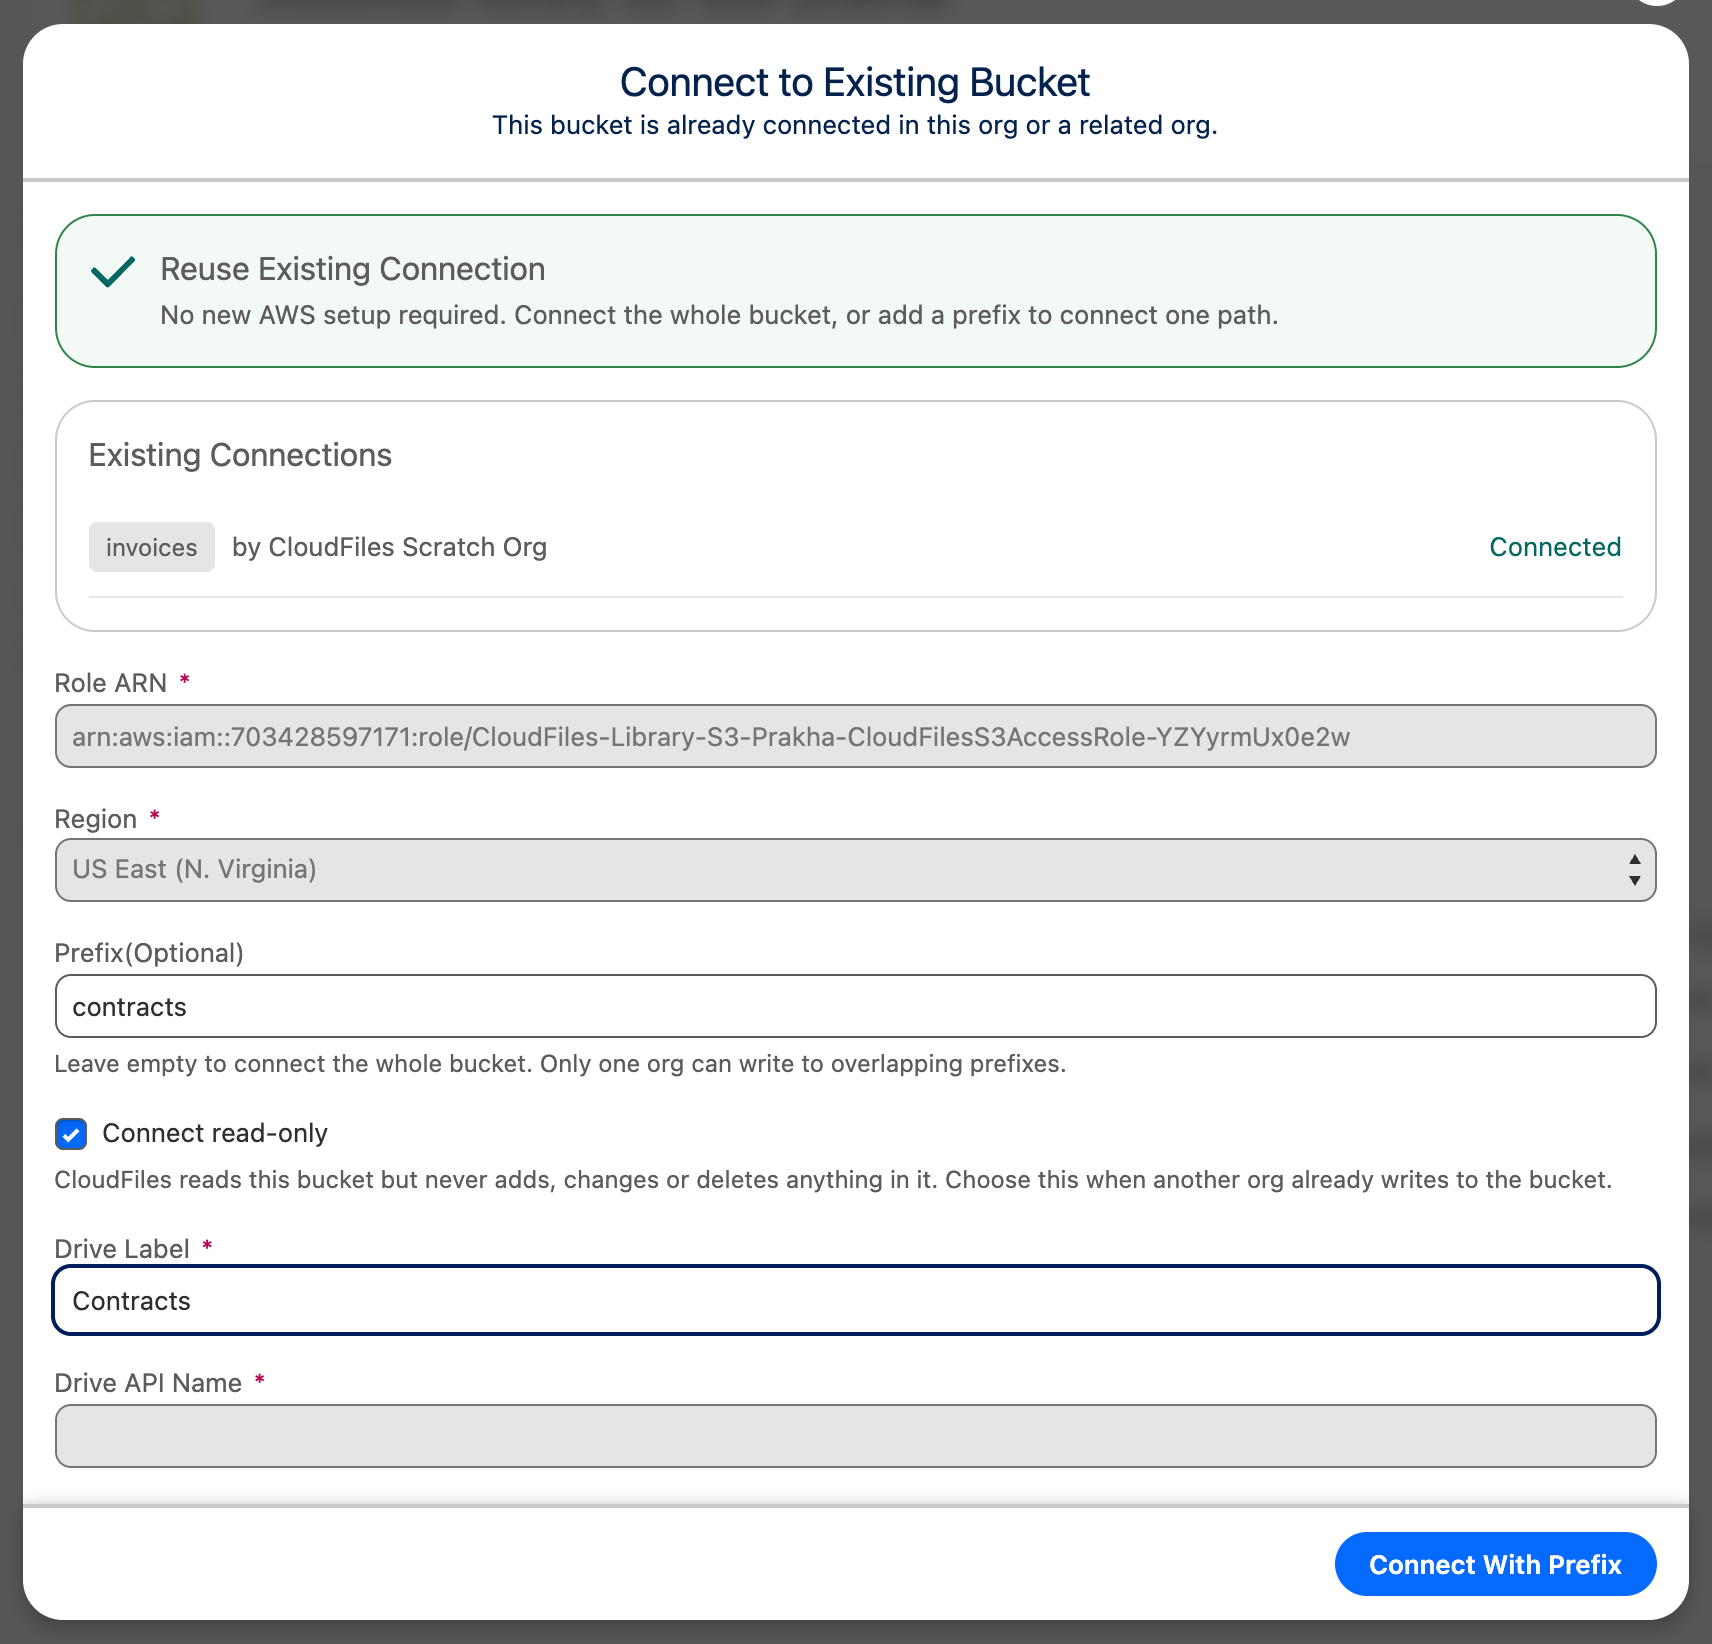
When a prefix, drive label or read-only is needed
A production org and its sandboxes are related orgs. Any other org is unrelated.
| Connecting | Prefix | Drive label | Read-only |
|---|---|---|---|
| First bucket in this org | Optional | Optional | Optional |
| Another bucket in this org | Optional | Required | Optional |
| Same bucket again in this org | Required, and must not overlap the other connection | Required | Optional |
| Same bucket as a related org | Optional, and may overlap | Required if this org already has a bucket | Required if the paths overlap and the other org already writes there |
| Same bucket as an unrelated org | Required, and must not overlap the other org's | Required if this org already has a bucket | Optional |
Two connections overlap when they use the same prefix, when one prefix sits inside the other (for example, team-a and team-a/2026), or when either has no prefix, because an empty prefix covers the whole bucket.
To connect the same bucket twice in one org, both connections need a prefix. If the first one has none, disconnect it and reconnect it with a prefix.
12 - Enable Sync (Optional)
- Turn on Enable Sync to automatically sync changes between your S3 bucket and CloudFiles.
- Once enabled, any files or folders that are uploaded, updated, or deleted in S3 will be reflected in CloudFiles.
Sync only applies to changes made after the toggle is enabled. Existing files in your S3 bucket will not appear automatically in CloudFiles. To make historical data available, a custom (paid) migration is required. Please contact support@cloudfiles.io for more details. If your S3 bucket was connected before the automated sync setup was introduced, enabling sync may require updating the IAM role permissions first. See How to enable Auto Sync for old S3 buckets connected in CloudFiles for steps.
Read-only connections
A read-only connection lets CloudFiles read the files in a bucket but never add, change or delete anything in it. Use it when another org already writes to the bucket, for example when a production org writes to a bucket and its sandboxes only read it.
- To connect read-only, select 'Connect read-only' in step 11 or on the 'Reuse Existing Connection' step.
- Only one org can write to the same path of a bucket. If another org already writes there, connect read-only or use a different prefix.
- If your IAM role is not allowed to write to the bucket, CloudFiles connects read-only automatically.
- Read-only connections show a 'Read-only' badge next to the bucket name.
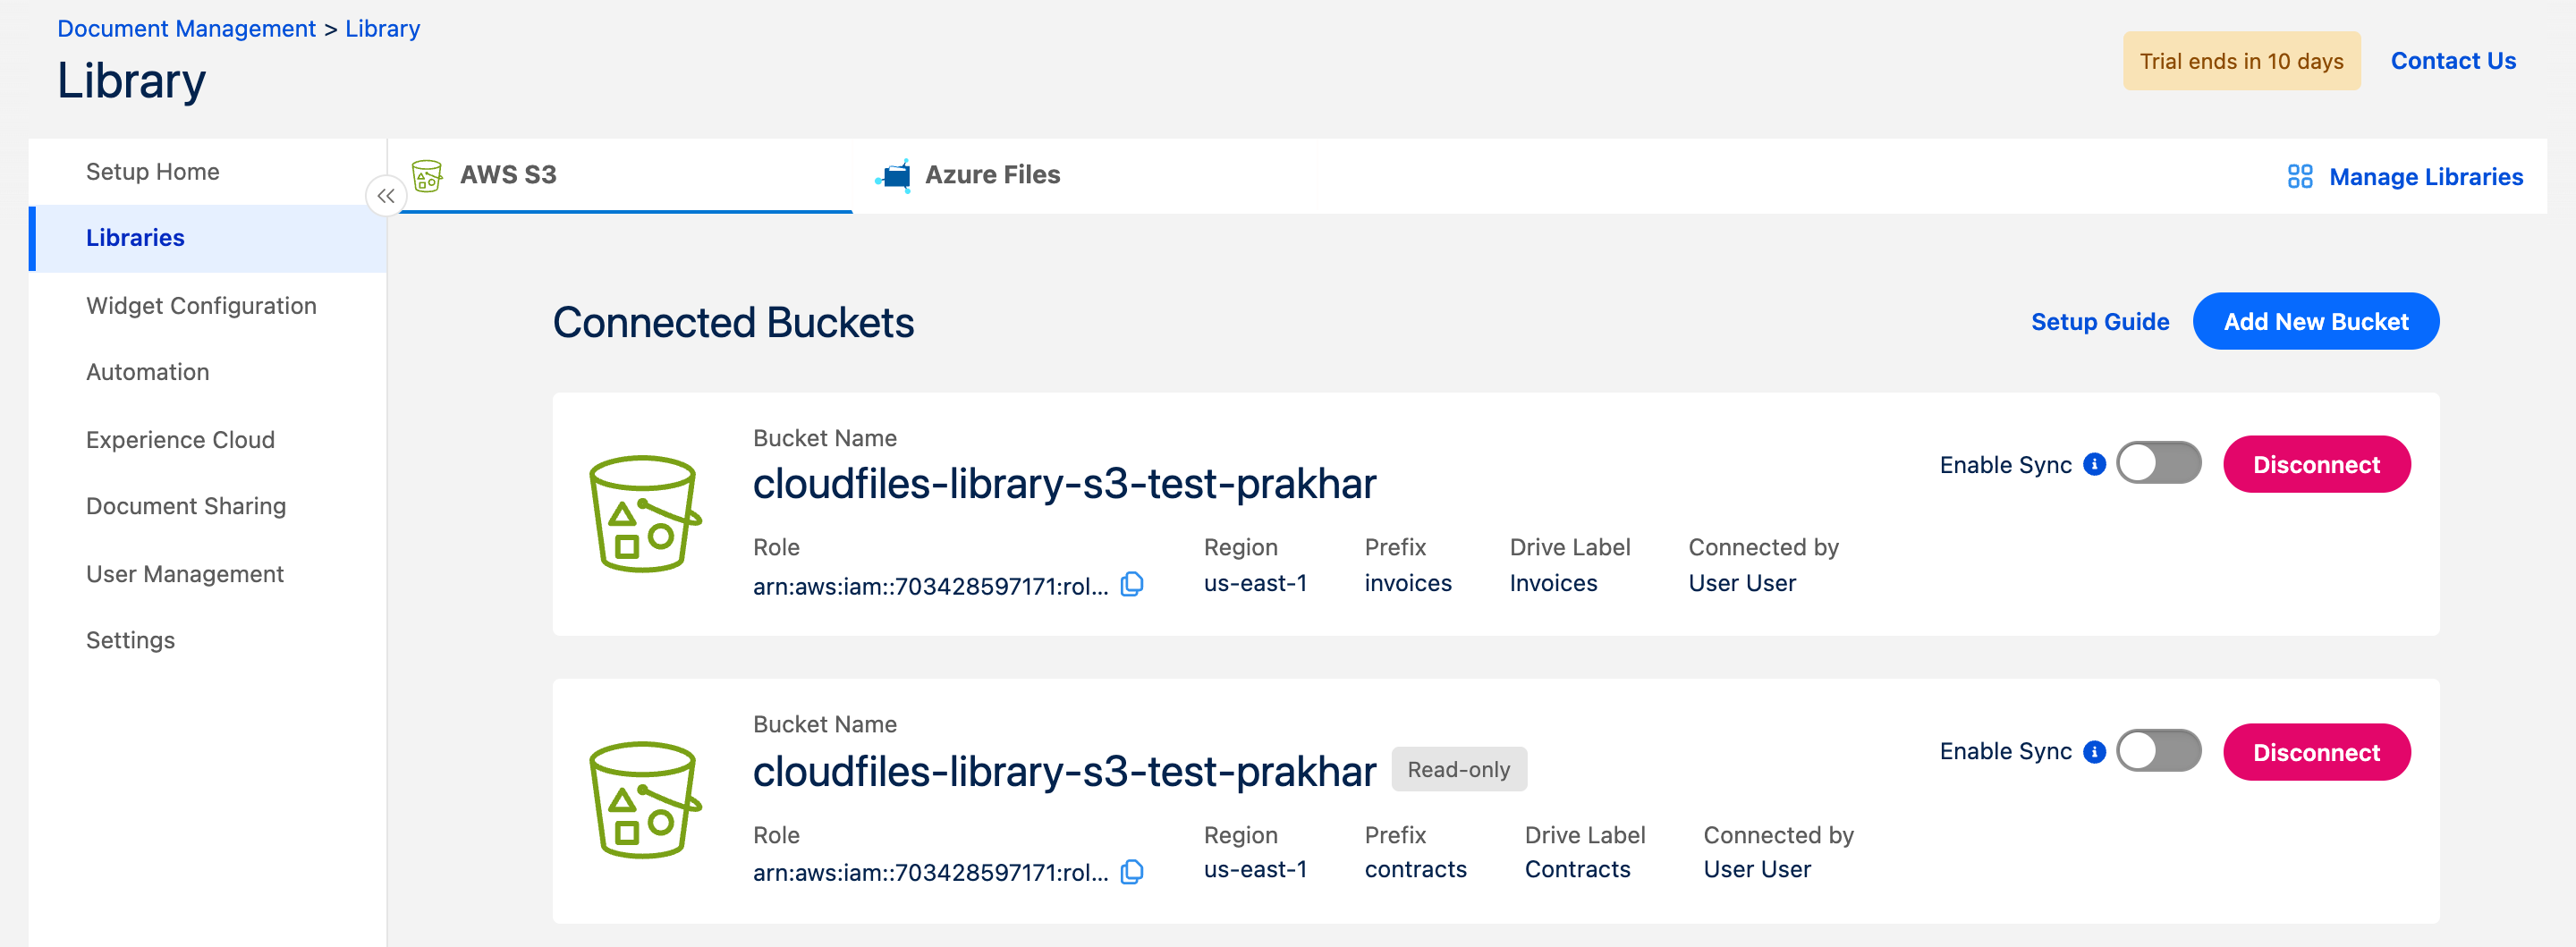
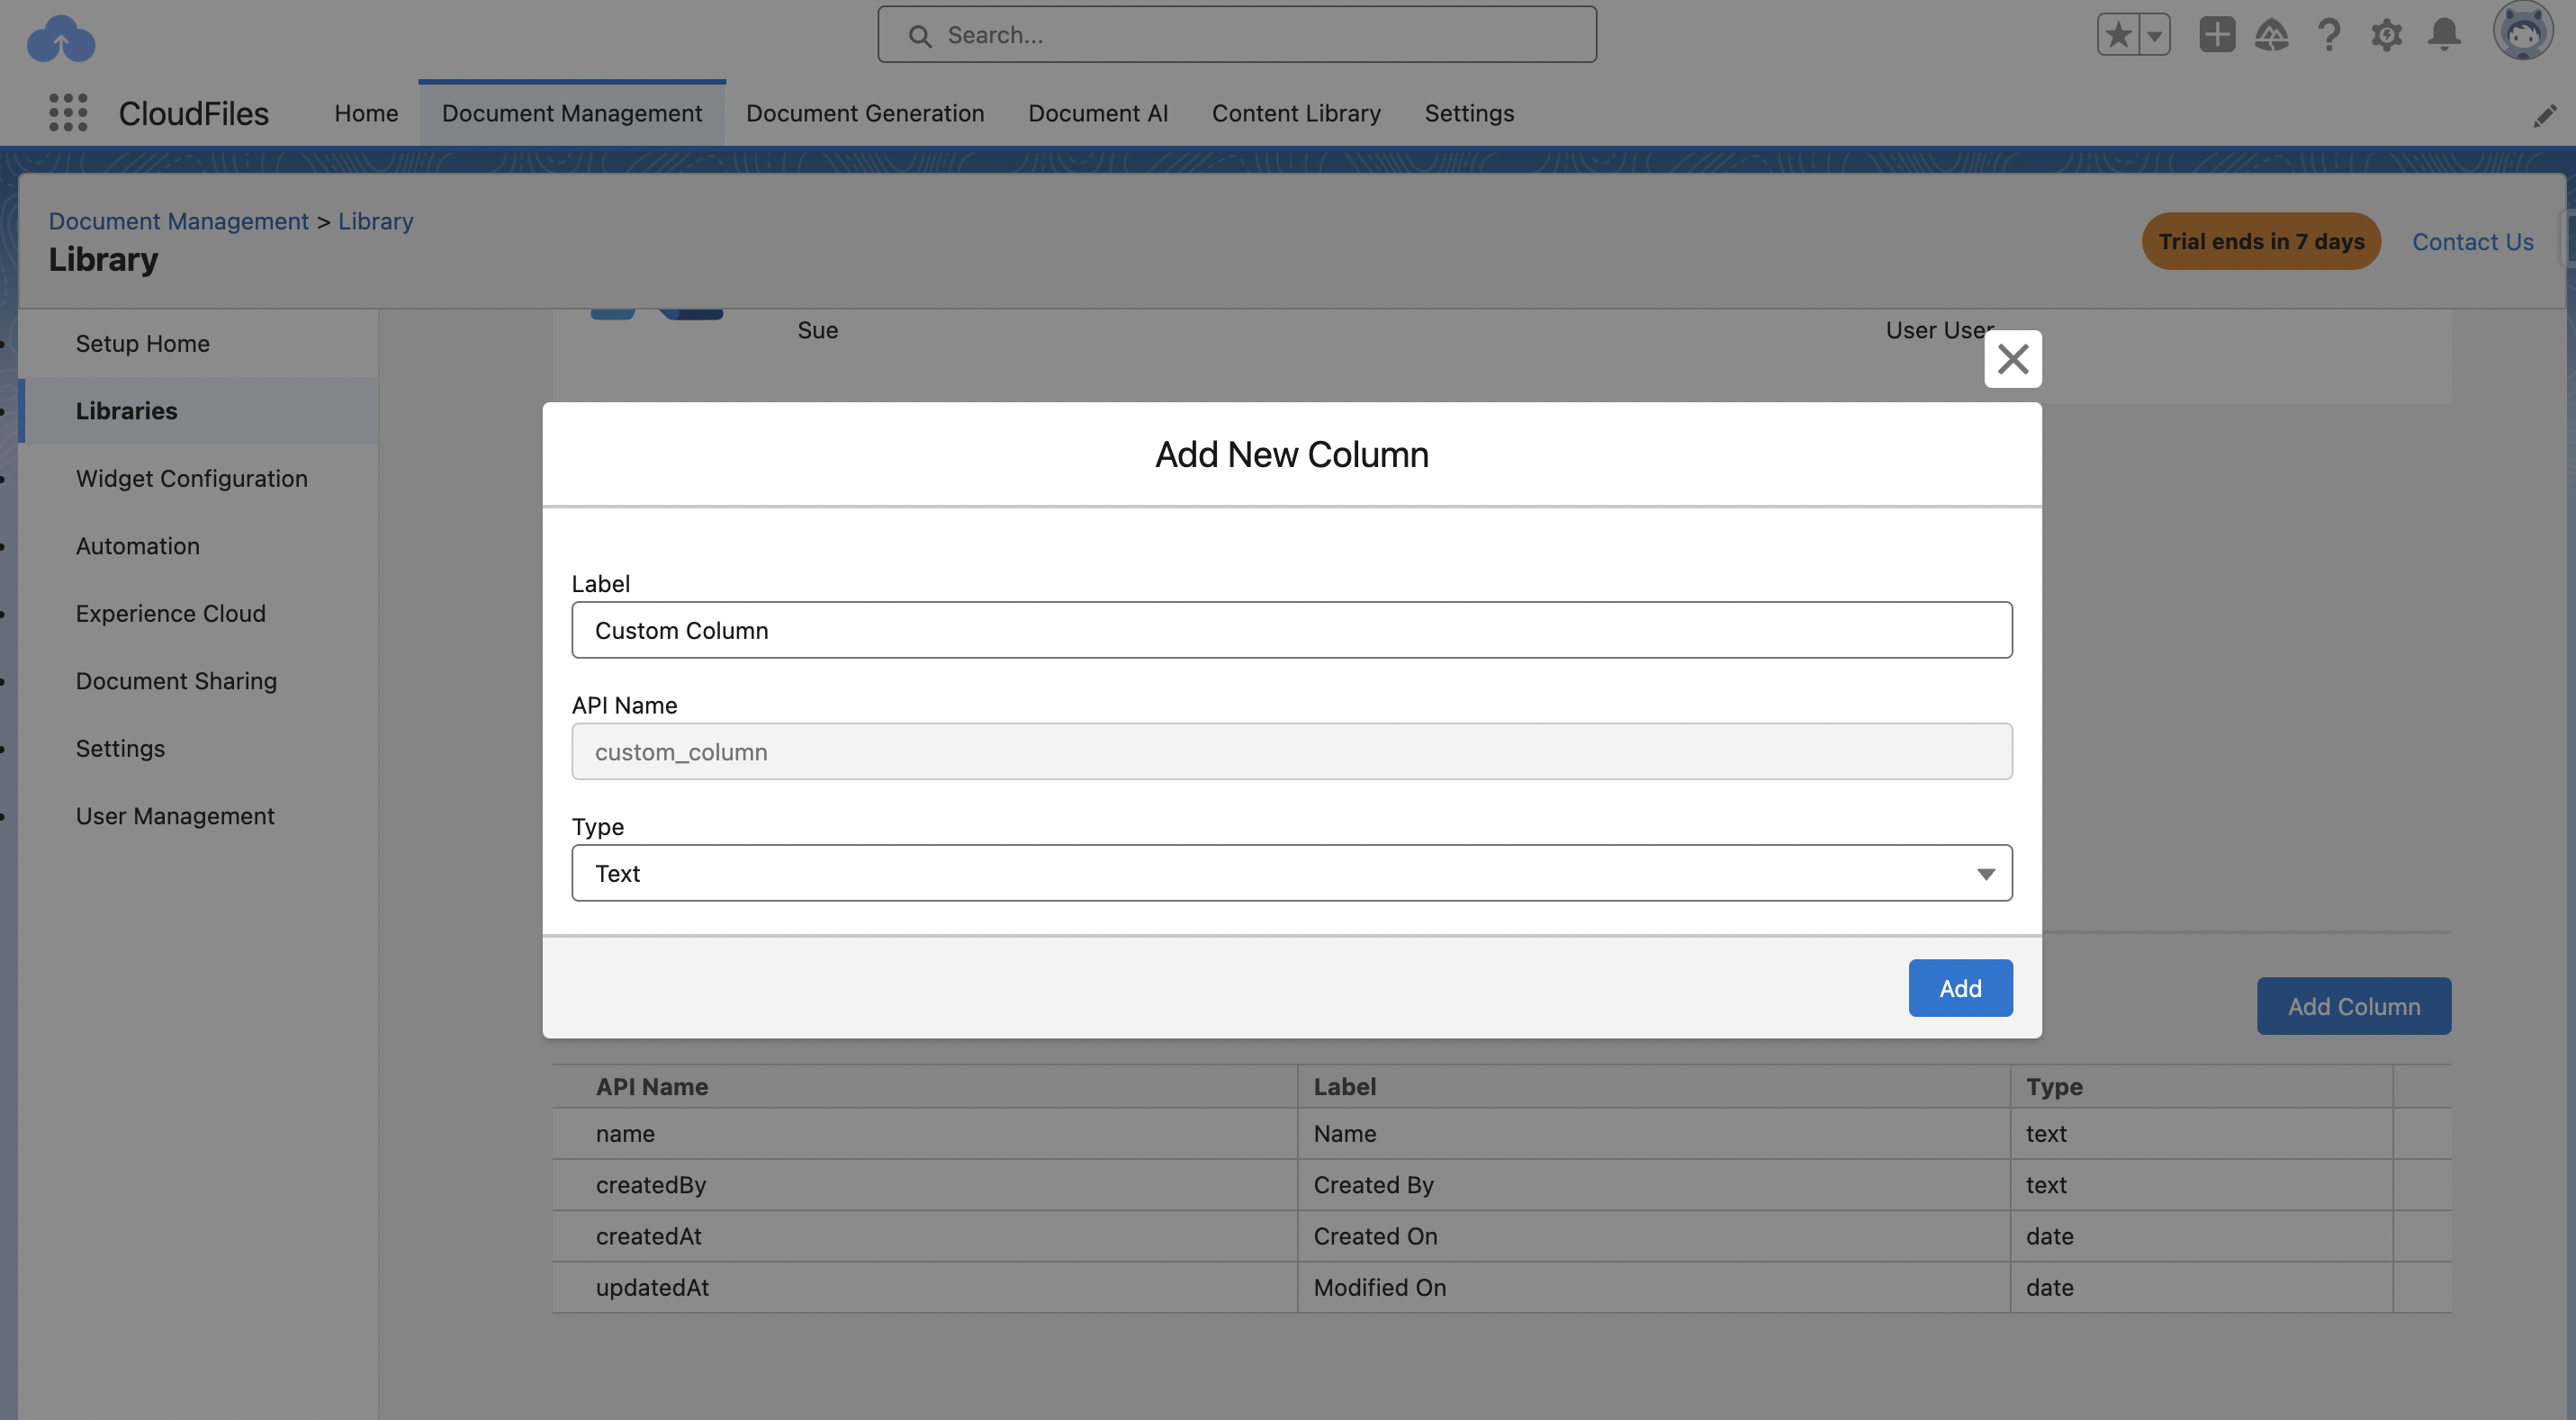
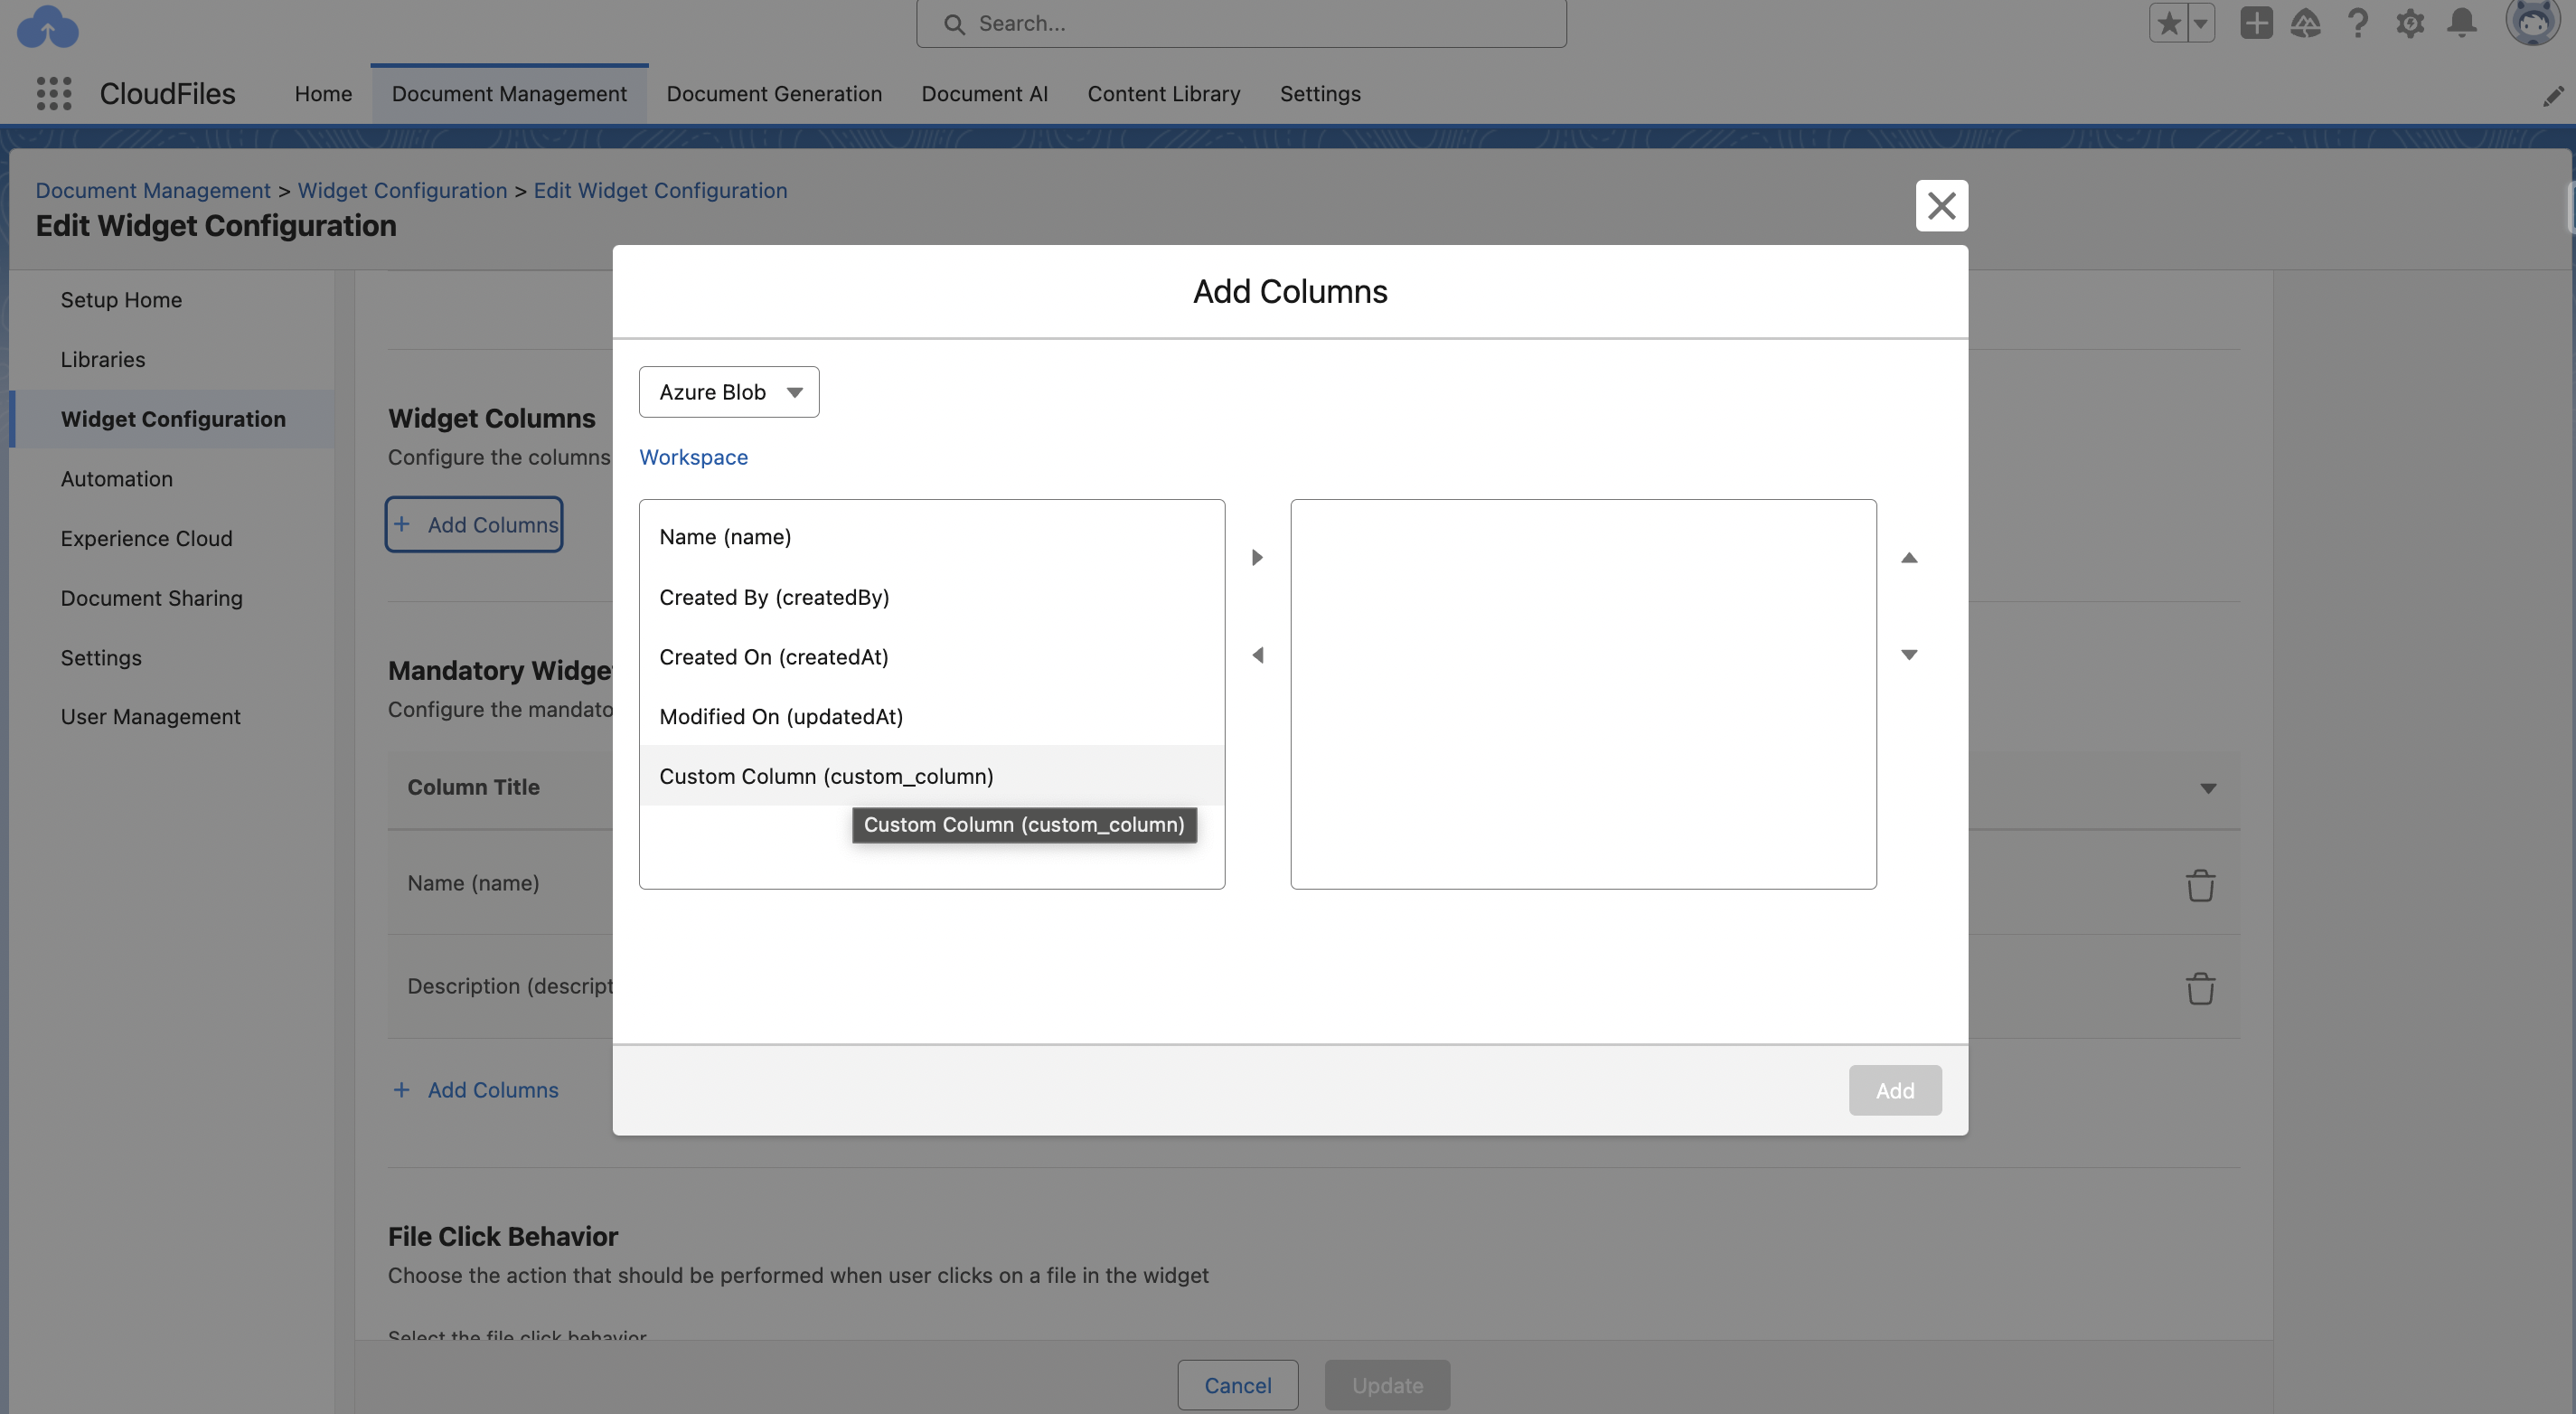
Column Configuration for S3 Library
You can customize the columns displayed in widgets through the Library Configuration tab in Document Management for S3. Refer to the images below for visual understanding.
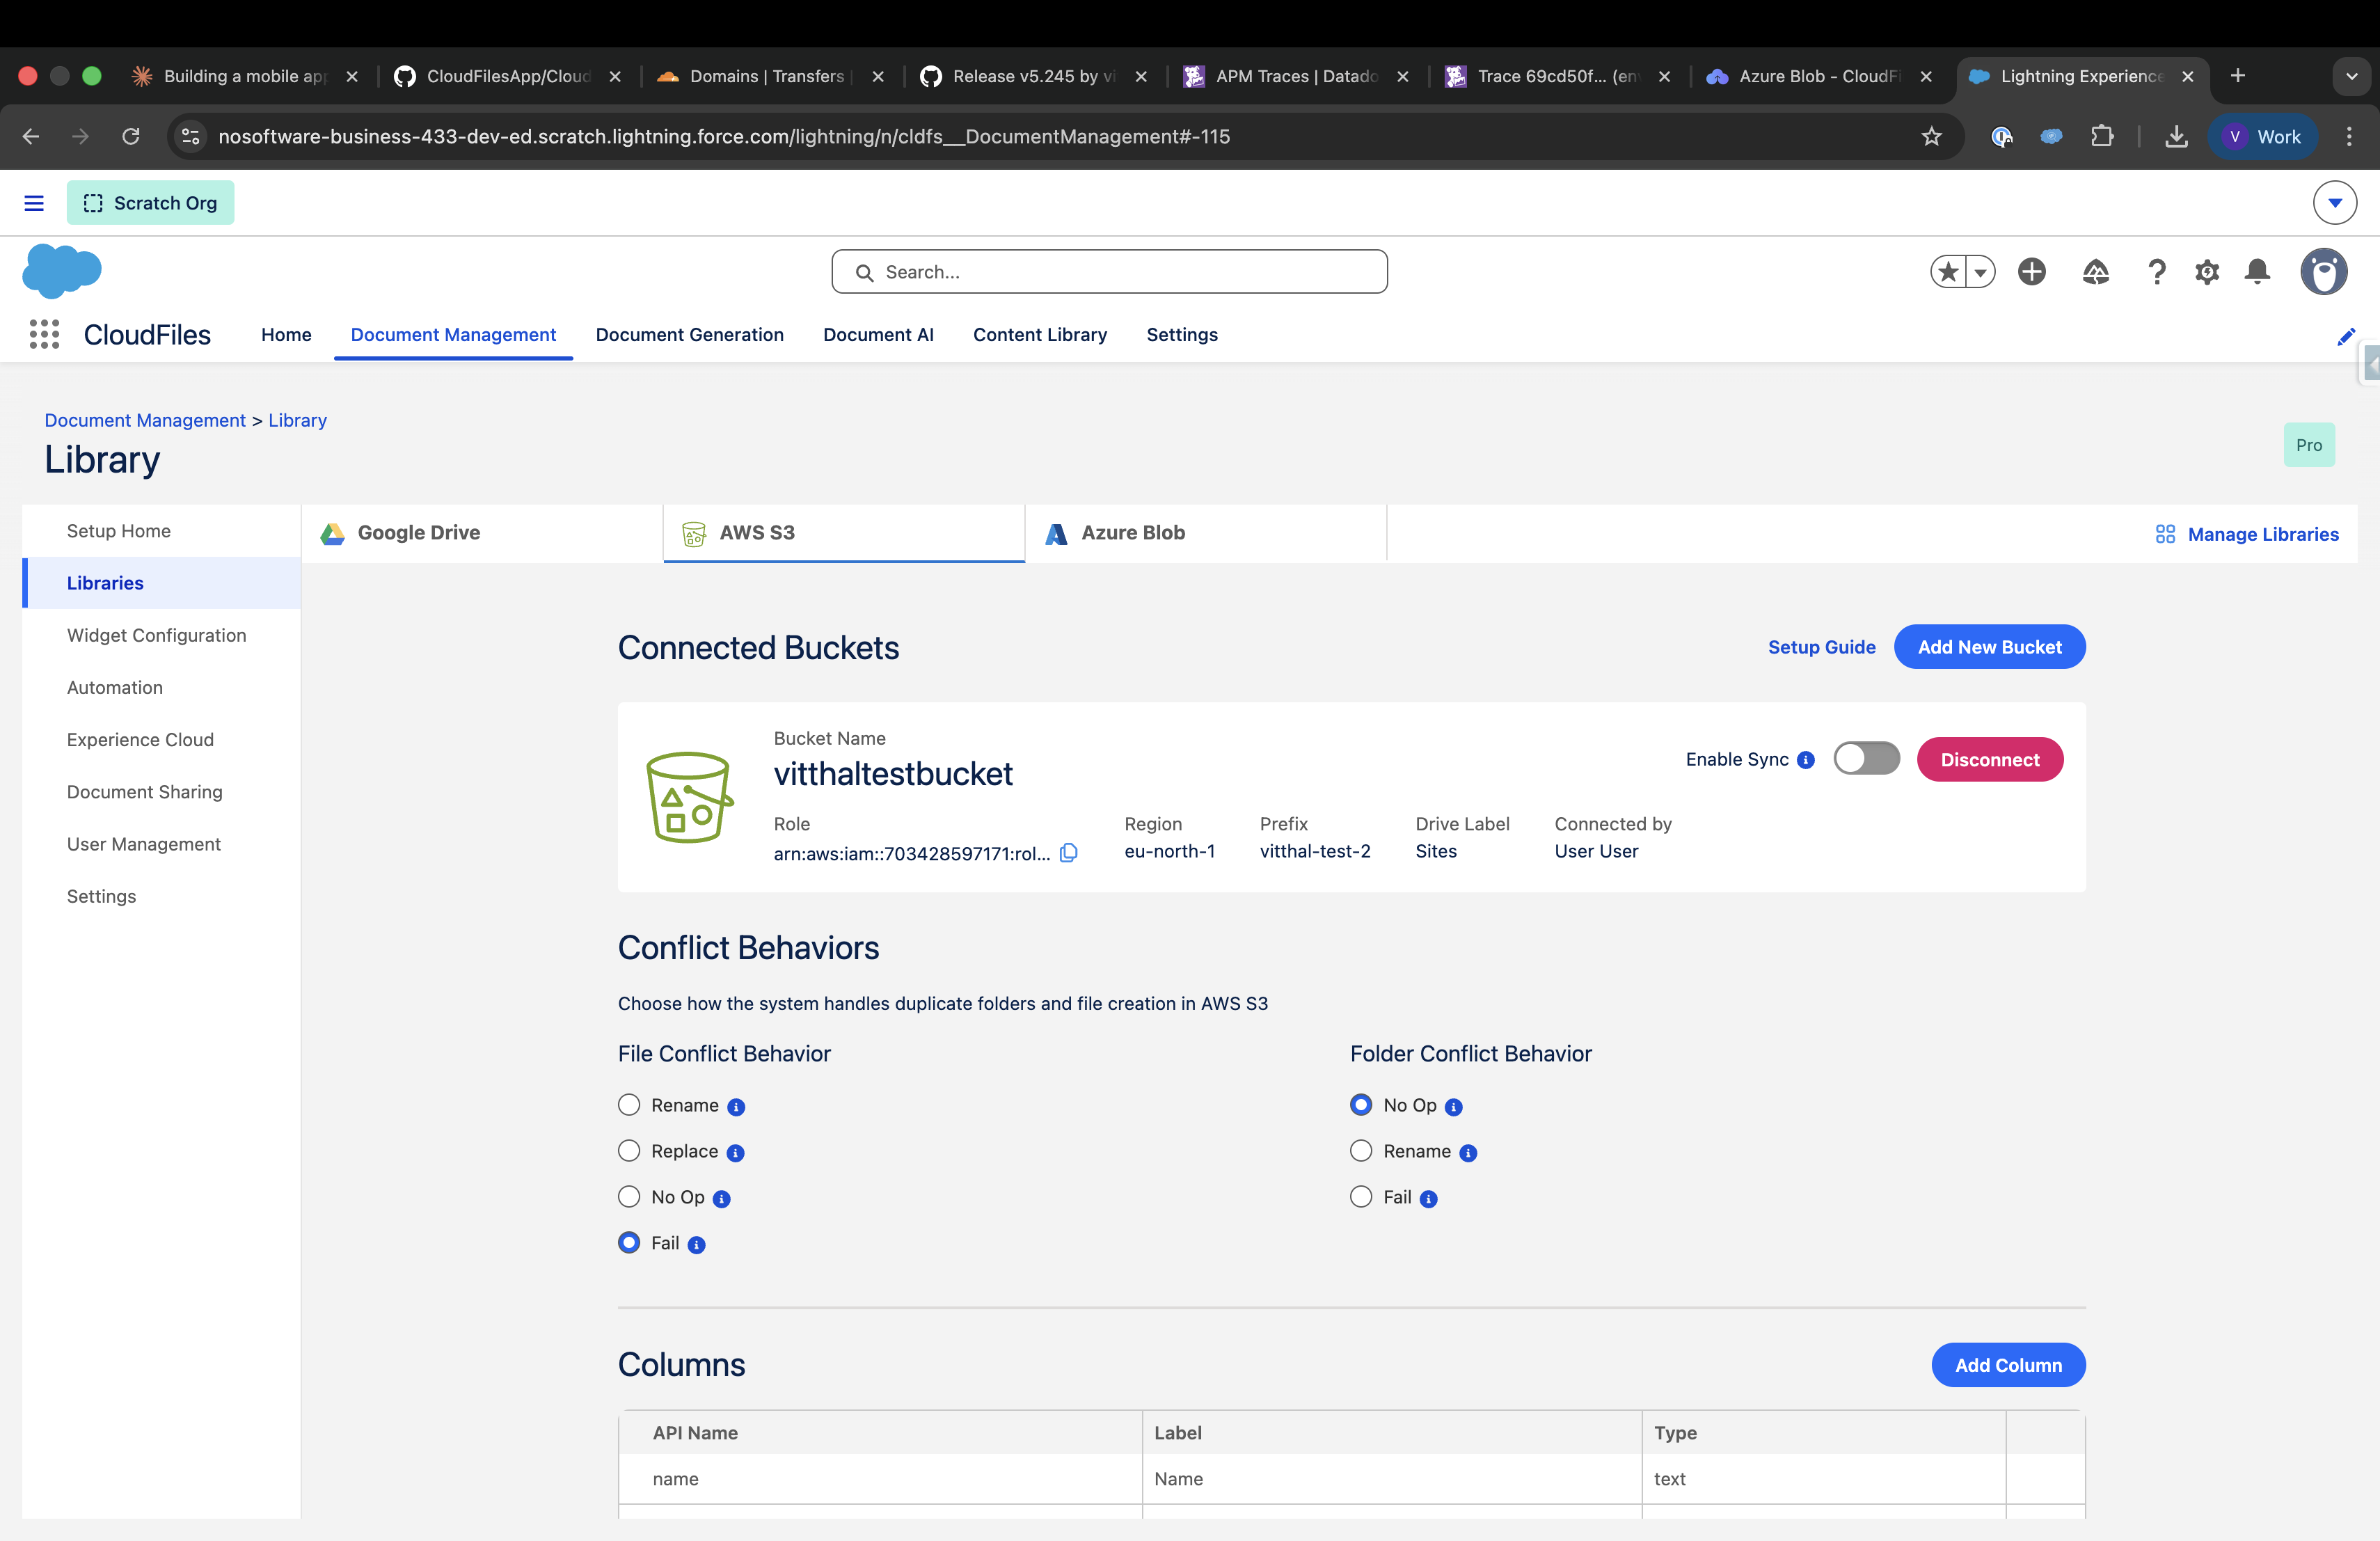
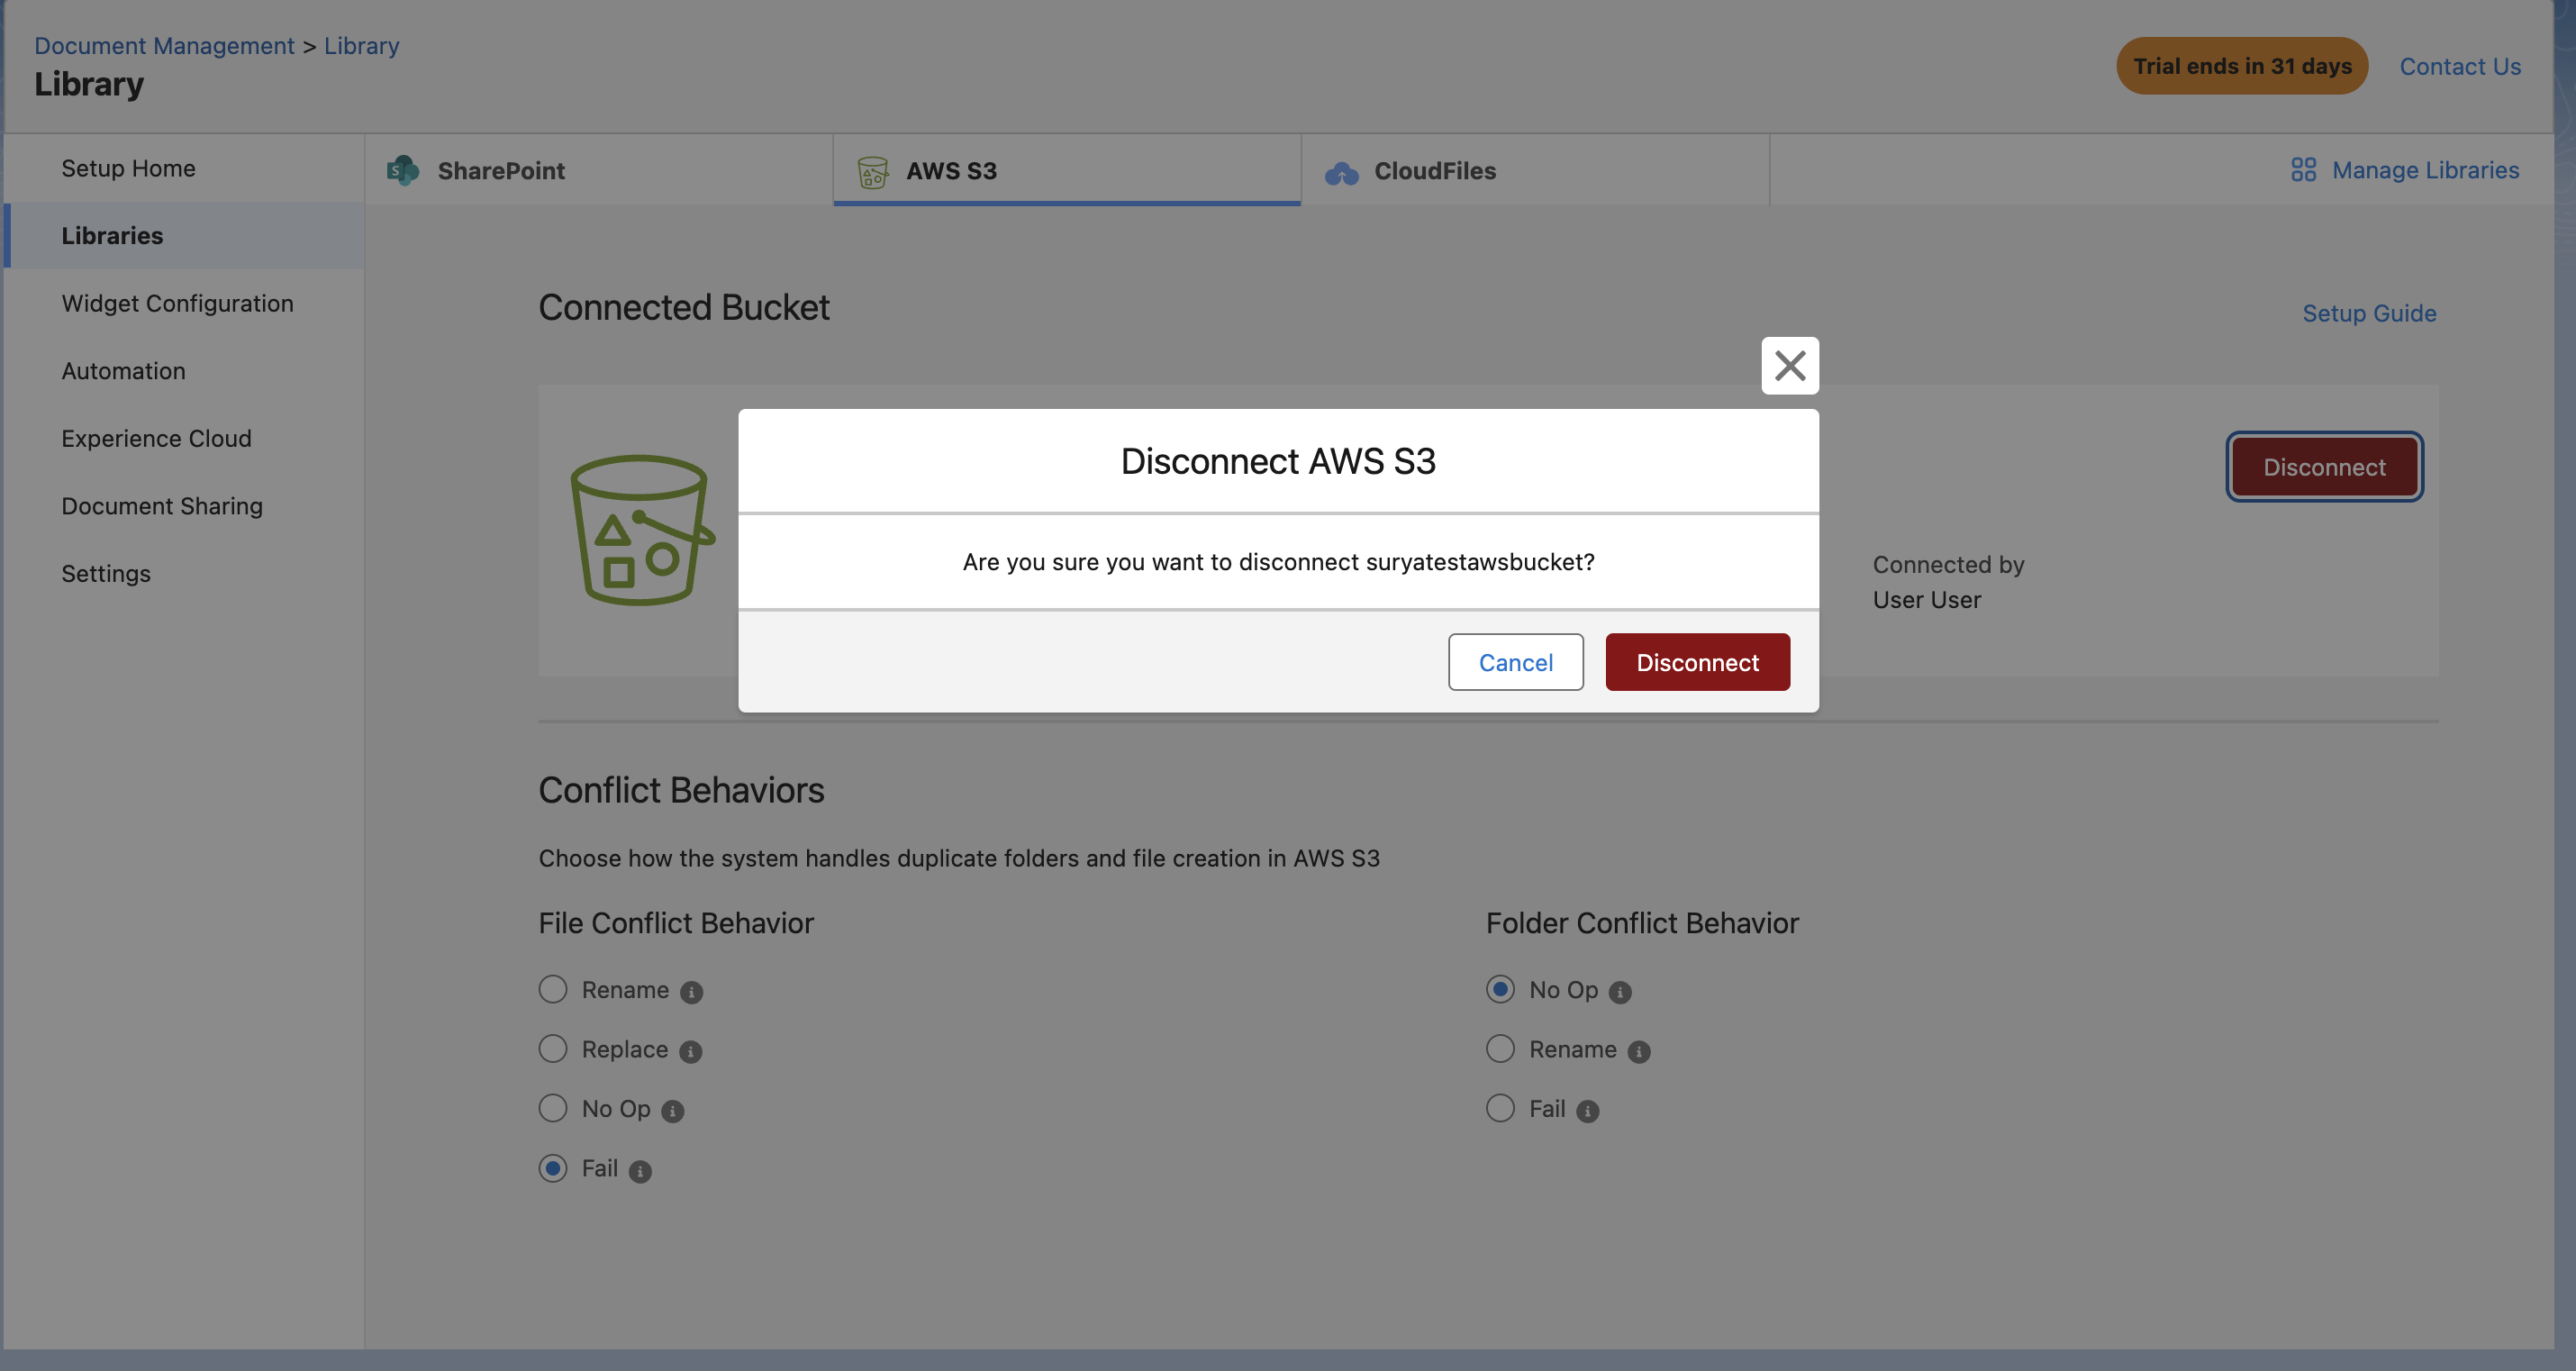
Disconnect AWS S3 buckets
Users can disconnect S3 Buckets directly from the Salesforce app. This action will remove the storage connection along with any associated metadata within the app.