If you have a basic grasp of Salesforce flows, you can expect to finish the tutorial in under 10 minutes.
What to Expect
By the end of this tutorial, you can expect to -
- Create an account object and have a folder created for it automatically in your backend storage.
- Have sub-folders created inside the account folder as per your custom requirement.
- You will be able to see these folders and sub-folders from your record.
- You will also be able to do various file & folder operations such as upload, preview, delete, edit etc.. right from the record.
The GIF below shows the expected output.

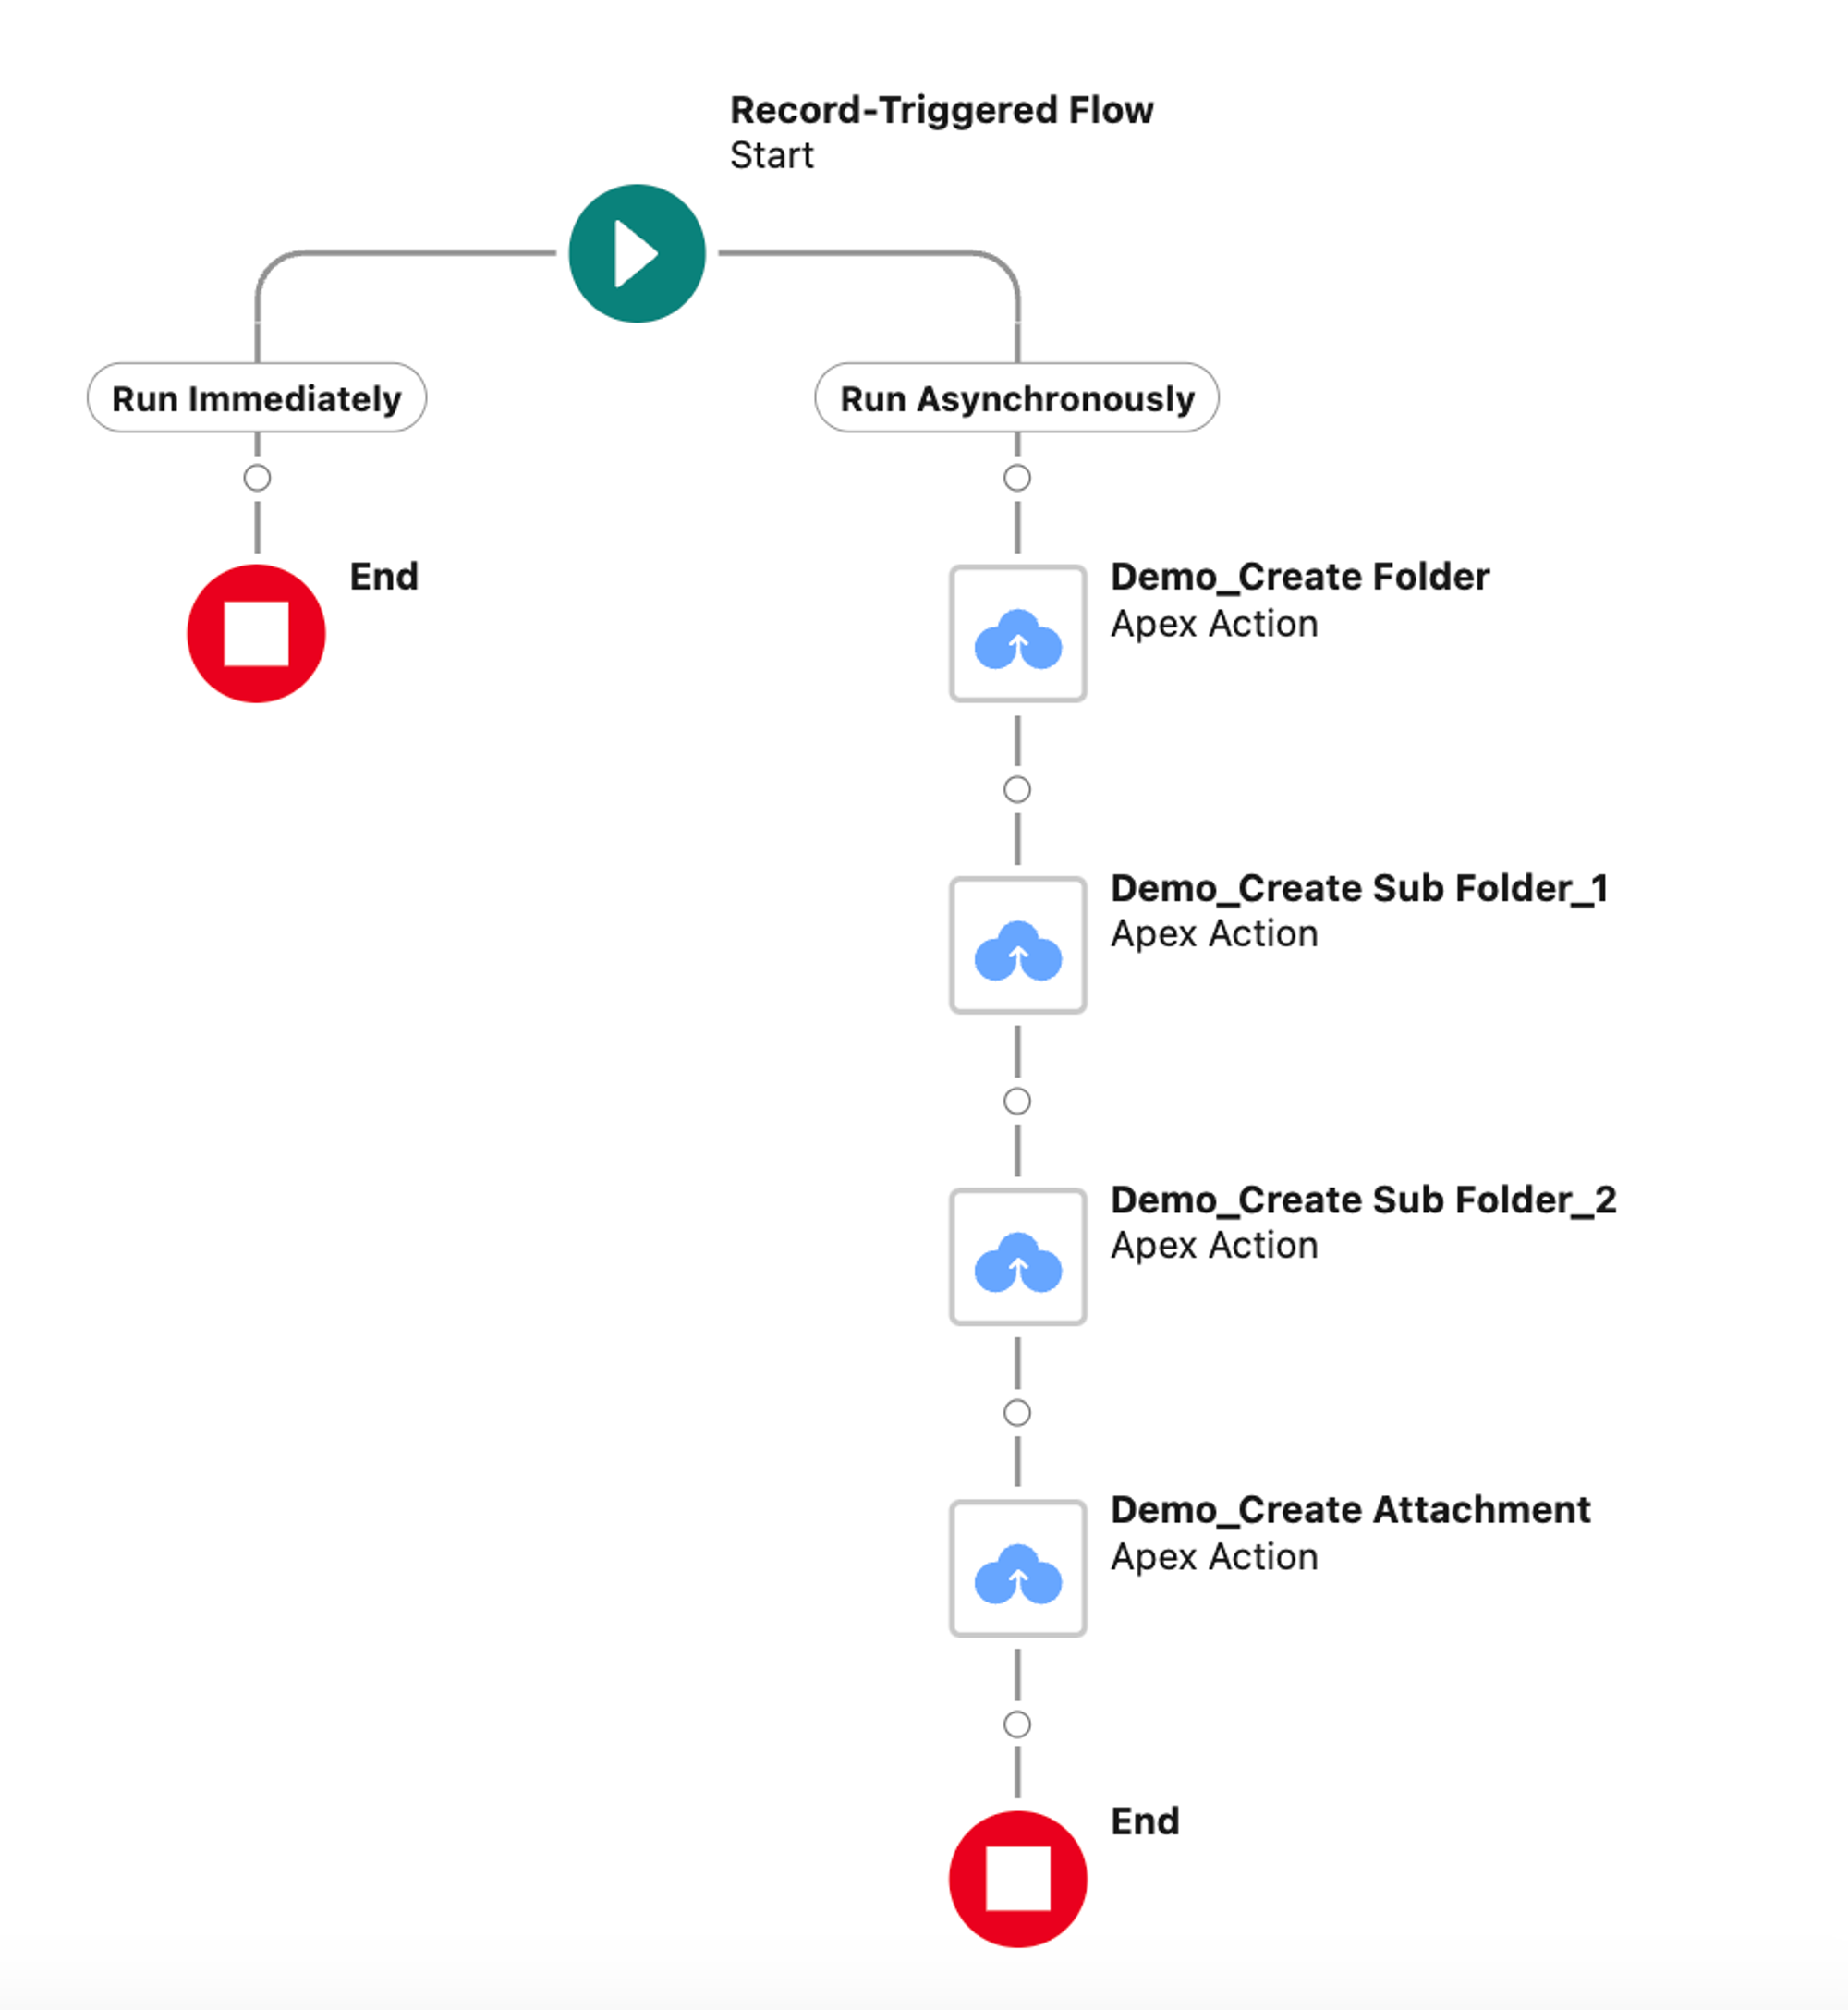
Our final setup involves a couple of flow actions added to a Salesforce flow as shown below. In the sections below, we cover each of these actions and how to configure them.
Tutorial Video
Refer to the quick video if you would like to have a visual guide for this tutorial. Read on if you prefer textual content.
1- Pre-requisites
Before you start with the set-up, please ensure these steps are completed.
Install CloudFiles in Salesforce
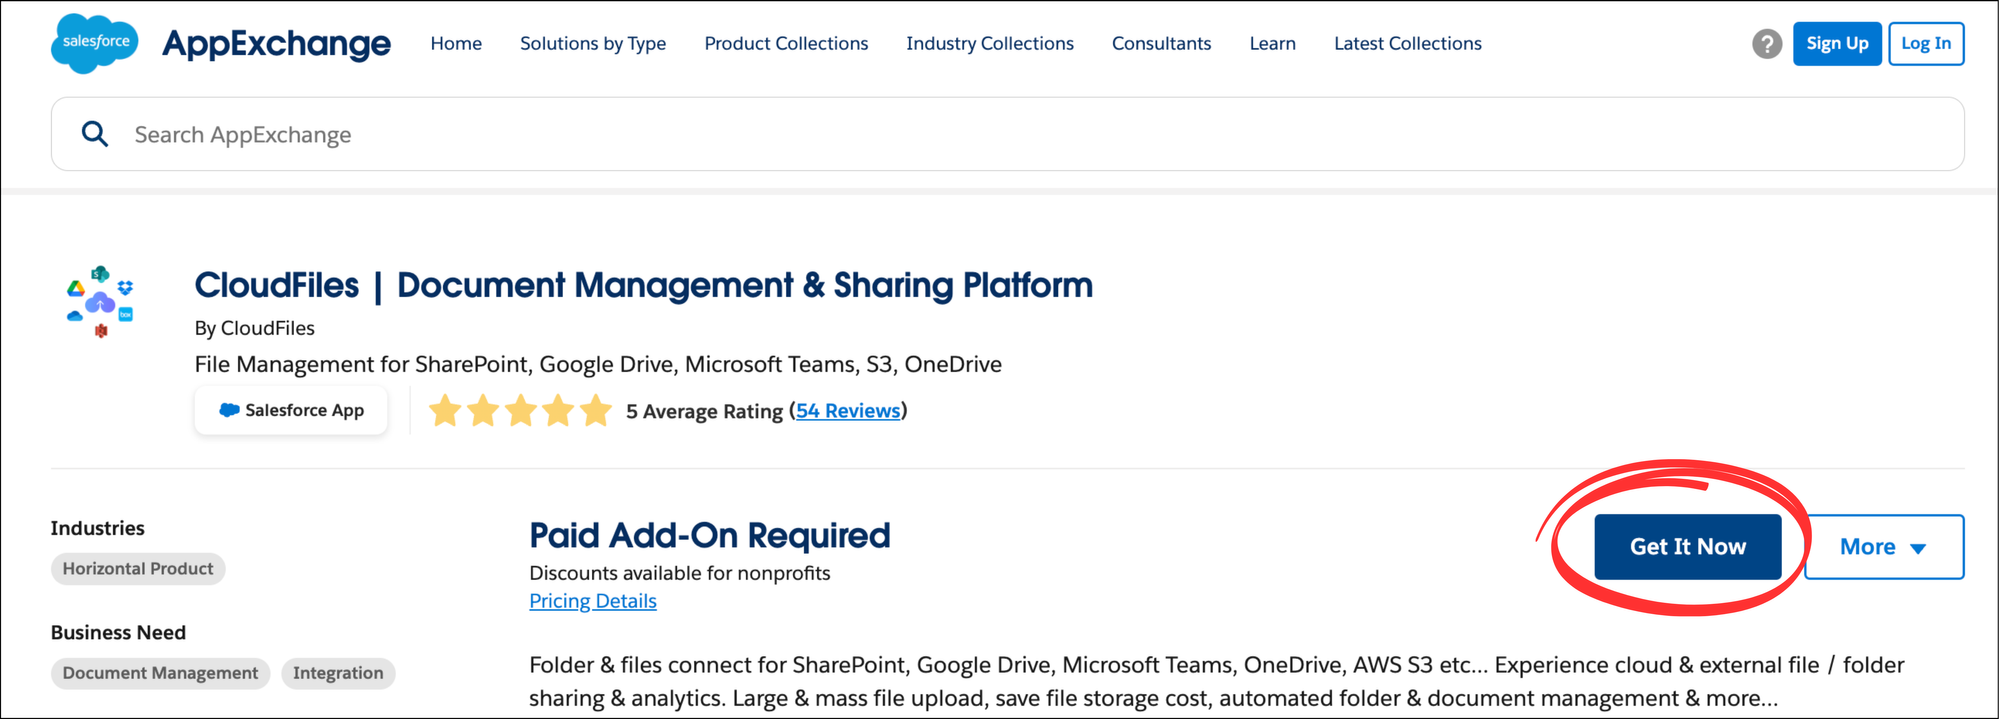
CloudFiles is available on the Salesforce AppExchange and can be installed using the standard app installation process. Check out Installation guide to know more.
Connect your Cloud Storage to Salesforce using CloudFiles
All automations in CloudFiles are activated through Salesforce Flow Builder, utilizing account-wide authentication for external storage libraries through a service (admin) user. To connect your service user, access the setup, click on the external storage of choice and log into your account. For detailed steps, efer to the GIF below for a clearer understanding.

2 - Create Account Folder using 'Create Folder' Action
"Create Folder" action can be used to create folders in any location on any cloud storage platform from Salesforce flows. We will use this action to first create the account's parent folder.
IMPORTANT - If you use a record triggered flow, make sure you run this action on an asynchronous path as shown below.
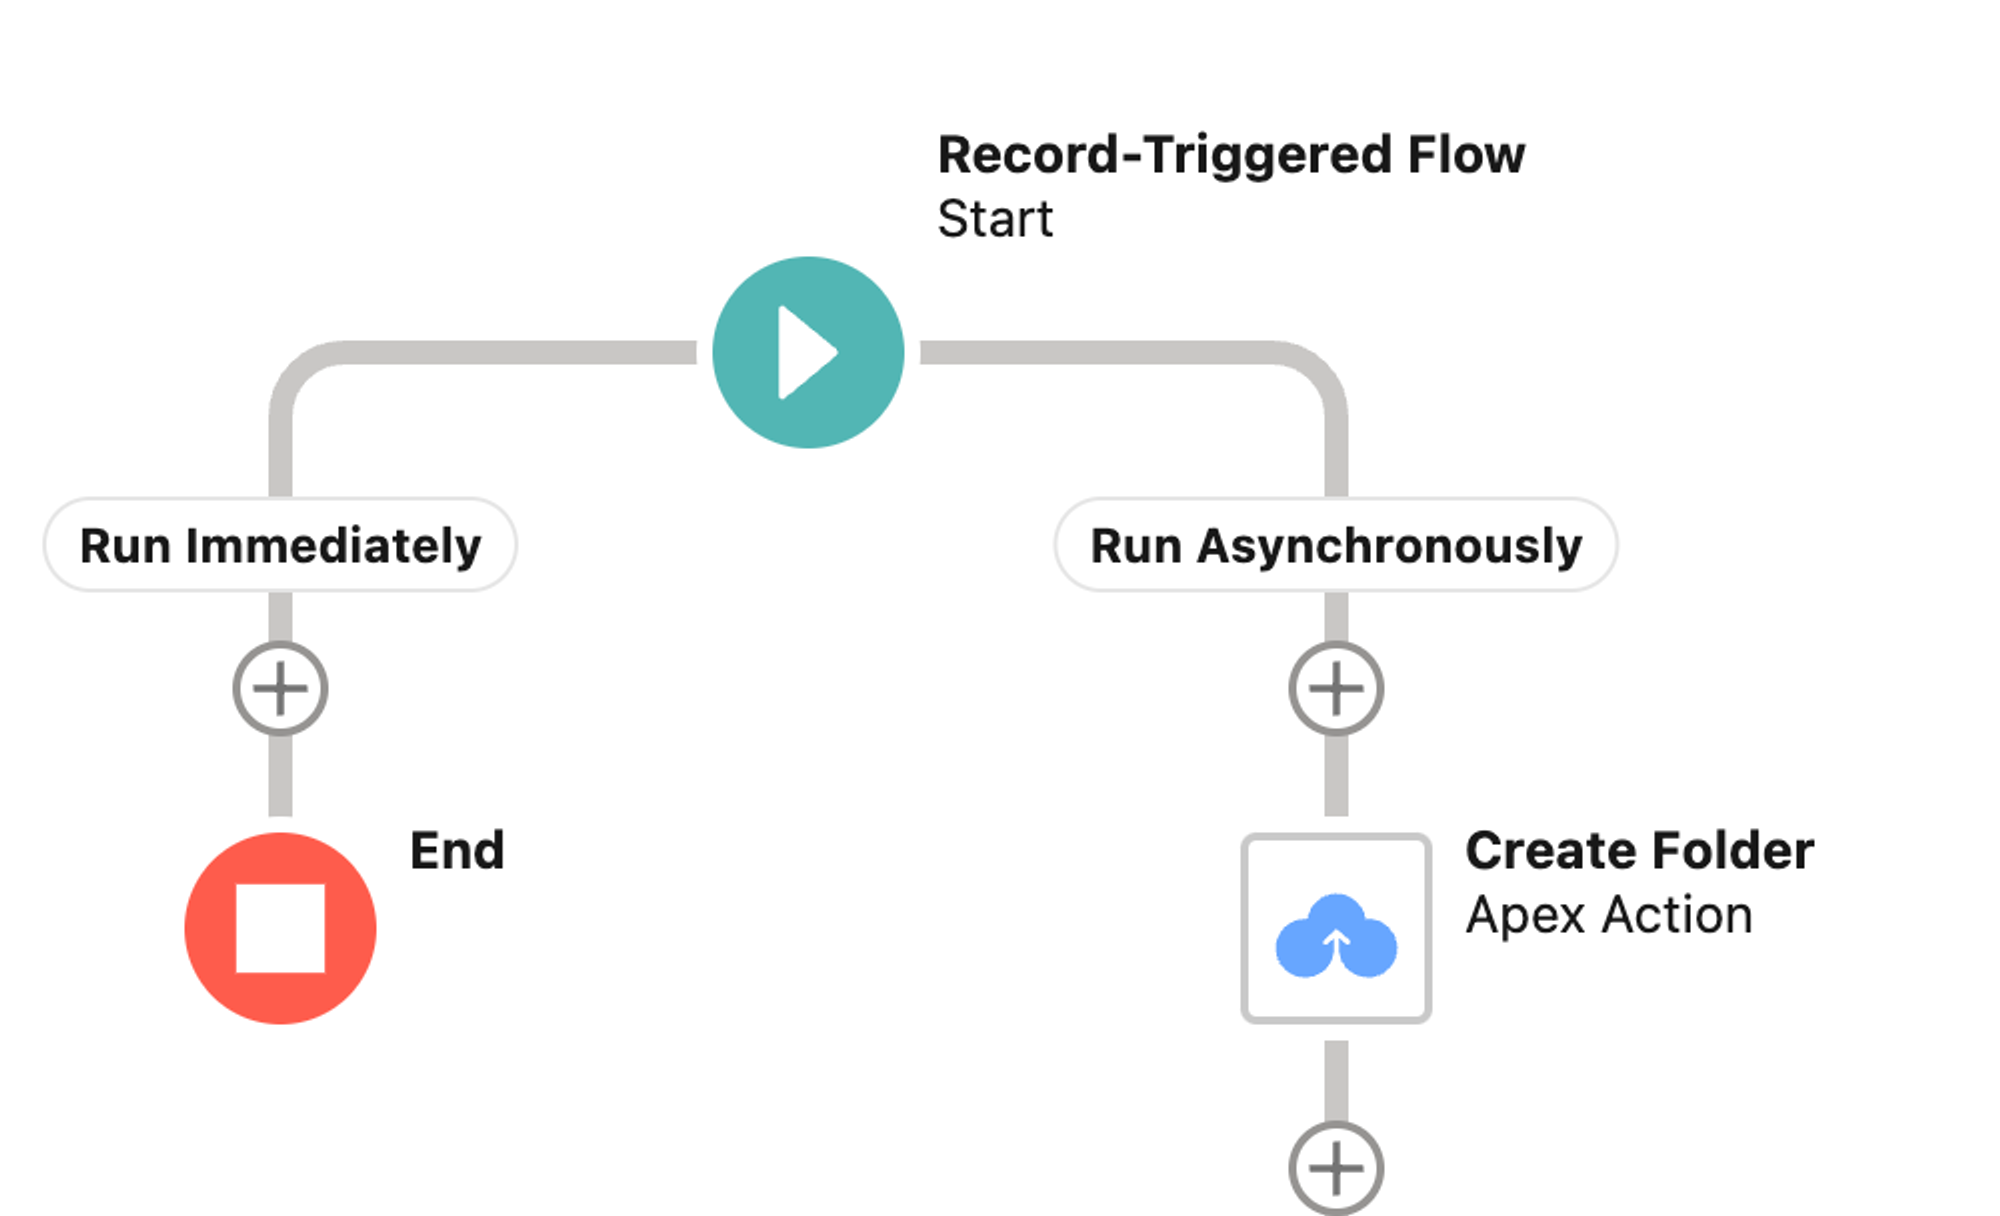
Create a new flow in your Salesforce org, select the trigger and add an asynchronous path as shown in the GIF below. We will then add CloudFiles flow actions on the asynchronous path.
To use the "Create Folder" action, simply click on add element button on the asynchronous path and search for 'Create Folder' as shown below. Once you add this action, it will ask you to fill in certain parameters.
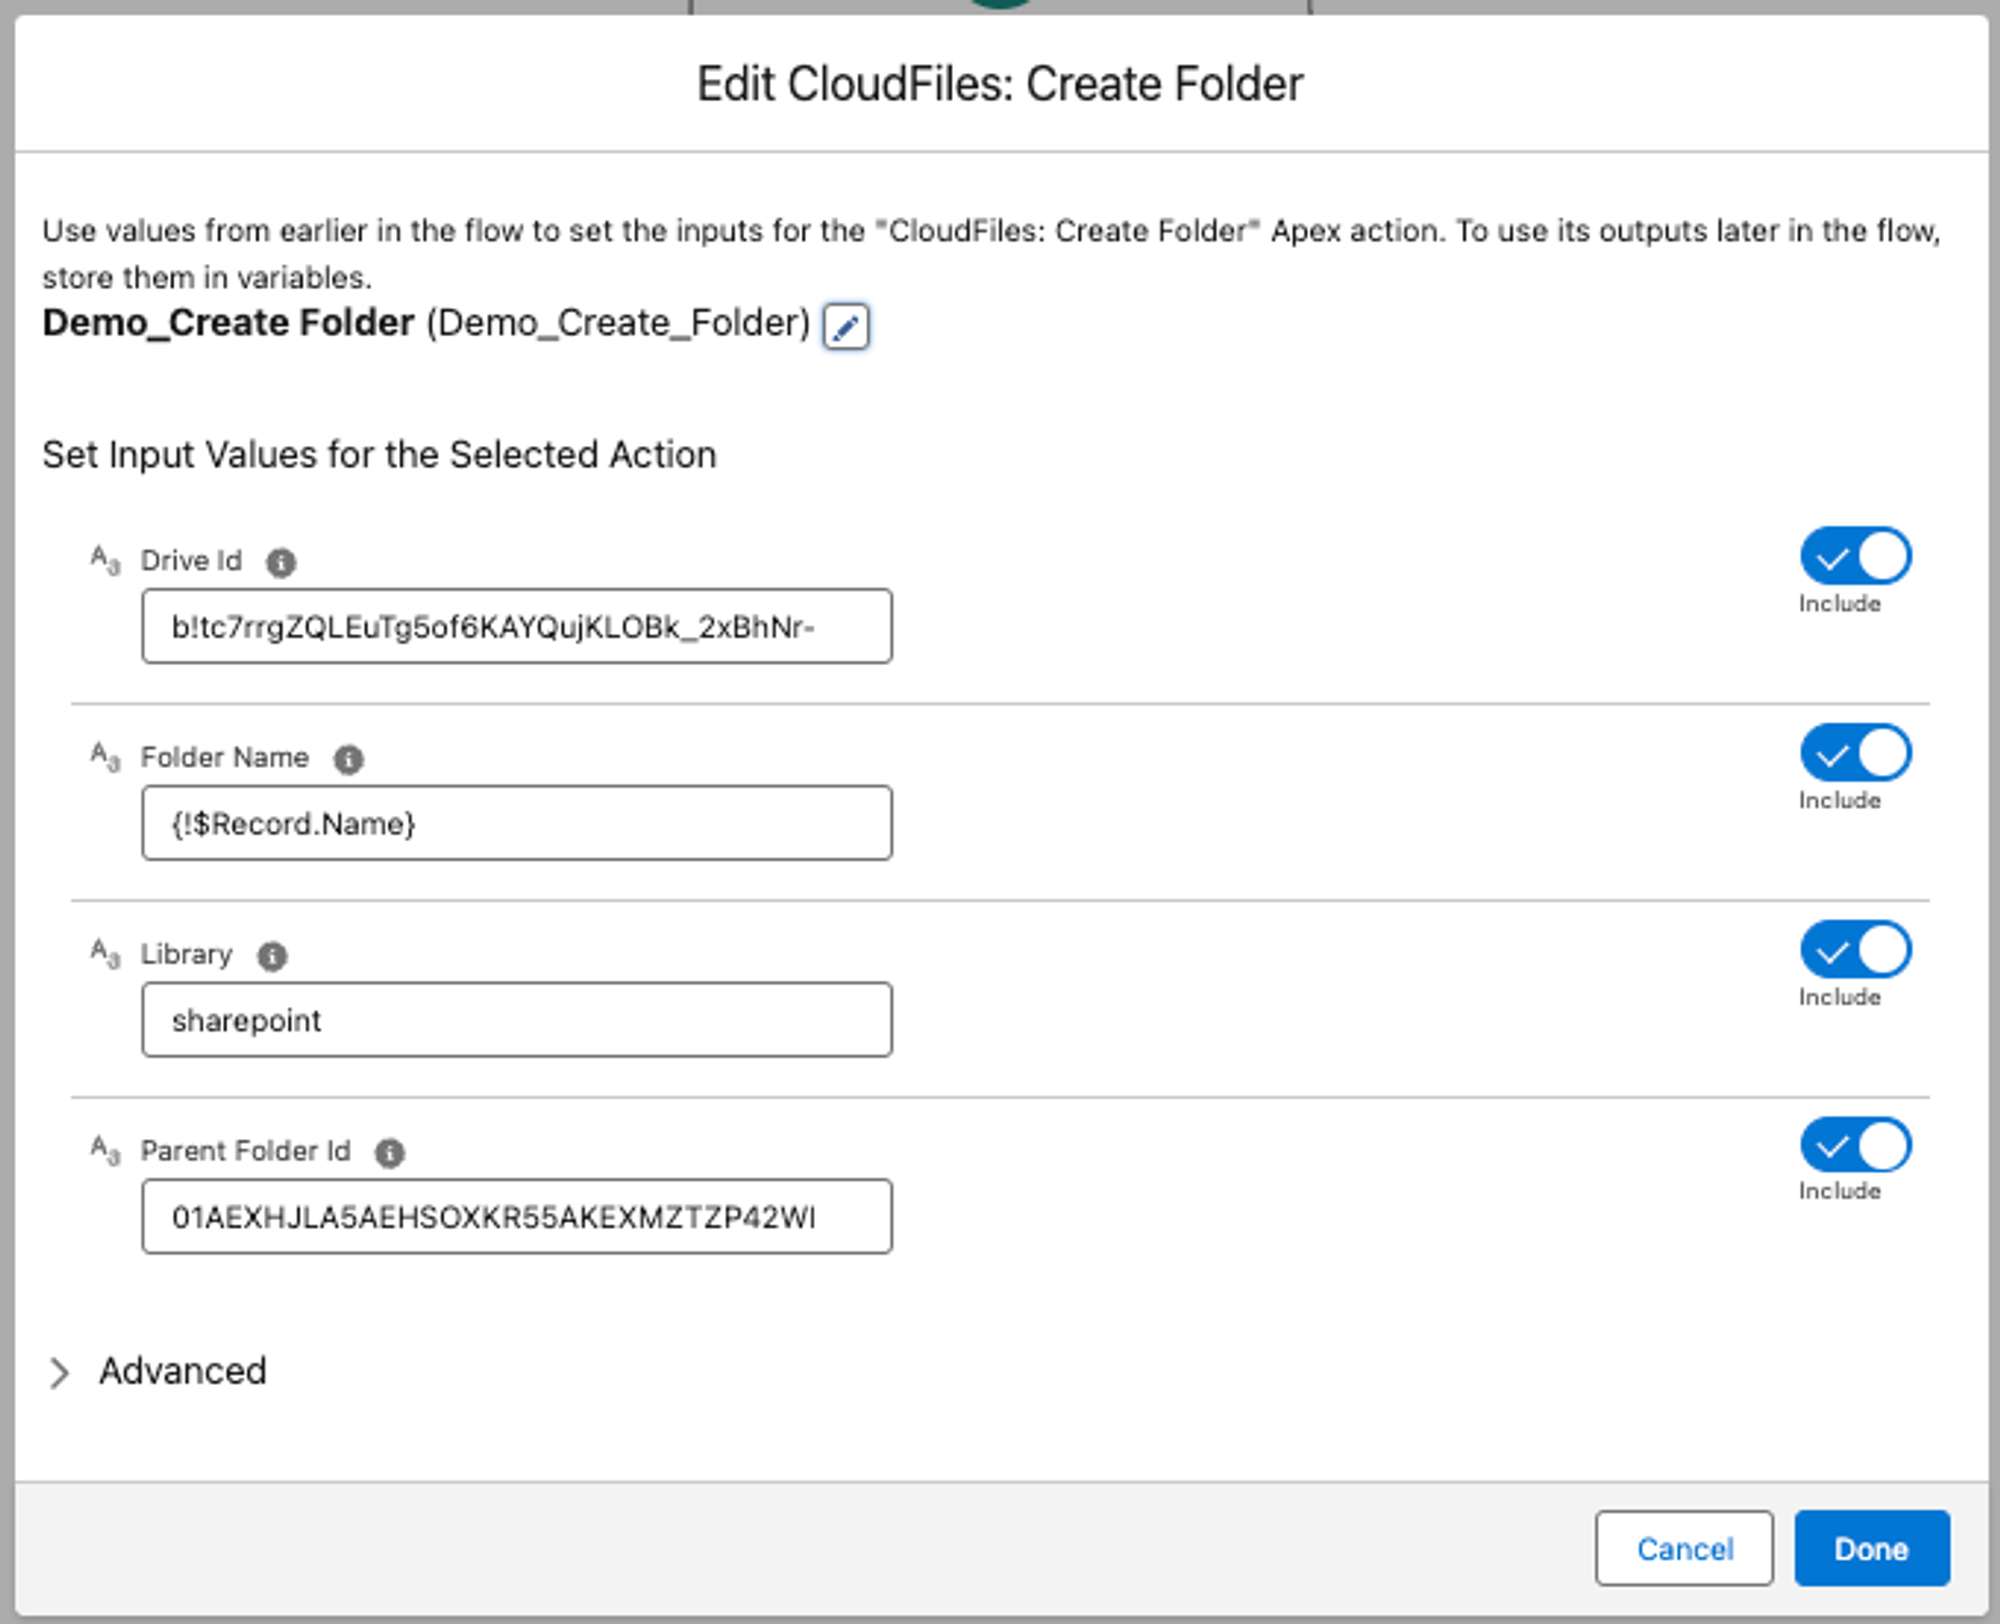
This action requires a few parameters. The Library parameter is the desired Cloud storage where you wish to create the folder. Possible values are sharepoint, google (for Google Drive), onedrive, dropbox, box, cloudfiles (AWS S3). The Folder name is the name you wish to give your created Folder. We simply use the Account's name but you can also create a complex text formula variable as well. We also need to enter values for Drive ID & Parent Folder ID. This is covered in the next section.
The GIF below shows how to populate the Library & Folder name parameter.
3 - Configure Destination Parameters in Flow Action
In the 'Create Folder' action, There are a few other parameters that help specify where the target folder should be created. E.g. in SharePoint, which site, drive and parent folder should this folder get created in. Here is a quick reference of destination parameters -
- Parent Folder ID - This is the cloud drive generated ID of the folder where you want to create this account folder in.
- Drive ID - This is important for google drive & sharepoint users only. These cloud storages offer multiple 'drives' where documents can be uploaded.
These parameters can be easily copied from within Salesforce using the CloudFiles Content Library Tab. Follow these steps -
- Click on App Launcher on top left. Search for the "CloudFiles" App.
- In the CloudFiles App, select the Content Library Tab.
- Go to your preferred cloud storage. Go to the target folder where you would like to place the created folders in.
- Click on 'View metadata' button as shown below. A dialog box opens up which shows all the IDs. Copy the ID from here.
Check the GIF below for a quick walkthrough of these steps.
For a detailed description of the Create Folder action, refer to the Create Folder detailed guide. This flow action returns various values related to the newly created folder. We will use the newly created folder's ID in the next step to create a sub-folder.
Here's how our final Create Folder action looks like.
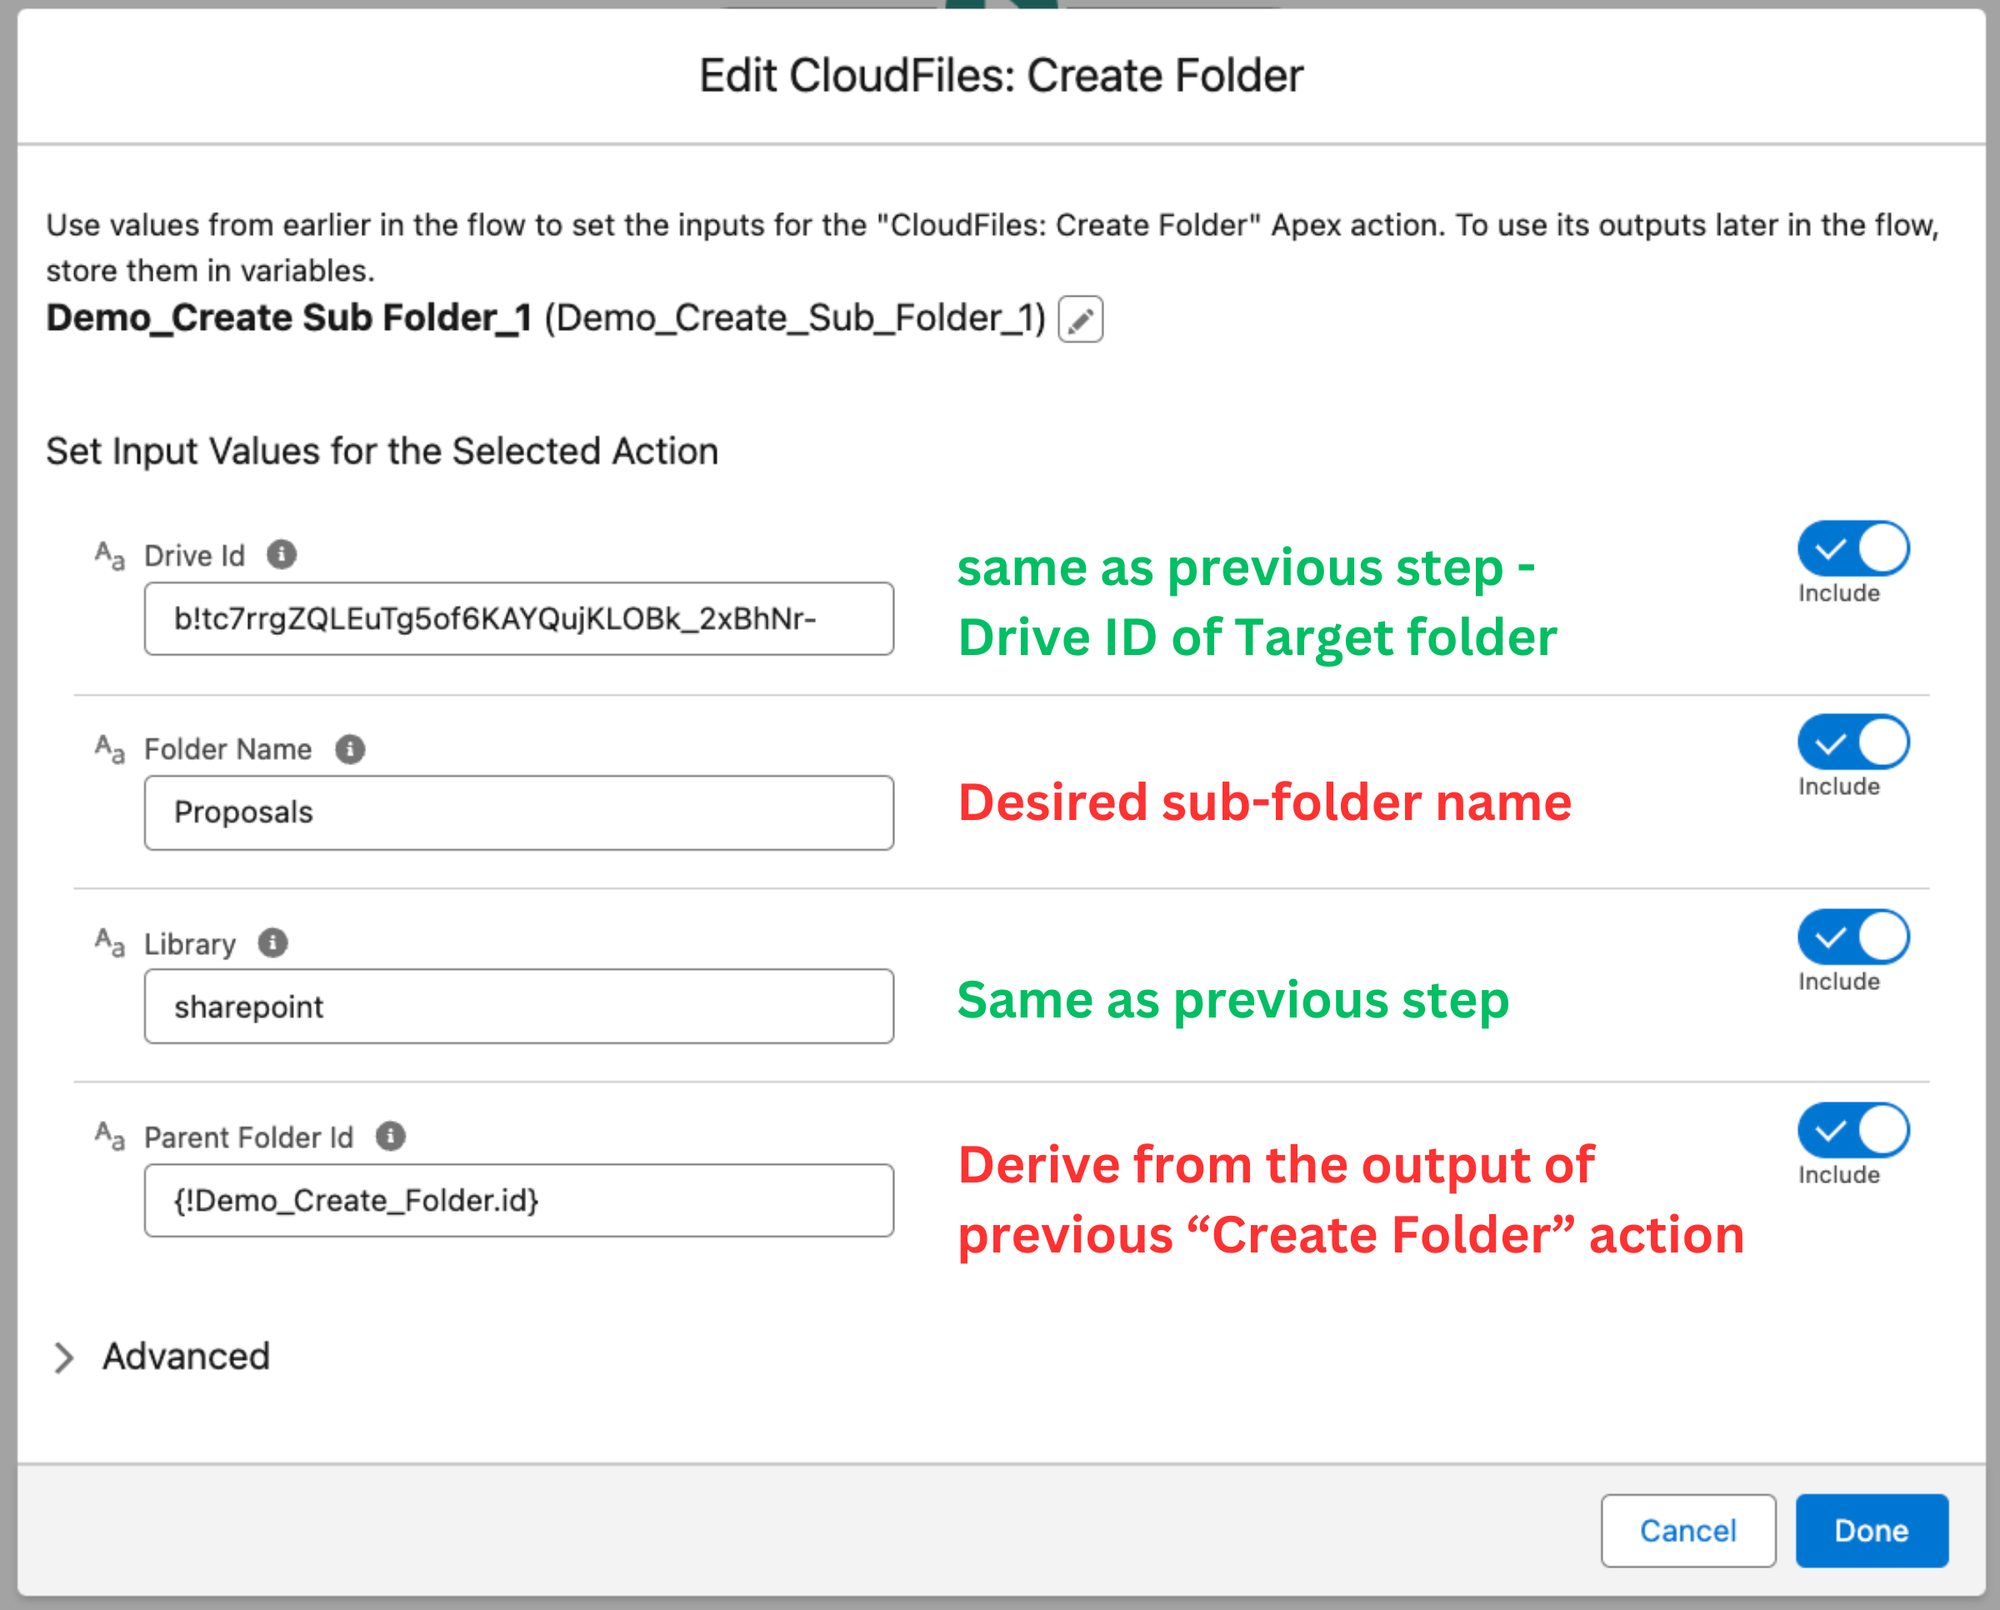
4 - Create Sub-Folders using 'Create Folder' Action
To create sub-folders, we can simply use the same 'Create Folder' action that we used above with a couple of simple tweaks.
- Change the 'Folder Name' to reflect the sub-folder you want to create. We are creating 'Proposals' sub-folder inside our account folder.
- Change the 'Parent Folder ID' to the return value of the previous Create Folder Action. This way, this new folder will get created inside the account's folder we created previously.
Here's how your second Create Folder action should look like.
You can choose to have as many sub folders as you want. Simply duplicate the Create Folder action. You can also create sub-sub-folders and even deeper hierarchies using this method. If you have very large or complex folder structure, we recommend using folder cloning method instead.
Now that we have parent and sub-folders created, we want all of this to show up on the Salesforce record. We will use the 'Create Attachment' action to associate the account folder to the Salesforce Account record. Later we will use the CloudFiles widget to actually see and manage the folder from the record.
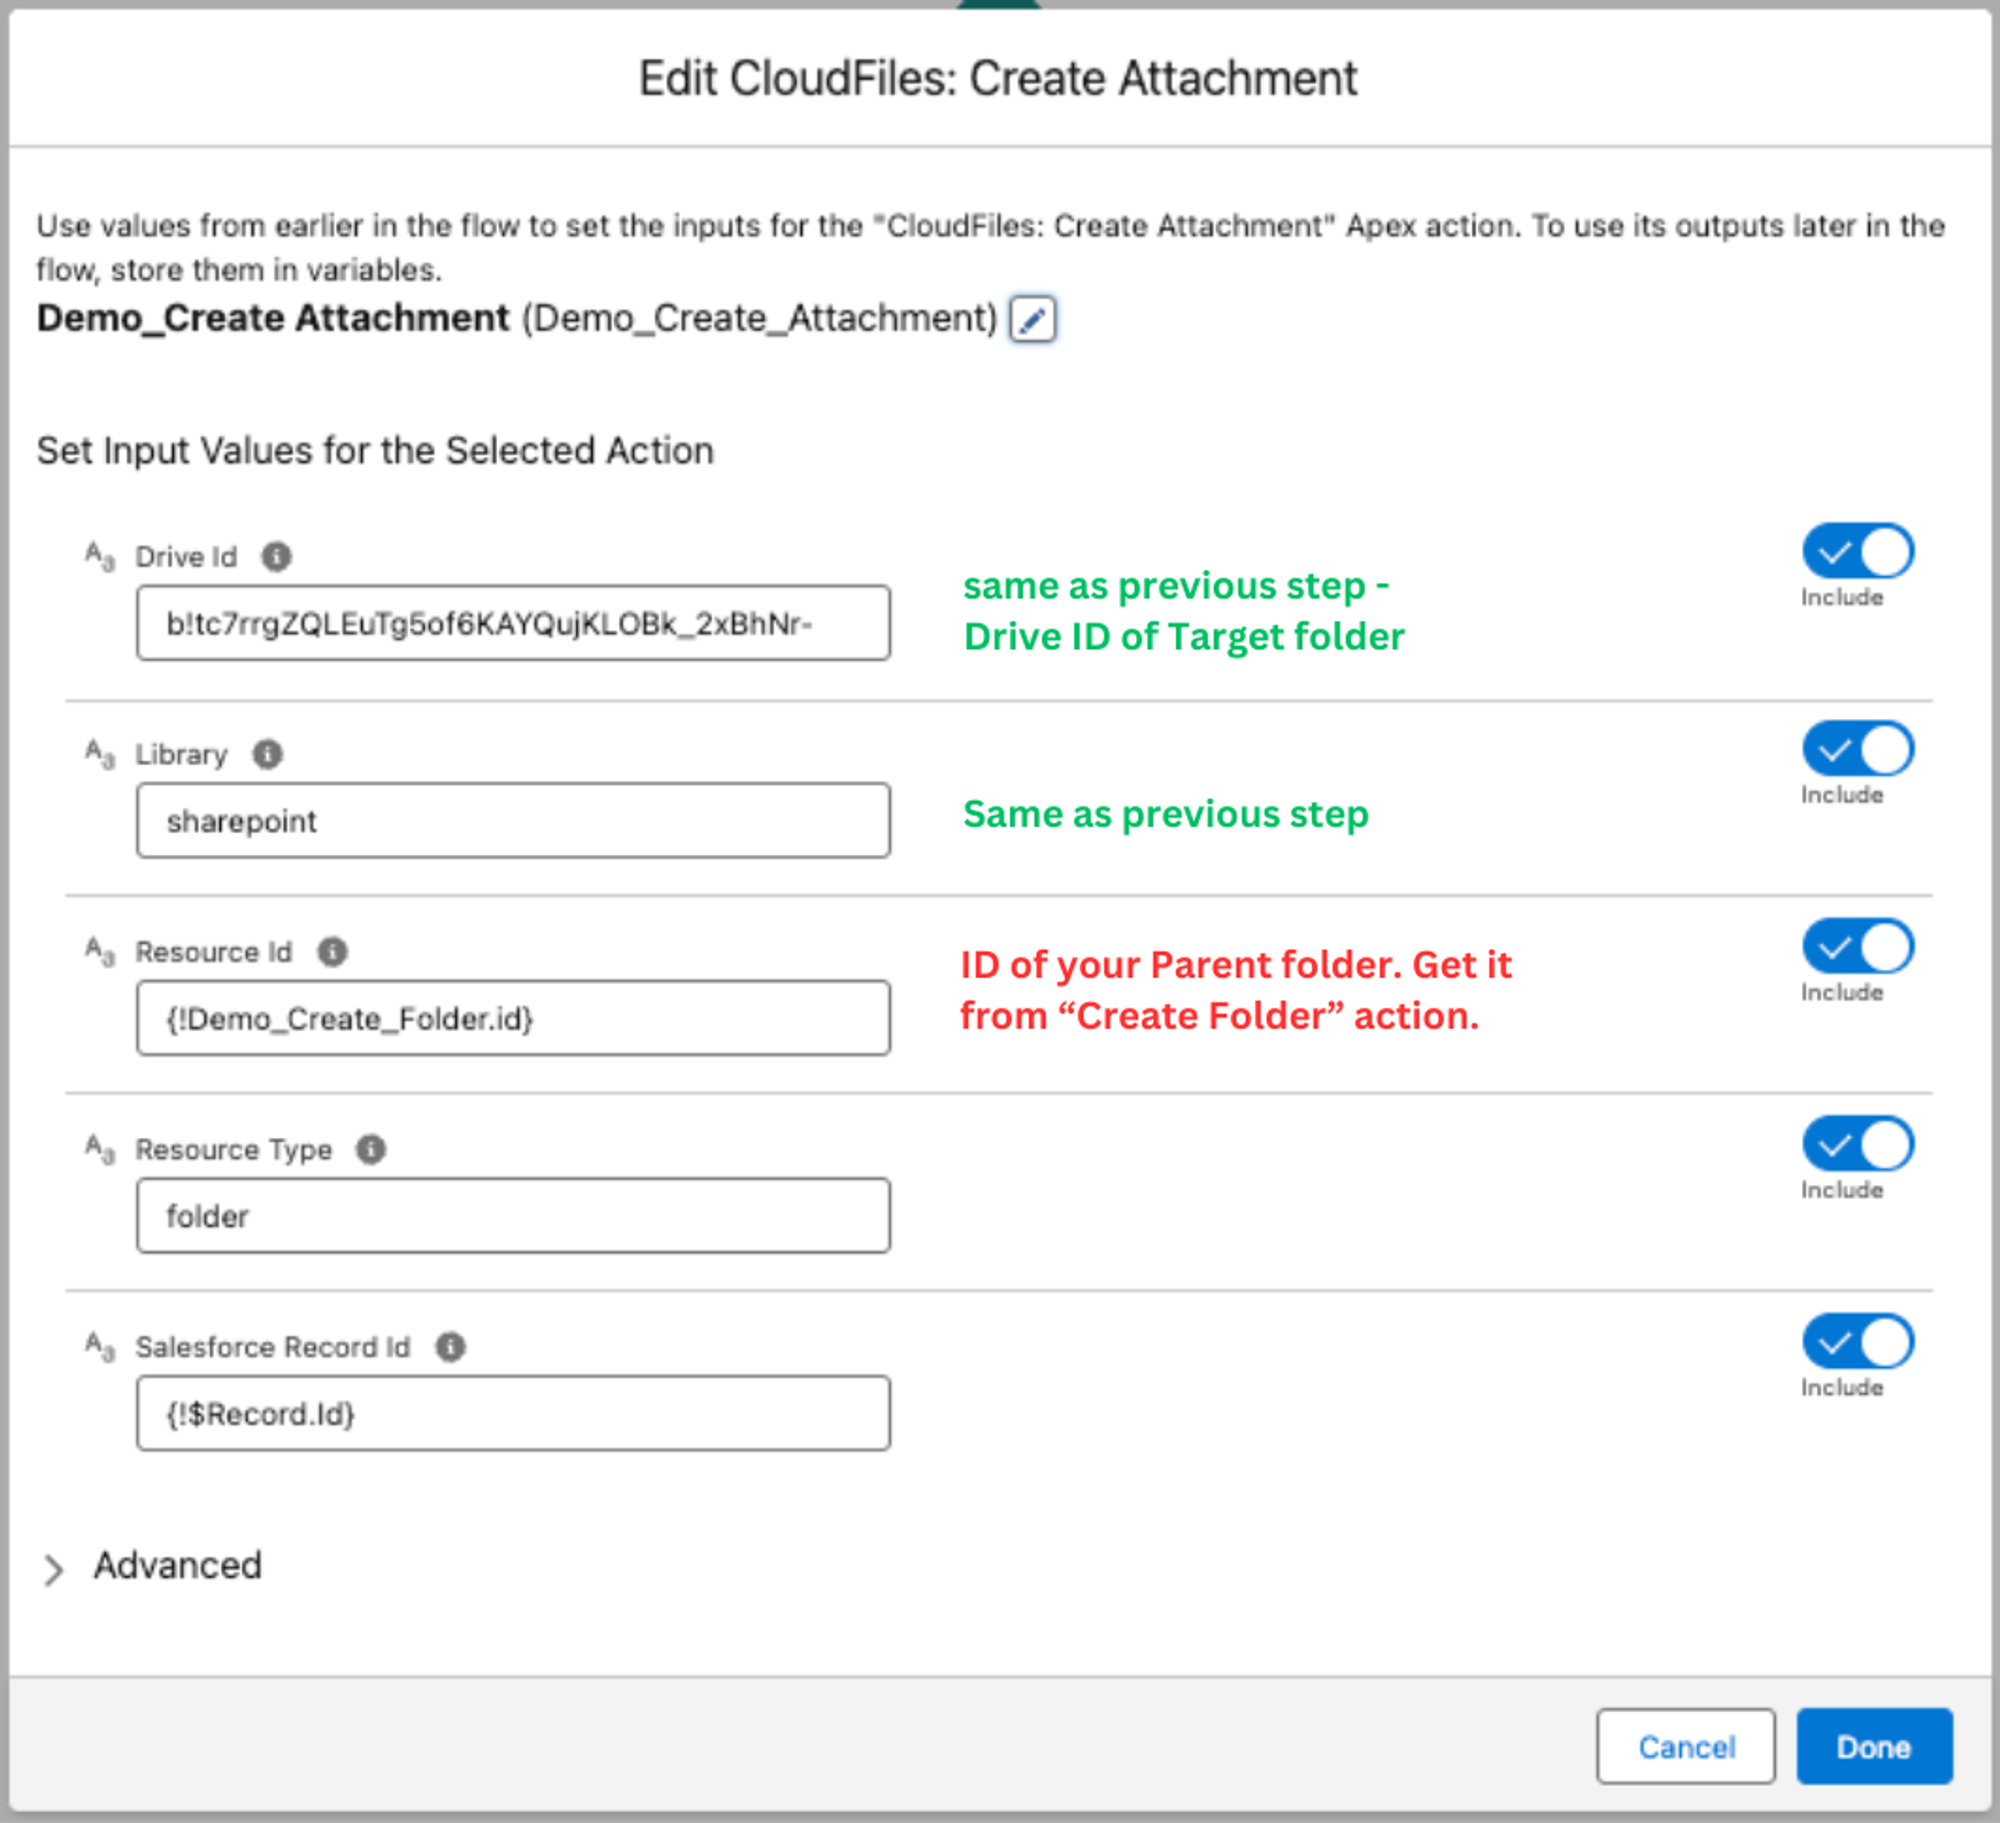
5 - Show Folder on Record using 'Create Attachment' Action
Create Attachment action allows you to attach the created folders and sub-folders to salesforce record. Attaching (or associating) our newly created folder is important since this will enable us to see and operate on the folder contents right from the Salesforce record.
To use this action, simply click on add element button and search for 'Create Attachment' as shown below. Once you add this action, it will ask you to fill in certain parameters. "Drive ID" and "Library" parameters will be same as above. Add the remaining parameters as given below -
- Resource Id - ID of your Parent folder. You can get it from the output of your first "Create Folder" action (The one we created in Step 2 above).
- Resource Type - Simply use the string 'folder' for this (without quotes)
- Salesforce Record Id - ID of the Salesforce record → {!$Record.Id}
That's it. Now our flow configuration is complete. Save and activate the flow. Refer to the GIF below to get a visual understanding of this step.
Here's how our final Create Attachment action looks like -
6 - Add CloudFiles Widget to Account Record
Now that folders and sub-folders are created and attached to the record, we will add the CloudFiles widget to the account record in order to view the files and folders within salesforce. Follow the steps below -
- Go to any Account record and click "Edit Page" Button.
- Lightning builder for this page will open. Insert a new tab and drag and drop the "CloudFiles" widget.
- Save and exit the builder. Refresh the Salesforce record page. The widget should now show up.
Refer to the GIF below to get a visual understanding of this step. The inserted widget will show a blank screen but you don't need to worry about it. Move on to the next step.
7 - Test the Automated Folders in Action
Now that everything is setup, lets test our flow. Follow the steps below to see this automation in action.
- Simply create a new Account record in Salesforce and then go the 'Files' tab that we added in the previous step.
- The flow may take a few seconds to run so click on the refresh icon on top right of the widget.
- Once the folder is connected, the system might show you a "Connect to SharePoint" button as shown below. This is a one-time login that your users will need to perform the first time they access CloudFiles using Salesforce.
- Once you connect your SharePoint here, you should see the newly created folder and the sub-folders inside.
- You can quickly navigate to SharePoint as shown below.
These steps are illustrated in the GIF below -
Congratulations! You've successfully created an automation to create custom folder and sub-folder hierarchies using Salesforce flows.
We have shown only a very specific part of this automation for the sake of speed. However you can customize these flow actions to a high degree to replicate any process imaginable.