Introduction
The CloudFiles: Create Folder flow action allows you to create a folder in a connected external storage system by specifying the folder name and its location. This action is particularly useful for automating processes where folders need to be created dynamically, ensuring a seamless and organized structure for file management.
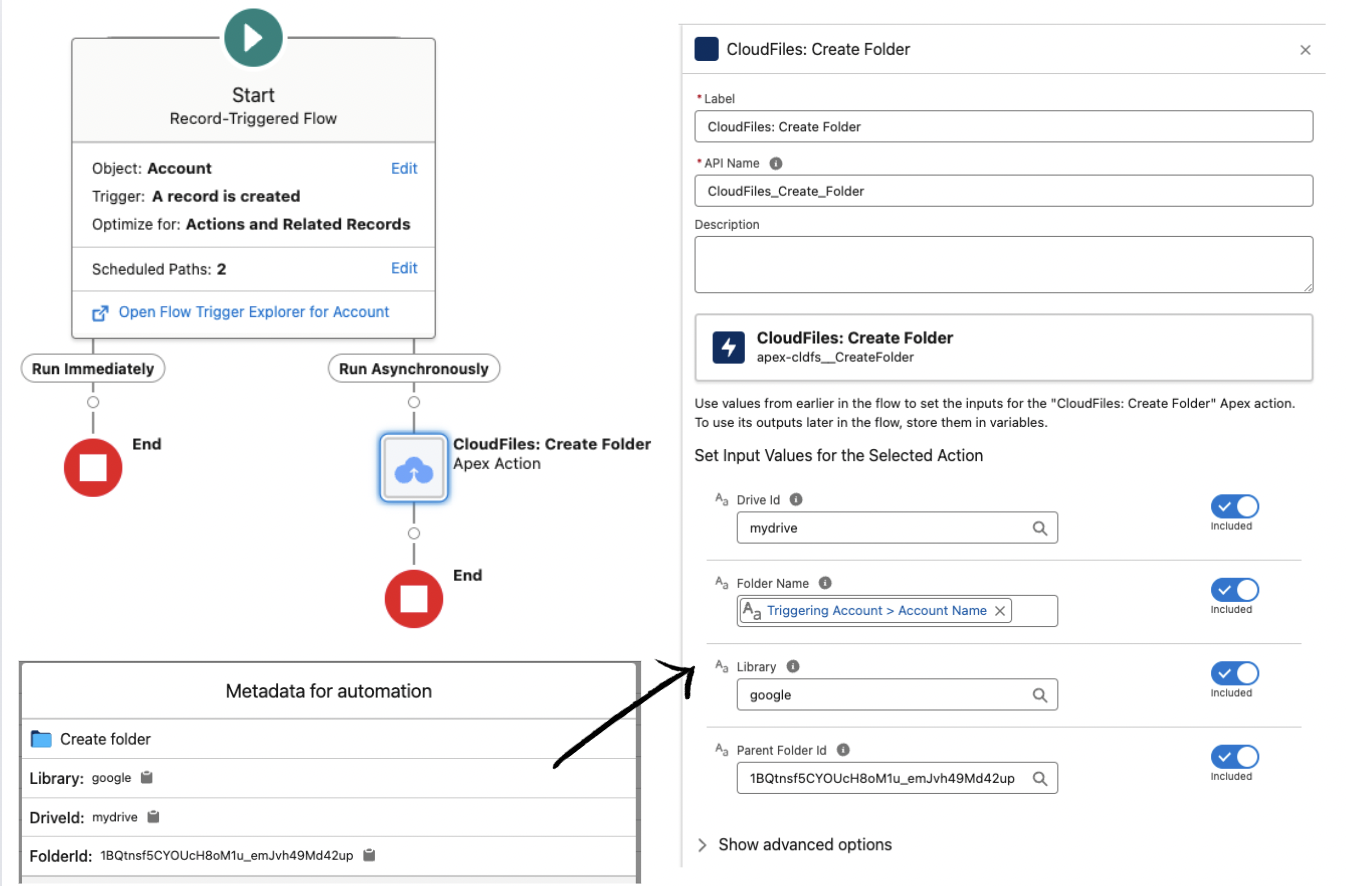
The image below illustrates the action's input and output parameters. Detailed descriptions of these parameters are outlined in the sections below.
What this action does
The CloudFiles: Create Folder action enables folder creation through specific triggers and automations in Salesforce. By providing essential details such as the folder name and its destination parameters, this action creates a folder in the specified external storage location and returns metadata about the created folder for further use.
Scenario:
Imagine a use case where every Account record in Salesforce requires a corresponding folder in an external storage system. These folders can organize and store all account related files. Instead of manually creating these folders, you can automate the process.
For example, when an Account record is created, a flow can trigger this action to:
- Create a folder with the Account name in the designated location.
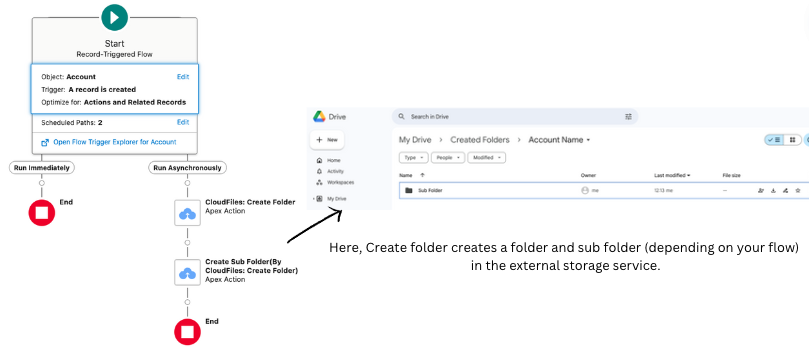
- Use the folder details returned by the action to create additional subfolders for specific purposes like contracts, invoices, or correspondence.
Check the Tutorial for more information.
The image below illustrates how this automation would look -
Input Parameters
Folder Name
- Description: The name of the folder to be created.
- How to Use:
- Use Salesforce merge fields to dynamically generate folder names, e.g., {!Account.Name}.
- Consider creating a Formula field on the object or Formula flow resource in case you wish to have merged field names.
- Alternatively, you can input the Folder Name as Text directly.

Destination Parameters help specify where the target folder should be created. There are multiple parameters that may need to be set based on the target cloud storage such as library, drive ID, parent folder ID etc... E.g. Sharepoint users require all 3, while dropbox users may require only one.
These parameters can be easily copied from within Salesforce from using the CloudFiles > Content Library Tab.
Some of these Parameters like DriveId can be obtained from within Salesforce CloudFiles App by navigating to the parent folder in the Content Library Tab and clicking the "View Metadata" button as shown in image below-
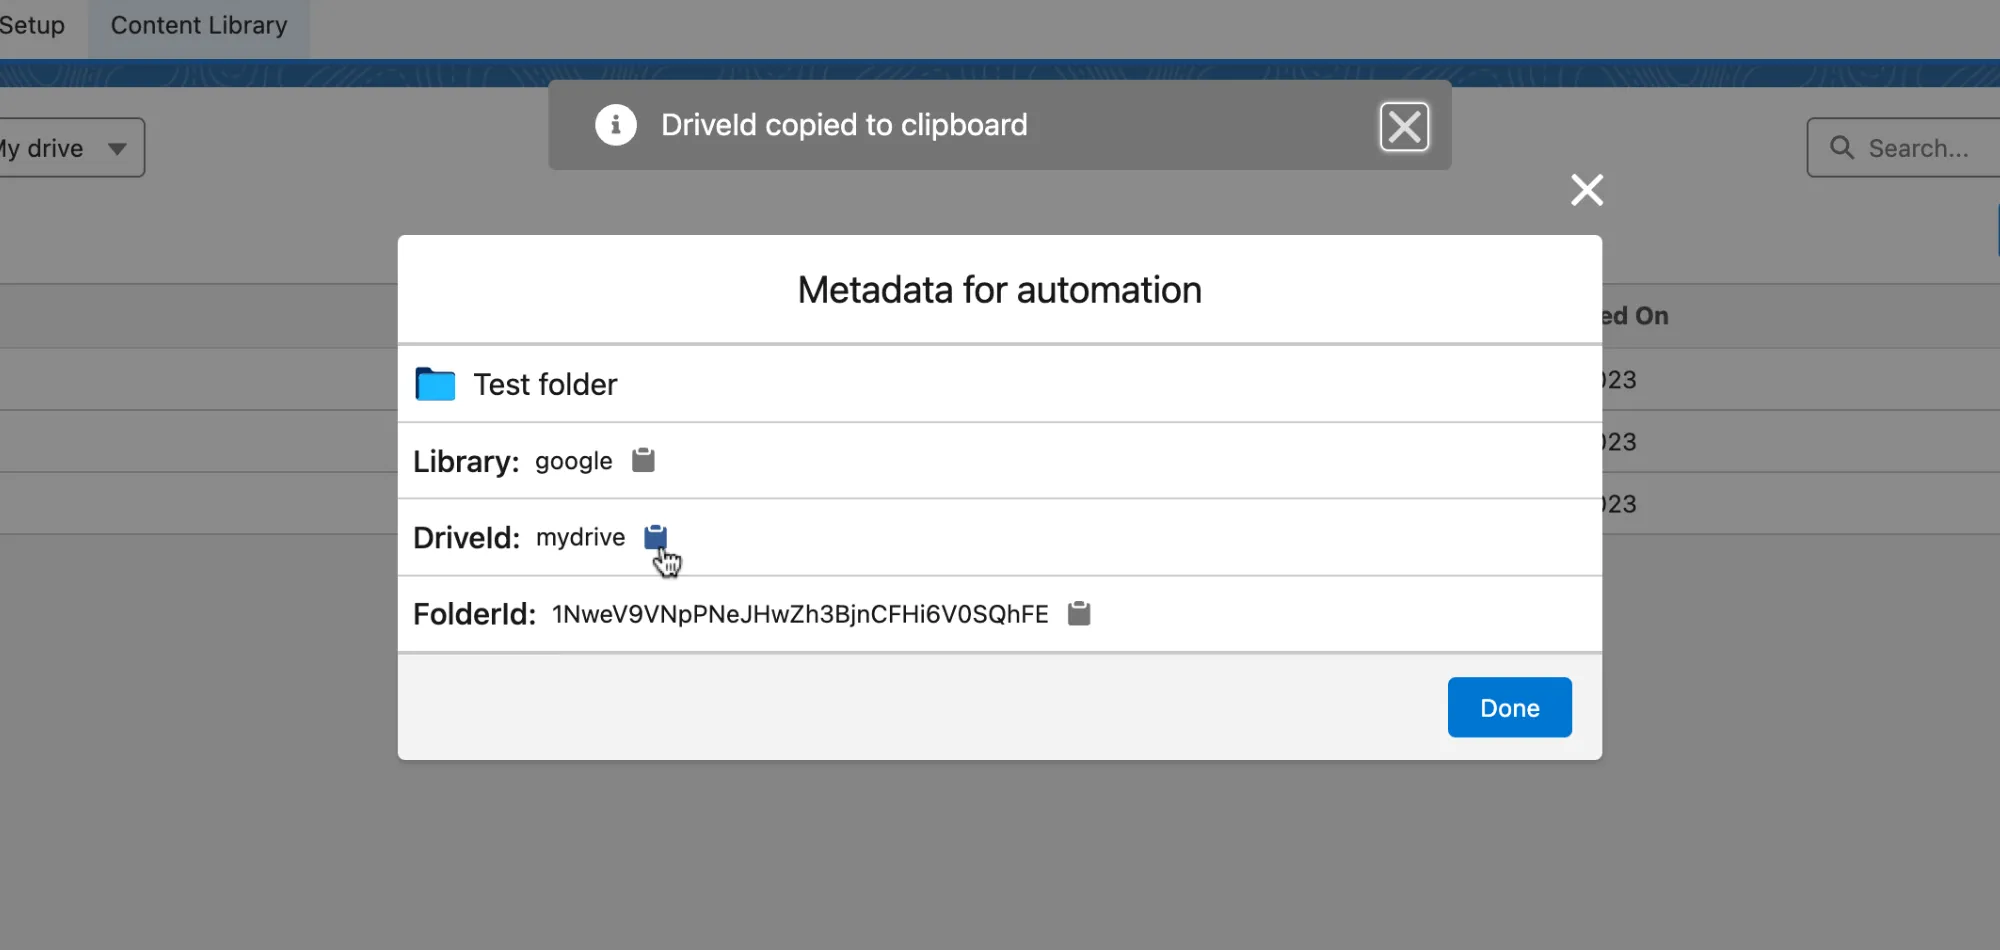
Follow the steps below to retrieve these IDs -
- Click on App Launcher on top left. Search for the CloudFiles App.
- In the CloudFiles App, select the Content Library Tab.
- Go to your cloud storage. You may need to login if you haven't already.
- Go to the target folder where you would like to place the created folders in.
- A dialog box opens up which shows all the IDs. Copy the ID from here.
These steps are shown in the GIF below --
Below we describe these parameters and then, we show how to copy them easily with a single click.
Library
- Description: Specifies the configured Cloud Storage where the folder should be created.
- Valid Values: sharepoint, google, s3, azure, onedrive, dropbox, box or cloudfiles.
Drive ID
- Description: Required for services like Google Drive and SharePoint with multiple drives.
- How to Get It:
- Use the output of a previous flow action like Create Folder or Get Resource Details to retrieve the Drive Id.
- Or retrieve this from the Content Library Tab in Salesforce using the "View Metadata" button.
Parent Folder ID
- Description: The Id of the folder in which the new folder should be created.
- How to Get It:
- Use the View Metadata option in the Content Library Tab to obtain this Id.
- Or use previous flow action's output like that of Create Folder or Get Resource Details.
Example Use Case: Automating subfolder creation
- Main Folder: An Account folder named "Trion Energies" is created using the Create Folder action.
- Subfolder: You want to automatically create a subfolder named "Invoices" within "Trion Energies".
Steps:
- The Create Folder action for "Trion Energies" outputs the folder's ID as 12345.
- Pass this 12345 as the Parent Folder ID in a subsequent Create Folder action to create "Invoices".
Output Parameters
The Apex action returns the following details of the created folder. You can choose to save them somewhere if you wish to use it later.
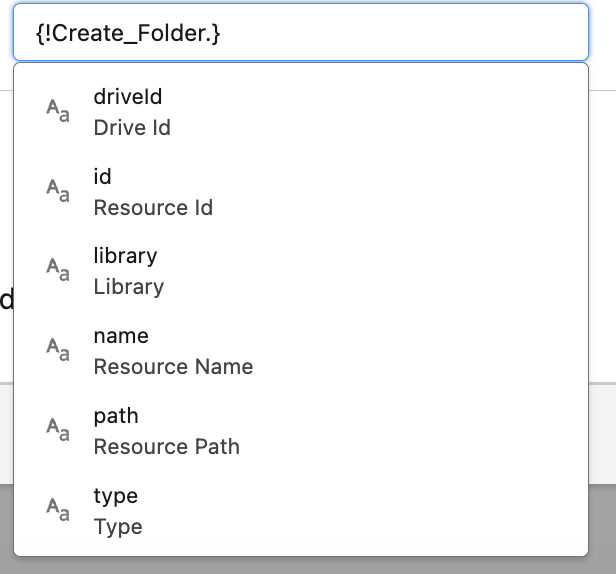
Resource ID
Description: The unique Id of the newly created folder. This Id can be used as the parent folder Id for creating subfolders.
Drive ID
Description: The Id of the drive where the folder was created. This value remains constant for subfolders created within the same drive.
Library
Description: Indicates the cloud storage used for folder creation, e.g.: google, sharepoint etc.
Resource Name
Description: The name of the created folder.
Resource Path
Description: The storage path of the folder in the cloud system.
The Resource Path Output value is always null.
In order to get the path of the created folder use a subsequent Get Resource Details action.
Type
Description: Specifies the type of resource created. This will always befolder
The output of the Create Folder action is influenced by the Folder Conflict Behavior configured for the connected cloud storage. This behavior determines what happens if a folder with the same name already exists at the specified location.
You can set the Folder Conflict Behavior in the Salesforce CloudFiles App by following these steps:
- Navigate to CloudFiles > Document Management > Library Tab.
- Locate the section for Folder Conflict Behavior.
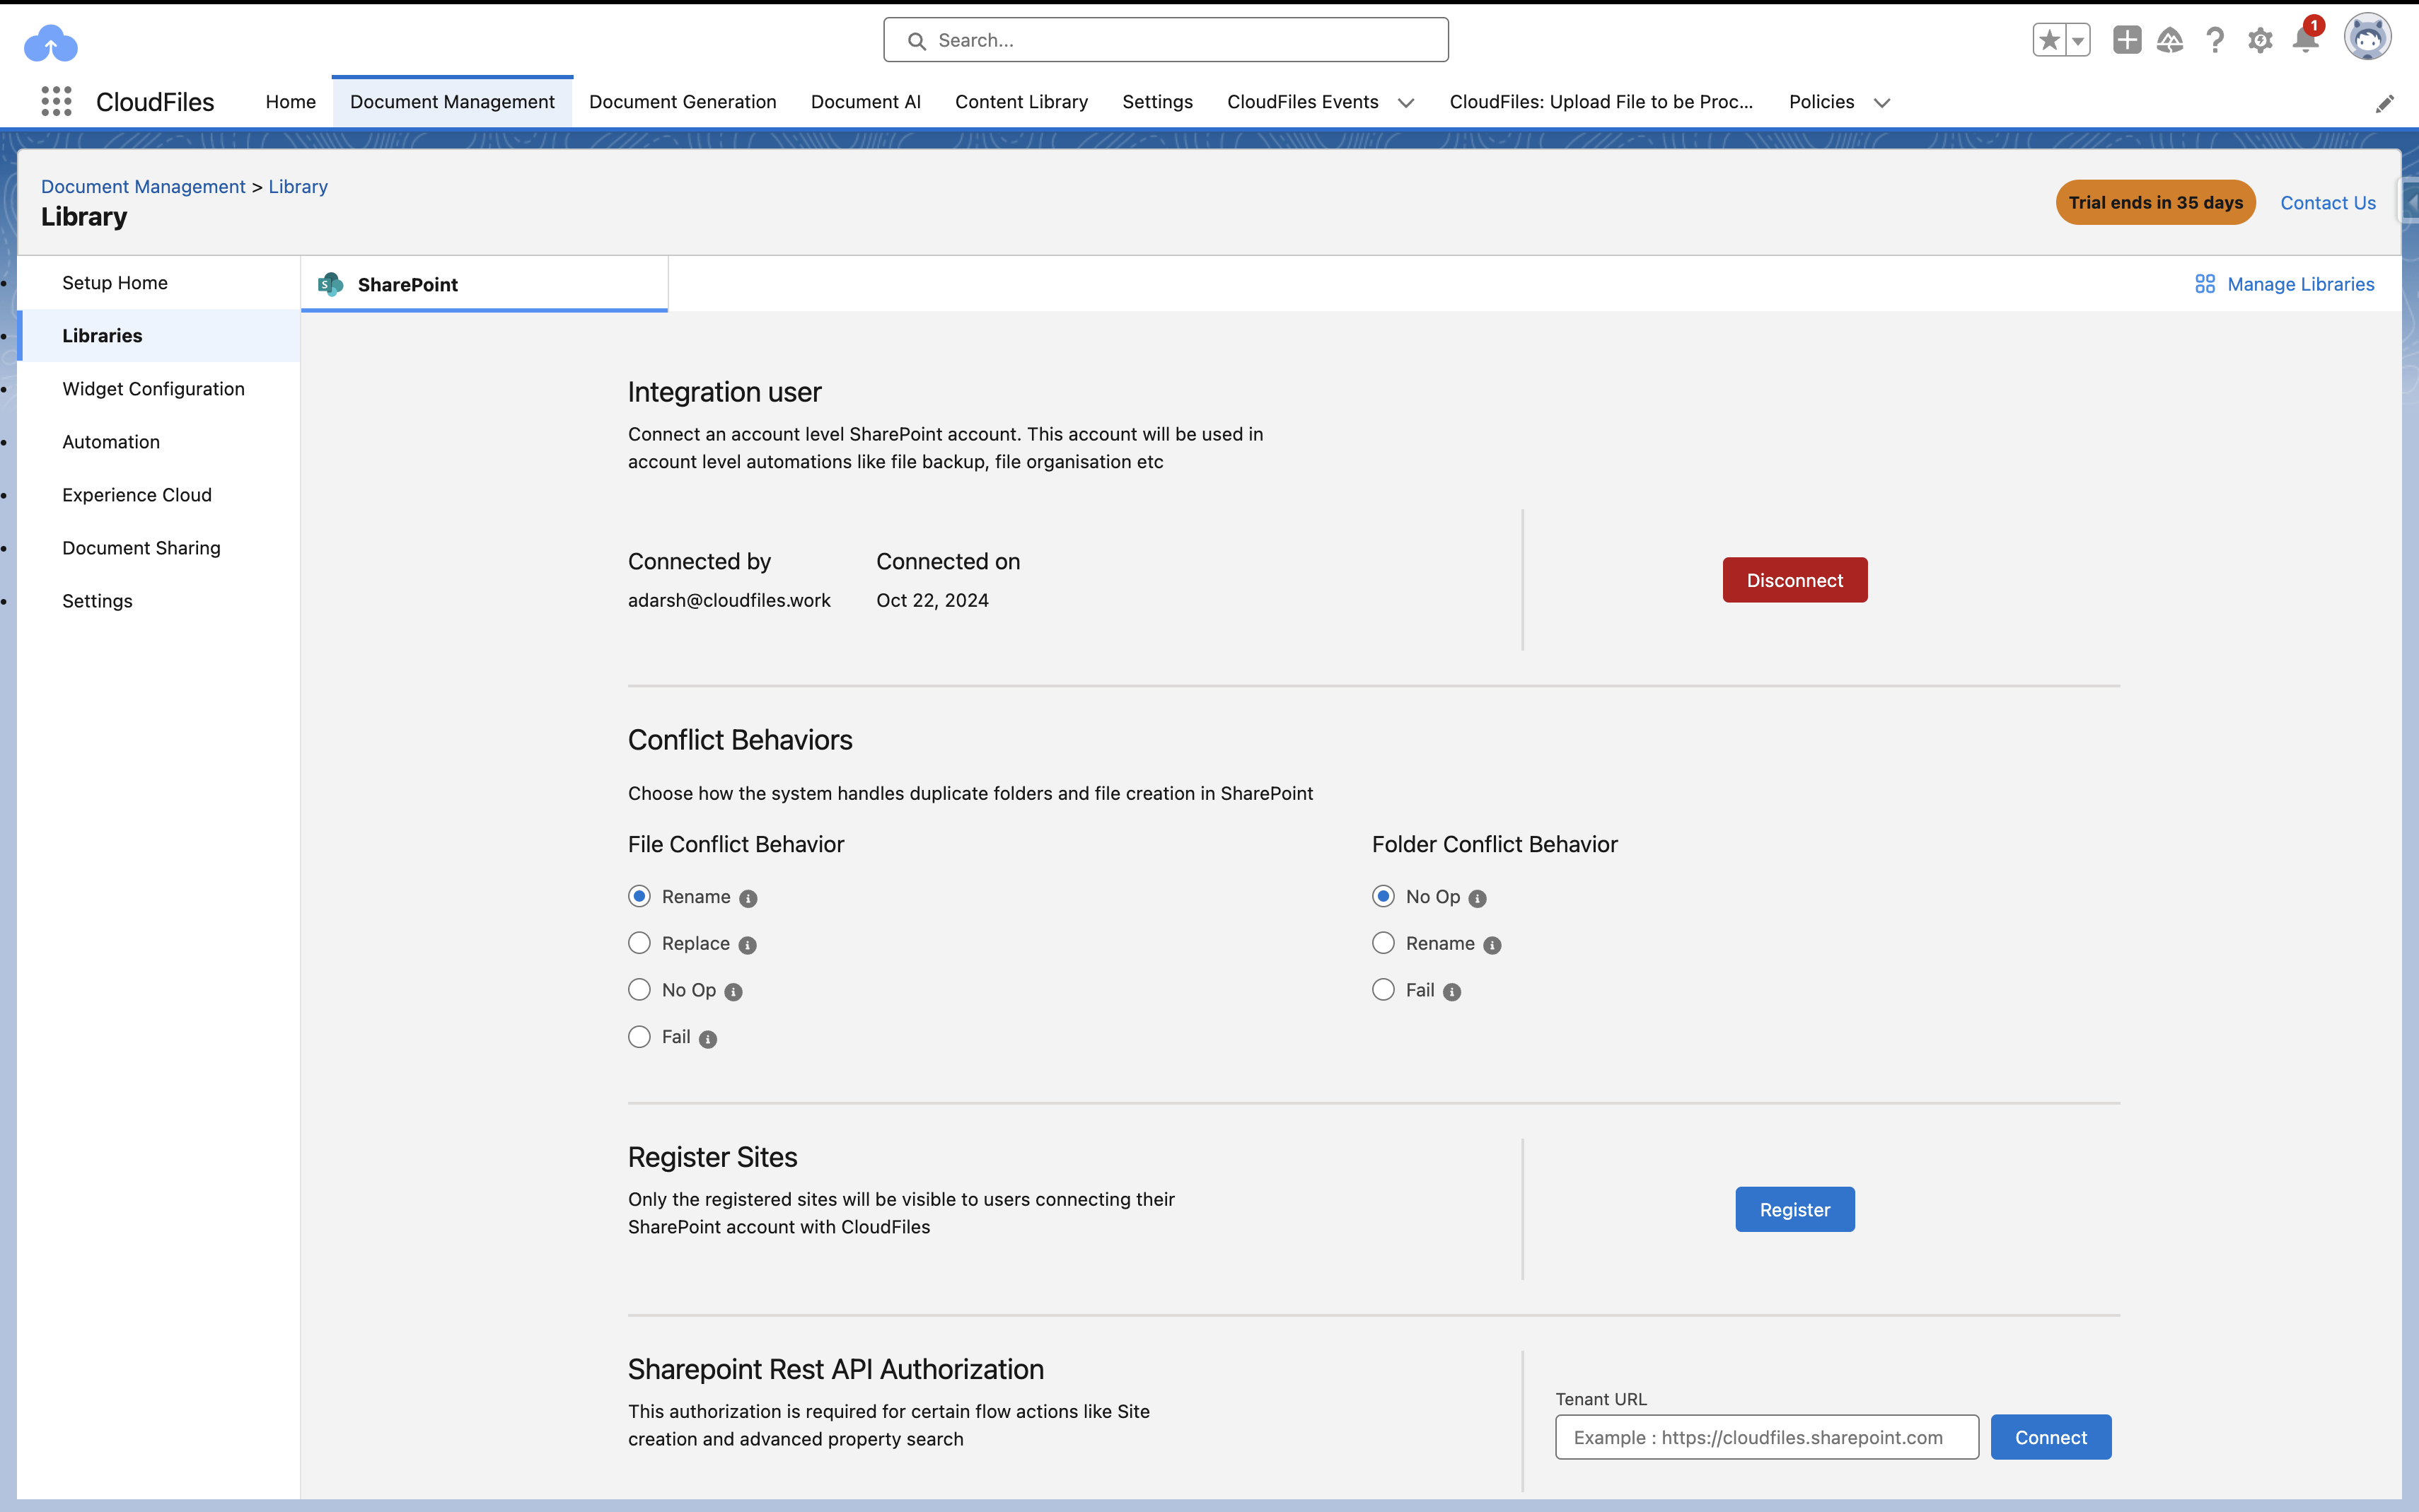
Conflict Behavior Options:
- No OperationWhat Happens: No new folder is created if a folder with the same name already exists.Output Behavior:The action does not create a new folder.Instead, it returns the metadata of the existing folder.Use Case: Ideal for scenarios where duplication should be avoided and existing folders should be reused.
- RenameWhat Happens: The new folder is created with a unique name by appending a number (e.g., "Folder Name 1").Output Behavior:The action successfully creates a renamed folder and returns its metadata.Use Case: Useful for creating unique folder structures without overwriting existing ones.
- FailWhat Happens: The action fails if a folder with the same name exists.Output Behavior:An error is thrown, and no folder is created.Use Case: Best for scenarios requiring strict folder naming rules to avoid duplication.
Important Notes
- Always ensure the Folder Conflict Behavior aligns with your use case to prevent unintended results or errors.
- For troubleshooting, refer to the error message details in case of failure due to conflict.
See it in Action
In the Gif below, we have shown how creating a new lead creates a new folder in Sharepoint-