Introduction
The DocuSign integration feature enables you to automatically send generated documents for e-signature directly via DocuSign, using predefined signature fields and recipient mappings.
This works in combination with three key additions to your document generation configuration -
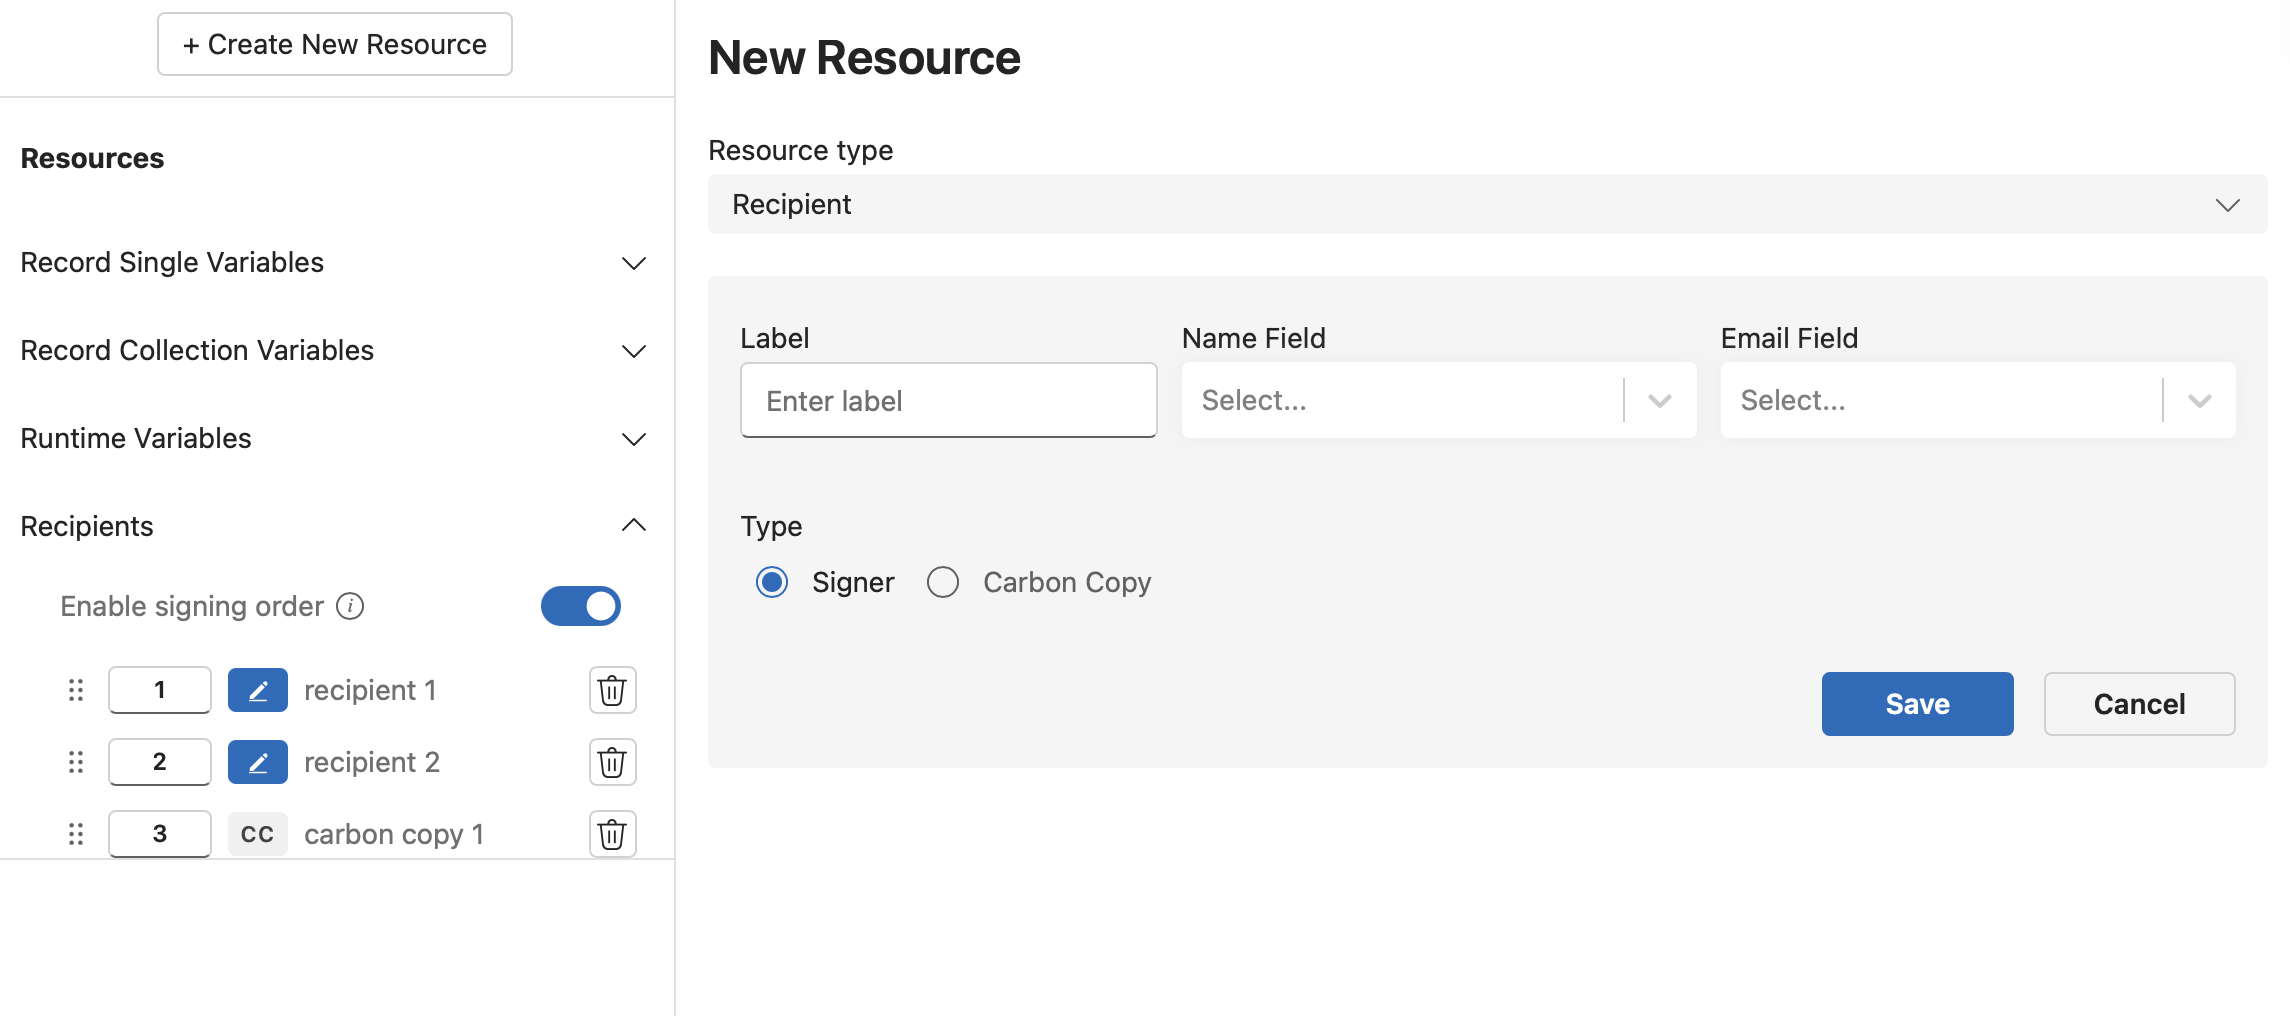
- Recipient Resource - This defines the recipient of the generated PDF. It includes the recipient's name, email, and any other necessary details.
- Insert Form Field Action - This allows you to insert a signature field directly into the Word document template. It determines the position of the signature within the document and links it to a specific recipient.
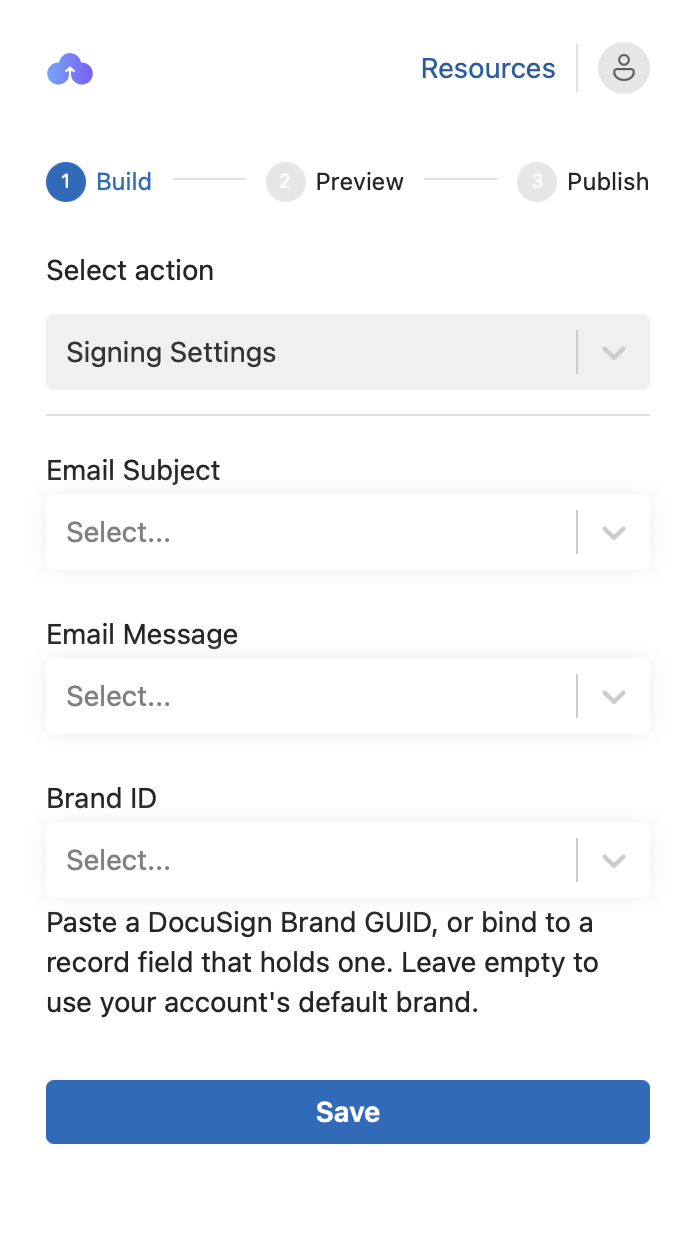
- Signing Settings - Control the order in which recipients are notified and the branding applied to the signing email.
Prerequisite
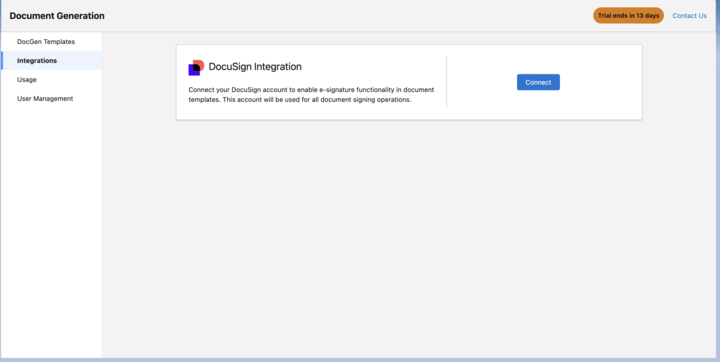
Before using this feature, ensure your DocuSign account is connected.
Navigate to Salesforce → Document Generation → Integrations Tab and connect your DocuSign account. This step is mandatory for the integration to function.
How to Use This Feature
Follow these steps to configure recipients and signature fields -
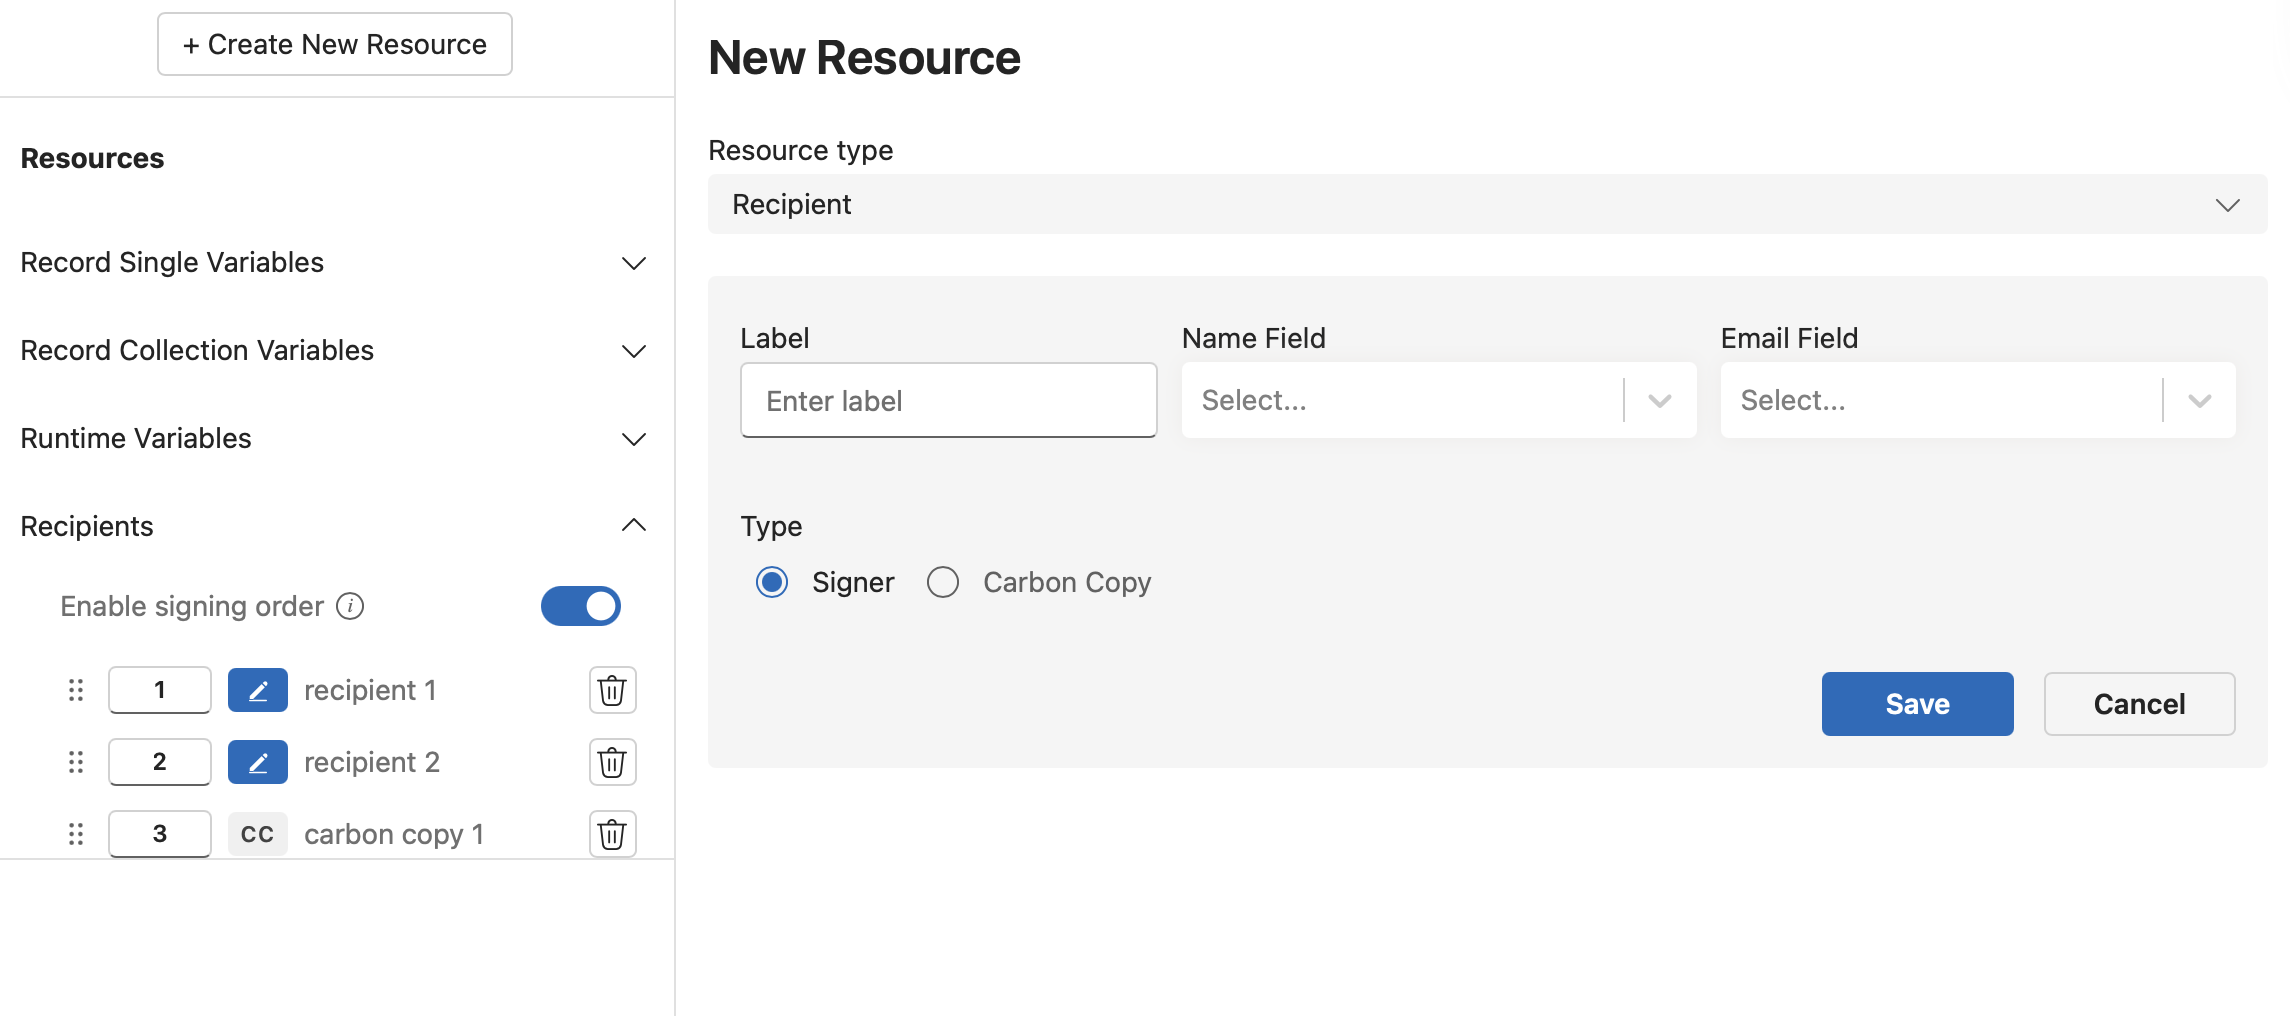
1 - Create a Recipient Resource
Start by adding a new recipient resource. This resource should include all relevant recipient details — especially the email address where the DocuSign request will be sent.
Each recipient can be added as a Signer or as Carbon Copy. Carbon Copy recipients receive the signed document by email but are not prompted to sign.
2 - Insert a Form Field Action
- Open your Word template in the document generation configuration.
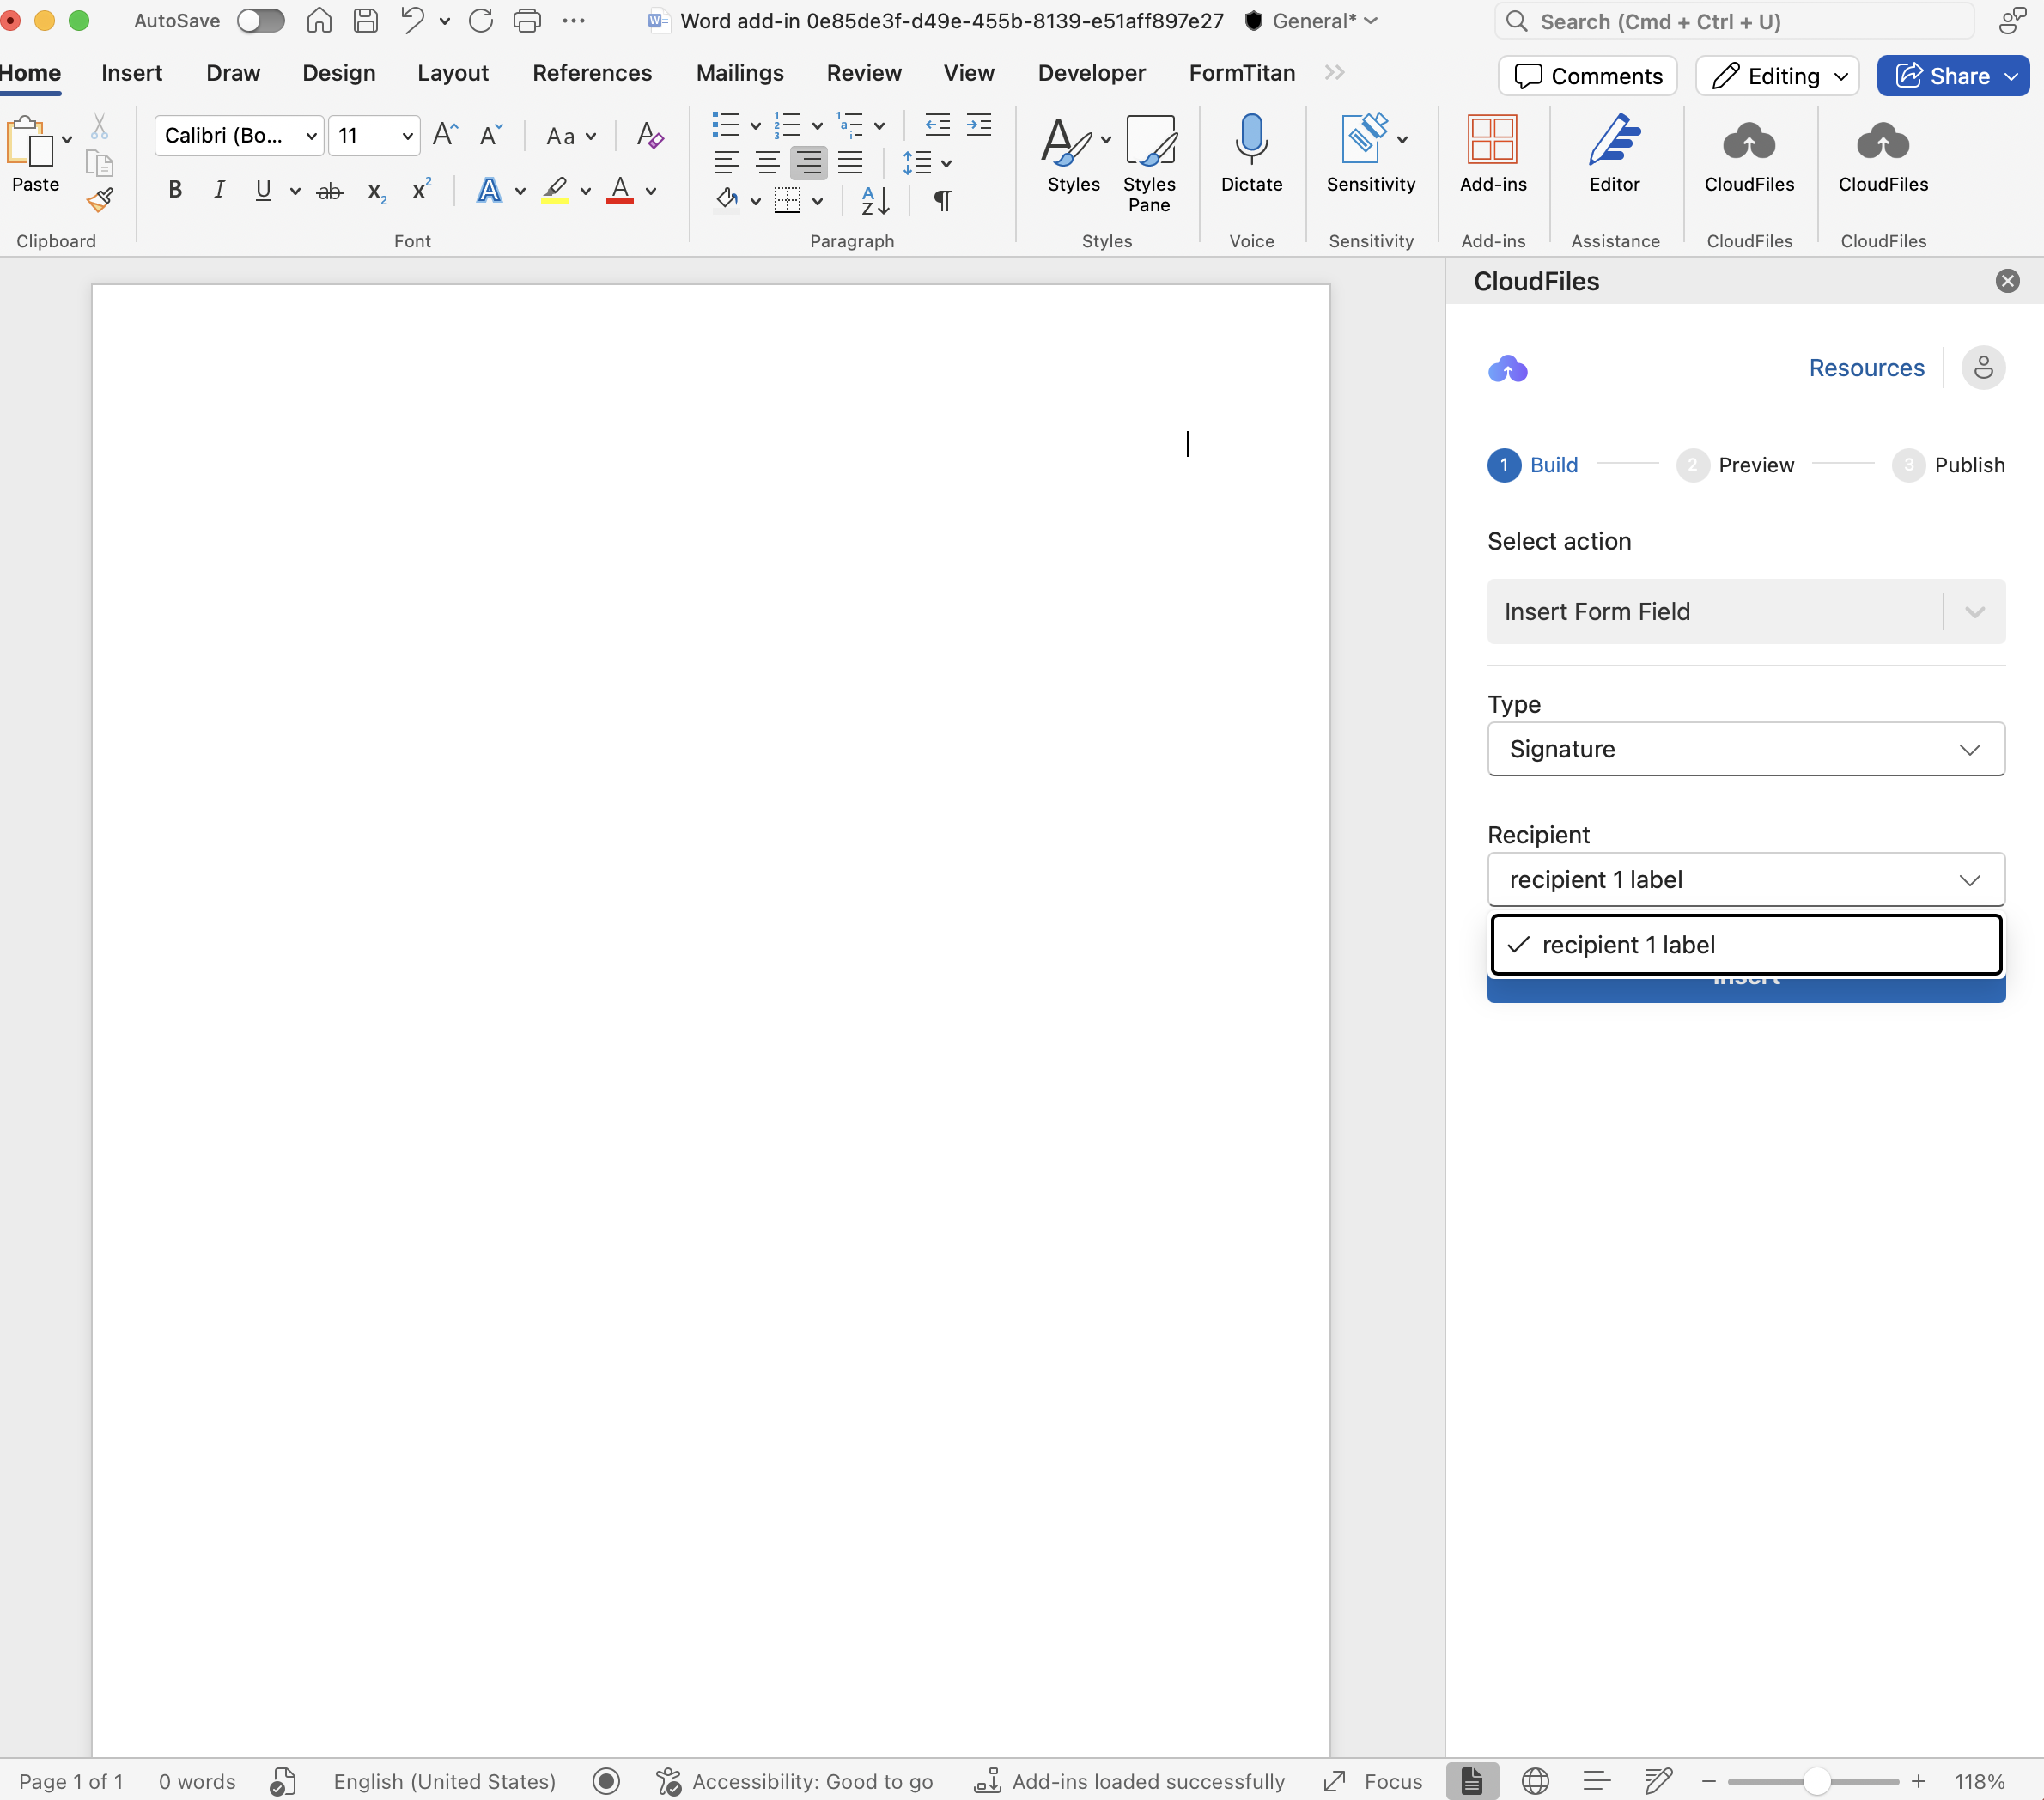
- From the Insert Form Field Action dropdown, select the Signature field type.
- Choose the intended Recipient to whom this signature is assigned. This ensures that when the document is sent, the correct person receives the email and is prompted to sign.
3 - Visual Placement of Signature Field
Once inserted, a placeholder form field with the word "signature" will appear in your document. This field marks the approximate location where the DocuSign signature box will appear.
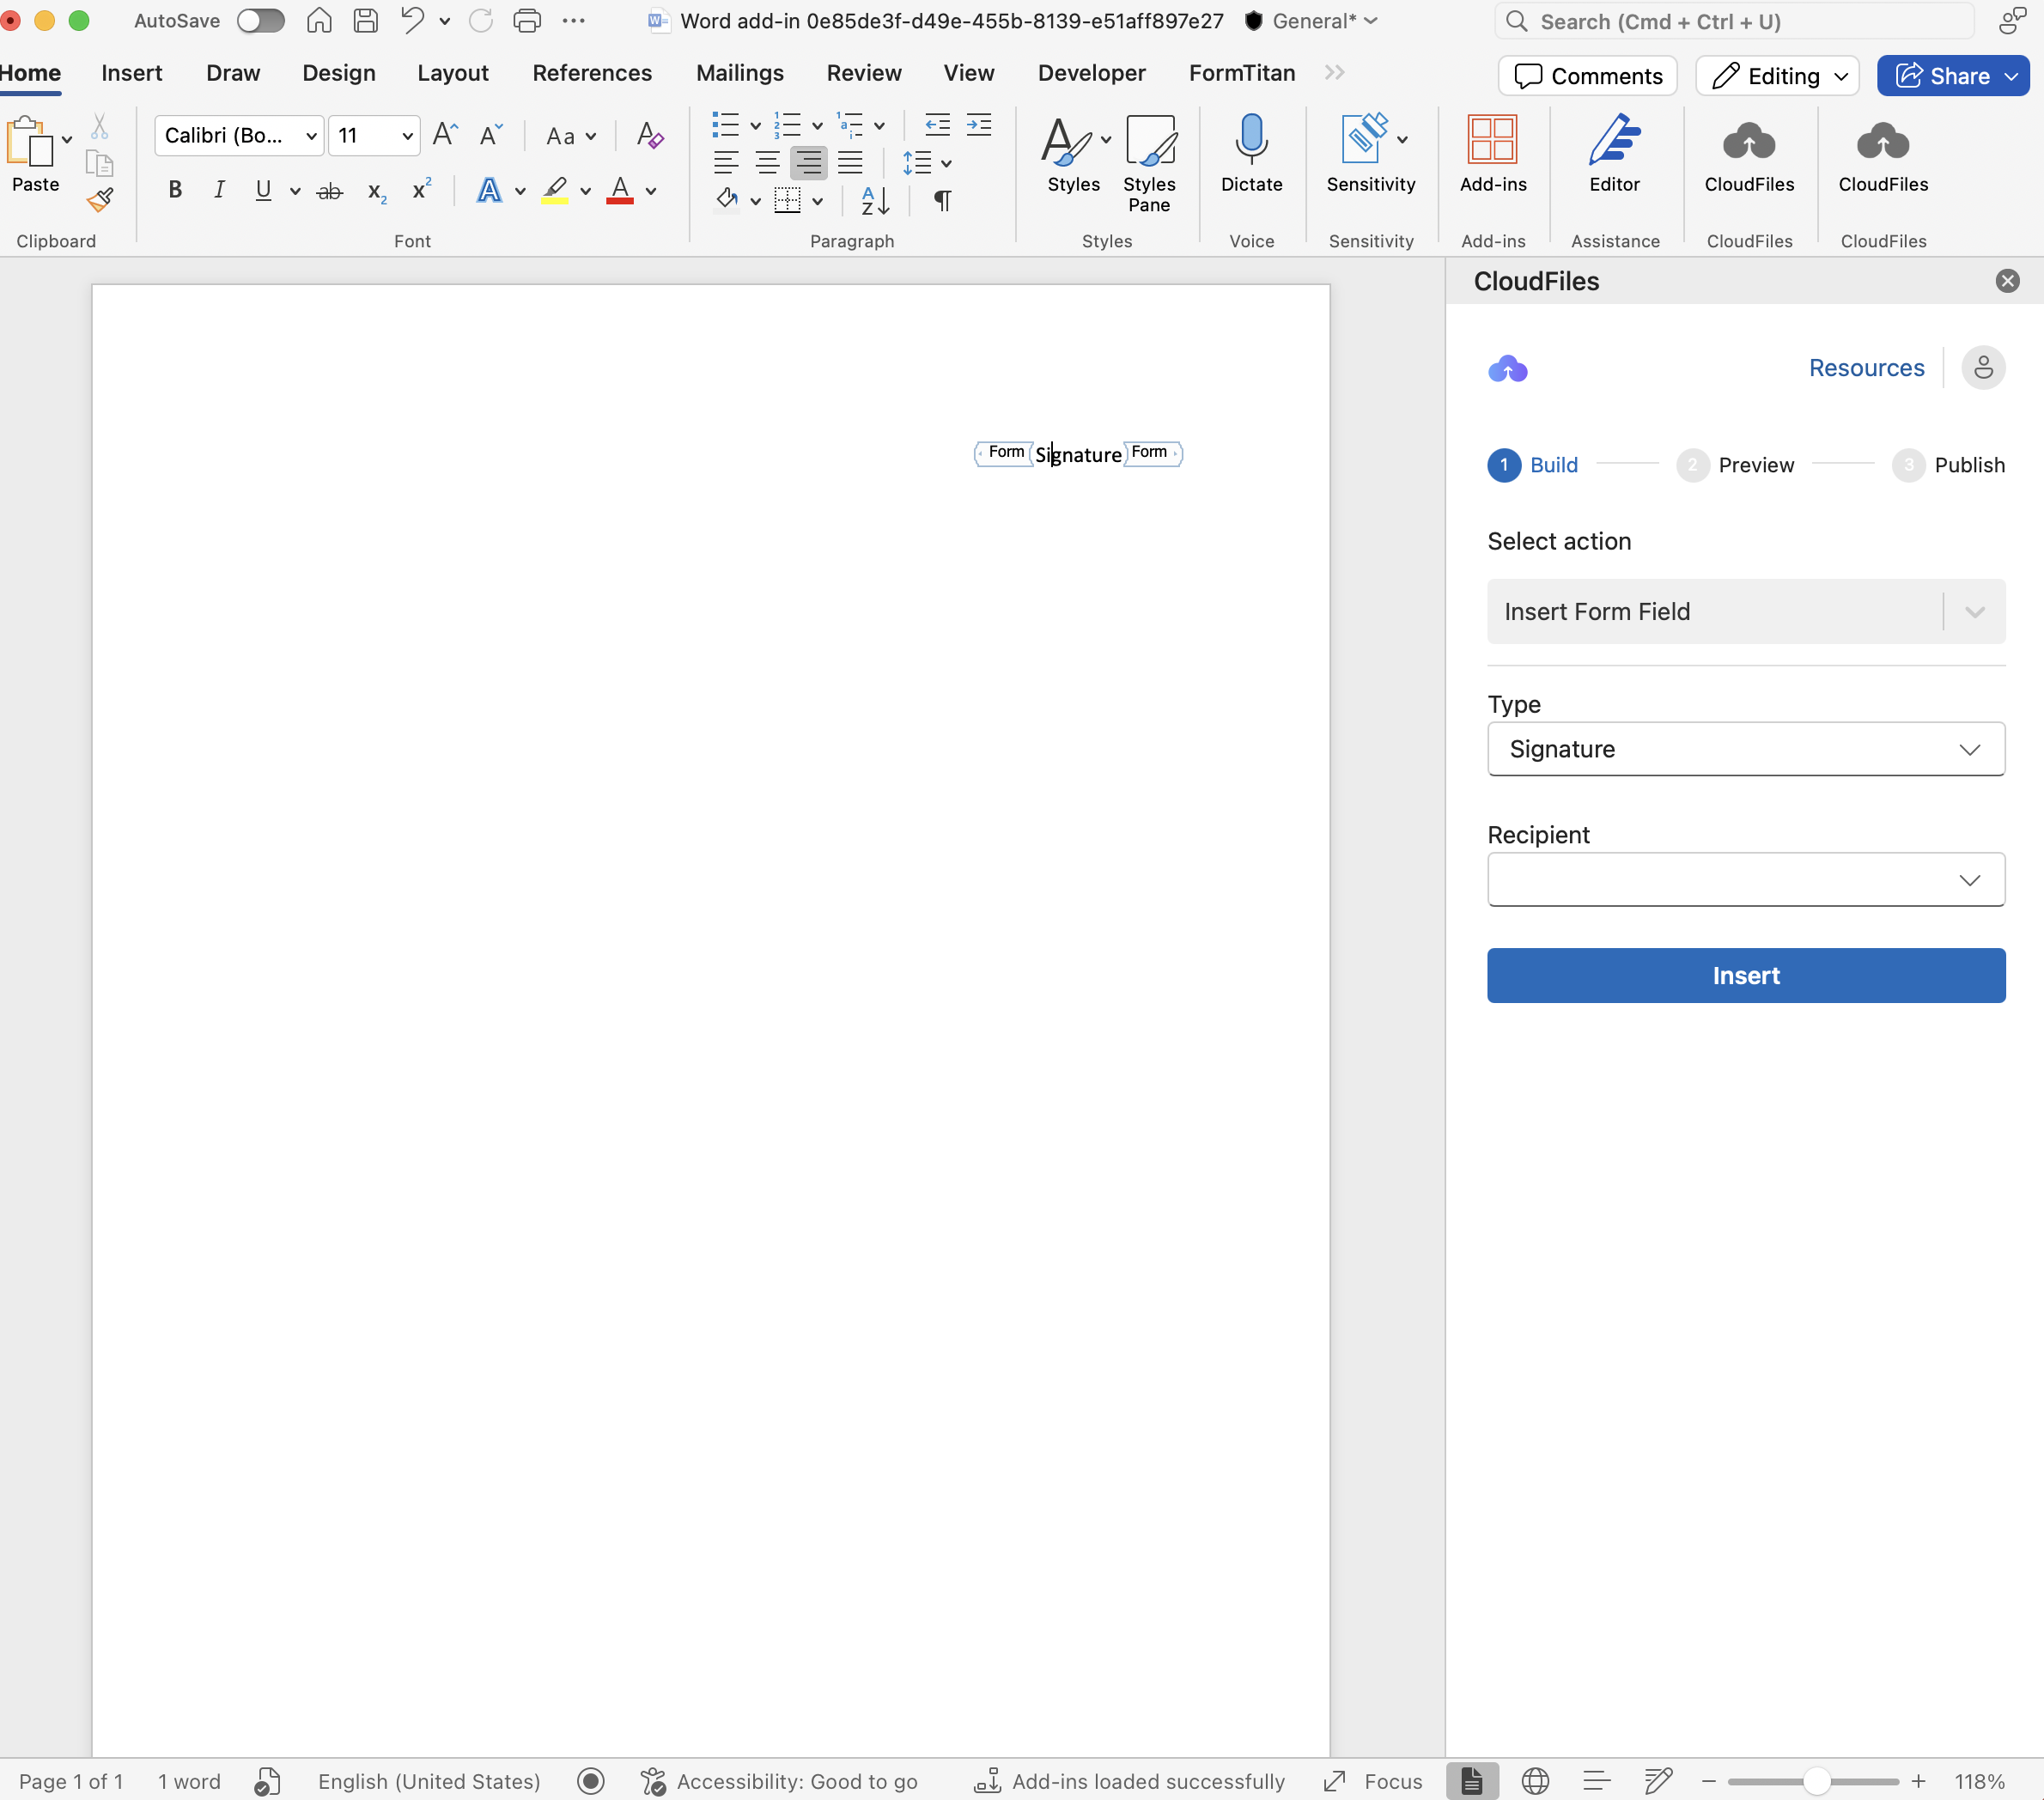
The actual rendering may vary slightly, so we recommend testing a few documents to ensure the signature appears at the ideal spot.
4 - Configure Signing Settings (Optional)
Signing settings apply to the recipients you created in step 1 and control how the signing request is sent. Both settings are optional.
- Signing Order: By default, all recipients are notified at the same time. Enable signing order to notify them in sequence, then give each recipient a number. Recipients with a lower number are notified first, and recipients with a higher number are notified only after the earlier ones finish signing. Recipients who share the same number are notified together. For example, with A=1, B=1, C=10, D=100, recipients A and B are notified first, then C once they finish, then D. You can drag recipients into order or type a number for each.
- Brand ID: Set the envelope Brand ID to apply DocuSign branding to the signing email. The brand controls the colors, logo, and email template your recipients see when they open the request.
5 - Triggering DocuSign
When you generate a preview or finalize the document, a call is made to DocuSign. The system will:
- Generate the PDF.
- Send an email to the designated recipient with the PDF attached for signature.