What to Expect
By the end of this tutorial, you can expect to -
- Have an Account folder created in your external storage for every new Account.
- Have a Lead folder created in your external storage for every new Lead.
- Automatically Move Lead folders into their respective Account folders on conversion of Lead.
Pre-requisites
Install CloudFiles in Salesforce
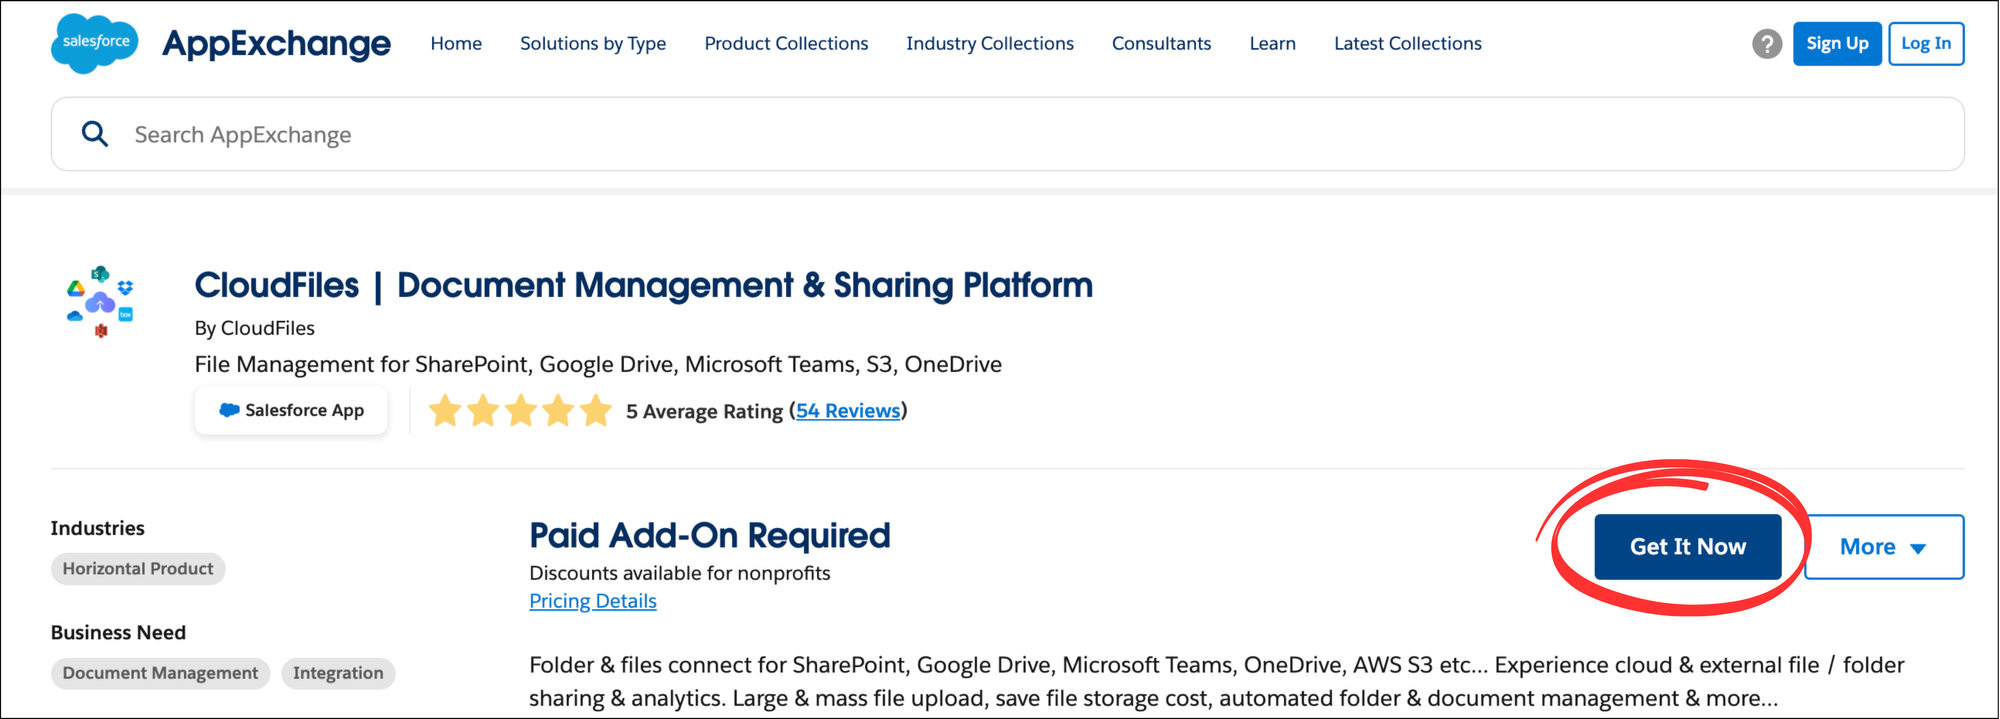
CloudFiles is available on the Salesforce AppExchange and can be installed using the standard app installation process. Check out Installation guide to know more.
Connect your Cloud Storage to Salesforce using CloudFiles
All automations in CloudFiles are activated through Salesforce Flow Builder, utilizing account-wide authentication for external storage libraries through a service (admin) user. To connect your service user, access the setup, click on the external storage of choice and log into your account. For detailed steps, refer to the GIF below for a clearer understanding.
Add CloudFiles Widget to Account and Lead record pages
Add the CloudFiles widget to Account and Lead record pages in order to view the files and folders within salesforce. Follow the steps below -
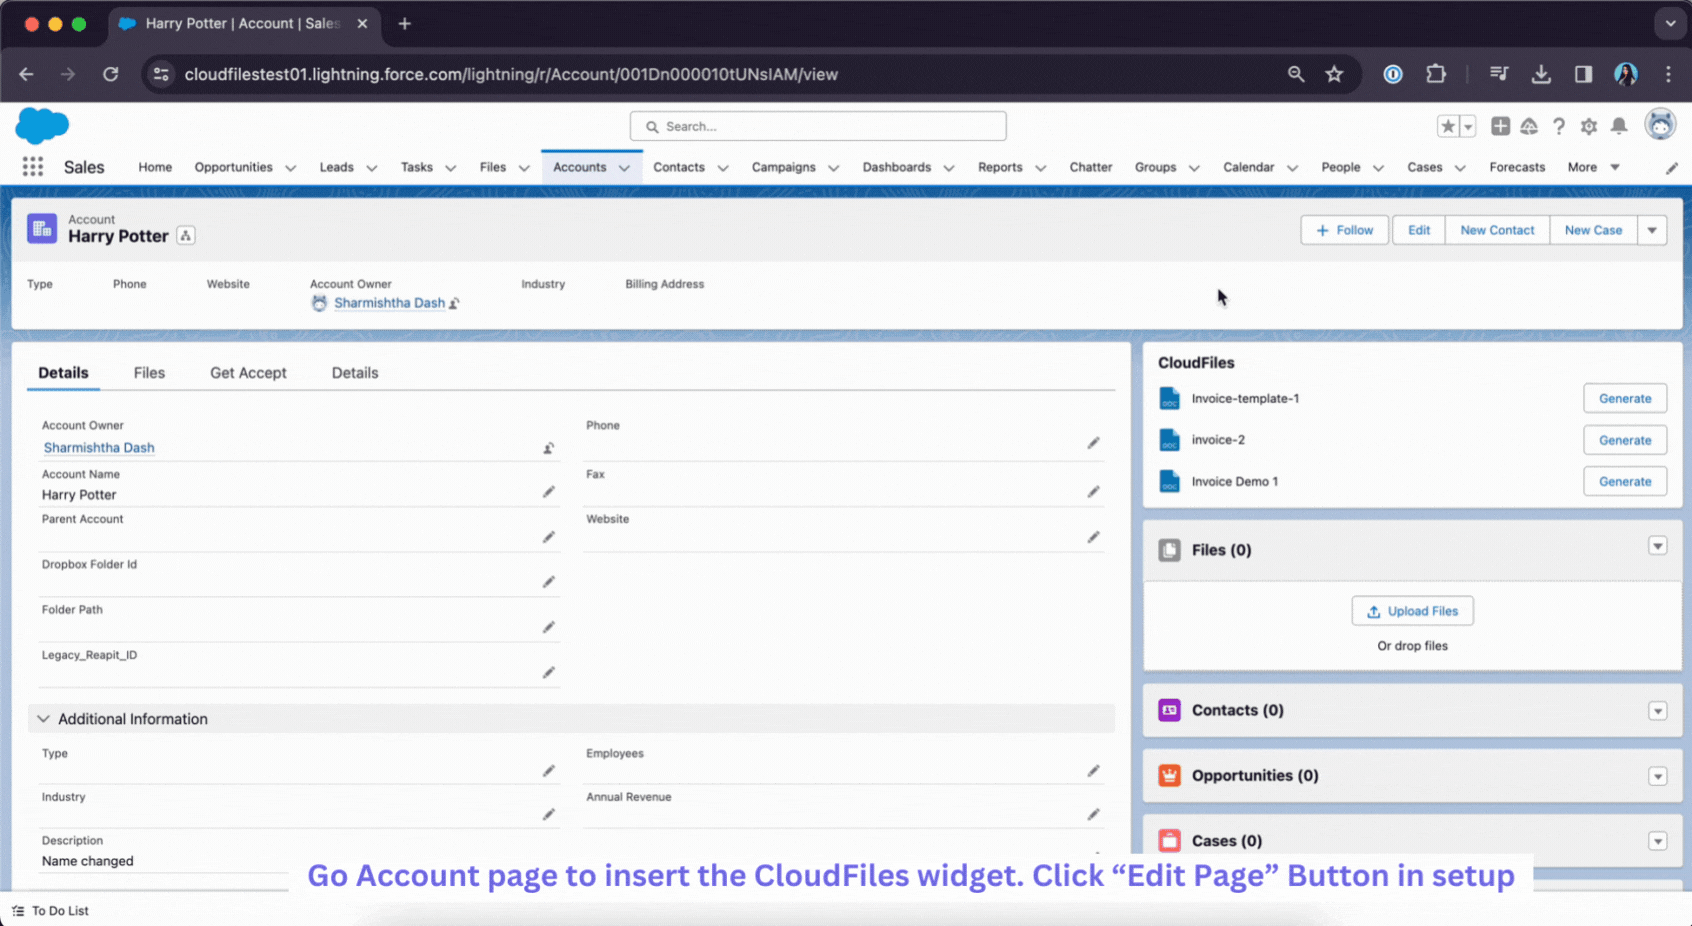
- Go to any Account record and click “Edit Page” Button.
- Lightning builder for this page will open. Insert a new tab and drag and drop the "CloudFiles" widget.
- Save and exit the builder. Refresh the Salesforce record page. The widget should now show up.
- Follow the above steps and add CloudFiles widget to the Lead record page as well.
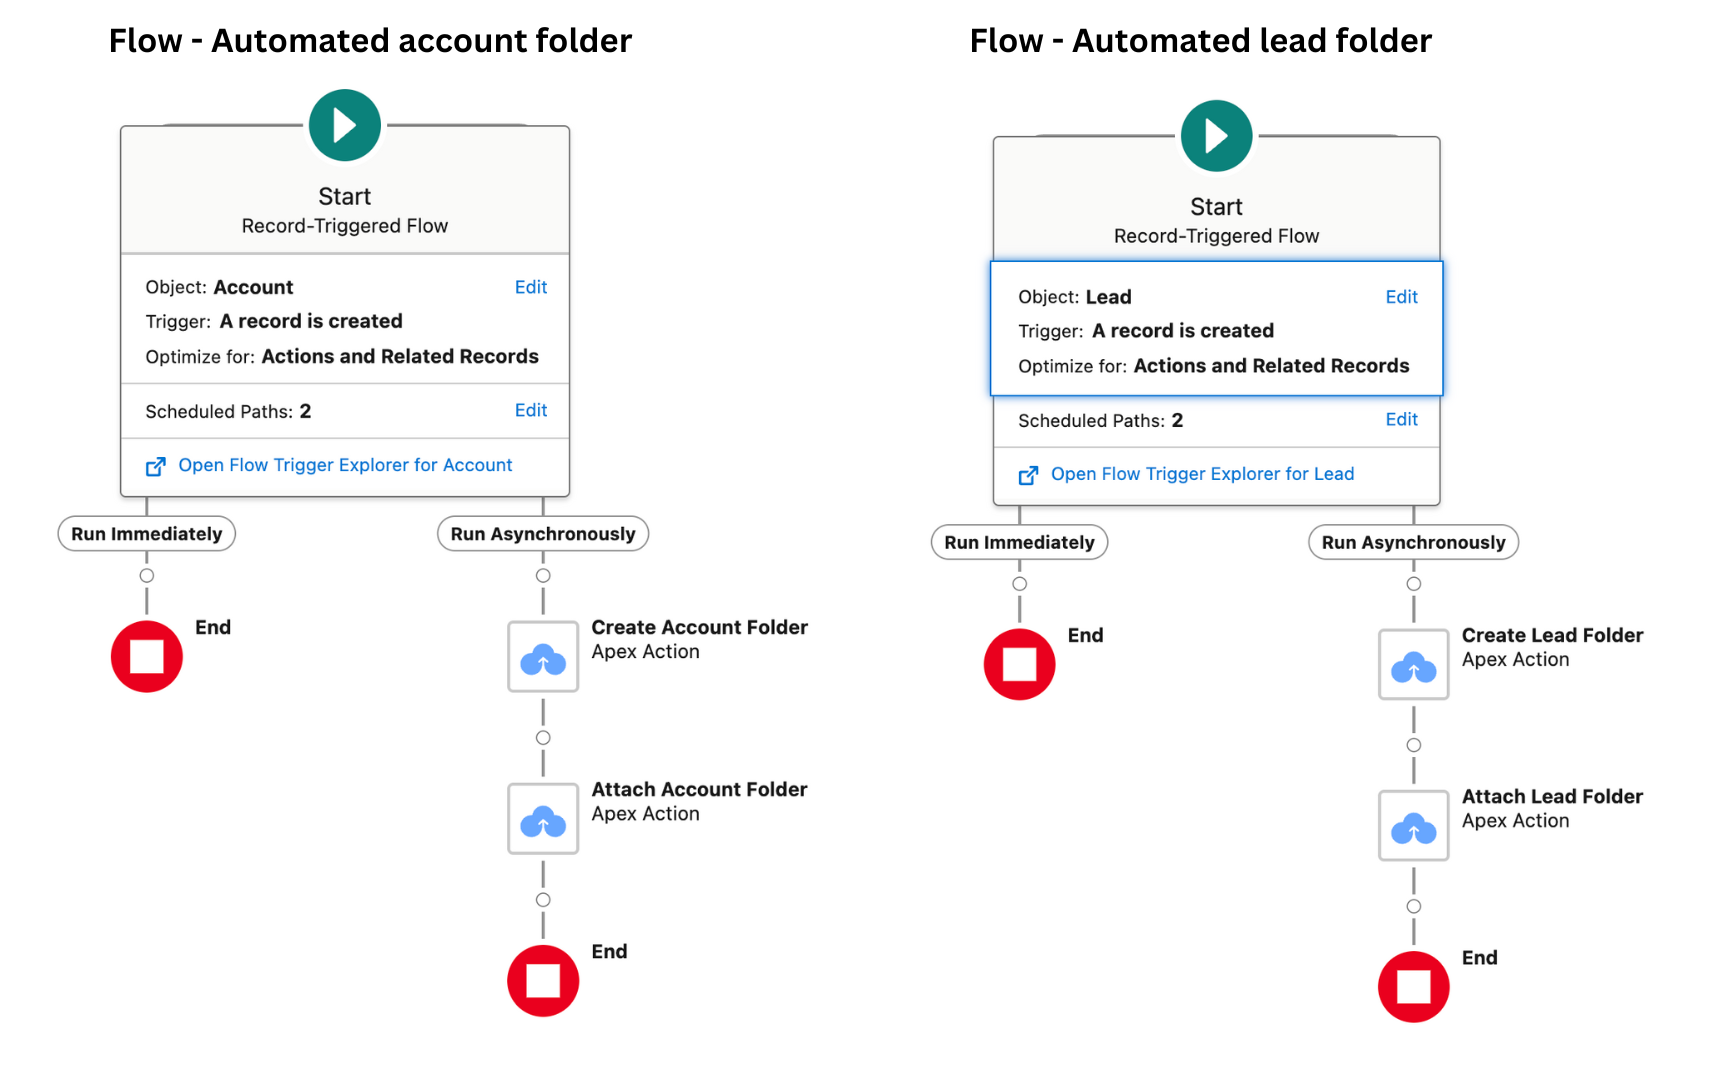
Automatic folder creation for Accounts and Leads
For this tutorial, We require automated folders to be created upon the creation of both new Account and new Lead. To accomplish this, we will create two distinct record-triggered flows using CloudFiles actions. For a comprehensive guide on the process of creating automated folders, please refer to our tutorial at Create Automated Folder Hierarchies for Managing External Files from Salesforce Objects. This is how the flow would look like -
Flow - Move Lead folder into Account folder on Lead conversion
In this section, we will create a flow to automatically move the previously created Lead folder into the corresponding Account folder upon lead conversion. Firstly, we'll configure a Record Triggered Flow to initiate the automation process. Then, we'll retrieve the details of the Lead folder. To ensure that the Account folder has been created, we'll implement a pause. Subsequently, we'll gather details of the Account folder. Finally, using CloudFiles action, we'll execute the movement of the Lead folder into the associated Account folder.This is how the final flow looks like -
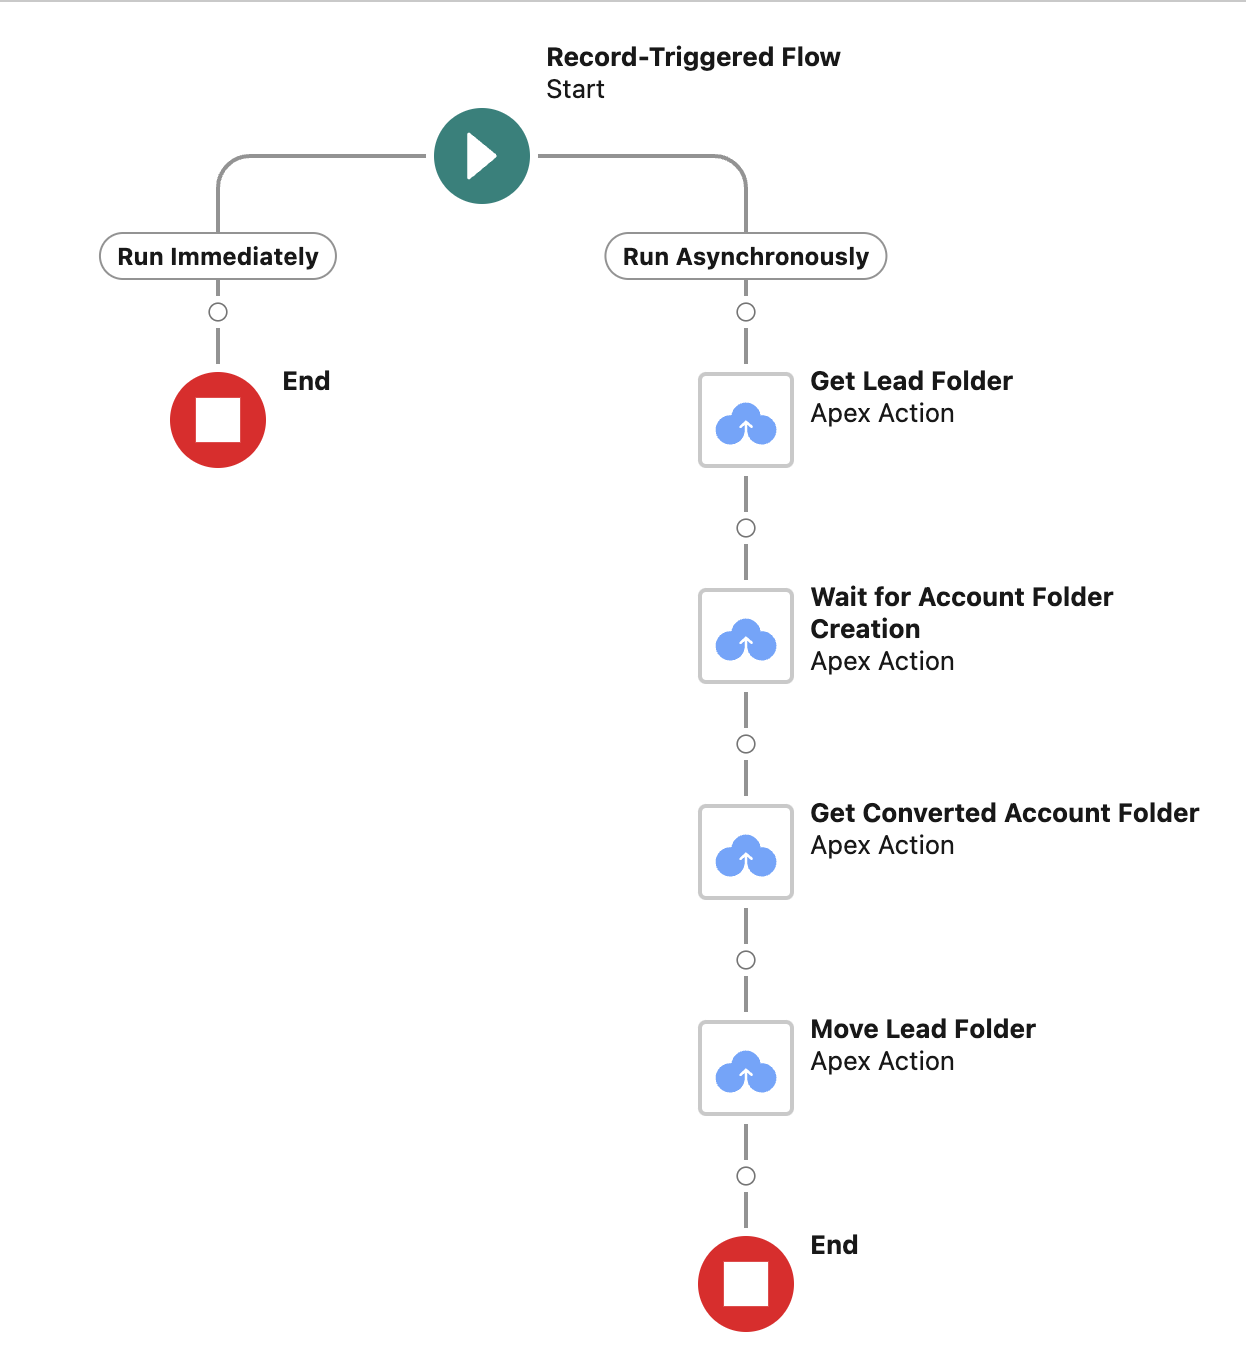
The details of the flow has been given below -
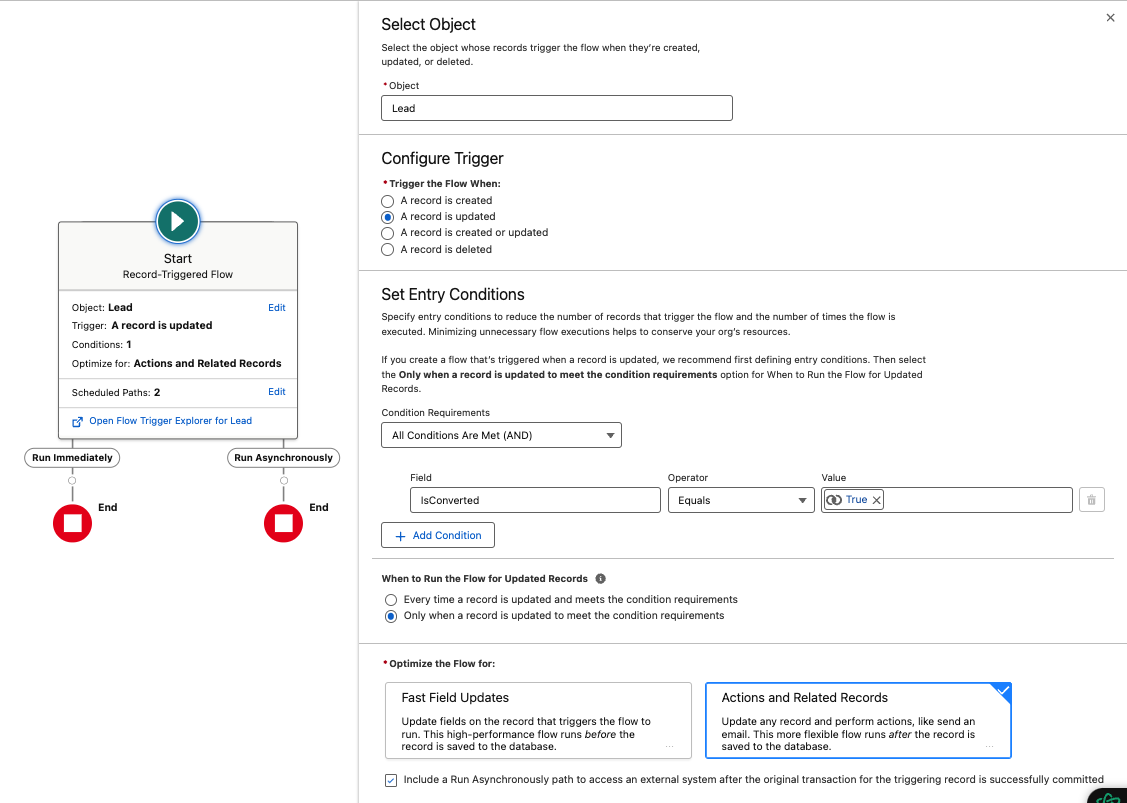
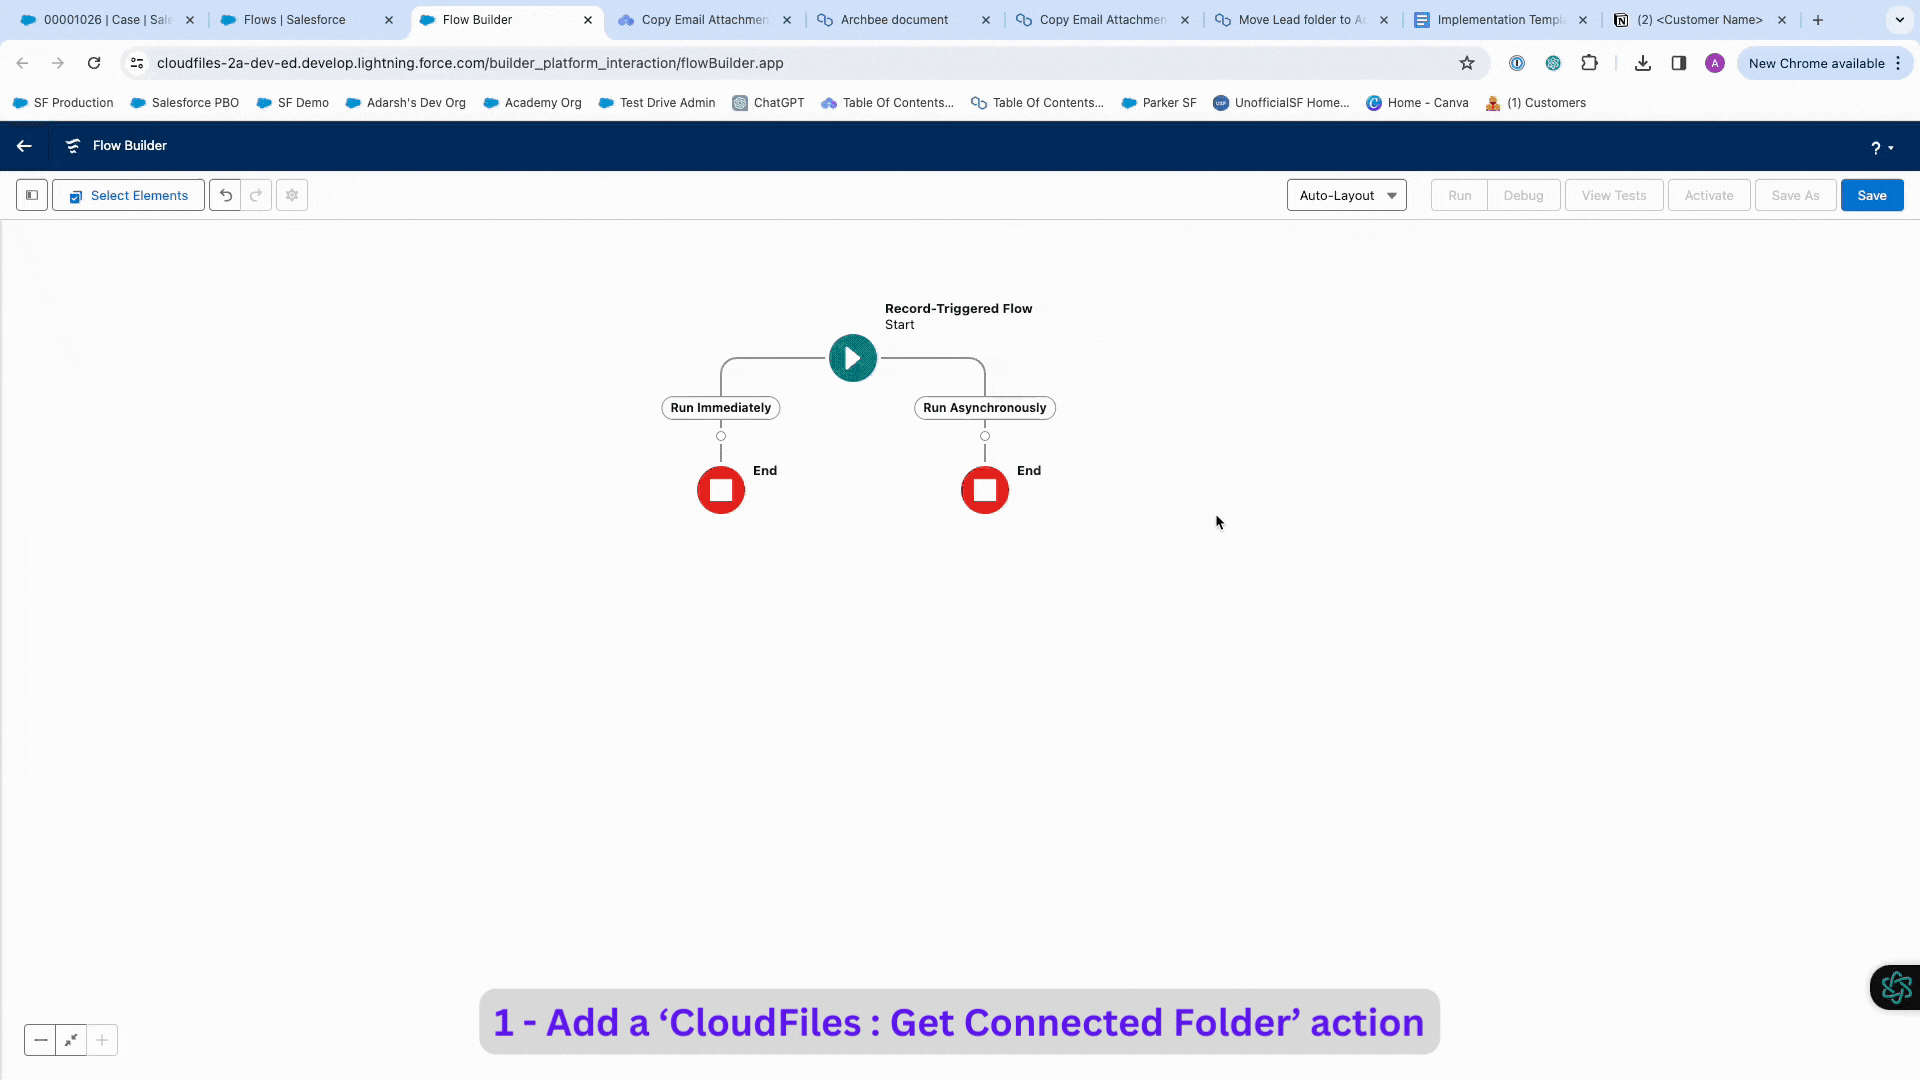
1 - Configure a Record Triggered Flow
We will start by creating a record-triggered flow on the 'Lead' Object. Follow the detailed instructions below for the input parameters -
- In the 'Configure Start' window, select Lead as the object
- Configure trigger of the flow when a A record is updated
- For setting the Entry Conditions, follow the following steps
- Condition Requirements -> select All Conditions Are Met (AND)
- Define the condition as Field-> IsConverted, Operator-> Equals, Value -> TRUE
- For When to Run the Flow for Updated Records, select Only when a record is updated to meet the condition requirements.We have selected this option since we want the Flow to run only when the triggered record is changed from not meeting the entry conditions to meeting the entry conditions. Above conditions ensure that the lead folder moves to account folder only once when the conditions for the lead's conversion are met for the first time.
- For Optimize the Flow For, select Actions and Related Records
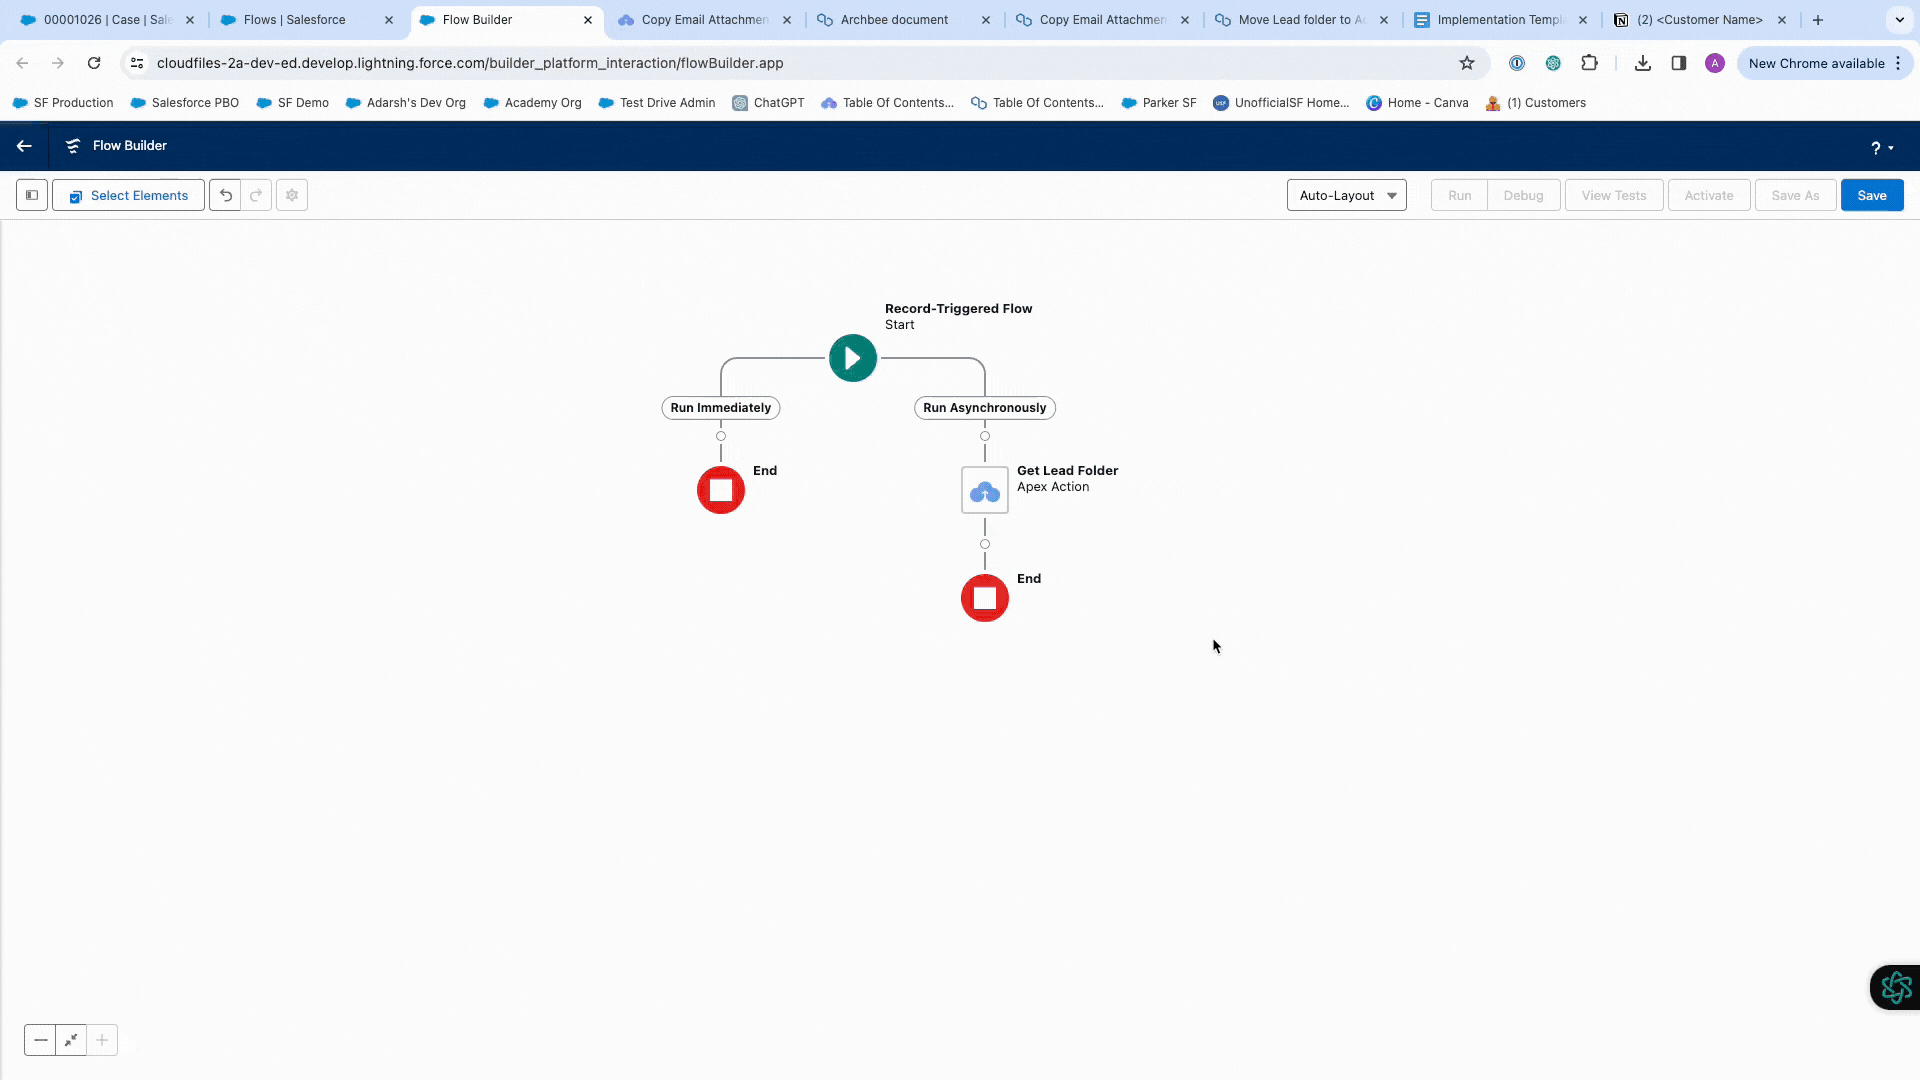
- Check the Include a Run Asynchronously path checkbox.
The GIF below provides a visual understanding of this step -
NOTE - In Record-triggered flows, make sure you run CloudFiles actions only in 'Run Asynchronously' path.
2 - Get details of the Lead folder
We will use Get Connected Folder Apex action to retrieve the details of triggering record's corresponding Lead folder. Once you add the action, it will ask you to fill in a single parameter. ParentId - Input the Salesforce Record Id whose connected folder is to be fetched. Here, input the flow triggering Lead record Id as 'Record' > 'Lead ID' i.e. {!$Record.Id}Refer to the GIF below to get a visual understanding of this step.
In case the Salesforce Record, whose Id is input into the action has got a single folder attached to it, then Get Connected Folder will give the attached folder details as output. Here, by inputting the Record Id of the Lead that triggered the flow, the action yields the details of he folder attached to the Lead record. We will use this details in the next step to move the lead folder to account folder.
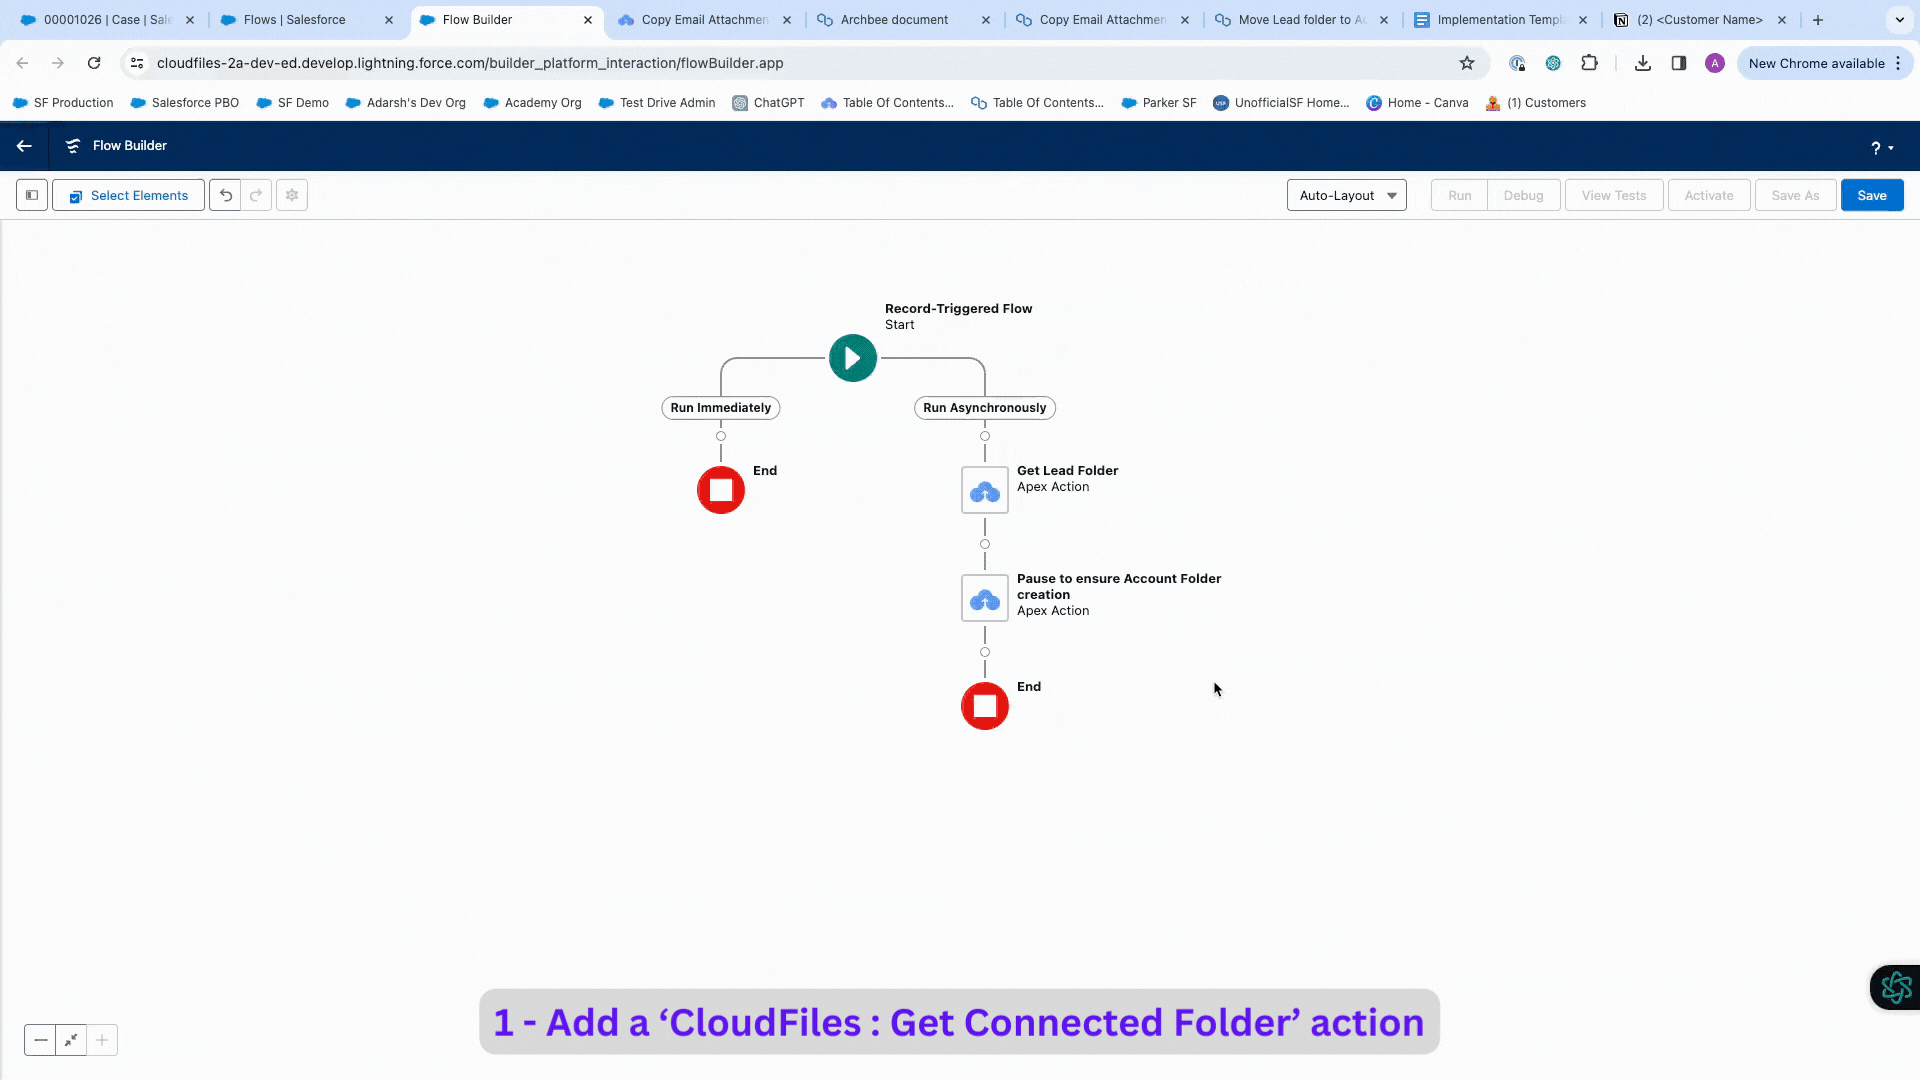
3 - Pause to ensure Account Folder creation
To ensure seamless execution and prevent flow errors, a delay element is introduced into the flow. This delay accommodates potential delays in the execution of the pre-requisite flow responsible for creating and attaching the Account folder, which occurs concurrently with the conversion of the Lead record. By incorporating this delay, we mitigate the risk of fetching incomplete or erroneous Account folder details before the completion of step -1. Add a 'CloudFiles: Delay' Apex action into the flow, positioned after the 'Get Lead Folder' element and before retrieving details of the corresponding Account folder in the subsequent action. The 'CloudFiles: Delay' Apex action functions as a 'pause for a given time' element before the flow proceeds to execute the next action or element. Once you add the 'CloudFiles: Delay' Apex action, it will ask you to fill in a single parameter -Delay(milli seconds) - The amount of time the pause acts for in milliseconds.Refer to the GIF below to get a visual understanding of this step.
NOTE - Avoid setting a long pause duration as it may result in flow timeouts and errors. For this specific flow, a delay of 10,000-15,000 milliseconds should suffice.
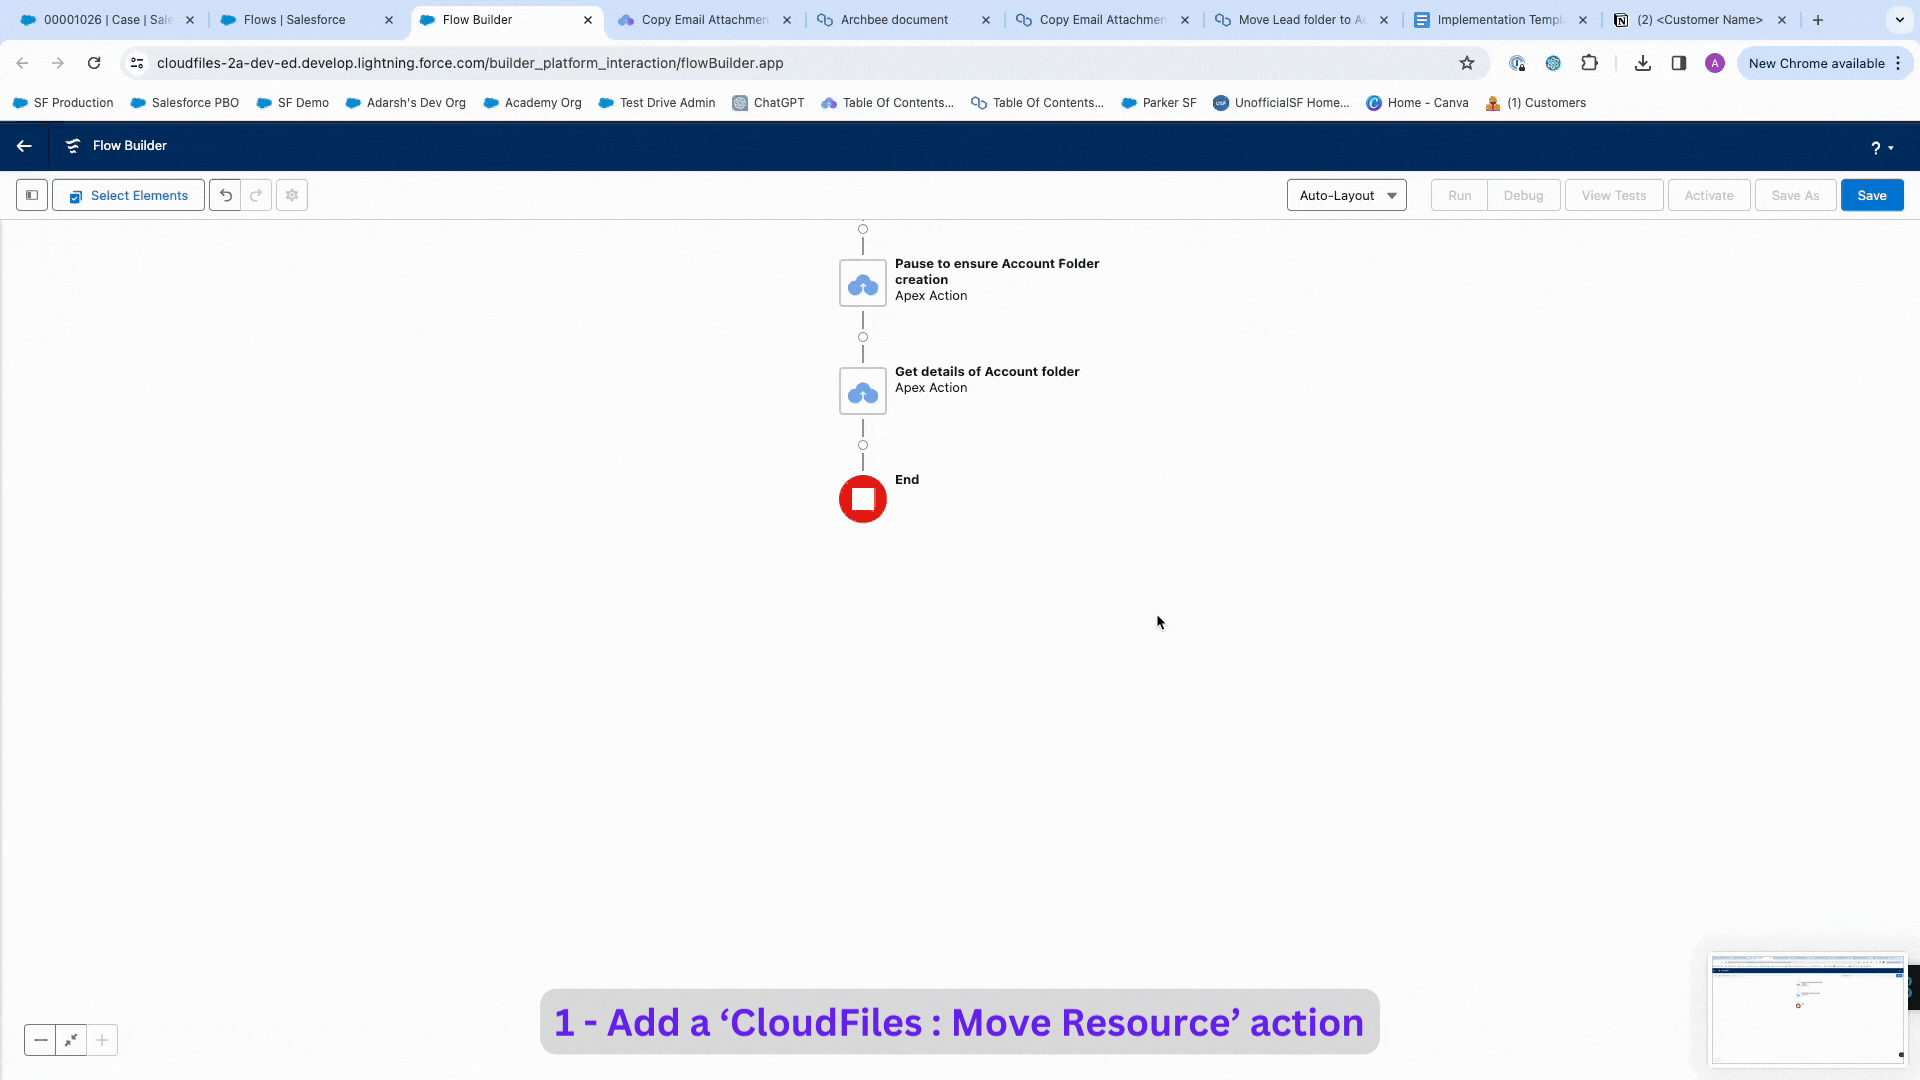
4 - Get details of Account folder
We will again use Get Connected Folder Apex action, this time to fetch the details of triggering record's corresponding Account folder. Once you add the action, it will ask you to fill in a single parameter. ParentId - Input the Salesforce Record Id whose connected folder is to be fetched. Here, input the flow triggering Lead record's converted Account Id as 'Record' > 'Converted Account ID' i.e. {!$Record.ConvertedAccountId}Refer to the GIF below to get a visual understanding of this step.
Here, as we input the converted Account Record Id of the Lead that triggered the flow, the action outputs the details of the folder attached to the Account record. In the next steps, we will see how this is useful.
5 - Move Lead folder into Account folder
Move Resource action can be used in a flow to relocate a Resource (file or folder) in any Cloud storage from one location to other.Once we have fetched the details of Lead folder and account folder in our previous steps, we will add a Move Resource Apex action to move the fetched Lead folder from step 2 into the fetched Account folder from step 4. Once you add the action, it will ask you to fill in these parameters:1 - LibraryThis is the desired Cloud storage where you wish to create the folder. Possible values are sharepoint, google (for Google Drive), onedrive, dropbox, box, cloudfiles (AWS S3)2 - Drive IdThis is required only for Google Drive & SharePoint libraries. Input the Drive Id in which the folders are stored. For this you can simply enter the 'Drive Id' in which the Account folders and Lead folders are stored. You can get this parameter by accessing your Cloud storage from within Salesforce , using CloudFiles app's 'Content Library' tab . OR You can even use the 'Drive Id' output by other Actions in the flow.In this tutorial, in step 2 and step 4 as we already added actions to output the Lead folder details and it's Account folder details, we can use any of these action's output to input this parameter. As 'Get Account Folder' > 'Drive Id' or 'Get Lead Folder' > 'Drive Id'
NOTE - If you are using google drive or sharepoint, the Move Resource action can only move those files/folders which exist in the same drive. Simply said, you cannot move files/folders across Drives.
3- Resource IdThis the Id of the resource which is to be moved. For this you can use the outputs of other Actions in the flow. In this tutorial, as we want to move the Lead folder (this folder is the resource to be moved), input the 'Resource Id' output by the action you have added in step 2 as 'Get Lead Folder' > 'Resource Id'.4 - Resource TypeThis is the type of the resource which is to be moved, whether it's a 'folder' or 'file'. Valid Inputs for this parameter:
- folder if the resource you want to move is a folder.
- file if the resource you want to move is a file.
6 - Save and Activate the flow
Once the Flow is activated, whenever a Lead is converted into a new Account or existing account , this flow should automatically move the triggering Lead record's Lead folder into it's converted Account folder.
Test the Flows in action
Now that everything is setup, lets test our flows. Follow the steps below to see this automation in action.
- Create a new Lead. This should create a Lead folder visible in the 'CloudFiles' widget on Lead record page.
- Click 'Convert' on the Lead record.
- In the 'Convert Lead' form, For Account, choose 'Create New' or 'Choose Existing' (If you are choosing this make sure you have a folder connected to Account record).
- Once converted, check the Account folder visible in the 'CloudFiles' widget on Account record page.
- You will find the Lead Folder moved into the Account folder.
Flow execution and folder creation may take some time (a few seconds to a minute). If you don't see any changes, try refreshing the CloudFiles widget a couple of times.
Congratulations! You've successfully configured flows to automatically move Lead folders into their respective Account folders on conversion.