Overview
In this tutorial, we will guide you on how to process Salesforce Files for Document AI. Processing the files is a mandatory step that must be done before AI queries can be executed on a file. Processing makes the file ready for CloudFiles AI.
You will need to create 2 separate flows. The first flow will trigger when the upload is done and will send the uploaded file to AI for processing. The second flow will trigger when the document has finished processing and can now be queried.
- Process New Document Flow - This flow sends any new file uploads for processing. Processing is an asynchronous operation and may take some time to complete.
- Document Processing Complete Flow - This flow executes when the document has been processed. This is the flow in which you will actually add the query & response logic.
Read the sections below carefully to setup these 2 flows.
Pre-requisites
Ensure the following before starting:
- CloudFiles Document AI Installation and Configuration are complete.
- You have an Active Subscription or Trial of CloudFiles Document AI.
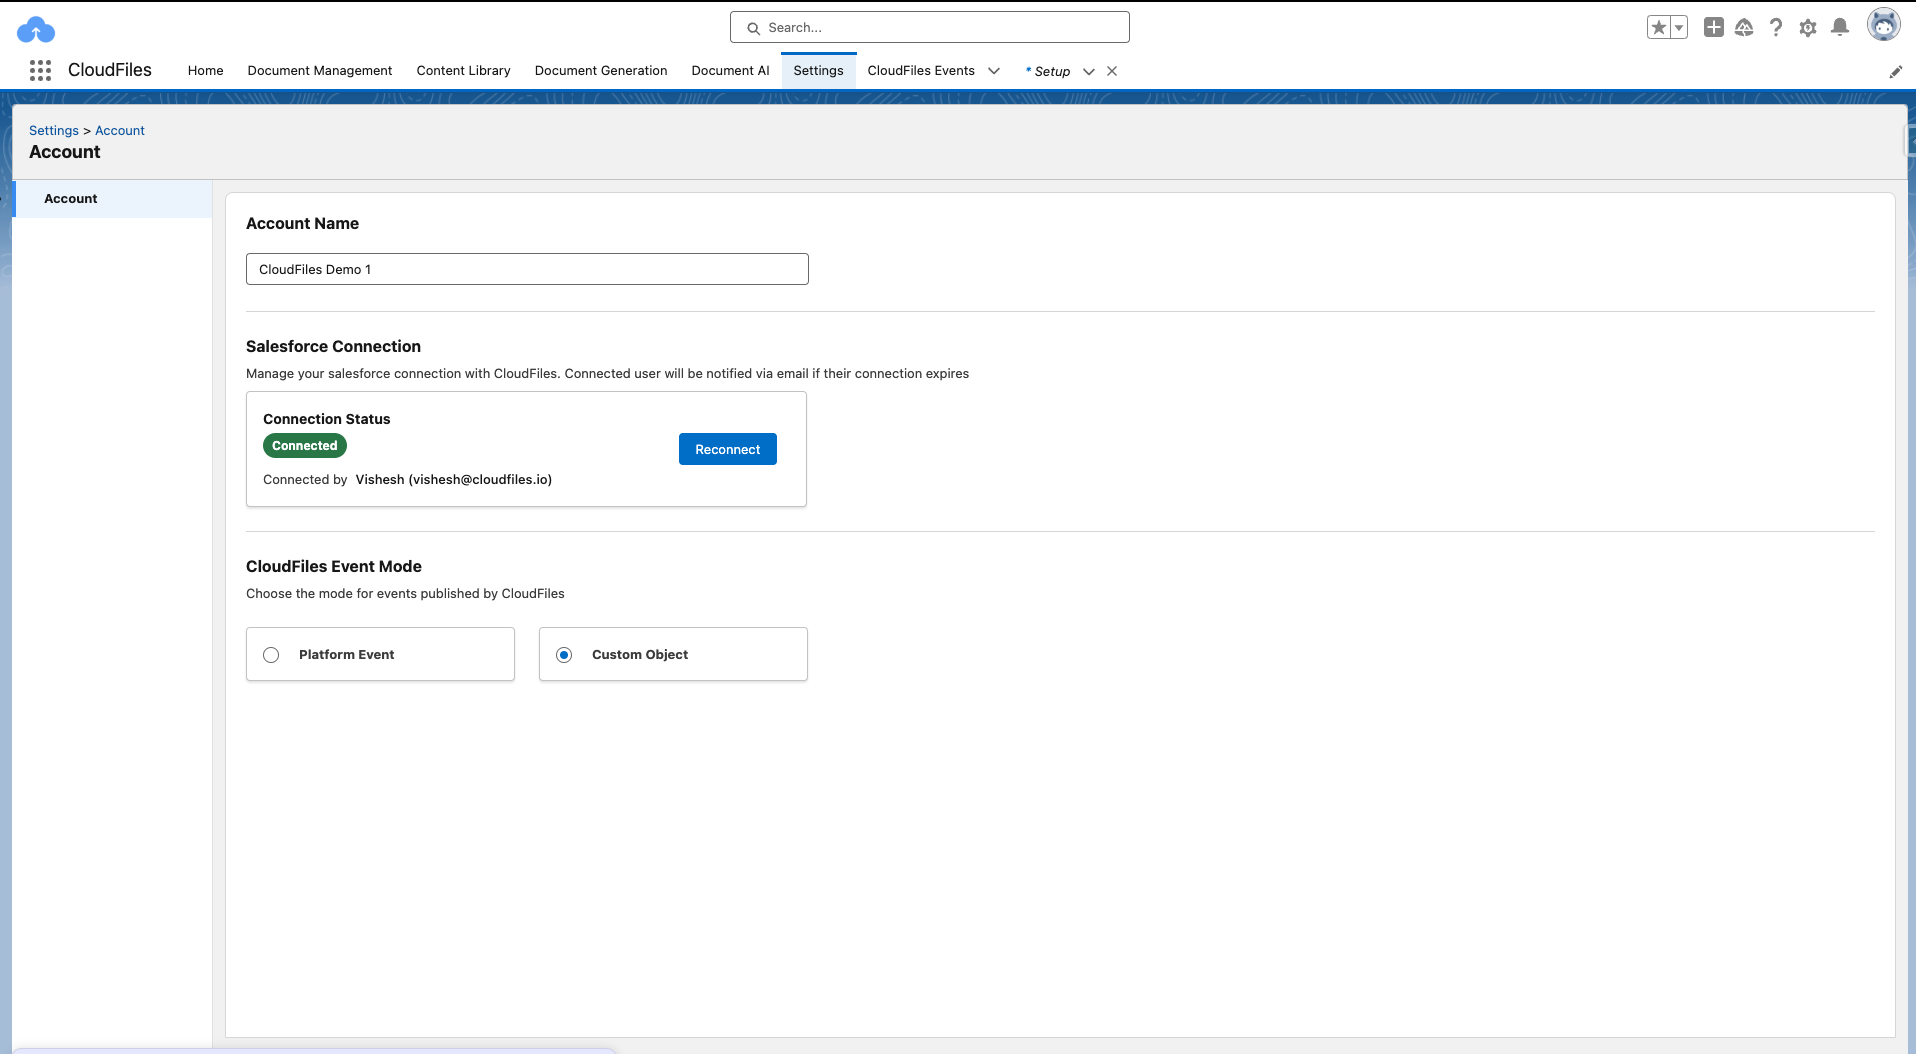
- The CloudFiles Event Mode setting is set to Custom Object
Process New Document Flow
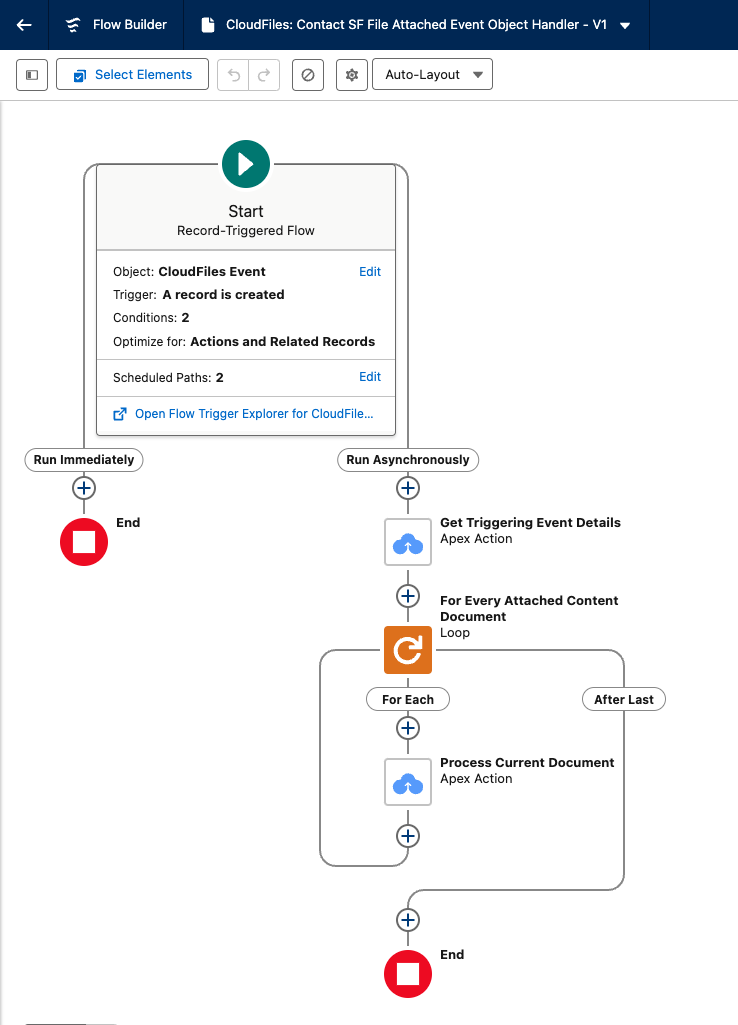
This flow is triggered whenever a new Salesforce File is uploaded or attached (identified by the Salesforce File Attached event) onto the records. It processes each attached file using Process Document using AI in the context of the triggering record. Successful file processing publishes a Document Processed event, triggering the Document Processing Complete Flow that is covered in the next section.
Check the sub-sections below for details on each of these steps.
Create Record Triggered Flow
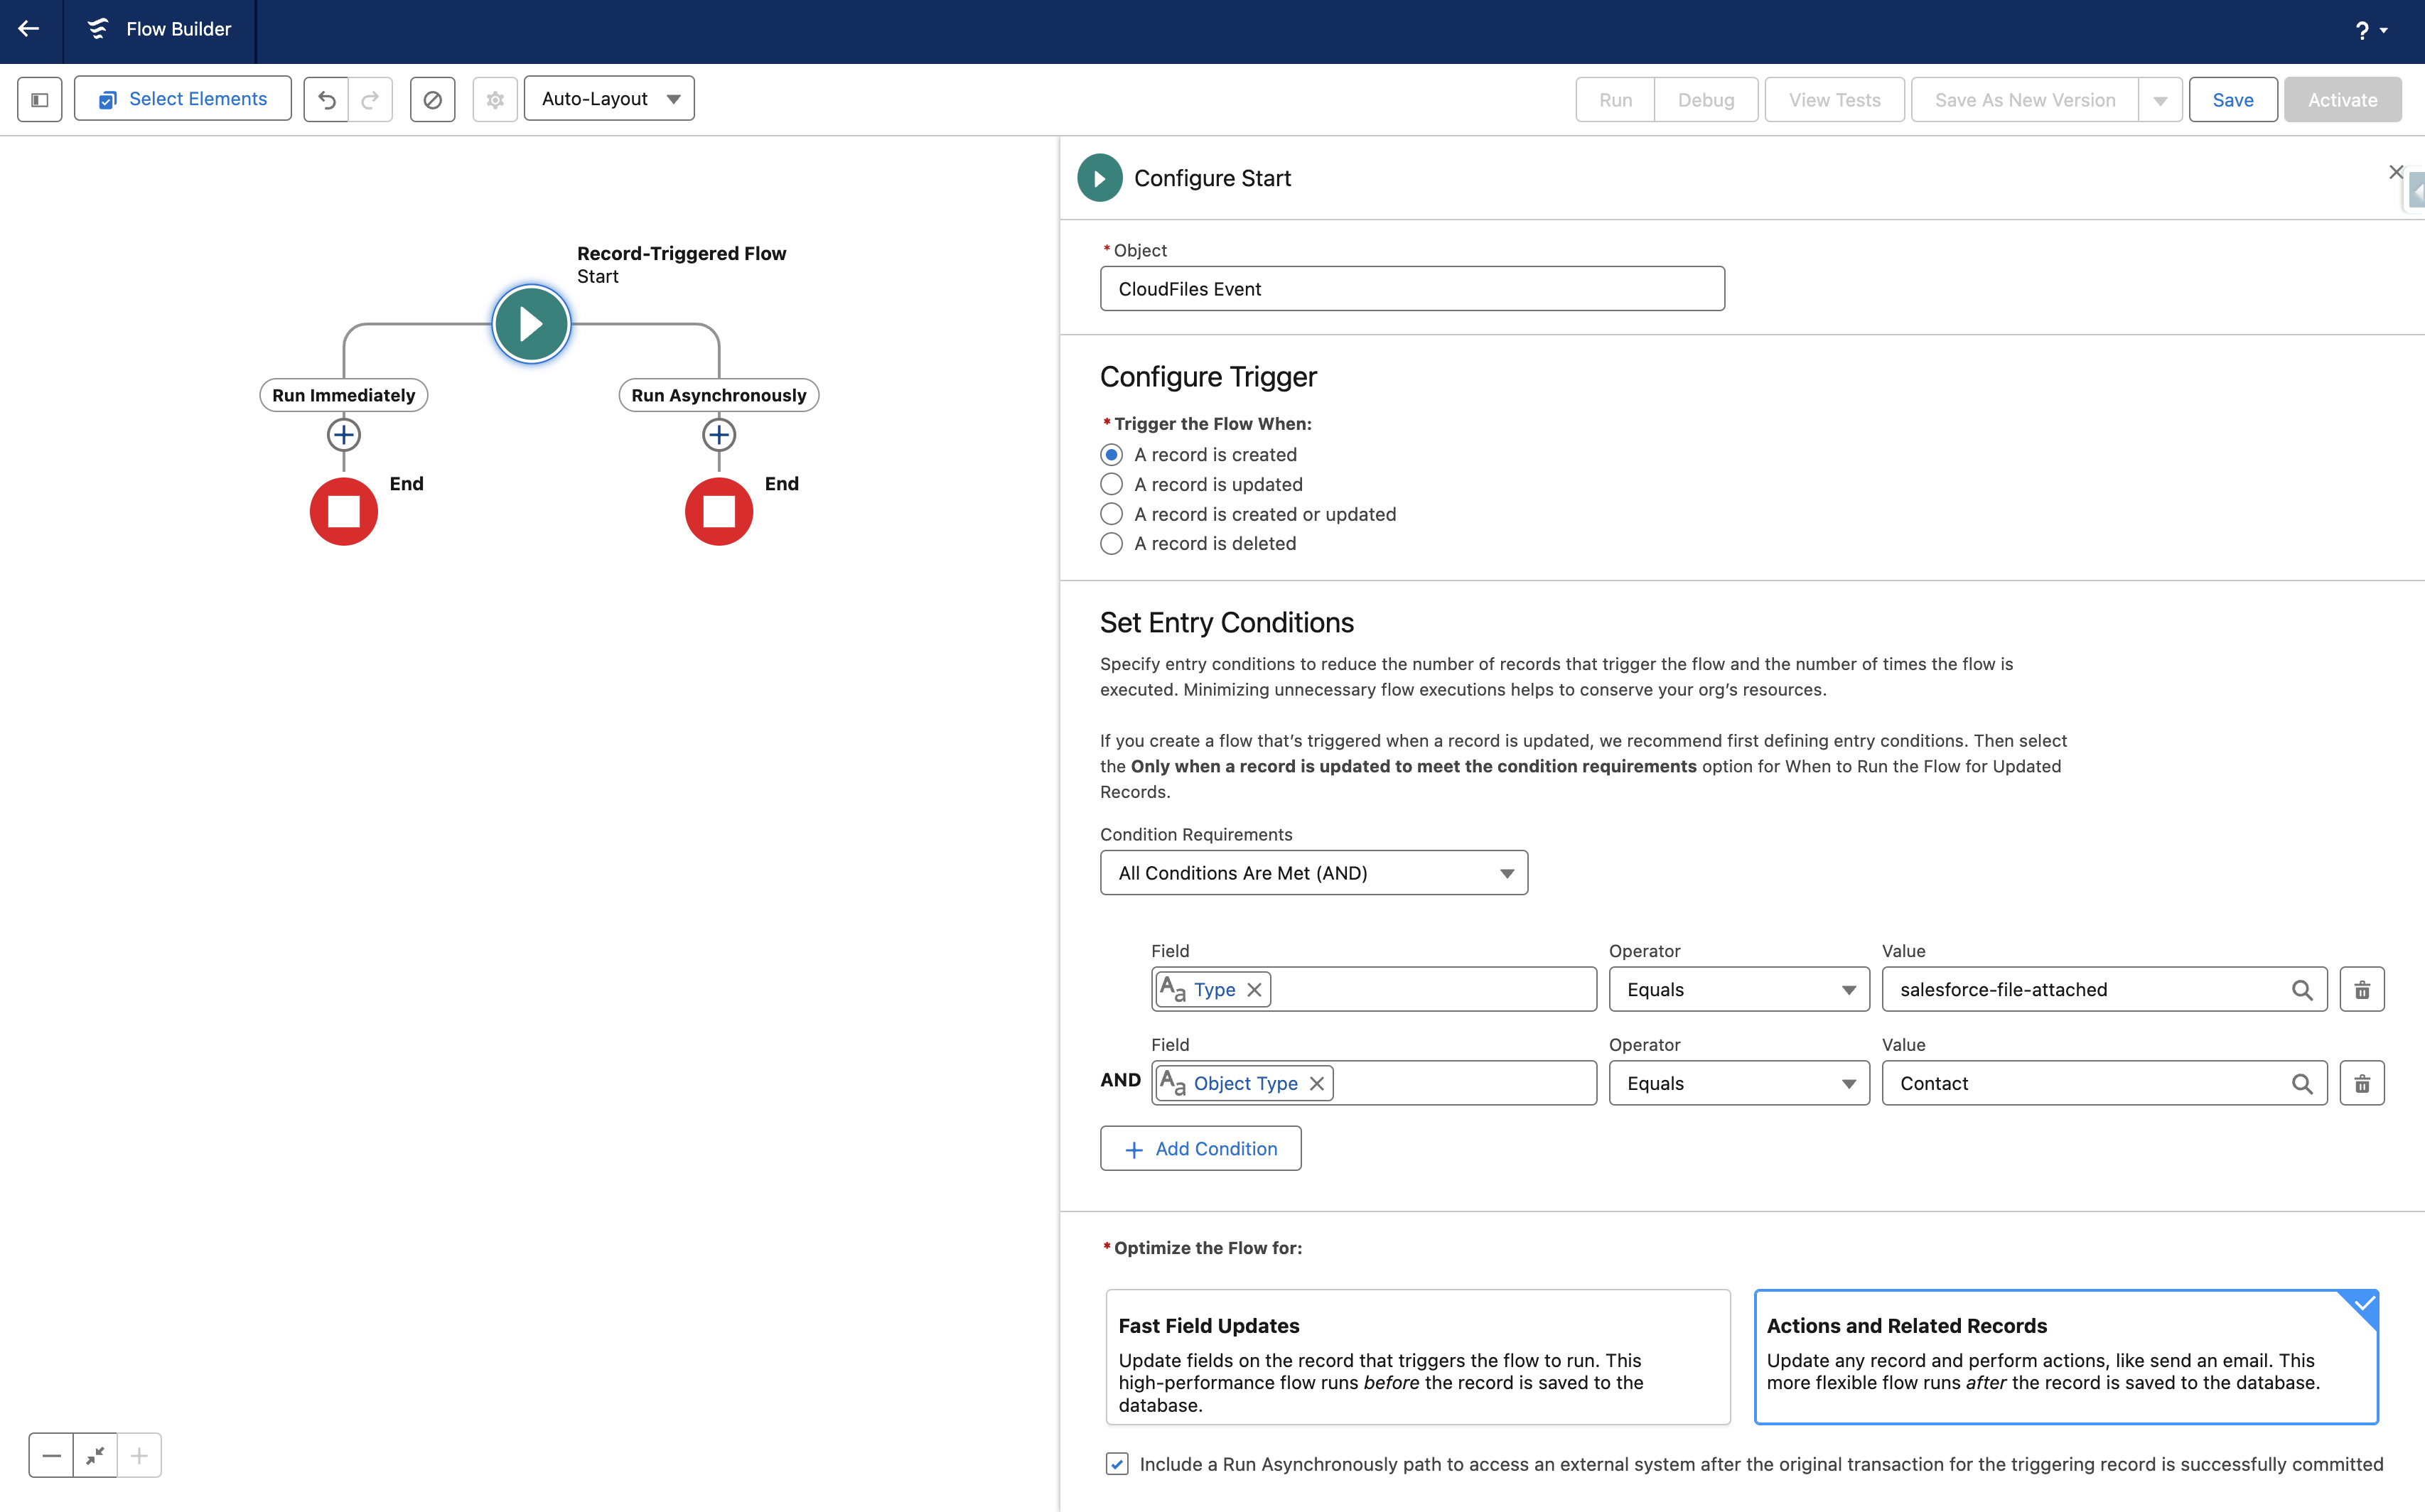
Create a new record-triggered flow with the triggering object type set as cldfs__CloudFilesEvent__c. Additionally set some filter conditions. This ensures that the flow is only triggered for the correct type of events. E.g. using the below conditions, we will only trigger the flow when a new file is uploaded on contact records -
- Type ( cldfs__Type__c ) = salesforce-file-attached
Include a Run Asynchronously path to access an external system after the original transaction for the triggering record is successfully committed.
Here's how the trigger conditions would look like.
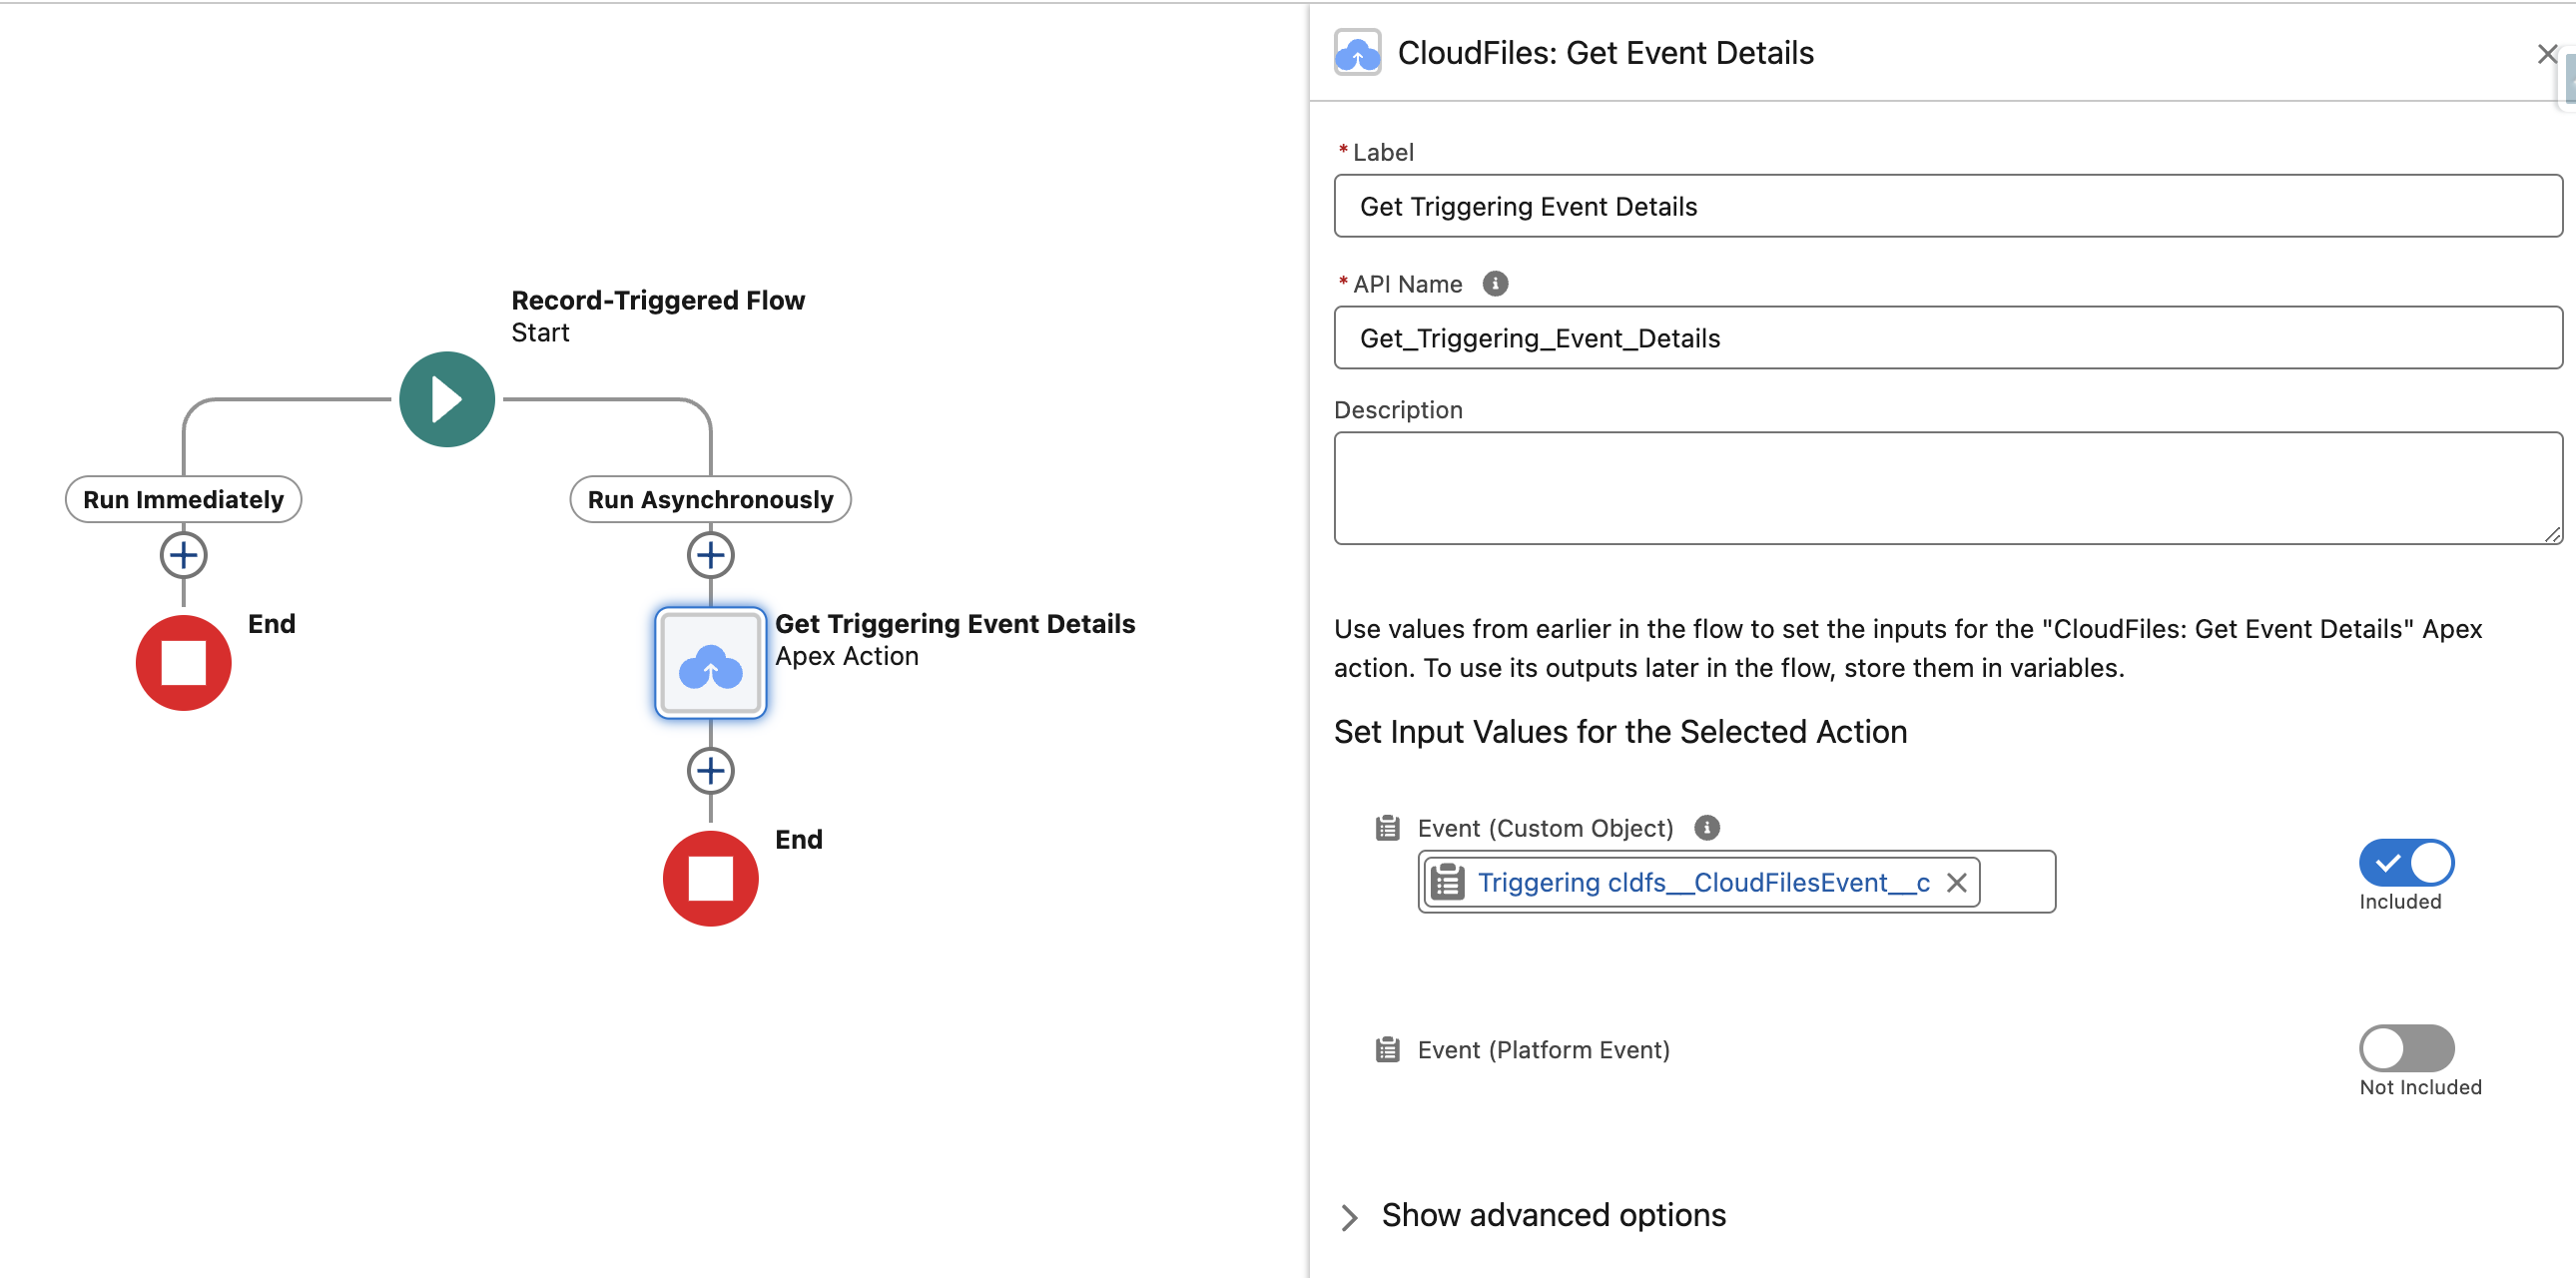
Get Event Details
Now that we have trigger setup, we will get more details related to the event. We will use the Get Event Details action for this. Within In the Run Asynchronously path, add the Get Event Details action. Under "Set Input Values", toggle Event (Custom Object) and select Triggering cldfs__CloudFilesEvent__c ( {!$Record} ).
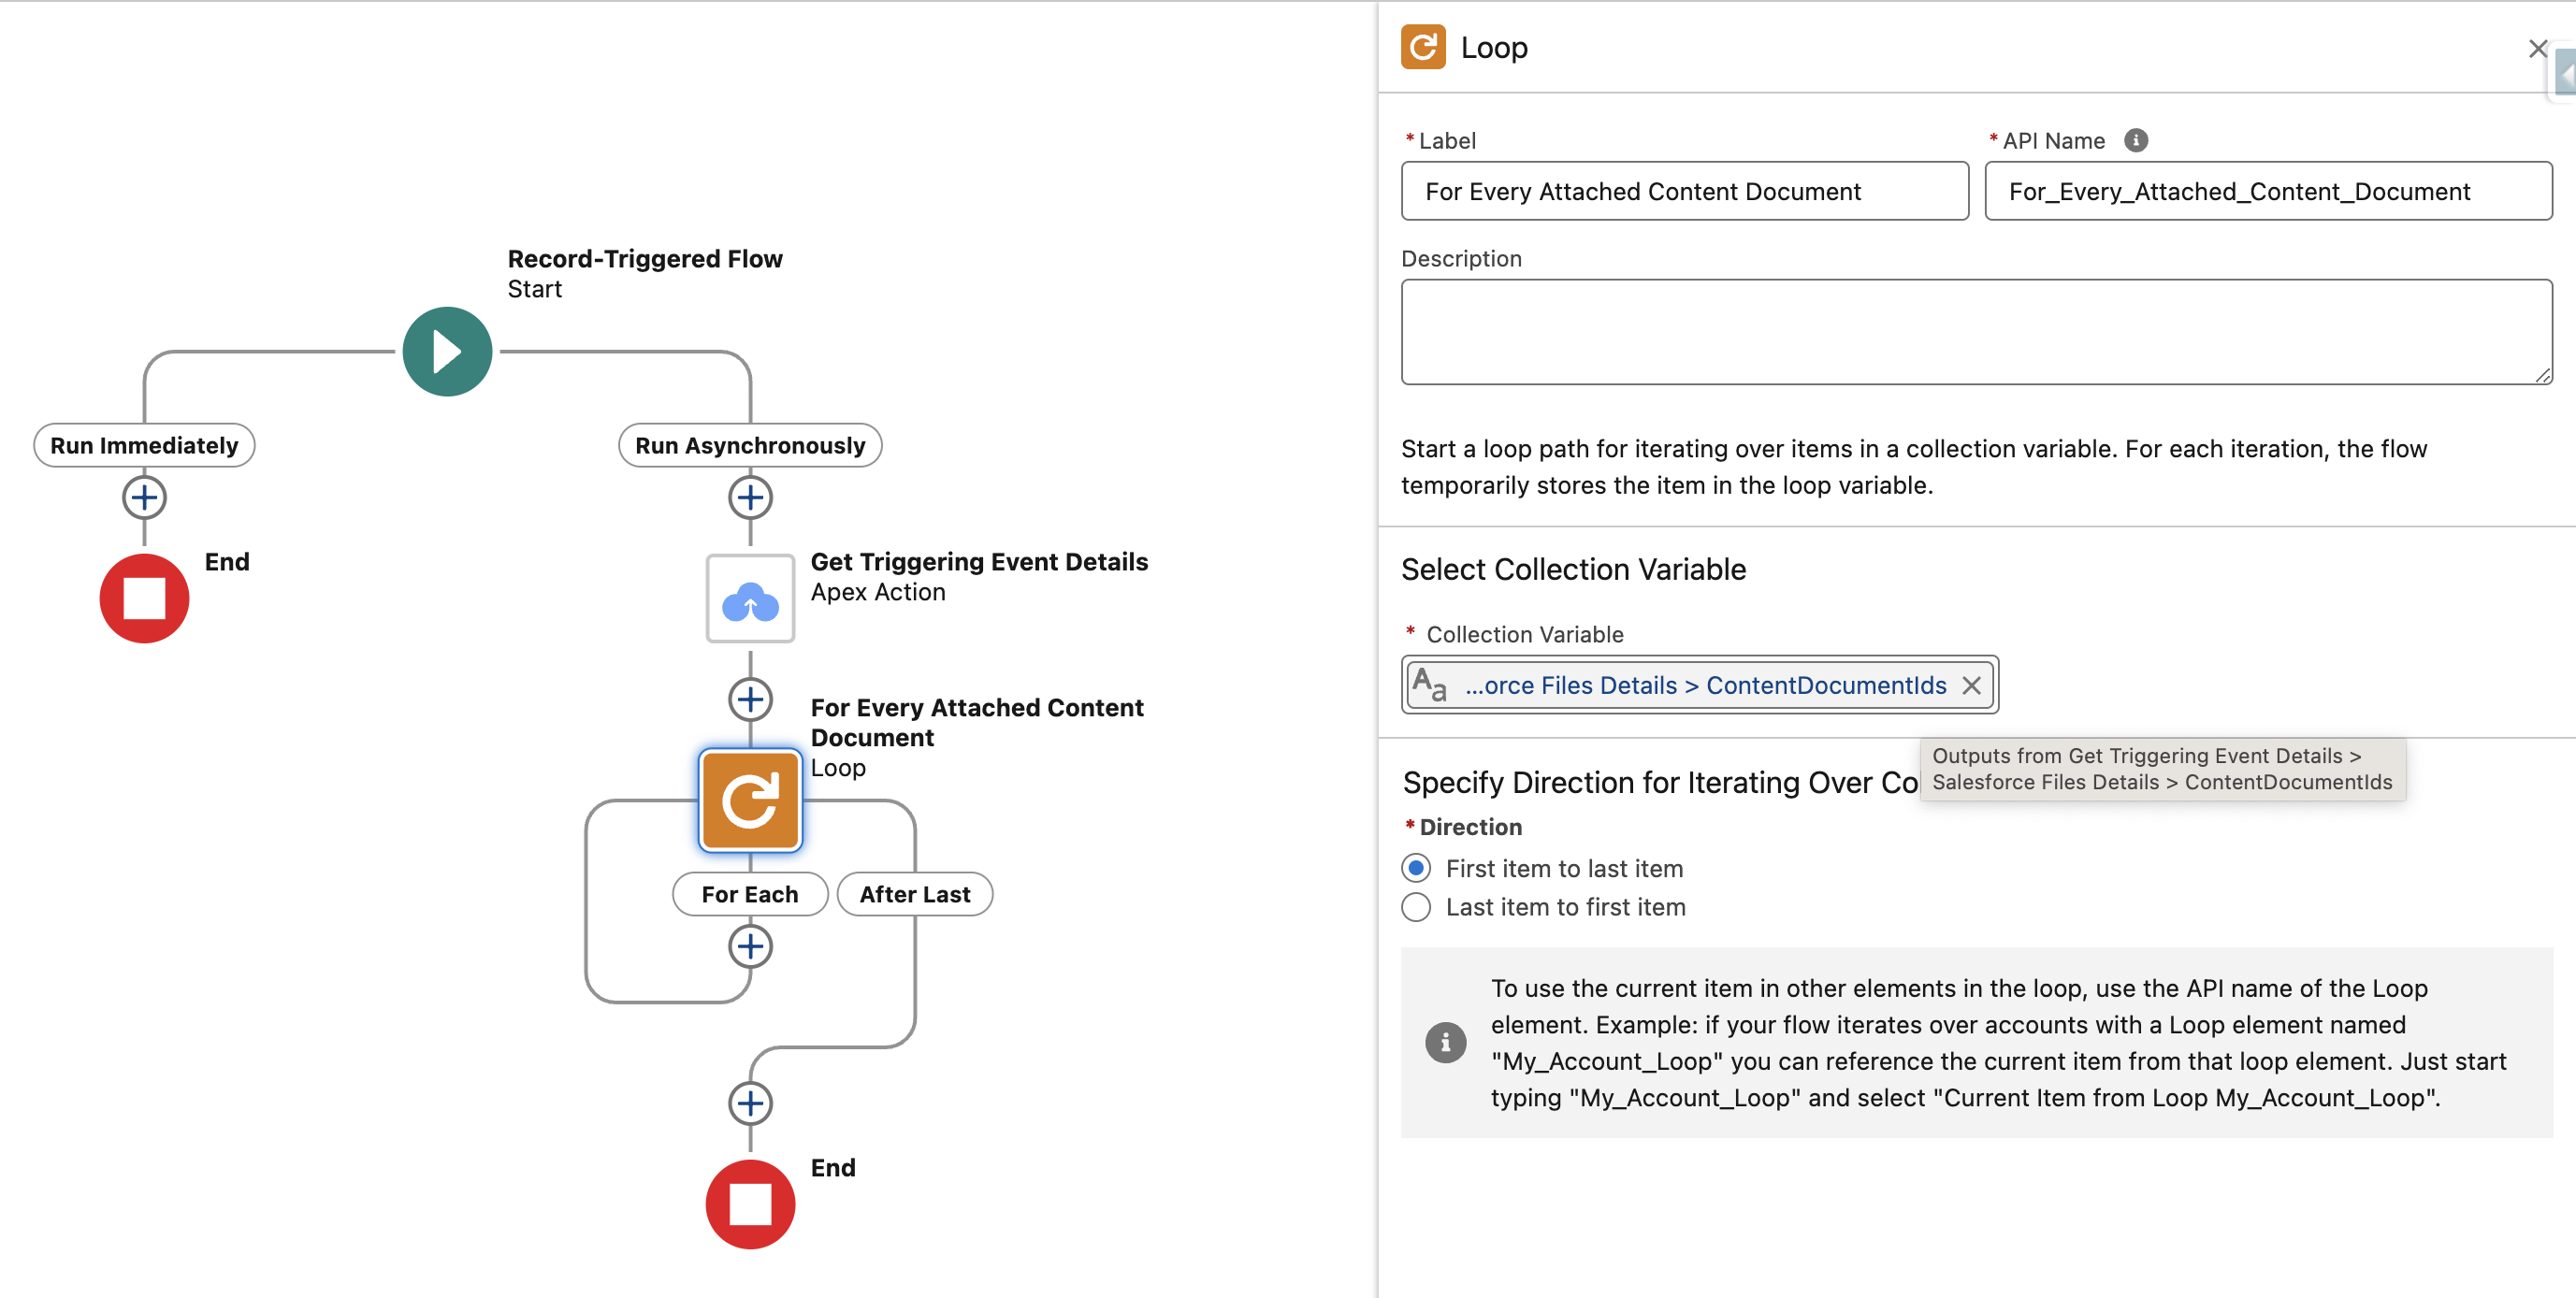
Loop through attached files
Since there might be multiple files attached, we will loop through all files and process each one seperately. For this we use a loop element and choose the collection variable from the output of Get Event Details : {!Get_Triggering_Event_Details.SalesforceFiles.ContentDocumentIds}
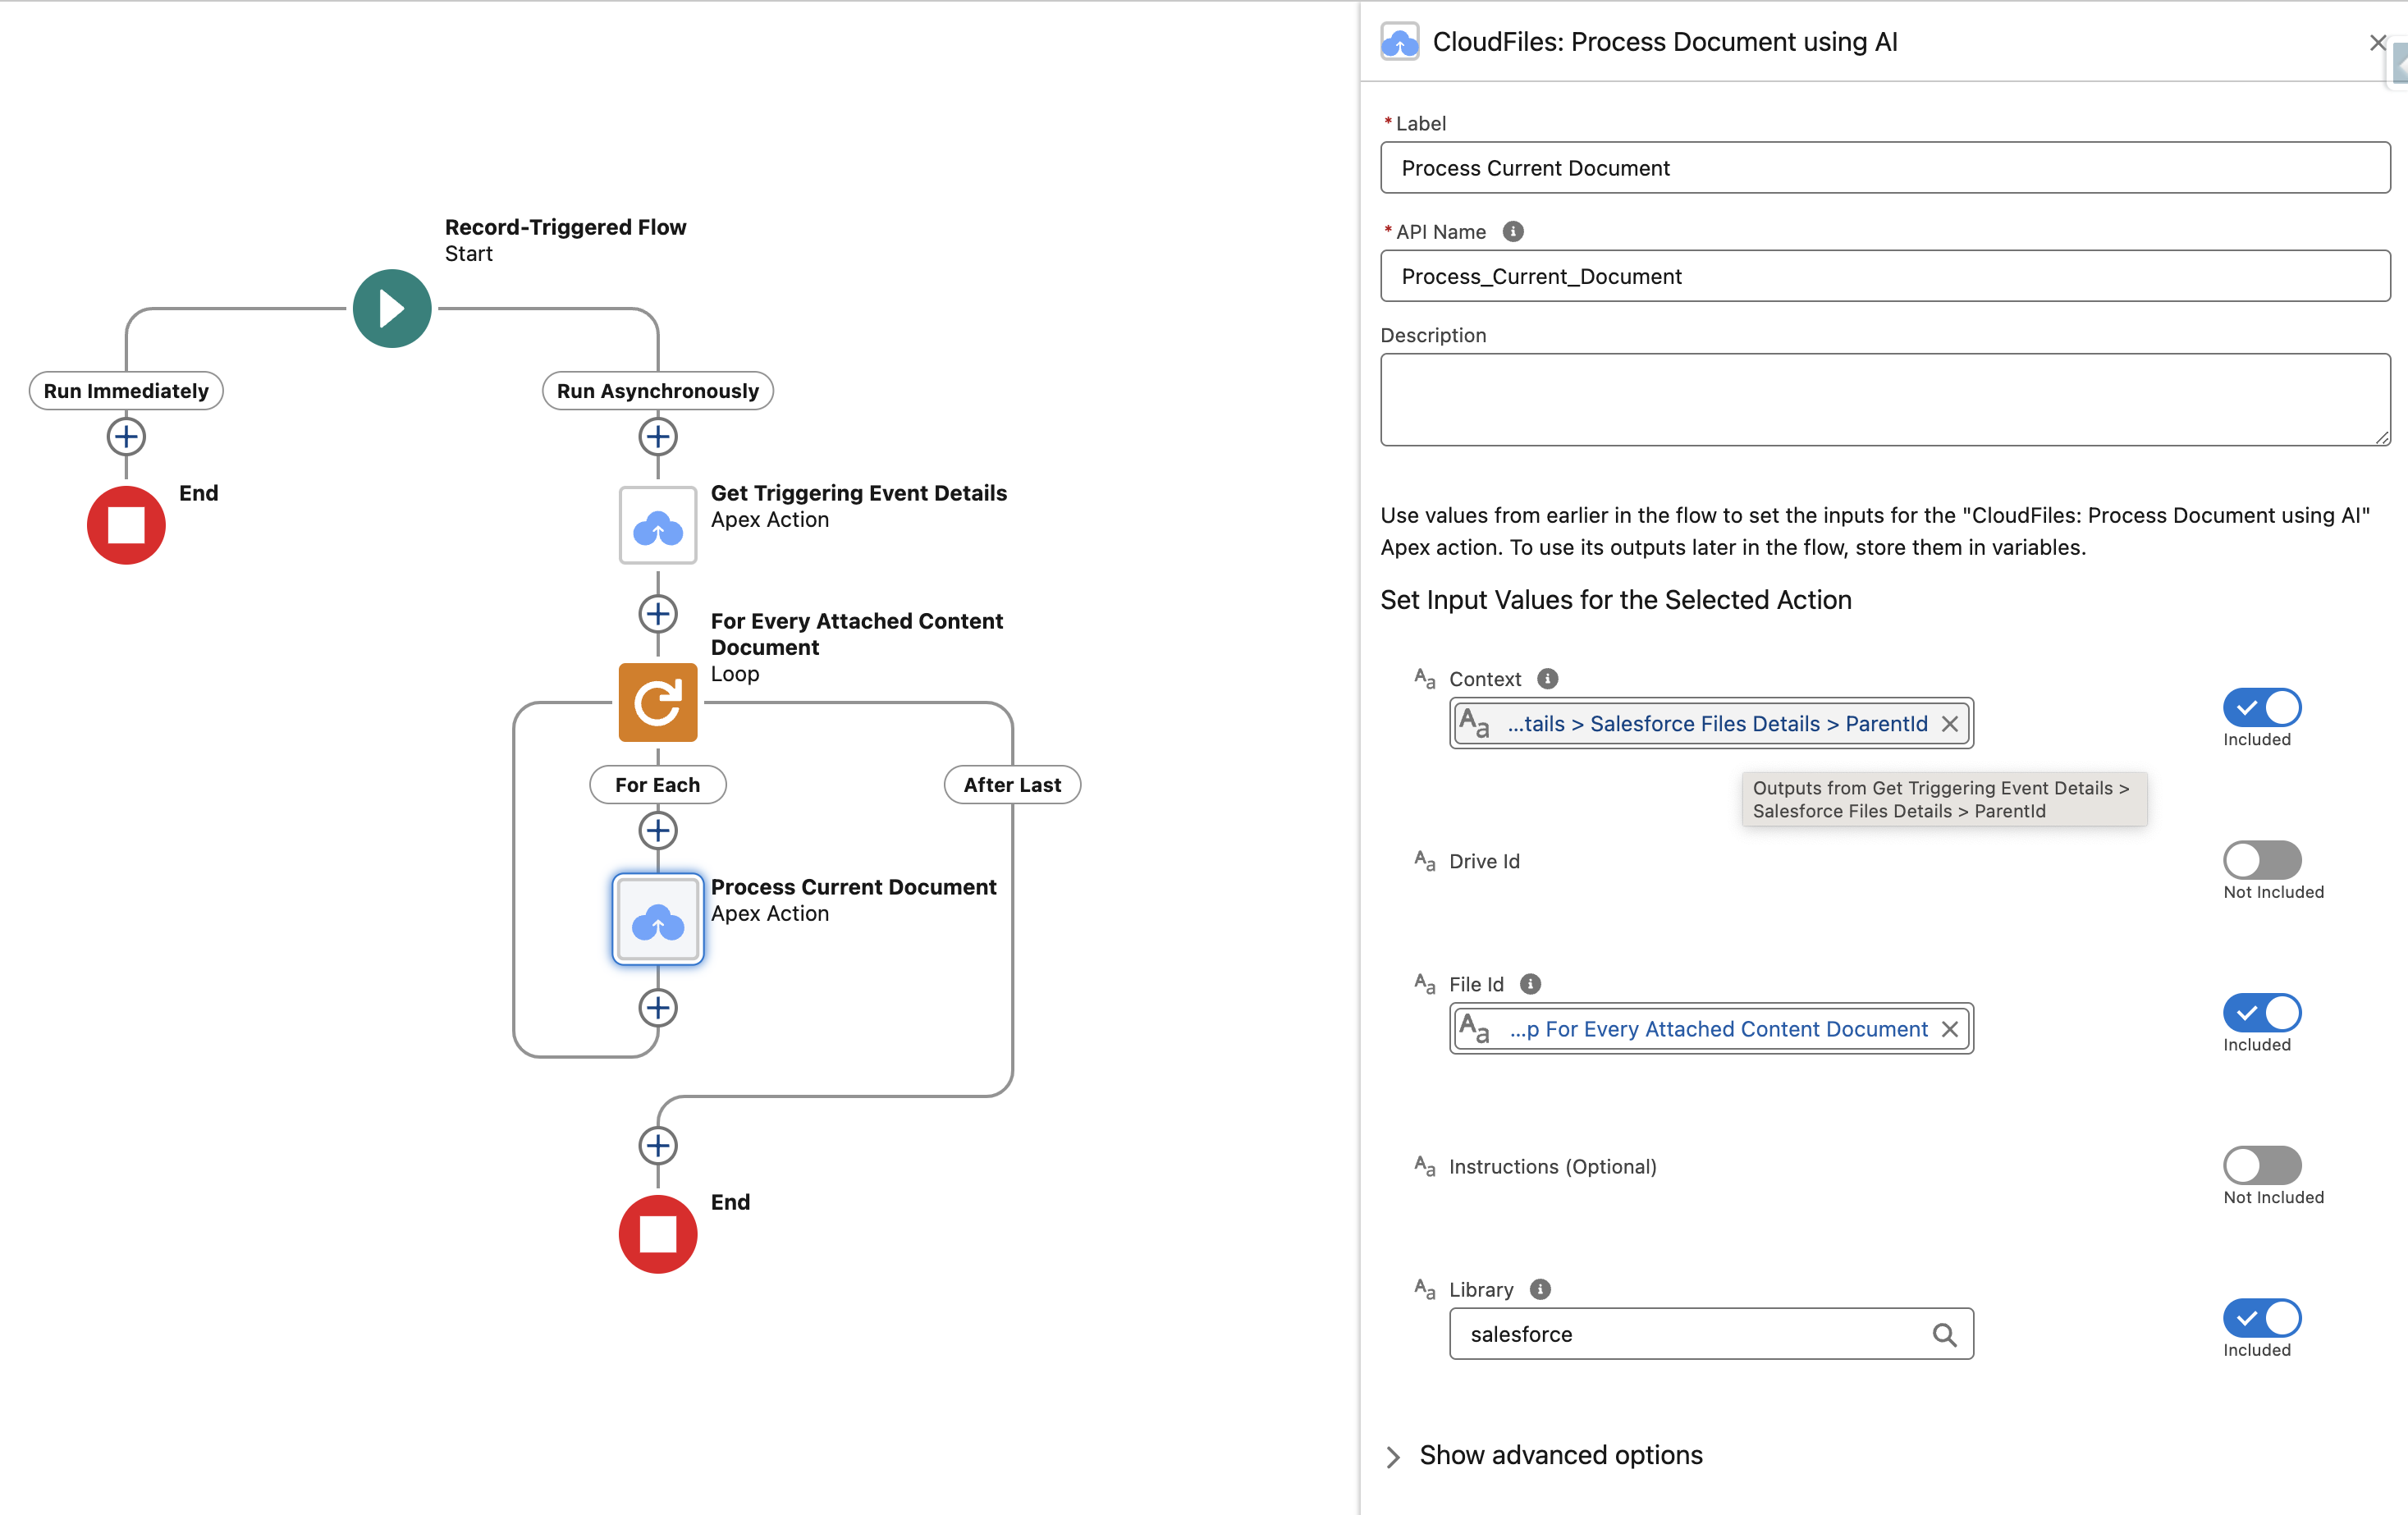
Process Each File
In order to actually process the file, we simply use the Process Document flow action as shown below. This action takes in the following parameters :
- File Id: select Current Item from Loop ( {!For_Every_Attached_Content_Document} ).
- Library: type salesforce.
- Context: select Outputs from Get Event Details > Salesforce Files Details > ParentId ( {!Get_Triggering_Event_Details.SalesforceFiles.ParentId} ).
- Optionally, set Instructions with special processing guidelines.
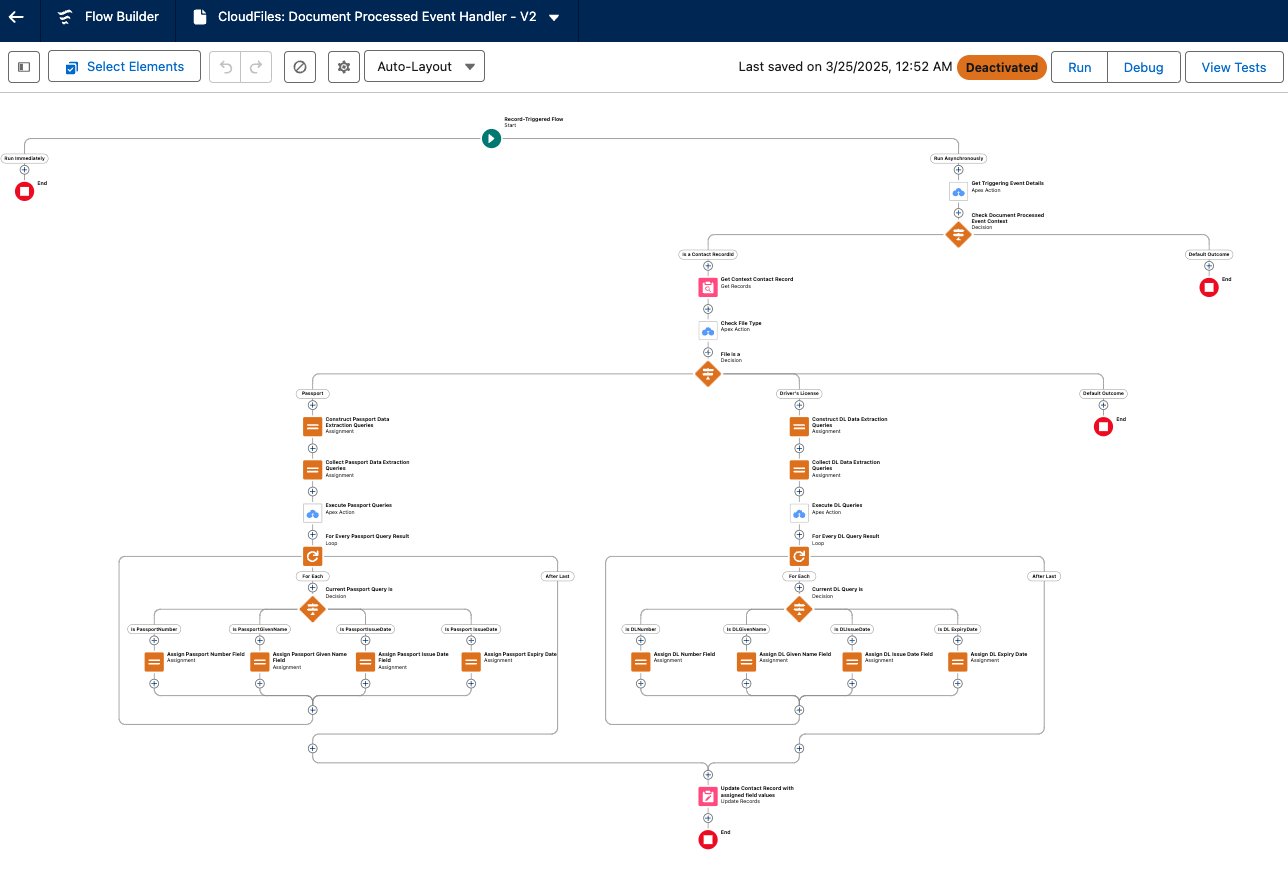
Document Processing Complete Flow
This flow is triggered when the document we sent for processing in the flow above has finished processing. We will use the Document Processed event along with a record triggered flow to intercept this. We will then get the event details that will give us the triggering record and the processed document ID that can be used later to perform AI queries on the document.
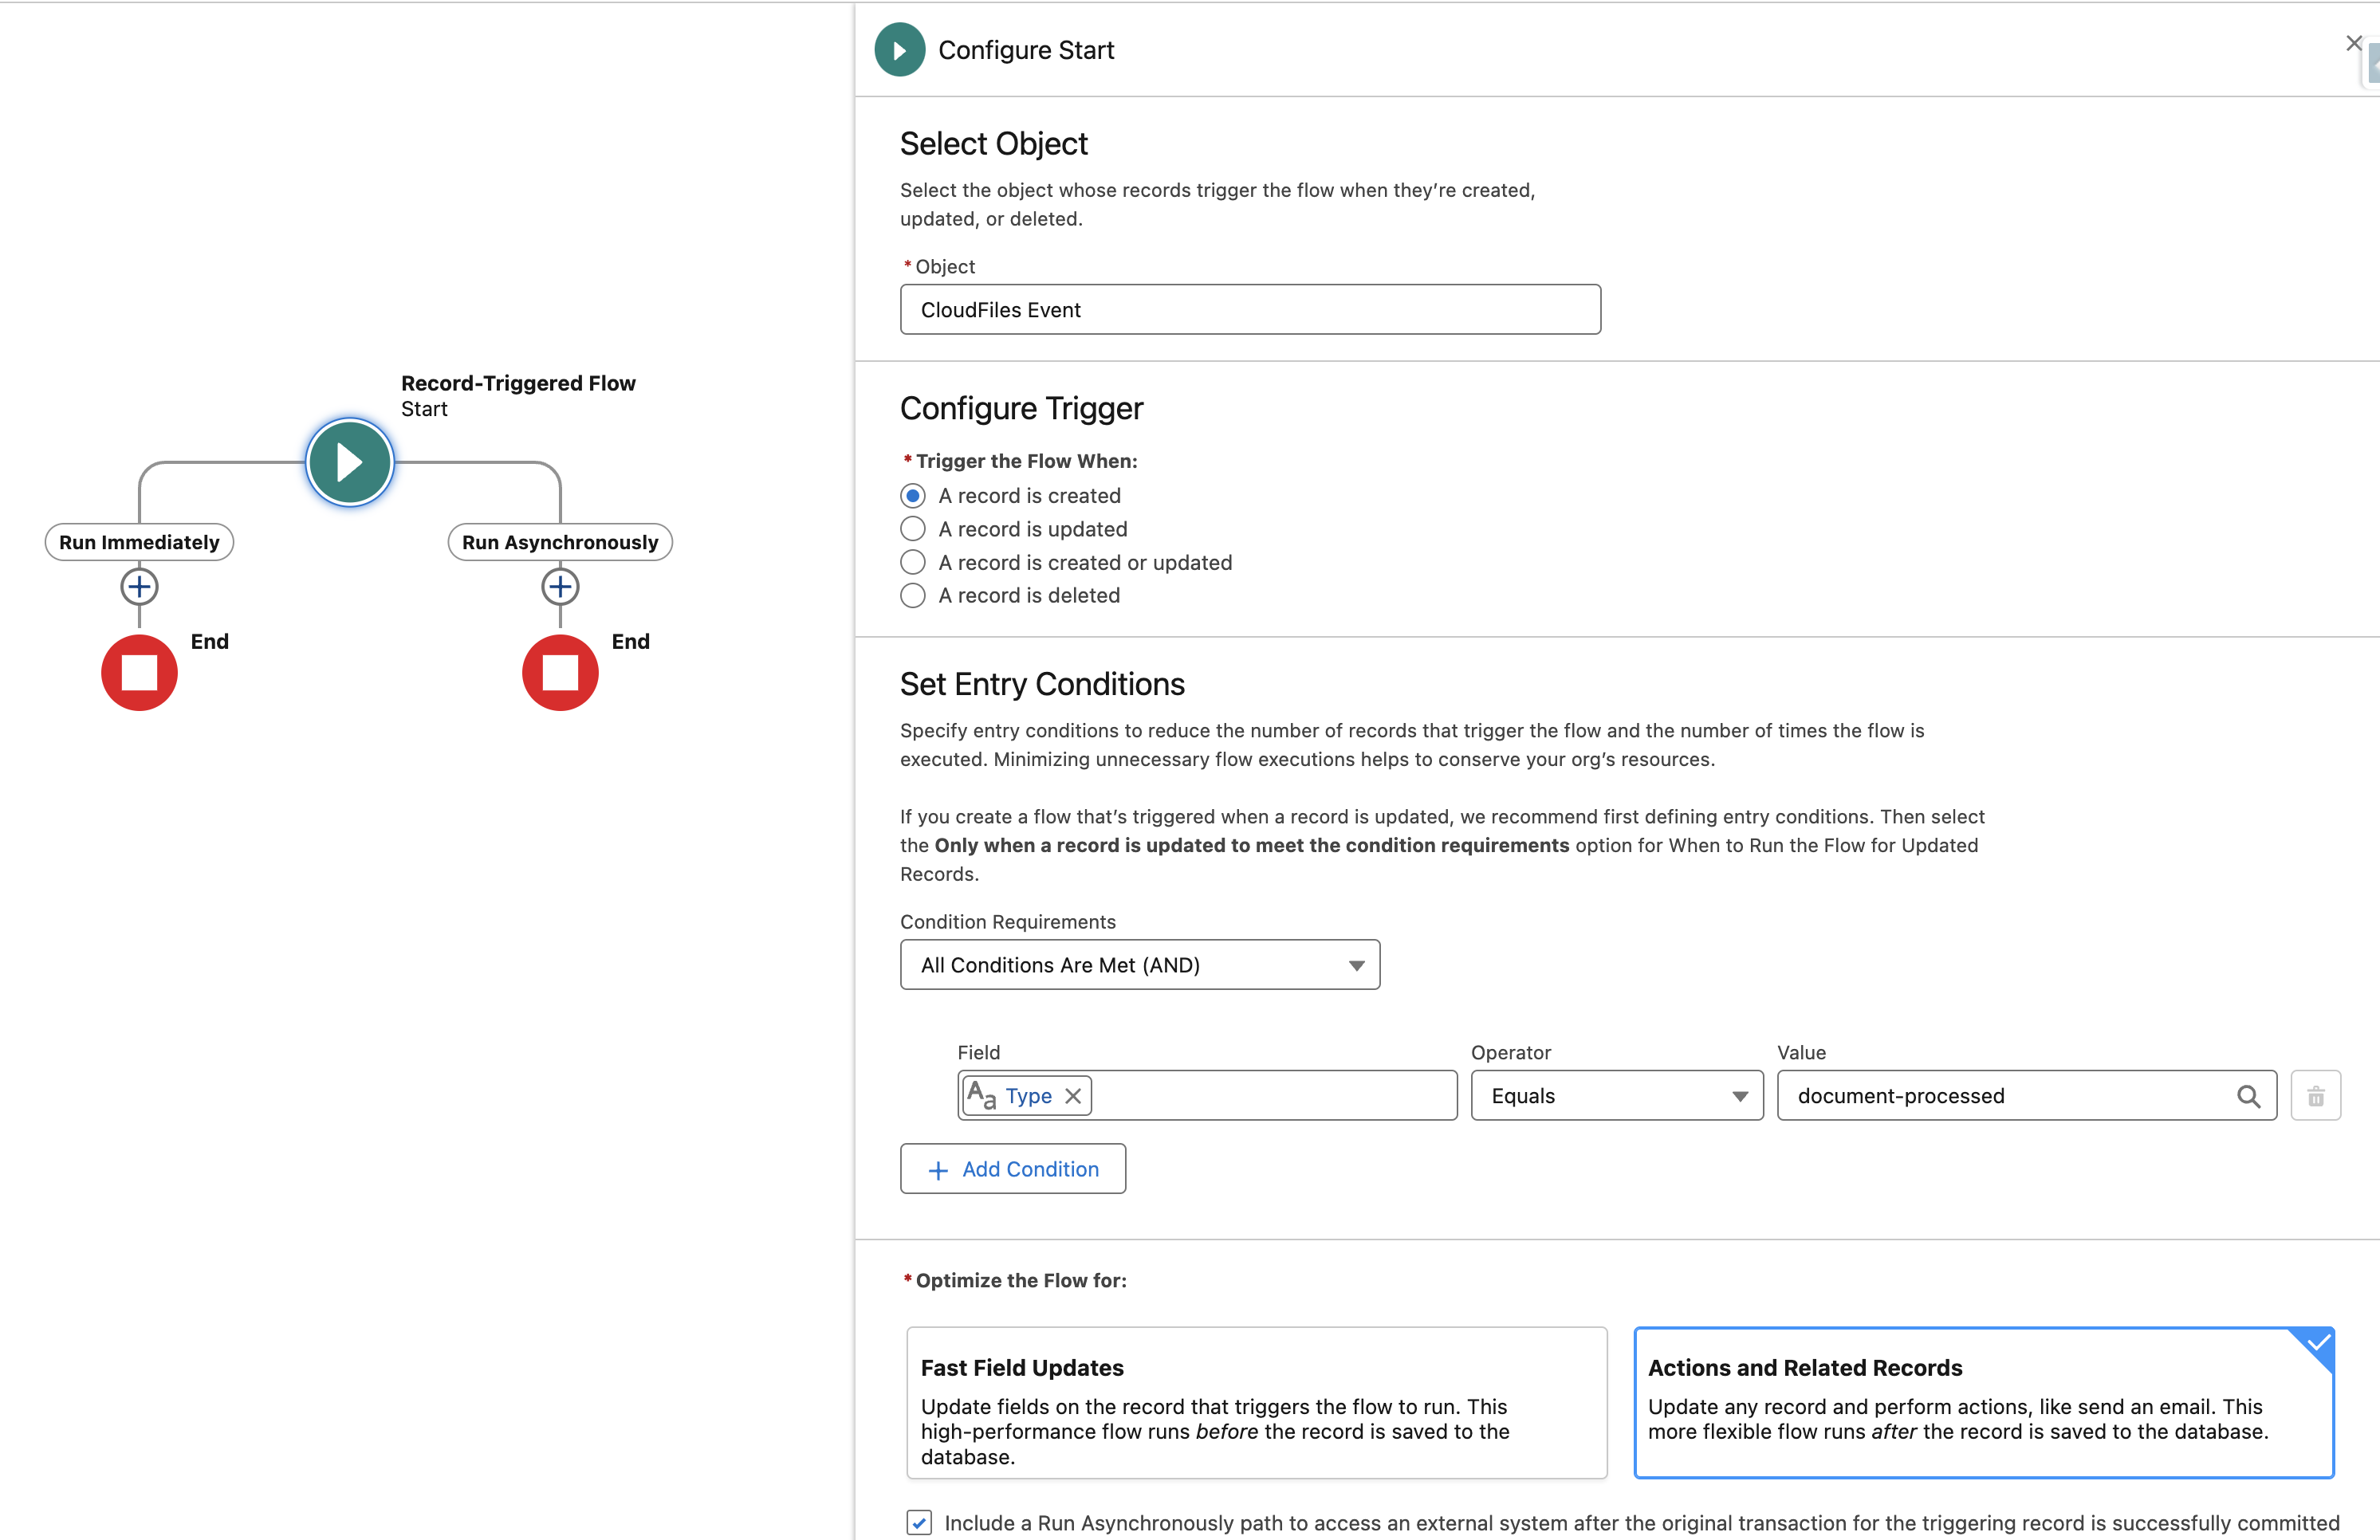
Create Record Triggered Flow
Create a new record-triggered flow with the triggering object type set as cldfs__CloudFilesEvent__c. Additionally set some filter conditions. This ensures that the flow is only triggered for the correct type of events. E.g. using the below conditions, we will only trigger the flow when a new file is uploaded on contact records -
- Type ( cldfs__Type__c ) = document-processed
Include a Run Asynchronously path to access an external system after the original transaction for the triggering record is successfully committed.
Here's how the trigger conditions would look like.
Get Event Details
Now that we have trigger setup, we will get more details related to the event. We will use the Get Event Details action for this. Within In the Run Asynchronously path, add the Get Event Details action. Under "Set Input Values", toggle Event (Custom Object) and select Triggering cldfs__CloudFilesEvent__c ( {!$Record} ).

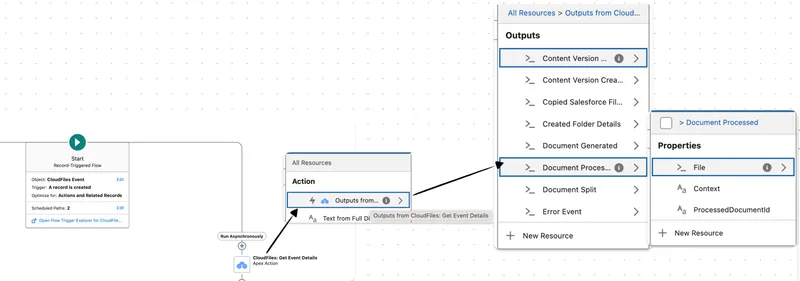
Useful Event Information
Now that we have the event details of the document-processed event, we can use this to get 2 useful pieces of information -
- Processed Document ID - This will be used as an input to the Query Document Action that has used in various other tutorials on Document AI Tutorials.
- Context - This is important to retrieve the record ID or other important metadata that you want to pass when processing the document. Check the Process Each File Section above to understand what is retrieved in the context output.
- File - Details of the processed file specified in the input, which helps identify the file post processing.
What Next?
In this tutorial, we have only explained how to process a Salesforce file so that it is ready for AI queries. For actually understanding how automated queries can be performed and how the responses can be used to enrich Salesforce data, check the other tutorials mentioned in the Document AI Tutorials article.