Step 1: Add CloudFiles Application
- Search for CloudFiles in Microsoft Entra Gallery.
- Click on CloudFiles and click "Create" to add an instance of CloudFiles application in your Azure portal
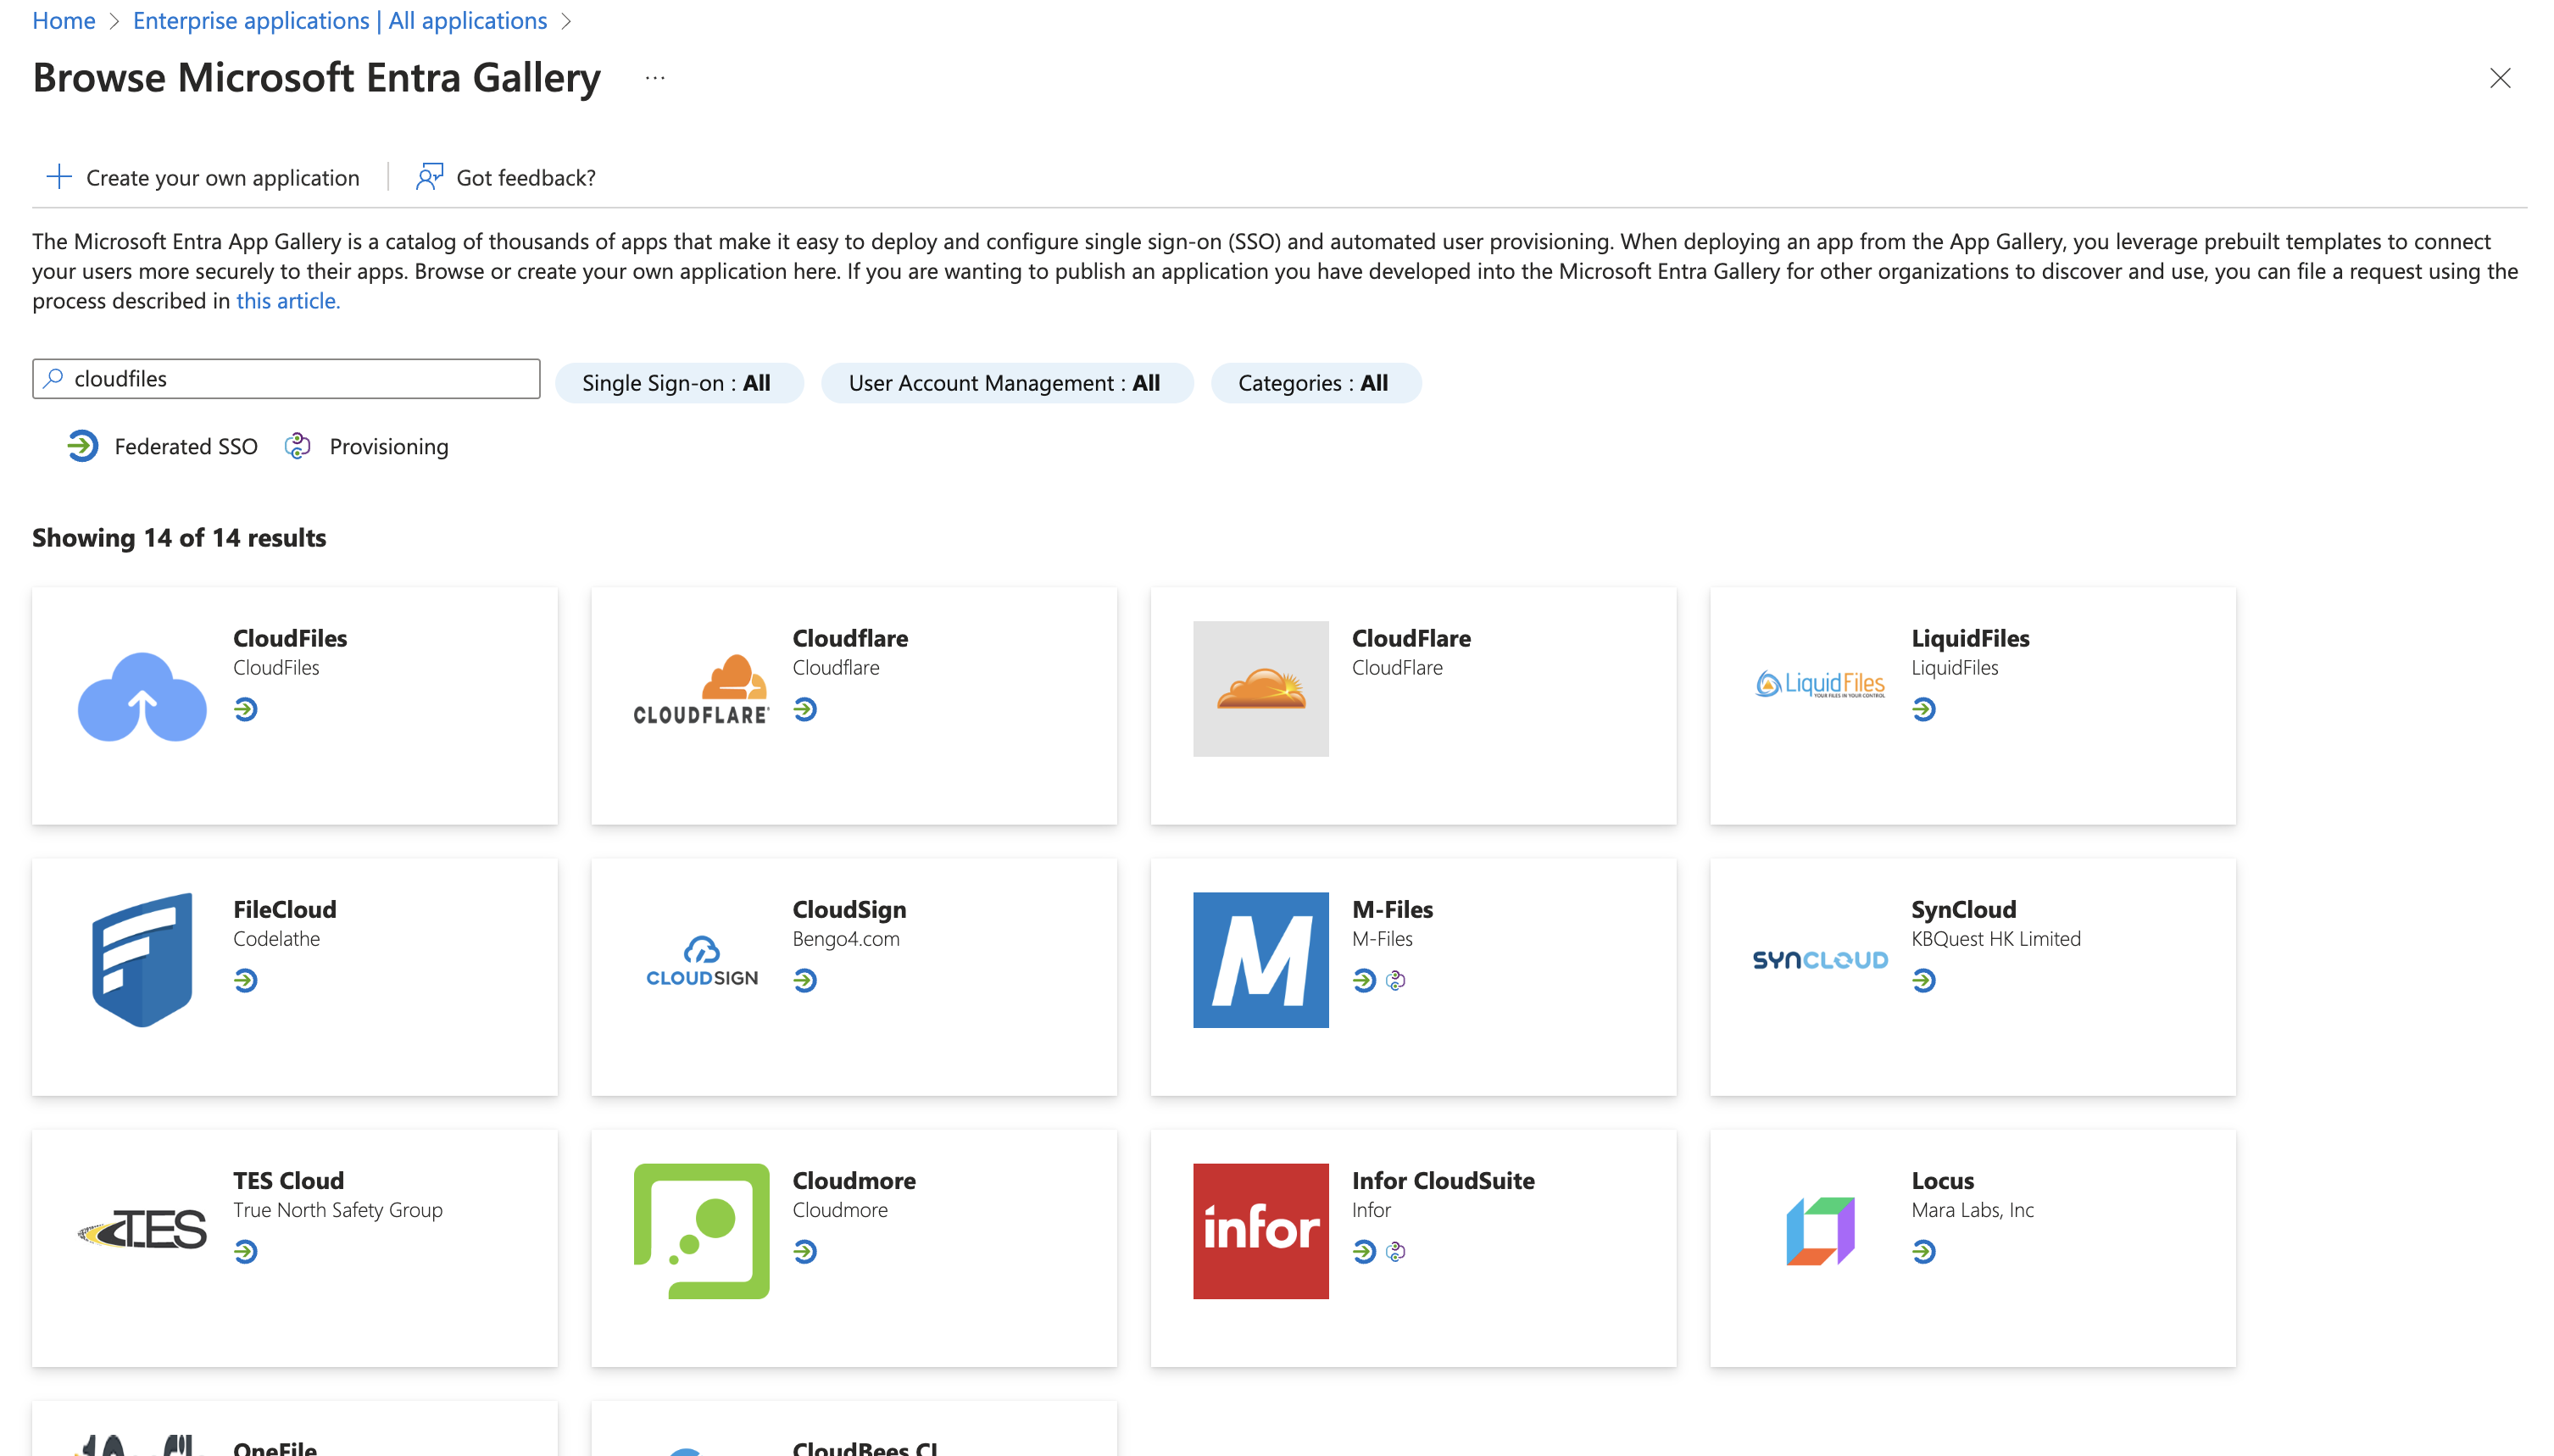
If the above doesn't work for you, alternatively you can click the button below to authorize CloudFiles. This will add CloudFiles automatically to your enterprise applications list.
Step 2: Create a Storage Account
- Navigate to Azure Portal - Log in to your Azure portal.
- Create a New Storage Account - Go to the 'Storage accounts' section and click on 'Add' to create a new storage account.
- Configure the Storage Account - Follow the on-screen instructions to configure your storage account, selecting the appropriate subscription, resource group, and other relevant settings.
Step 3: Create a Container in Storage Account
- Open Storage Account - Once the storage account is created, open it.
- Create Container - In the storage account dashboard, locate the 'Containers' section and create a new container. Assign a name and set the access to Private (no anonymous access)
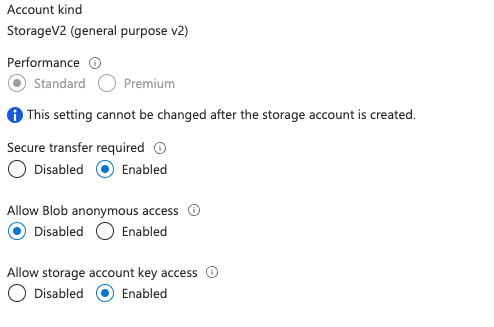
Step 4: Update Storage Account Configuration
- Enable Storage Account Key Access - In the storage account settings, go to Configuration. Ensure Allow storage account key access is enabled, which is essential for CloudFiles integration.
- Update CORS settings - In the storage account settings, go to Resource Sharing (CORS). Add CORS rules to allow GET/PUT methods. For the origin, enter your Salesforce domain and https://salesforce.cloudfiles.io. Ensure you include both sandbox and production URLs, depending on where the account will be used. CloudFiles URL is required to view files inside salesforce
| Allowed origin | Allowed methods | Allowed headers |
|---|---|---|
| GET, PUT | * | |
| https://salesforce.cloudfiles.io | GET,PUT | * |
Make sure to NOT include /at the end of the URL
- Add Storage Blob Delegator Permission - In the storage account settings, go to Access Control (IAM). Create a new Role Assignment. Select the role: "Storage Blob Delegator". On Members screen, search for "CloudFiles" service principal.
Step 5: Update Container Access Control
- Add Storage Blob Data Contributor Permission - In the container settings, go to Access Control (IAM). Create a new Role Assignment. Select the role: "Storage Blob Data Contributor". On Members screen, search for "CloudFiles" service principal.
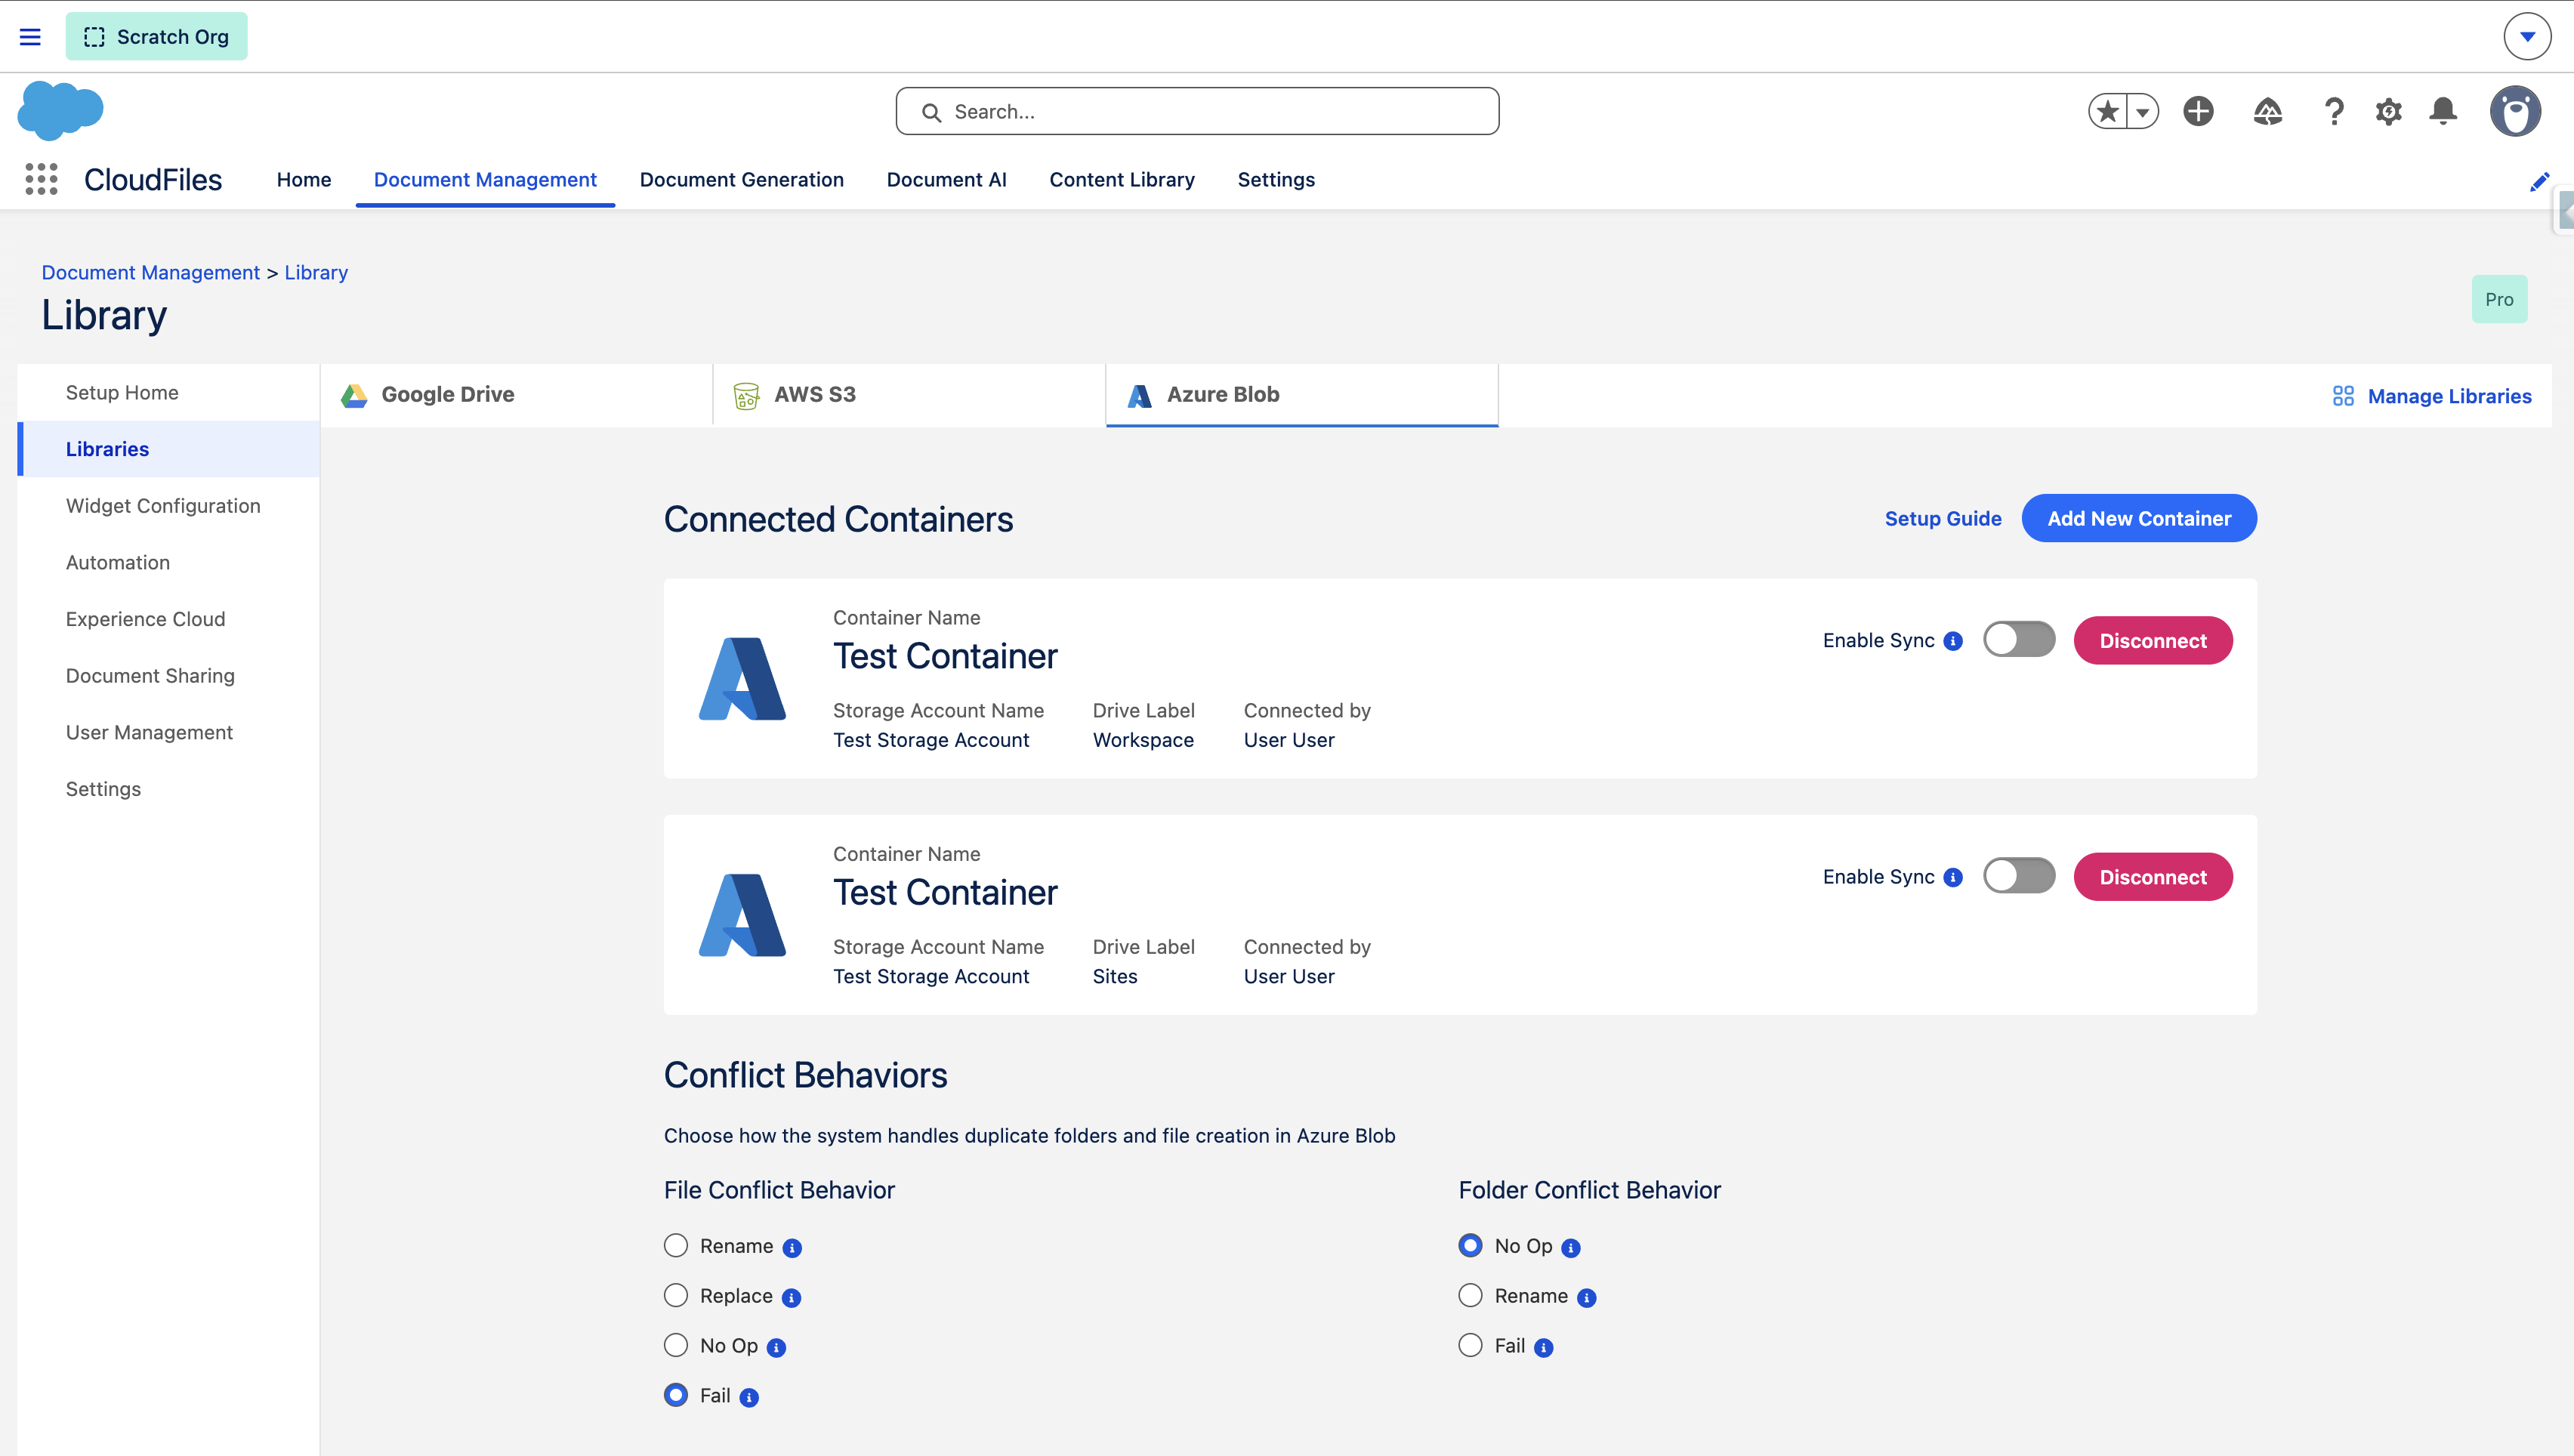
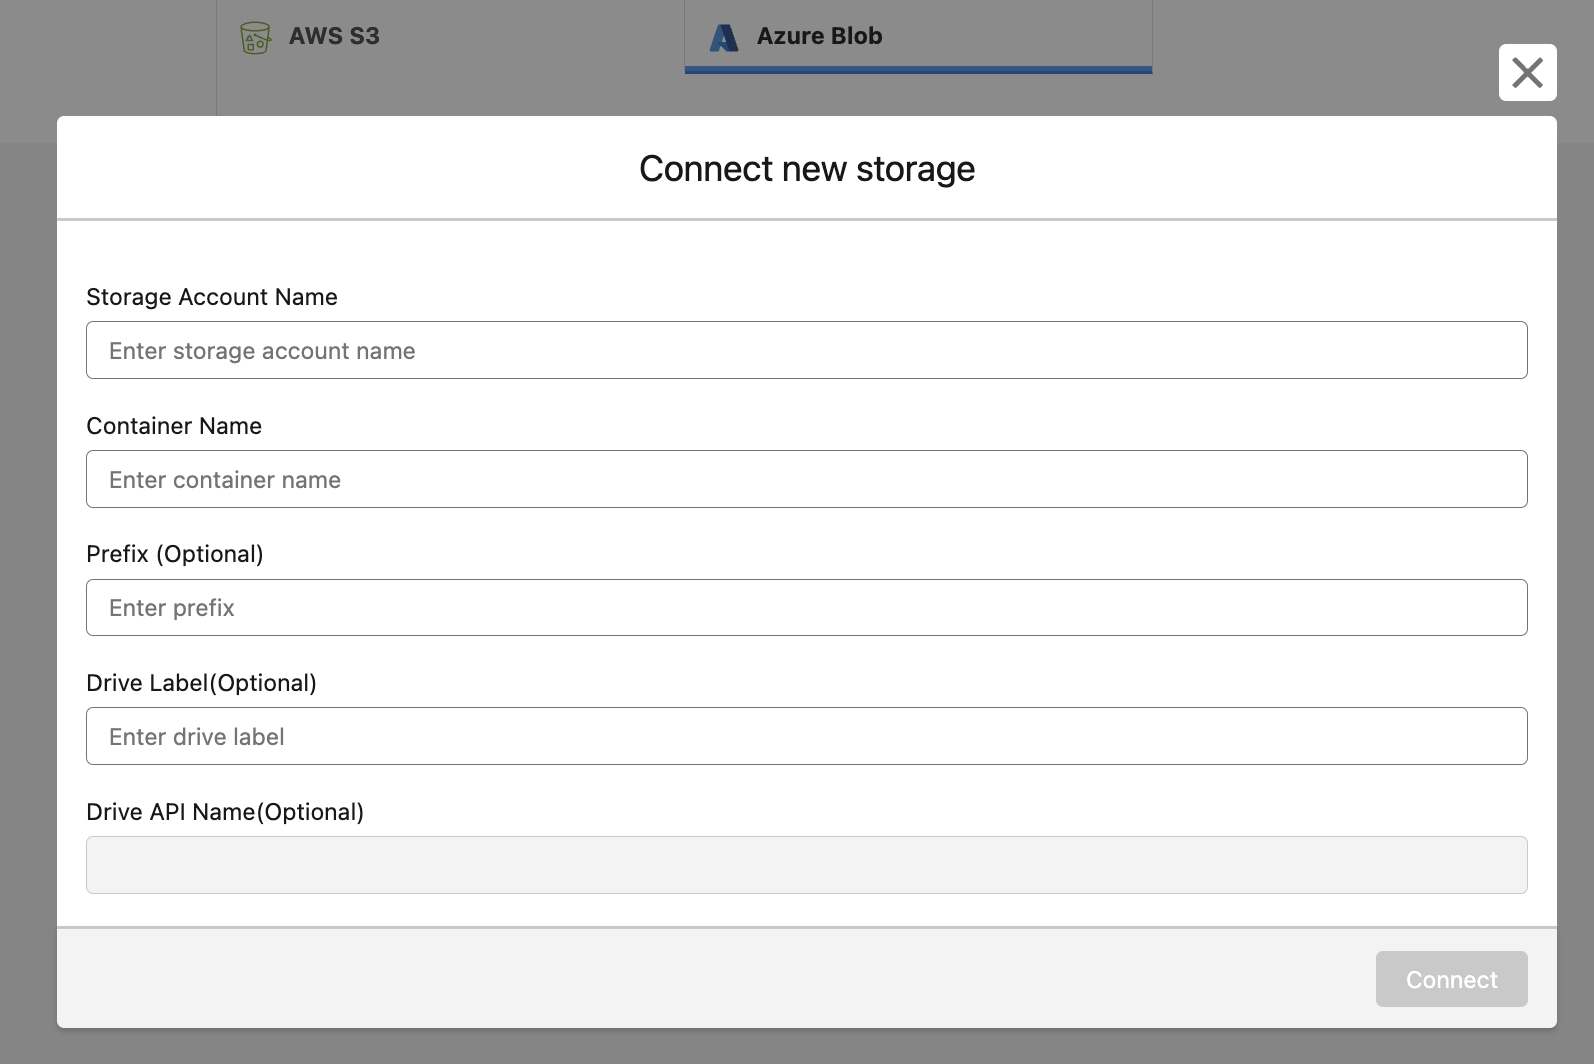
6 - Configure Azure Storage in CloudFiles
- Open CloudFiles Setup in Salesforce: Log into your Salesforce account and navigate to the CloudFiles app launcher. Go to libraries section in Document Management app, select Azure Blob.
- Enter the 'Storage Account Name' and 'Container Name'
- (Optional) Enter 'Prefix': The Prefix defines the folder path within your azure container that CloudFiles will use. This allows you to organize data within a single section of the container instead of using the entire container. When connecting a container for the first time, you can choose any prefix. If you reuse an existing container in another org, each connection must use a unique, non-overlapping prefix to prevent conflicts. For example, team-a/ and team-b/ are valid, but team-a/ and team-a/subfolder/ are not.
- Enter 'Drive Label': The Drive Label is the display name for the storage connection in CloudFiles. This label is what users will see in the UI when accessing or selecting a storage location, making it easier to identify and distinguish between multiple connected drives. It is optional for the first container connected in the org but required for any additional connections to ensure each drive can be easily identified.
- Connect
A prefix is mandatory every time you connect the same container more than once, whether within the same org or across different orgs — this ensures paths do not overlap. If you are connecting the same container a second time within the same org, both the original and the new connection must have a prefix, so if the first connection was made without one, disconnect it and reconnect with a prefix before adding the second.
A drive label is mandatory from the second container onward within the same org, regardless of whether the containers are the same or different.
7 - Update Trusted URLs in Salesforce
Add the following URL to trusted URLs in Salesforce: https://{storageAccountName}.blob.core.windows.net For example, if storage account name is cloudfiles , URL will be: https://cloudfiles.blob.core.windows.net
8 - Enable auto sync in Azure (Optional)
- If you wish to have a 2 way sync to view your files in Azure through the CloudFiles widget, please follow the steps mentioned in How to enable auto-sync on Azure Blob
9 - Enable Sync in CloudFiles
- Turn on Enable Sync to automatically sync changes between your azure container and CloudFiles. (Completing step 8 is mandatory if you wish to turn this toggle on)
- Once enabled, any files or folders that are uploaded, updated, or deleted in azure will be reflected in CloudFiles.