Overview
In this tutorial, we will see how CloudFiles can be used with Salesforce flow automations to extract data from documents in a specified format. Each time a file is uploaded into Salesforce or external storage, the following actions will occur:
- The file is processed using CloudFiles Document AI.
- A Natural Language Query executes to extract order line items from the uploaded purchase orders.
- Information is extracted
- The extracted information is then processed.
In order to setup this automation, you first need to have some pre-requisites. After this you can start setting up some query automations and updates to achieve your use-case. Check the sections below for more information.
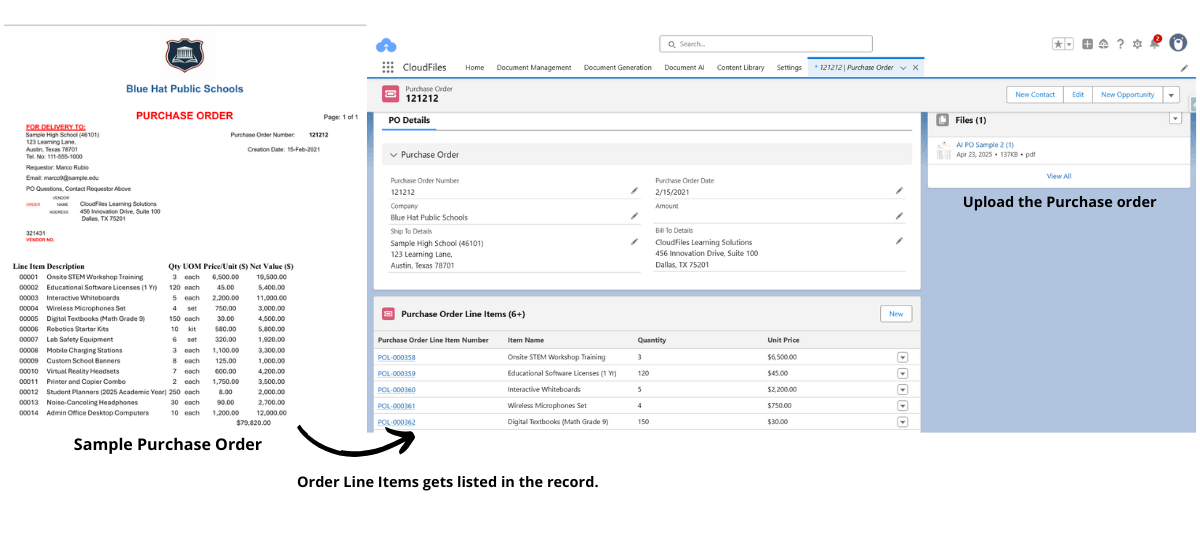
Refer to the below image to understand the working:
Pre-requisites
Before starting with this tutorial, you need to ensure that CloudFiles Document AI is properly installed & configured in your system. Additionally, you also need to create some initial automations to process the files before you can query them. Check the 2 sections below carefully -
Installation & Configuration
Ensure the following before starting:
- CloudFiles Document AI Installation and Configuration are complete.
- You have an Active Subscription or Trial of CloudFiles Document AI.
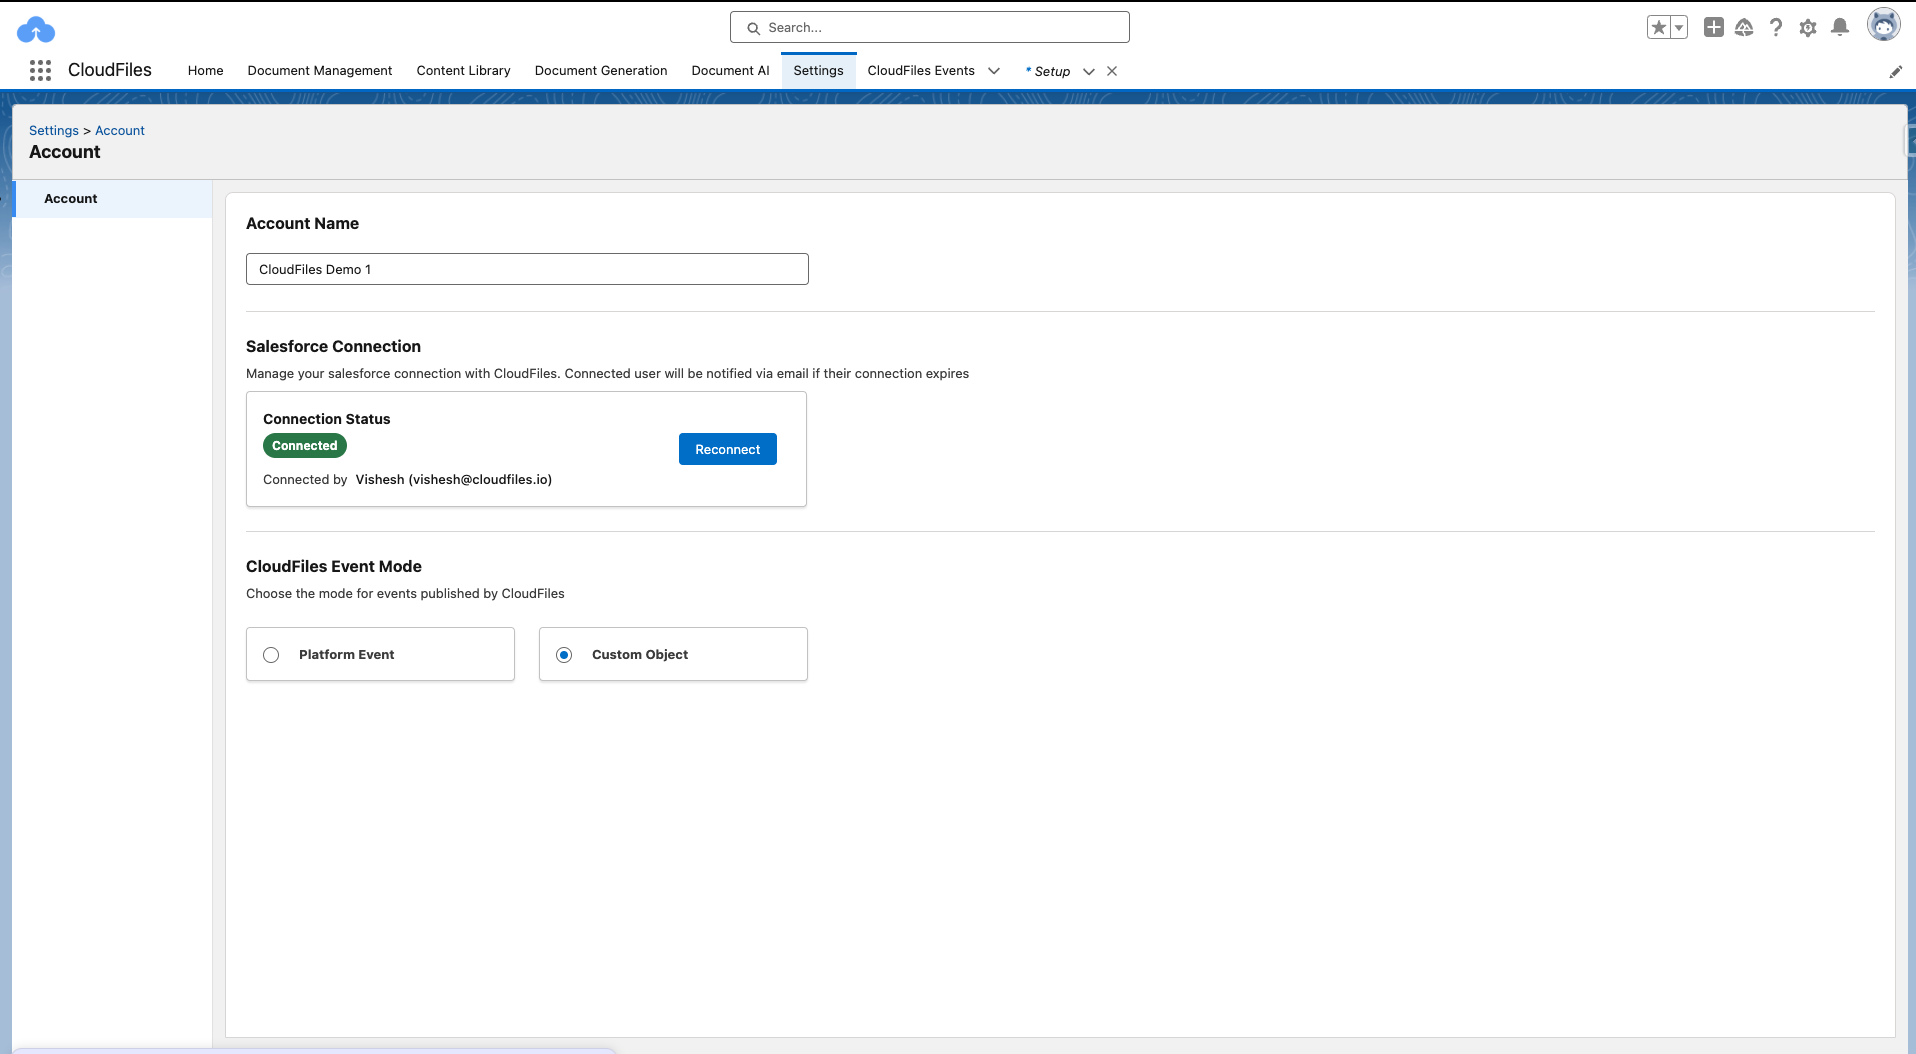
- The CloudFiles Event Mode setting is set to Custom Object
Initial Automation Setup
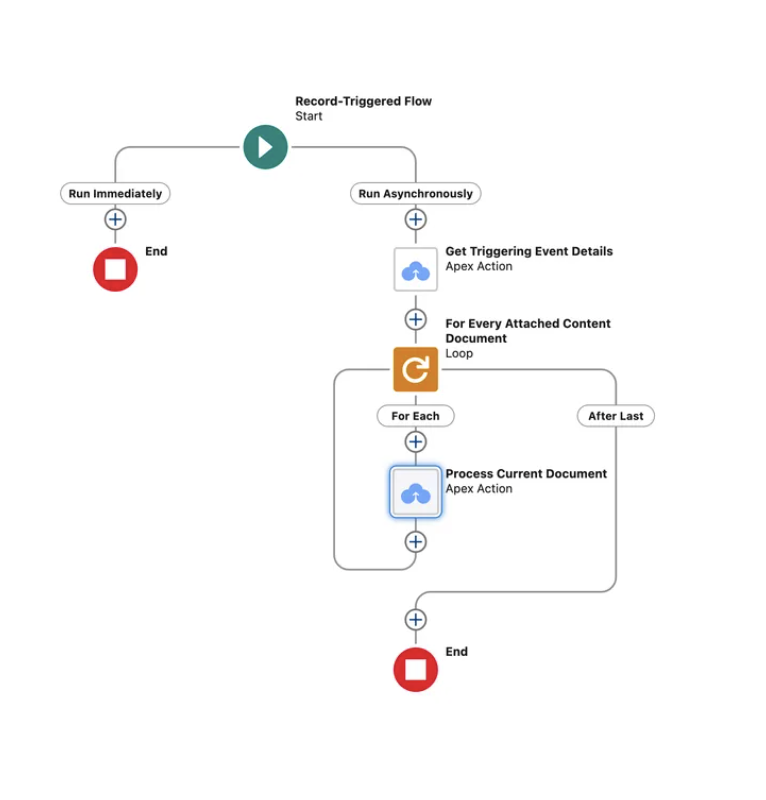
There are 2 flows you will need to setup to process the uploaded files. The first flow is triggered when the document is uploaded into Salesforce or external storage. This flow sends the file to AI for processing. This might take a few seconds. Once the AI is done with processing, the second flow will trigger which will contain the processed document. You can then run queries on this processed document.
- Flow 1: Send Document For Processing - Triggered when file is uploaded into Salesforce or external storage. Sends the file for processing which may take a few seconds to a minute.
- Flow 2: Document Processing Complete - Triggered when the file has been processed by AI. Performs queries on the file to extract the data.
Read the article on AI Flows - Initial Setup Guide carefully to setup both the flows. Once your initial flows are setup as shown above, you are ready to move to the next step.
Once your flow setup is complete, your flows should look like the following.
Query Automation Setup
Now that you have the initial automation setup, we can take the document processed flow and extend it to query the document and update the required fields. In this section, we show how to query the processed document, check the results and perform the necessary updates.
Querying the document
In order to query the document, we will simply use the Query Document/Dataset flow action. This action taken in a processed document ID and a text query as input. The processed document ID is available as output of the Get Event Details action.
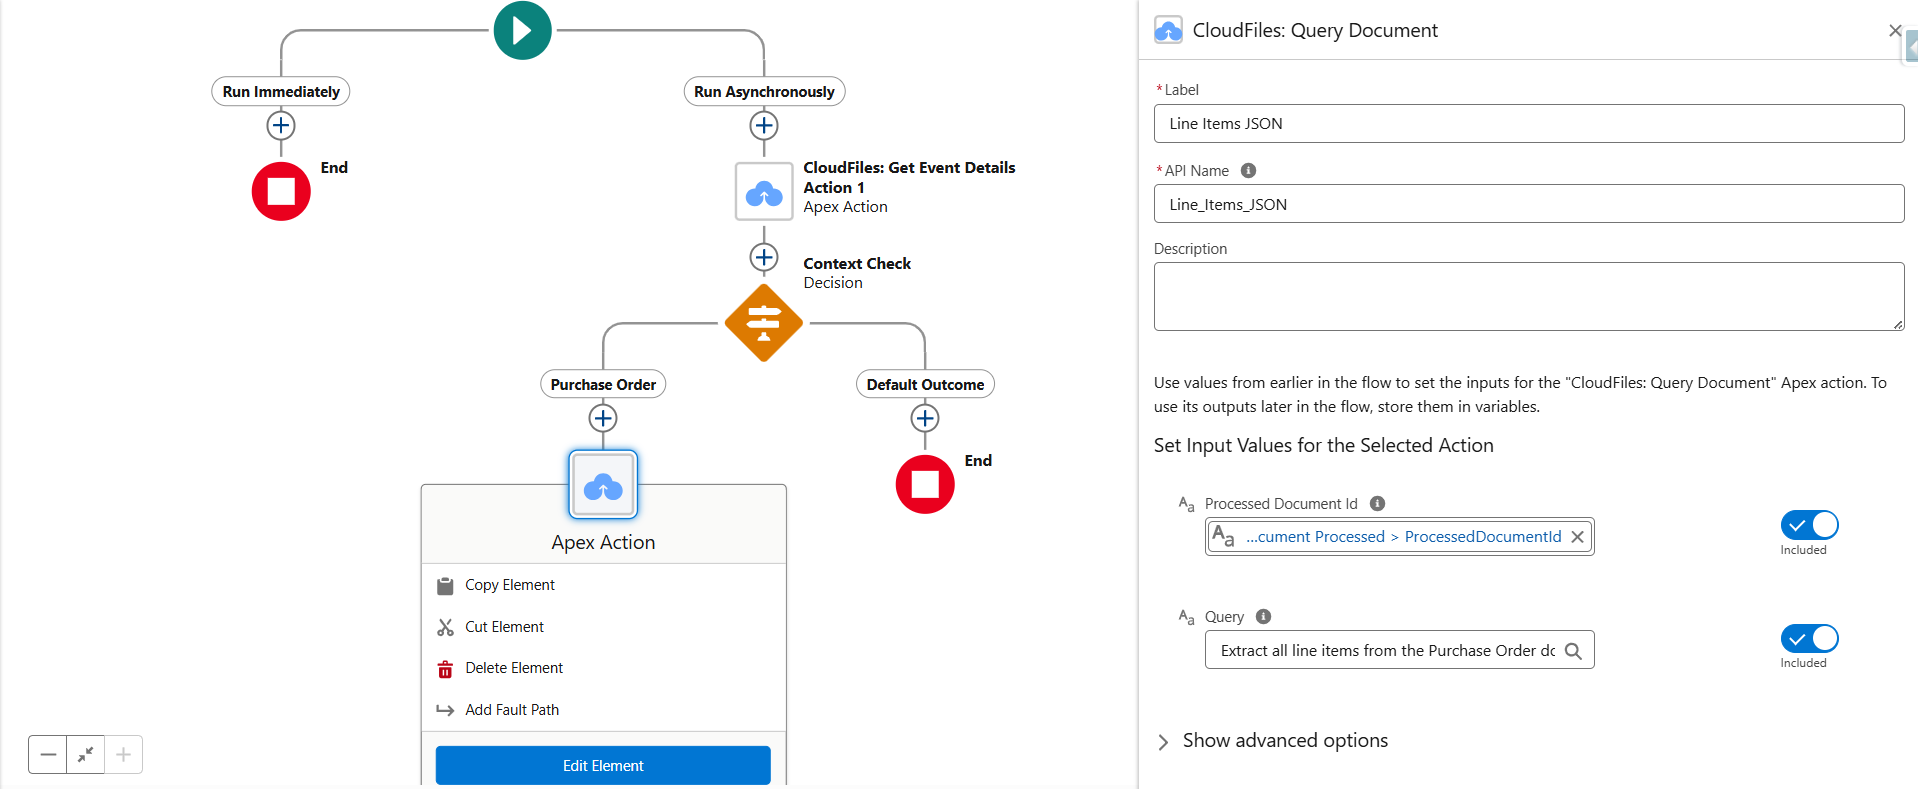
Here are the full inputs used in the above image:
Processed Document Id :
( {!Get_Triggering_Event_Details.DocumentProcessed.ProcessedDocumentId} )
Query = AI can be guided to generate structured outputs and responses tailored to our specific requirements, thereby simplifying data processing. Provide a clear prompt that tells the AI what data to extract, the required format for each field, and the output structure (e.g., JSON). Specify how to handle missing values (e.g., use null ) and include any key mappings for integration.
Suppose there is a parent object called Purchase Orders, which has a related child object called Order Line Items. Each order line item includes the following fields: Line Item Name, Quantity, Unit Price, and Line Amount.
We need a query that can extract the Order Line Items from a given sample Purchase Order and return the results in a structured JSON array format.The sample query is:
Extract all line items from the Purchase Order document. For each line item, extract the following fields: - Line Item Name - Quantity (whole number) - Unit Price (currency value with two decimals) - Line Amount (currency value with two decimals) Return the result as a JSON array of objects. Each object must have these keys: - Item_Name__c - Quantity__c - Unit_Price__c - Line_Amount__c Format example: [ { "Item_Name__c": "", "Quantity__c": , "Unit_Price__c": , "Line_Amount__c": }, { "Item_Name__c": "", "Quantity__c": , "Unit_Price__c": , "Line_Amount__c": } ] Rules: - If any field is missing for a line item, set its value to null (e.g., "Unit_Price__c": null). - Quantity must be an integer (no decimals). - Unit Price and Line Amount must be numbers with two decimal places. - Output only the JSON array. No extra text, comments, or explanation.
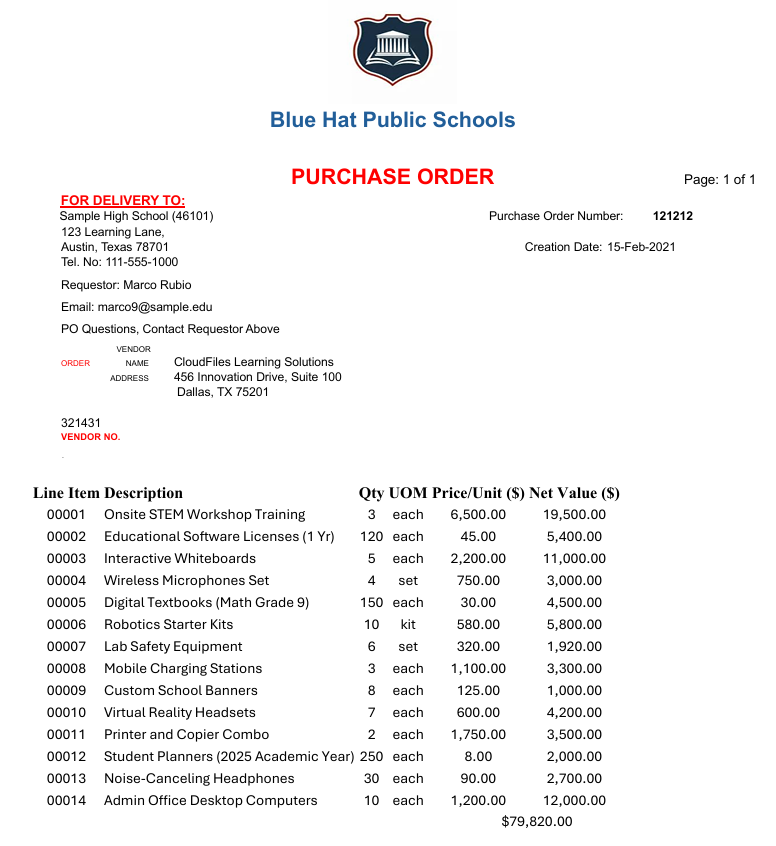
The AI Output as tested in the AI Playground on the above sample document is as follows:
[{"Line Item Name": "Onsite STEM Workshop Training", "Quantity": "1", "Unit Price": "5000.00", "Line Amount": "5000.00"}, {"Line Item Name": "STEM Workbook 1", "Quantity": "850", "Unit Price": "12.00", "Line Amount": "10200.00"}, {"Line Item Name": "STEM Workbook 2", "Quantity": "850", "Unit Price": "42.00", "Line Amount": "35700.00"}, {"Line Item Name": "STEM Workbook 3", "Quantity": "850", "Unit Price": "15.50", "Line Amount": "13175.00"}, {"Line Item Name": "Test Series 1", "Quantity": "850", "Unit Price": "9.50", "Line Amount": "8075.00"}, {"Line Item Name": "Test Series 2", "Quantity": "850", "Unit Price": "11.50", "Line Amount": "9775.00"}]
The AI Output as tested in the AI Playground on the above sample document is as follows: [{"Line Item Name": "Onsite STEM Workshop Training", "Quantity": "1", "Unit Price": "5000.00", "Line Amount": "5000.00"}, {"Line Item Name": "STEM Workbook 1", "Quantity": "850", "Unit Price": "12.00", "Line Amount": "10200.00"}, {"Line Item Name": "STEM Workbook 2", "Quantity": "850", "Unit Price": "42.00", "Line Amount": "35700.00"}, {"Line Item Name": "STEM Workbook 3", "Quantity": "850", "Unit Price": "15.50", "Line Amount": "13175.00"}, {"Line Item Name": "Test Series 1", "Quantity": "850", "Unit Price": "9.50", "Line Amount": "8075.00"}, {"Line Item Name": "Test Series 2", "Quantity": "850", "Unit Price": "11.50", "Line Amount": "9775.00"}]
Process AI Output Using Apex Action
Once the line items are available in JSON format, they can be processed in various ways within Salesforce. In this case, we use an Apex Action to handle the data — it reads the JSON, maps each item to the correct Salesforce fields, associates them with the specified Purchase Order, and inserts all the records in a single step.
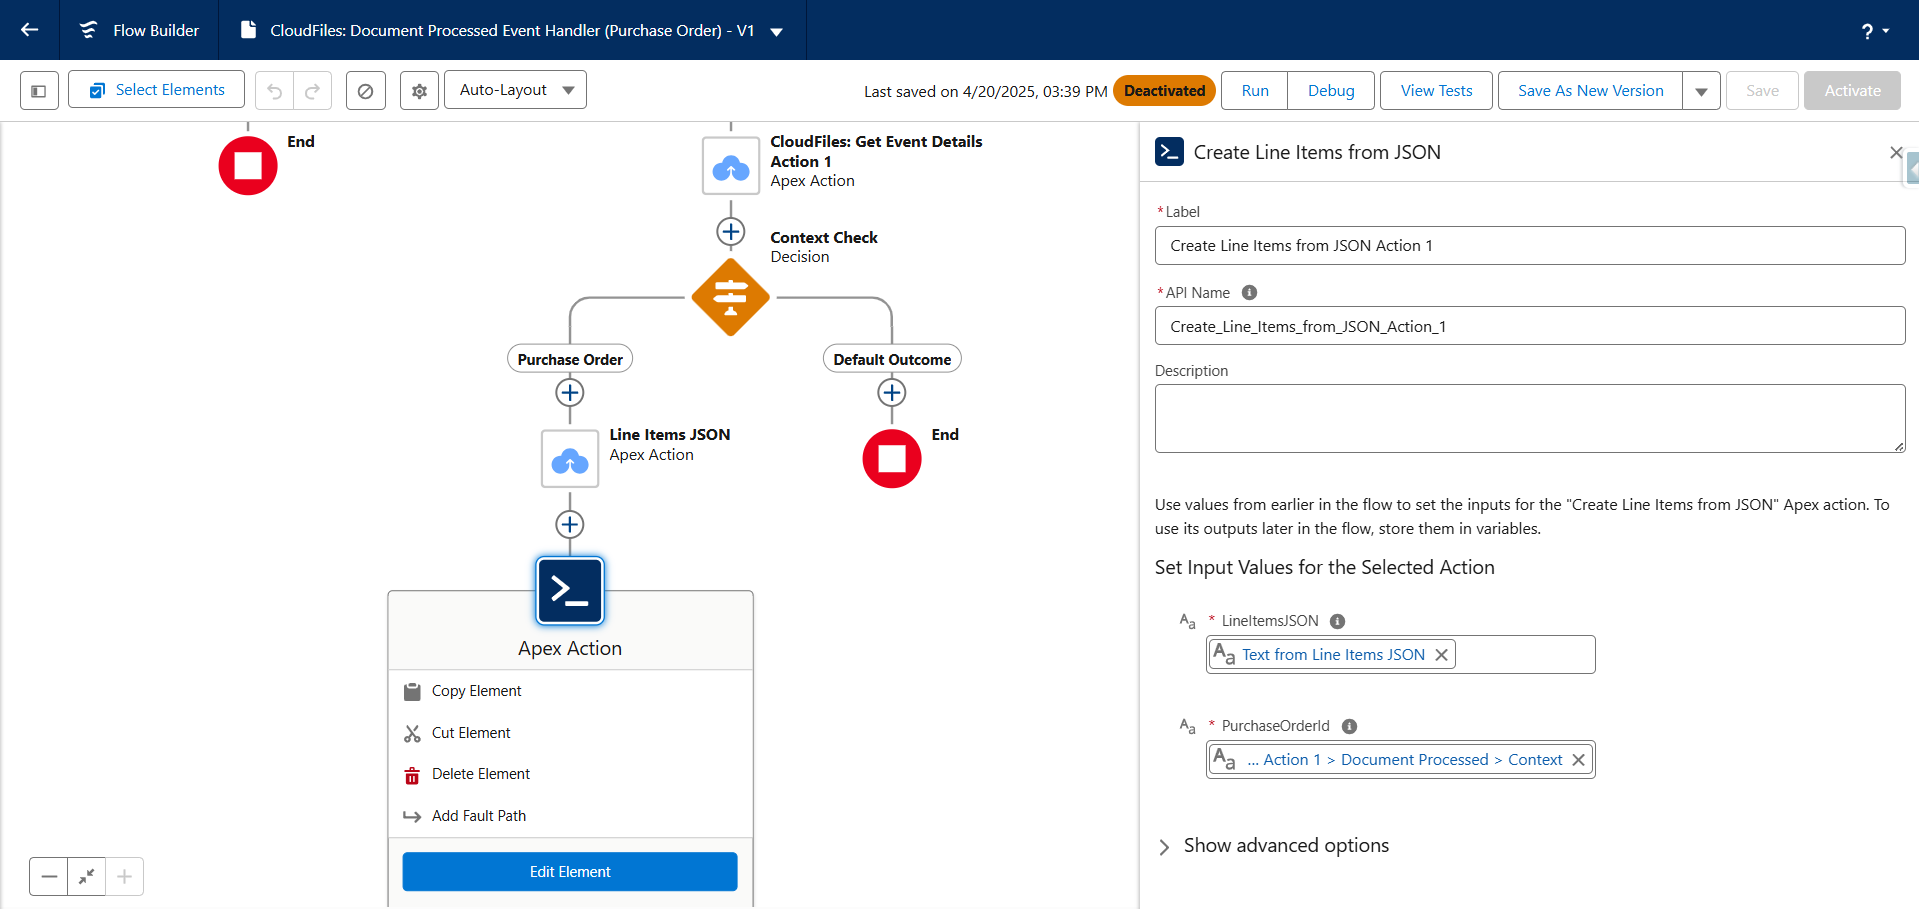
This is the Apex code used to process the JSON input :
See it in Action
Now that everything is set up, you can test your flows. When a Purchase Order is uploaded as a Salesforce File on the record, the corresponding order line items are automatically extracted, created, and listed.
Note: As Flow Automation executions and document processing via AI may take a short time, the field updates will not reflect immediately. To view the updates, wait briefly and refresh the page.
Whenever a file is processed using the Process Document using AI action, a Document Processed object record is published.
You can query these event object records to verify successful file processing and debug the flow.
Example SOQL Query:
To check Document Processed events sorted by the most recent:
SELECT Id, Name, CreatedDate, cldfs__Data__c
FROM cldfs__CloudFilesEvent__c
WHERE cldfs__Type__c = 'document-processed'
ORDER BY CreatedDate DESC
You can check the Context and File Details in the Data Field of the record.
When a flow runs in debug mode and executes Query Document/Dataset action, you can check the results and modify the queries if required.