Introduction
The PDF Template Builder is used to populate PDF forms with data from Salesforce. It allows you to map fields such as text inputs or checkboxes with values from Salesforce, and add form fields for document signing via DocuSign.
You can upload any fillable PDF form (for example, a tax form or agreement), select the fields or checkboxes that need to be populated, and configure them using data from Salesforce. This setup supports Single, Collection, and Runtime Variables to handle different use cases like simple field inserts or dynamic values.
Once configured, the PDF template can be published and used in flows or embedded in record widgets for document generation.
Steps to create a PDF template
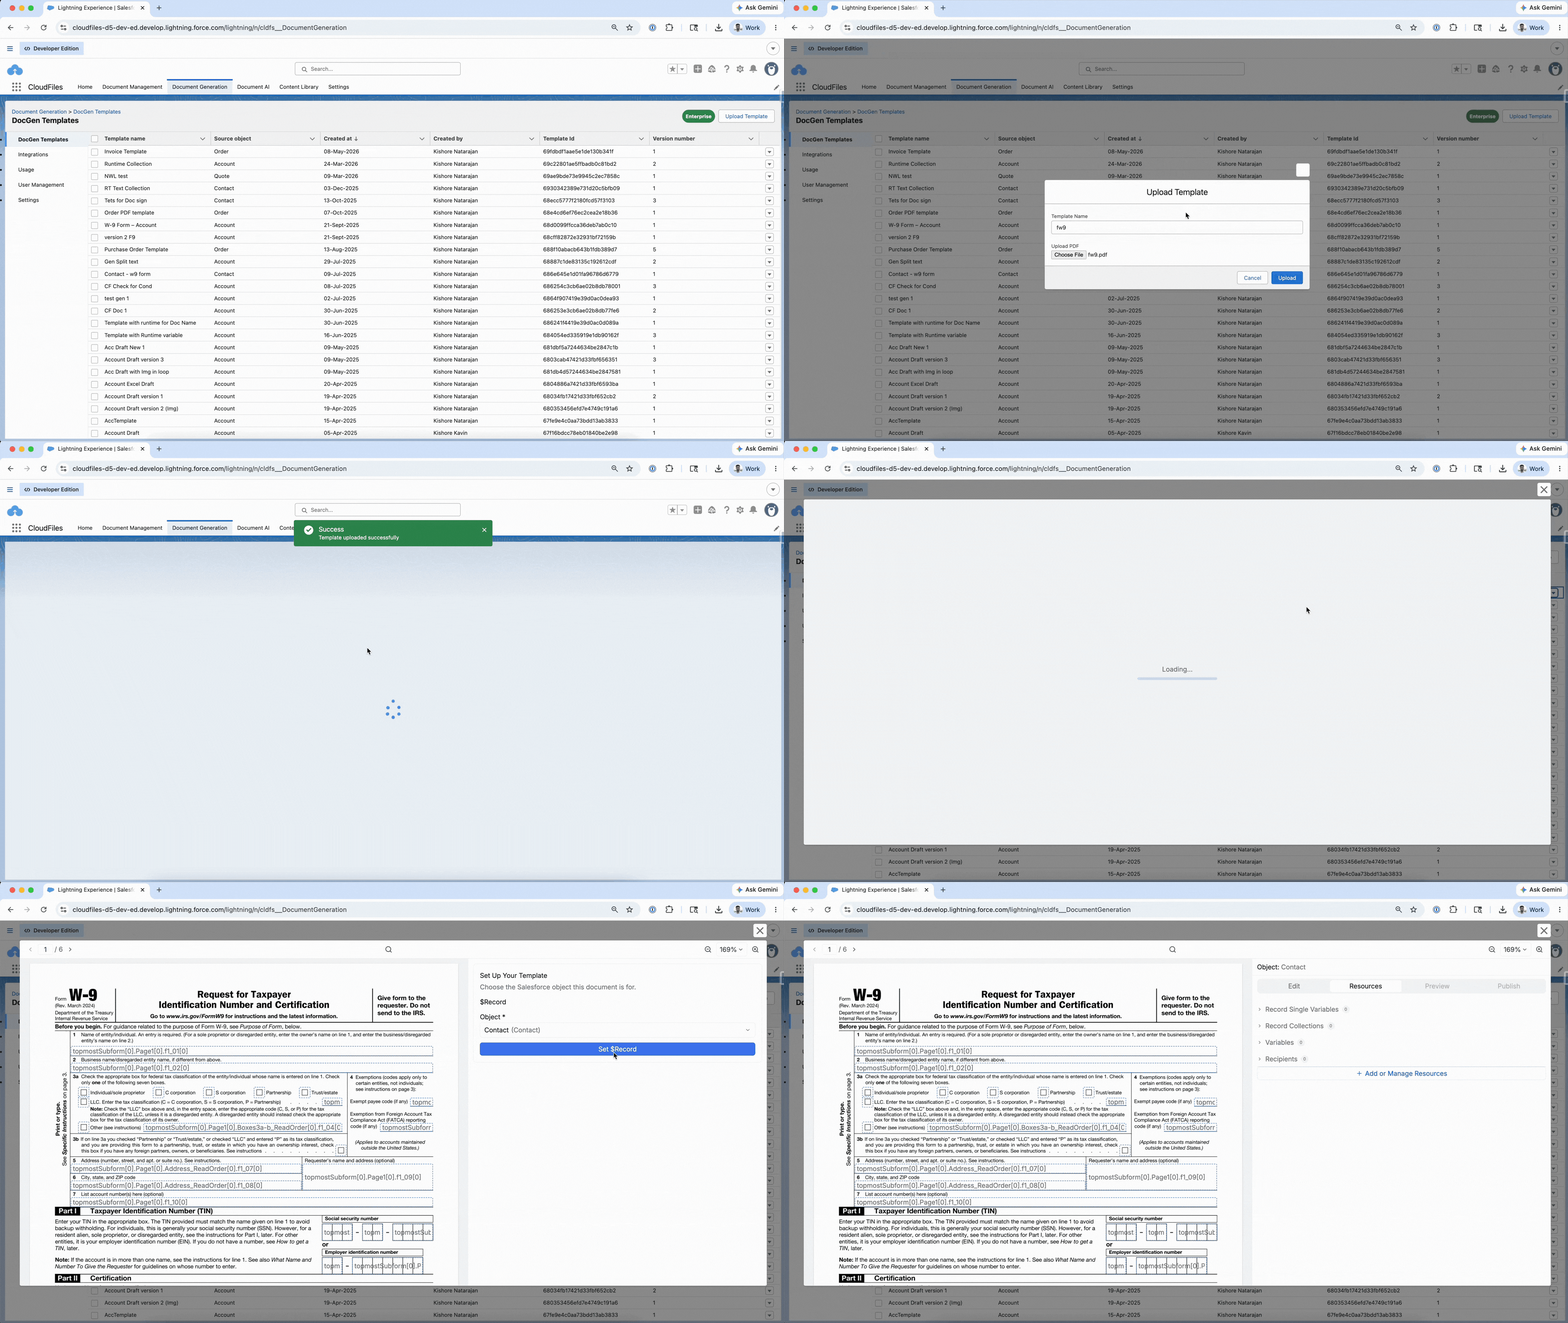
- Go to the CloudFiles app in Salesforce and open the Document Generation tab.
- Click Upload Template and select the PDF form you want to use.
- Once uploaded, locate the template in the list. Click the menu icon (⋮) next to it and choose Edit.
- In the side panel that opens, select the Salesforce object (Contact) this document is for and click Set Primary Record.
- The PDF will now open in edit mode with four tabs on the right panel: Edit, Resources, Preview, and Publish.
The template is now ready for configuration. Use the actions described below.
Insert Field
Use Insert Text when you need to place a Salesforce field value into a specific text area of the PDF. It is commonly used for fields like names, dates, addresses, or reference numbers that need to appear in the final generated document. You can select the target field directly from the PDF or from the field list in the bottom panel, then map it to any Salesforce field using the Field API Name selector.
Insert Checkbox
Use Insert Checkbox when you need to tick a checkbox or radio button in the PDF based on data from the Salesforce record. It is typically used for classification fields, consent indicators, or any yes/no selection that the PDF form requires to be pre-filled. You configure a condition against a Salesforce field value, and the checkbox is automatically marked when that condition is met during document generation.
Form Field
Use Insert Form Field when you need to place a signable field, such as a signature box or date signed, on the PDF for DocuSign recipients. Unlike Insert Text and Insert Checkbox which pull data from Salesforce, form fields are placeholders that the recipient fills in during the signing process. You select the field type, assign it to a recipient defined in your Resources, and position it anywhere on the PDF before publishing.
Document Settings
Document Settings apply to the whole template rather than to a field on the PDF. You'll find them in the Select action menu on the Edit tab, below the Insert actions.
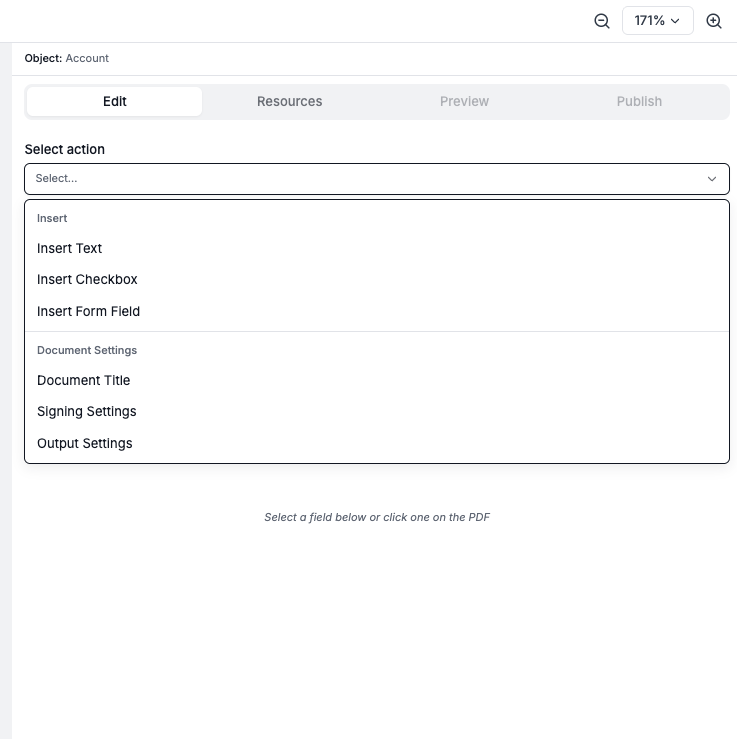
Document Title
Use Document Title to name the documents generated from this template. Type a fixed title, pick a Salesforce field, or combine both, for example Invoice - {!Record.Name}. If you leave it empty, the generated document gets the default name.
Signing Settings
Use Signing Settings to control the DocuSign email that recipients receive when the document is sent for signature.
- Email Subject: The subject line of the signing email.
- Email Message: The message shown in the signing email.
- DocuSign Brand ID: The DocuSign brand to apply to the email and signing page. Leave it empty to use your DocuSign account's default brand.
Each setting accepts typed text or a Salesforce field. Your DocuSign account must be connected before these settings can be used.
Output Settings
Use Output Settings to choose how the generated PDF is produced. By default, the fields CloudFiles fills in are locked into the page, so recipients can't change them. Turn on Keep form fields editable if recipients need to correct a filled value after the document is generated.
Preview and Publish
Once all fields have been mapped, navigate to the Preview tab and generate a preview using a valid Salesforce record to verify that the template is populated correctly. The Publish tab becomes available only after a successful preview is generated. After reviewing the output and confirming that all fields, checkboxes, and form fields are correctly configured, navigate to the Publish tab and click Publish. The template will then be available for use in CloudFiles Document Generation and Salesforce Flows.