1. Access CloudFiles' LWC
You can drag and drop the CloudFiles widget onto any standard or custom Salesforce object. Simply go to the 'Edit Page' from the object page, add a new tab to your object and drag and drop the widget -
2. Attach a folder
Now that your widget is setup, you can start linking files or folders with your Salesforce objects. Just click the "Select folder/file" button in the widget, select the folder from any cloud storage (e.g. SharePoint, Google Drive, Box, Dropbox, AWS S3, OneDrive) and that's it. Follow the simple steps below -
- Go to the Salesforce record where you want to link the folder
- Locate the CloudFiles widget that you had added in the previous step
- Click on the "Select folder/file" button (See note below if you instead see the "Connect CloudFiles" button here)
- A dialog will open where you can select your library / folder / file that you want to link
- Select the folder or file. The contents will immediately start showing up in your widget
NOTE: If you see the "Connect CloudFiles" button instead of the "Select folder/file" button on the widget, this is because you recently installed the Salesforce app and haven't connected it to the CloudFiles account yet. Simply click the Connect button and follow on-screen instruction. Screenshots for this are shown in Step 2 here.
Here's a video that shows this in action. You can also connect multiple folders and files in this widget.
If you haven't already done so, check out our article on Connect external folder to a record which talks about this in detail.
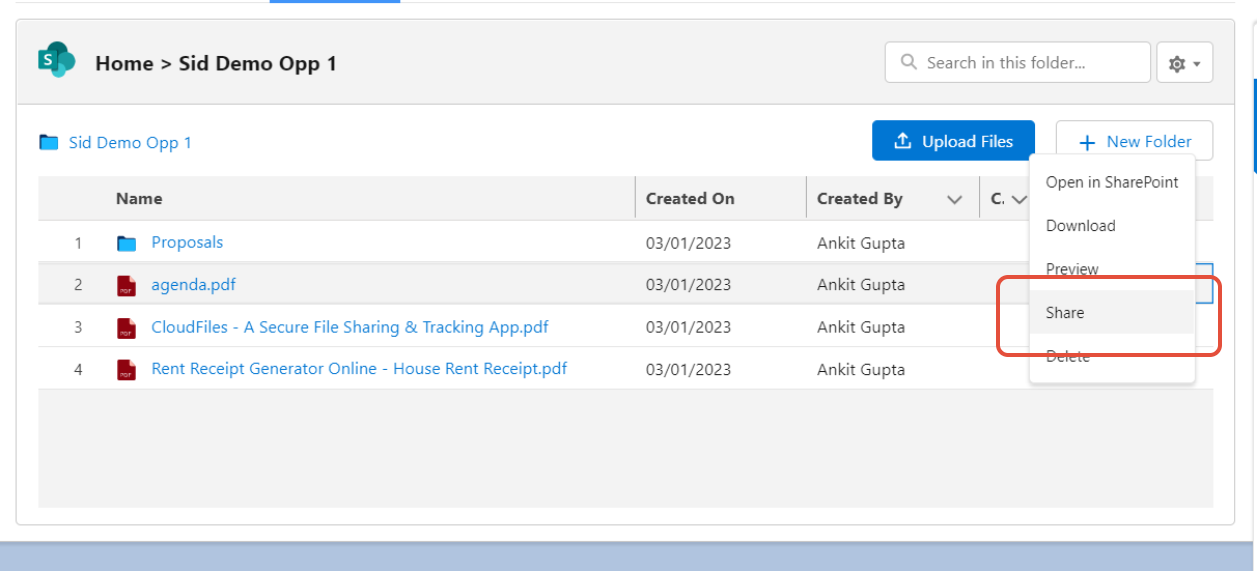
3. Create Sharing Link
Once the file / folder has been attached, you can use the options dropdown on the right side of the tile in the widget. Click on the attachment dropdown and choose the Share option. This is shown in the graphic below.
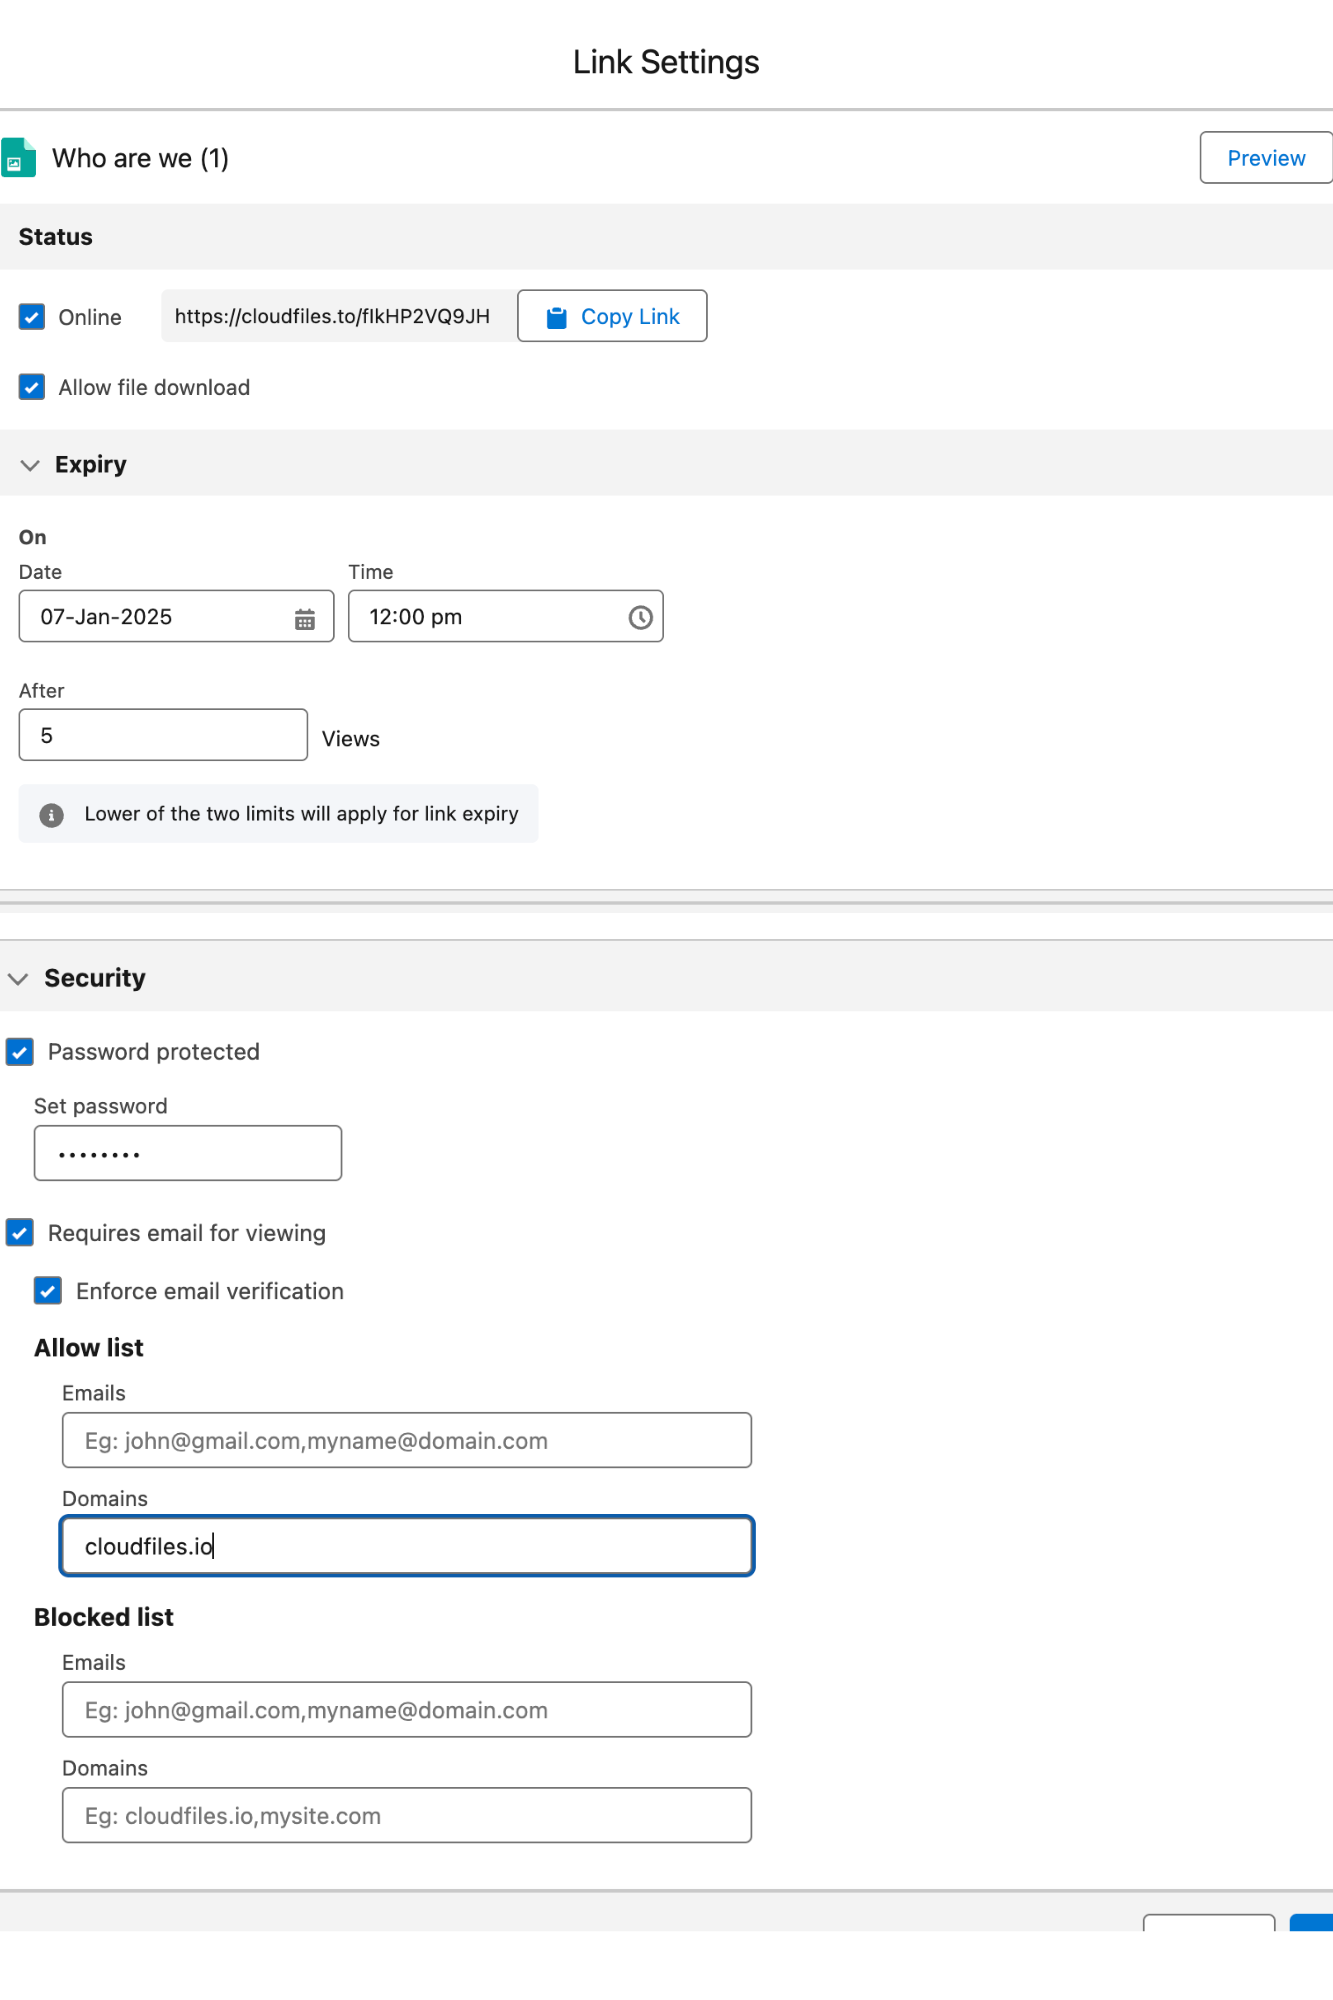
4. Configure Link
You can set a number of security & analytics settings on this link. You can further change these settings anytime right from the Salesforce object. The security settings open up when you click on the Share button above. You can also update these settings by clicking the 'Edit Link Settings' option from the same dropdown as shown above. This option appears after you have created a sharing link.
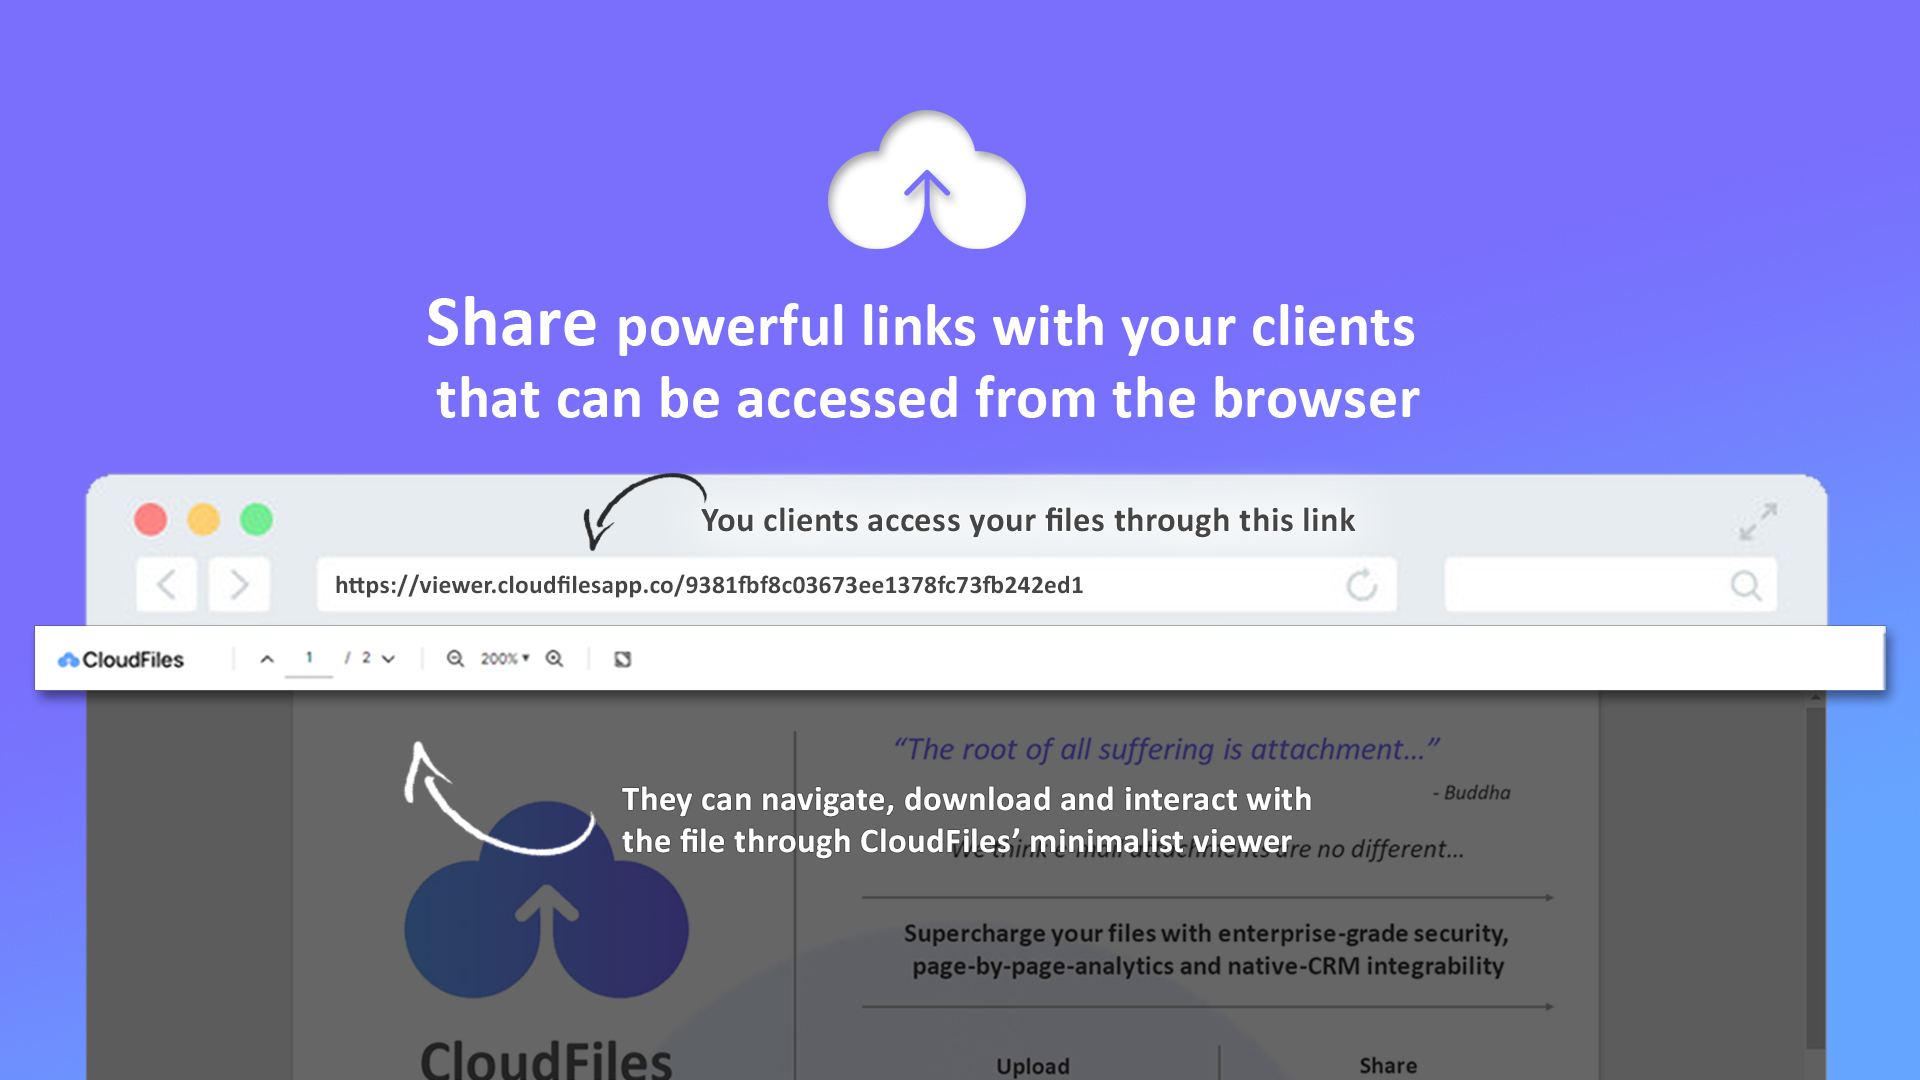
5. Access the link
To checkout how your file looks in the CloudFiles viewer, copy the link from the dialog above, and paste it in a browser window. This will open the file as a webpage, right there in the browser.
You can also white-label the viewer by using your own custom logo & domain.
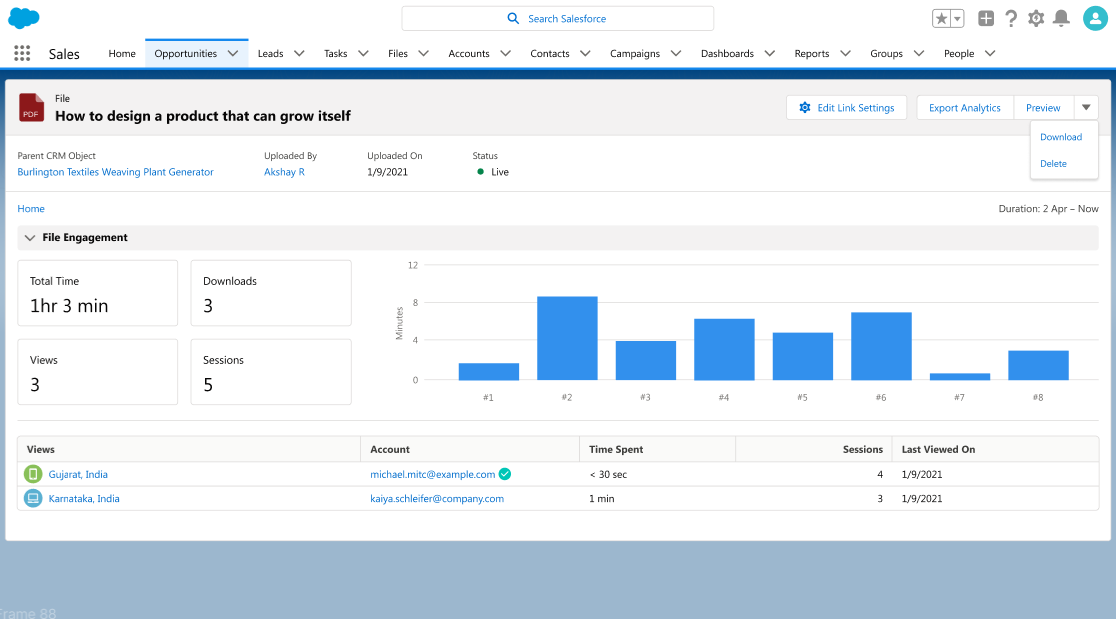
6. Check the Analytics
You can view your file analytics right there from the Salesforce object. You can analyze a number of details such as opens, time spent, page wise analytics etc... You can also drill down into individual users, devices & sessions in case the link has been accessed multiple times. Analytics can be accessed by using the 'View analytics' button in the same dropdown. This option appears after you have created a sharing link.
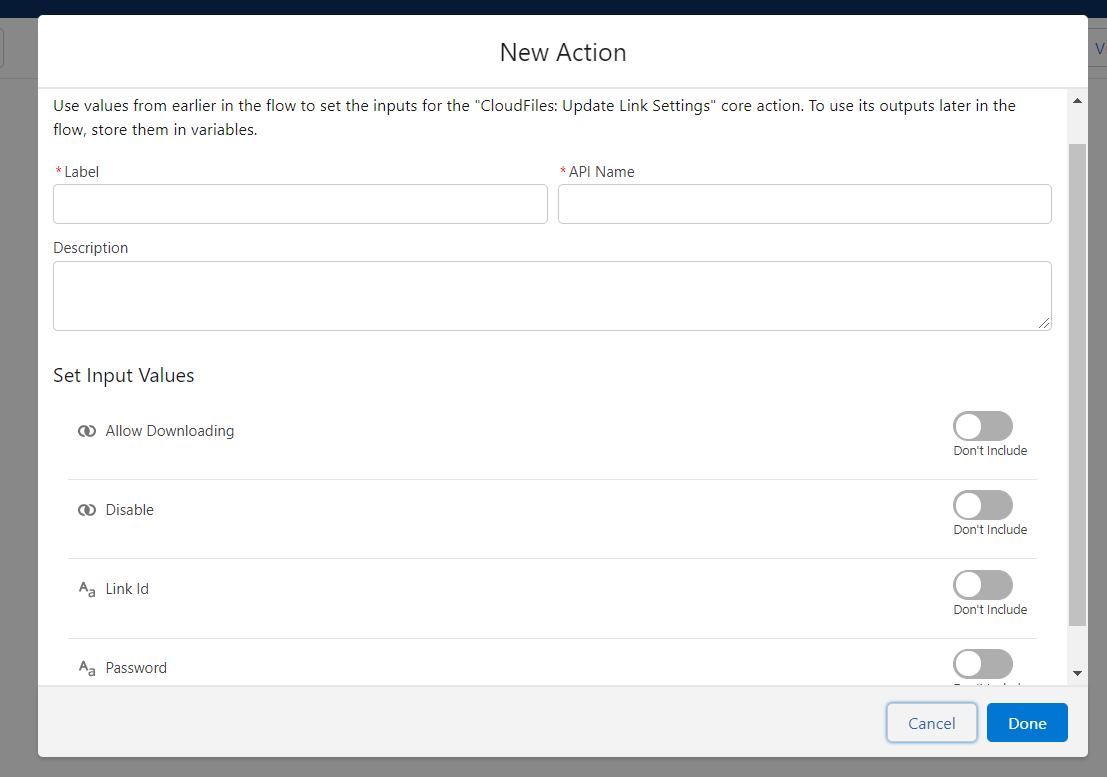
7. Flows Support
You can also do any of the things above through CloudFiles flow builder triggers or actions provided. These customizations can further streamline your processes. We provide a Create link action that can automatically create a sharing link and an Update Link Settings action that can be used to add security settings on a link.
For more information on the various flow actions availabel in CloudFiles, check our articles on Flow Actions.