Introduction
Enhance automation with CloudFiles' Custom Actions through internal widgets in Salesforce, allowing you to trigger Screen Flows or Autolaunched Flows directly from the widget. You can configure both Resource Actions (for individual resources) and List Actions (for multiple resources) to streamline your document management workflows.
Prerequisites
Ensure you have the following ready before setting up widget flow actions:
- Access to the CloudFiles Document Management App in Salesforce.
- Required flows (Screen Flow or Autolaunched Flow) configured in your Salesforce environment.
- Familiarity with creating flow input variables.
Setting Up Widget Flow Actions in CloudFiles Widget
Follow these steps to configure List Actions in the CloudFiles widget -
Step 1: Open Widget Configuration
- Navigate to the CloudFiles Document Management App.
- Open the "Widget Configuration" page.
Step 2: Locate Resource / List Actions Section
Scroll to the bottom of the page, where you'll find the Resource Actions & List Actions section. Refer to the image below for a visual understanding -
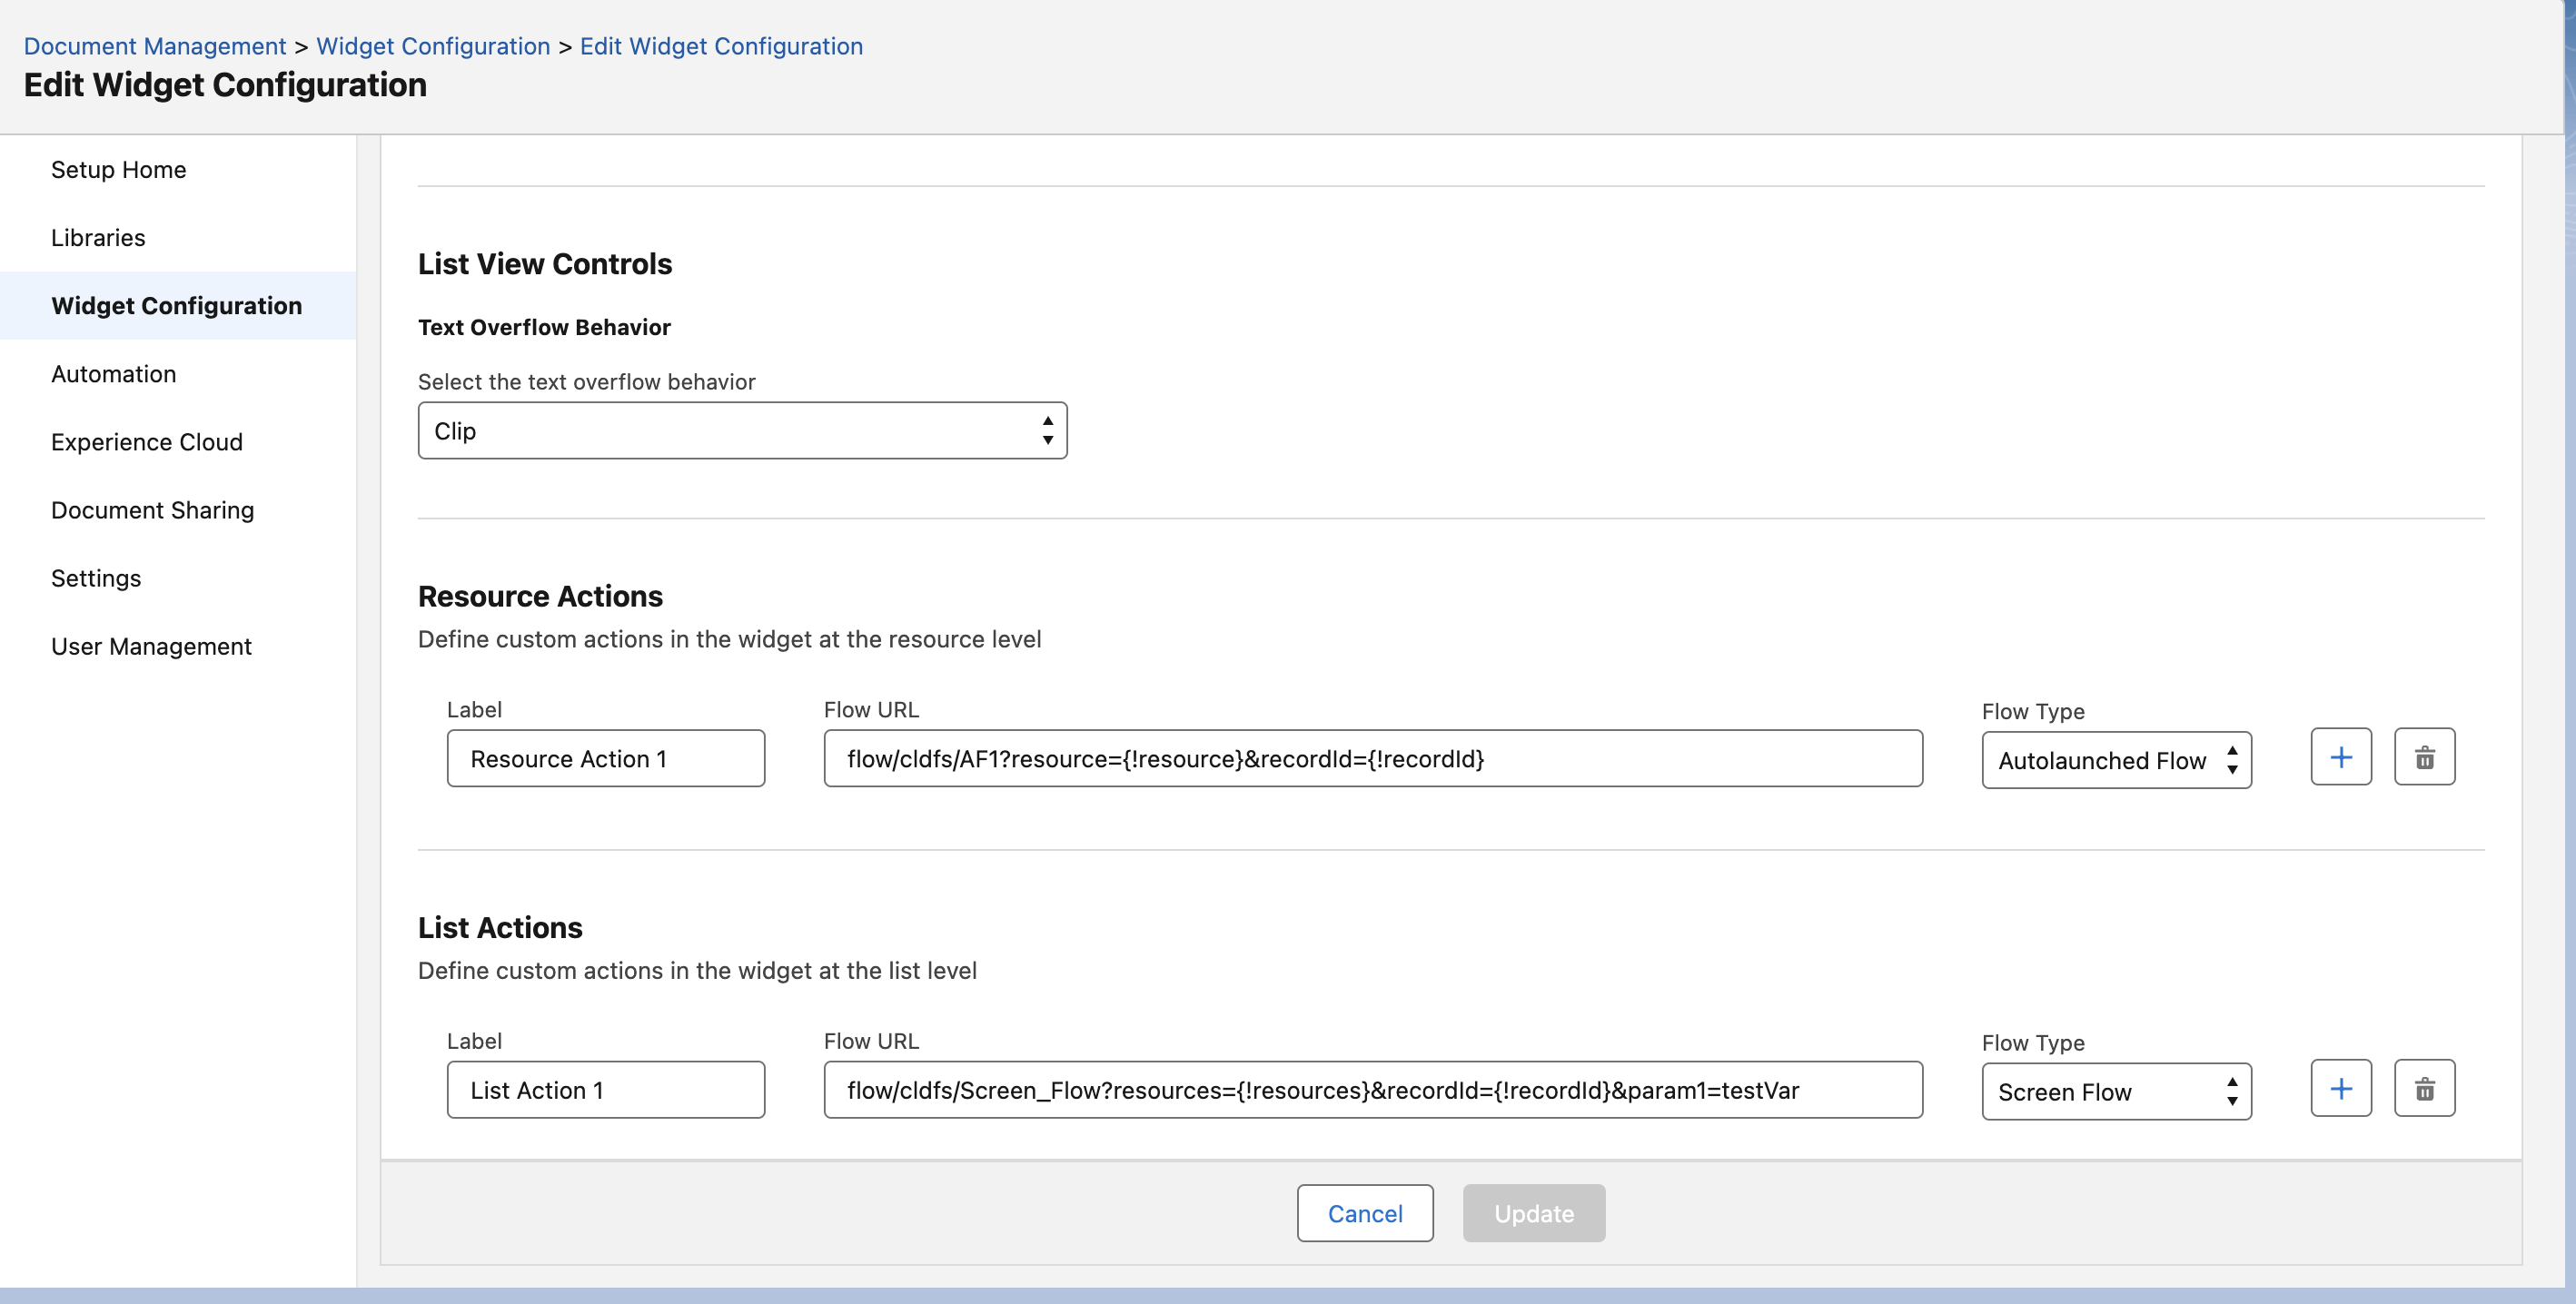
Step 3: Specify Attributes for Actions
For each action (Resource or List), specify the following attributes -
- Label - The name of the action displayed on the widget.
- Flow URL- The URL of the flow to be triggered.
/flow/CloudFiles_add_to_approval_pack- Flow Type- Select the type of flow from the dropdown (Screen Flow or Autolaunched Flow).
Step 4: Create Flow Variables
To pass selected resources (files/folders) and the current record ID to the flow, create the following two variables -
For Resource Actions
- resource:
- Type - Variable
- Data Type - Apex Defined
- Apex Class - clds__Resource
- Allow Multiple Values (Collection) - False
- Available for Input - True
- recordId:
- Type - Variable
- Data Type - Text
- Allow Multiple Values (Collection) - False
- Available for Input - True
For List Actions
- resources:
- Type - Variable
- Data Type - Apex Defined
- Apex Class - clds__Resource
- Allow Multiple Values (Collection) - True
- Available for Input - True
- recordId:
- Type - Variable
- Data Type - Text
- Allow Multiple Values (Collection) - False
- Available for Input - True
Step 5: Using Flow URLs
You can then use the flow URL in this format -
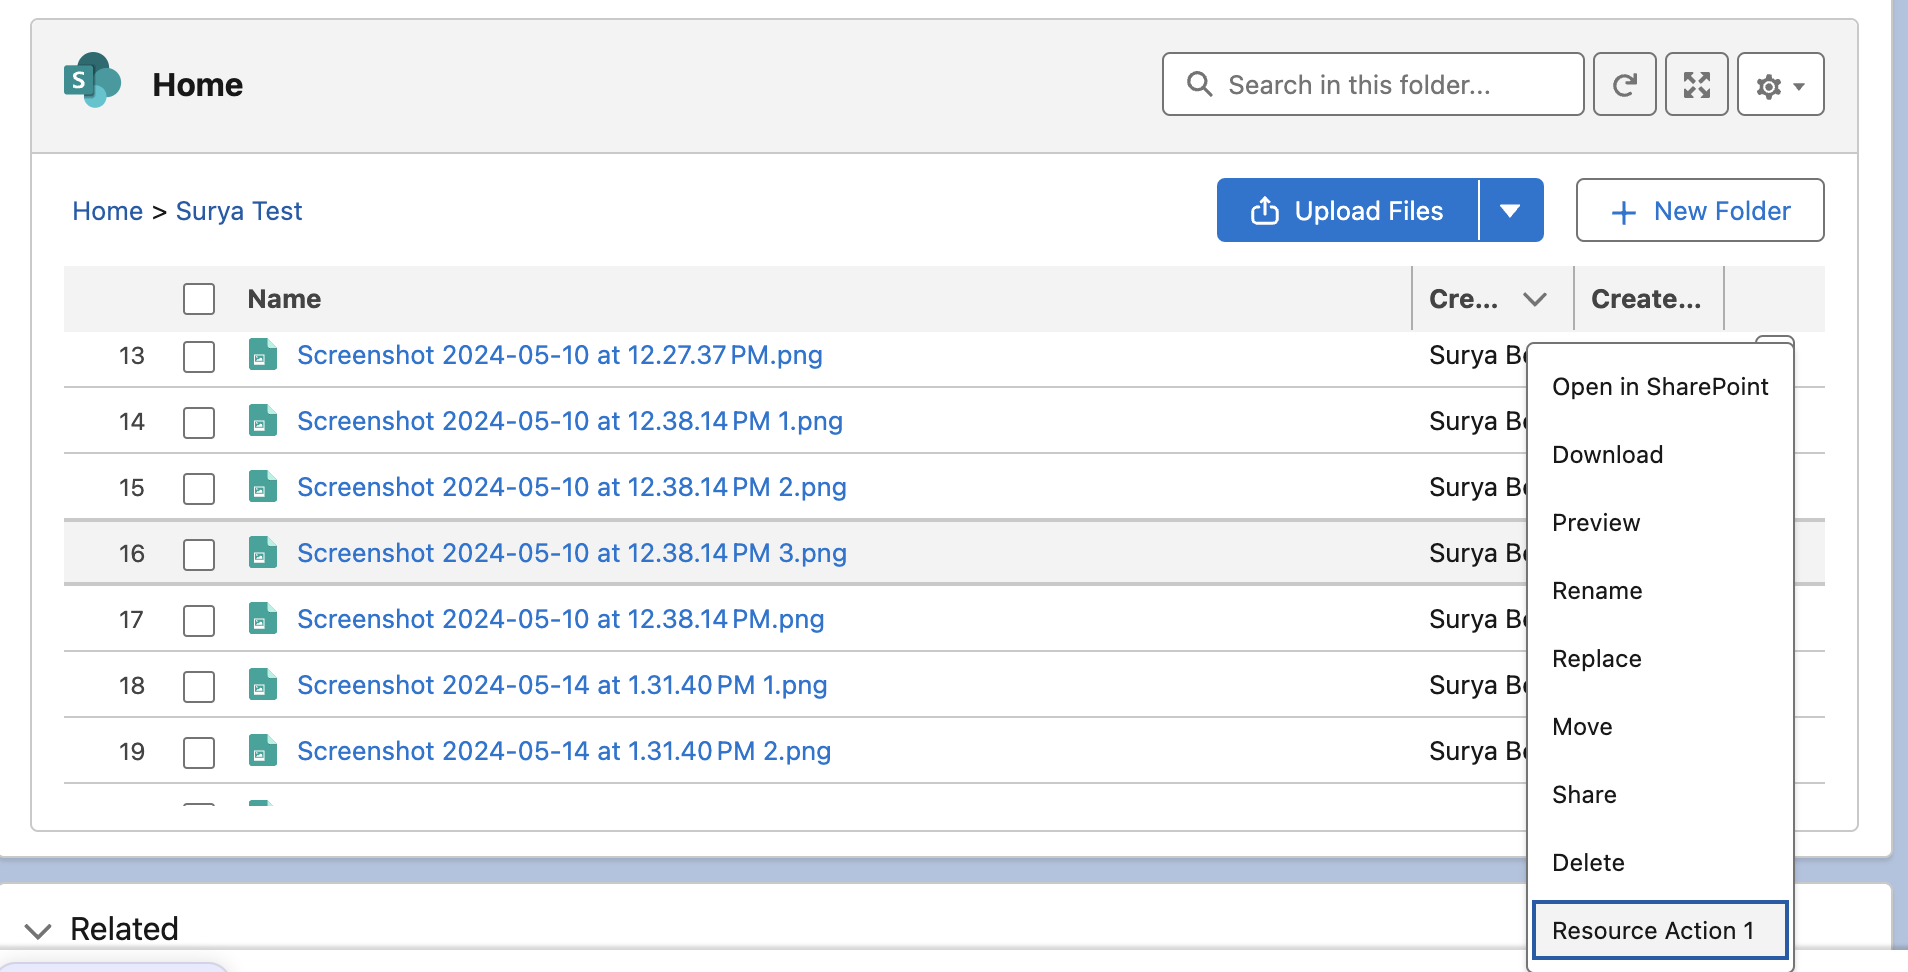
For Resource Action
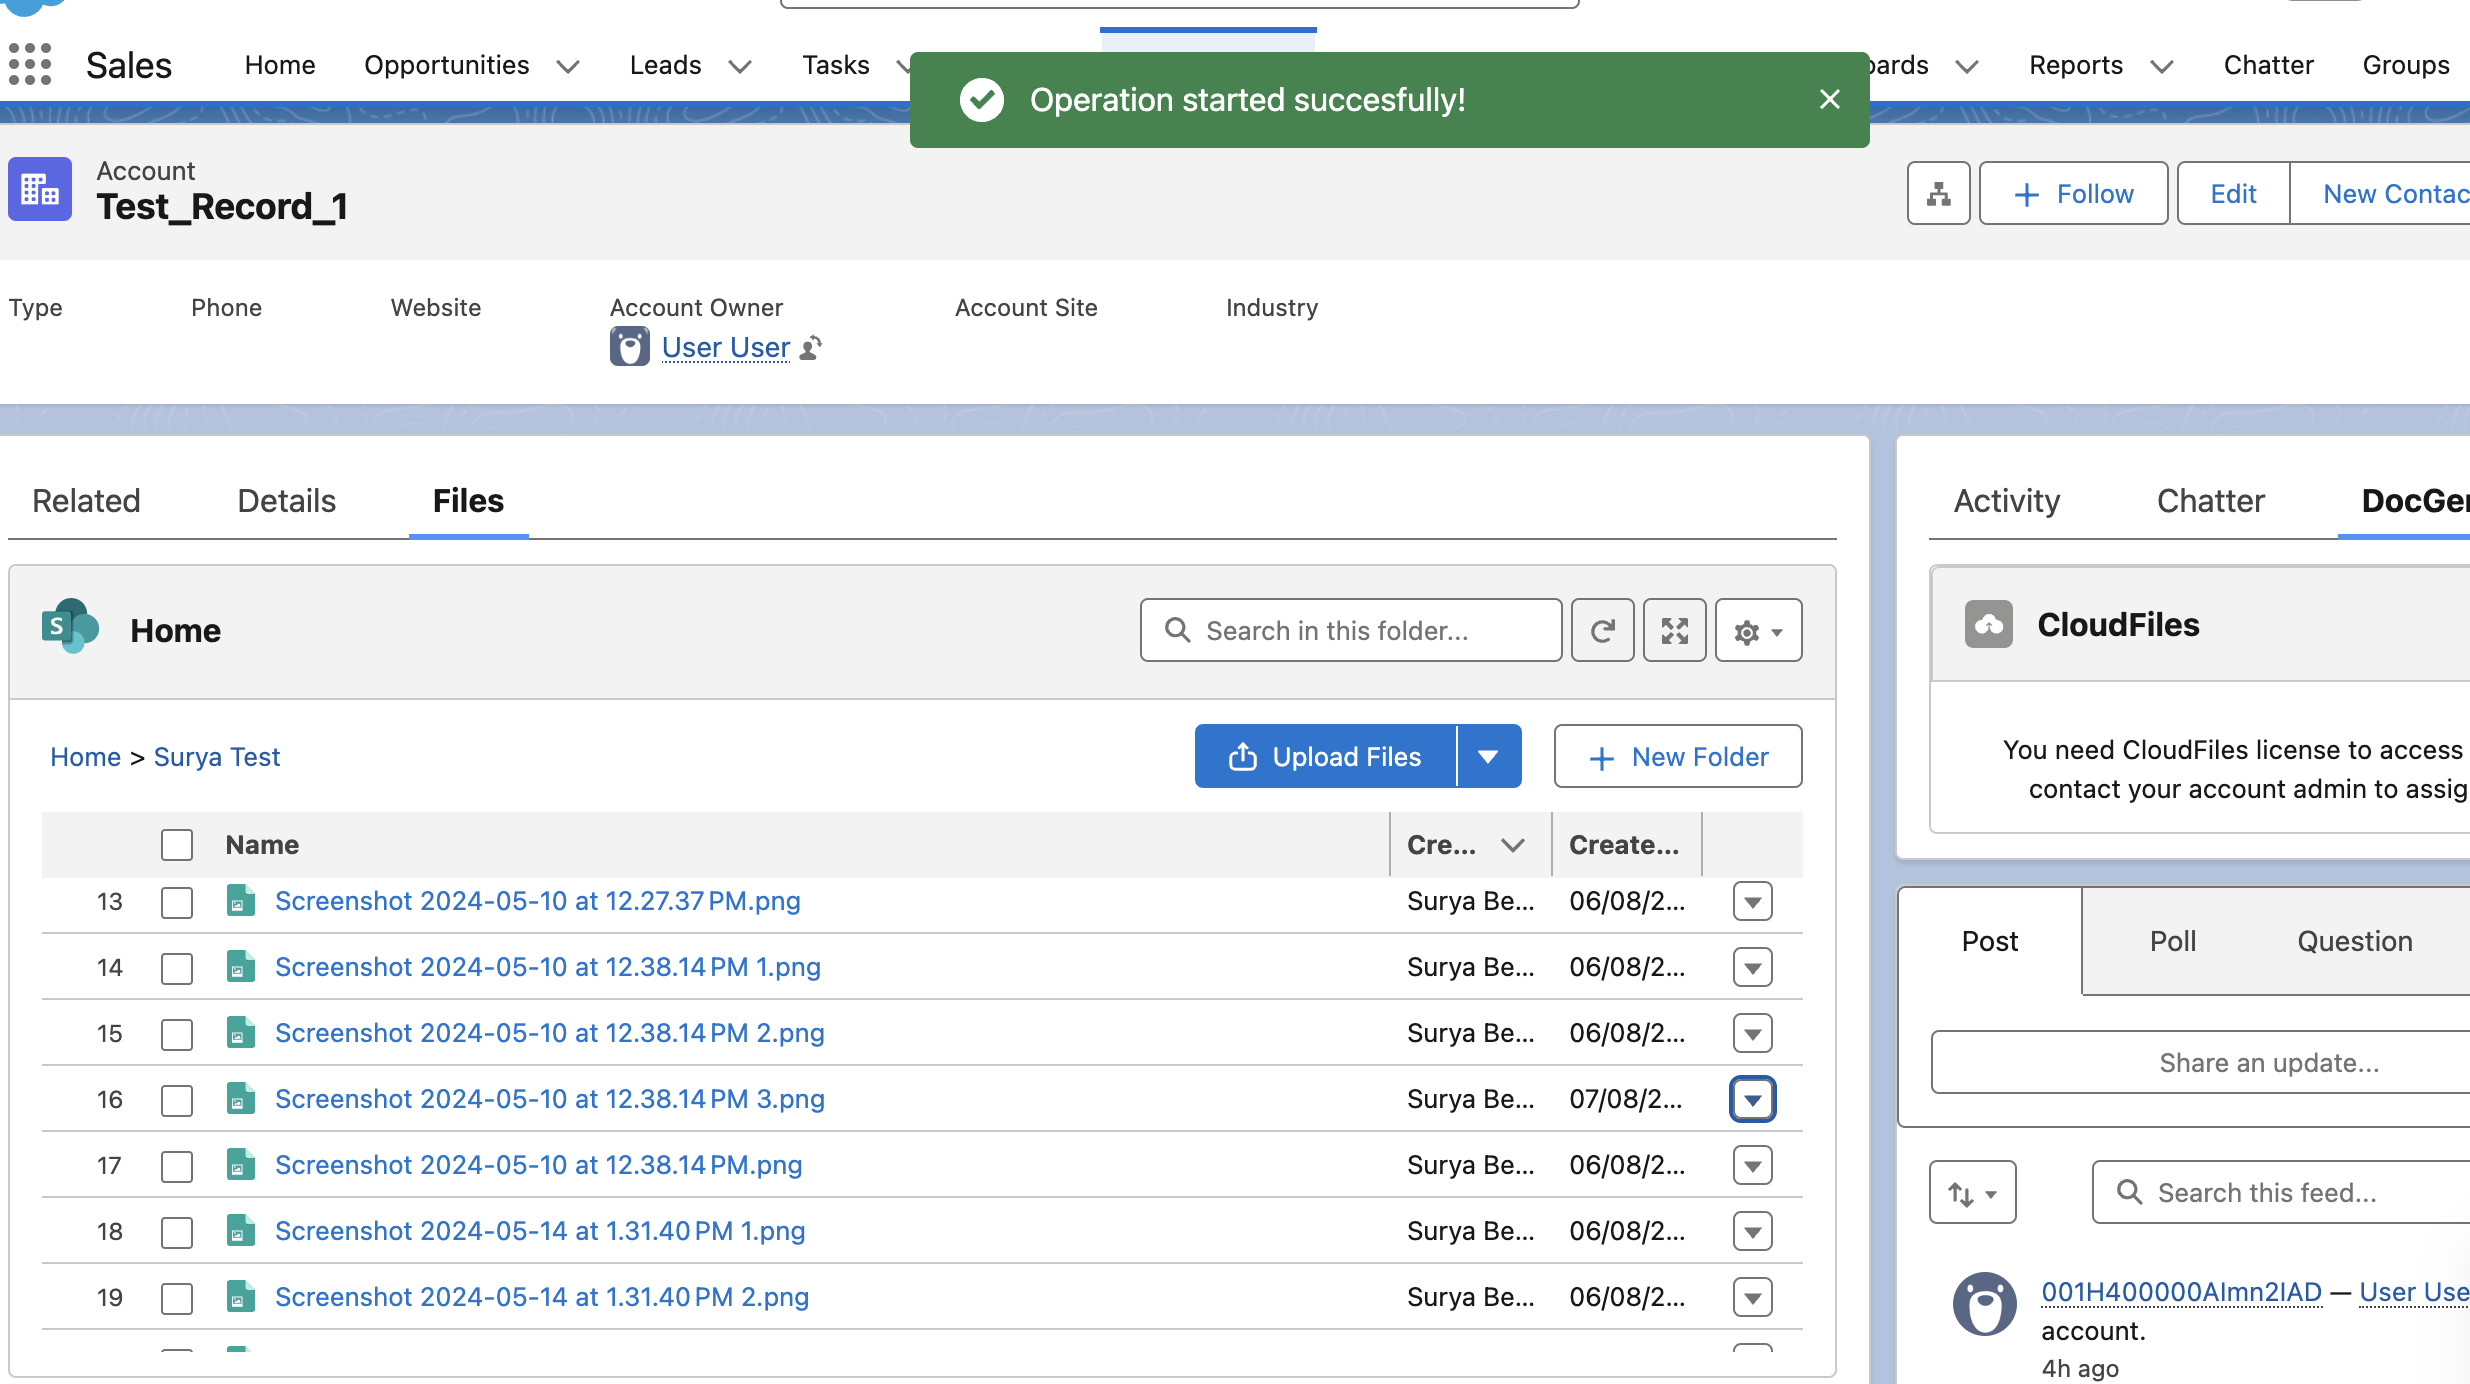
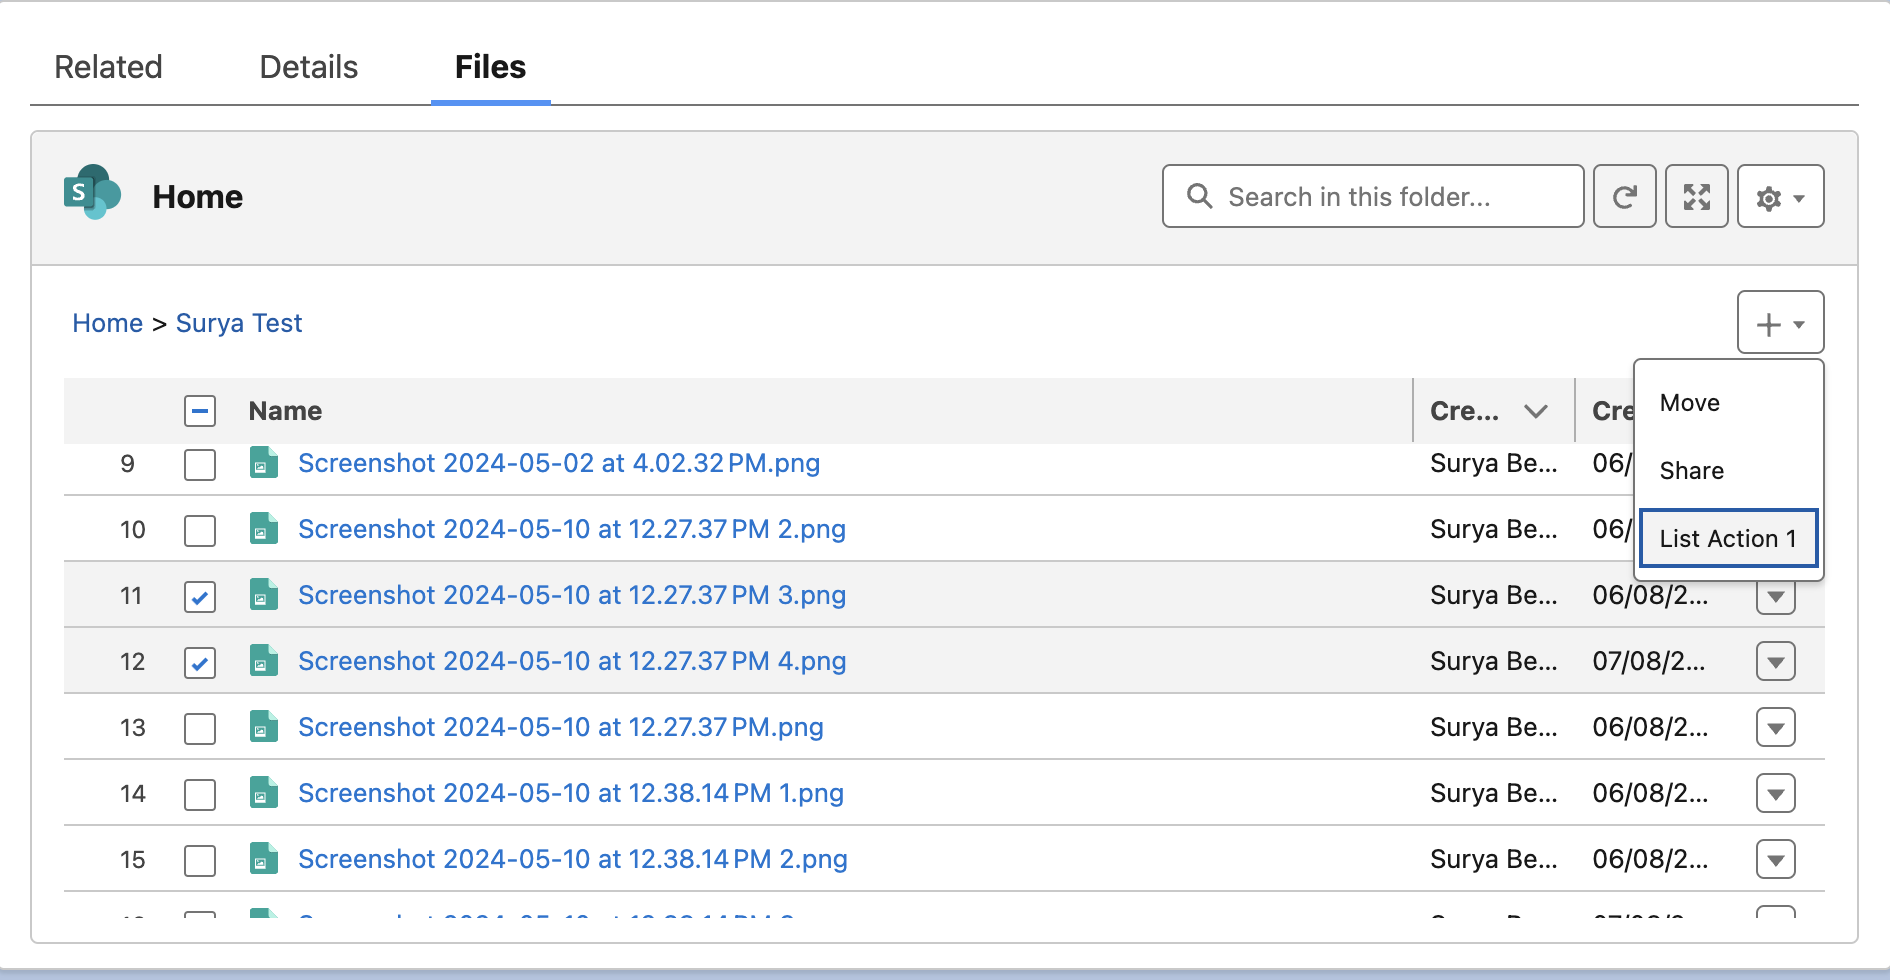
/flow/CloudFiles_add_to_approval_pack?resource={!resource}&recordId={!recordId}For List Action
/flow/CloudFiles_add_to_approval_pack?resources={!resources}&recordId={!recordId}When the user clicks the resource action or list action, your flow will be triggered with the variable values passed into the flow variables. Refer to the images shown below -