This setup is useful when you want to ensure folders do not remain in external storage after the related Salesforce record is removed. For example, when an Account, Opportunity, or Case is deleted, the corresponding folder and its contents can also be deleted automatically.
What to Expect
By the end of this tutorial, you can expect to —
- Automatically trigger CloudFiles automation to delete the attached folder from the connected external storage system when an Account is deleted.
- Keep external storage clean and consistent by removing folders tied to deleted Salesforce records.
Pre-requisites
Before you start with the set-up, please ensure these steps are completed.
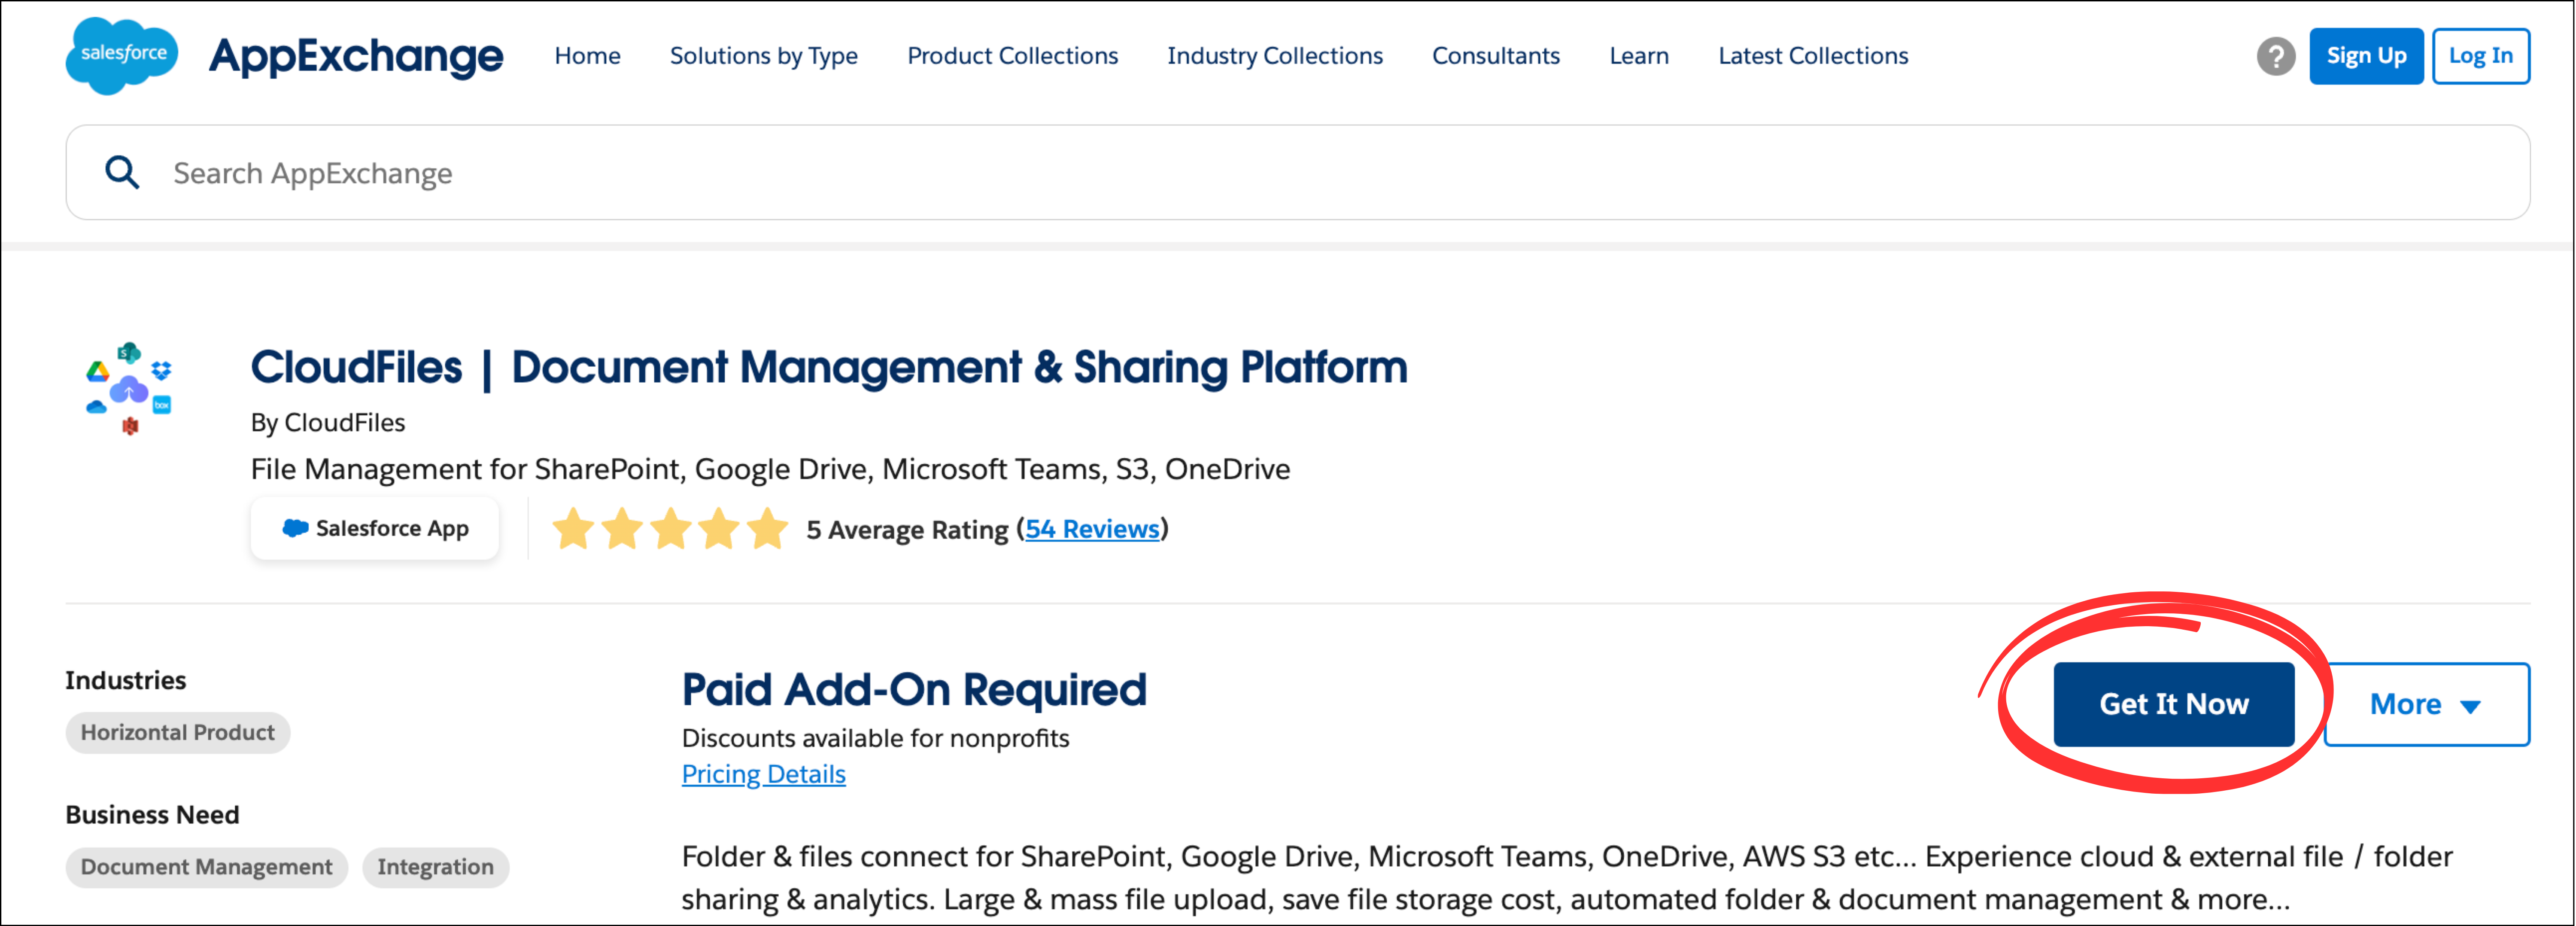
Install CloudFiles in Salesforce
CloudFiles is available on the Salesforce AppExchange and can be installed using the standard app installation process. Check out Installation Guide to know more.
Connect your Cloud Storage to Salesforce using CloudFiles
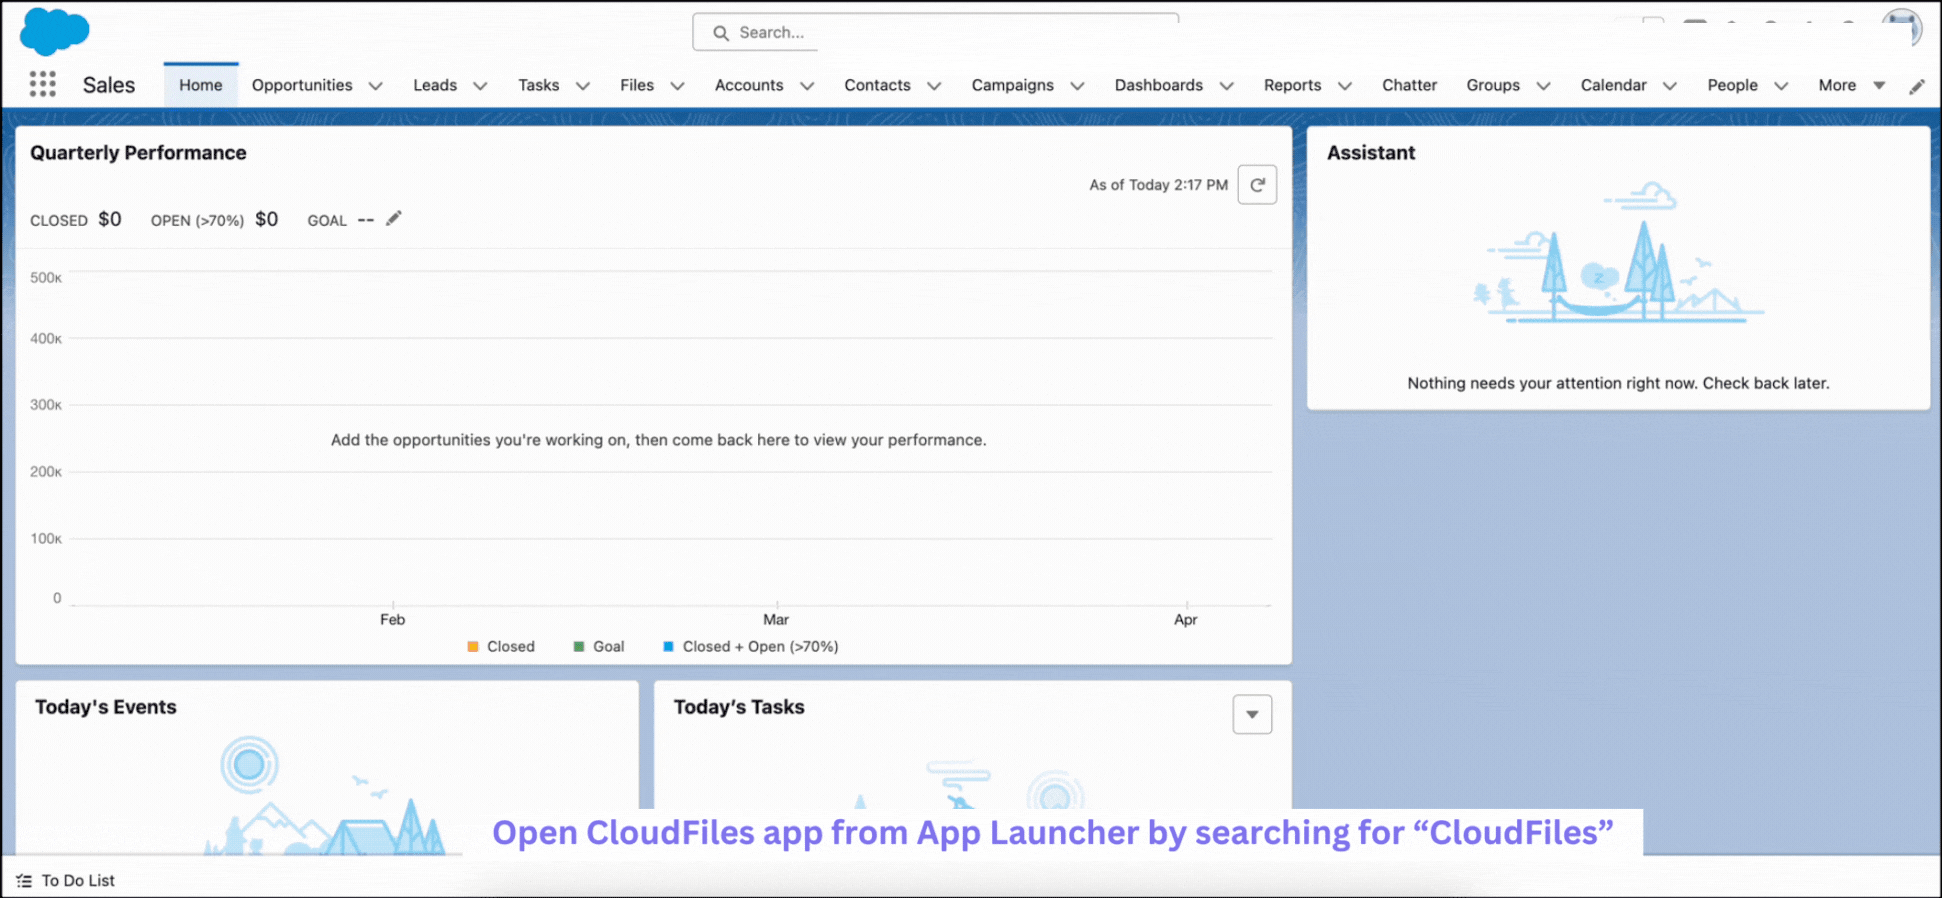
All automations in CloudFiles are activated through Salesforce Flow Builder, utilizing account-wide authentication for external storage libraries through a service (admin) user. To connect your service user, access the setup, click on the external storage of choice and log into your account. For detailed steps, refer to the GIF below for a clearer understanding.
Add CloudFiles Widget to Account page
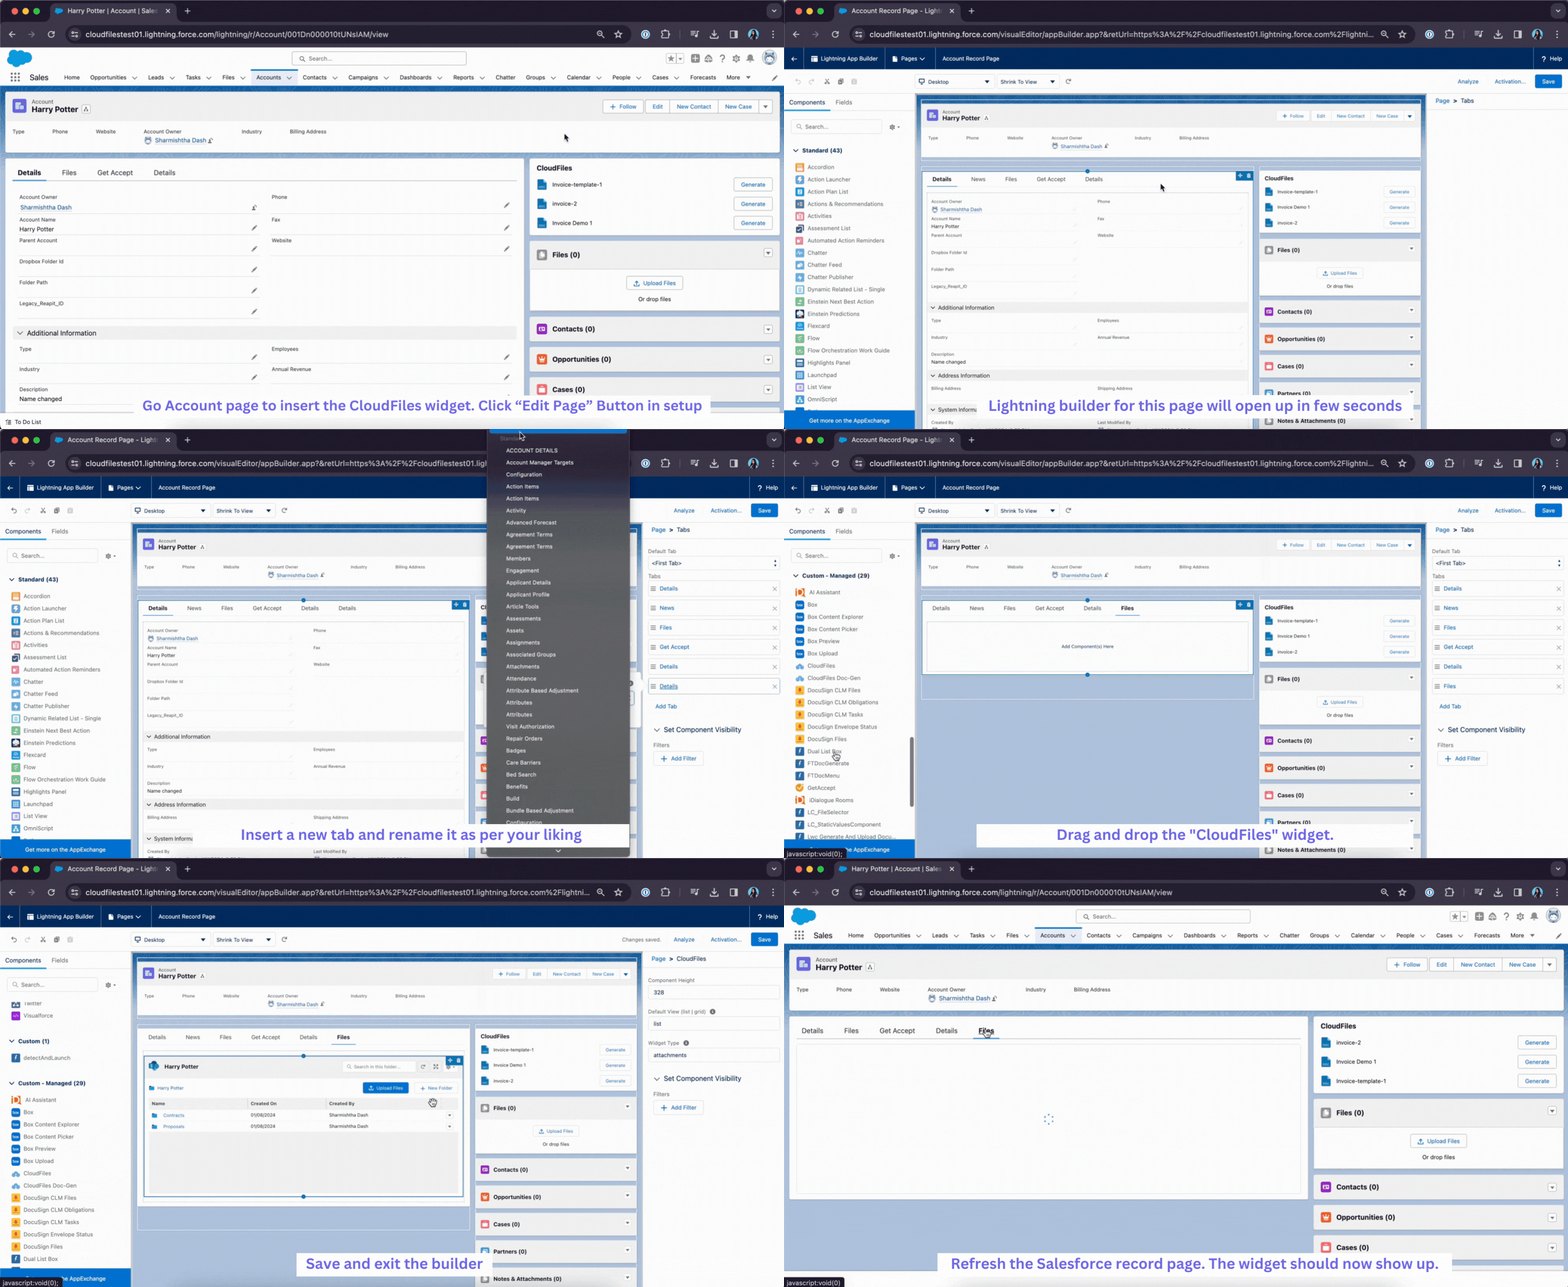
Add the CloudFiles widget to Account page in order to view the files and folders within salesforce. Follow the steps below -
- Go to any Account record and click “Edit Page” Button.
- Lightning builder for this page will open. Insert a new tab and drag and drop the "CloudFiles" widget.
- Save and exit the builder. Refresh the Salesforce record page. The widget should now show up.
- Follow the above steps and add CloudFiles widget to the Lead record page as well.
Refer to the GIF below to get a visual understanding of this step. The inserted widget may show a blank screen but you don't need to worry about it. Move on to the next step.
Automatic folder creation for Accounts
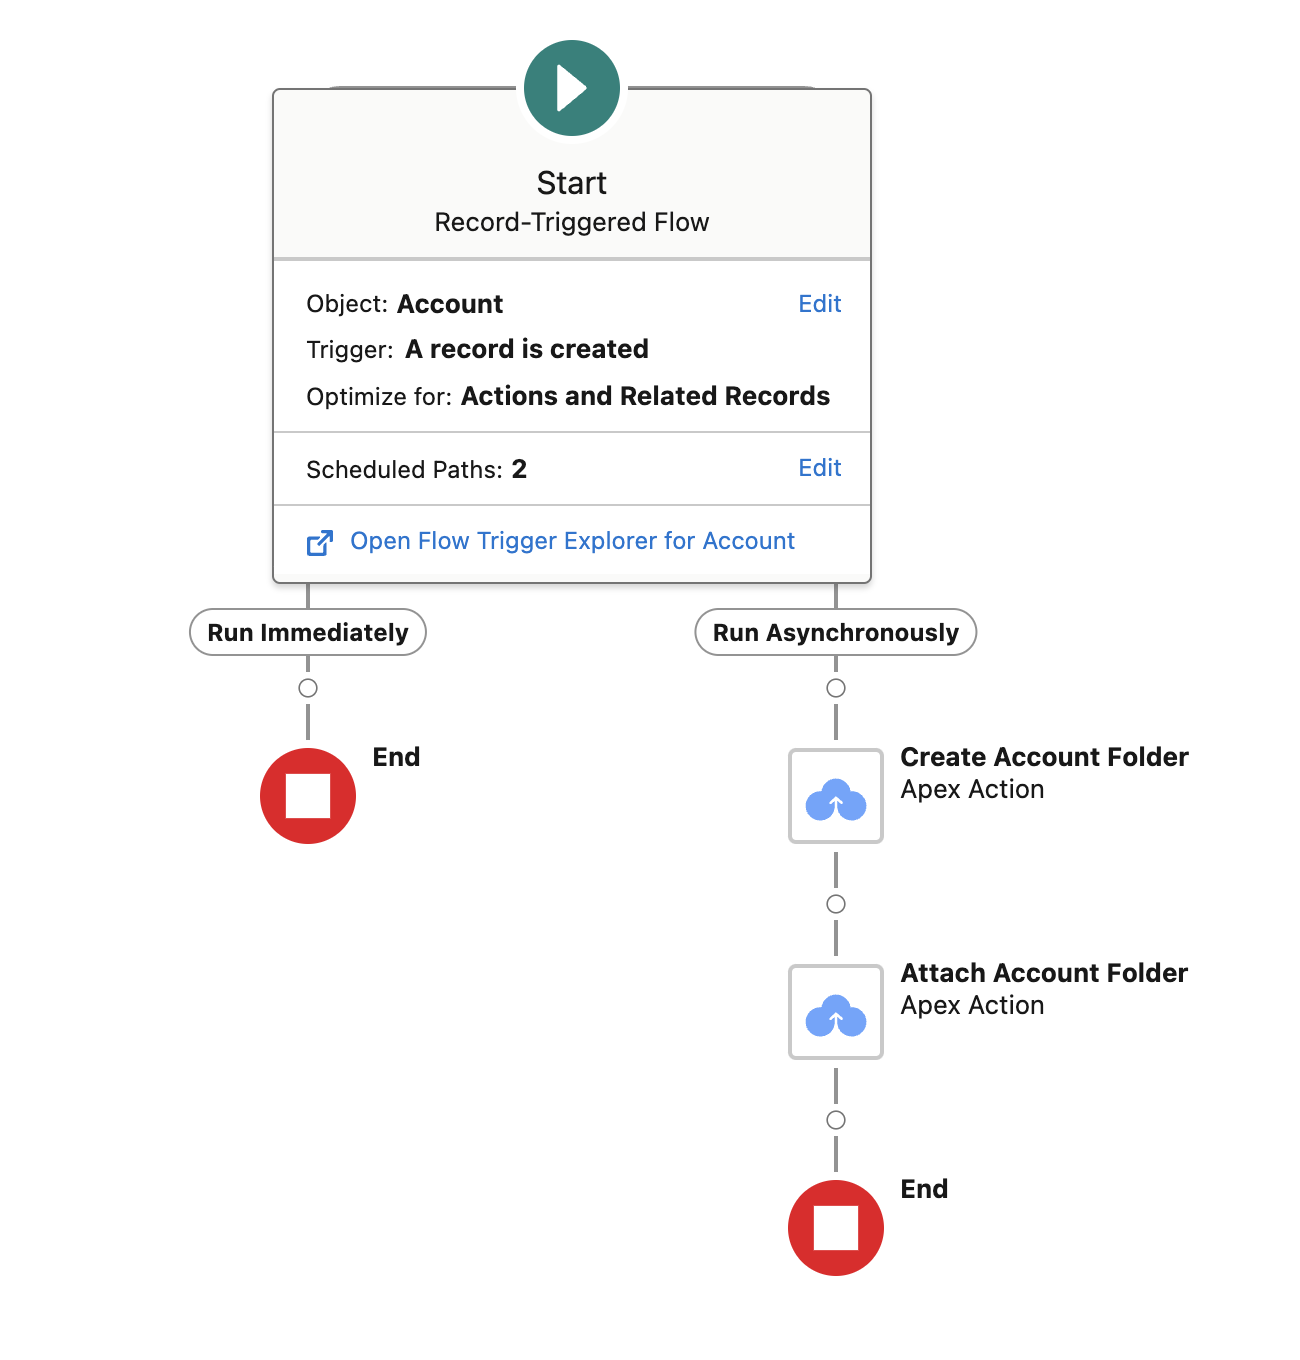
For this tutorial, We require automated folders to be created upon the creation of new Account. To accomplish this, we will create a record-triggered flow using CloudFiles actions. For a comprehensive guide on the process of creating automated folders, please refer to our tutorial at Create Automated Folder Hierarchies for Managing External Files from Salesforce Objects
This is how the flow would look like -
Flow - Folder deletion on record deletion
- In this section, we will create two Salesforce flows:
- Flow 1 captures the Account deletion event and creates a CloudFiles Event (cldfs__CloudFilesEvent__c) record with the Type set to custom-account-deleted.
- Flow 2 listens for this event type and triggers CloudFiles automation to delete the folder attached to the deleted Account in your external storage system.
Why two flows?
Salesforce record-triggered flows that run “A record is deleted” trigger cannot reliably perform external actions (like deleting a folder in Google Drive/SharePoint). That’s why we capture the deletion as an event first, then process the deletion safely using a separate event-driven flow.
Flow 1 - Capture Account deletion
This flow runs when an Account is deleted and creates a CloudFiles Event record containing the deleted Account’s record Id. This event is later used by Flow 2 to trigger folder deletion.
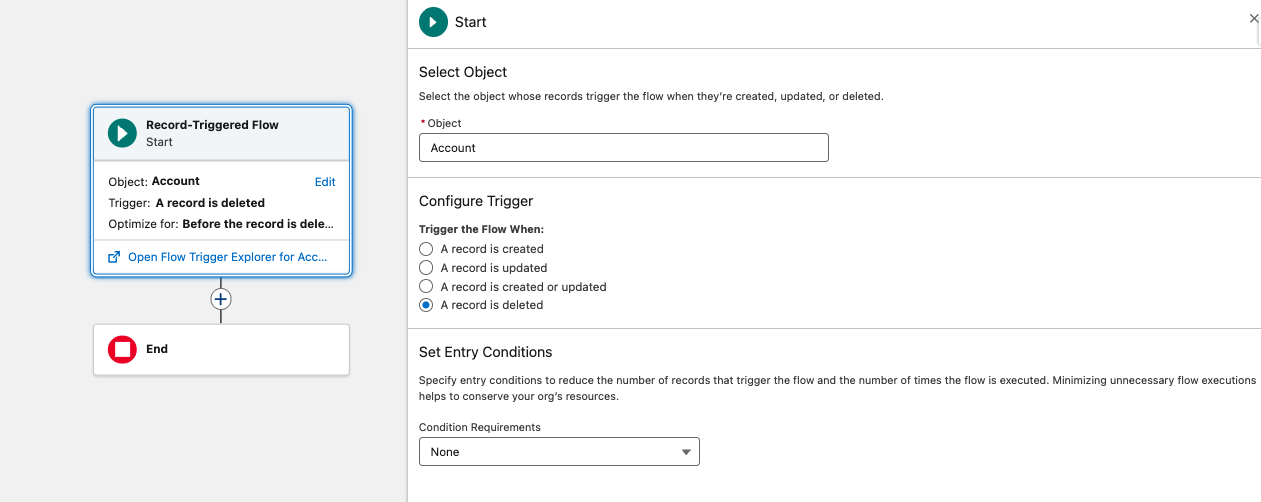
1 - Configure a Record Triggered Flow
- Go to Setup → Flows → New Flow
- Choose Record-Triggered Flow
- Configure the Start element:
- Object: Account
- Trigger the Flow When: A record is deleted
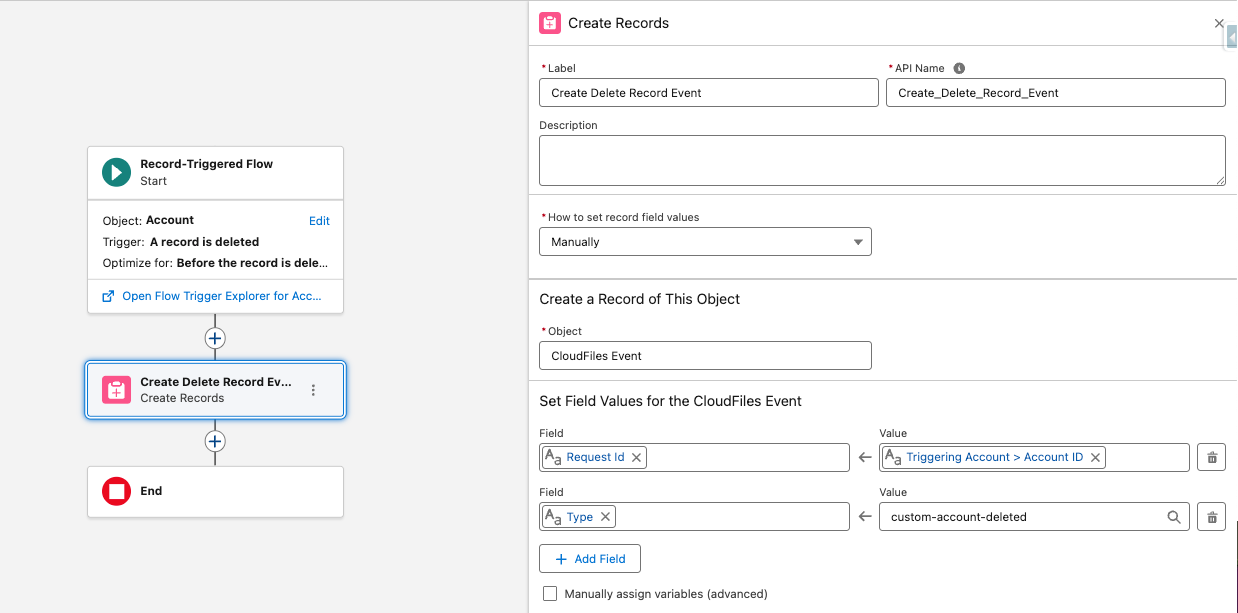
2 - Create CloudFilesEvent record
Create a new record of object: cldfs__CloudFilesEvent__c and use the following field values:
- cldfs__Type__c = custom-account-deleted
- cldfs__Request_Id__c = {!$Record.Id}
Flow 2 – Process Account Folder Deletion
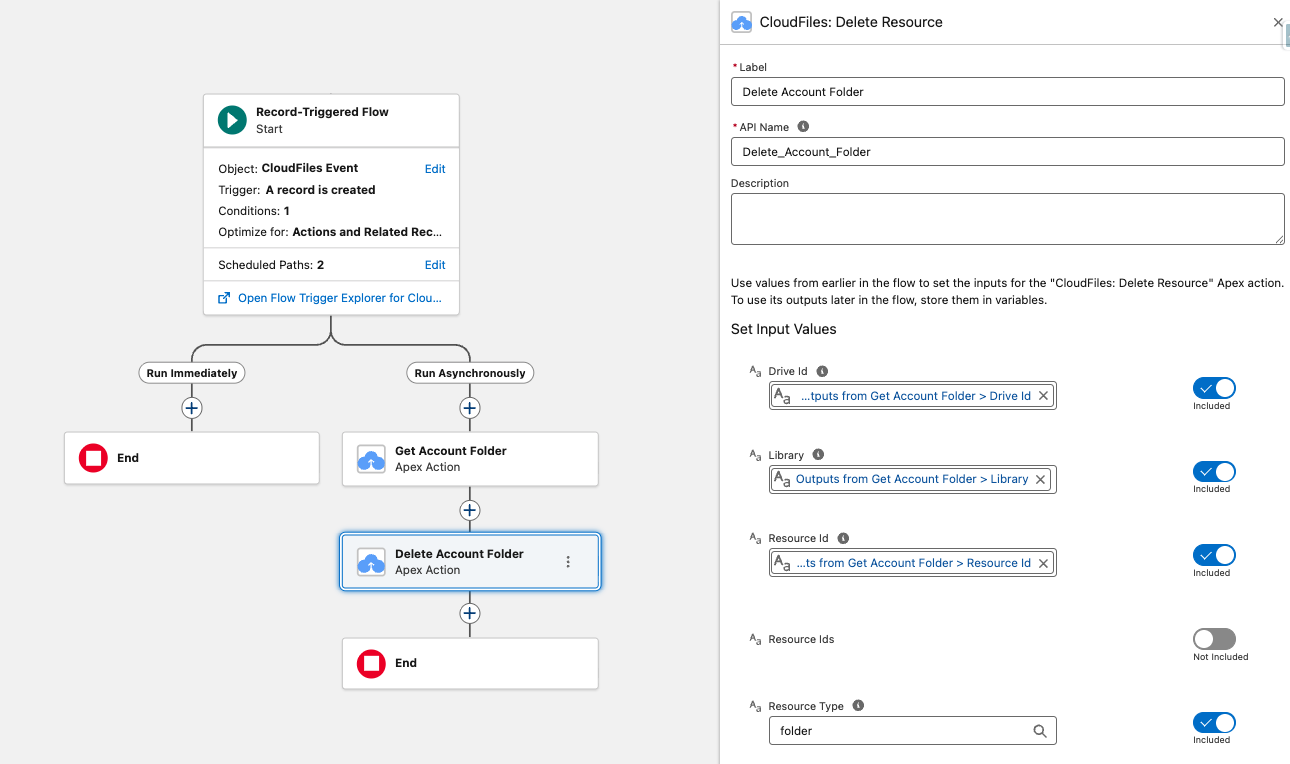
In this flow, we process the CloudFiles Event record created by Flow 1 and delete the folder attached to the deleted Account.
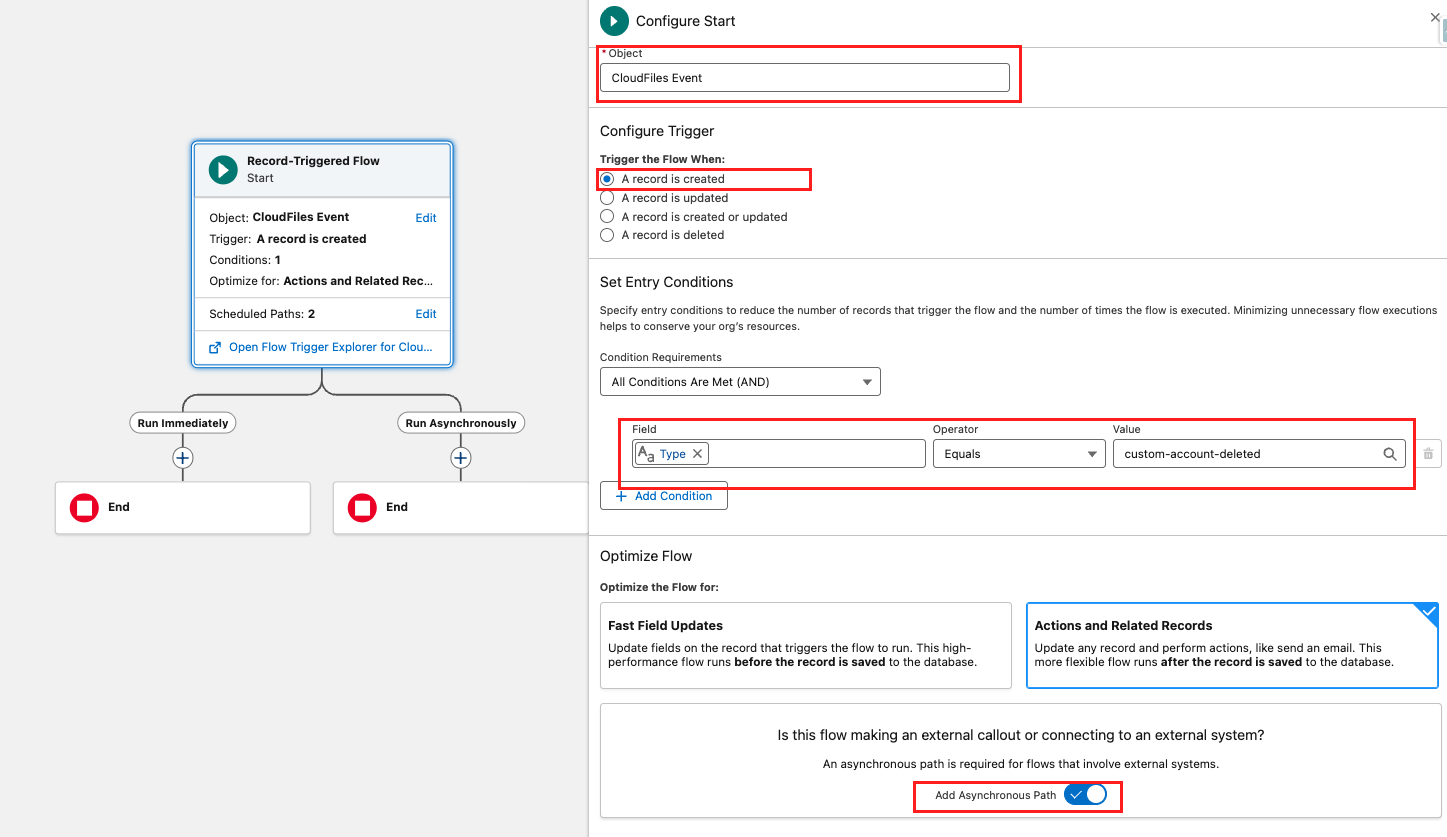
This flow triggers when a CloudFiles Event (cldfs__CloudFilesEvent__c) record is created and the event Type equals custom-account-deleted
1 - Configure a Record Triggered Flow
- Create a new Record-Triggered Flow.
- Select the Object as: CloudFiles Event (cldfs__CloudFilesEvent__c)
- Configure the Trigger:
- Trigger the Flow When: A record is created
- Entry Condition: Type Equals custom-account-deleted
- Set Optimize the Flow for: Actions and Related Records
- Enable Run Asynchronously, since CloudFiles actions are executed asynchronously.
2 - Get Account Folder
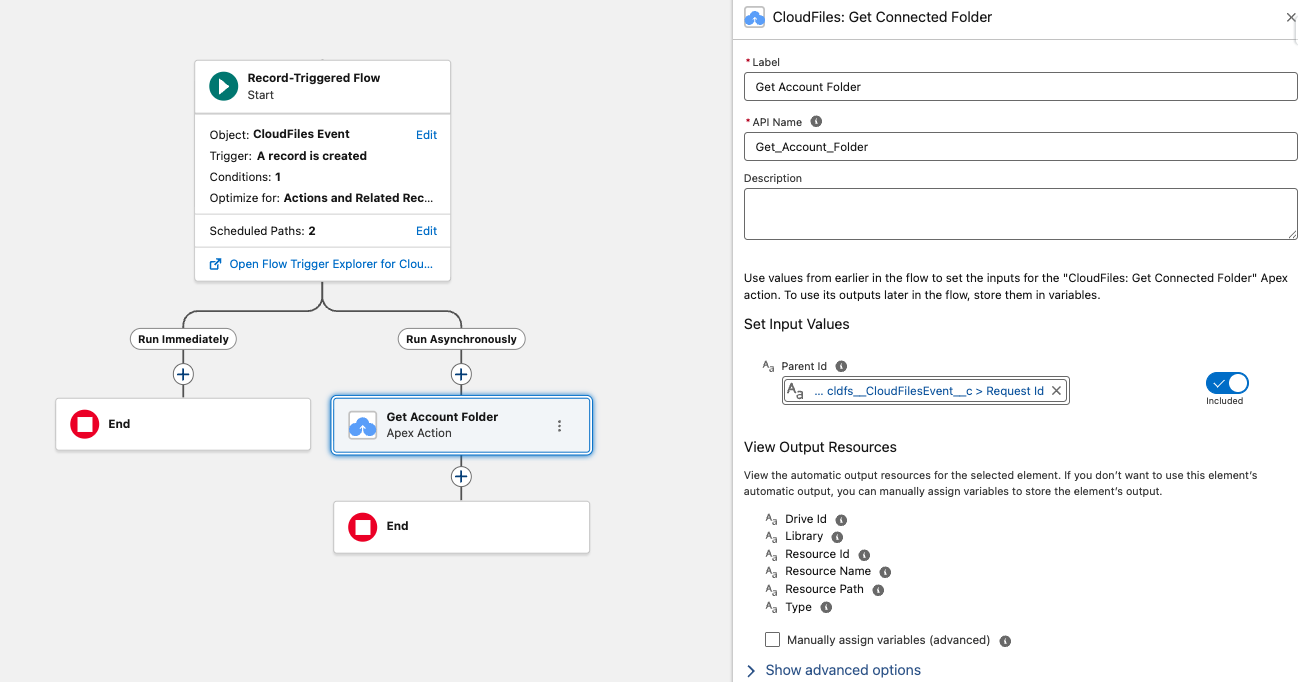
Once the flow is triggered, we need to identify the folder connected to the deleted Account. To do this, we use the CloudFiles Apex Action: CloudFiles: Get Connected Folder.
- Add an Action element and select: CloudFiles: Get Connected Folder
- Set the input value:
- Parent Id = Request Id from the CloudFiles Event ({!$Record.cldfs__RequestId__c})
3 - Delete Account Folder
Now that we have the folder details from the previous step, we can delete the folder from external storage using the CloudFiles Apex Action: CloudFiles: Delete Resource.
- Add an Action element and select: CloudFiles: Delete Resource
- Map the required inputs using outputs from Get Account Folder:
- Drive Id = Outputs from Get Account Folder → Drive Id
- Library = Outputs from Get Account Folder → Library
- Resource Id = Outputs from Get Account Folder → Resource Id
- Resource Type = folder
Save and Activate the Flows
Save and activate both flows. Once they are active, whenever an Account is deleted, Flow 1 creates a CloudFiles Event (cldfs__CloudFilesEvent__c) record with the Type set to custom-account-deleted and stores the deleted Account’s record Id in the event. This triggers Flow 2, which retrieves the connected folder using the CloudFiles Event information and deletes the folder asynchronously from the configured external storage system.
Test the Flows in Action
Now that everything is set up, let’s test the flows. Follow the steps below to confirm the folder deletion automation is working as expected.
- Create a new Account record. This should create and attach a folder that is visible in the CloudFiles widget on the Account record page.
- Open the Account record and confirm the folder is connected correctly in the CloudFiles widget.
- Delete the Account record.
- Navigate to CloudFiles Events (cldfs__CloudFilesEvent__c) and confirm that a new event is created with Type custom-account-deleted.
- Verify that the connected Account folder has been deleted from your external storage system (Google Drive / SharePoint / Box).