Overview
CloudFiles supports a webhook that allows you to trigger a resource-updated event in Salesforce whenever metadata or properties of a file are changed directly in a connected SharePoint library. This is useful when you want Salesforce automations to respond to file updates made in SharePoint (for example, when a column like “Tags” is updated), not just when actions are taken via the CloudFiles Lightning component.
Setting up the Power Automate Flow
The flow will consist of 3 main steps and looks like the following -
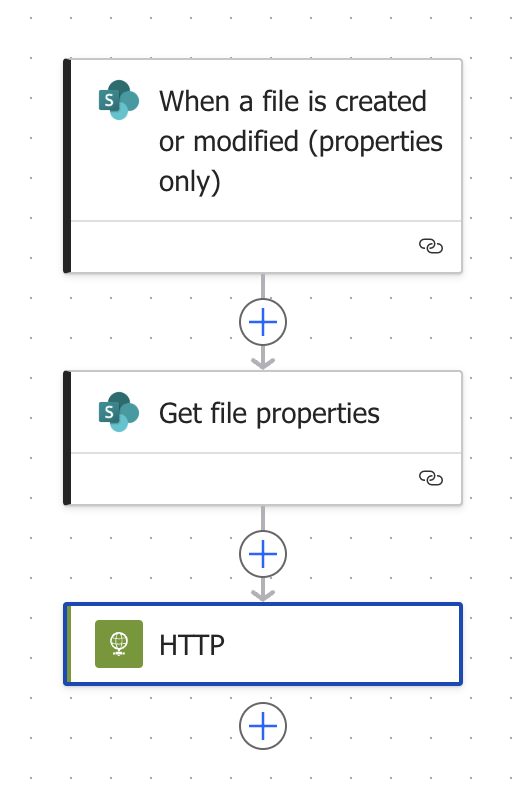
Step 1 – Trigger on File Modification
Start with the “When a file is created or modified (properties only)” SharePoint trigger. Configure this trigger to monitor the specific Site Address and Document Library where file metadata changes will happen. You can also add a specific parent folder under which changes need to be monitored in the advanced parameters.
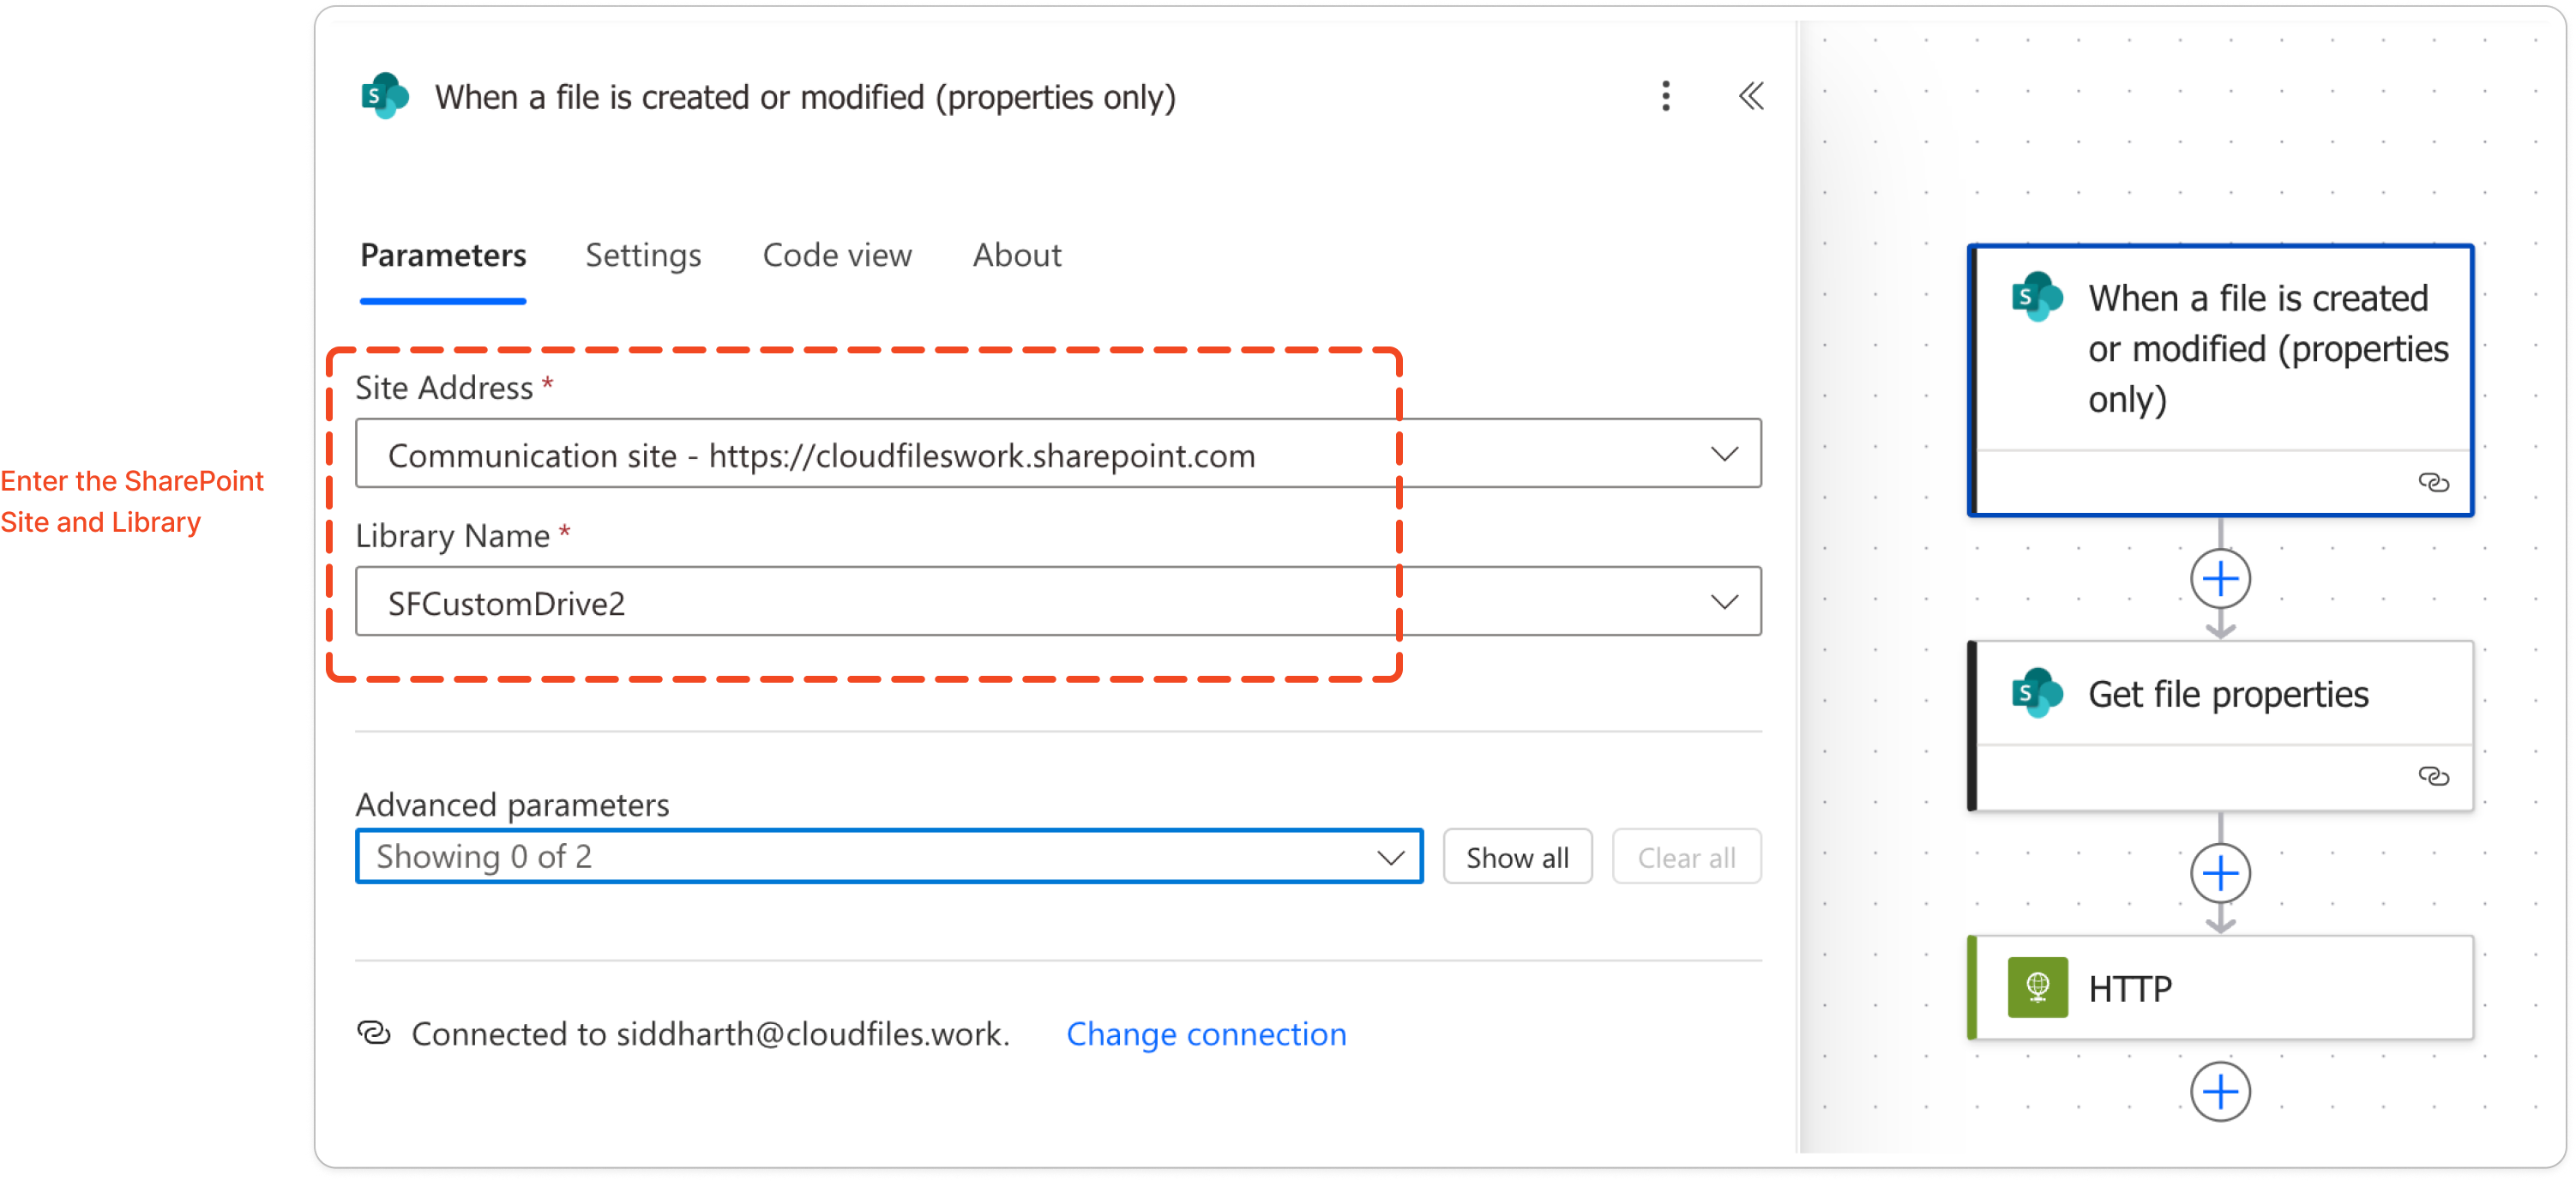
Step 2 – Retrieve File Properties
Add the “Get file properties” SharePoint action. Set the Site Address and Library Name to the same site and library used in the trigger in previous step.
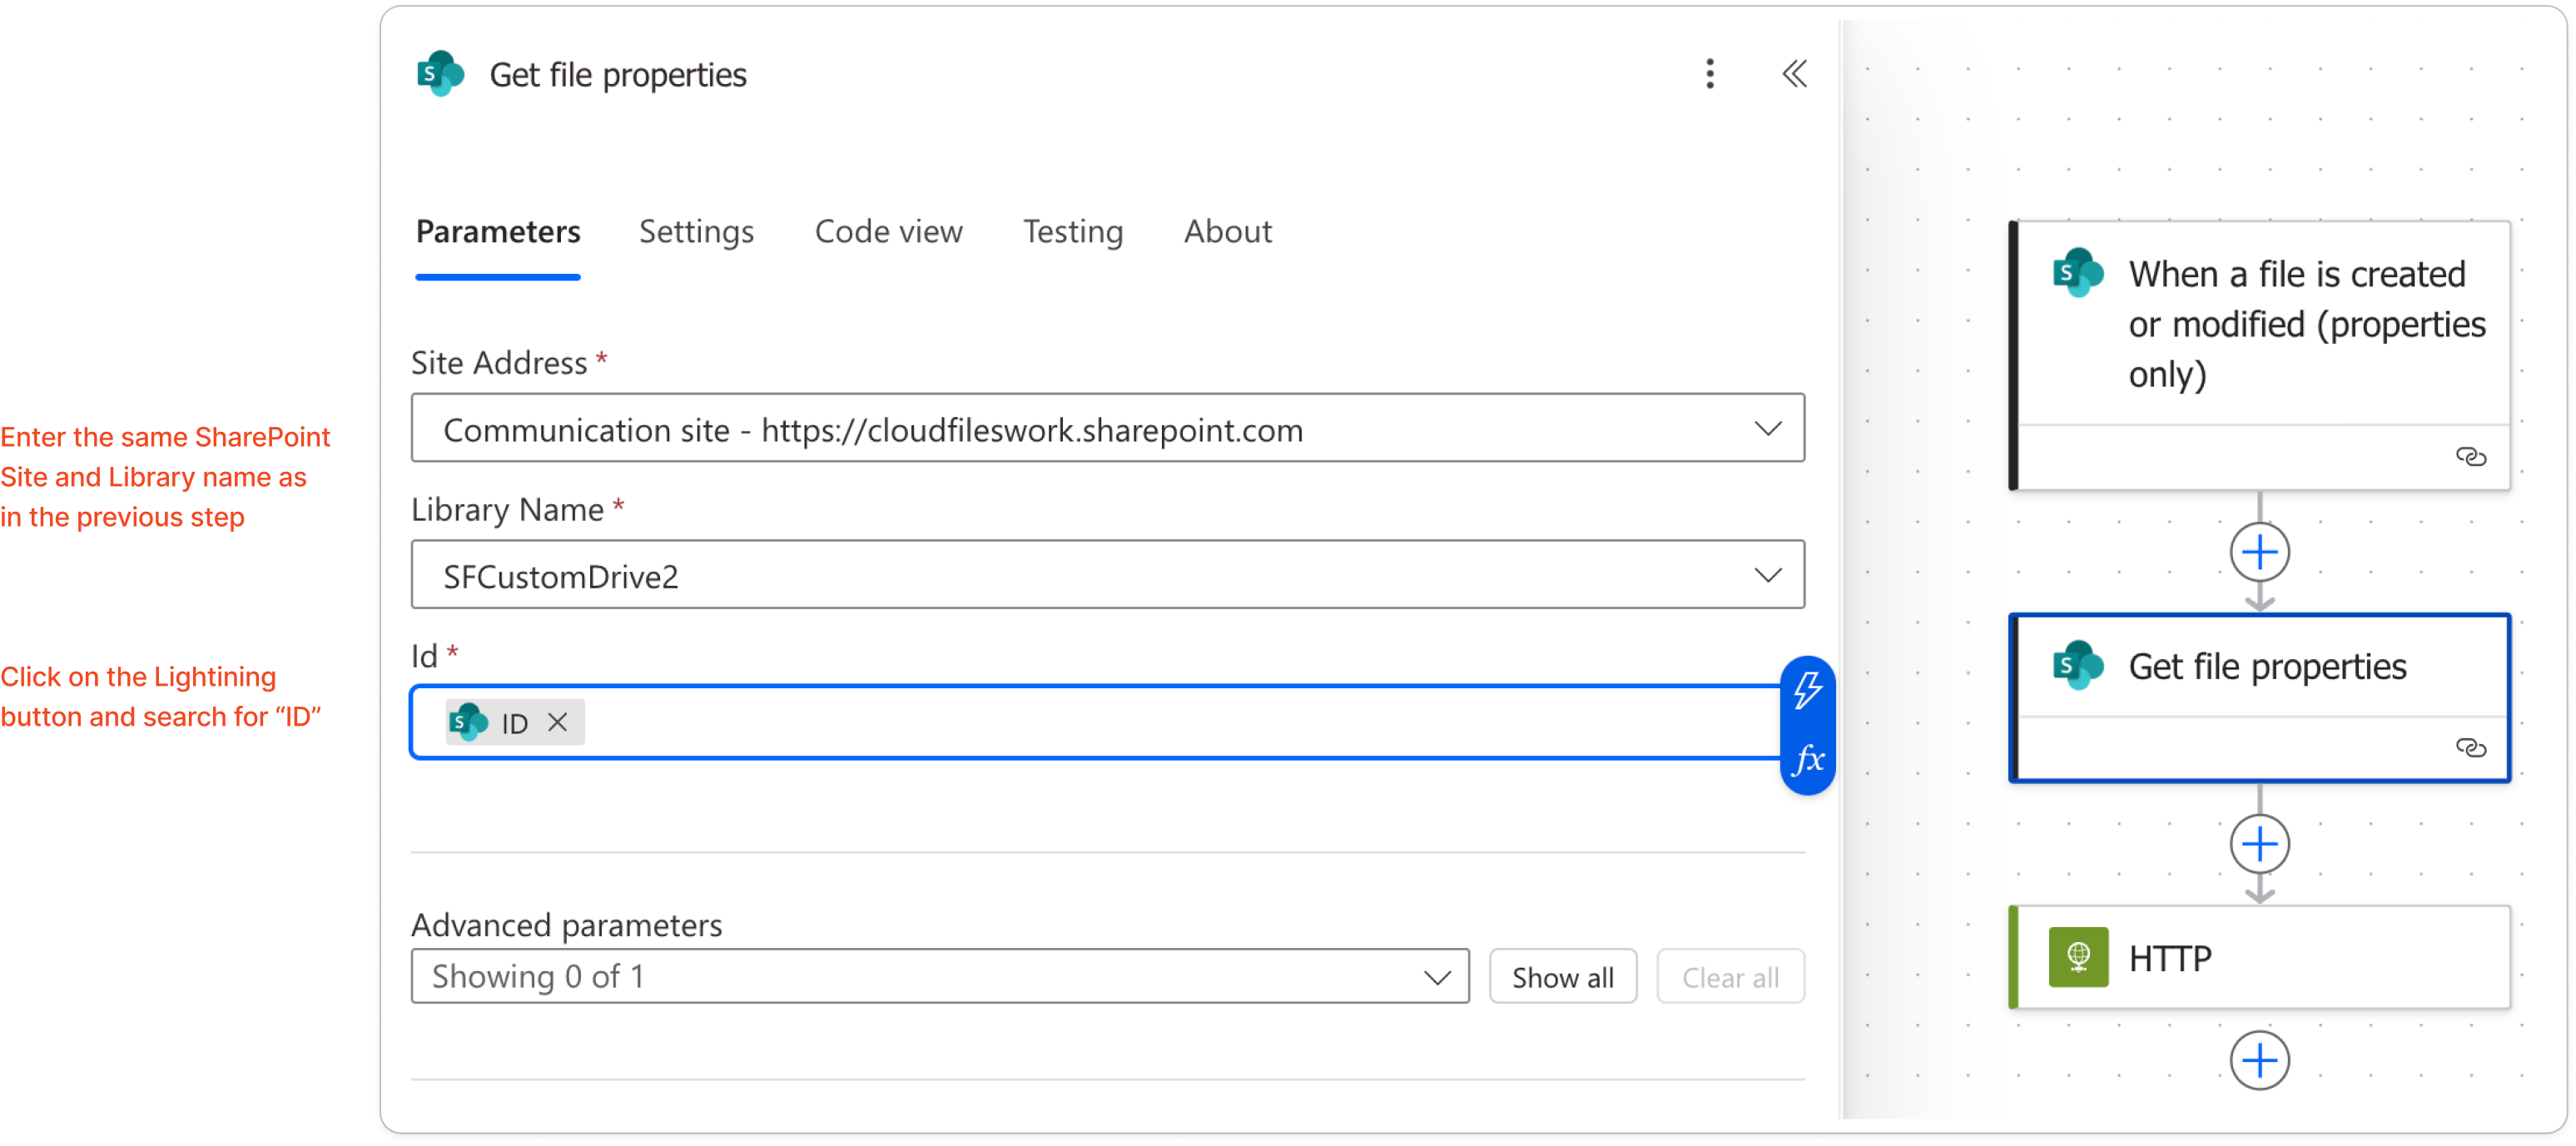
In the Id field, pass the ID value from the trigger step. This action fetches the metadata you will need later. You can use the lightning icon that appears on the Id* field to fetch data from the previous step and search for "ID".

Step 3 – Send Updated Details to CloudFiles Webhook
Add an HTTP action and configure it to send the collected file details to the CloudFiles webhook endpoint. Set the Method to POST, and in the URI field, paste the production webhook URL for SharePoint (https://api.cloudfiles.io/webhooks/library-event?library=sharepoint)
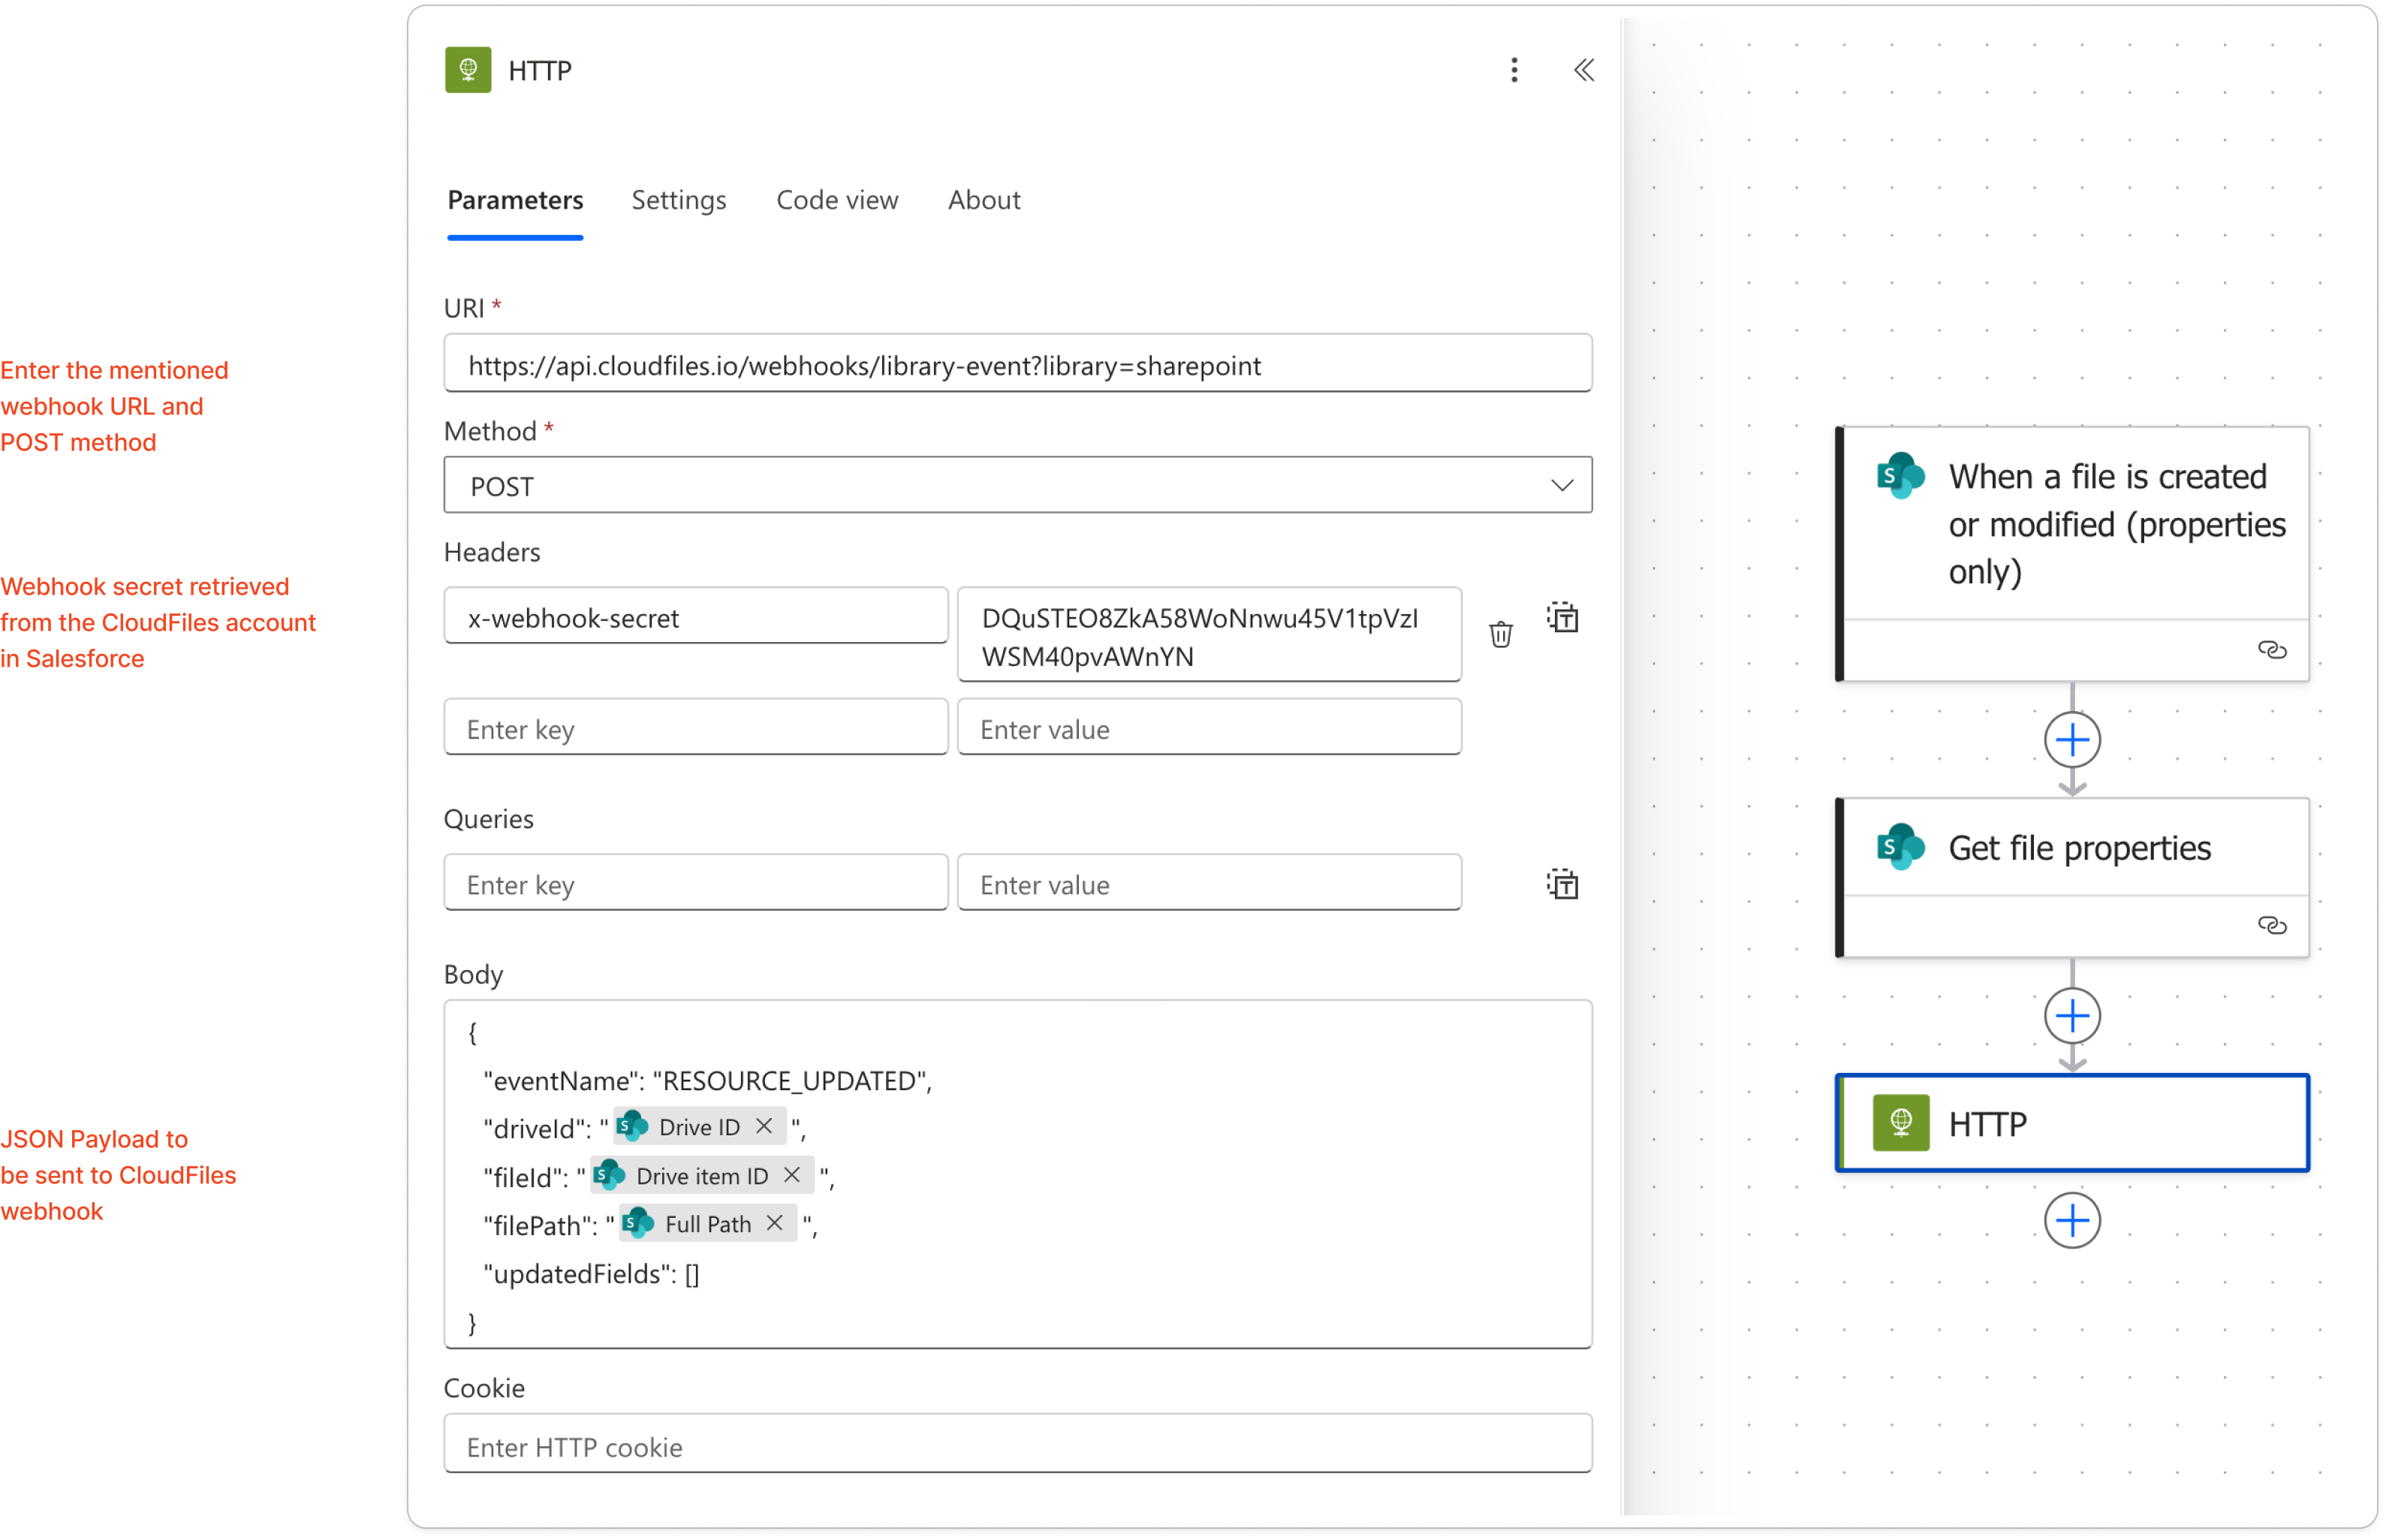
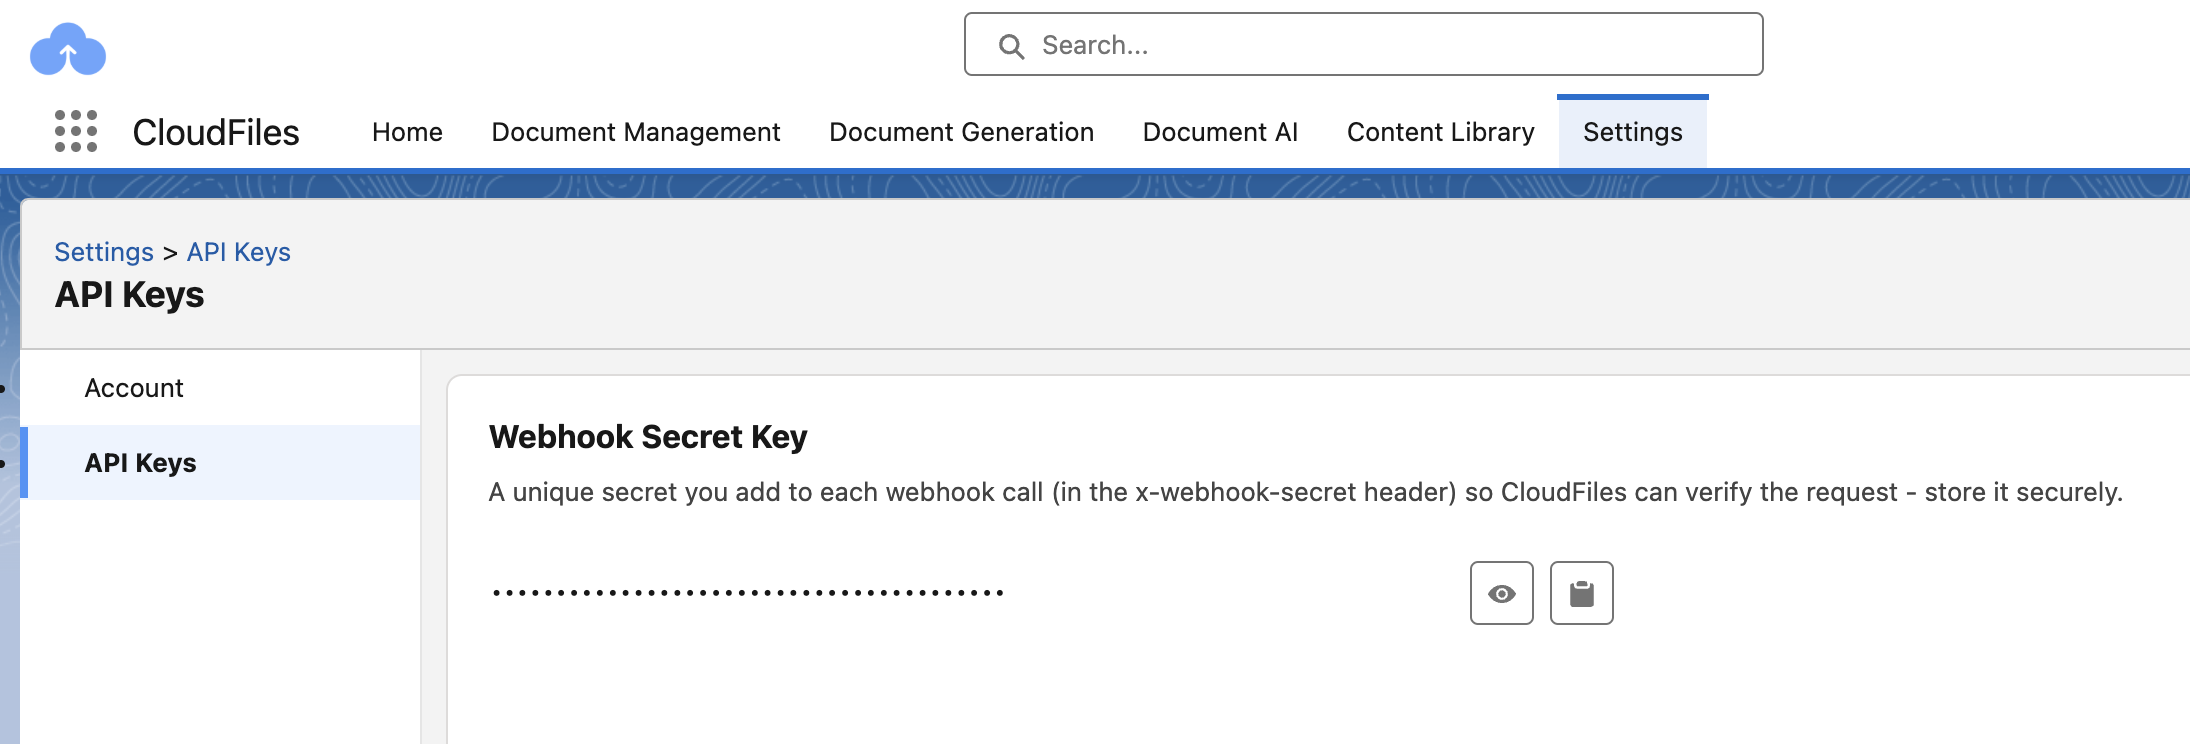
In the Headers, include a x-webhook-secret key with the secret value you retrieved from Salesforce. You can go to CloudFiles app -> Settings -> API Keys and copy the "Webhook Secret Key" to retrieve this key.
In the Body, send a JSON payload containing:
- The event name ("RESOURCE_UPDATED")
- The Drive ID from the “Get file properties” output
- The Drive Item ID from the same output
- The Full Path of the file
- The list of Updated Fields (as a list of strings)
You can use the lightning icon to fetch the parameters directly or alternatively use the following JSON function -
{
  "eventName": "RESOURCE_UPDATED",
  "driveId": "@{triggerBody()?['{DriveId}']}",
  "fileId": "@{triggerBody()?['{DriveItemId}']}",
  "filePath": "@{triggerBody()?['{FullPath}']}",
  "updatedFields": []
}
It is optional to send the names of actual columns that are being changed in the updatedFields array. It is recommended that the follow up salesforce flow that gets triggered on this event can use the Get Resource Property flow action to retrieve the metadata value of the specific column being monitored. In case you still wish to send a specific list of columns, you can add that as a list of strings - e.g. "updatedFields": ["Tags", "Status"]
Testing the Flow
After the flow is saved and enabled:
- Modify metadata (for example, update the “Tags” field) on a file in the monitored SharePoint document library.
- In Power Automate, check the flow’s run history. Confirm that the trigger fired, properties were retrieved, and the HTTP request succeeded.
- In Salesforce, look for a new resource-updated event. You can check the list of most recent resource-updated CloudFiles Events recorded in salesforce with the help of the following SOQL query -
SELECT Fields(All) from cldfs__CloudFilesEvent__c where cldfs__Type__c = 'resource-updated' order by CreatedDate DESC LIMIT 200If the event isn’t recorded, double-check the posted file details (Drive ID, Item ID, Full Path) and ensure the user connected in Power Automate has access to the file. Once you confirm that the event is getting successfully recorded in Salesforce, you can intercept that event and build automations on top of it.