Introduction
The CloudFiles Office add-in facilitates the integration of CloudFiles with your HubSpot instance, enabling you to create and design templates that incorporate HubSpot CRM data. This powerful tool streamlines the process of merging HubSpot data into documents, making it easier to generate consistent and accurate templates directly from Microsoft Word, Microsoft PowerPoint, Microsoft Excel. Once installed, your users can build dynamic templates, insert HubSpot fields and publish templates directly to CloudFiles for document generation in HubSpot.
A valid Microsoft account is necessary to complete the installation successfully and access the CloudFiles add-in.
Installing the CloudFiles Word Add-in
To add CloudFiles Word add-in to your Microsoft Word account, start by launching Microsoft Word, Excel or PowerPoint on your PC or in web browser. Then follow the steps below:
- Navigate to the "Home" tab and click on "Add-ins" to explore available options.
- In the Add-ins window, select "+ More Add-ins" to open the "Office Add-ins" window, then click on "Microsoft AppSource" to be redirected to appsource.microsoft.com.
- In the search bar, type "CloudFiles" and browse the results to locate the CloudFiles Add-in.
- Click "Get it now" to install the add-in. Once the installation is complete, open Word to check the new add-in.
- In the "New Office Add-in" sidebar, click "Allow and Continue" to launch the CloudFiles Word add-in, ensuring it's ready for use with your HubSpot data.
Refer to the video below to have a visual understanding of these steps -
Since the CloudFiles add-in is linked to your Microsoft account, once installed in one application (Word, Excel or PowerPoint), it will automatically be available in the other two.
Connecting Your CloudFiles Account to the Word Add-in
After installing the CloudFiles Word add-in, the next step is to connect your CloudFiles account. This connection allows the Office add-in to access your HubSpot data, pull in mapped properties and publish templates directly from Microsoft Word.
Follow the steps below to complete the setup:
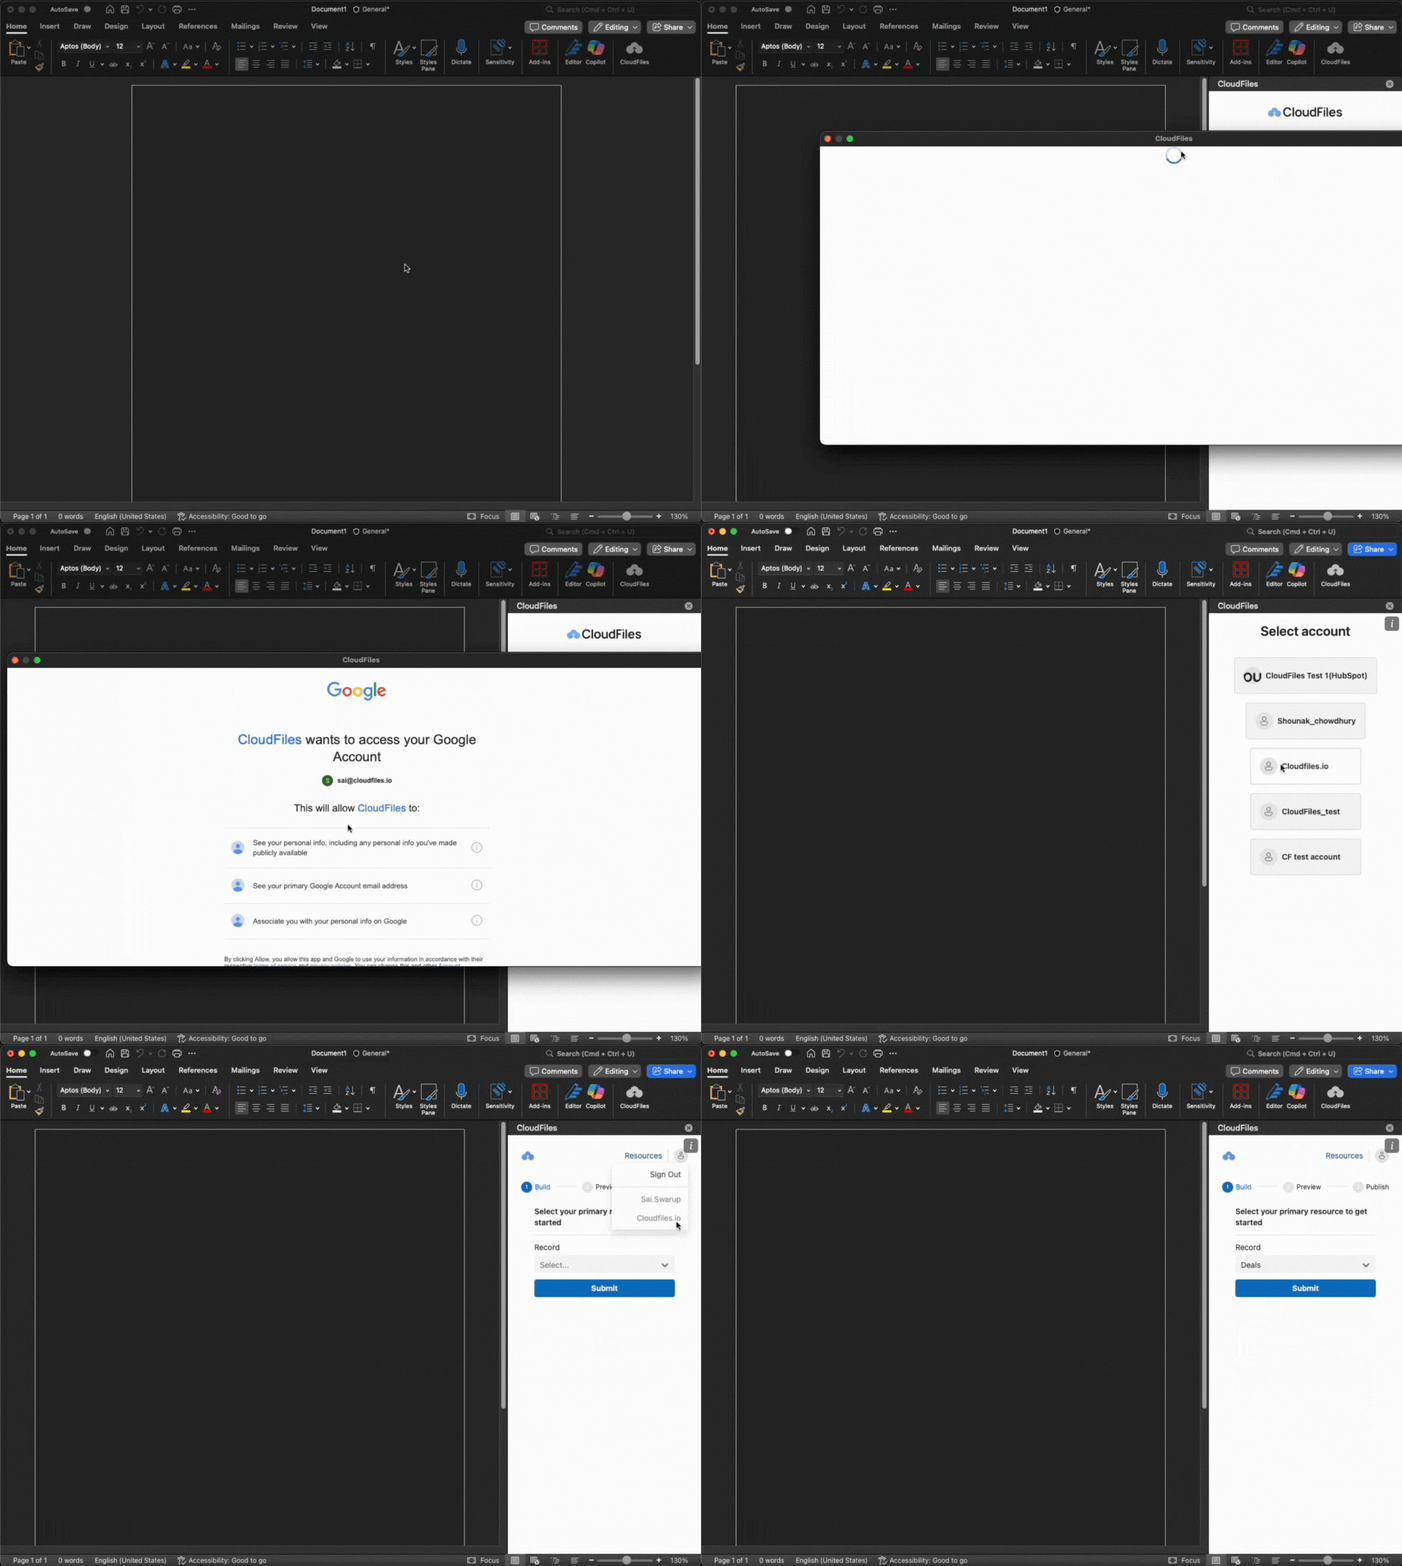
- Open Microsoft Word and navigate to the Add-ins section.Launch the CloudFiles add-in from the available options to begin the authentication process.
- Choose HubSpot as the data source
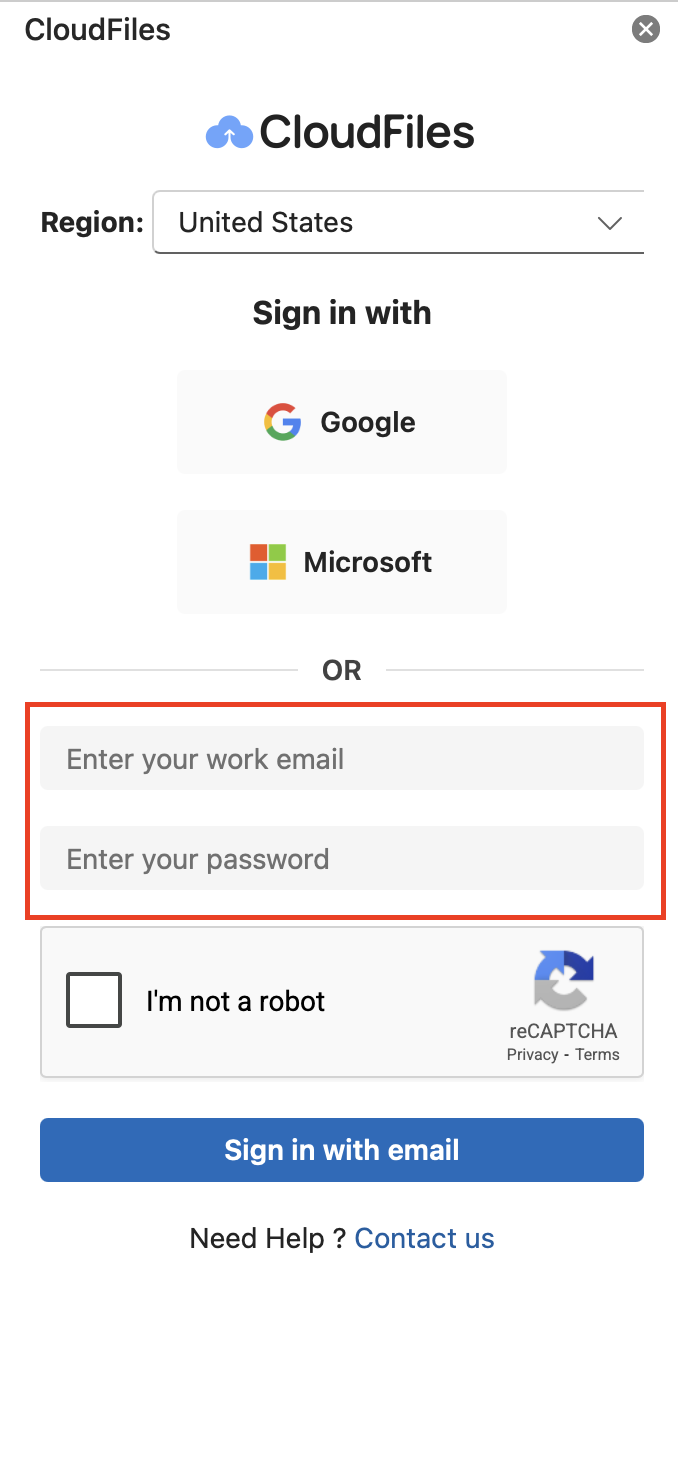
- On the signin page, enter your CloudFiles Login credentials or sign in using your Google or Microsoft account and follow the on-screen instructions to complete authentication.
- Once successfully signed in, you can start designing document templates directly in Word, Excel or PowerPoint, embedding HubSpot fields for dynamic data merge.
When signing in using email and password, use your CloudFiles login credentials. Do not use your HubSpot credentials.