What to Expect
By the end of this tutorial, you can expect to:
- Have an Automated Parent Folder for a HubSpot deal record when it is created.
- You will be able to attach this parent deal folder to its associated contacts.
- You will also be able to access these folders within your HubSpot record within the CloudFiles Connected folder widget.
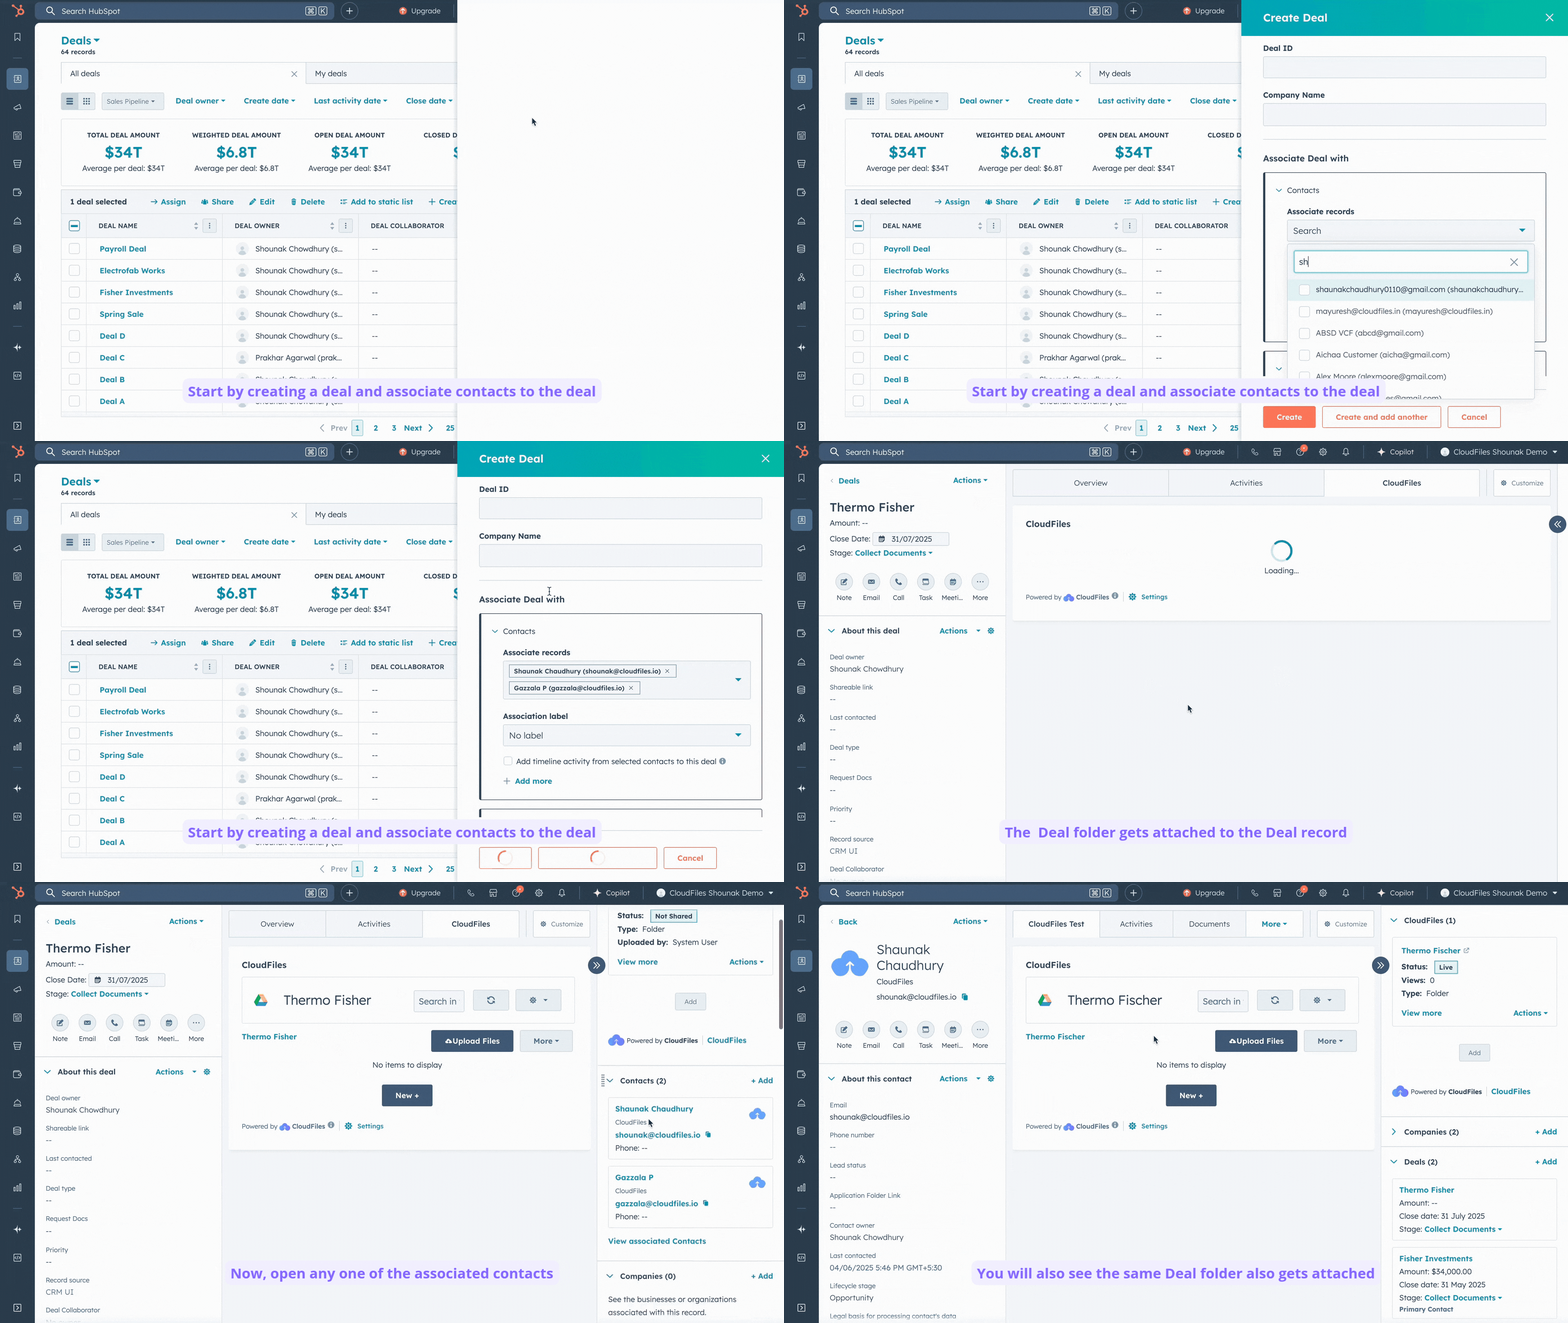
The GIF below shows the expected output. If you have a basic grasp of these concepts, you can expect to finish the tutorial in under 10 minutes.
1 - Pre-requisites
Before you start with the set-up, please ensure you have installed CloudFiles and connected it to your cloud storage of choice.
Install CloudFiles in HubSpot
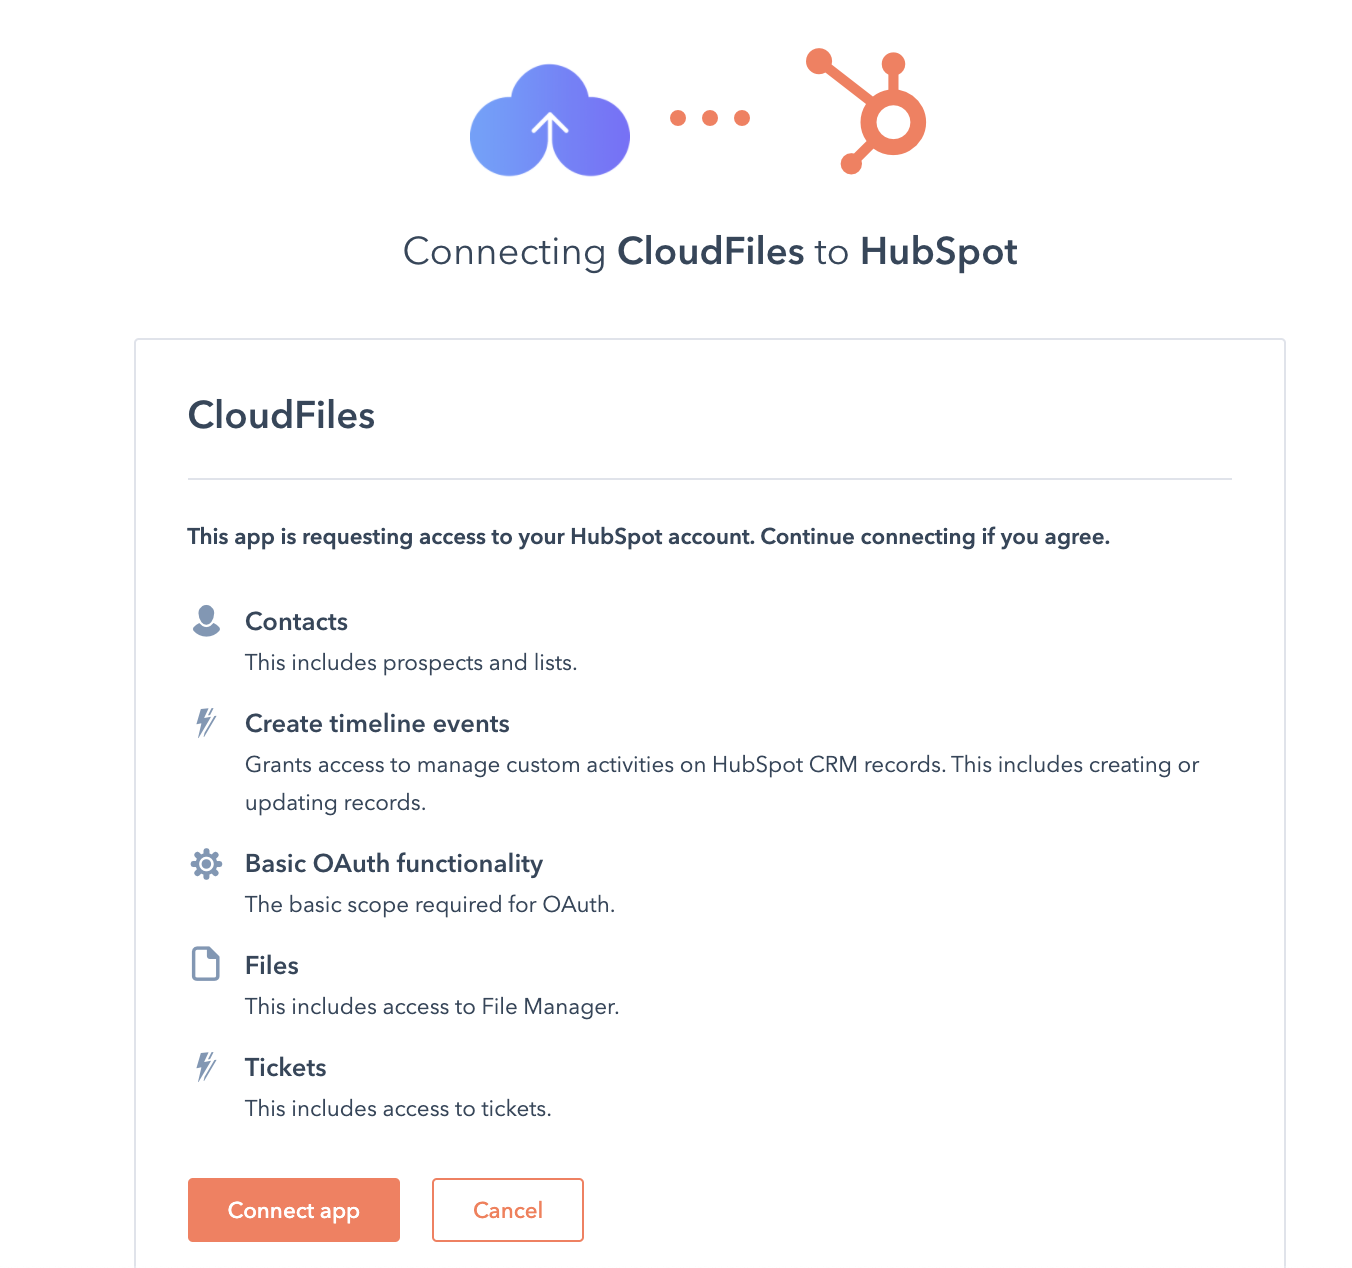
CloudFiles is available on the app marketplace and can be installed using the standard app installation process. Check out Installation guide for CloudFiles HubSpot Integration.
Connect your storage
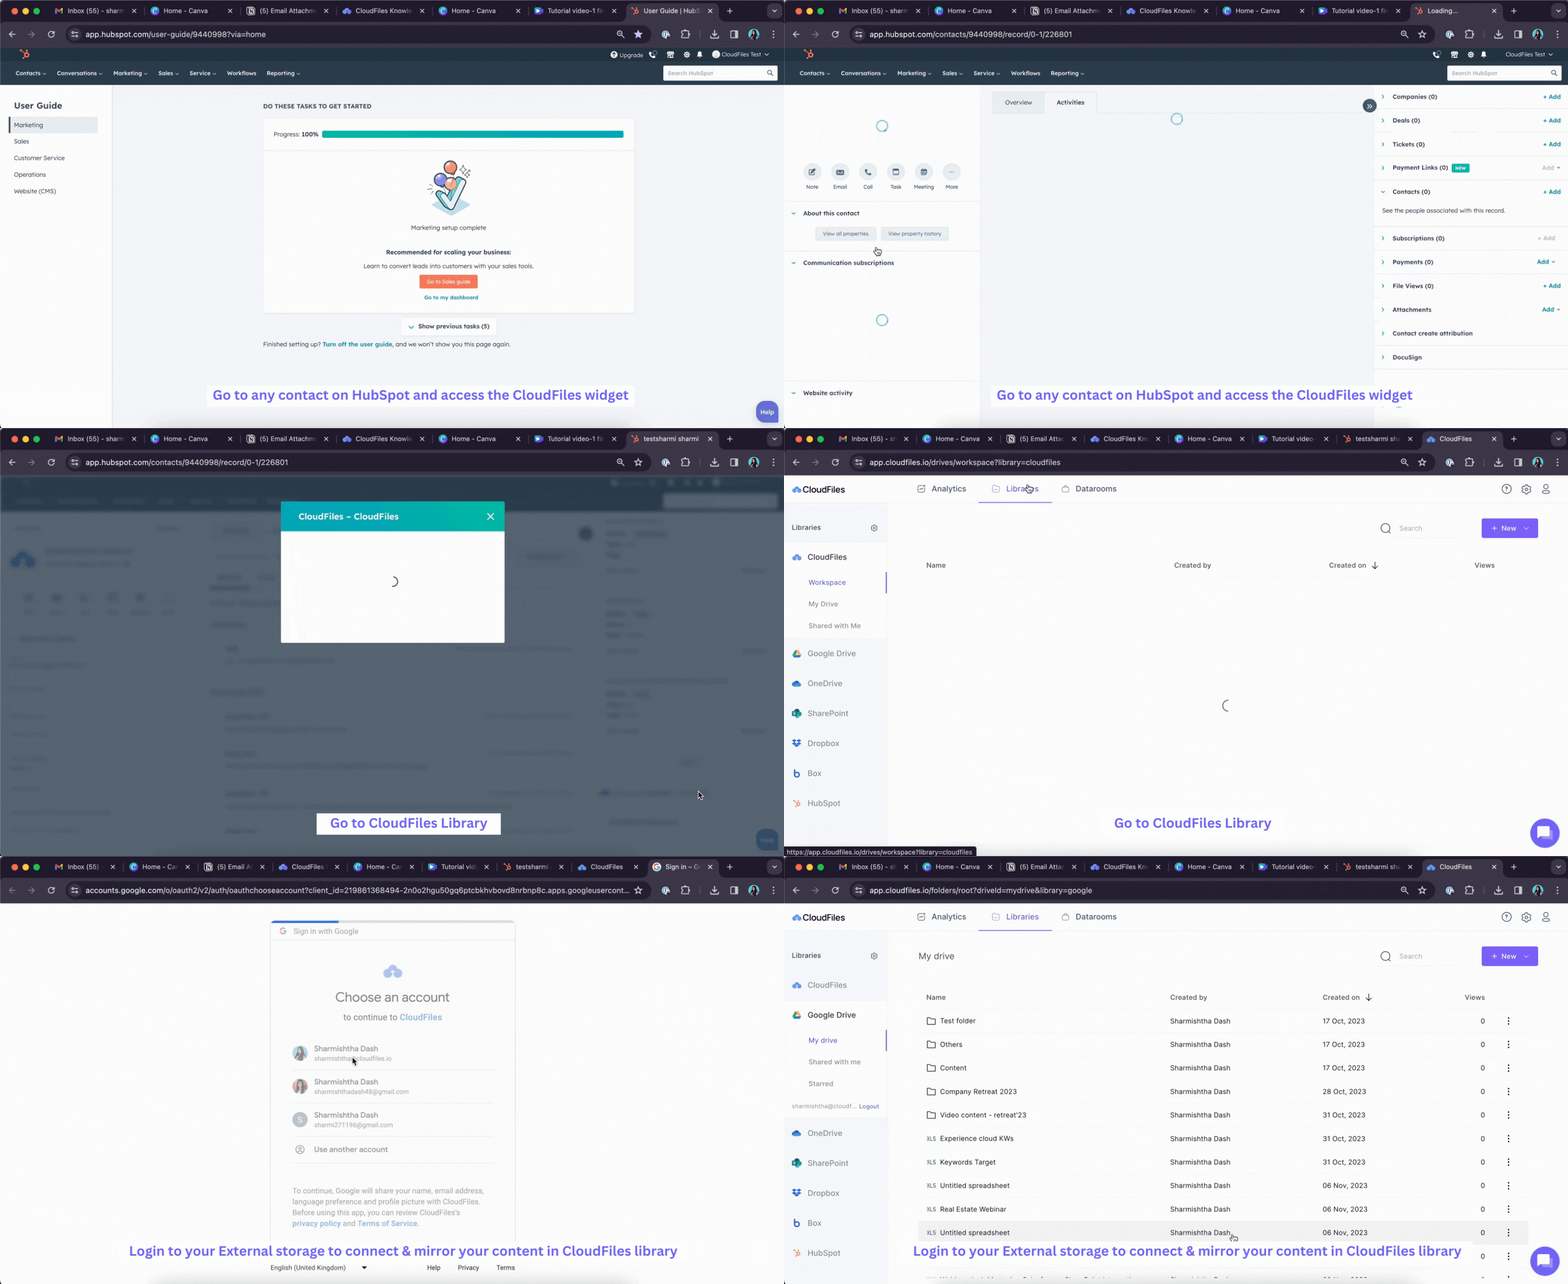
Login to your external storage of choice such as Google Drive, SharePoint etc. through the CloudFiles interface. This will give you instant access to your external files within HubSpot. The GIF below shows the steps quickly.
Check out Quick start for file connector in HubSpot for more information.
Connect Automation User for Storage
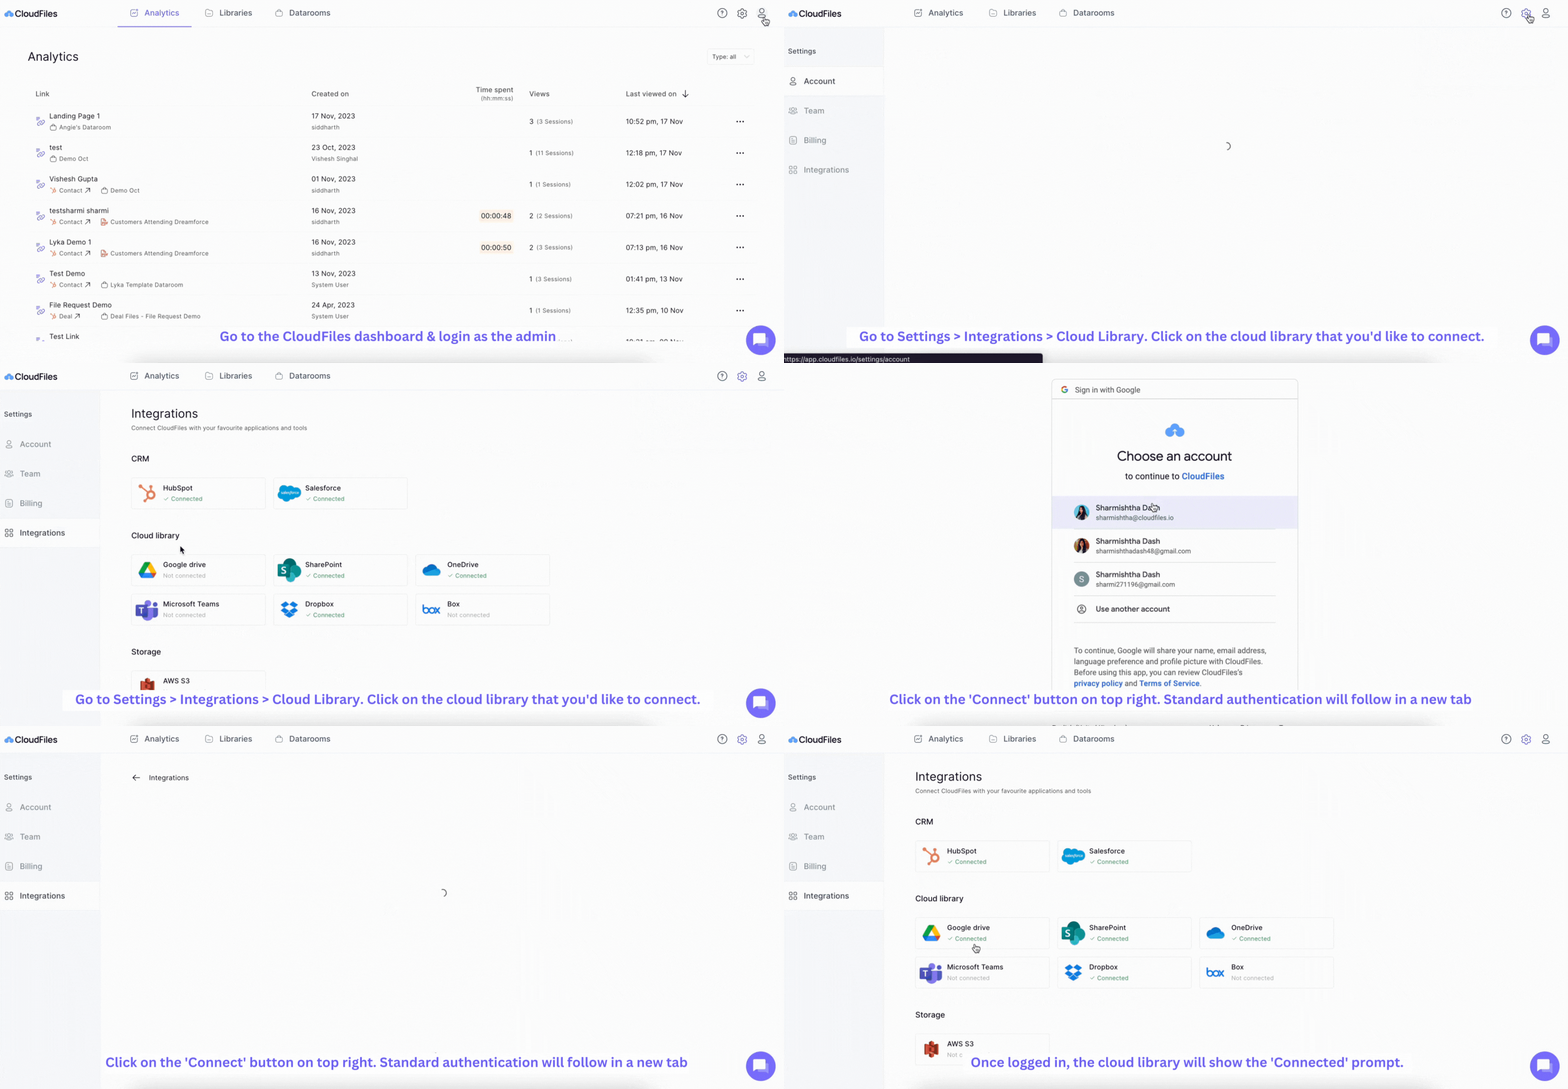
In addition to installing CloudFiles in HubSpot, you also need to set an automation user for the workflow to work. This is the integration user that will be used by the workflow actions to pass files into the cloud storage.
To connect an automation user, simply head over to app.cloudfiles.io > Settings > Integrations > Google Drive and login through your google account. What is an 'Automation User' and how does it work? this article explains everything you need to know about the automation user, including what it is, why it's useful, and how it operates.
After connecting the desired storage, we’ll proceed to create a deal-based workflow that is triggered when a new deal is created. Next, we’ll set up a contact-based workflow to link the deal folder to its associated contacts. Below is an overview of the workflows, which we’ll break down in the sections that follow.
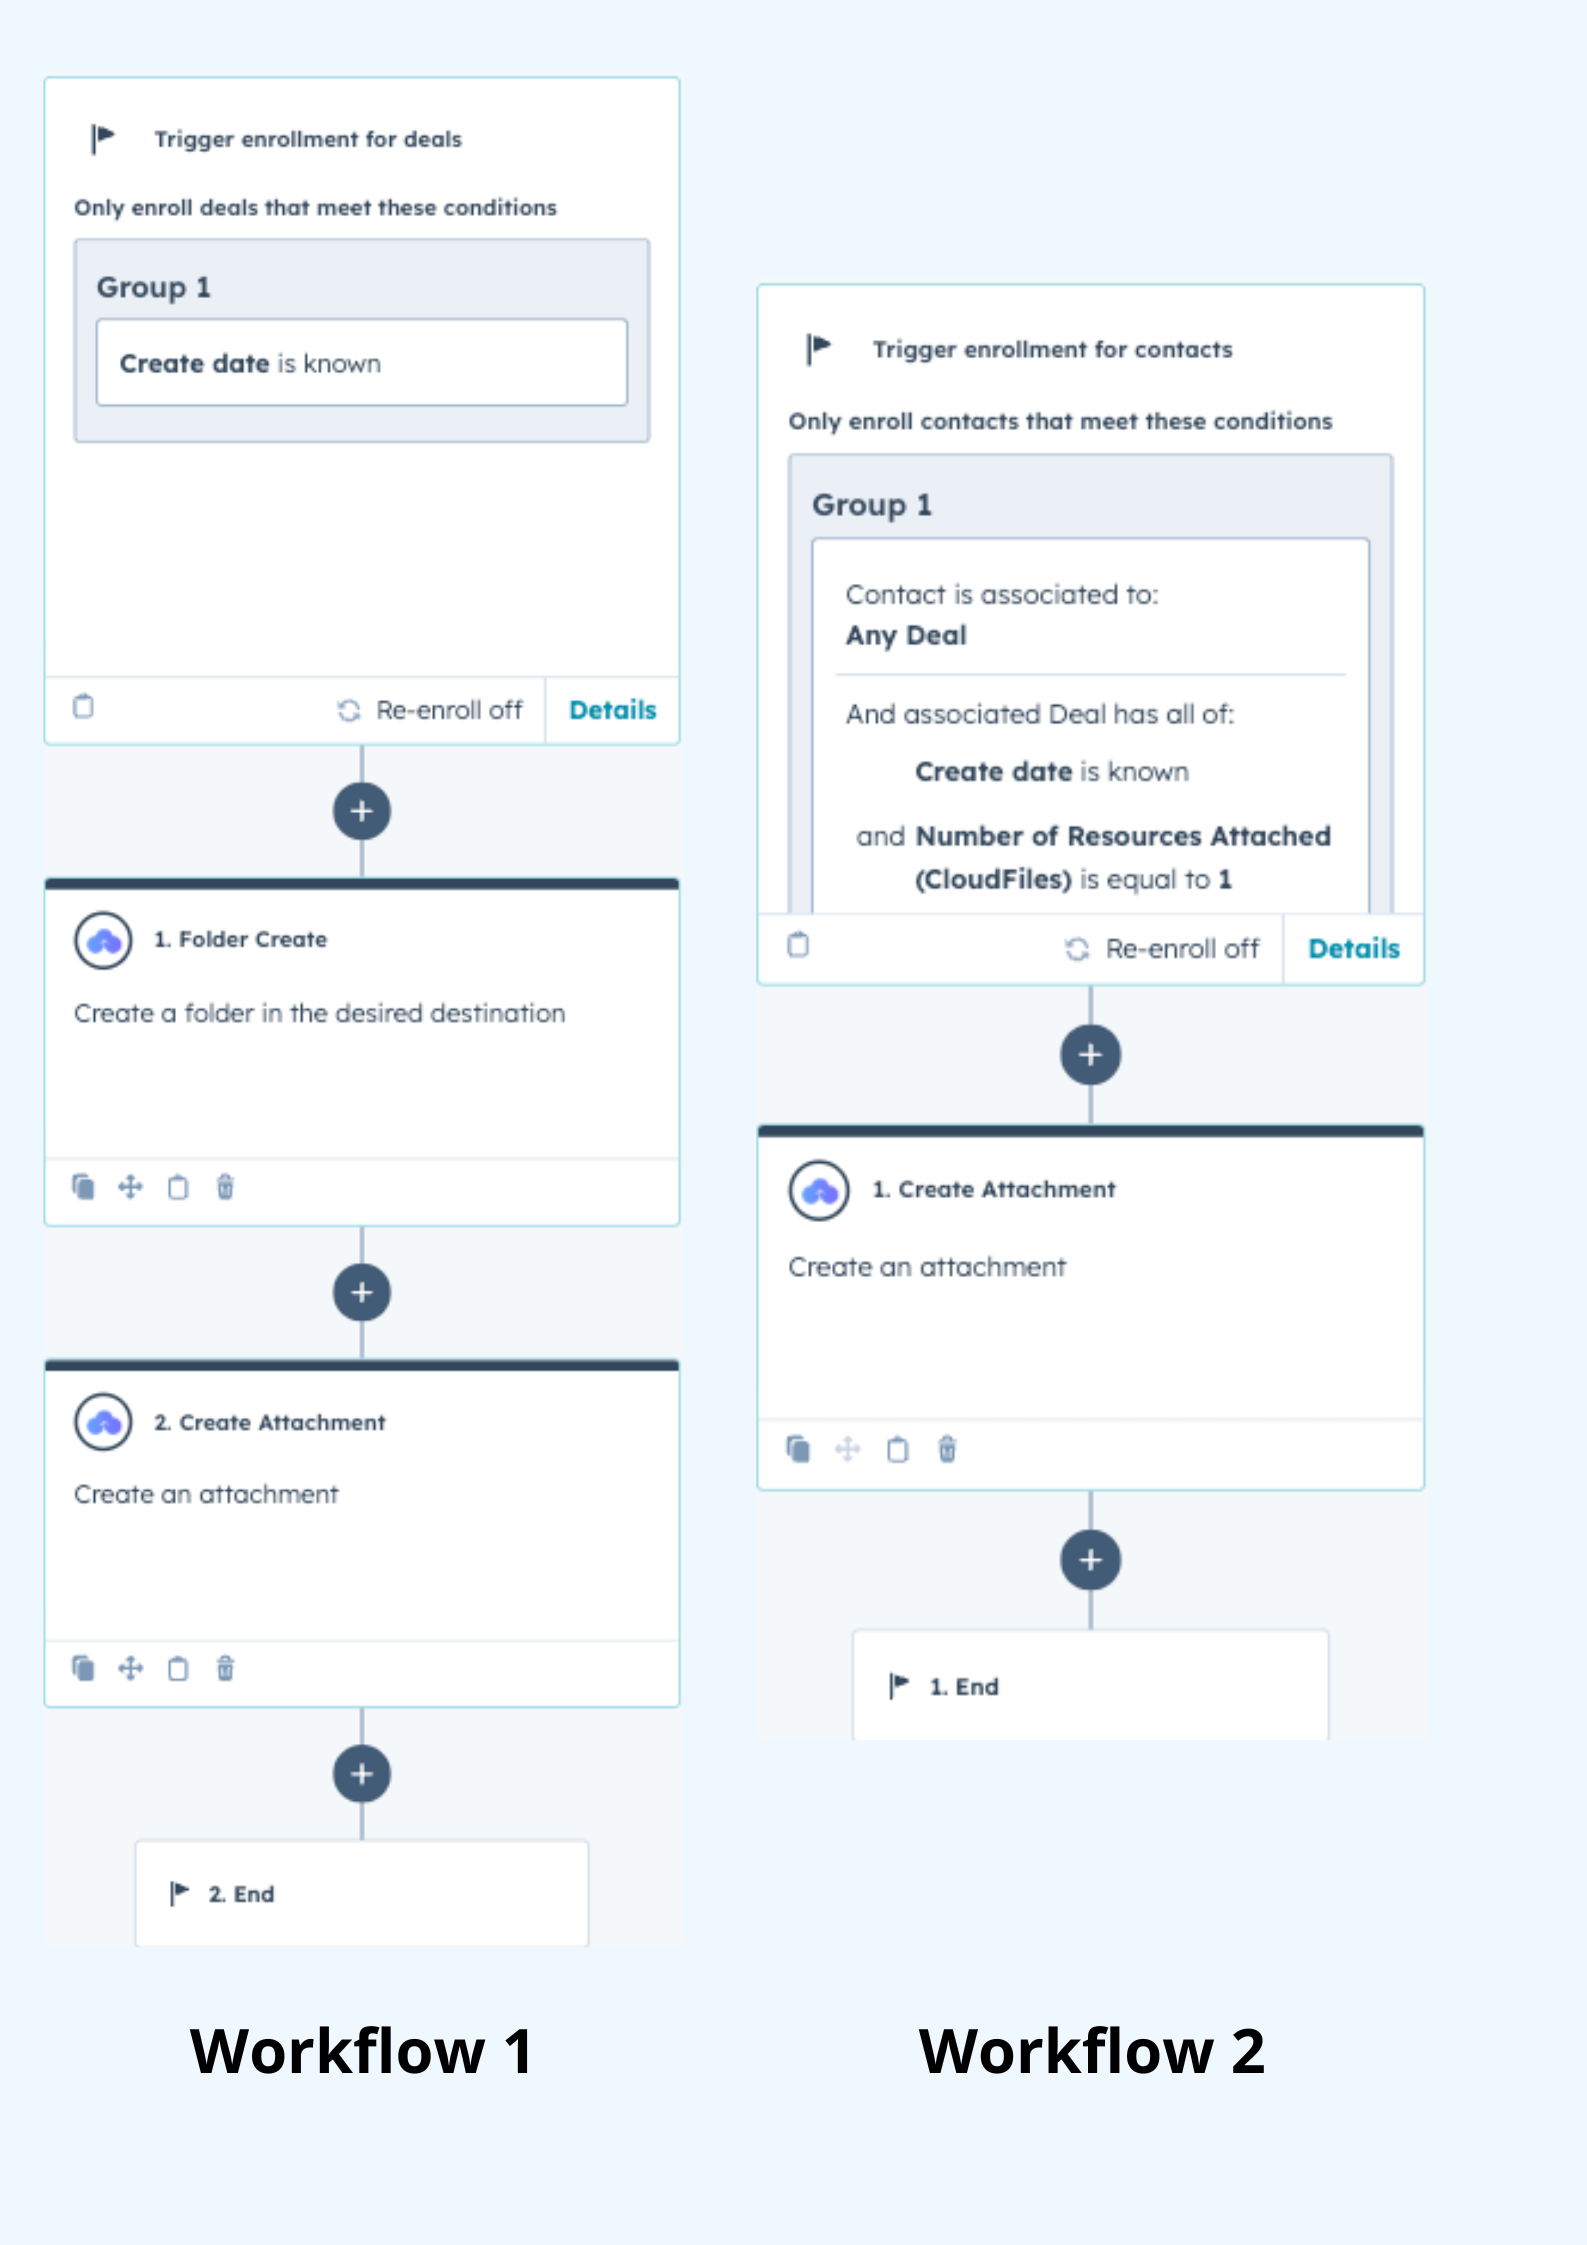
Section 1: Create a Folder for the Deal and Link It
In this section, we’ll make a workflow that automatically creates a folder when a new deal is added and attaches it to the deal record in your CRM.
1 - Create a Deal-Based Workflow
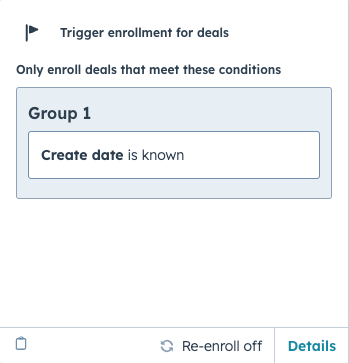
Create a new deal-based workflow from scratch and select the trigger to fire when a new deal is created, as shown in the picture below.
2 - Create Parent Folder using ‘Create Folder’ Action
Create Folder action can be used to create folders in any location on any cloud storage platform from HubSpot flow action. We will use this action to first create the Parent folder.
To use the “Create Folder” action, simply click on add button and search for ‘Create Folder’ as shown below. Once you add this action, it will ask you to fill in certain parameters.
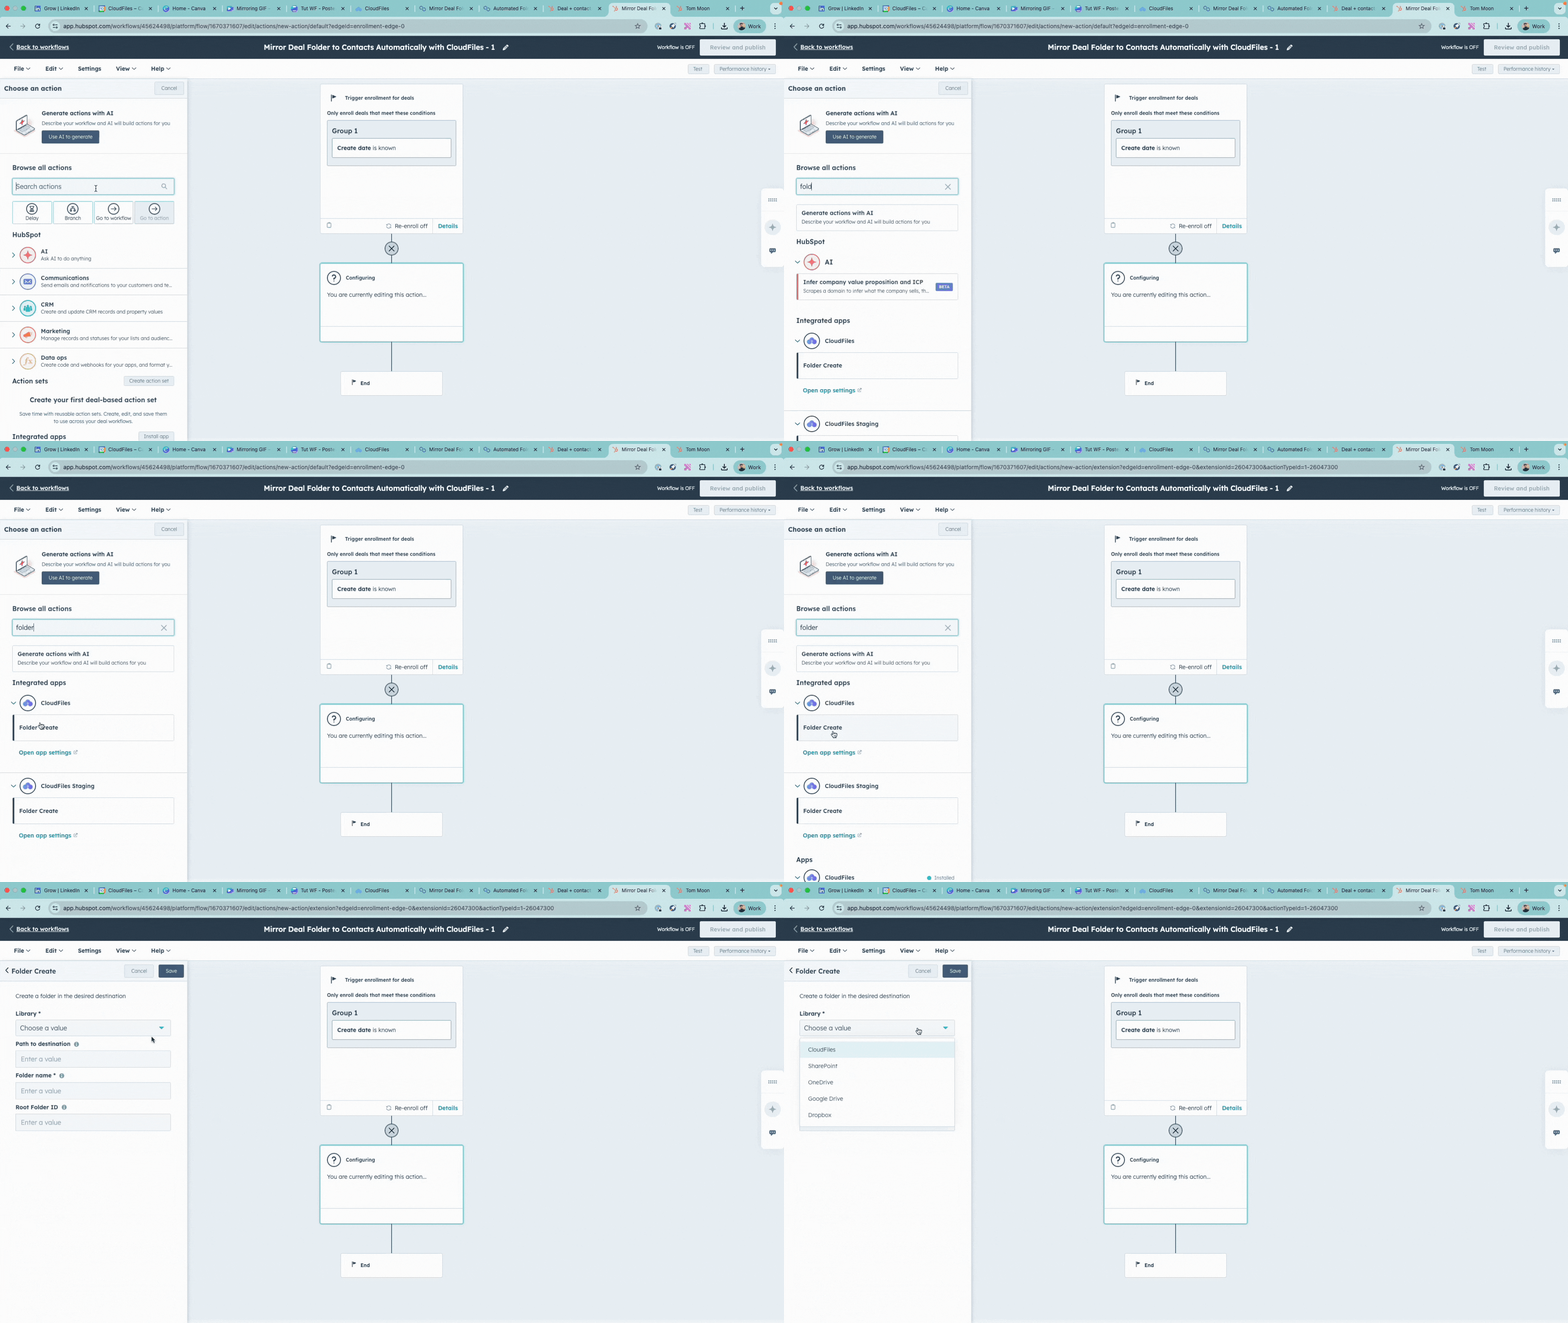
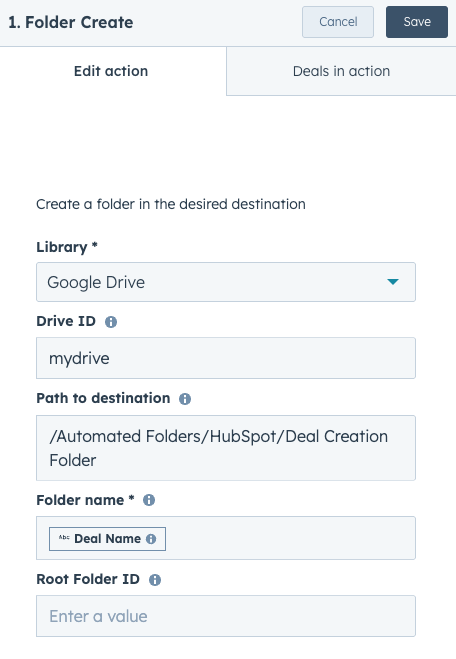
This action requires a few parameters.
The Library parameter refers to the cloud storage service (like Google Drive, SharePoint, etc.) where you want to create the folder. Simply choose your preferred storage option from the dropdown menu.
The Folder Name is the name you’d like to assign to the newly created folder. In most cases, we use the Deal’s name for simplicity, but you can also use a custom text formula or variable to generate more complex names.
You’ll also need to provide values for the Shared Drive ID and Path to Destination. These are:
Shared Drive ID – This applies only to Google Drive and SharePoint users. These platforms support multiple “drives” where documents can be stored. You’ll need to specify which one to use.
Path to Destination – This defines the exact location (folder path) where the new folder should be created inside your selected storage.
You can easily copy these parameters from the CloudFiles app. Just follow these steps:
- Locate the CloudFiles widget on any HubSpot record and click on CloudFiles. You’ll be redirected to your connected CloudFiles storage.
- Under the Libraries tab, navigate to the folder where you want to save your files, or create a new one.
- On the right side of the screen, you’ll see a metadata section. Copy the required parameters from there.
Check the GIF below for a quick walkthrough of these steps.
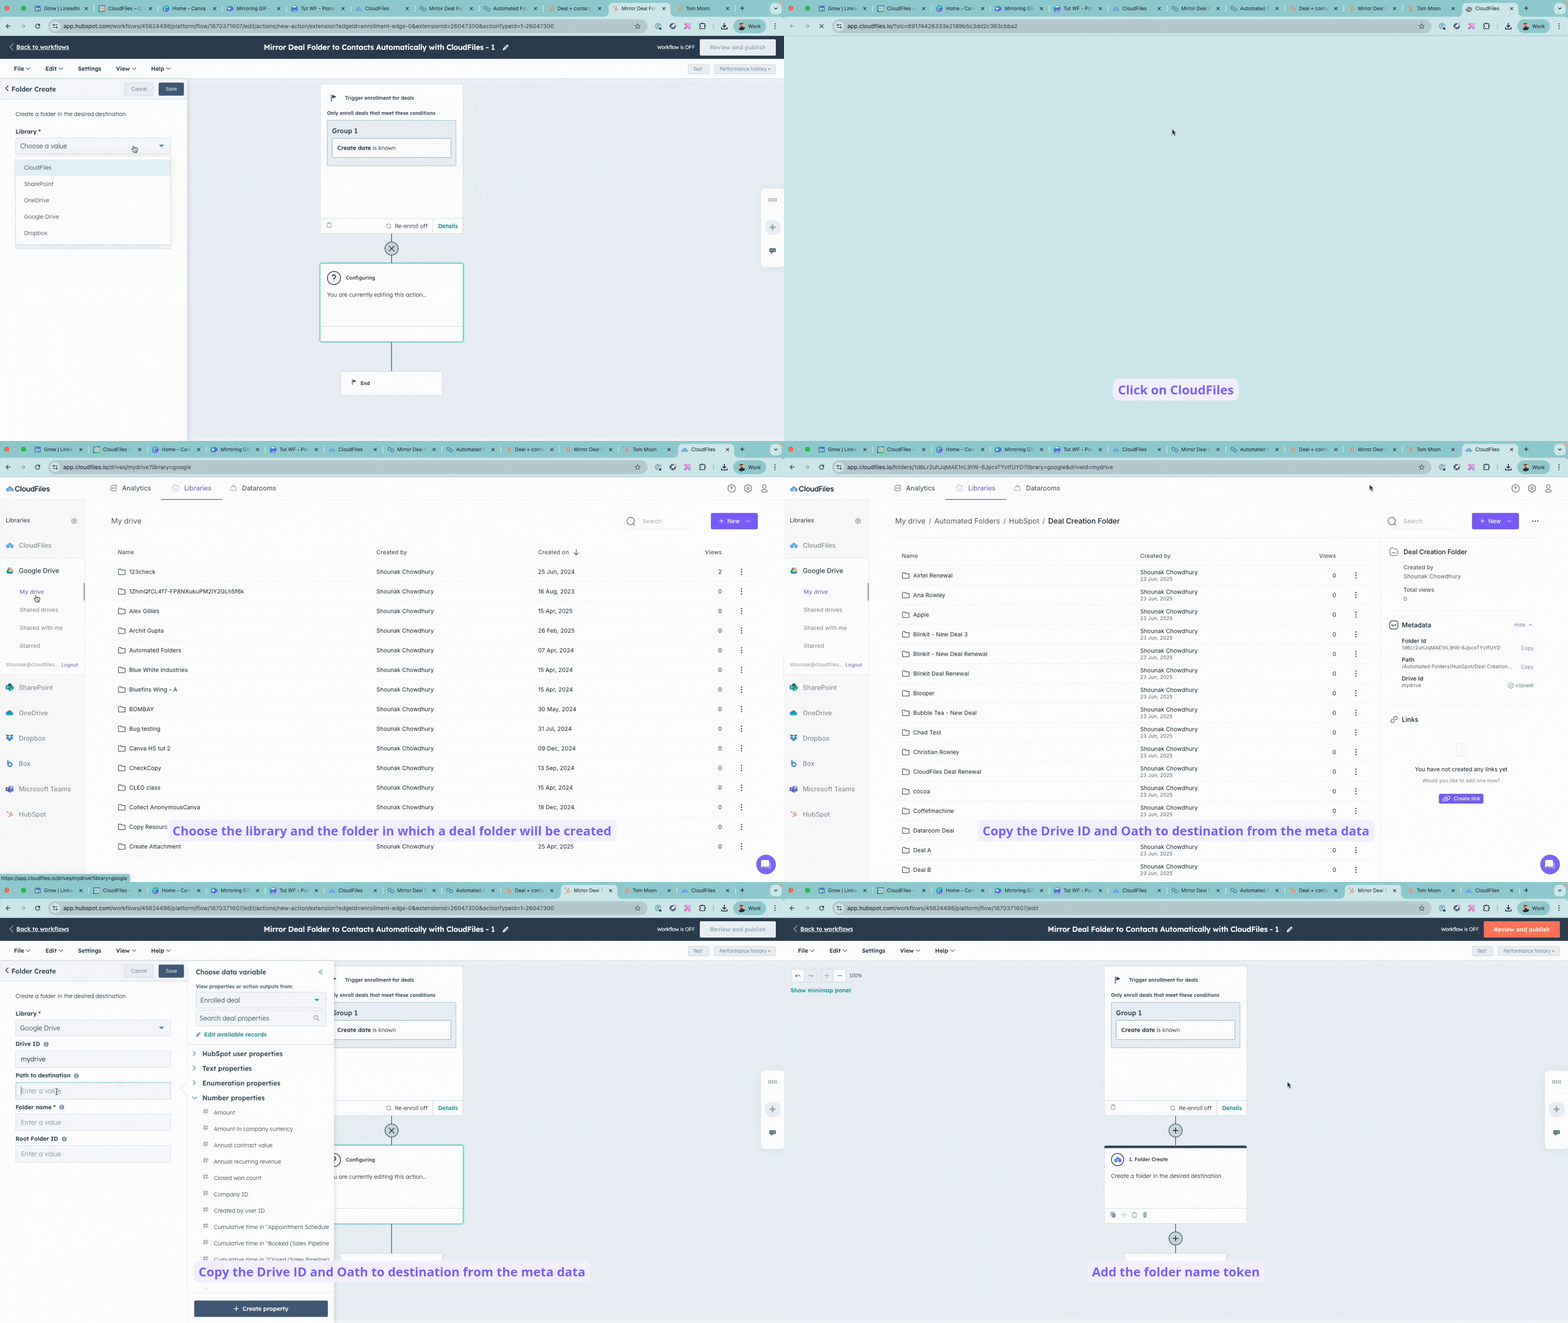
For a detailed description of the Create Folder action, refer to the Create Folder detailed guide. Here’s how our final Create Folder action looks like -
3 - Show Parent Folder on Deal Record using ‘Create Attachment’ Action
The Create Attachment action is used to link the newly created folder to a HubSpot record.
Attaching (or associating) the deal folder is essential because it allows you to view and manage the folder’s contents directly from within the HubSpot record itself.
To use this action, click on the Add button and search for ‘Create Attachment’ as shown below. After adding the action, you’ll be prompted to enter a few parameters.
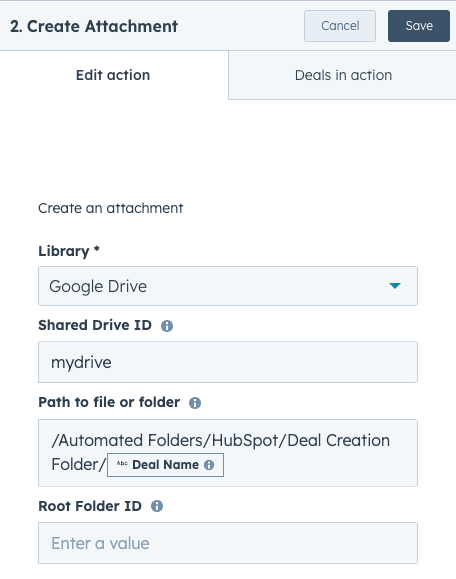
The Shared Drive ID and Library fields will remain the same as mentioned earlier.
The Path to Folder is the full and exact folder path of the parent folder you created.
You can easily copy this path from the metadata section in the CloudFiles Library, just follow the same steps described earlier for getting the Shared Drive ID.
Here’s how our final Create Attachment action looks like -
Section 2: Attach the Same Folder to the Deal’s Contacts
In this section, we’ll use that same folder and connect it to the contacts associated with the deal, so everyone has access to the same folder.
1 - Create a Contact-Based Workflow
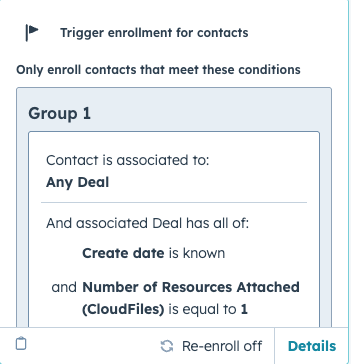
To set up the workflow, start by creating a new contact-based workflow from scratch in HubSpot. For the trigger, select the option to fire when a new deal is created and whenever a contact is associated with any deal.
To ensure the workflow only runs when the deal has a folder attached, add a filter condition using the CloudFiles property called "Number of Resources Attached" and set it to equal 1. This filter ensures that the first workflow, which creates the folder for the deal, has already run, so this workflow only proceeds when a resource (folder) is linked to the associated deal.
To learn more about the CloudFiles properties that can be used in workflows and triggers, refer to All CloudFiles Properties.
2 - Show Deal Folder on Contact Record using ‘Create Attachment’ Action
We will follow the same steps that we had followed previously. The Create Attachment action is used to associate created folder to HubSpot records. Attaching (or associating) our newly created deal folder is important since this will enable us to see and operate on the folder contents right from the HubSpot record.
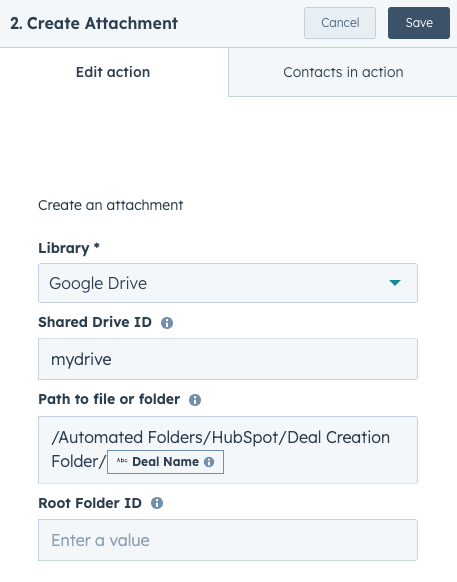
The parameters such as Library, Shared Drive ID, and Path to file or folder will remain the same as those used in the Create Attachment action within the deal-based workflow.
However, when you try to insert the "Deal name" token while configuring the folder name at the end of the path to file or folder parameter, you will notice that the token does not appear if you select Enrolled contact in the View "properties or action outputs from:" section.
To make the "Deal name" token available:
- Click Edit available records.
- In the Edit available records dialog, click Add records.
- Provide a name for the data source (e.g., Deal).
- Set the Record type to Deal.
- Define a condition to filter the deals:
- Condition: If associated to the enrolled contact
- Association label: all associated deals
- Condition to filter deals: most recently created
This setup ensures that the path to file or folder parameter can include the Deal name from the most recently created deal associated with the enrolled contact.
Here’s how our final Create Attachment action looks like -
Test the Automated Folders in Action
Now that everything is set up, it’s time to test the workflow. Start by creating a new Deal in HubSpot and associating one or more contacts to it. The workflow might take a few seconds to run, so give it a moment and refresh the page if needed. Next, go to the CloudFiles Connected Folder widget tab in the middle section of the Deal record. You should now see the newly created Deal folder right there in the Deal record, and the same folder will also appear under the associated contact’s records. This is shown in the GIF below -
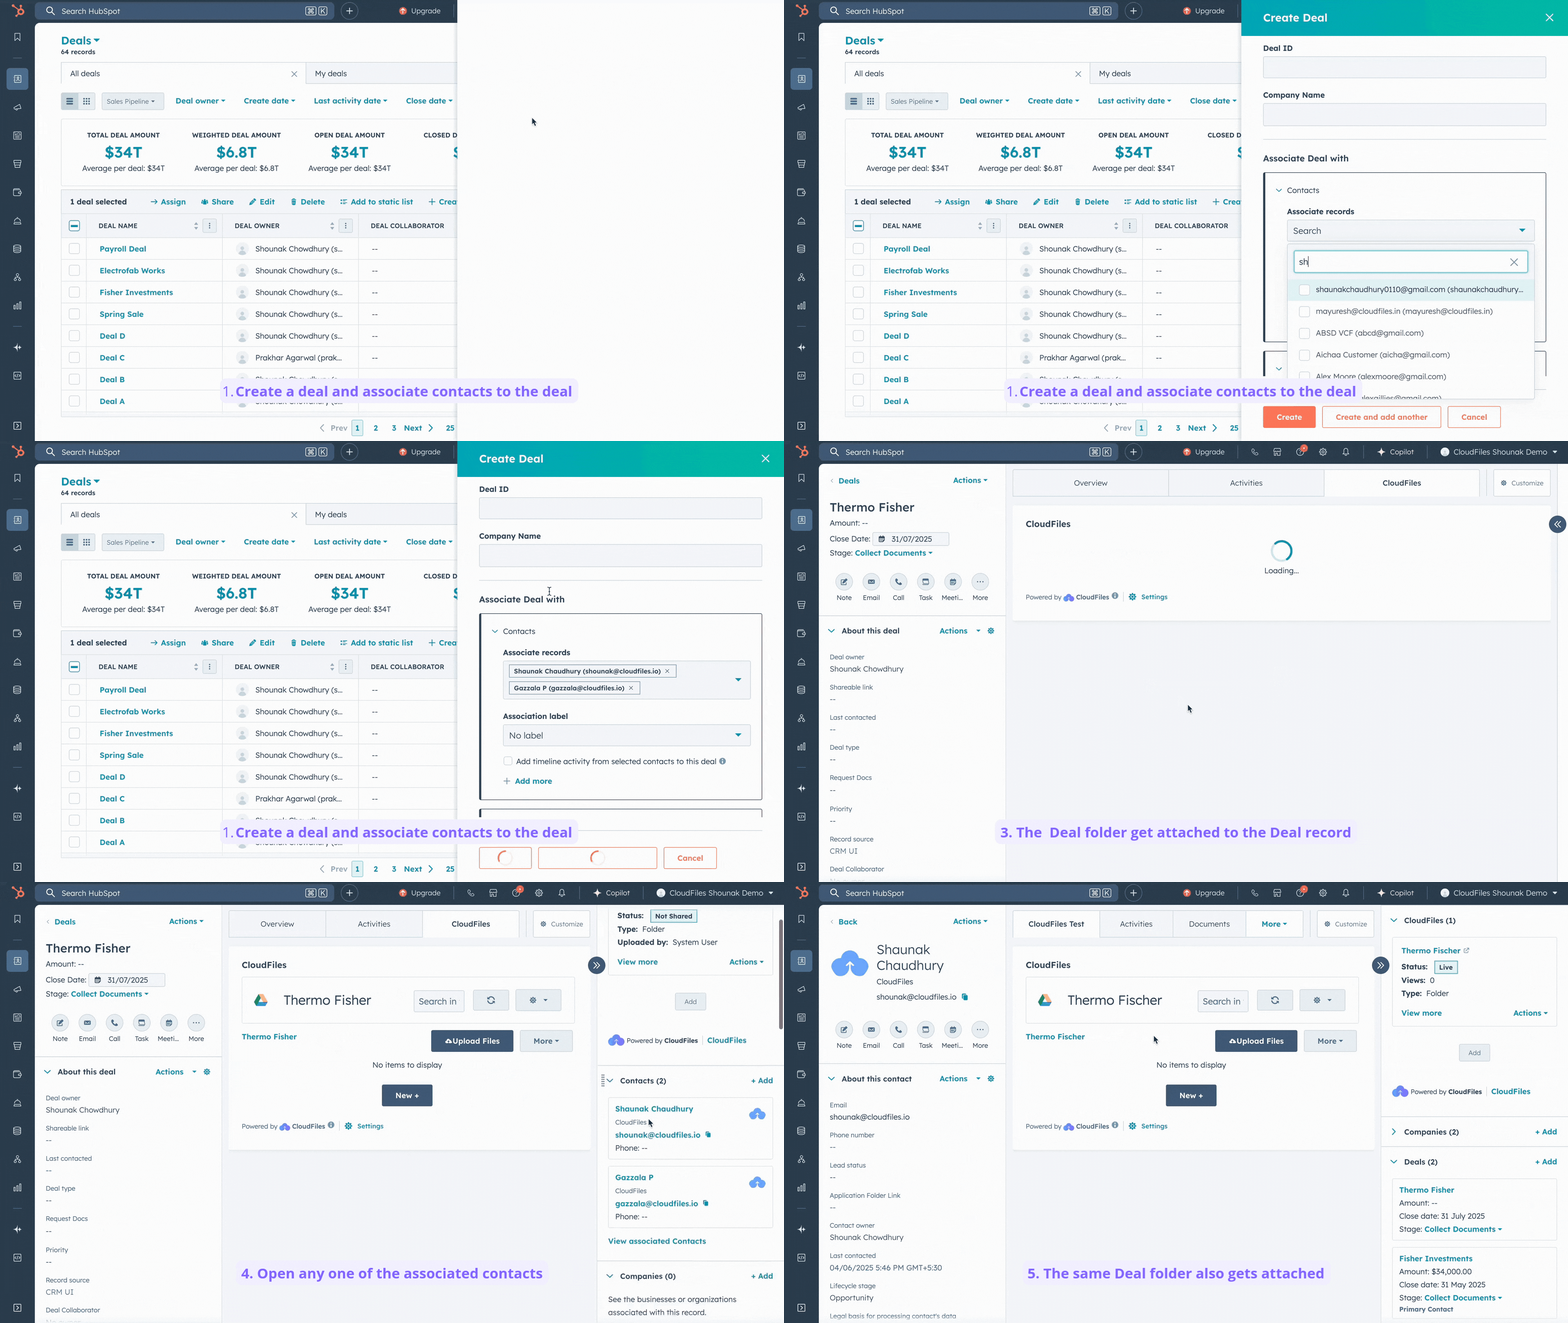
If someone creates a new deal for an existing contact, for example, if you are associating another deal with a contact that already exists in your CRM and you want a folder to be automatically created and linked to that contact record again, make sure the re-enrollment option is enabled in your workflow. This allows the workflow to run again for the same contact whenever a new deal is associated..