Before placing form fields, you must set up at least one Recipient in the Resources tab. The recipient defines who will receive the document for signing via DocuSign.
Steps to Insert a Form Field:
Step 1: Add a Recipient Resource
- In the PDF editor, click the Resources tab in the right panel.
- Click + Add or Manage Resources to open the Manage Resources dialog.
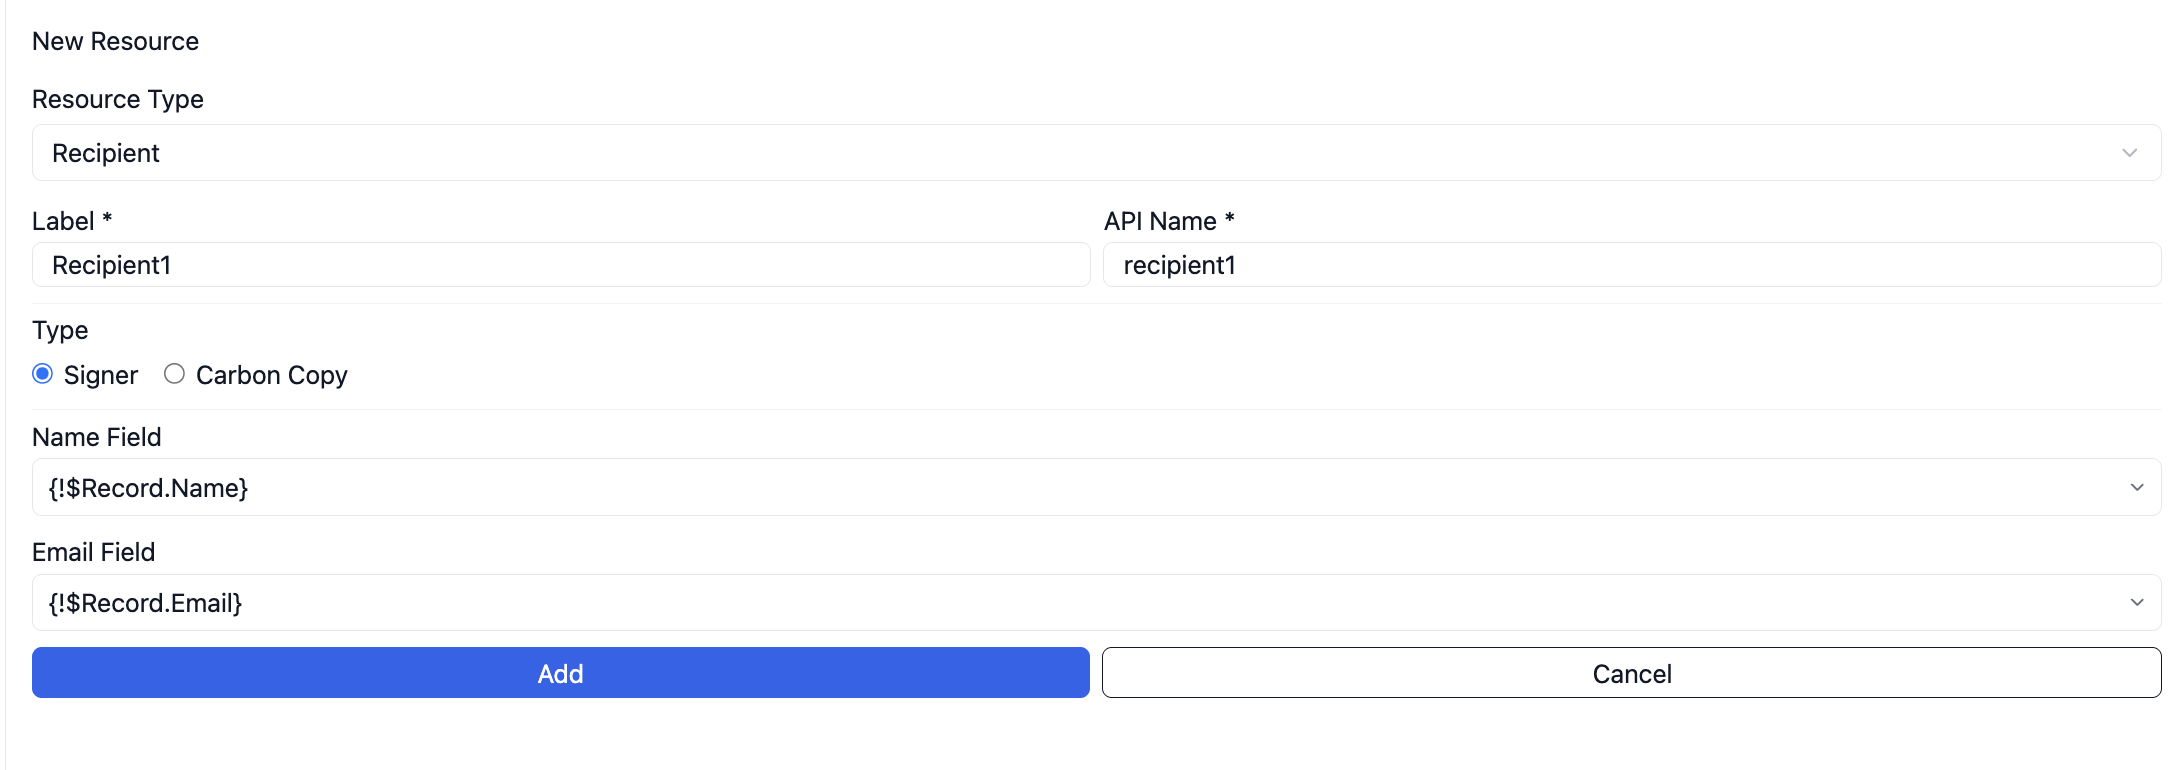
- Click + Create New Resource and set the Resource Type to Recipient.
- Fill in the following fields:
- Label — A display name for this recipient (e.g., Sample Recipient Name).
- API Name — Auto-populated based on the label (e.g., sample_recipient_name).
- Type — Select Signer if this recipient needs to sign the document, or Carbon Copy if they should only receive a copy of the completed document without signing.
- Name Field — The Salesforce field that holds the recipient's name, used by DocuSign for communication.
- Email Field — The Salesforce field that holds the recipient's email address, used by DocuSign to send the signing request.
- Click Add to save the recipient.
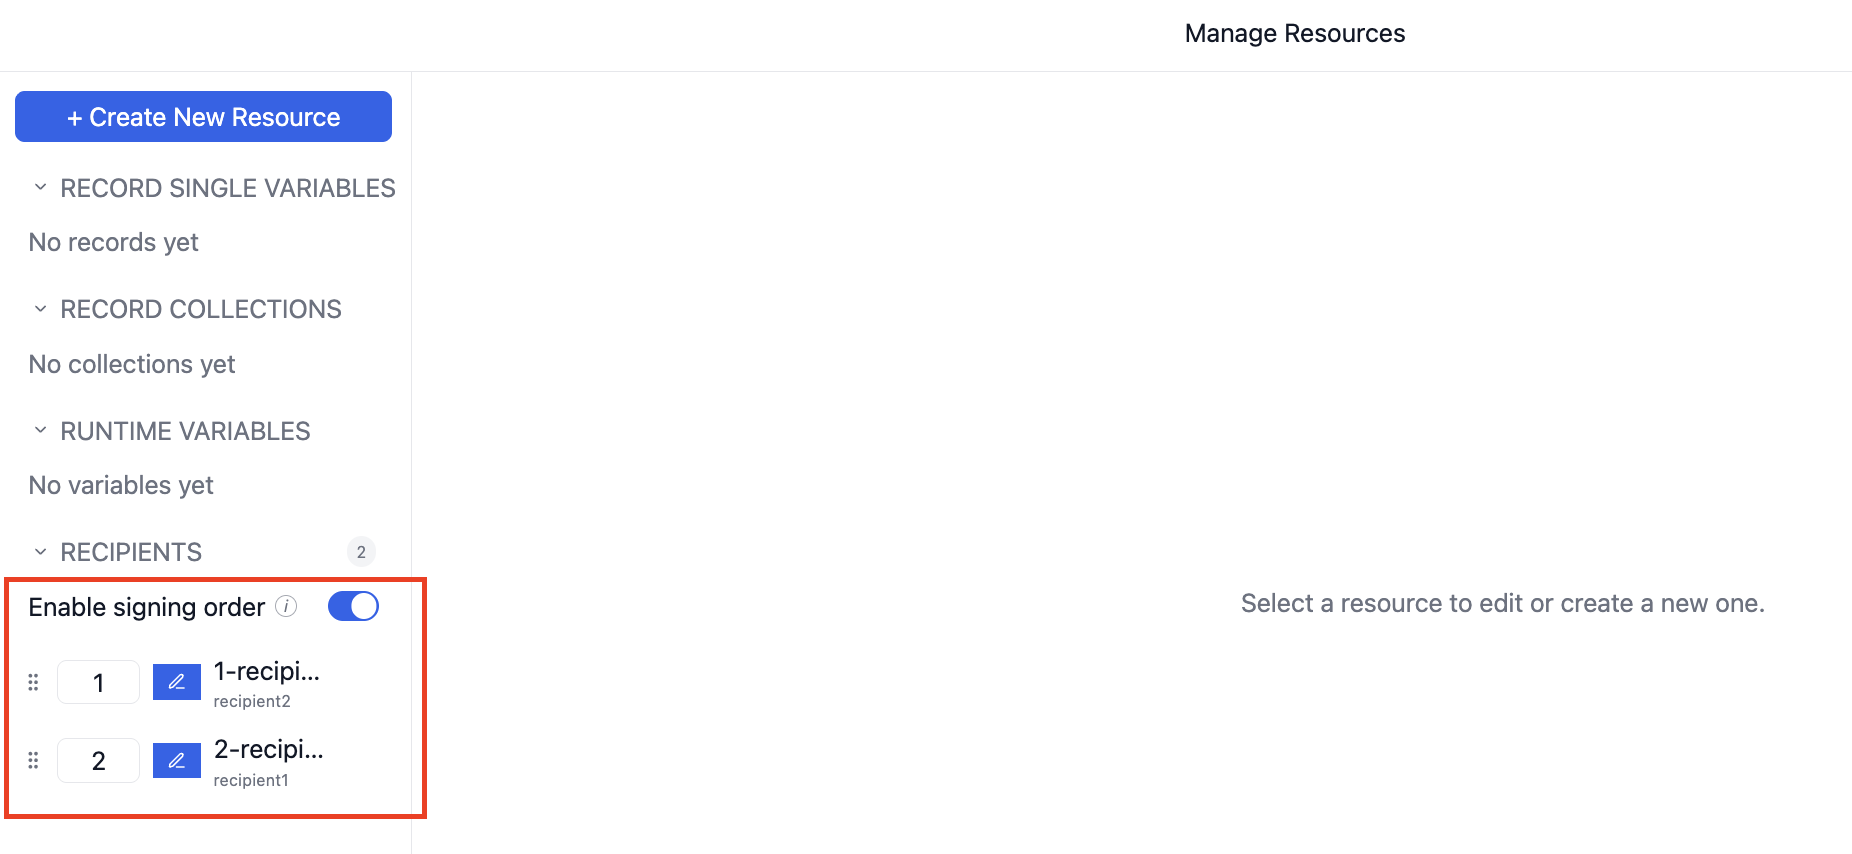
You can enable Signing Order in the Recipients section to control the sequence in which recipients receive the signing email. Once enabled, each recipient is assigned a number — recipients with a lower number receive the email first. To send the document to multiple recipients simultaneously, assign them the same number. You can reorder recipients by dragging and dropping or by editing the number directly.
Step 2: Insert Form Fields
- Go to the Edit tab and click + Form Field in the right panel.
- Click anywhere on the PDF to place the form field at that location.
- A sample field is inserted on the PDF. Its appearance will update based on the Field Type selected.
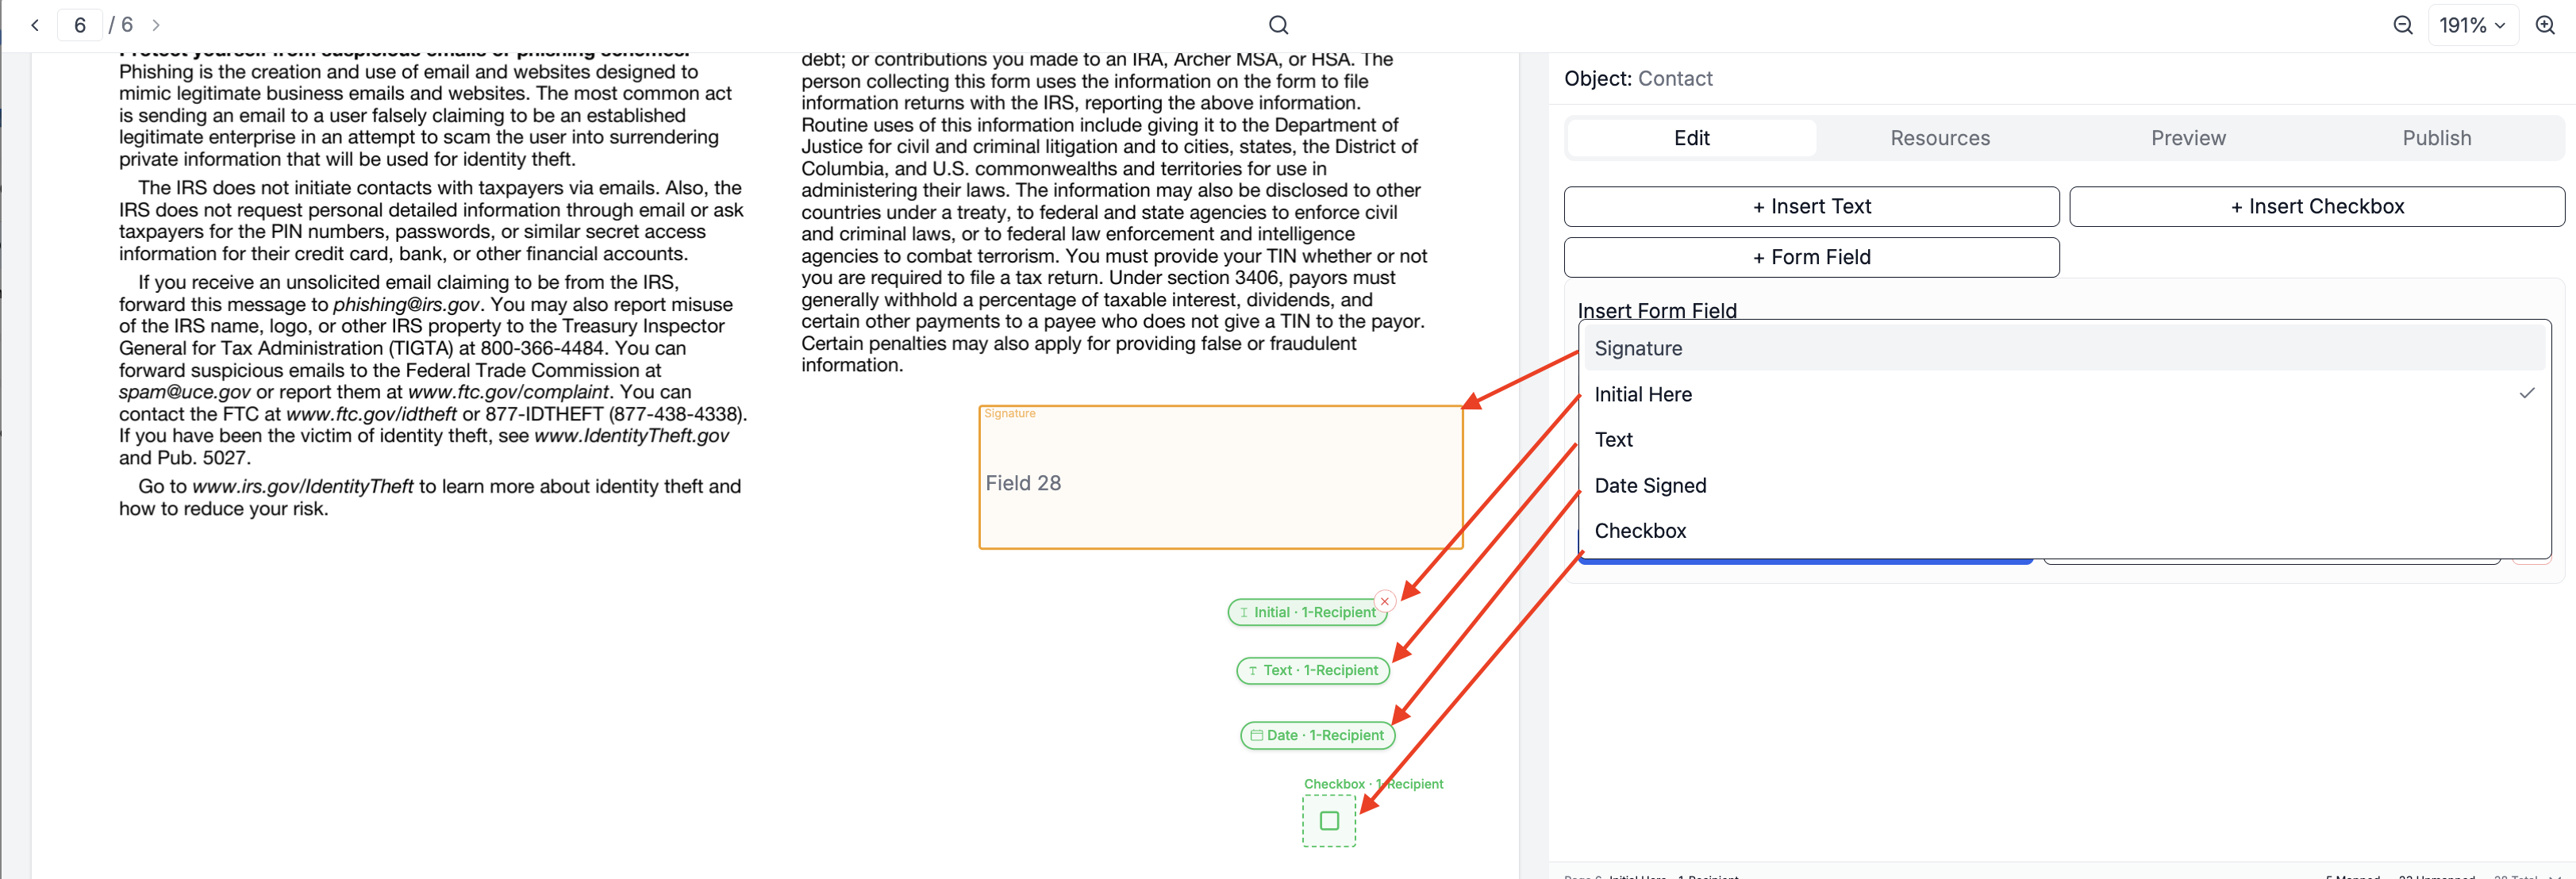
- In the Insert Form Field panel on the right, configure the field:
- Field Type — Choose from one of the following:
- Signature — A box where the recipient signs the document.
- Initial Here — A smaller field for the recipient to place their initials.
- Text — A free-text field the recipient can type into.
- Date Signed — Automatically captures the date on which the recipient signs.
- Checkbox — A checkbox the recipient can tick during the signing process.
- Recipient — Select the recipient this field is assigned to.
- Field Type — Choose from one of the following:
- Click Apply to confirm. The field will be labeled with the field type and recipient name on the PDF.
- Repeat for each additional field needed. You can move or remove any placed field as required.
Step 3: Preview for Signing
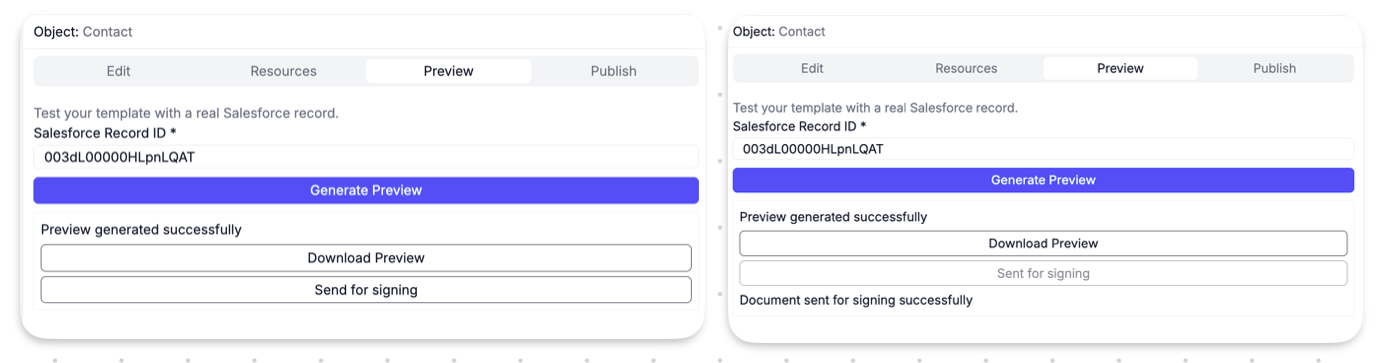
- Once all form fields are placed, click the Preview tab.
- Enter a Salesforce Record ID to test the template with real data.
- Click Generate Preview to generate the document.
- Once the preview is generated successfully, click Send for Signing to dispatch the document to the recipient via DocuSign.
- A confirmation message — Document sent for signing successfully — will appear once the document has been sent.
You are generating a W-9 form for Account records and need the account representative to sign and date the document before it is submitted. You want the signature and date to be captured via DocuSign.
Steps:
- In the Resources tab, create a Recipient resource with the account contact's name and email fields.
- On the last page of the W-9 (the Sign Here section), click + Form Field and place a Signature field for the recipient.
- Add a Date Signed field next to the signature box and assign it to the same recipient.
- Click Publish to save the template.
When the document is generated — either manually through a flow action or automatically via an automation — it will be sent to the configured recipients for signature via DocuSign.