Steps to Insert a Field:
- Navigate to the Document Generation tab in the CloudFiles app and open the PDF template in Edit mode using the menu (⋮) next to the template.
- Click the + Insert Text button in the right panel.
- Click on a text field area in the PDF, or select a field from the list in the bottom panel. The selected field will be highlighted.
- In the Insert Field section that appears on the right, choose the Salesforce field from the Field API Name dropdown.
- Optionally, select a Format to control how the value is displayed in the generated document.
- Click Apply to map the field. A green dot will appear on the field to indicate it has been successfully mapped.
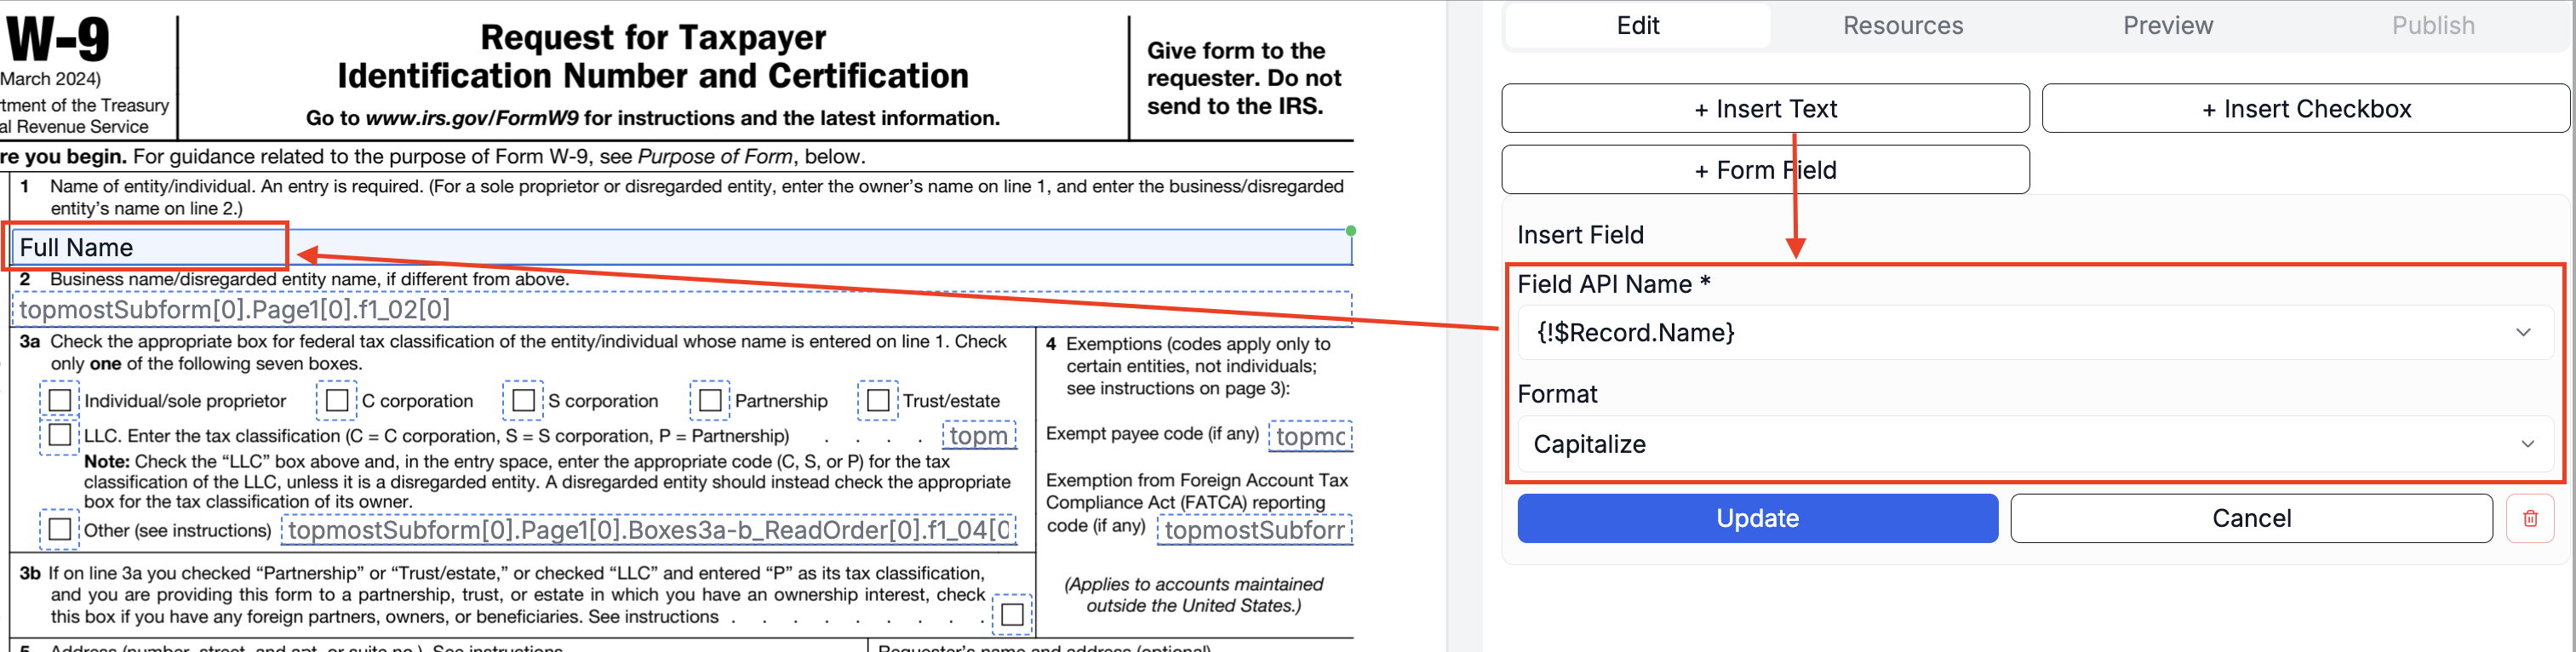
Let's say you need to generate a W-9 form for each Contact record in Salesforce. Instead of manually entering the contact's name, address, or tax details each time, you can set up the PDF template to automatically fill these fields using the Insert Text action.
Steps:
- Upload the W-9 PDF as a new template in the Document Generation tab.
- Click the menu (⋮) next to the uploaded file and choose Edit.
- In the right panel, select Contact as the object and click Set Primary Record to open the PDF editor.
- Click + Insert Text, then click on Line 1 (under Name of entity/individual) and map it to Contact.Name.
- For Line 2, map a business or company name (e.g., Contact.Account.Name or a custom field).
- Insert address details into Lines 5 and 6 using:
- MailingStreet
- MailingCity
- MailingState
- MailingPostalCode
- After mapping all fields, click Publish to save the template.
Number Formatting
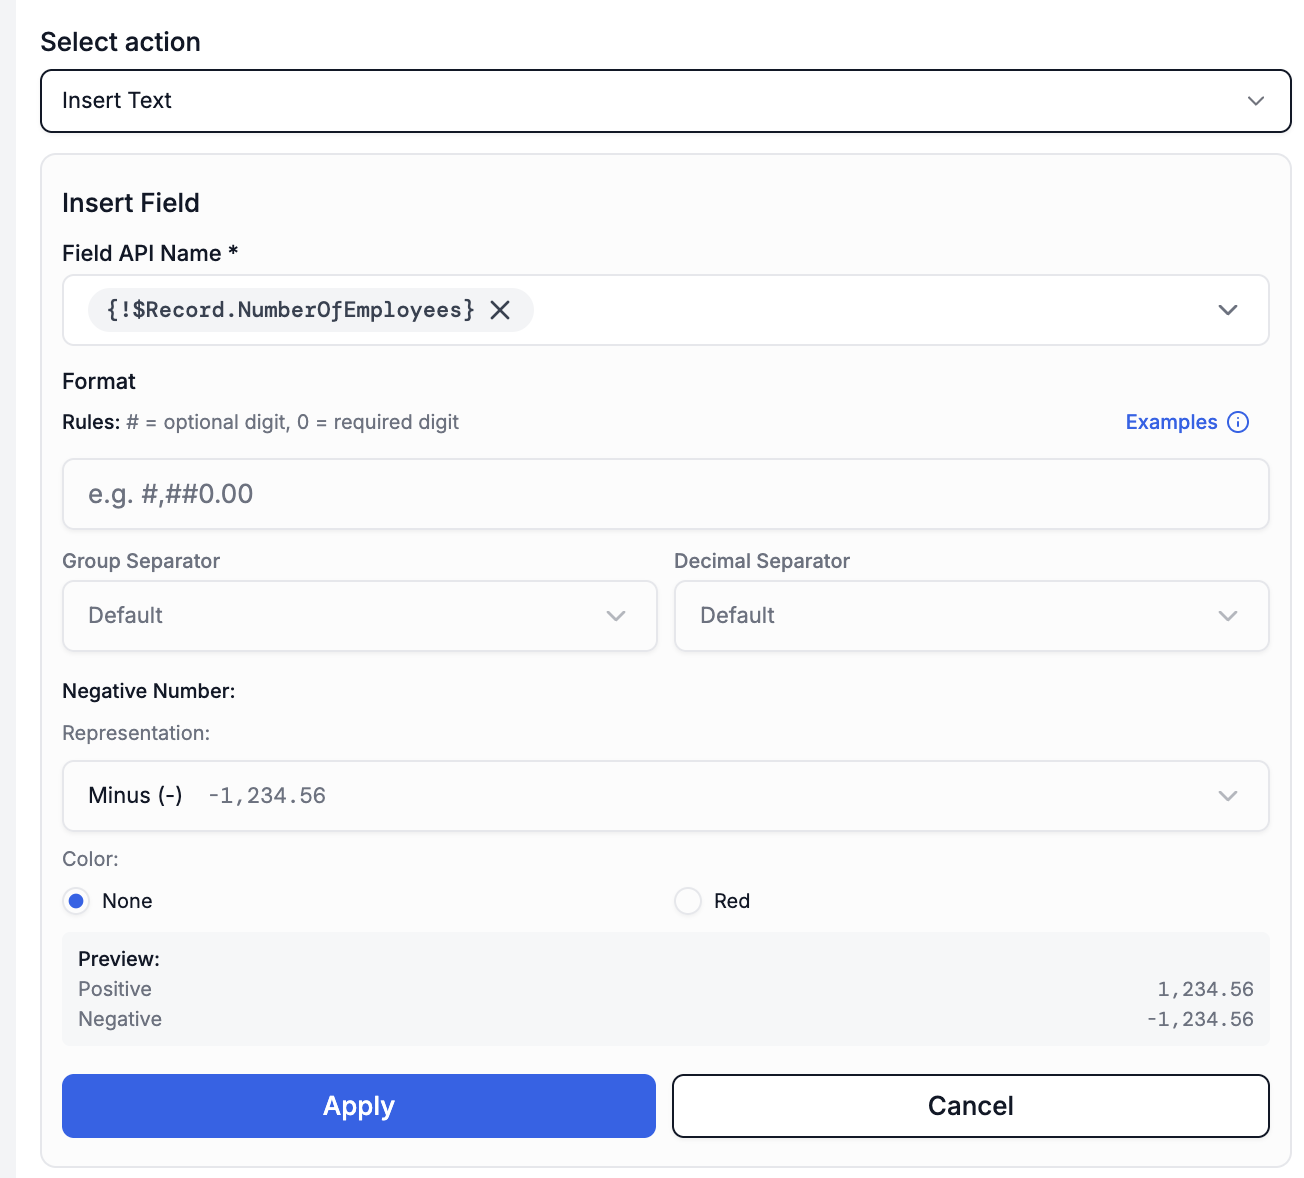
When the mapped field is a number, currency, or percent field, the Insert Field section shows number formatting options. Enter a pattern in the Format box to control decimal places, separators, and any currency symbol. Select Examples to see sample patterns with their output.
| Character | What it does |
|---|---|
0 | Always shows a digit. Inserts a zero if the value has none. |
# | Shows a digit only if the value has one. |
, | Thousands separator. |
. | Decimal separator. |
Anything else you type, such as $ or £, is printed as-is around the number. For example, $#,##0.00 prints 9503.1 as $9,503.10.
Always write the pattern with , for grouping and . for decimals. To print a different convention such as 1.234.567,89, set the Group Separator and Decimal Separator dropdowns. These change the printed characters only.
Negative numbers
The Negative Number options control how negative values are printed.
| Option | Choice | Output for -1,234.56 |
|---|---|---|
| Representation | Minus (-) | -1,234.56 |
| Representation | Bracket ( ) | (1,234.56) |
| Color | None | Printed in the same color as the surrounding text |
| Color | Red | Printed in red |
These options apply to every negative value, whether or not you enter a format pattern. Positive values are not affected. The Preview shows a sample positive and negative value with your settings applied, so you can check the result before clicking Apply.