Before you begin
You need Agentforce enabled in your Salesforce org, permission to manage Agentforce Registry and Agentforce Builder, and an MCP credential from Create and Manage MCP Credentials. Register the server in each Salesforce org where an agent uses CloudFiles. A sandbox needs its own credential and its own registration. See Production, Sandbox and Regions. Every user who works with the CloudFiles tools through an agent needs the permission set that Salesforce creates for the registration, as described in Step 4.
Step 1: Create an MCP credential
In the CloudFiles app, create an MCP credential and keep the Server URL, Identity Provider URL, Client ID and Client Secret it shows. See Create and Manage MCP Credentials.
Step 2: Register the CloudFiles MCP server
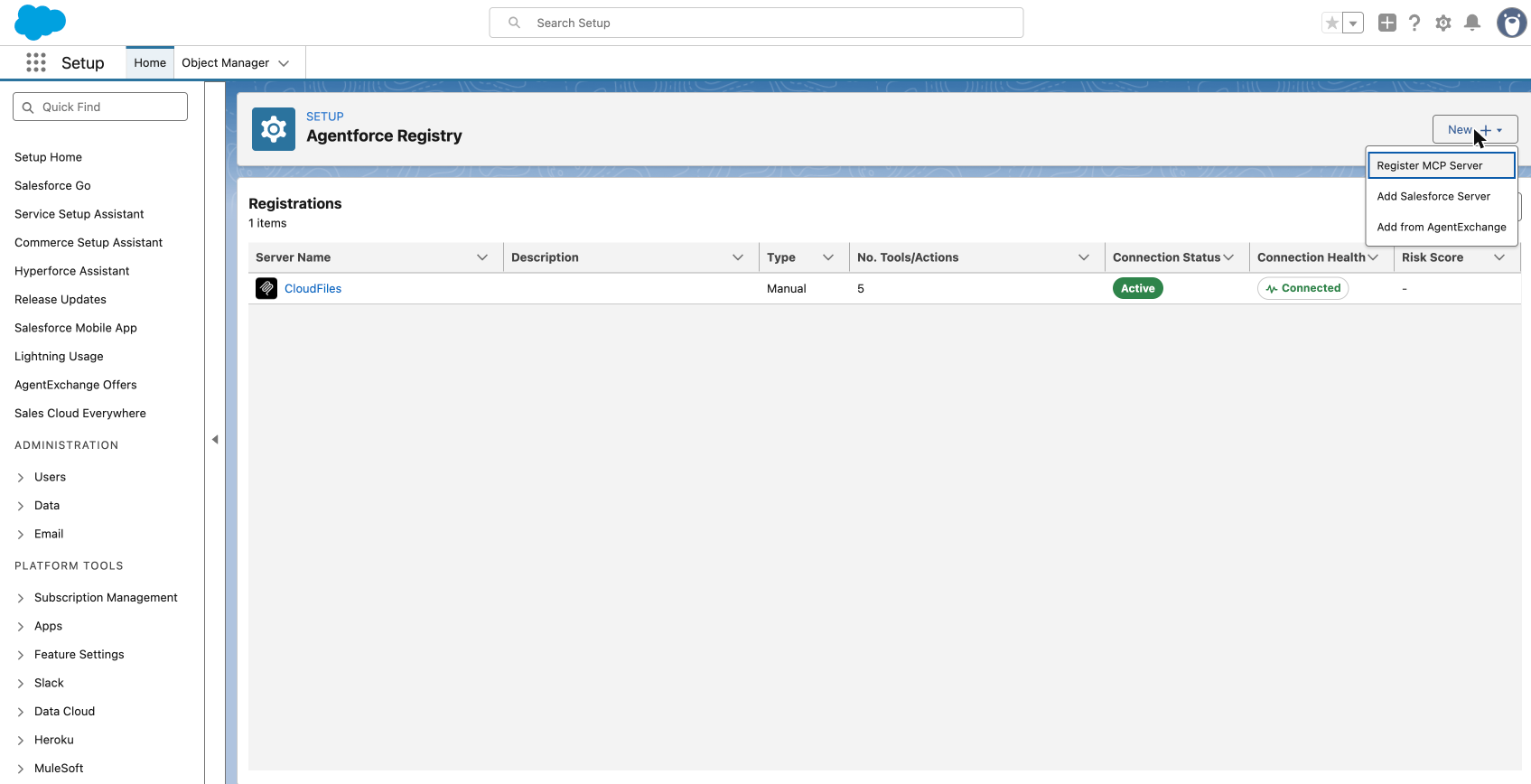
- In Salesforce Setup, enter Agentforce Registry in Quick Find and select Registered MCP Servers.
- Click New and select Register MCP Server.
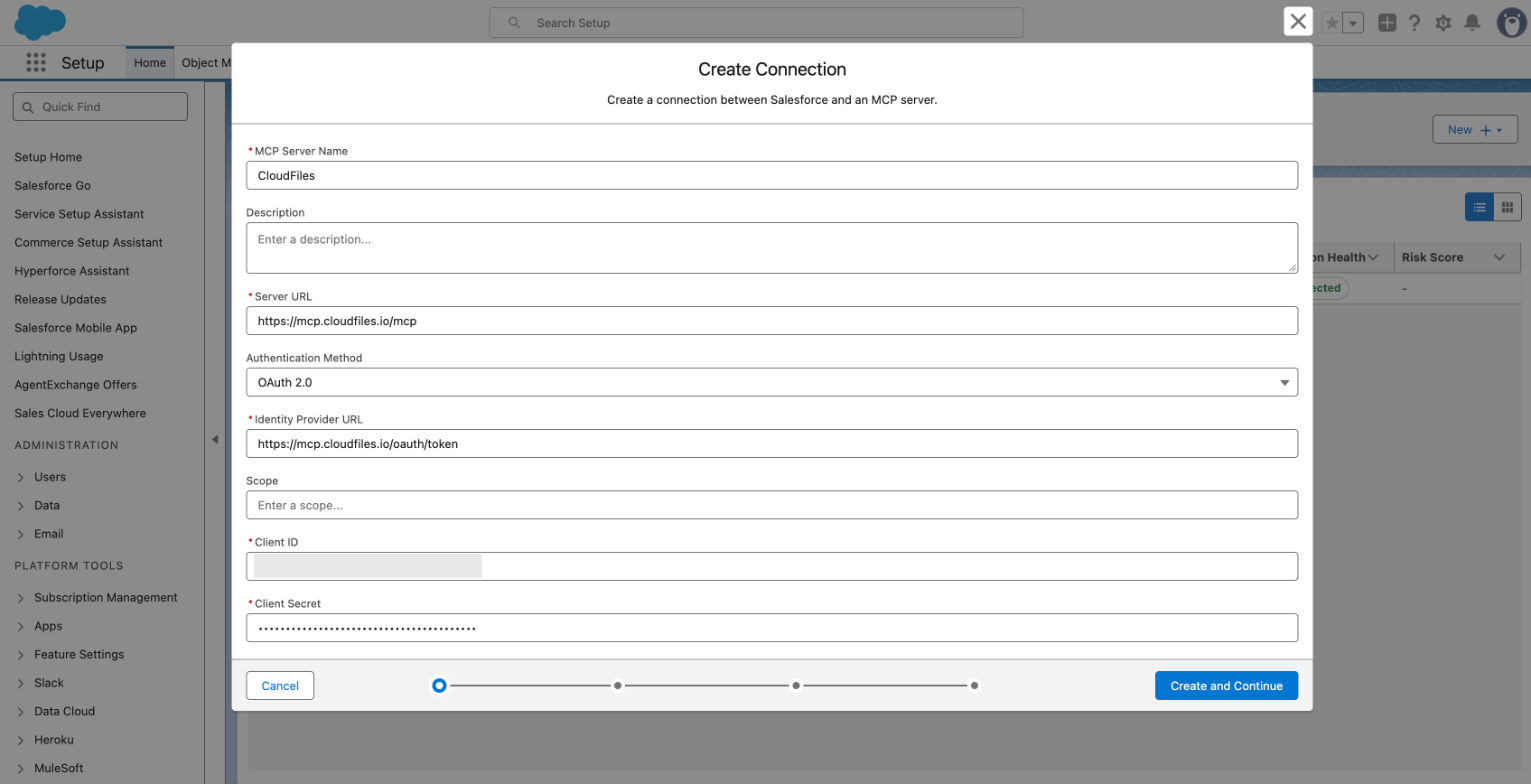
- In Create Connection, enter an MCP Server Name, for example CloudFiles. The name can contain only letters and numbers, and it must be unique in the org.
- In Server URL, enter the Server URL from your MCP credential.
- Leave Authentication Method set to OAuth 2.0.
- Enter the Identity Provider URL, Client ID and Client Secret from your MCP credential. Leave Scope empty.
- Click Create and Continue. Salesforce creates the connection, checks it with the credential and reads the list of CloudFiles tools.
Step 3: Allow the CloudFiles tools
Salesforce shows the MCP Server Allowlist with a risk assessment and the CloudFiles tools. Expand a tool to see its description and the schema of its inputs and outputs.
- Click Select All to give agents every CloudFiles tool, or click Add Tool next to each tool your agents may use.
- Click Allow and Continue.
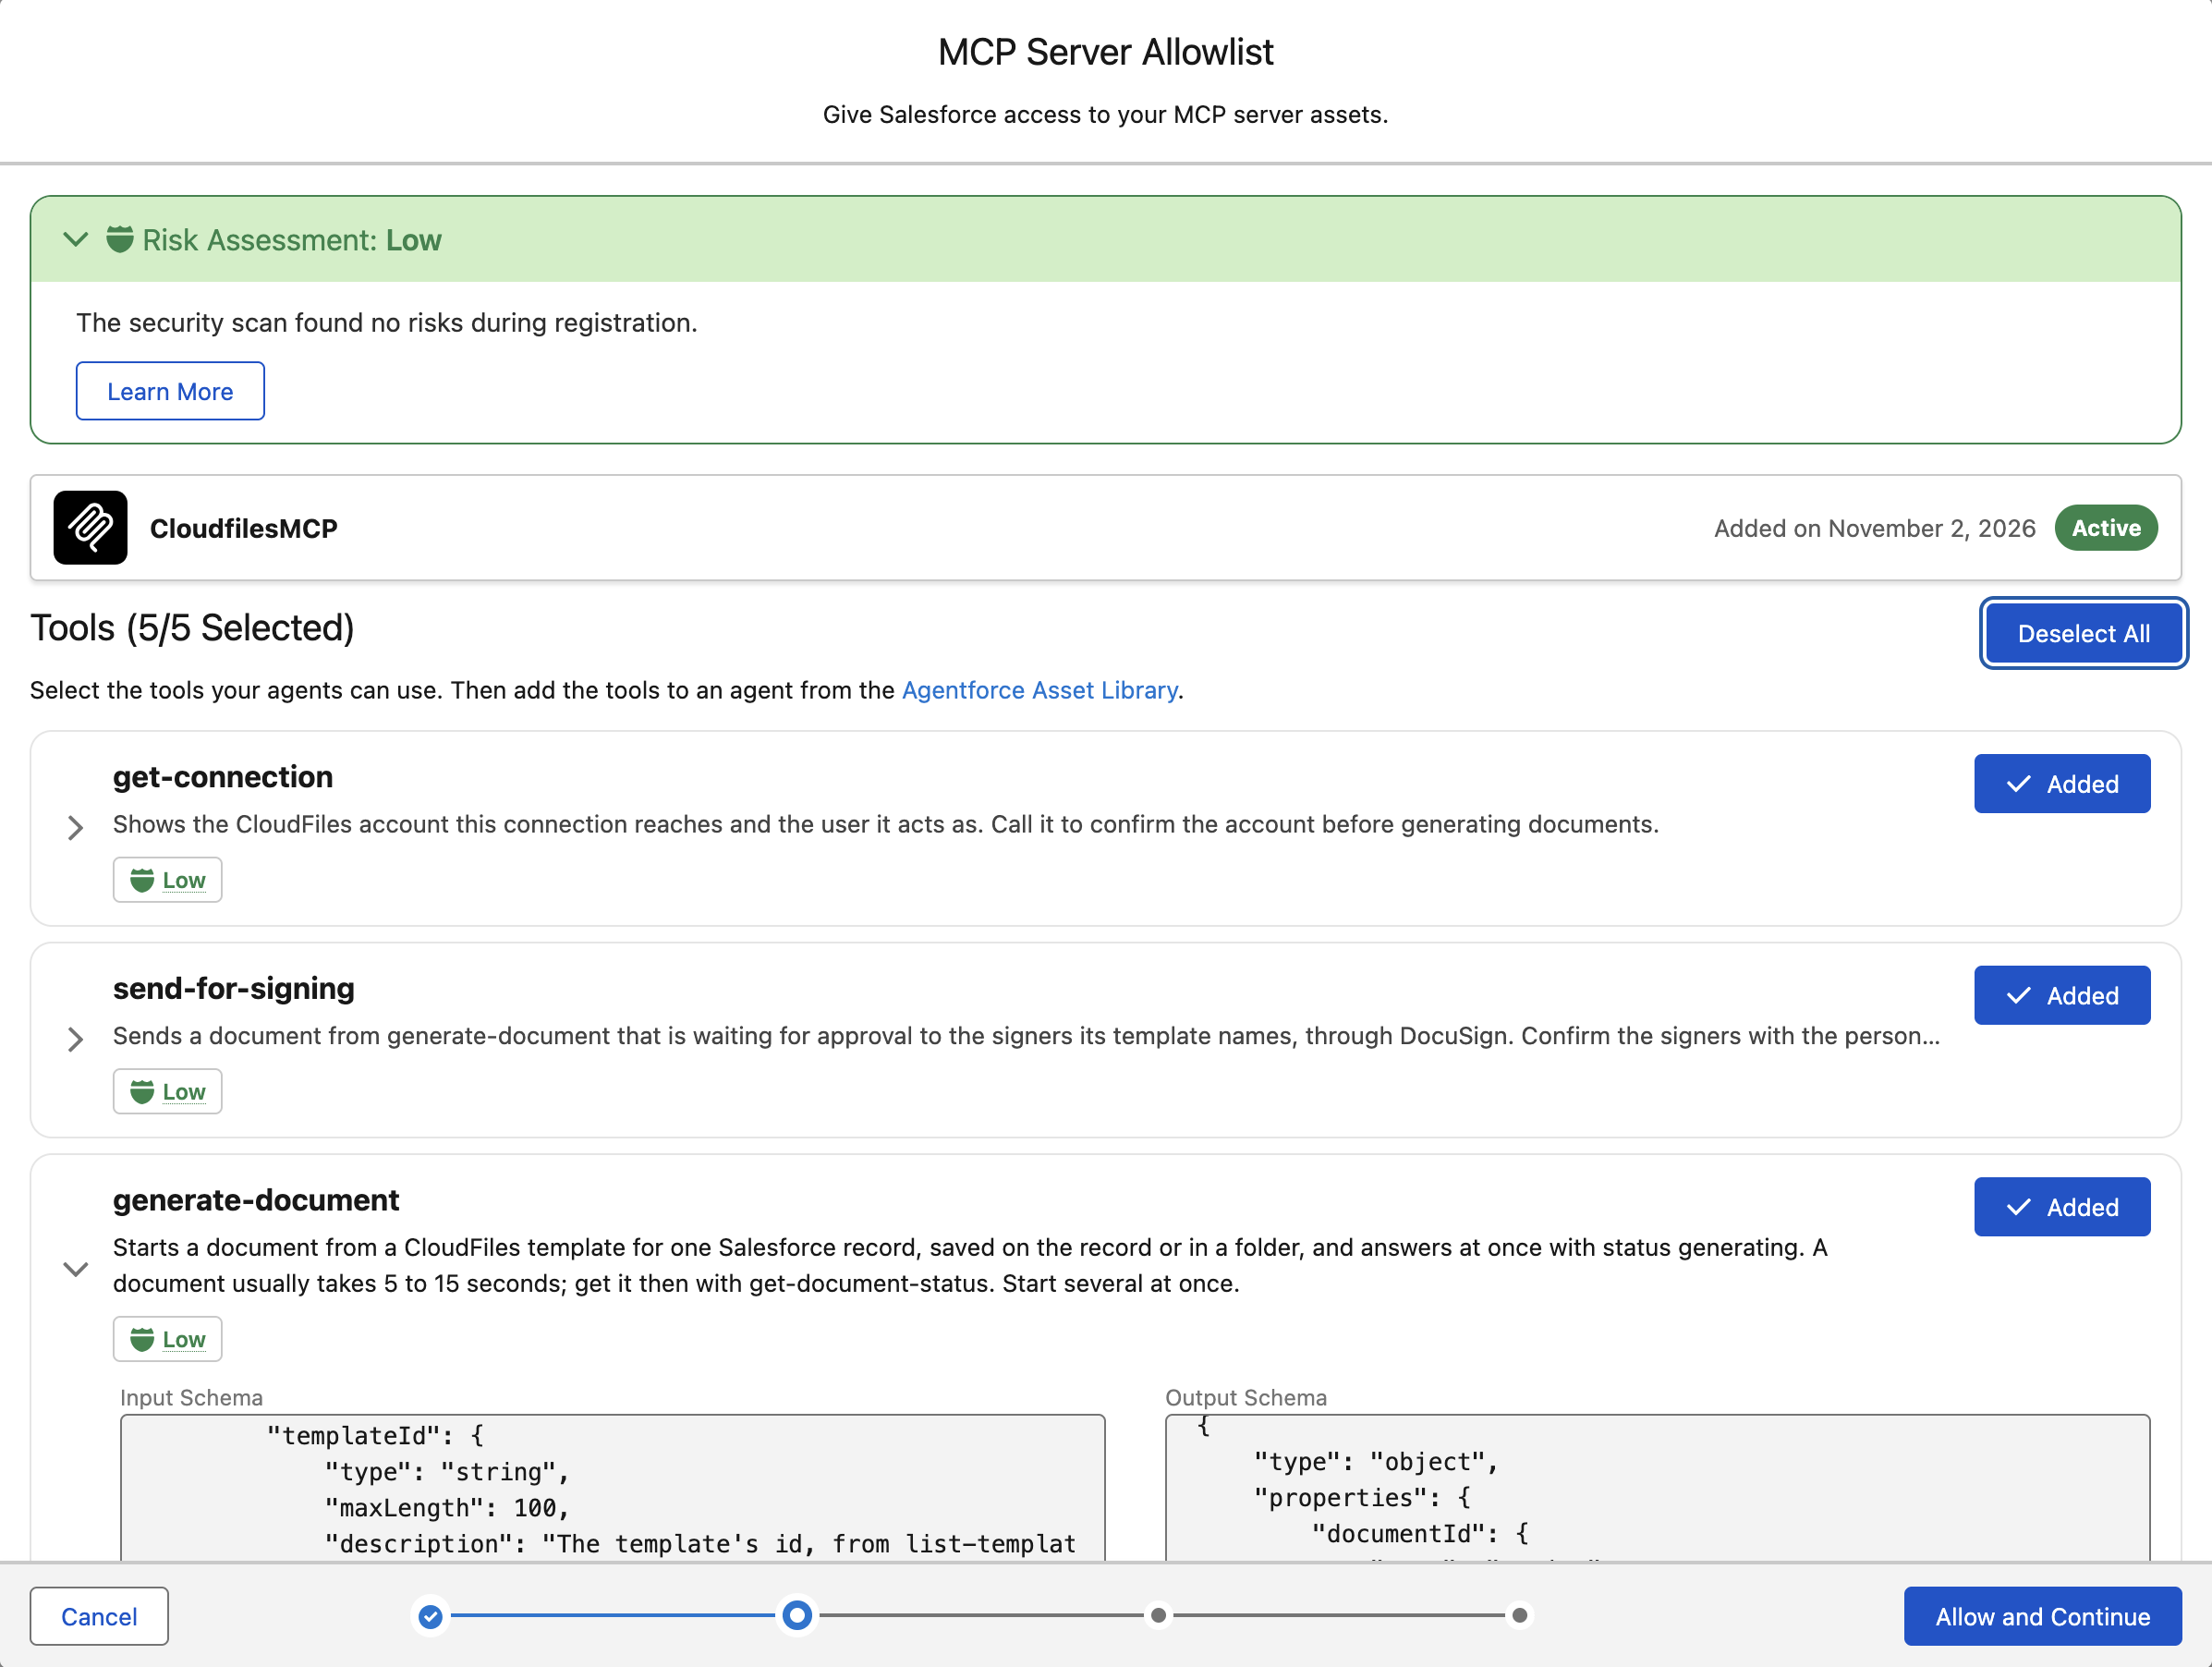
A tool you do not allow here cannot be used by any agent in the org.
Step 4: Give users access
In Grant Access to Users, Salesforce creates a permission set named after the server, <MCP Server Name>_Perm_Set, for example CloudFiles_Perm_Set, and assigns it to you. Every user who works with the CloudFiles tools through an agent needs this permission set.
- Click Manage User Assignments and assign the permission set to the users who will use the agent.
- Click Next.
- In Apply Policies, select any policies you want to apply to the server. Policies are optional.
- Click Save.
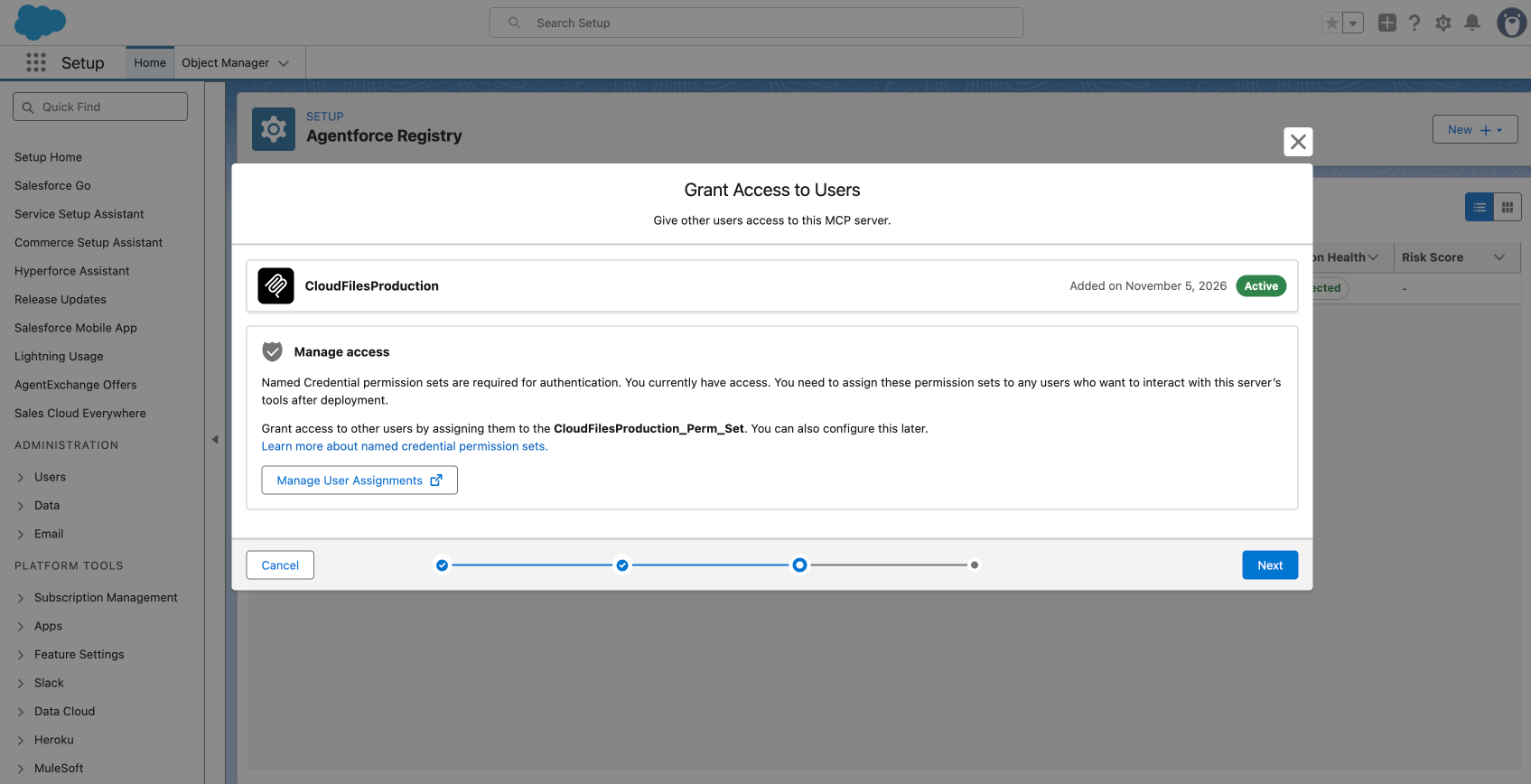
You can assign the permission set later as well. Open the server in Agentforce Registry. Its Details tab names the permission set under Permissions.
Step 5: Add the tools to an agent
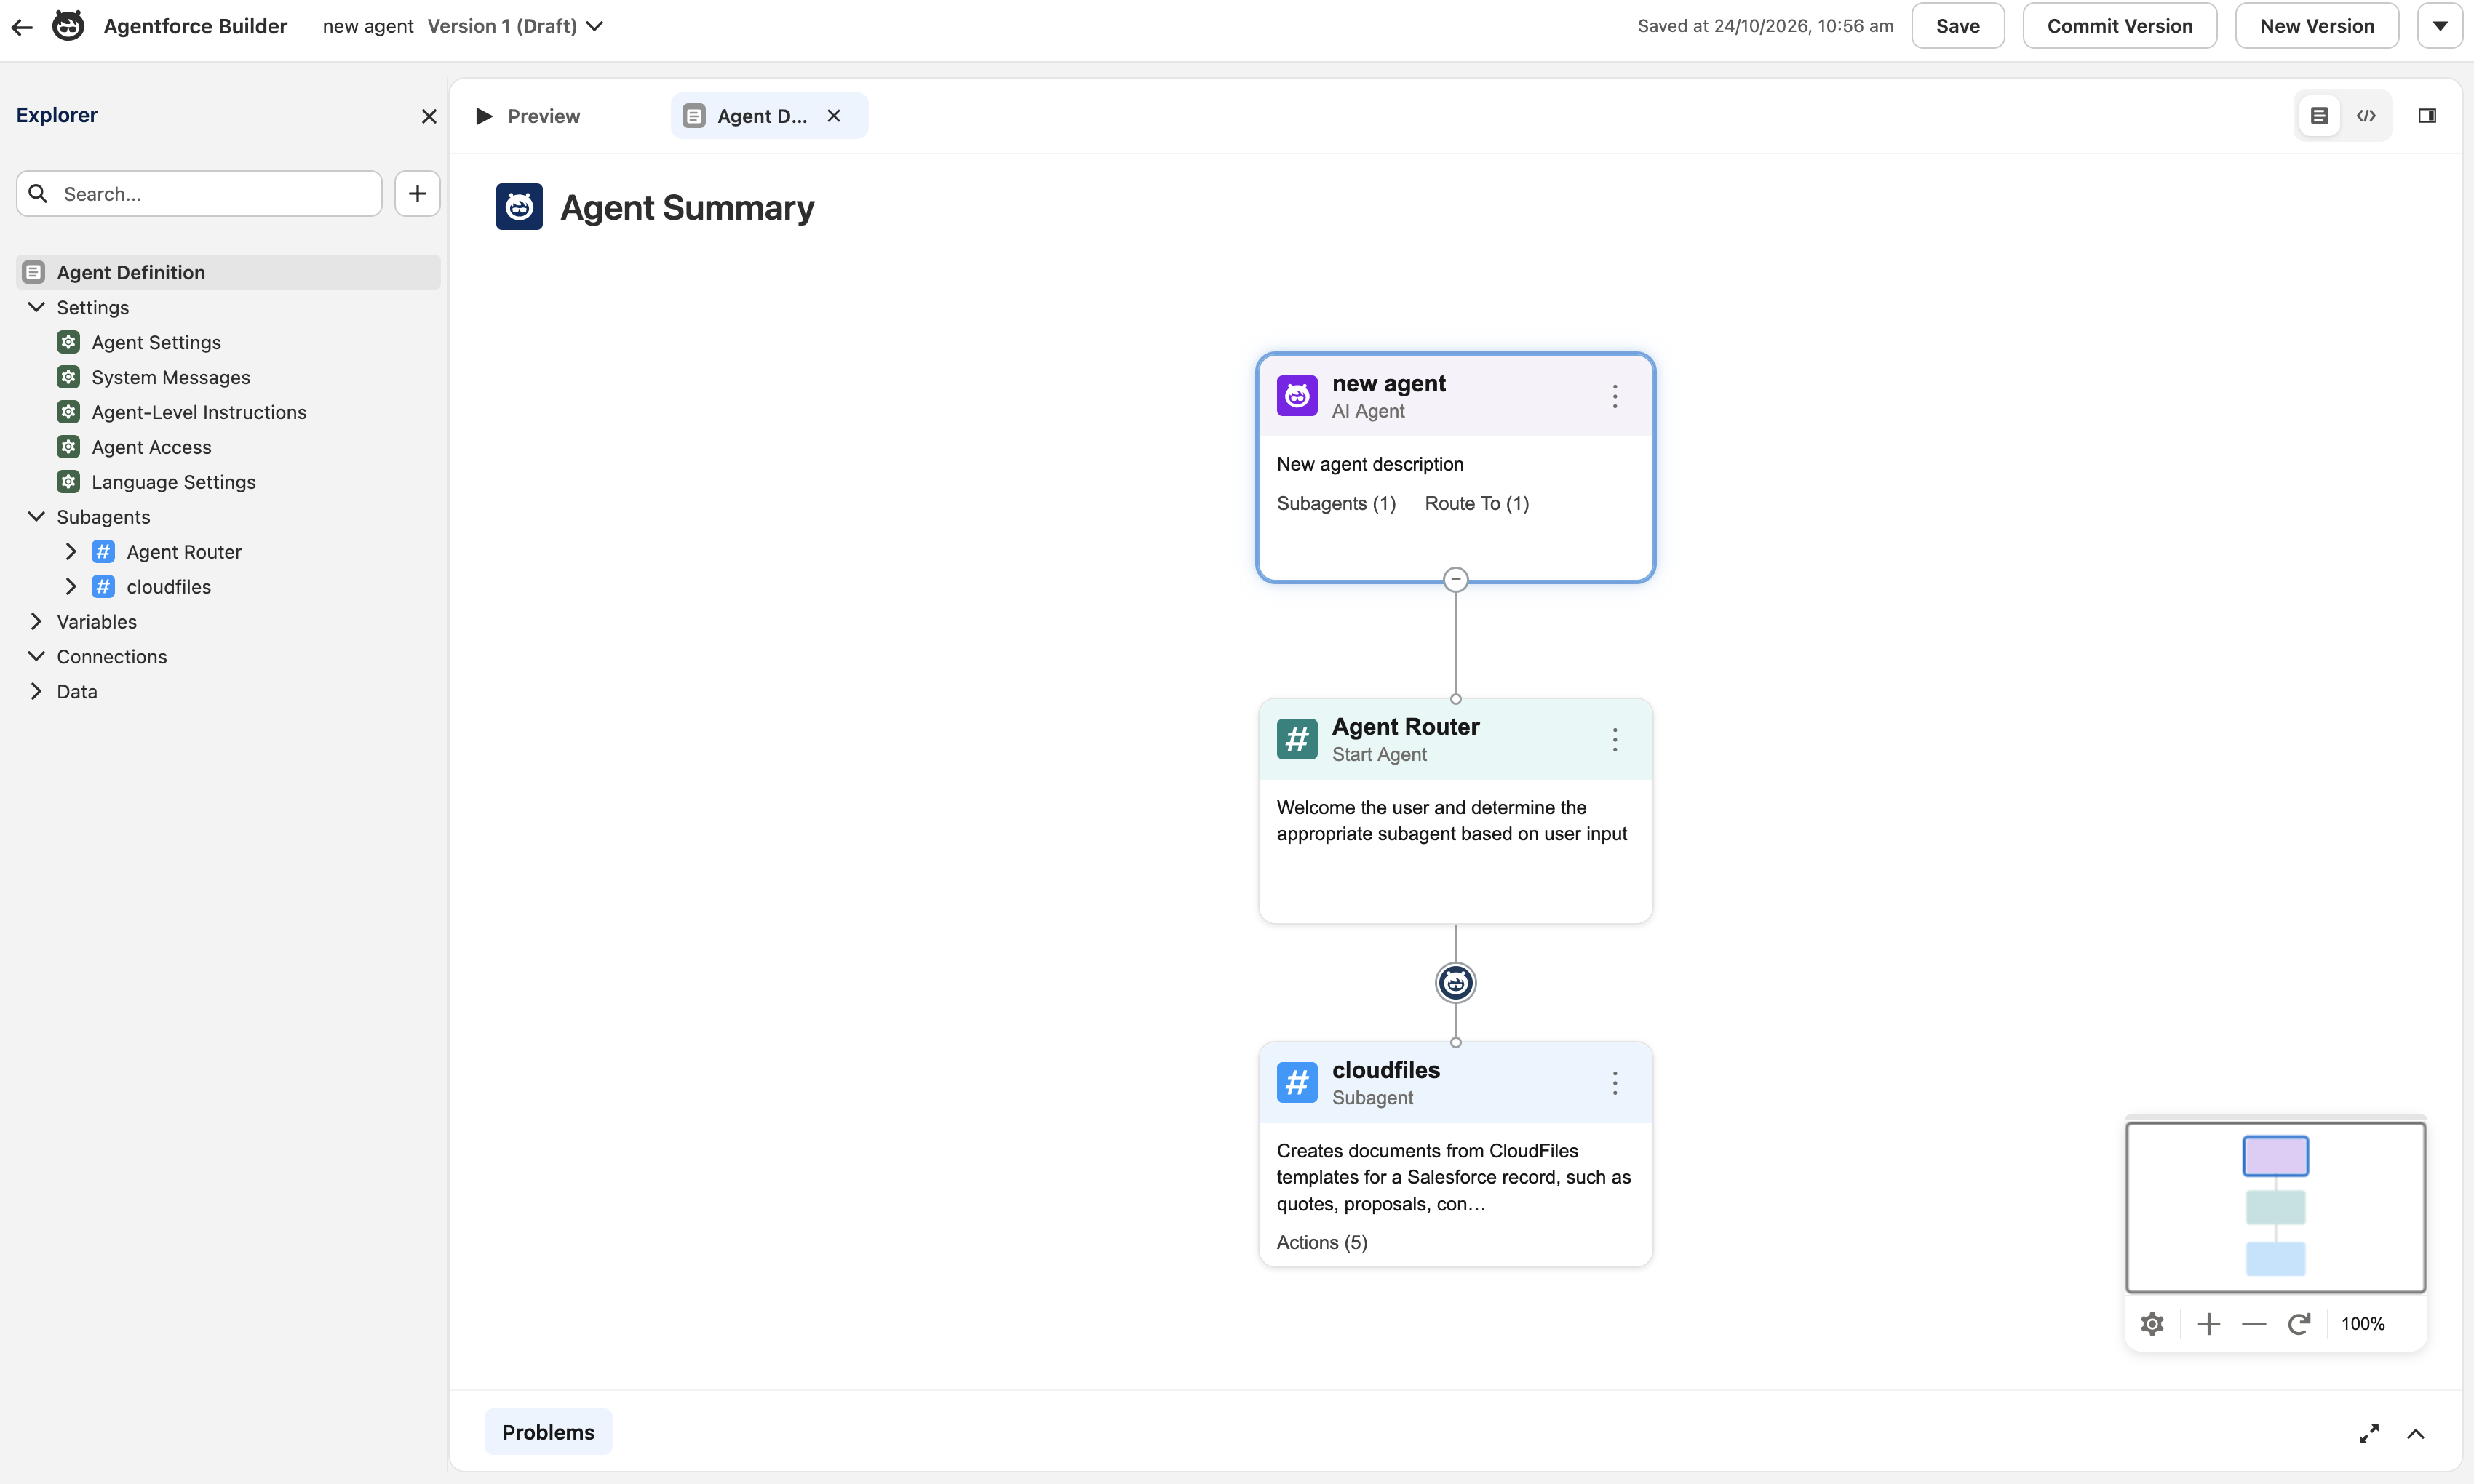
- Open Agentforce Builder.
- Open the agent that should work with CloudFiles.
- Add a subagent for CloudFiles, for example named CloudFiles, with a description that tells the agent when to use it.
- Add the CloudFiles tools to the subagent from the Agentforce Asset Library. Each tool appears as an action.
- Add instructions to the subagent. You can start from the example below.
- Click Save.
Use the CloudFiles tools for any request about CloudFiles.
When the user asks which CloudFiles account is connected, call get-connection.
Before you run a tool that sends anything to people outside the company, show the user what will be sent and to whom, and wait for them to confirm.
When a tool answers that it could not complete a request, pass its message to the user as it is.
Step 6: Test the agent
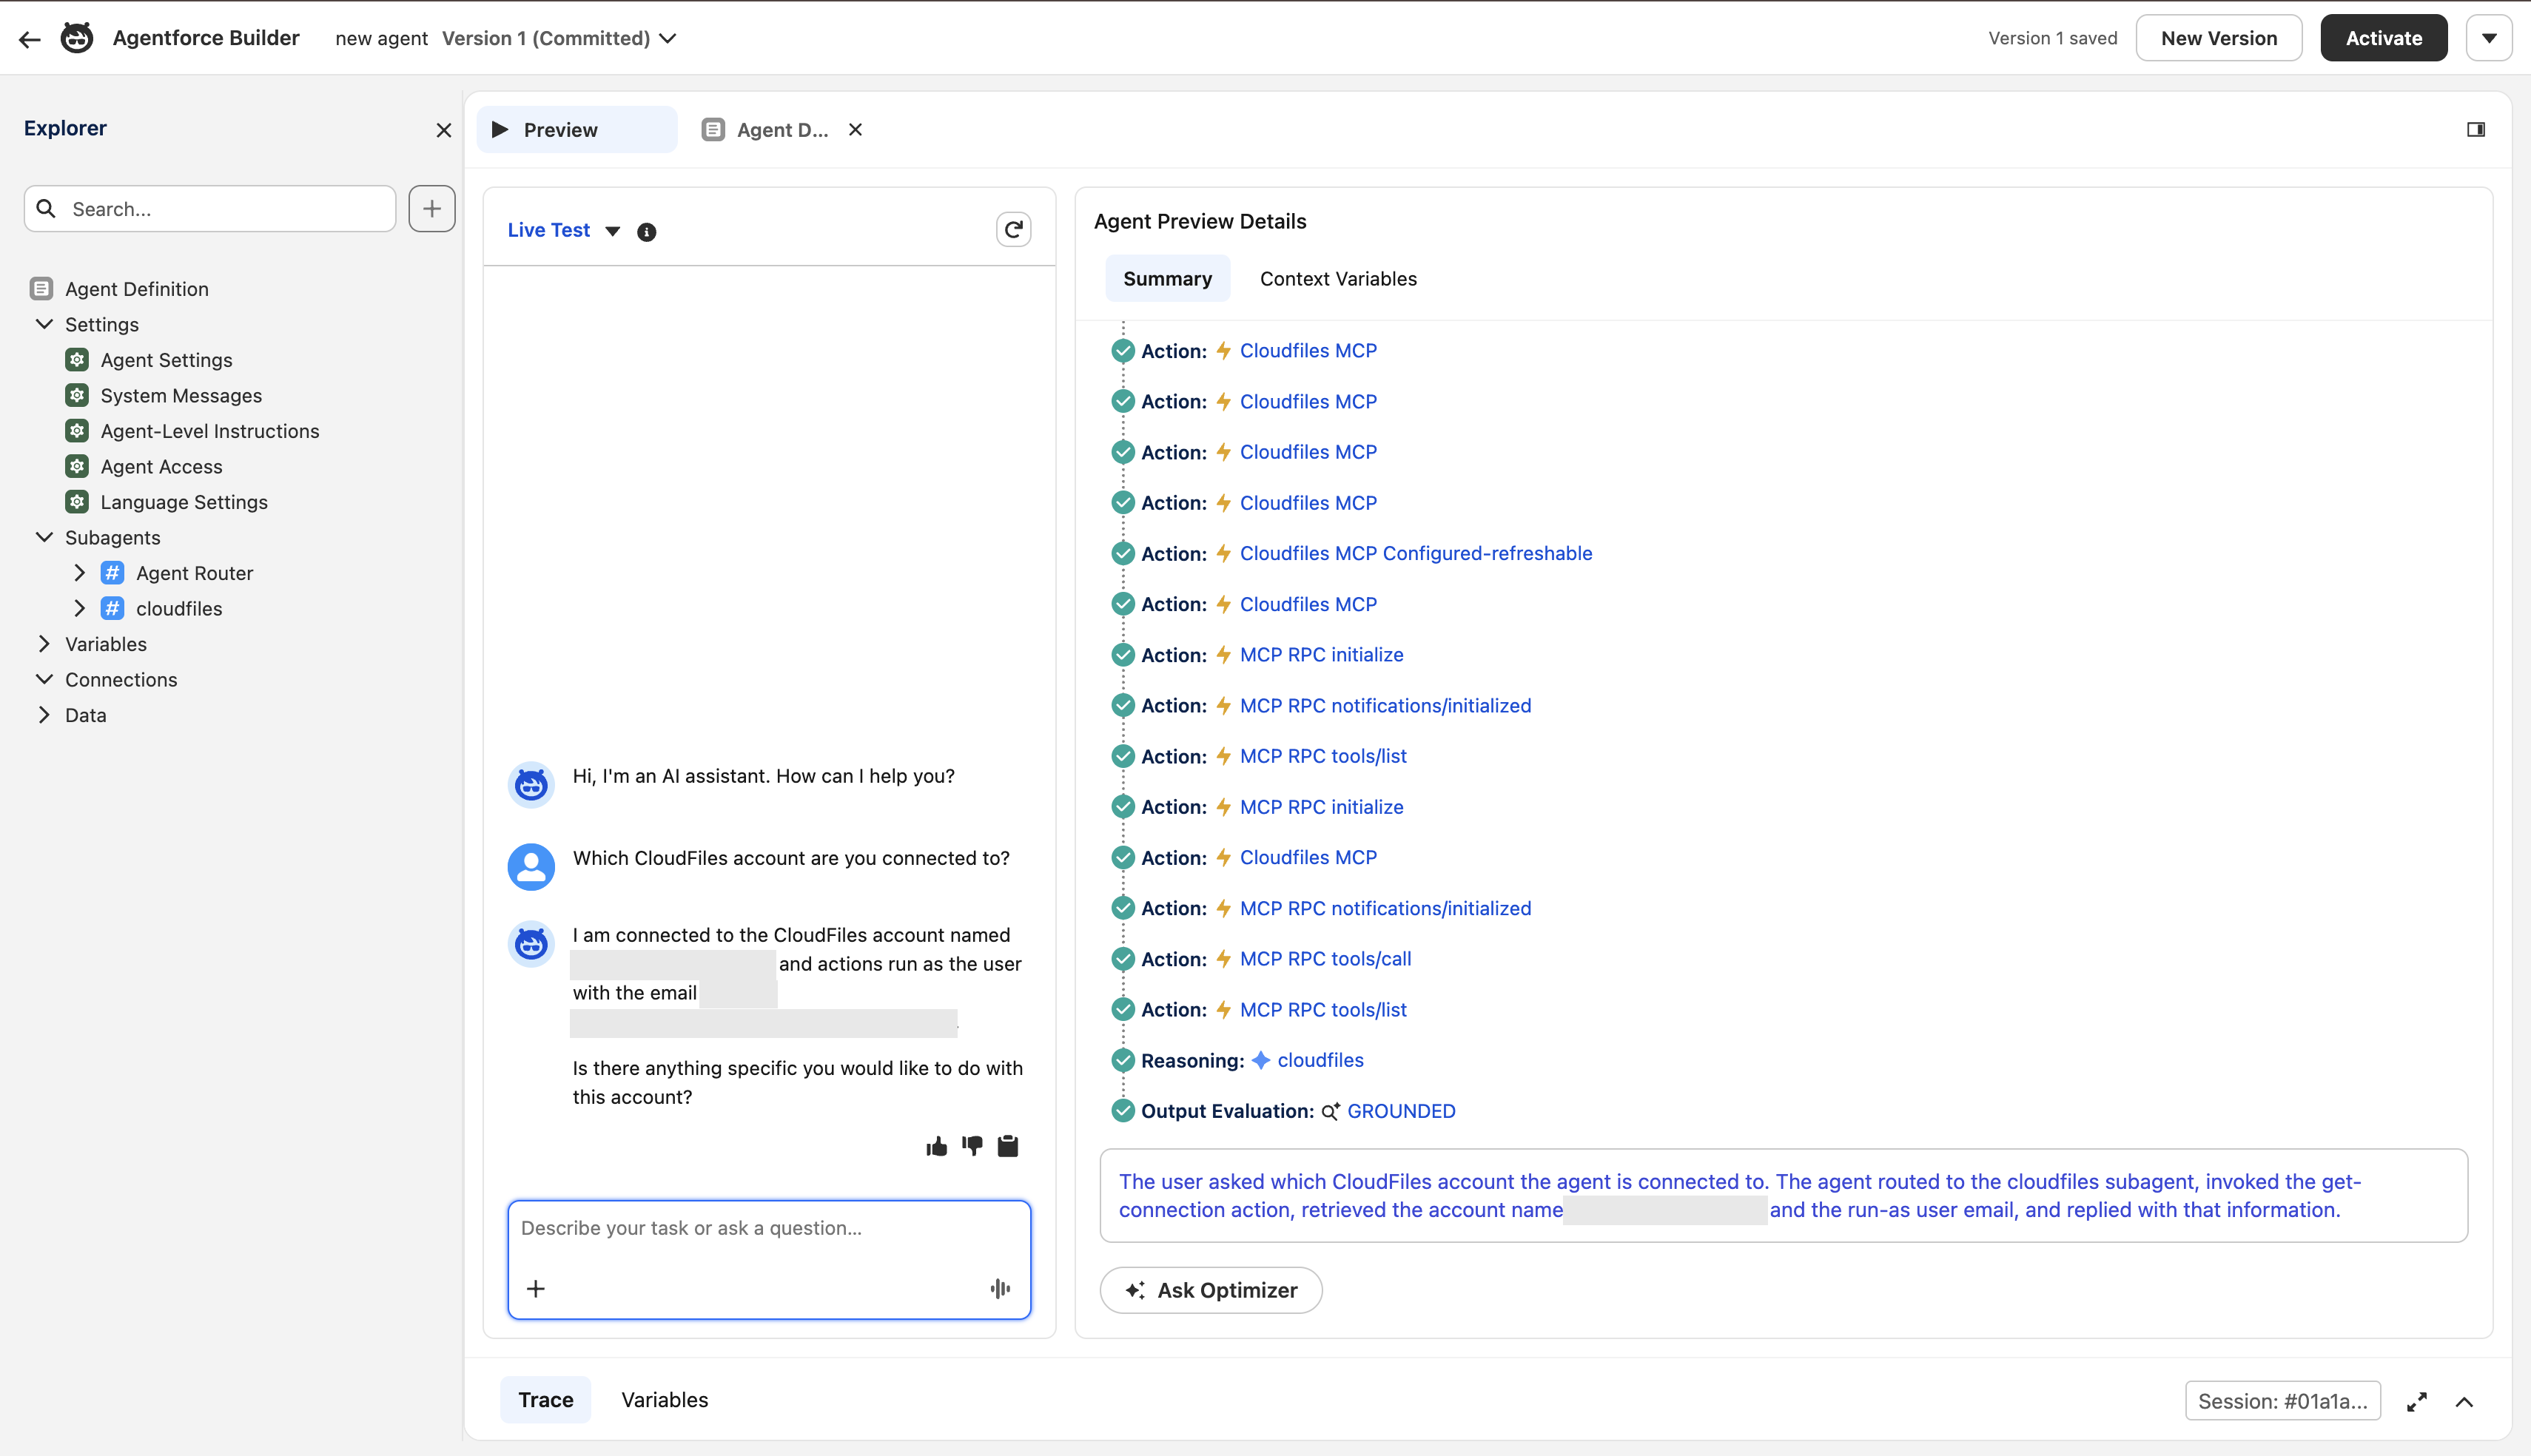
In Agentforce Builder, open Preview and ask: Which CloudFiles account are you connected to? The agent calls get-connection and answers with your CloudFiles account name and the user it acts as.
Verify the setup
The agent names your CloudFiles account in Preview, and the credential's Last Used time on the MCP Credentials page updates. To ask the agent for CloudFiles work, see the tools for each product in Tools.
Agentforce agents act as your CloudFiles account's system user, so they can reach what your account's connections can reach. Use the tools you allow in Step 3, the permission set in Step 4 and the subagent's instructions to decide what agents may do. See Who the Agent Acts As.
When CloudFiles updates a tool
When CloudFiles changes a tool, for example its description or the information it takes, Agentforce Registry marks the tool Out of Sync and notifies an admin. Agents cannot use an out-of-sync tool until it is synced.
- In Setup, open Agentforce Registry and select your CloudFiles server.
- Open the Tools tab and click Manage Tools.
- Click Sync on each tool marked Out of Sync.
- Click Save. Connection Health shows Connected again.
Nothing in the agent needs to change. Start a new conversation to use the updated tools.