CloudFiles supports two authentication methods for SharePoint - Integration User and Service Principal. Only one method is active for automations at any given time.
| Method | What it uses | Best for |
|---|---|---|
| Integration User | A real Microsoft user account in your tenant | Fastest way to get started. Works well for teams that already have a dedicated integration account and are comfortable managing MFA, license, and password policies on it. |
| Service Principal | The CloudFiles app registered in your Microsoft tenant, approved once by a Global Administrator | Long-running, reliable connections. No user account, no license consumed, no risk of the connection breaking due to MFA prompts, password rotation, or user offboarding. |
Integration User
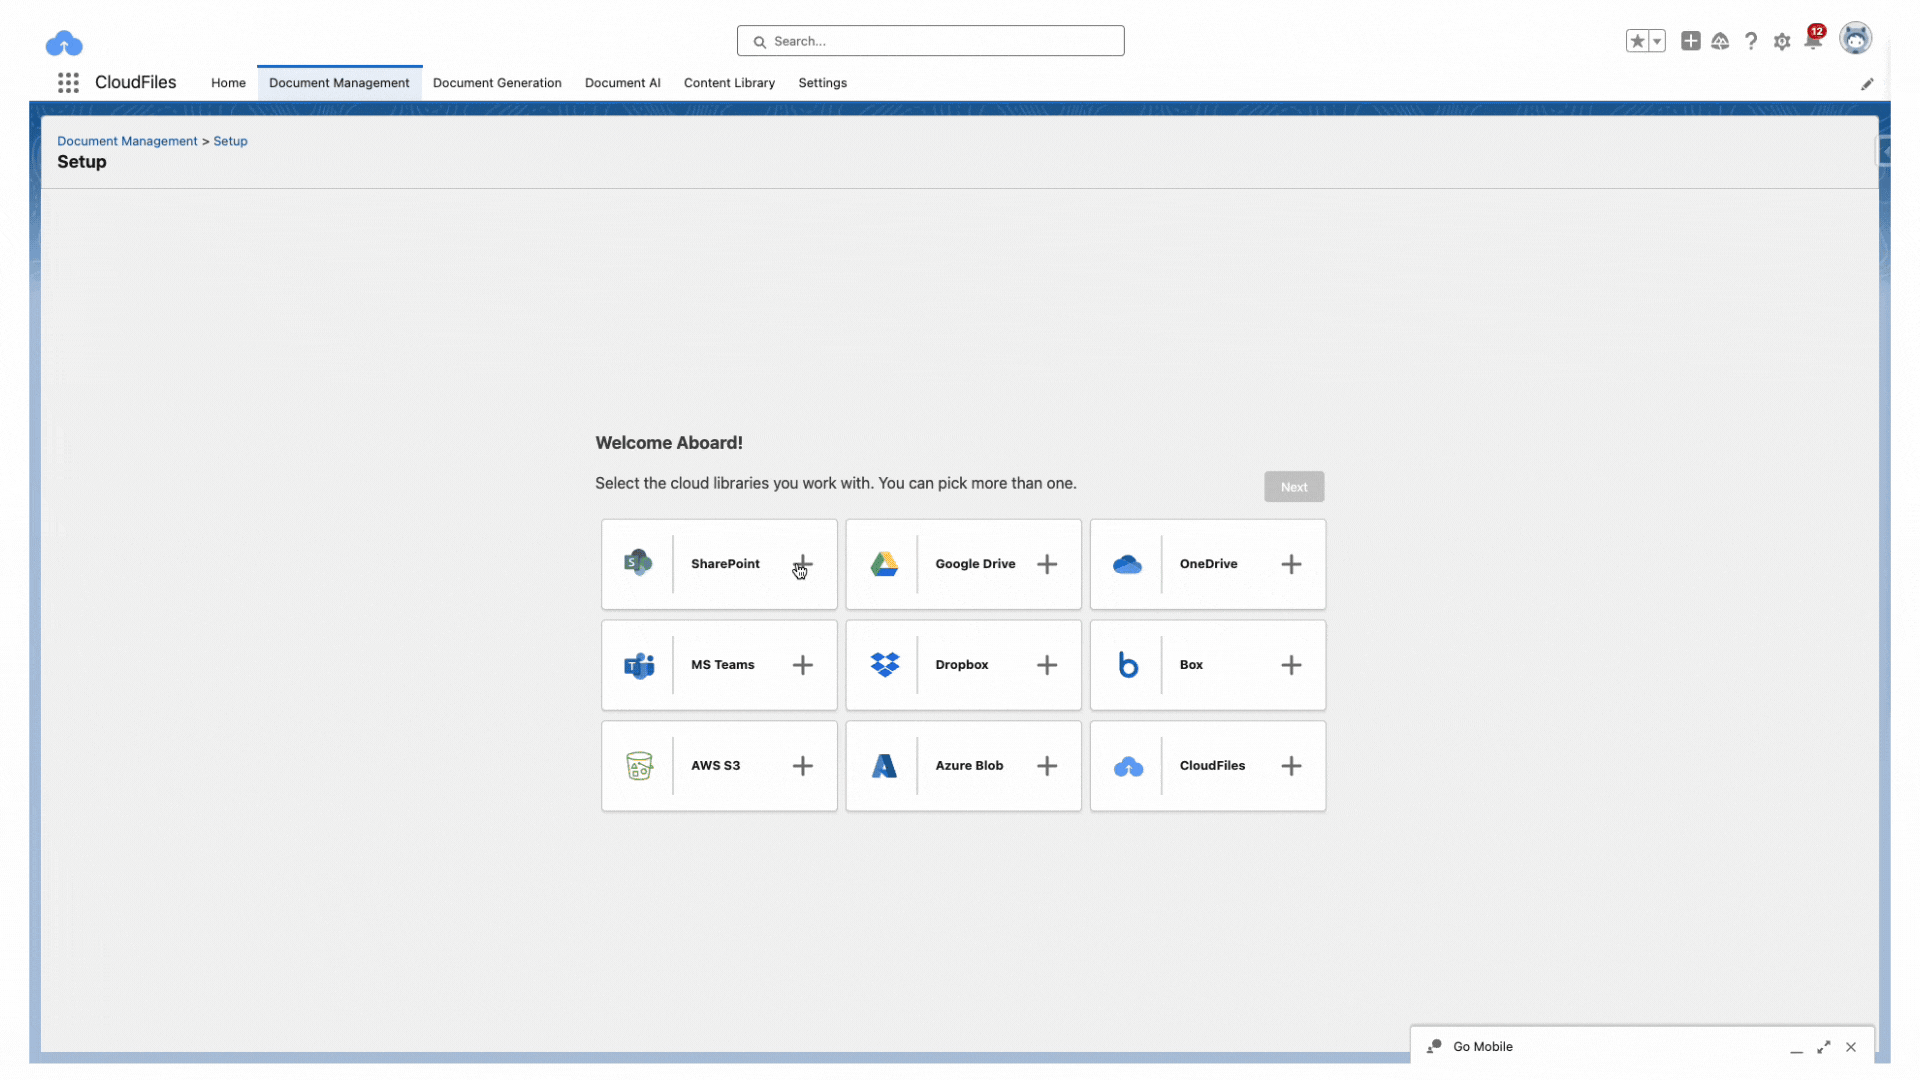
The Integration User allows you to connect an account-level SharePoint account, which is used for automations like file backup and organization. To configure, follow the steps below -
- Navigate to the "Libraries" page and access the SharePoint section on the canvas.
- Under "Integration User," click the Connect button.
- Log in to the Microsoft account associated with SharePoint, or select the account if already logged in.
- Once connected, the username and connection date will be displayed under "Integration User."
- To change the Integration User, use the Disconnect option and repeat the process.
Service Principal
With service principal, CloudFiles authenticates as the CloudFiles app already registered in your Microsoft tenant. A Global Administrator approves app-level permissions once, and the connection then runs without a user account, license, MFA prompt, or password rotation risk.
The setup happens in three parts: the Salesforce admin generates a setup link, a Microsoft Global Administrator approves the permissions using that link, and the Salesforce admin then activates service principal for automations.
- Under Service principal, click Setup. The status shows Not configured until this step is completed.
- In the Tenant URL field, enter your SharePoint tenant URL (for example, https://cloudfileswork.sharepoint.com).
- Click Generate. CloudFiles generates a setup link and the status changes to Awaiting admin consent. The setup link is active for 7 days.
- Copy the setup link and share it with your Microsoft Global Administrator. This admin is often not a Salesforce user, which is why the link is shareable and does not require a CloudFiles or Salesforce login.
- Ask the admin to open the link and approve the permissions requested for the CloudFiles app. Once approved, the status on the SharePoint tab changes to Consent granted.
- Return to the SharePoint tab and click Switch automations to service principal.
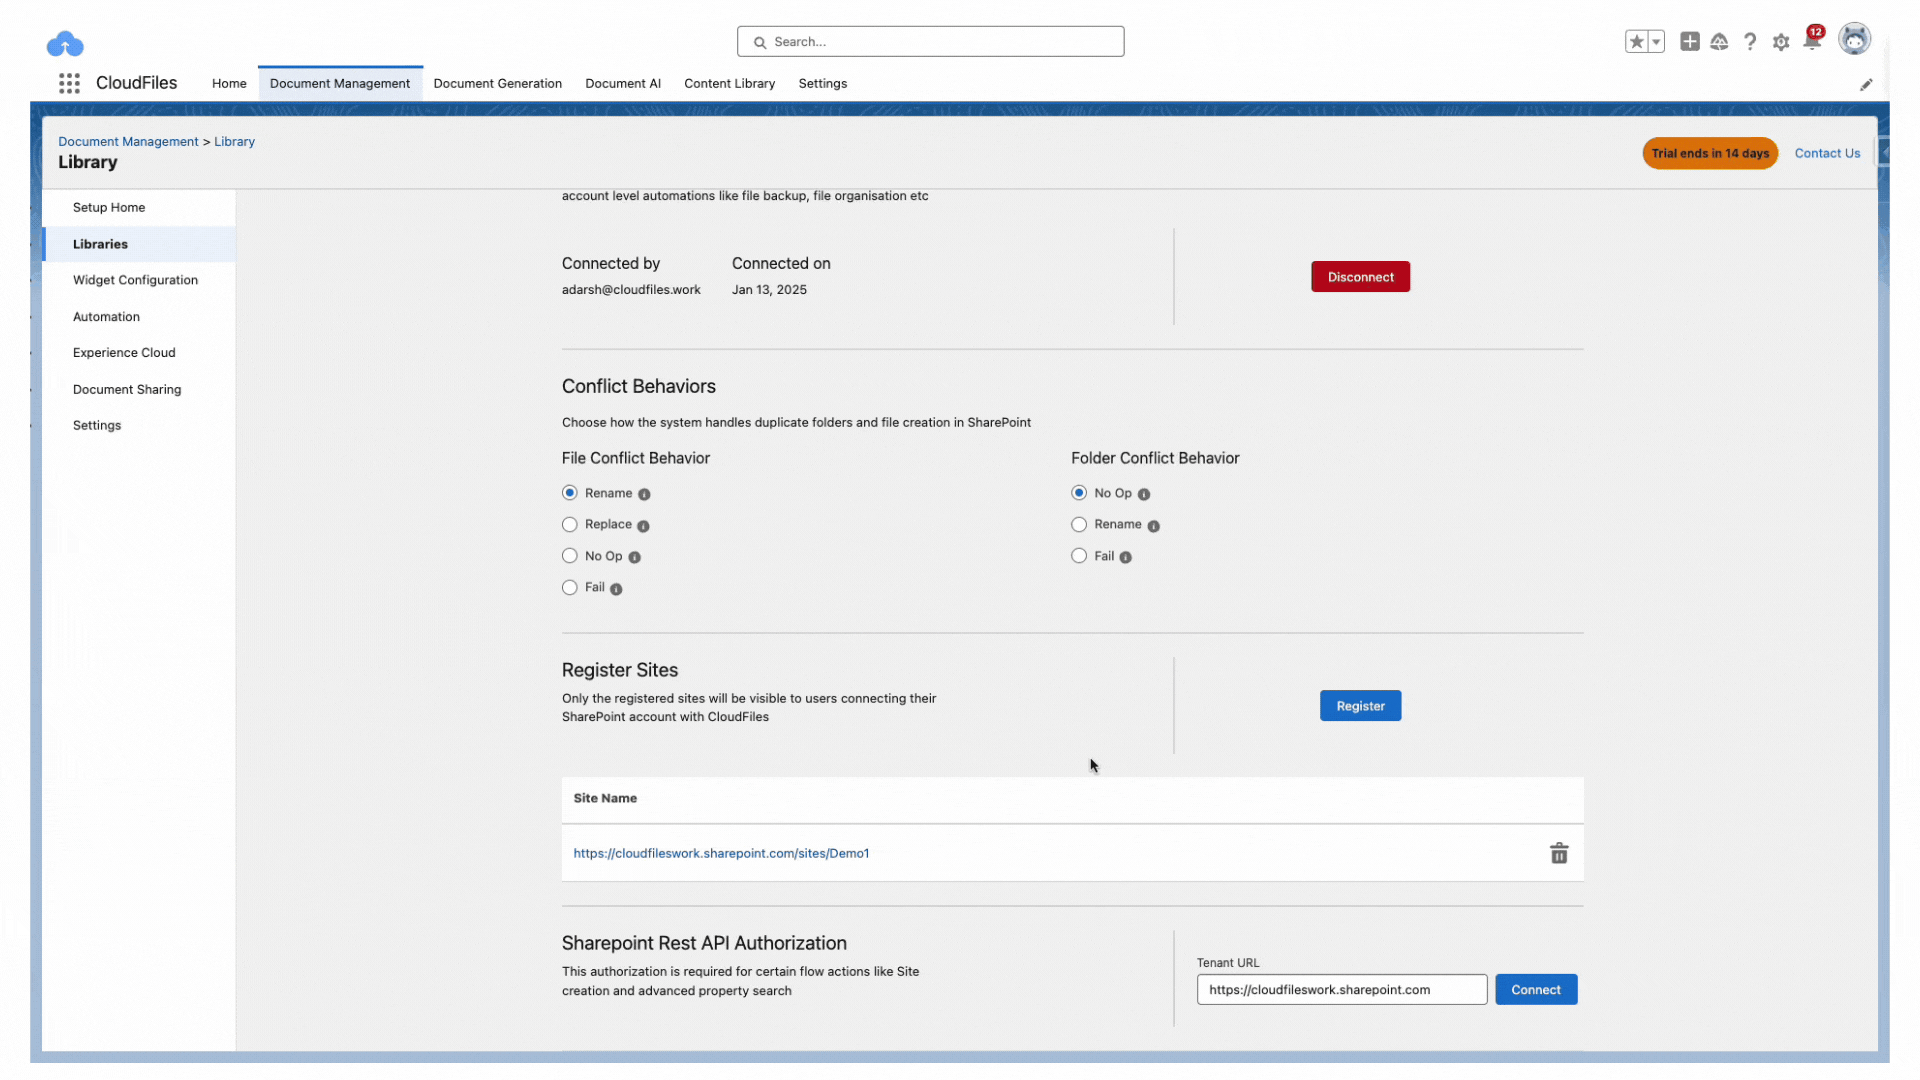
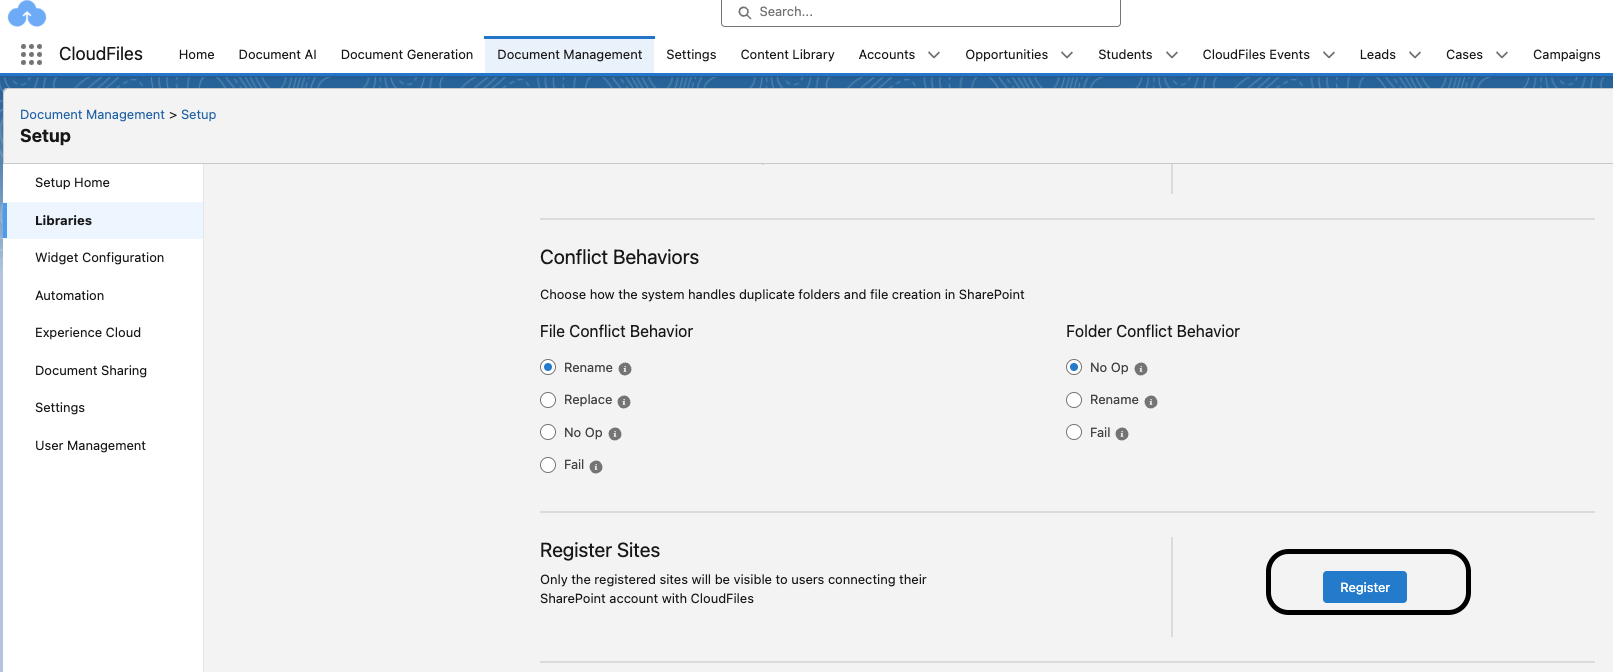
Conflict Behaviors
Specify how the system should handle duplicate files or folders during operations in SharePoint:
- File Conflict Behavior: Options include Rename, Replace, No Op, or Fail.
- Folder Conflict Behavior: Options include No Op, Rename, or Fail.
Register Sites
This option is only needed if you wish to restrict which sites are displayed and available for use. Only registered SharePoint sites will be accessible for users connecting their SharePoint account with CloudFiles. To register a site:
- Click the Register button under the "Register Sites" section.
- In the popup window, paste the URL of the SharePoint site (e.g., https://cloudfileswork.sharepoint.com/sites/Demo1) and click Register.
- The registered sites will appear as a list in the same section.
- To remove a site, click the delete icon next to it and confirm the action in the "Remove Site" popup.
Sharepoint Rest API Authorization
This authorization is necessary for advanced functionalities such as site creation and property searches within flows. To connect:
- In the Tenant URL box, paste the URL of the SharePoint (e.g., https://cloudfileswork.sharepoint.com) and click Connect.
- Log in to the Microsoft account associated with SharePoint, or select the account if already logged in.
- Accept the Permissions requested by clicking "Accept"
- The authorized Tenant URL along with the username and connection date will be displayed under the same section.
- To deauthorize, simply click the Disconnect button.