1 - Retrieve your Connection String from Azure Portal
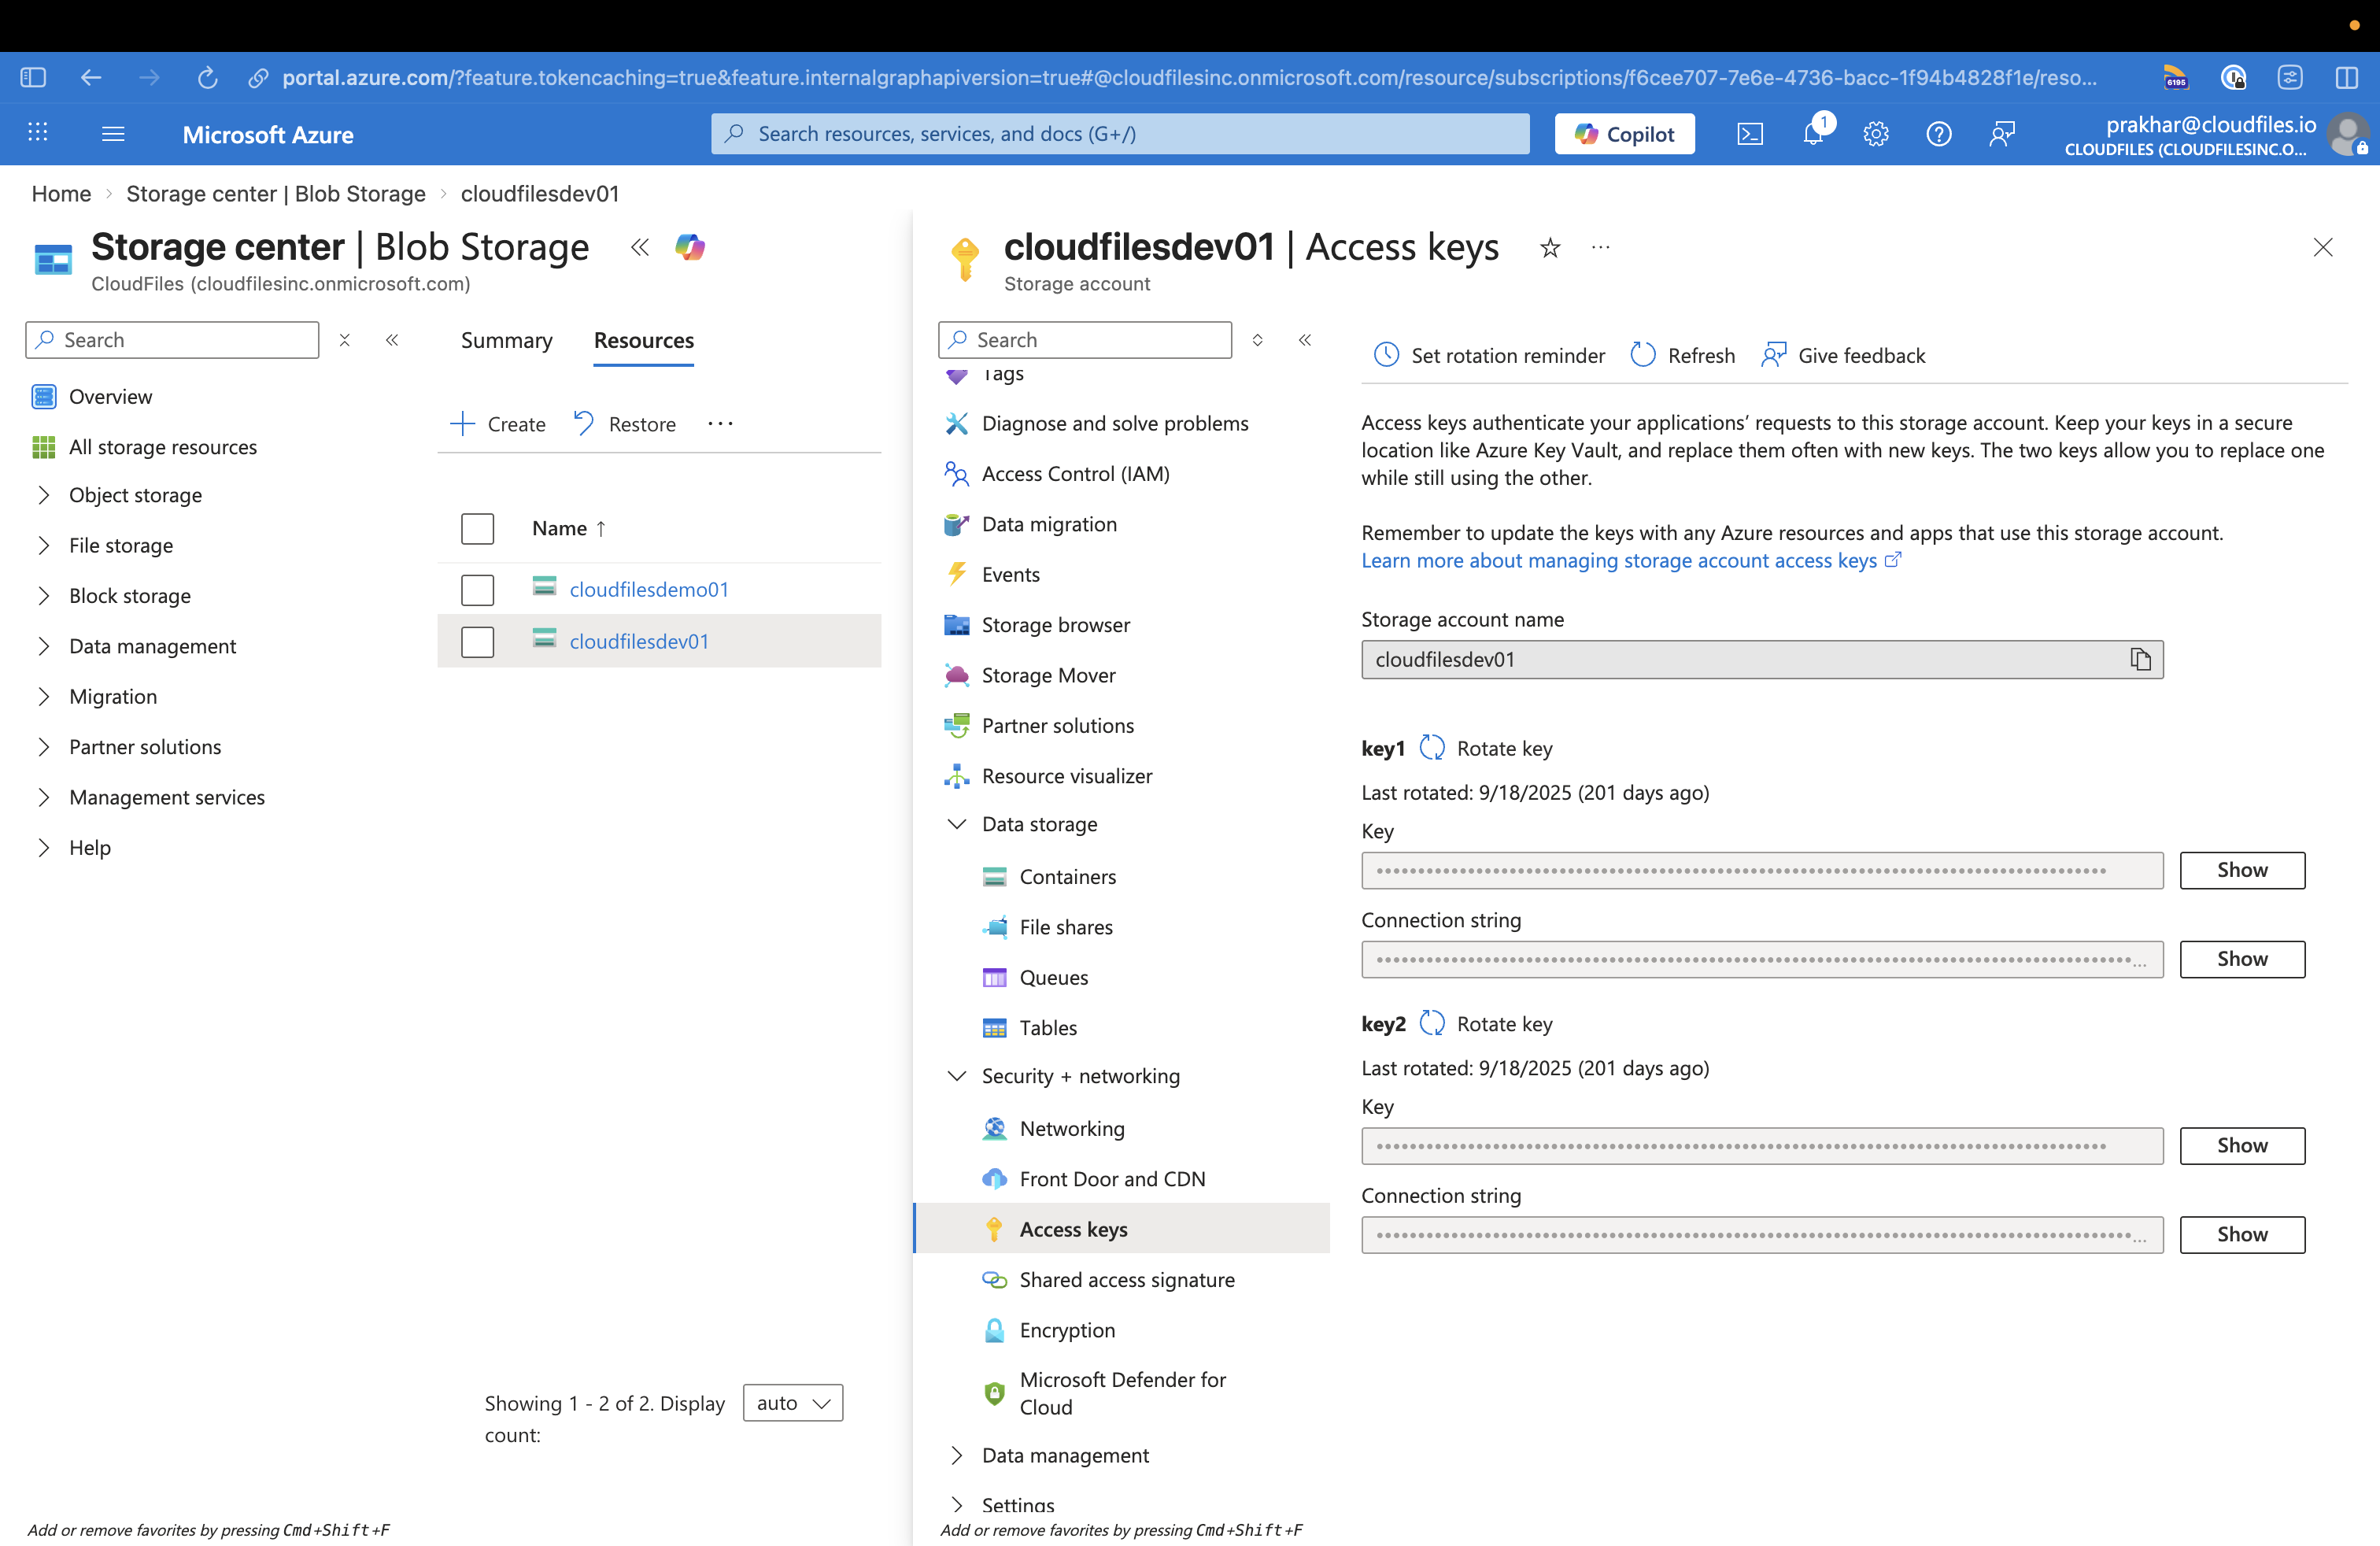
- In the Azure Portal, open your Storage Account.
- Go to Security + Networking > Access keys.
- Copy either key1 or key2 connection string.
- Note: The connection string must use HTTPS. Strings using HTTP are not accepted.
2 - Retrieve your Share Name from Azure Portal.
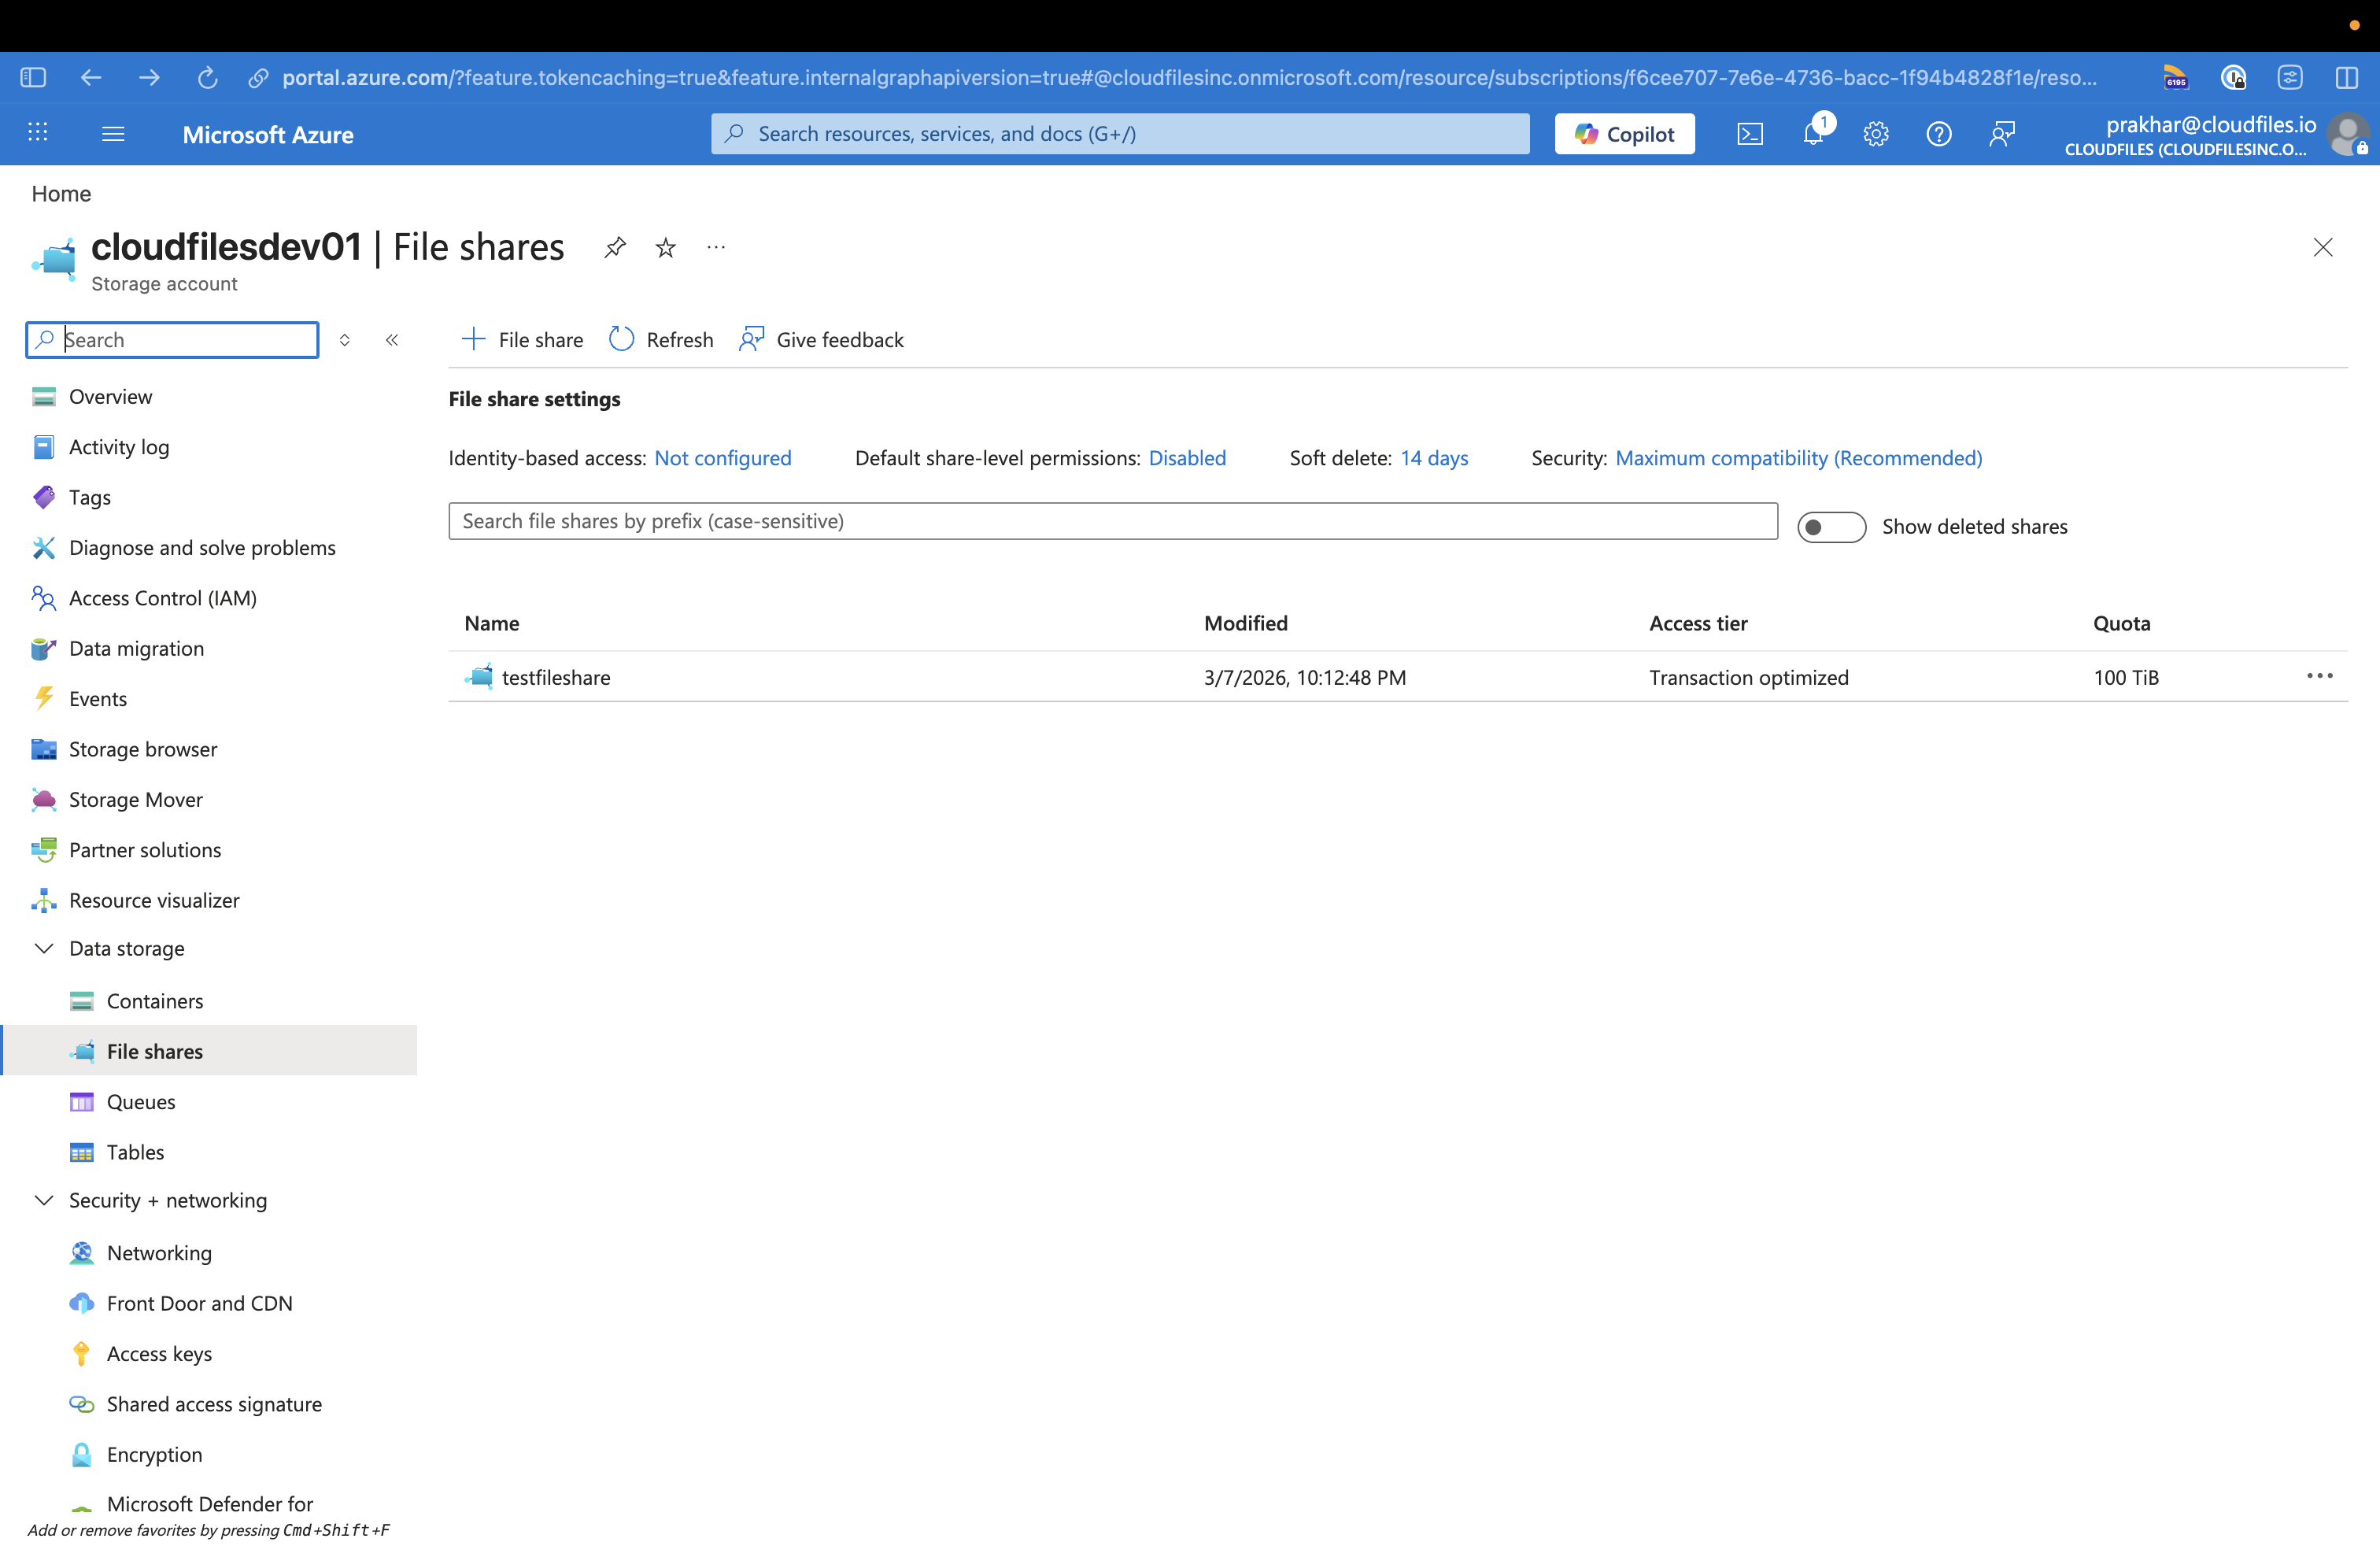
- In the Azure Portal, open your Storage Account.
- Go to Data storage > File shares.
- Copy the name of the file share you want to connect.
3 - Add details in CloudFiles libraries
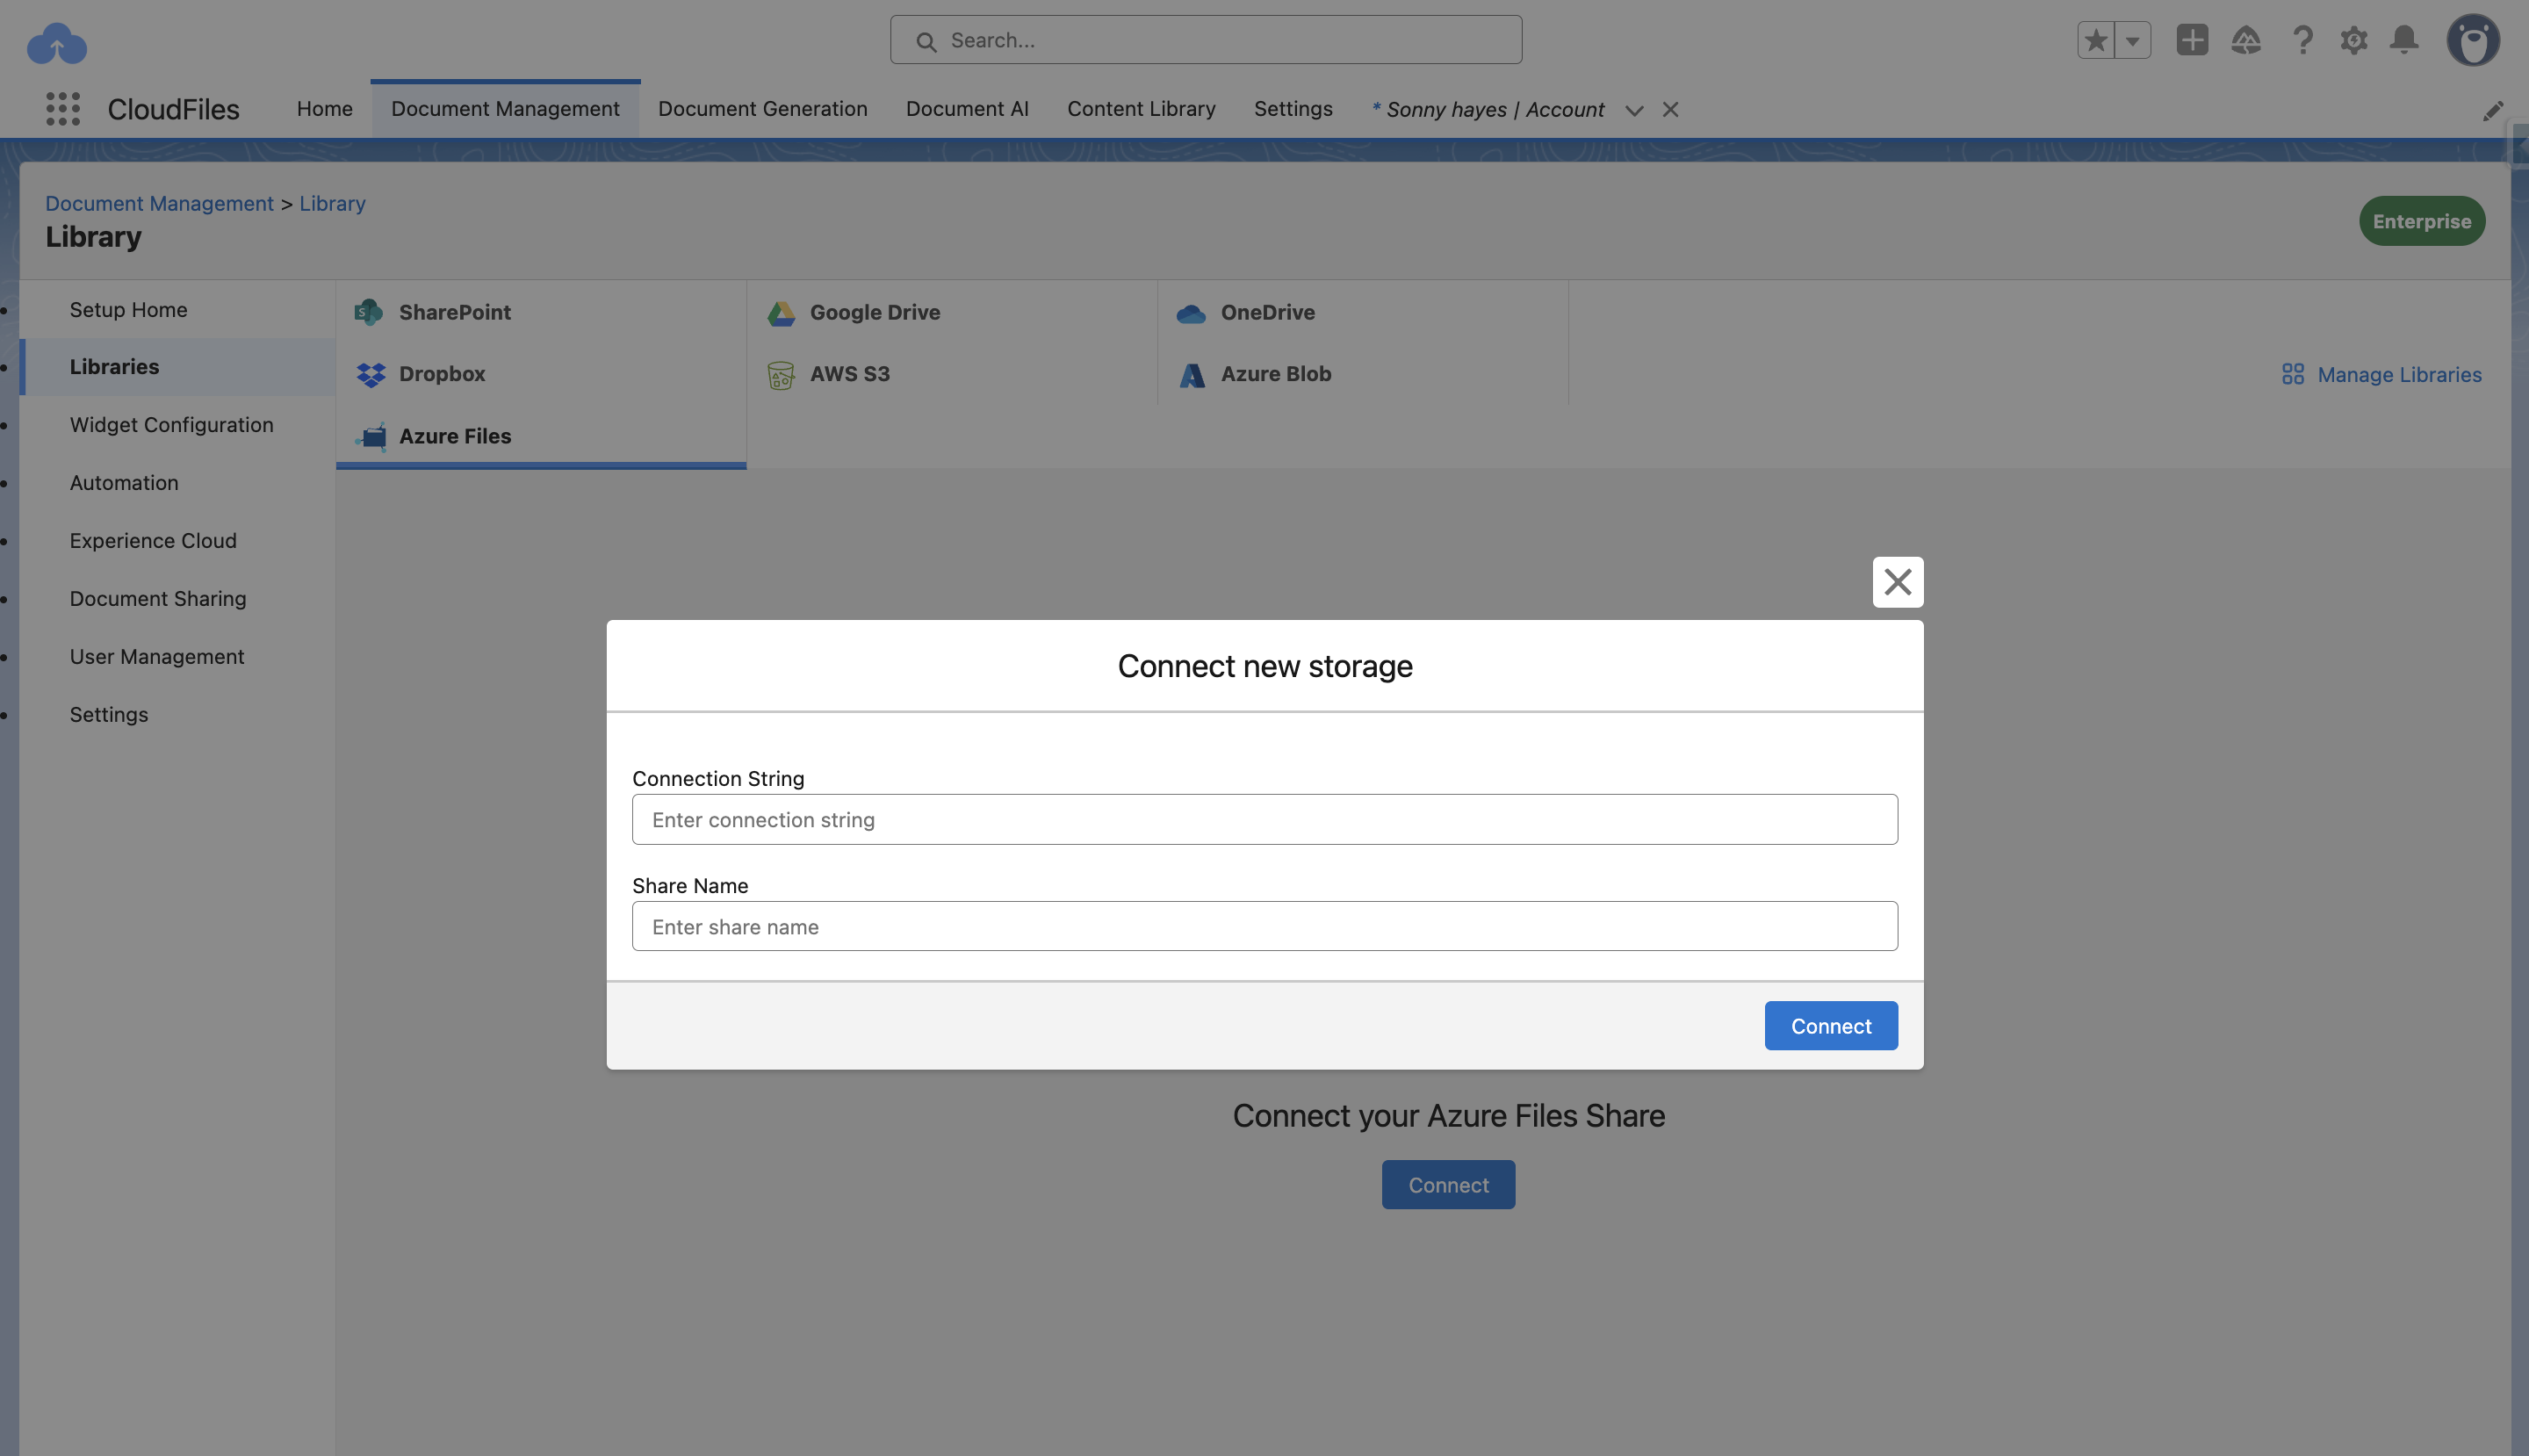
- In Salesforce, open the CloudFiles app and navigate to Document Management > Libraries. If Azure Files is not already visible in your library list, click on Manage Libraries and add it.
- Then click on Azure Files to open its configuration page.
- Enter the Connection String and Share Name in the configuration screen.
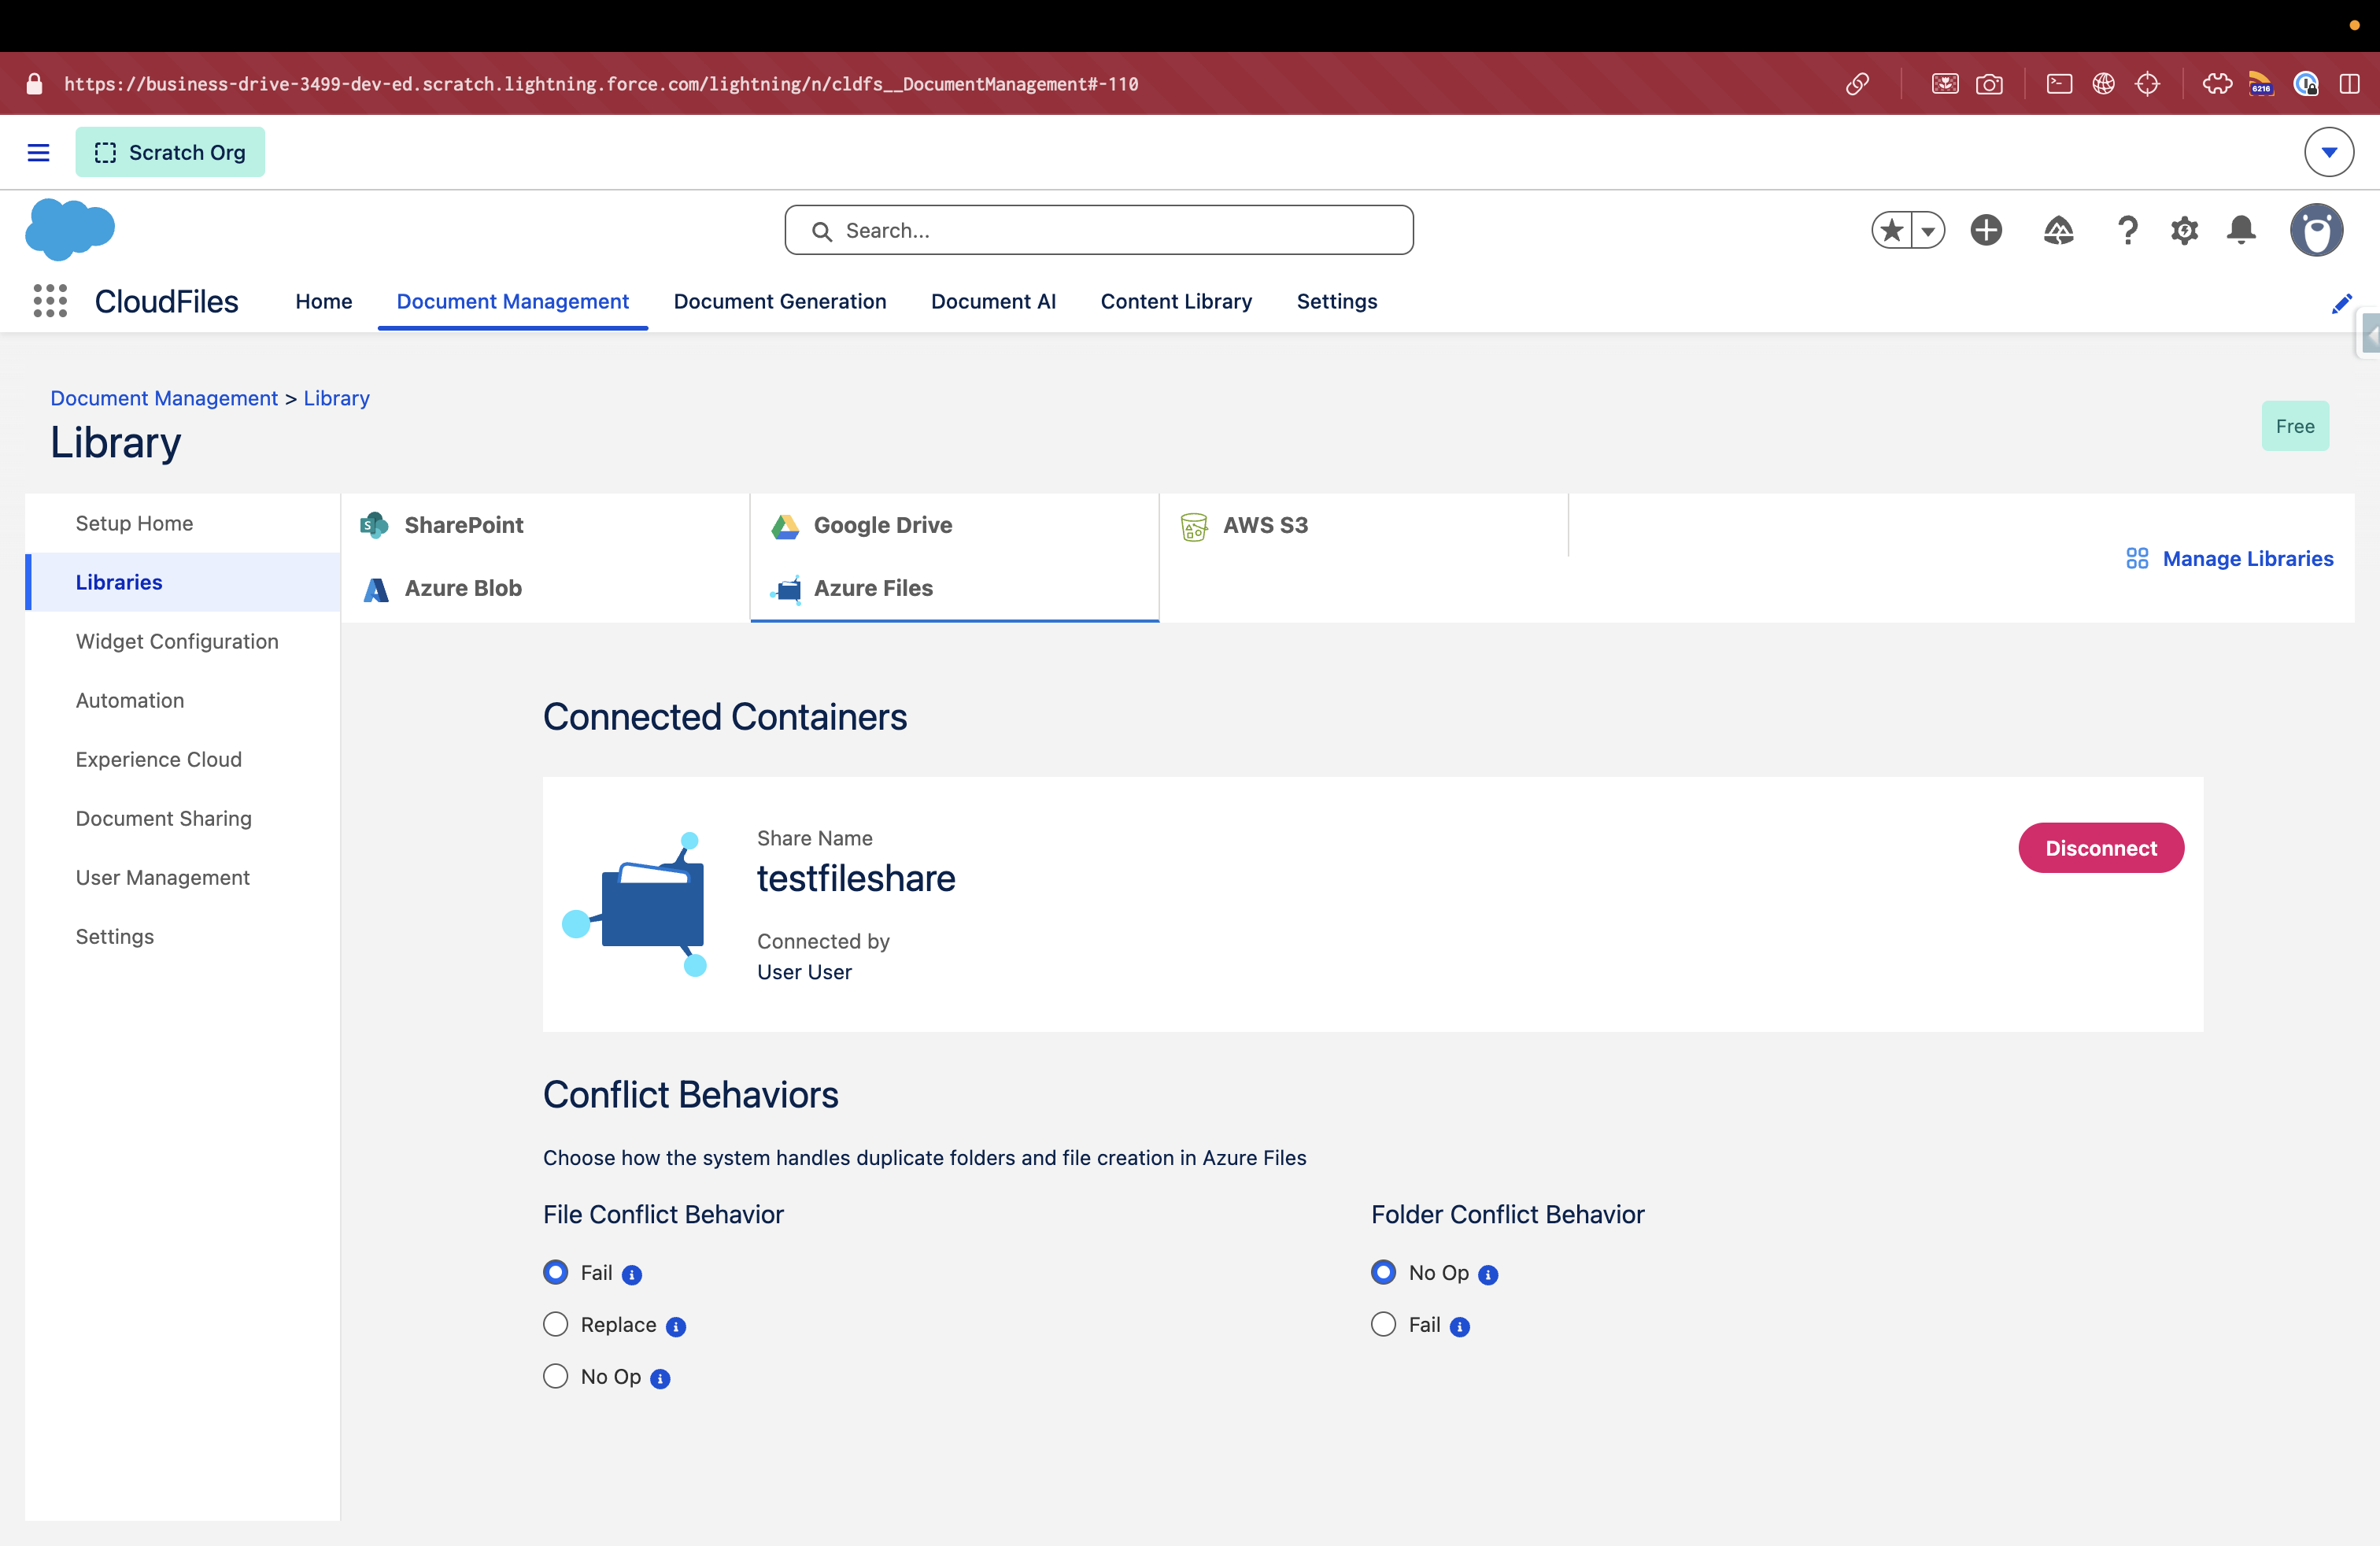
- Click on Connect. CloudFiles will validate your credentials before saving. If the connection string or share name is invalid, an error will be shown and the connection will not be saved.
Supported actions
The following actions are available for files and folders in Azure Files:
- Browse, upload, download, rename, move, and delete files and folders
- Create new files and folders
- Copy files across libraries
- Share links for files
- File preview for PDFs
Known limitations
- Search is not supported. Azure Files natively supports only prefix-based search. Full-text or keyword search is unavailable.
- Non-PDF file preview is not supported. Files in formats such as DOCX and PPTX cannot be previewed inline.
- Open in App is not available for files stored in Azure Files.
- File replace is not supported. To update a file, delete the existing version and upload the new one.
Disconnect Azure Files
To remove an Azure Files connection, open Document Management > Libraries, select the Azure Files library, and use the disconnect option. This will remove the storage connection and all associated metadata from the CloudFiles app.