What to Expect
By following this tutorial, you will learn how to:
- Combine different files into a single merged PDF.
- Configure Salesforce Flow to dynamically collect files and pass them into the Merge Documents (Sync) action.
- Attach the final merged PDF to a Destination
Prerequisites
Install CloudFiles in Salesforce
CloudFiles is available on the Salesforce AppExchange and can be installed using the standard app installation process. Check out Installation and Configuration guides to set up your account and user access.
Building the Flow
In this tutorial, we’ll use the Opportunity object. Imagine a scenario where users upload supporting files such as invoices (PDFs), contracts (DOCX/JPEG), or other documents to an Opportunity record.
We’ll create a flow that can be launched from a button, allowing users to select these files and merge them into a single PDF that can be viewed directly from the Opportunity record.
1 - Create Screen Flow
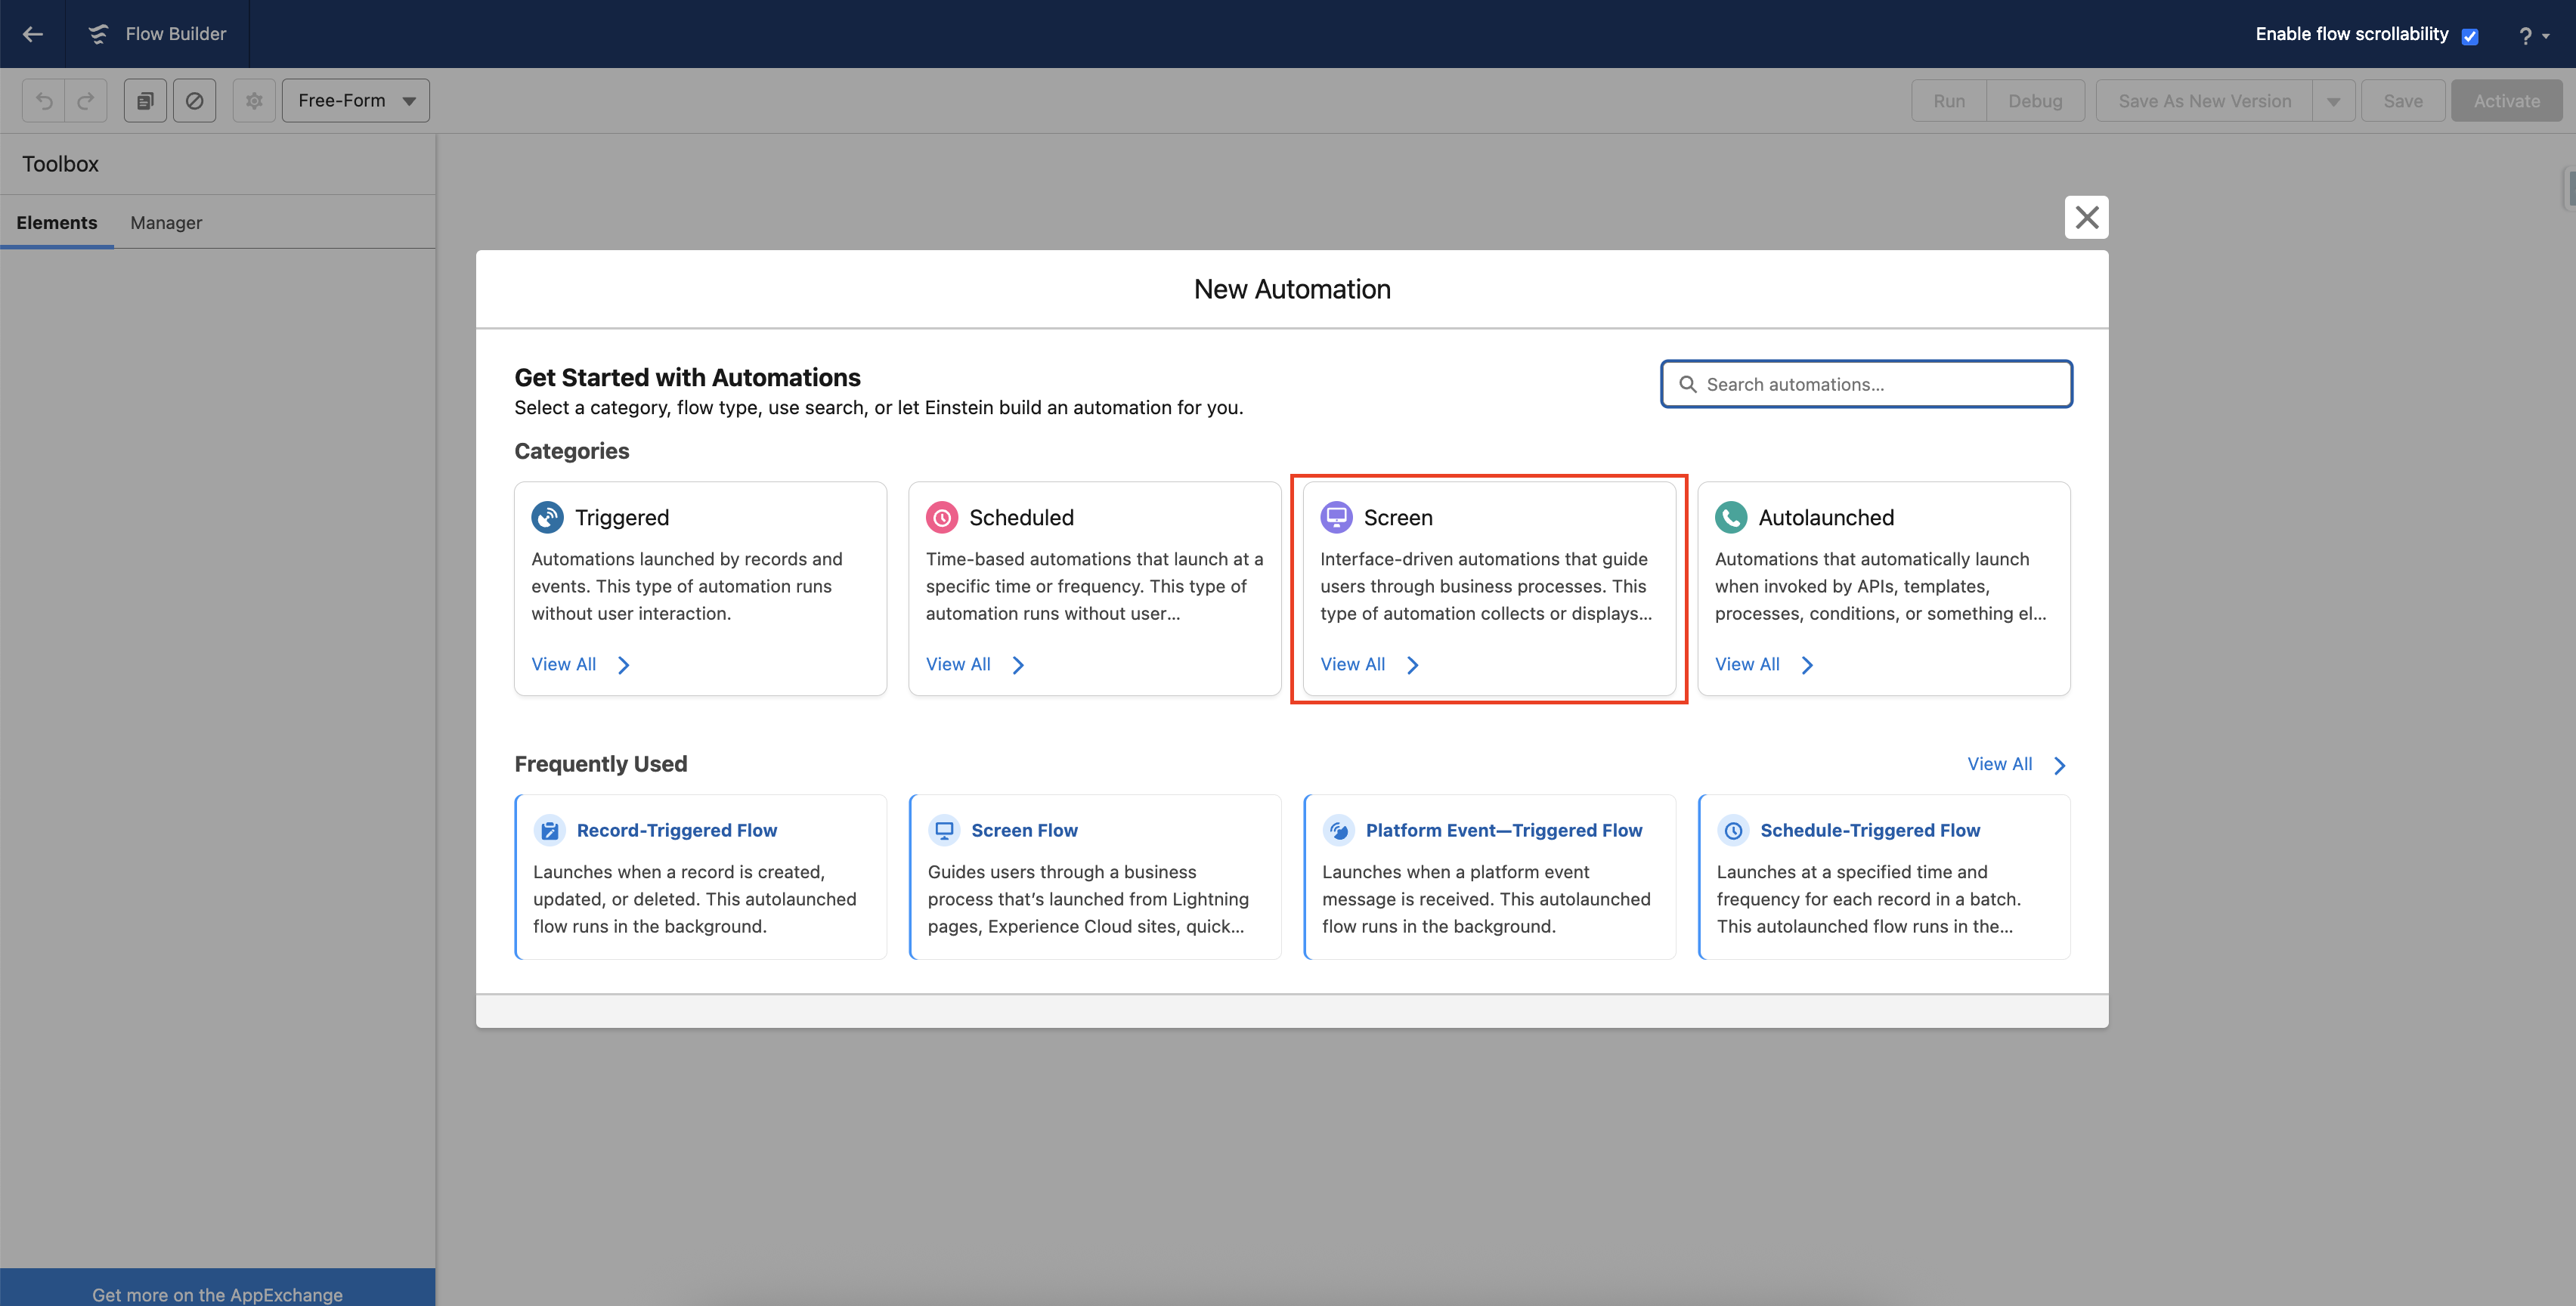
- Go to Setup → Flows in Salesforce and create a new Screen Flow.
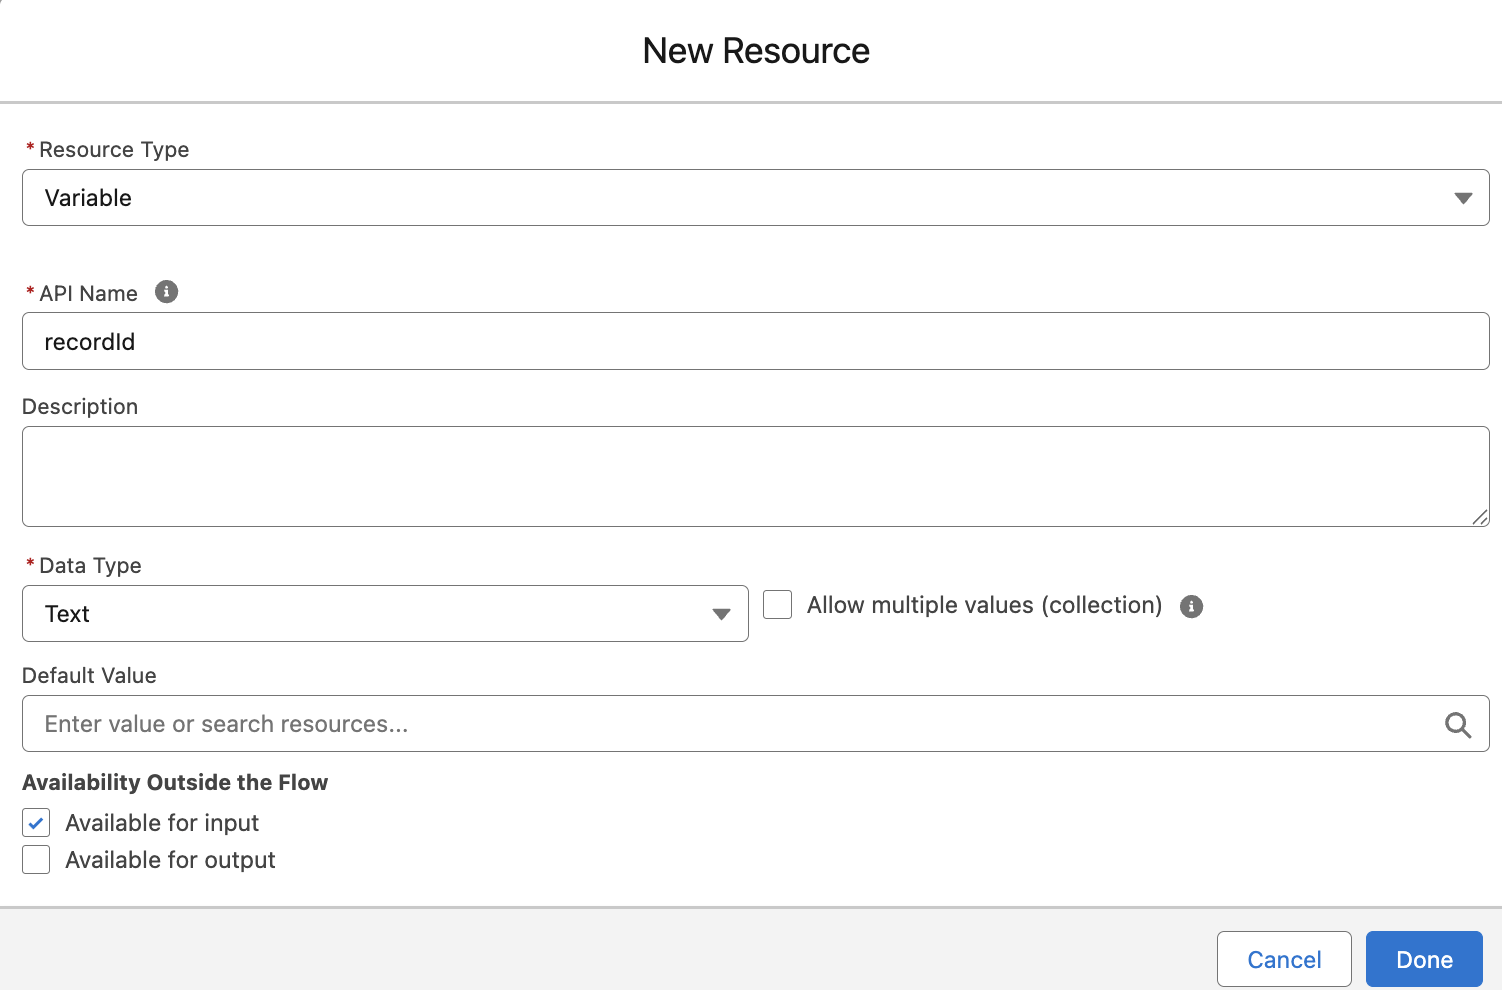
- Create a recordId variable to capture the Salesforce record ID (Opportunity record) from which the flow is launched. Set its data type to Text and mark it as Available for input so the record ID is automatically passed when the flow runs from the record page.
2 - Collect Content Document Ids
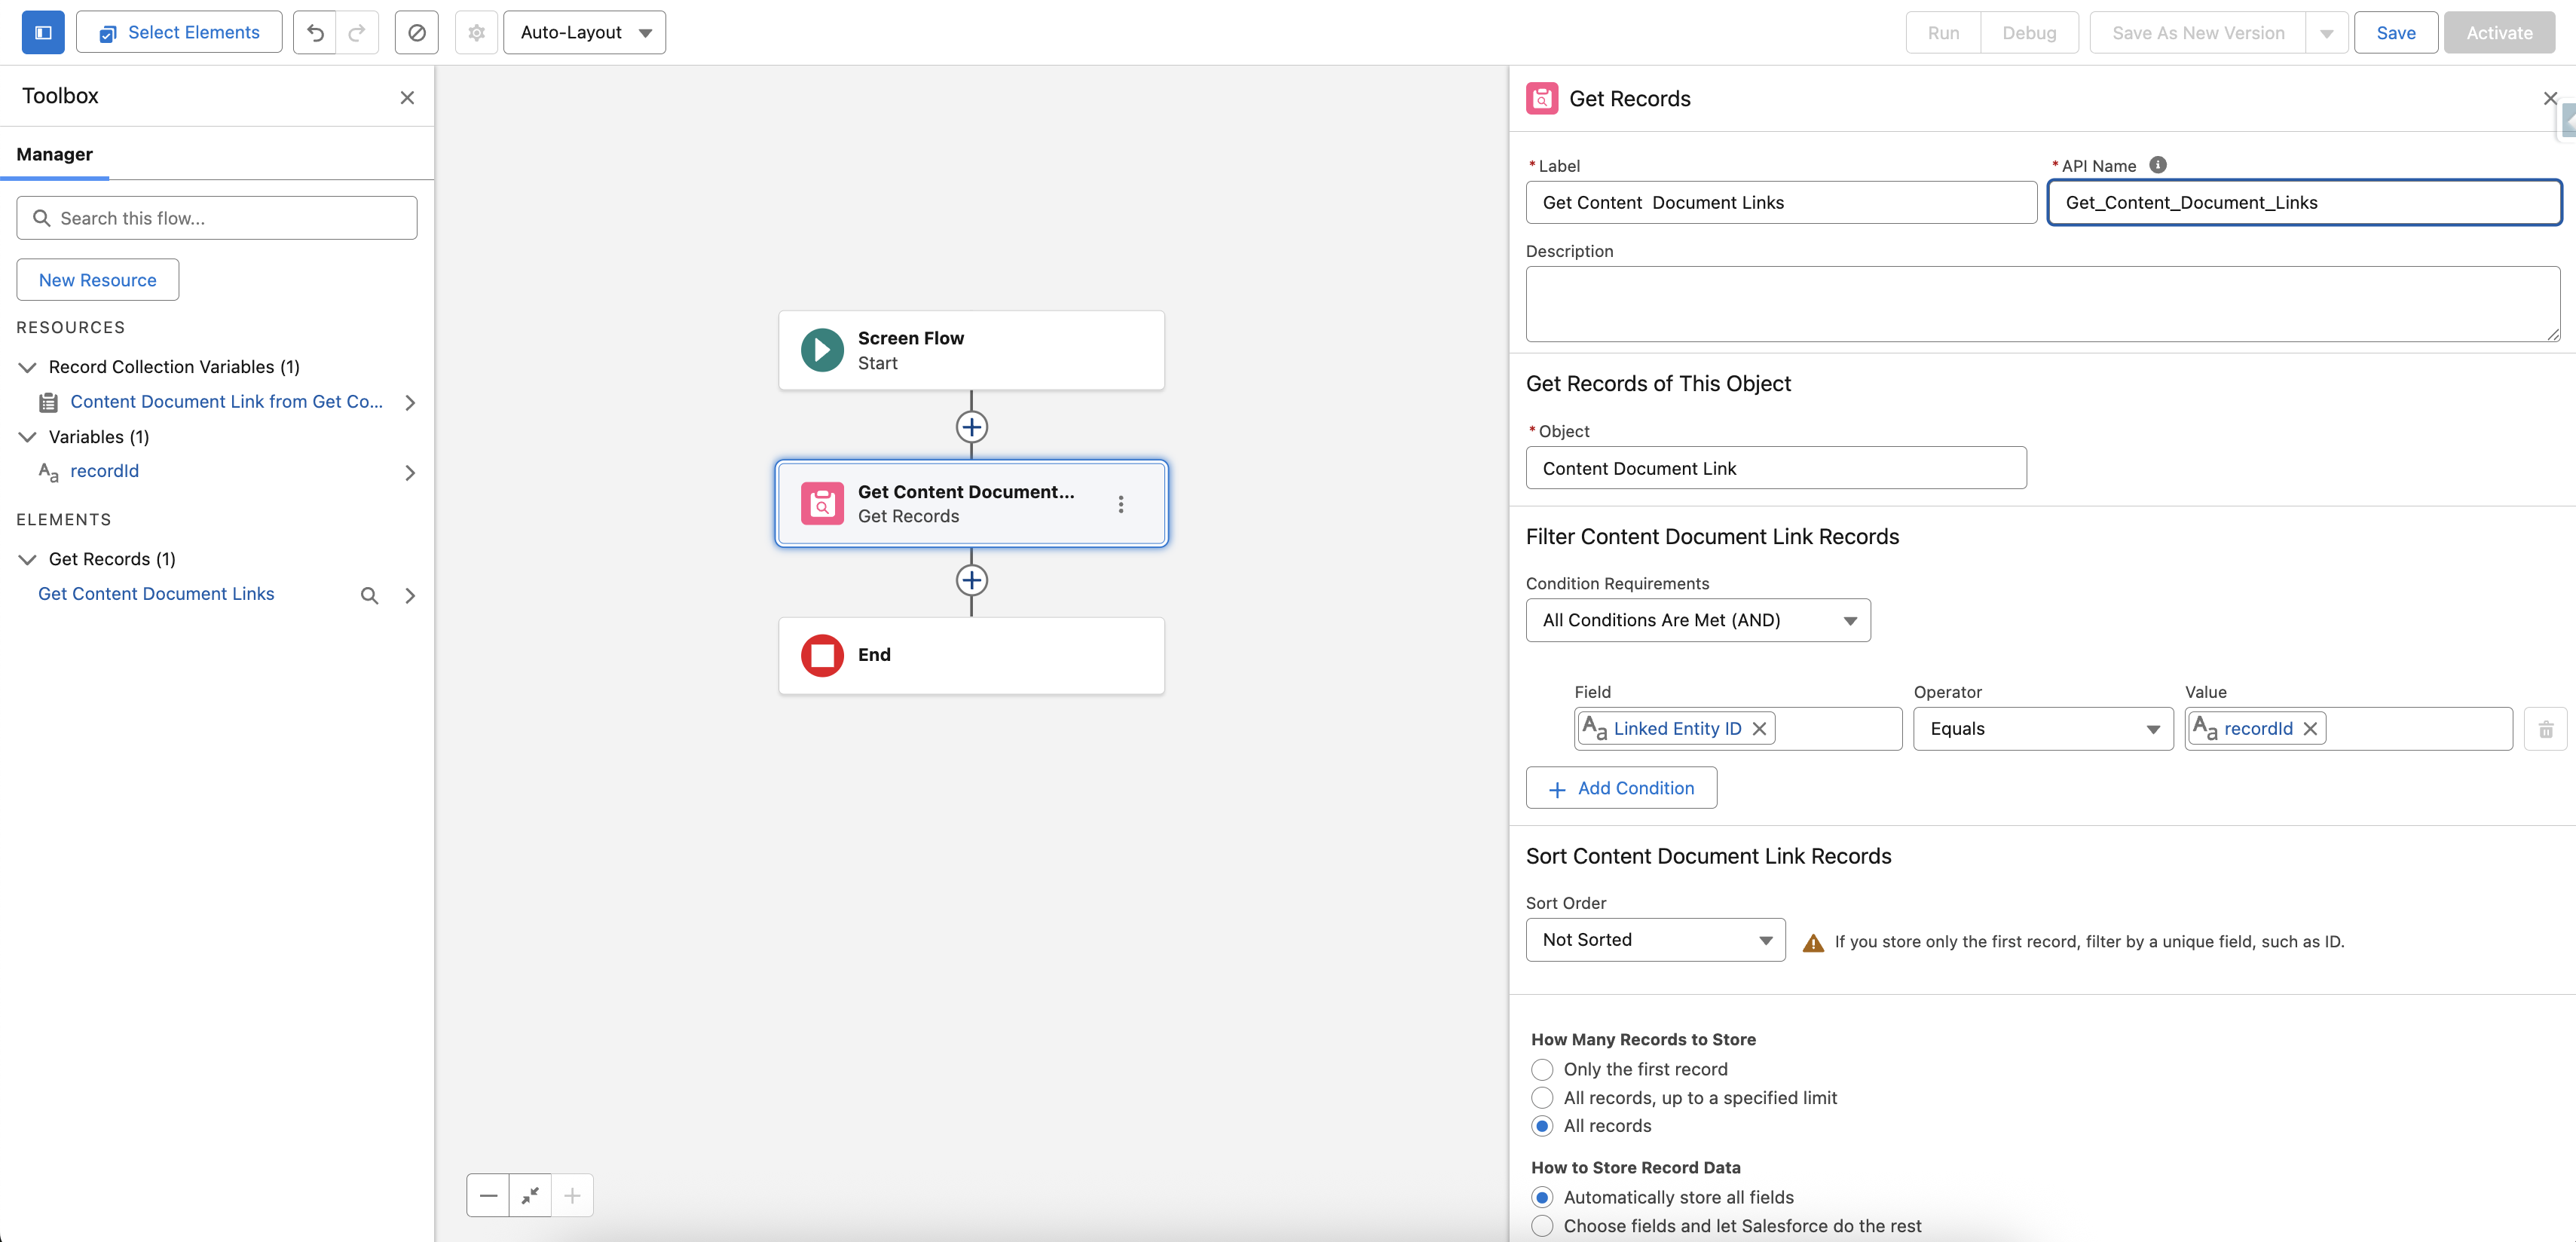
- Add a Get Records element to fetch all ContentDocumentLink records where the Linked Entity Id equals the recordId. This ensures you retrieve all files that have been uploaded to the Opportunity.
- Add a Loop element to iterate over each ContentDocumentLink record fetched in the previous step.
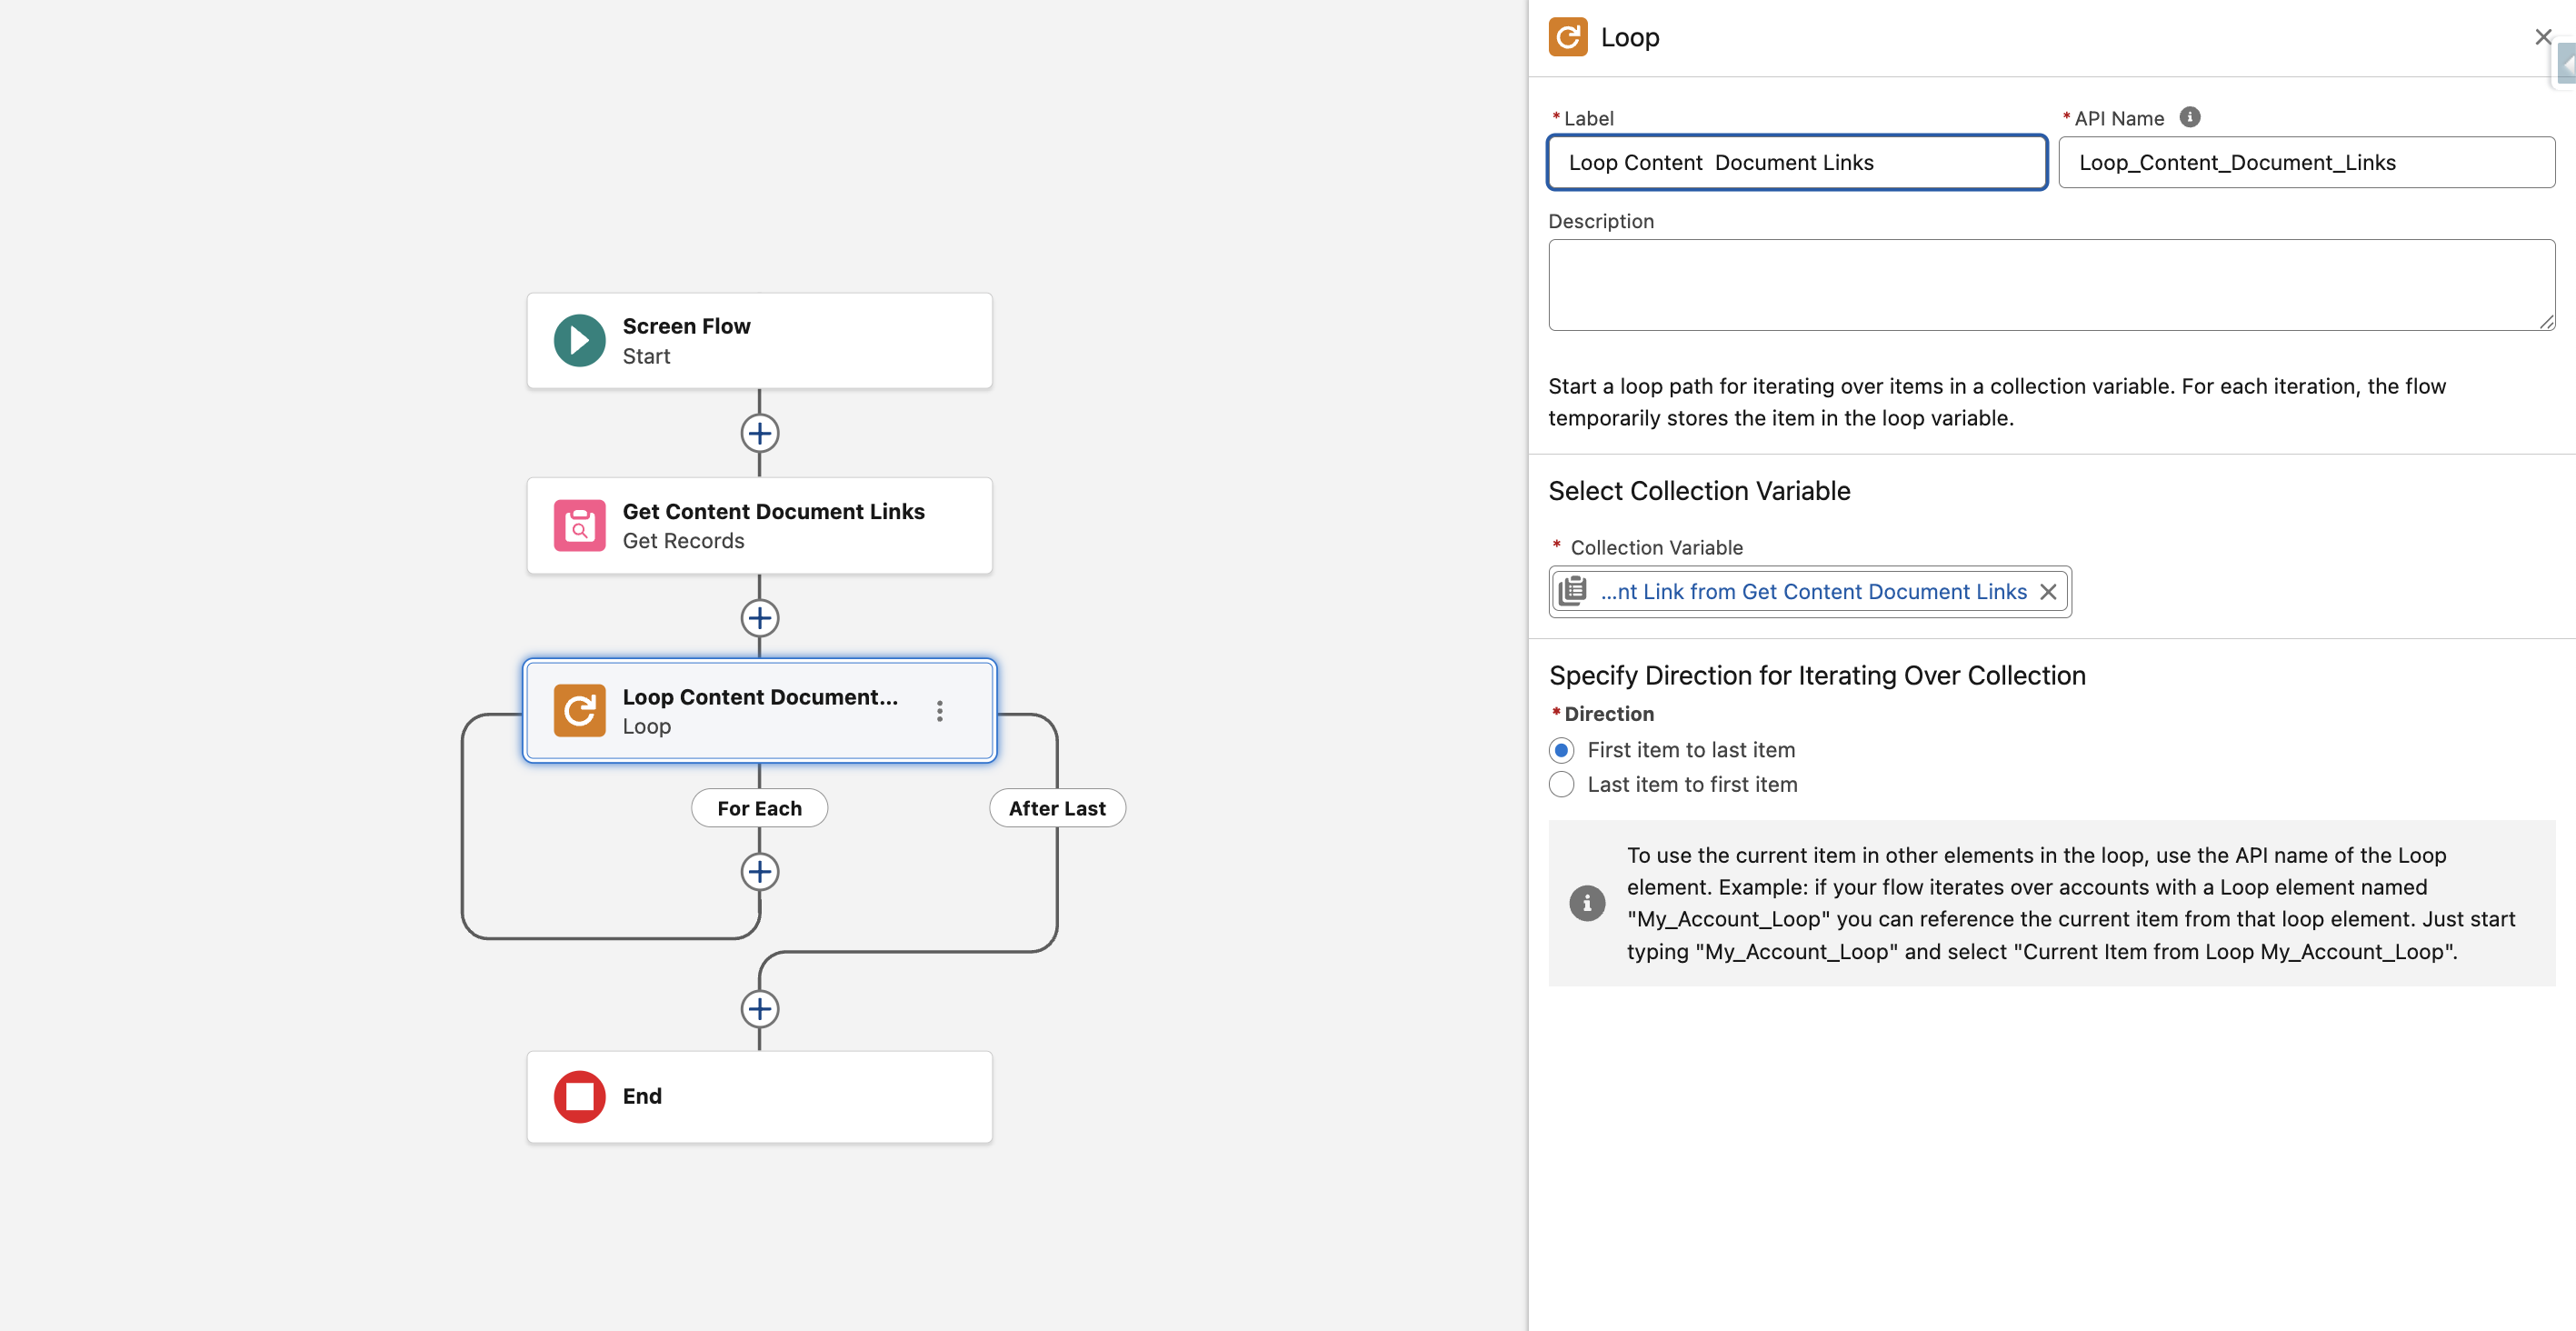
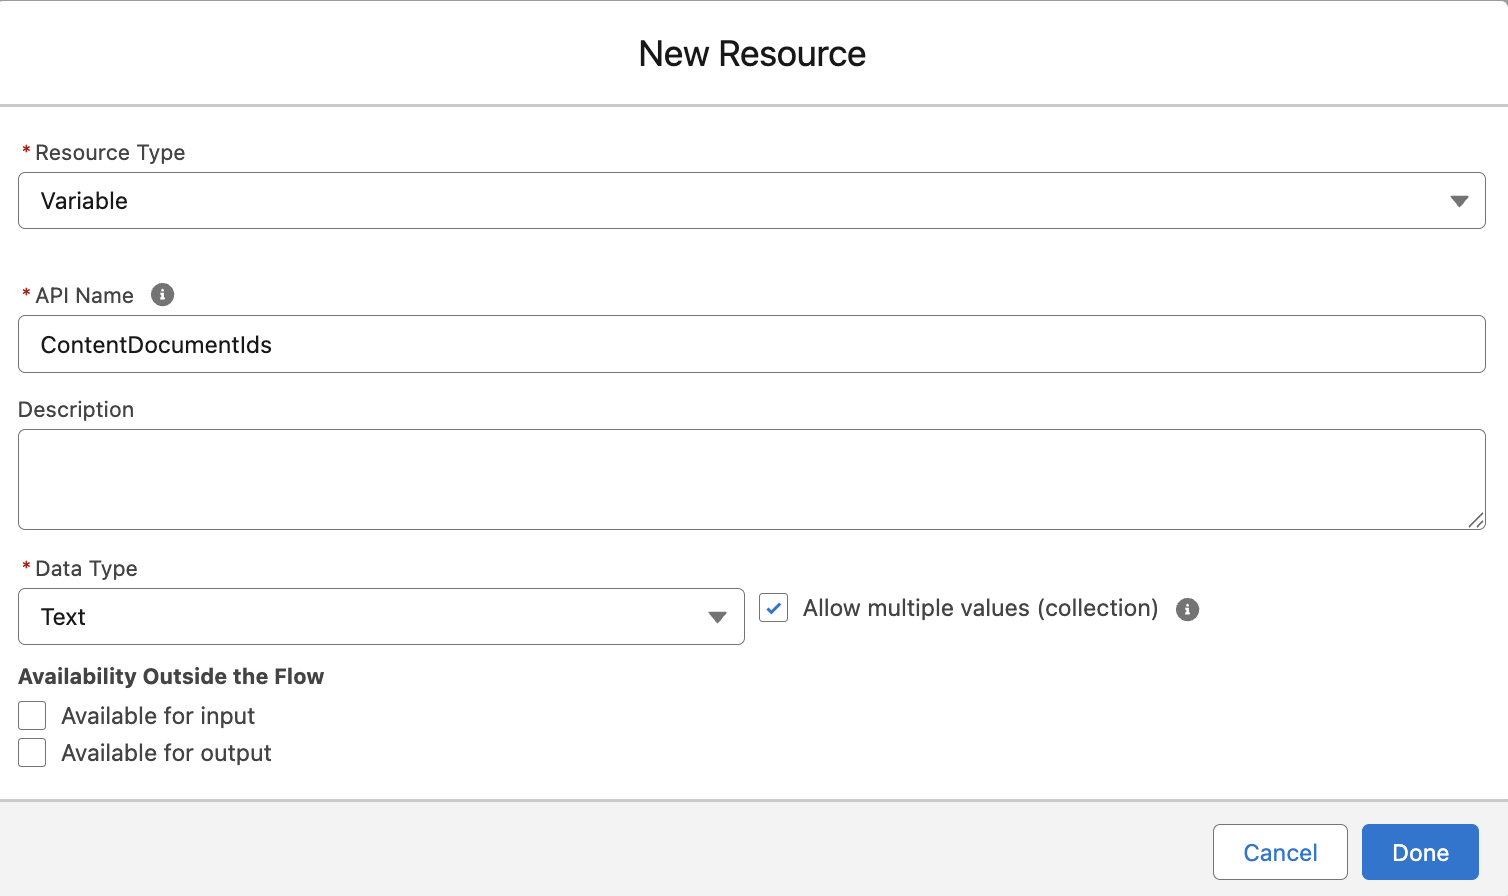
- Create a Variable resource named ContentDocumentIds, set its Data Type to Text, and enable Allow multiple values (collection) so it can store multiple Ids. This variable will hold all the document IDs retrieved from the Opportunity record, allowing them to be used later in the flow for merging.
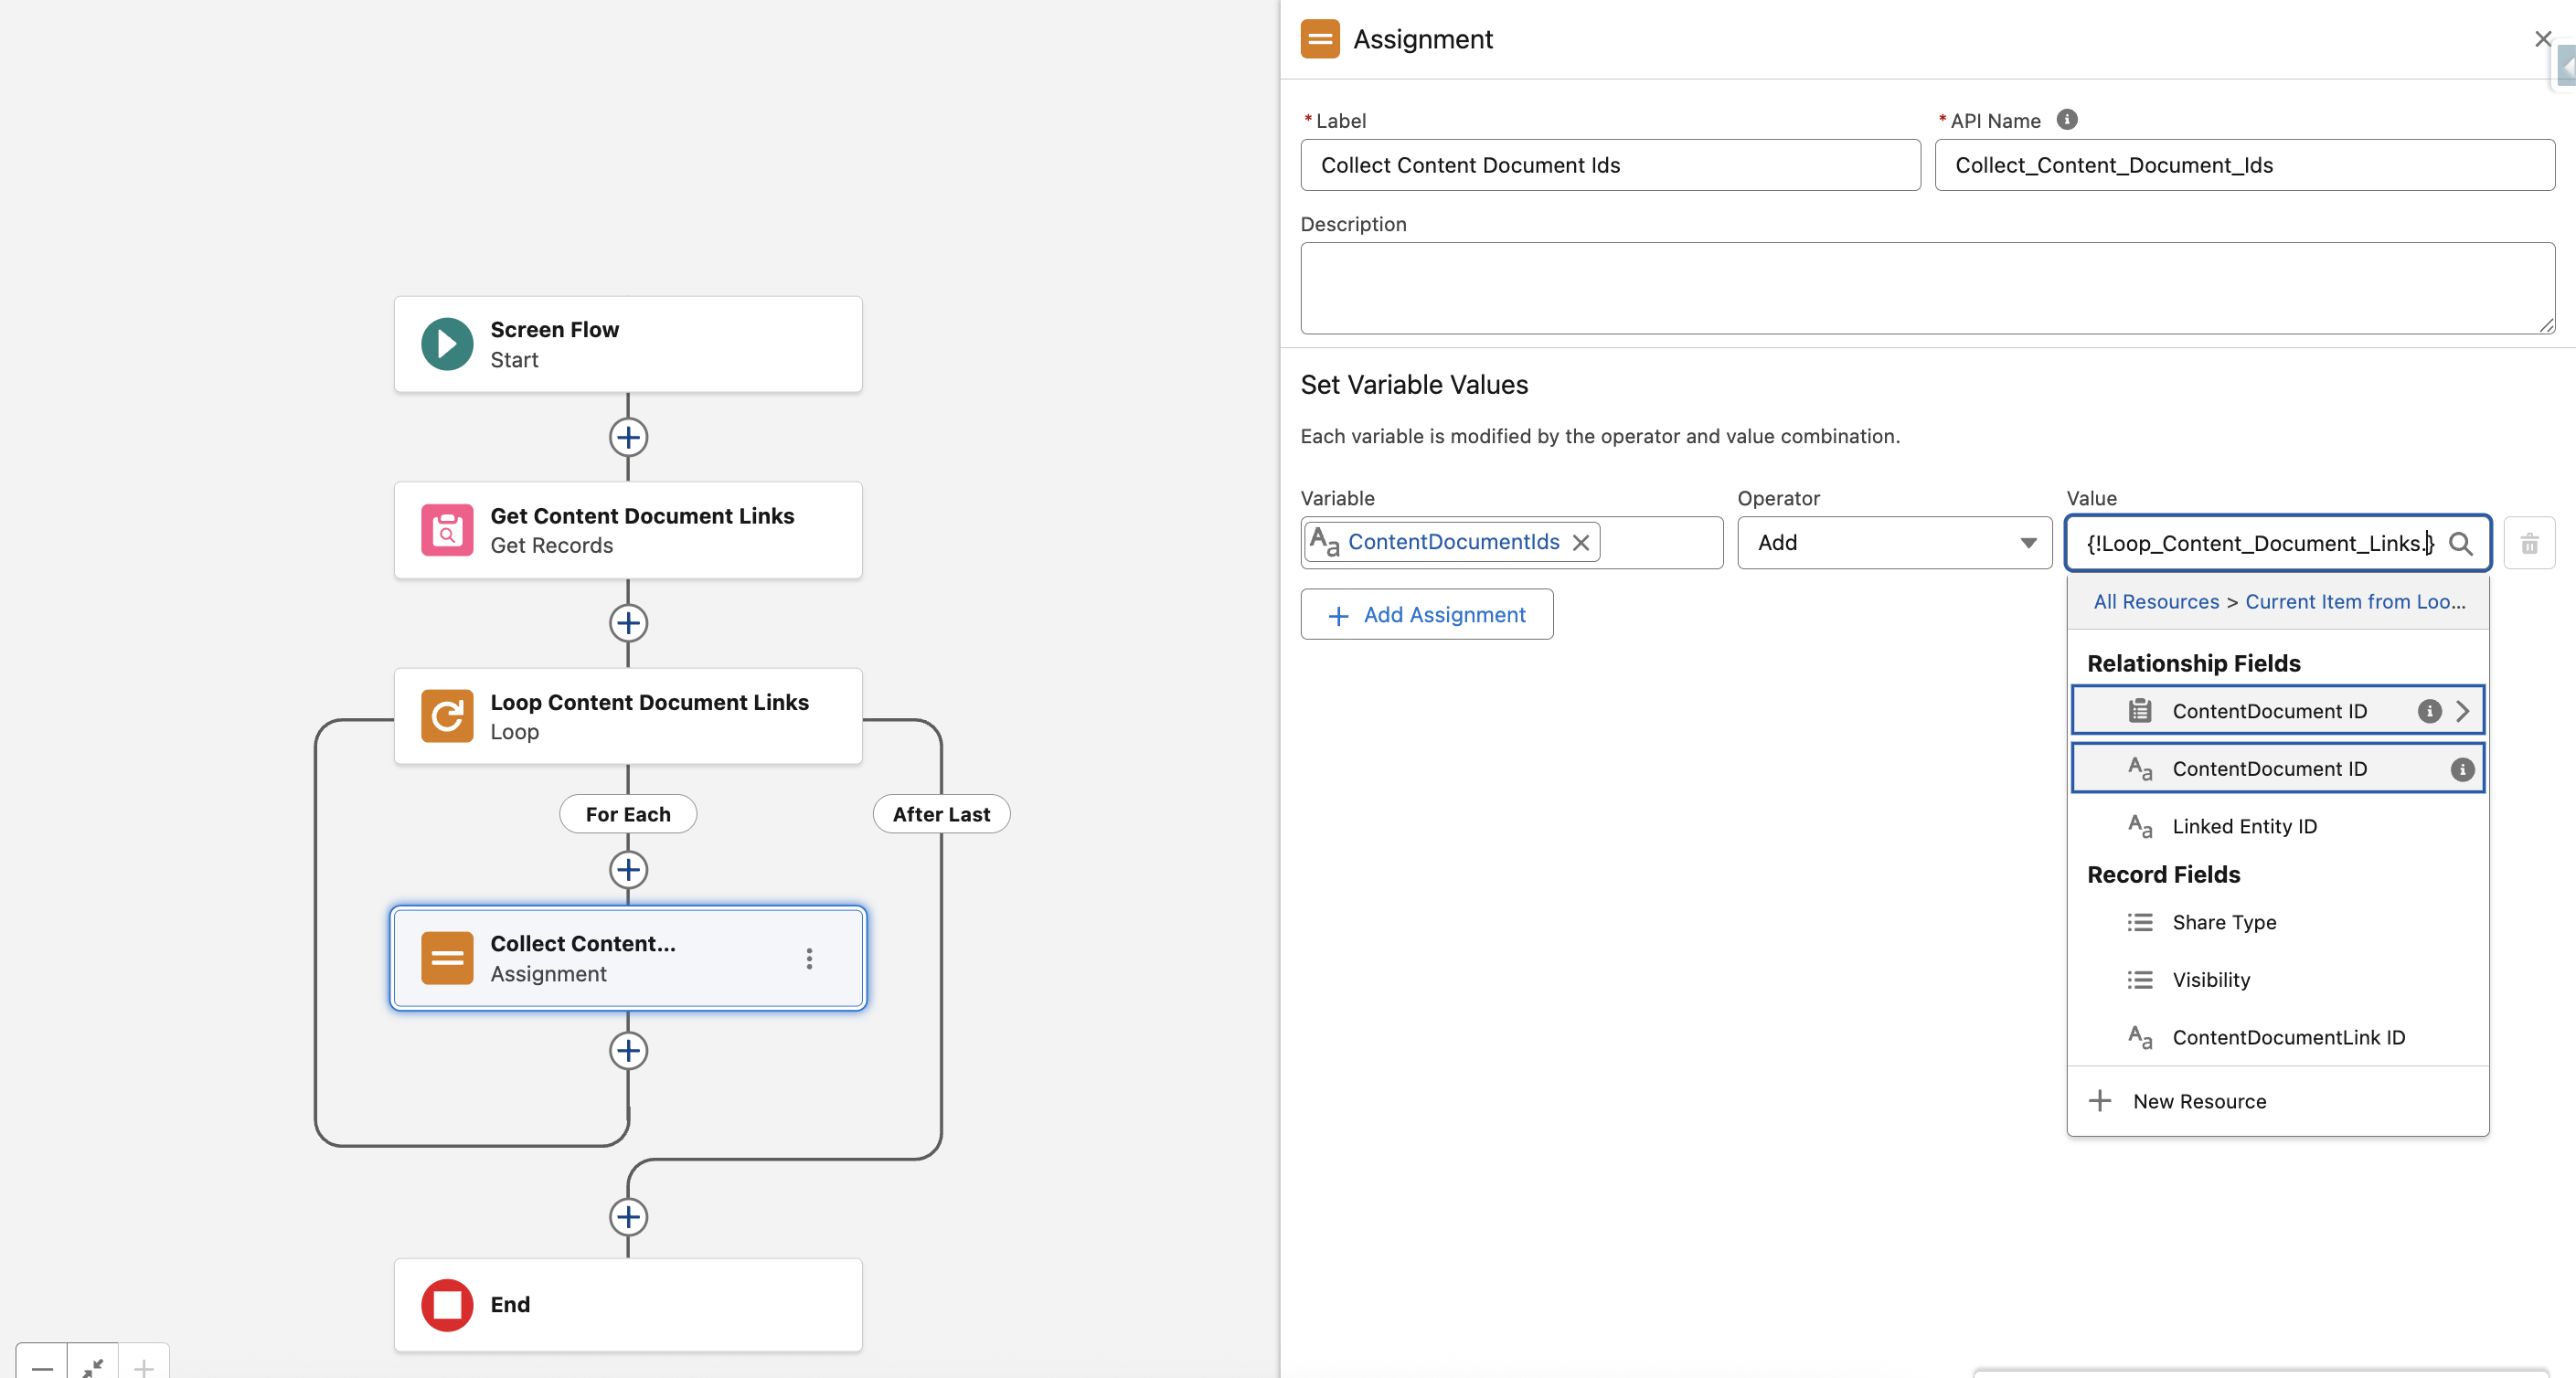
- Inside the loop, use an Assignment element to add each file’s ContentDocumentId to the ContentDocumentIds collection variable.
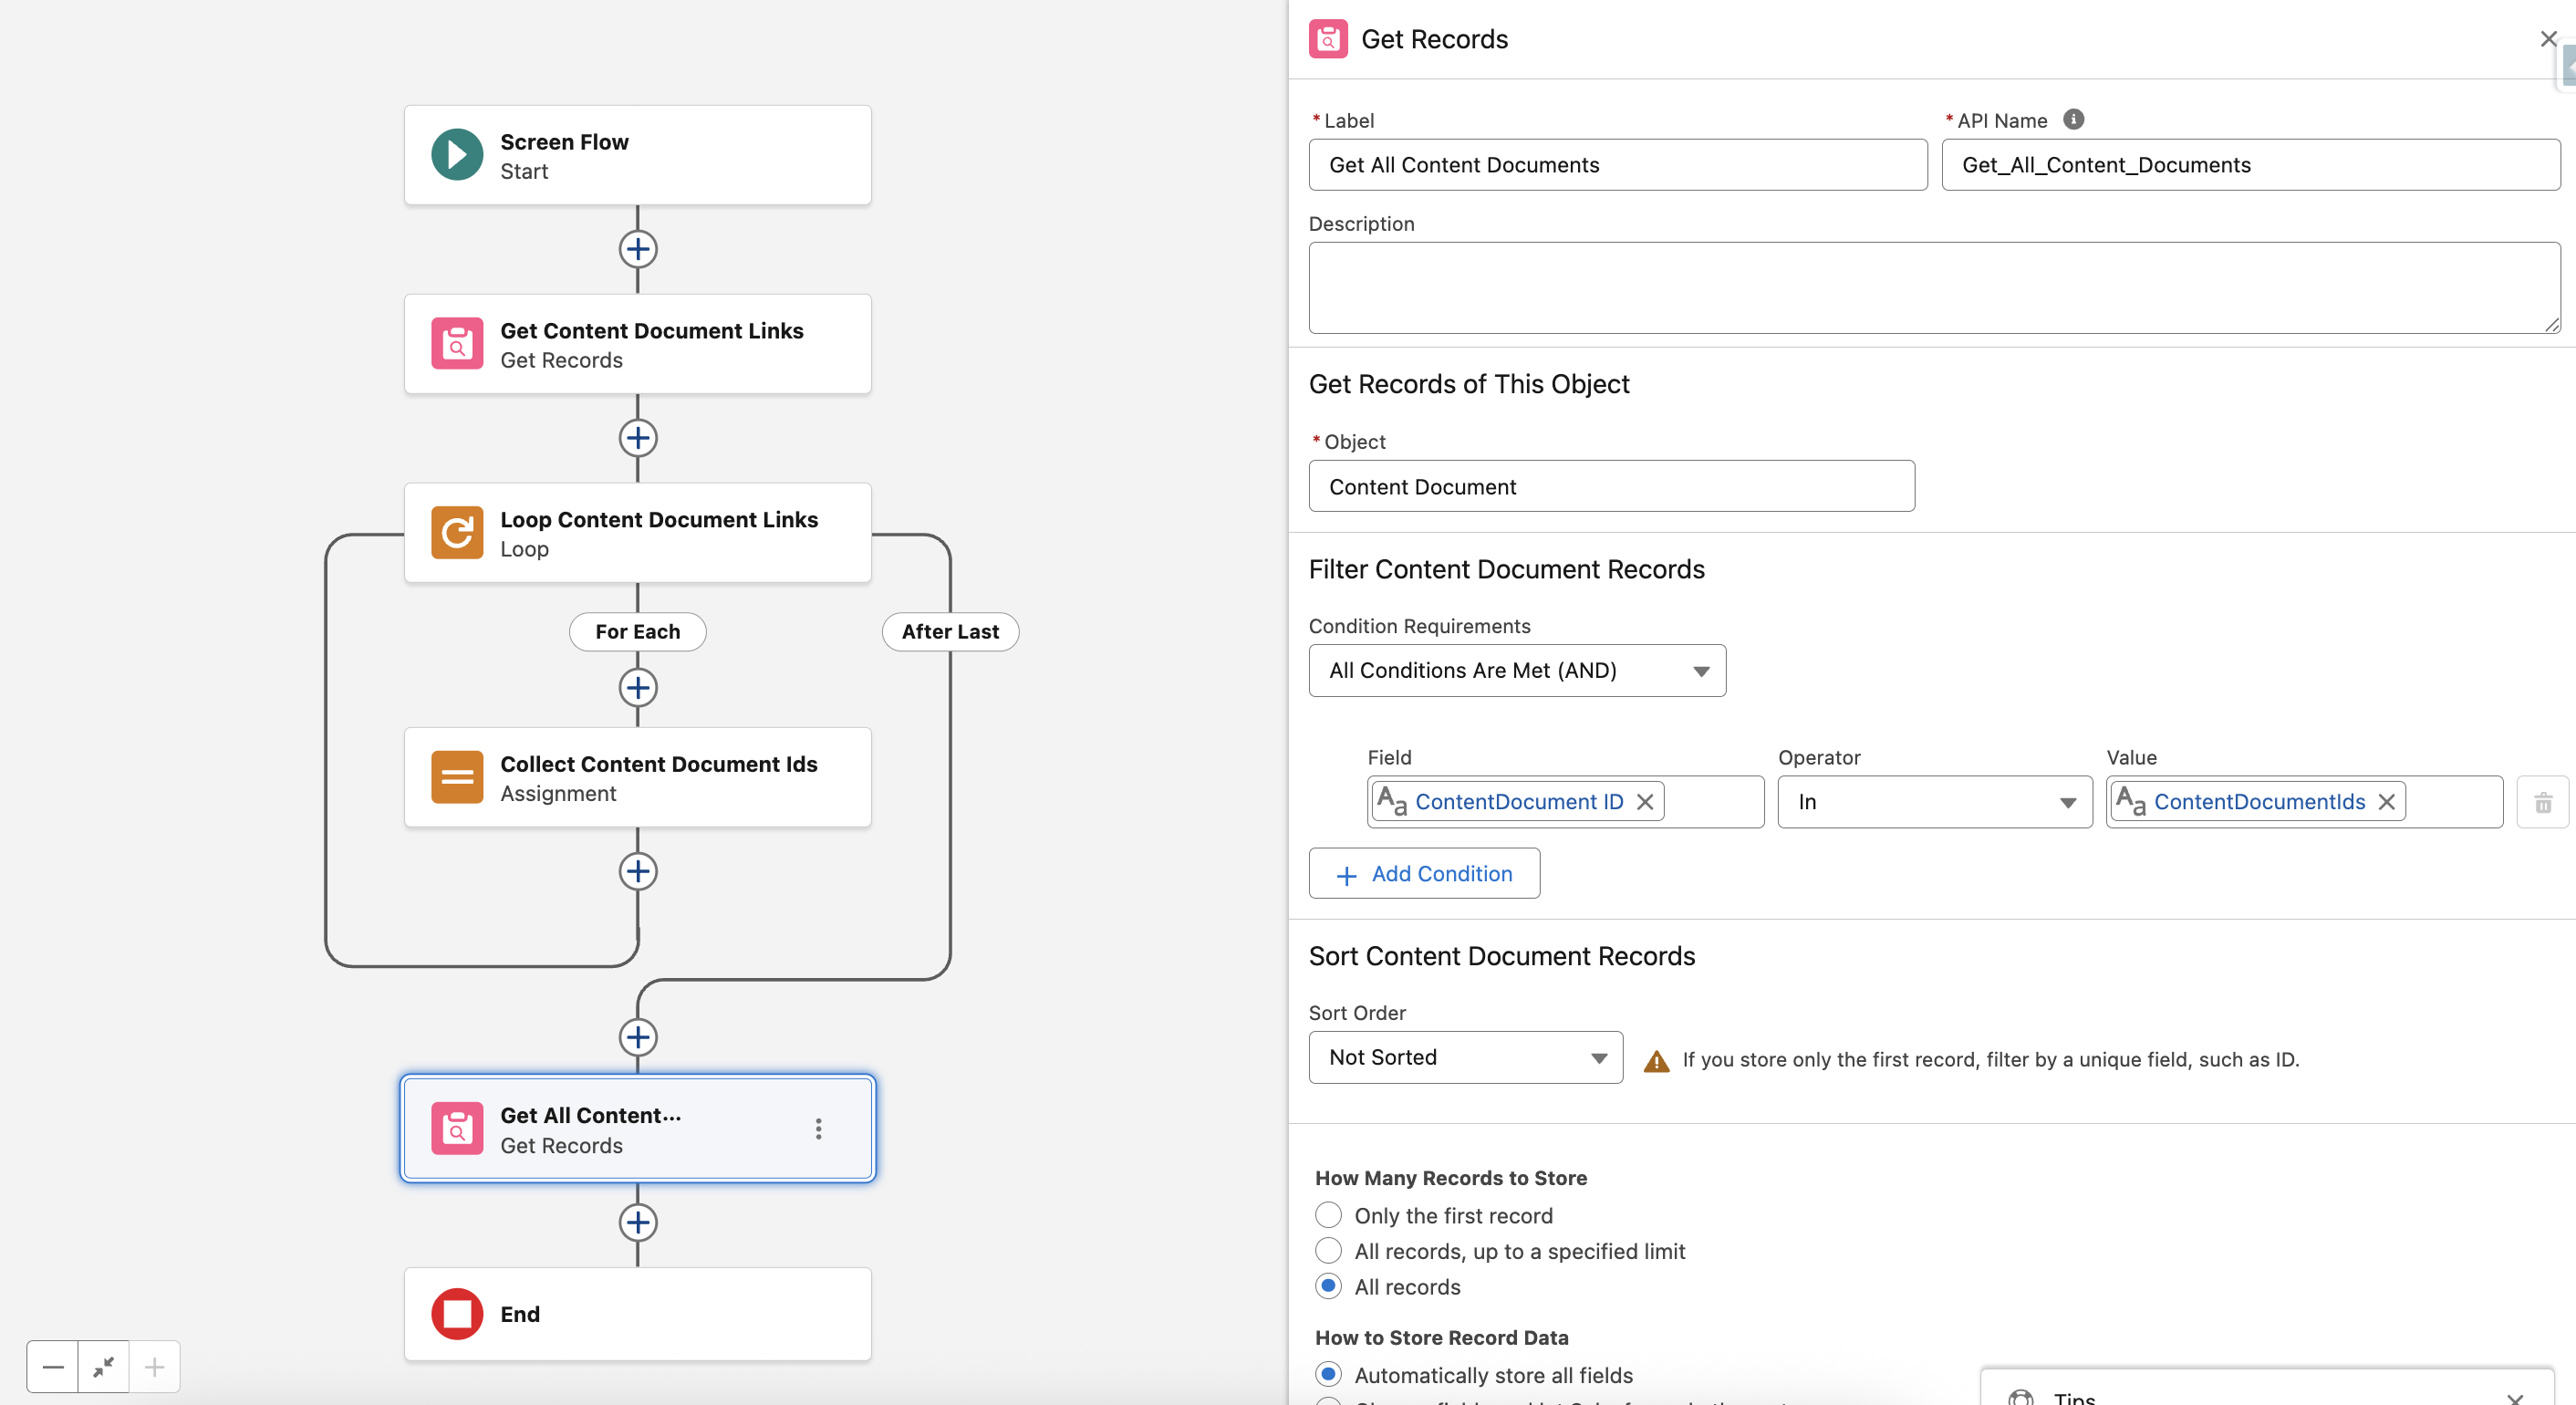
3 - Get Content Documents
- Add a Get Records element to fetch all ContentDocument records using the ContentDocumentIds.
4 - Let Users Select Files
Add a Screen element to choose which files to merge, rather than merging all. This provides flexibility for users to pick specific files.
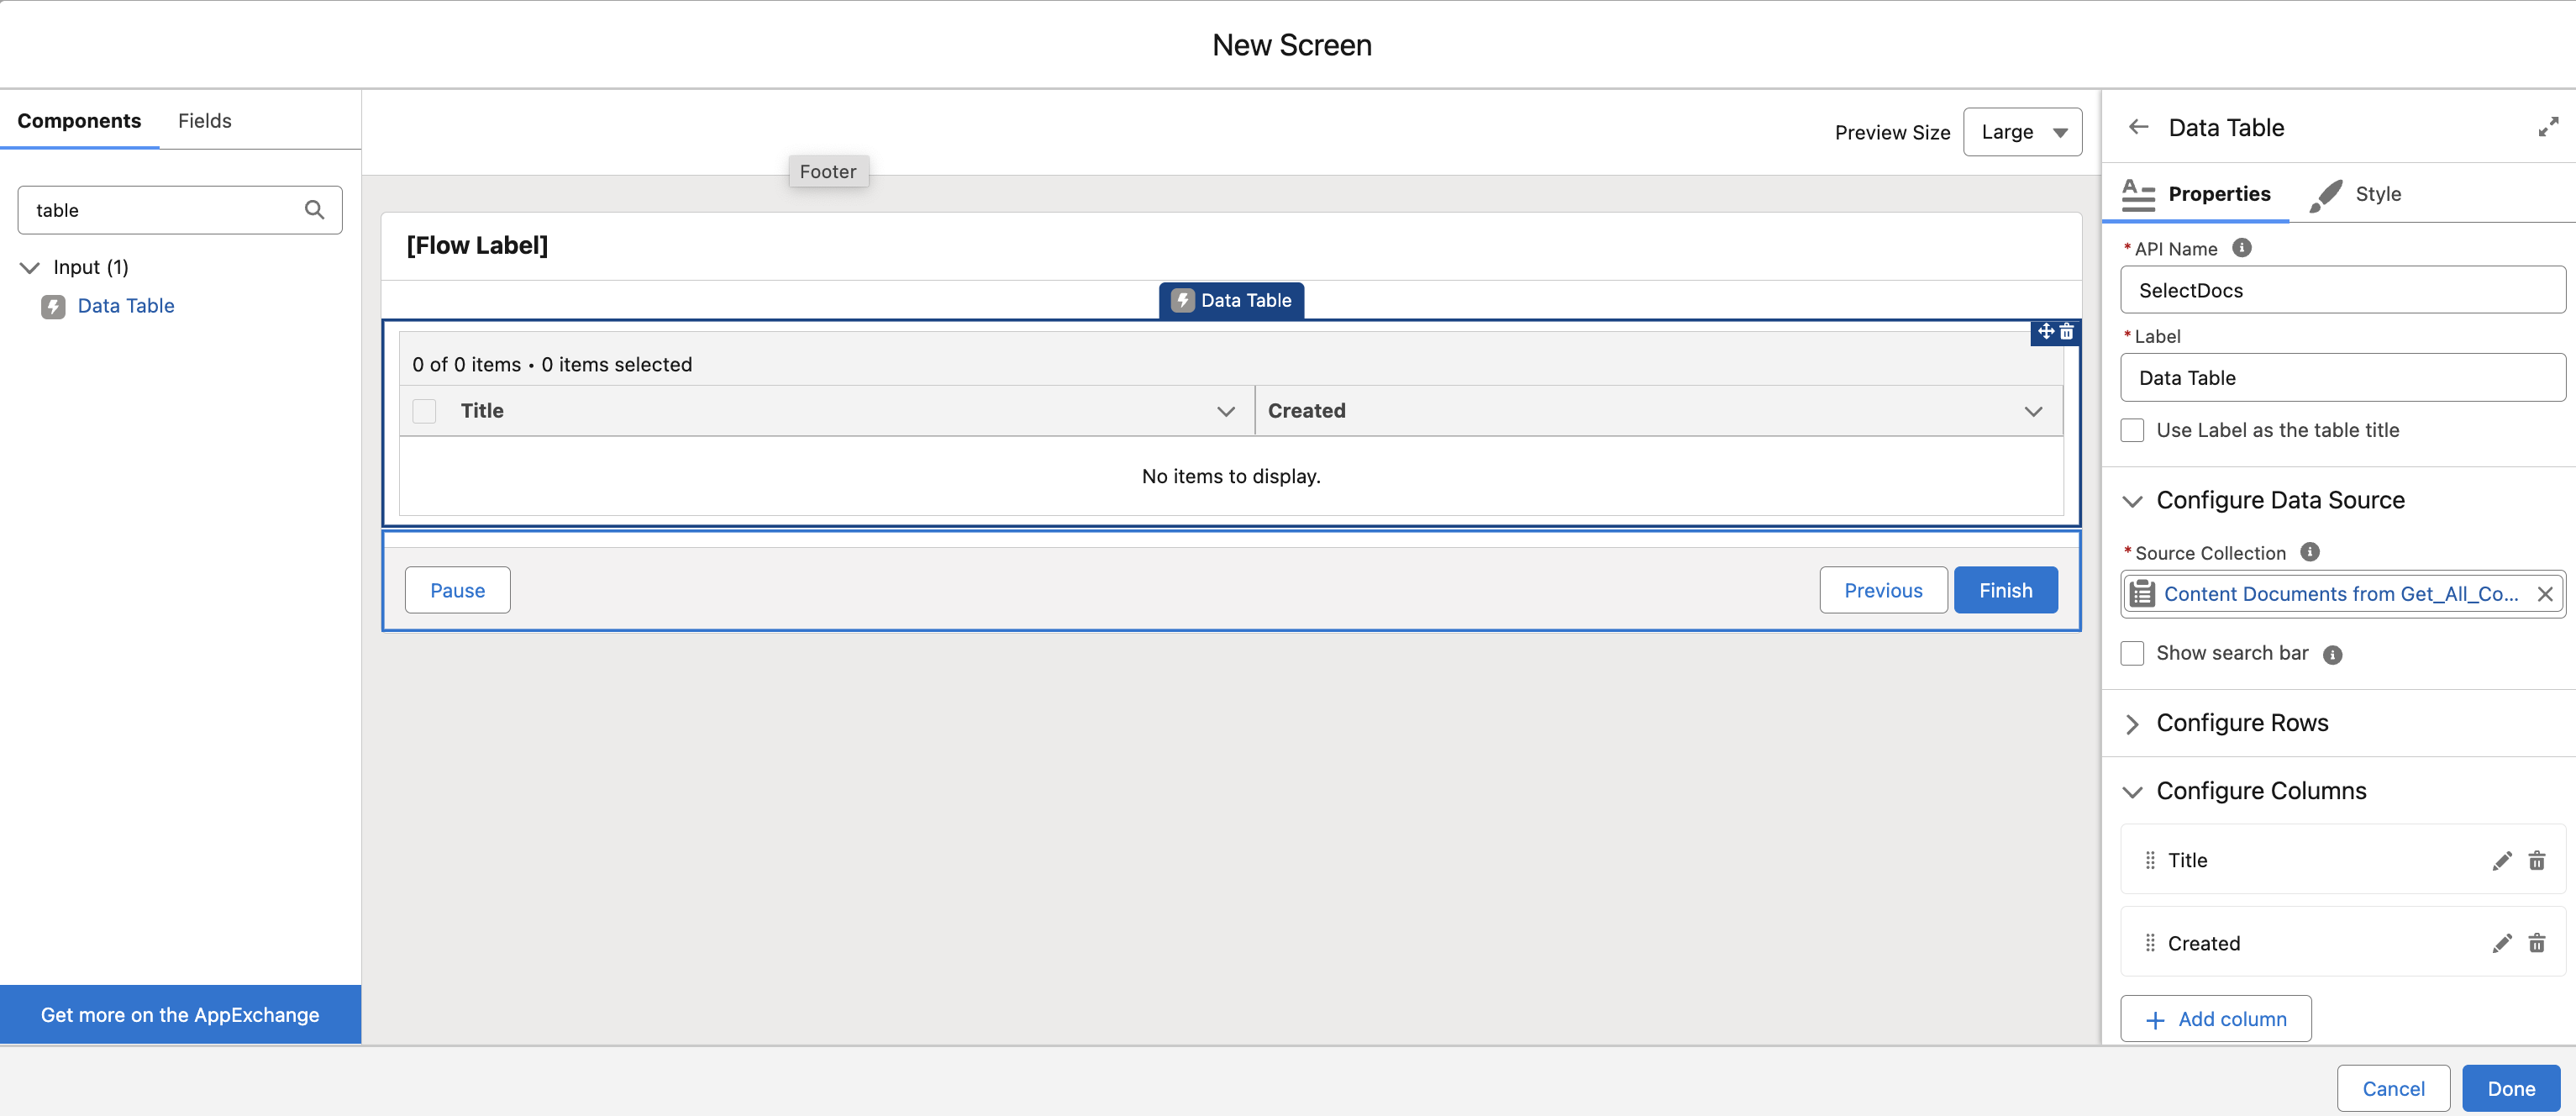
- Add a Screen element with a Data Table component.
- Set the Source Collection to the list of Content Documents ContentDocumentIds retrieved in the above step.
- Set Row Selection Mode to Multiple so users can pick more than one file.
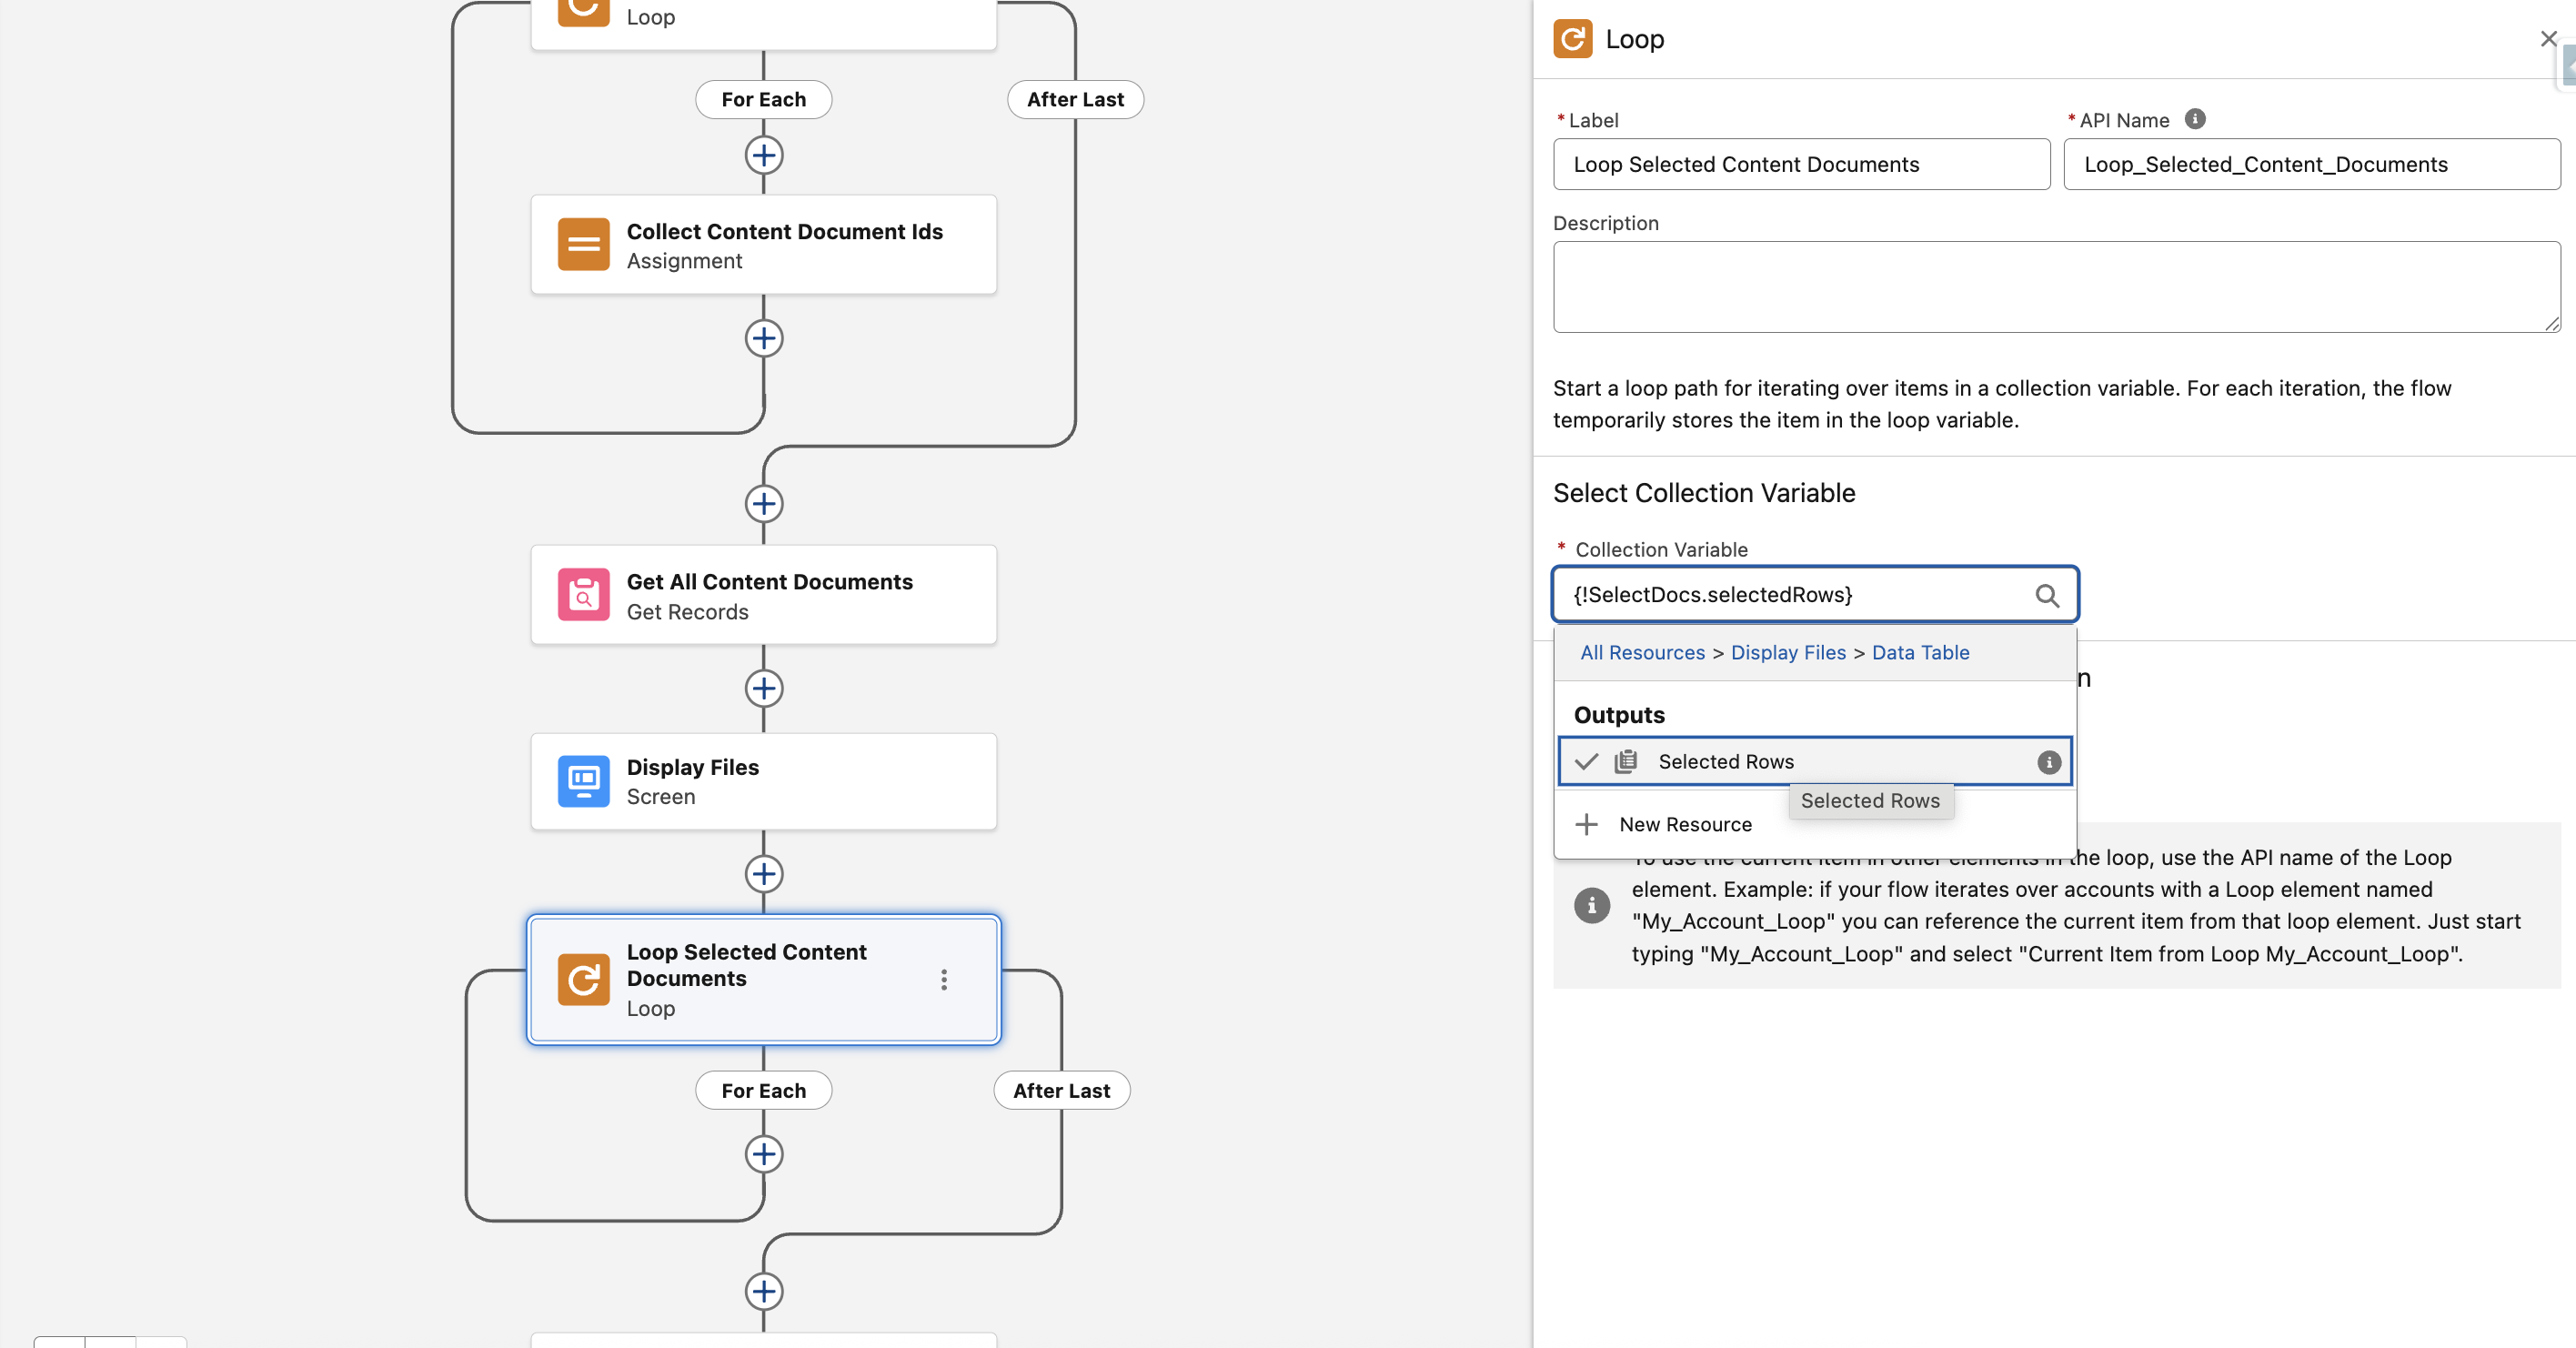
- Add a Loop element to iterate over the Selected Rows from the Data Table {!SelectDocs.selectedRows}.
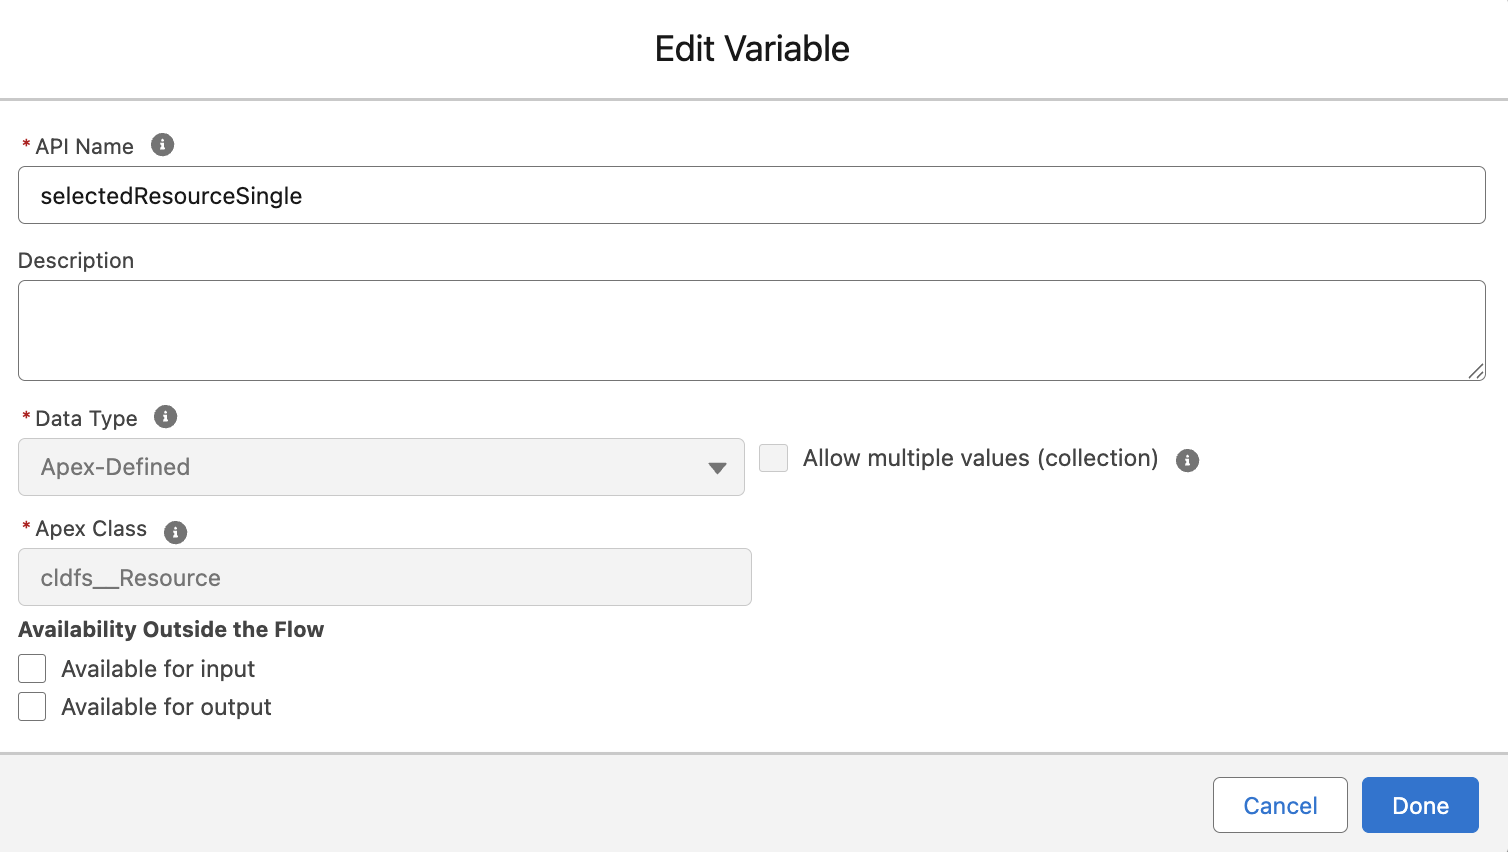
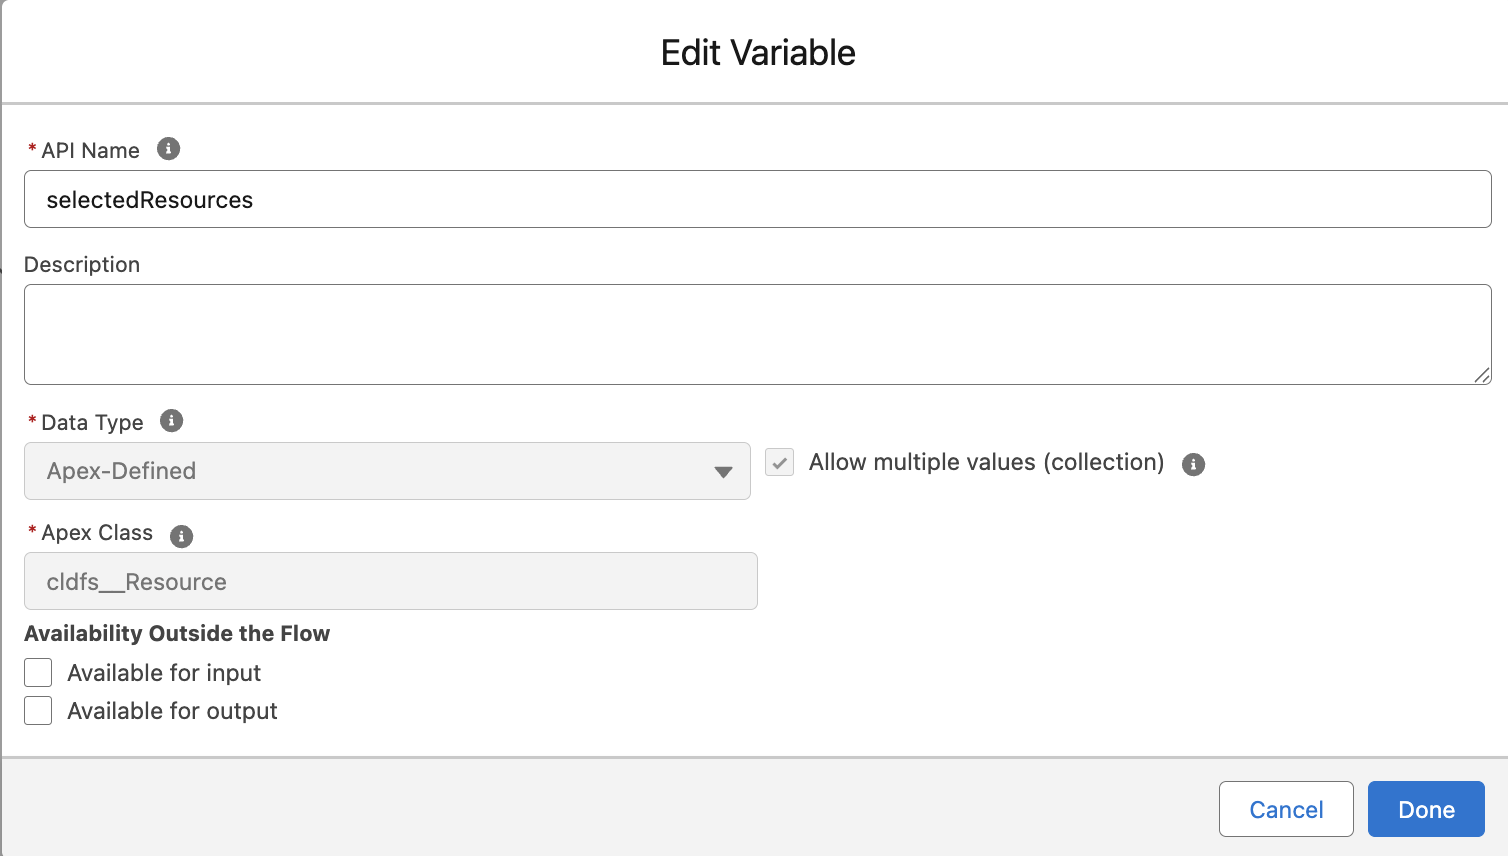
To pass documents into the Merge Documents action, you need Apex-defined variables of type cldfs__Resource.
- selectedResourceSingle → Single resource (to configure each resource inside the loop).
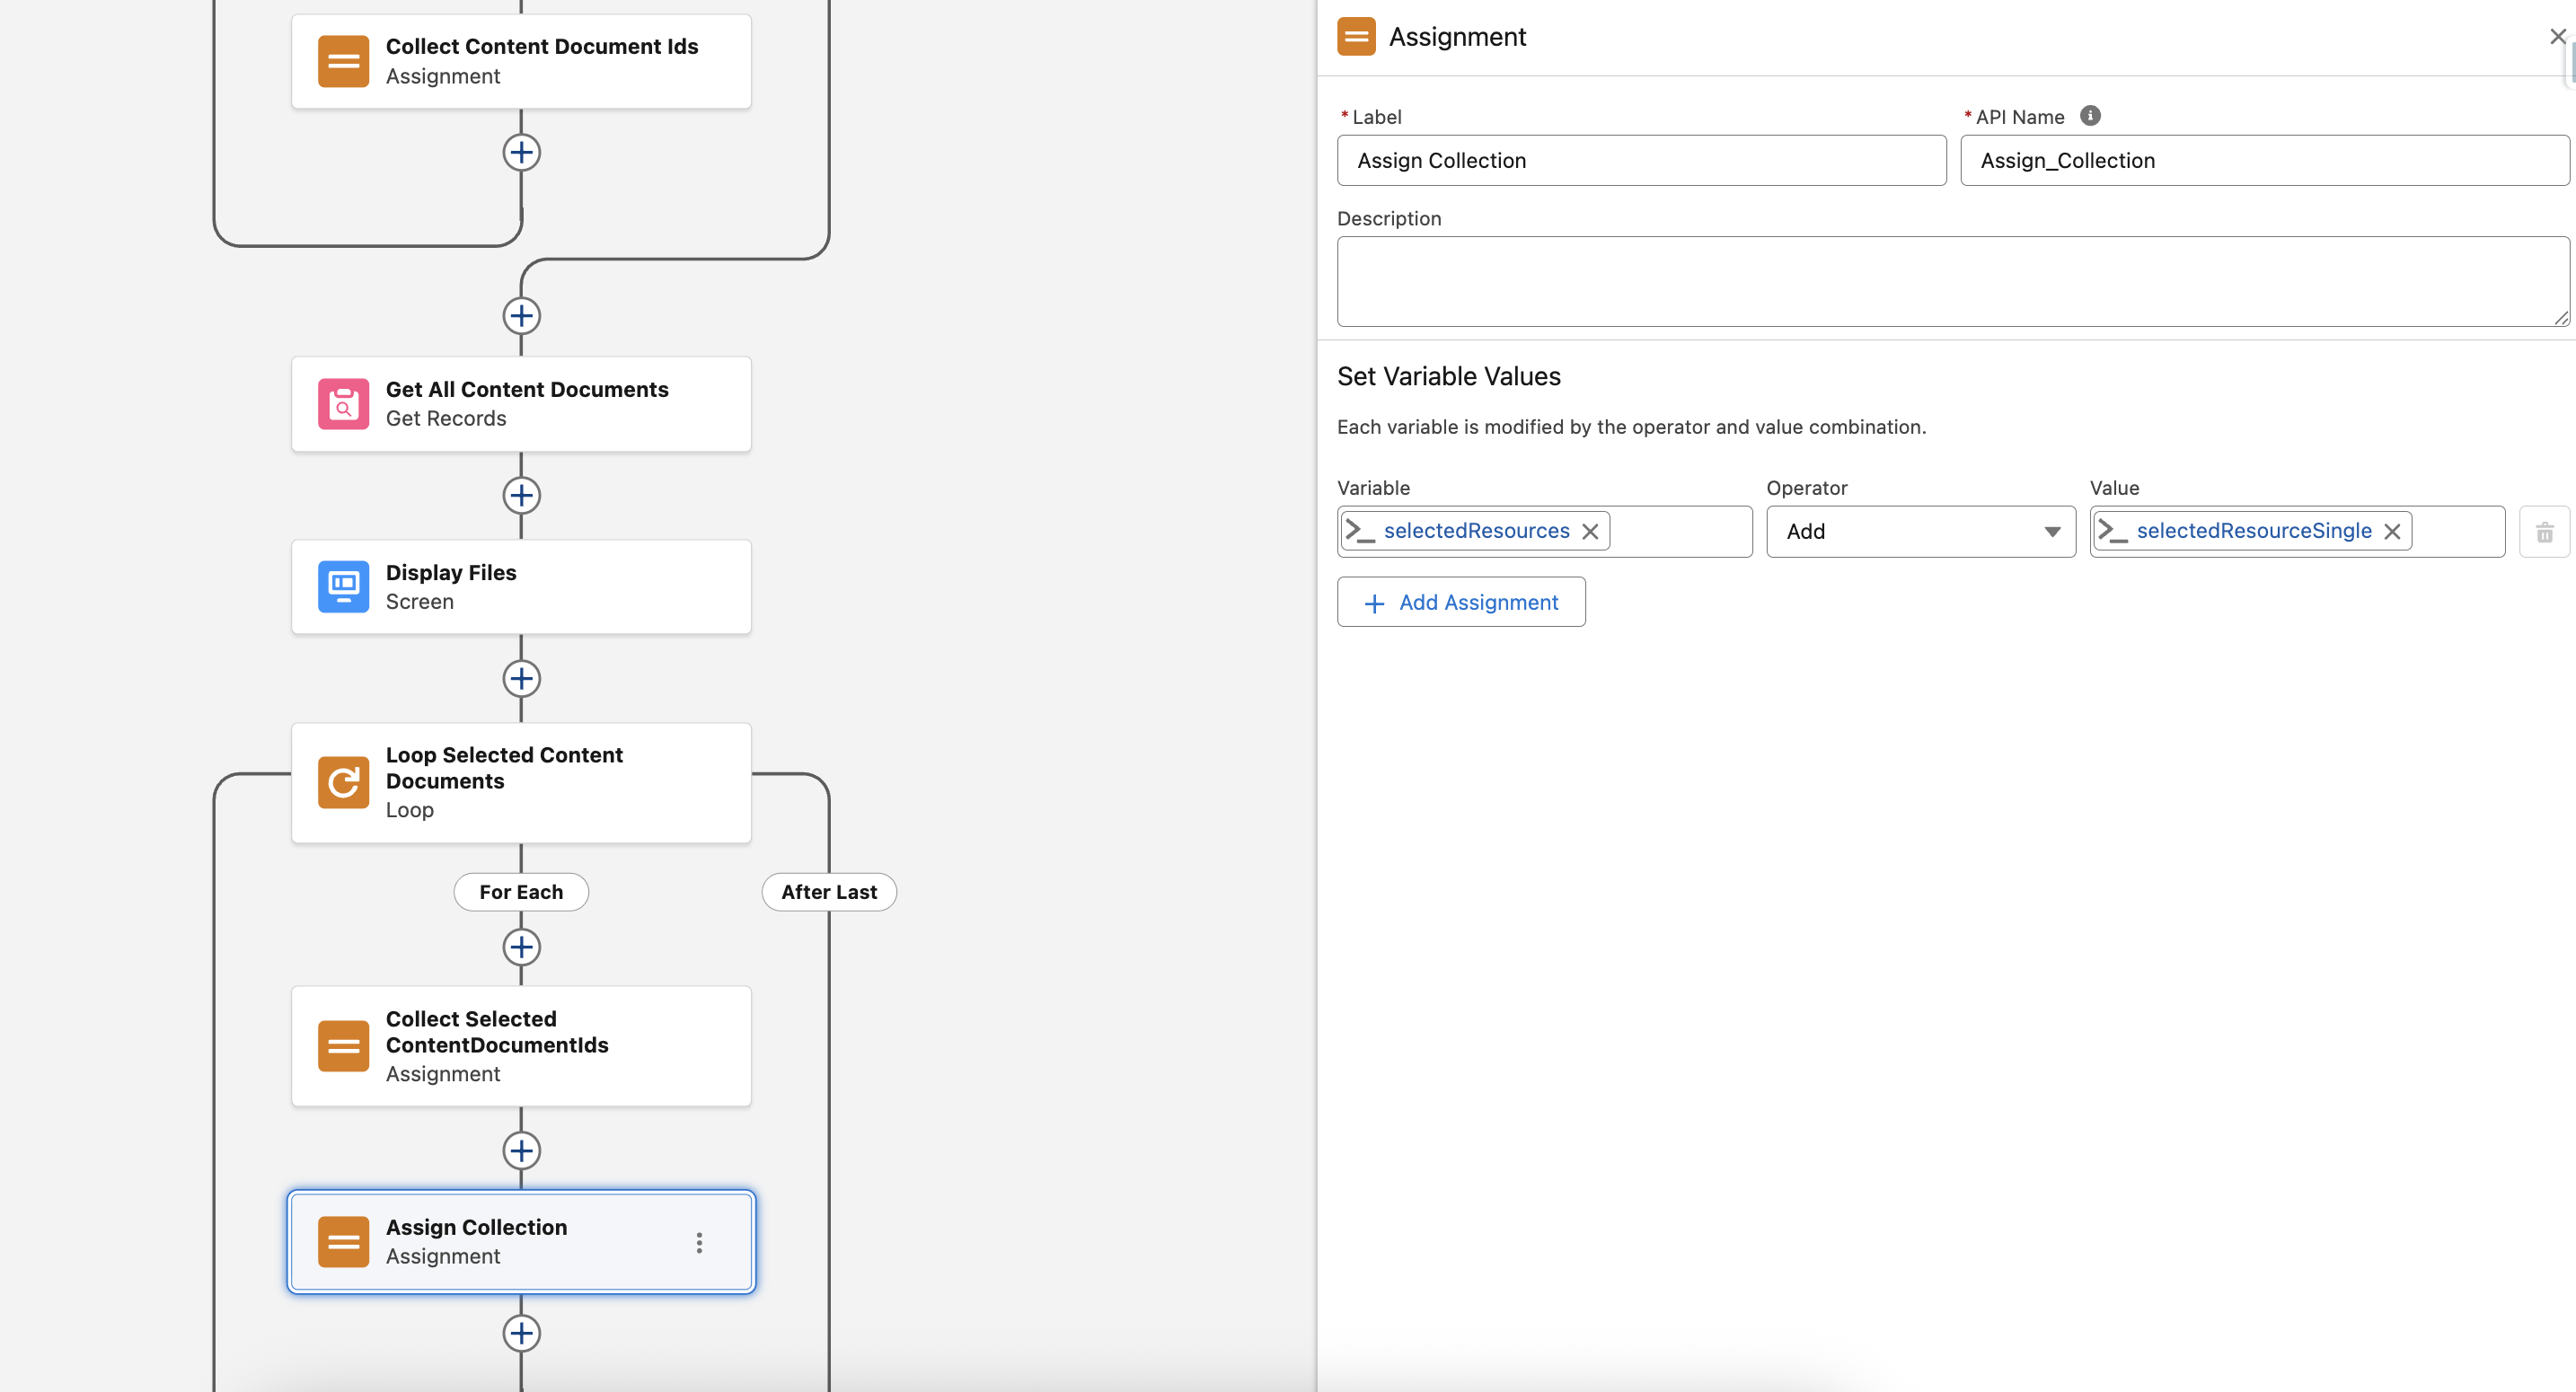
- selectedResources → Collection resource (to store all selected documents).
Assign Values in Loop
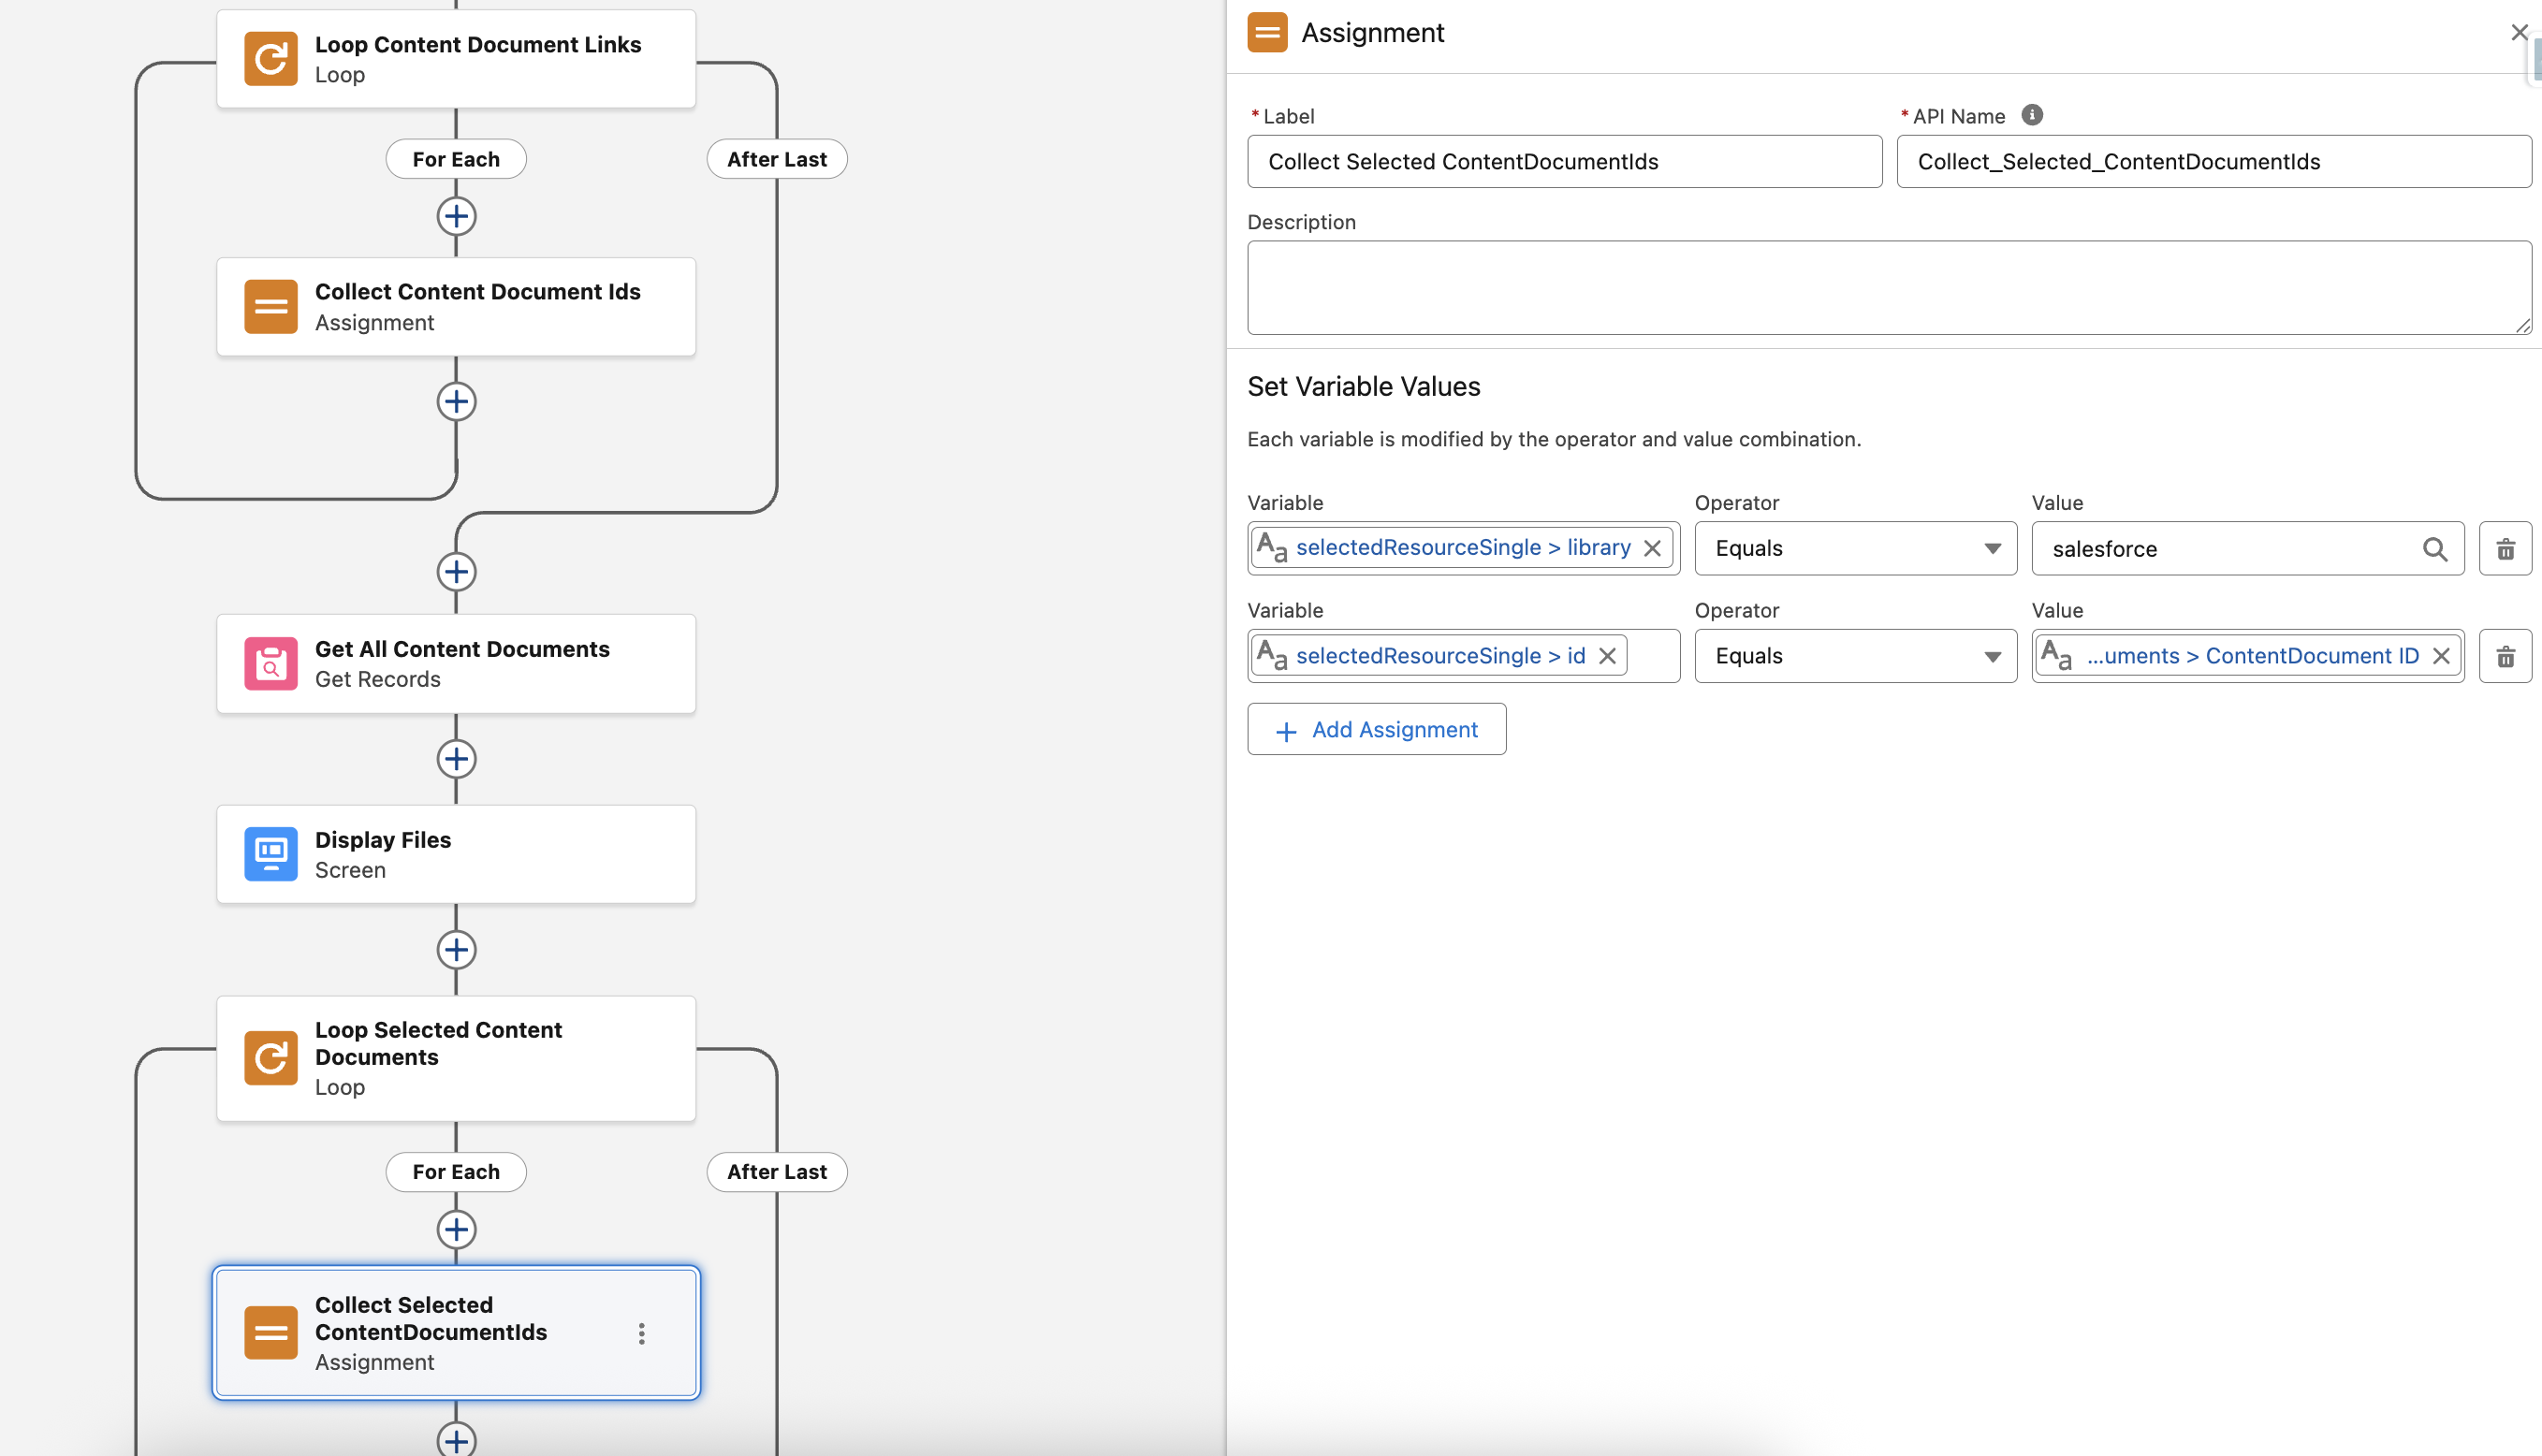
- Inside the Loop Selected Content Documents, add an Assignment element:
- Set selectedResourceSingle.library = salesforce.
- Set selectedResourceSingle.id = ContentDocumentId ({!Loop_Selected_Content_Documents.Id}).
Add to Collection
- Use another Assignment element to add the selectedResourceSingle into the selectedResources collection.
5 - Define Destination
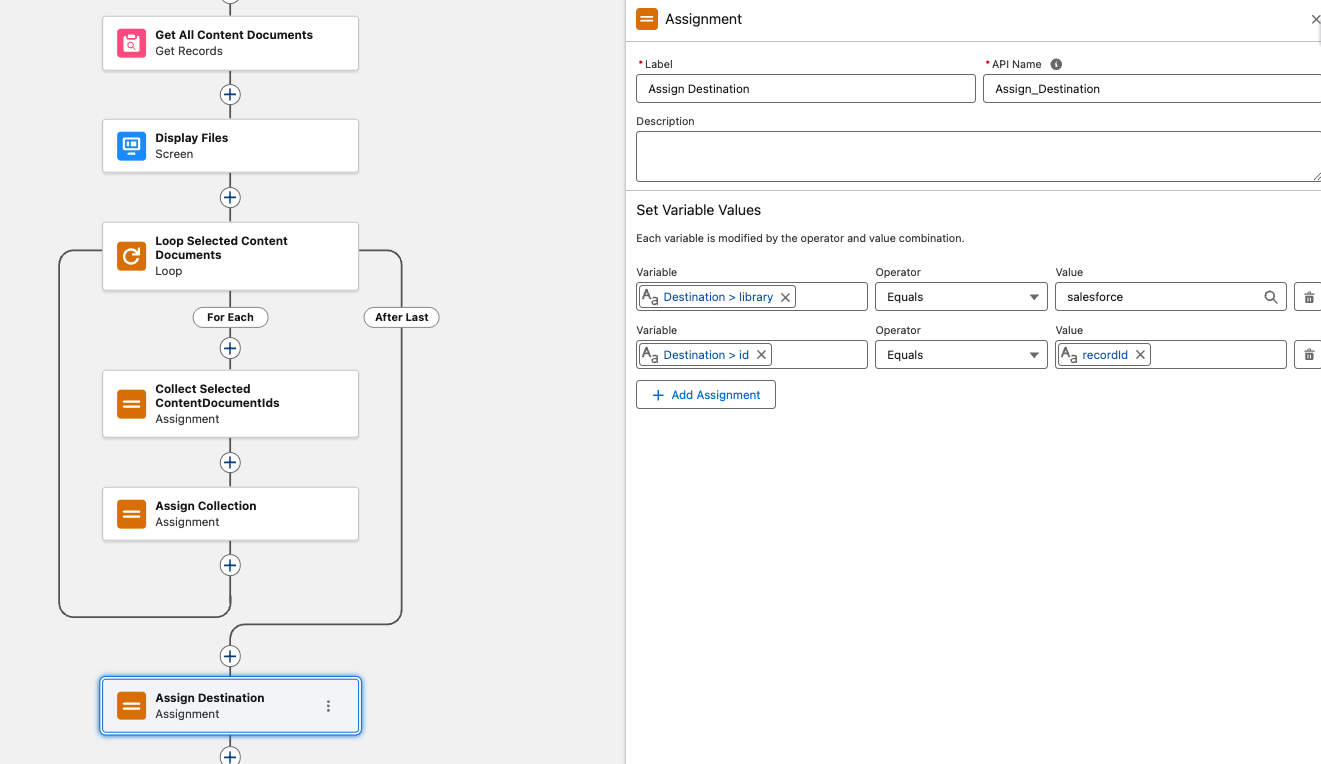
Defining a Destination ensures that the merged document is properly linked and stored in Salesforce. To do this, create Apex-Defined Variable of Apex Class cldfs__Resource and define values such as id, driveId and library according to the storage location.
To Save in Salesforce, add an Assignment element to set the values:
- Destination → id = recordId (ensures the merged file is linked to the current record).
- Destination → library = salesforce (stores the file in the Salesforce library).
To Store in External Storage:
When using CloudFiles with the Document Management & Sharing, assign the Library (external library name), DriveId (ID of the connected drive), and Id (folder or location ID within the drive).
6 - Add the 'Merge Documents' Action
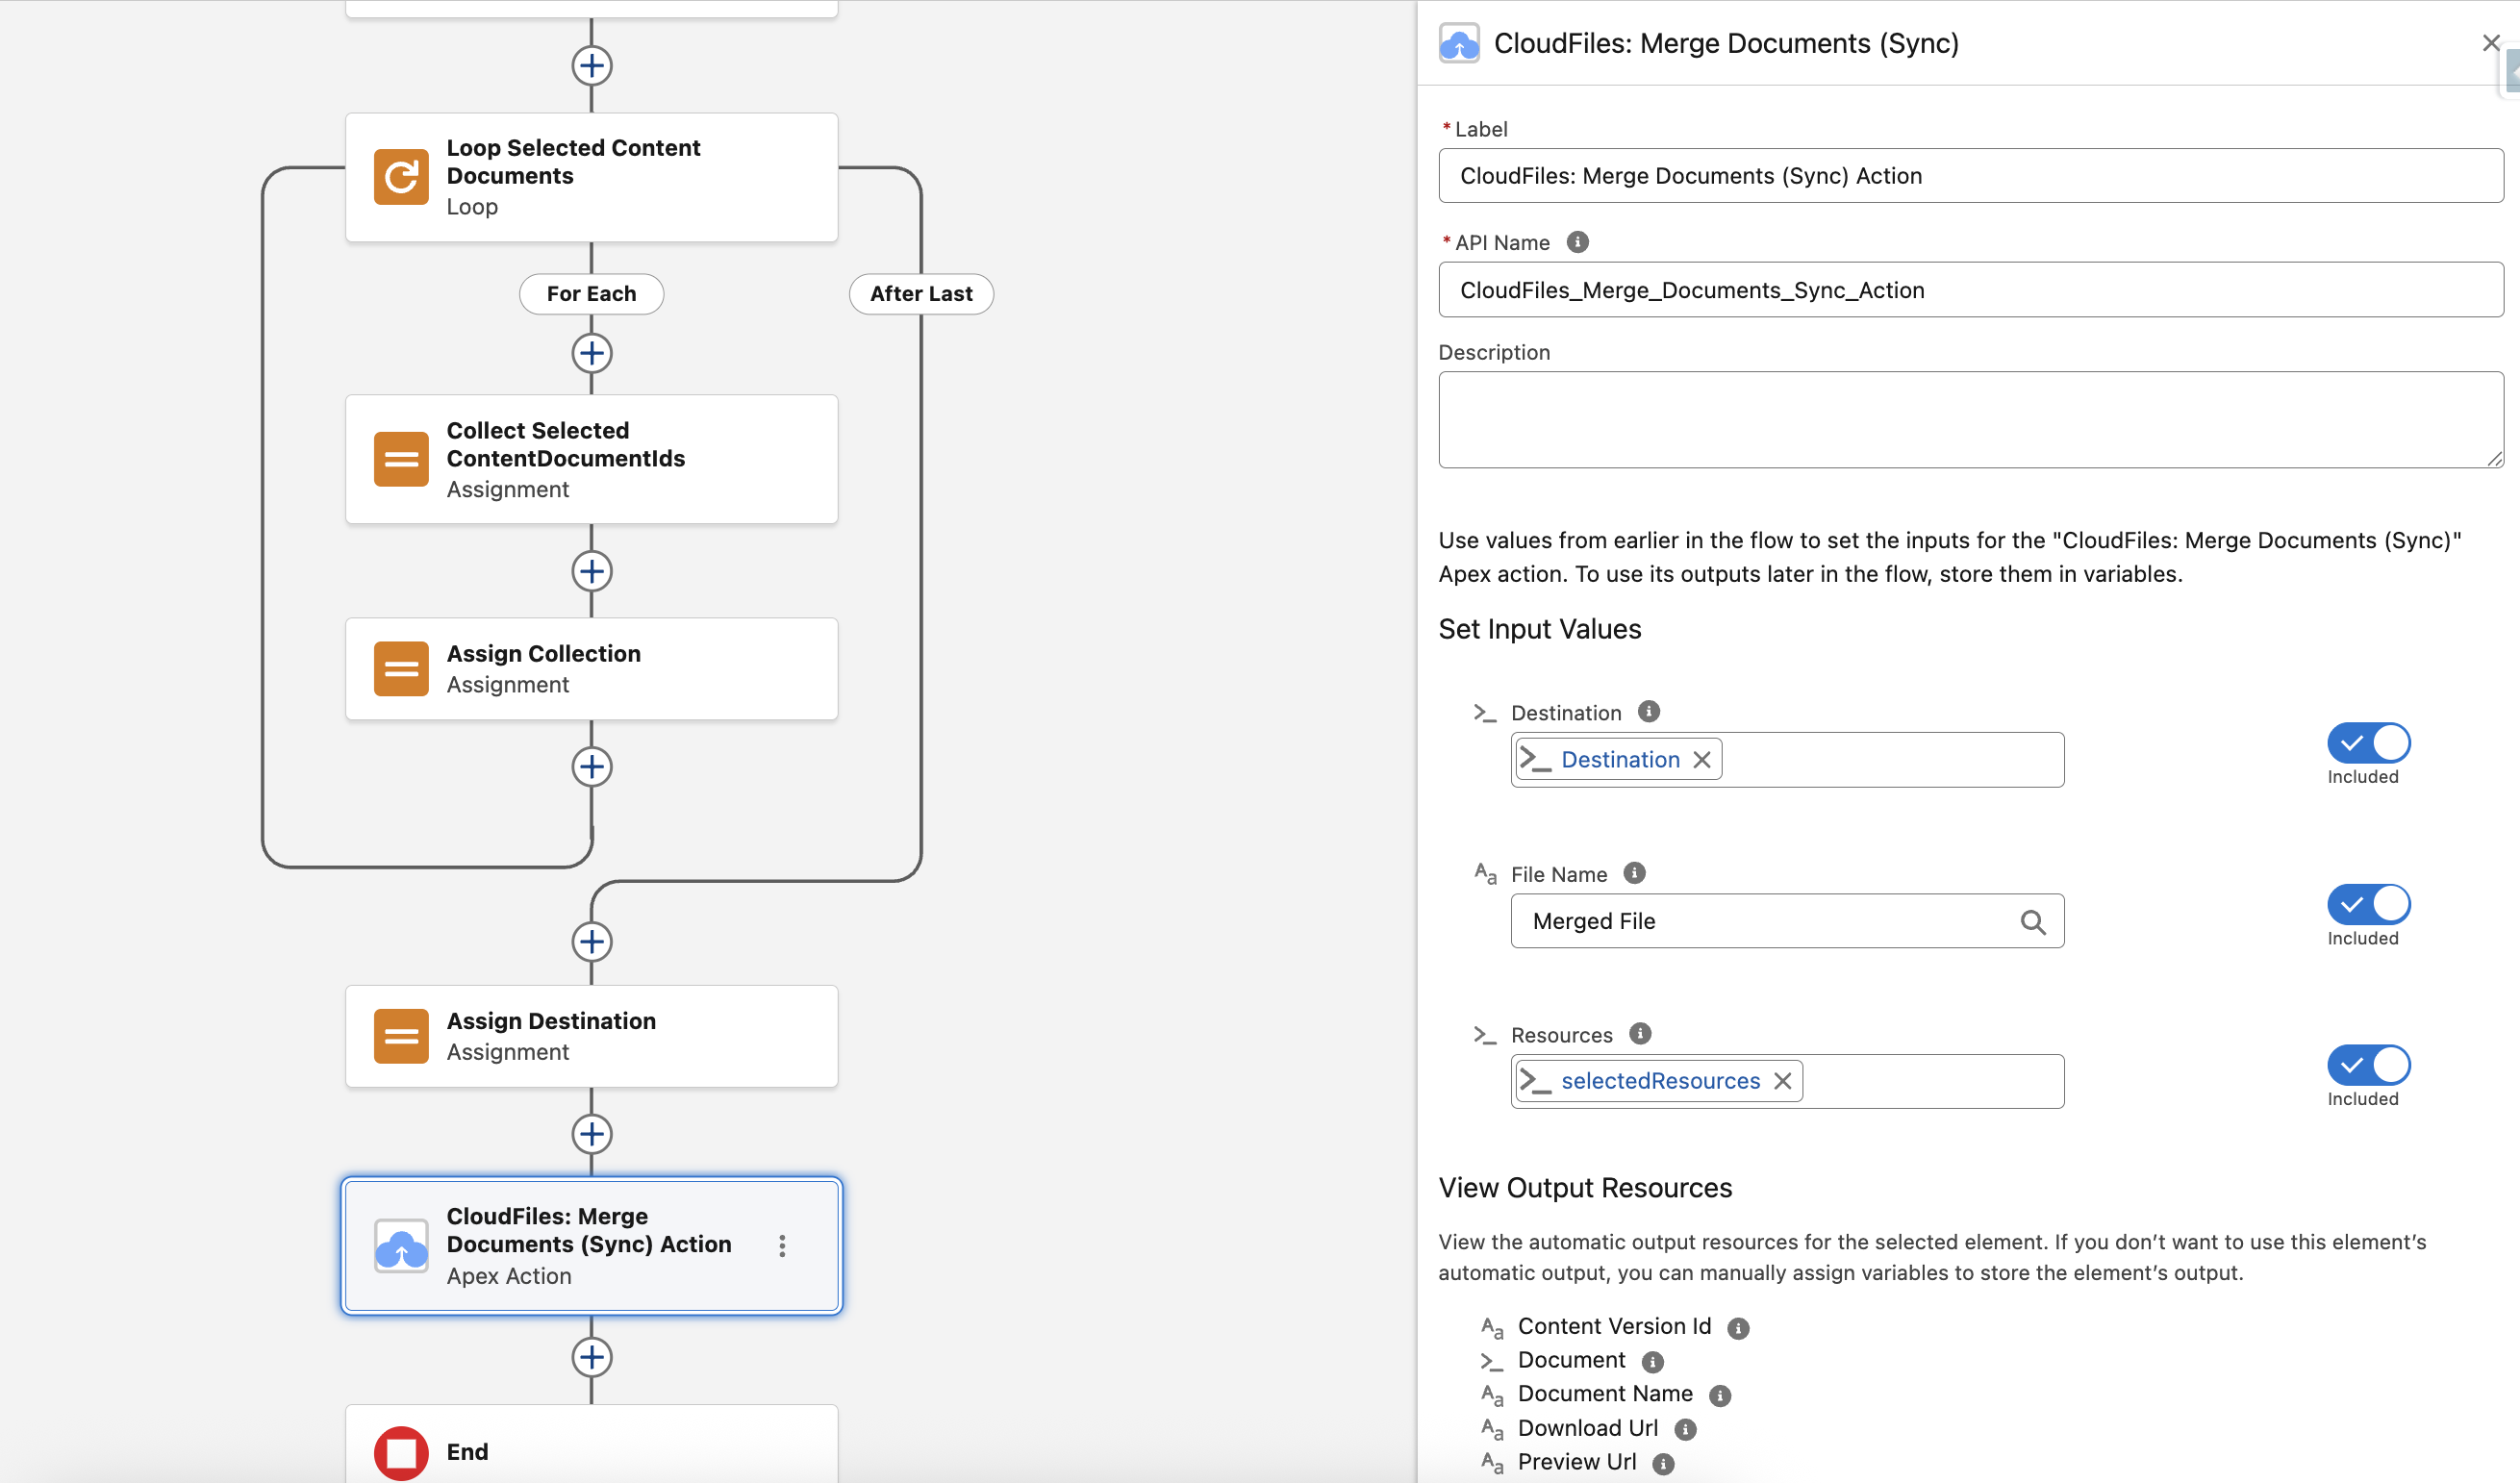
The Merge Documents (Sync) action is the final step that combines all the selected files into a single PDF. In this step, you define where the file should be stored (Destination), give it a name, and pass in the list of documents to merge.
Drag in the Merge Documents (Sync) flow action and configure the following input values:
- Destination → Use the Destination variable you created earlier to define where the merged file should be stored (e.g., linked to the current record).
- File Name → Provide a name for the merged output file (e.g., Merged File).
- Resources → Map the selectedResources collection variable, which contains all the documents to merge.
Test the setup
1 - Add the Flow to an Action
To make the flow easily accessible to users, add it as a button on the Opportunity record page:
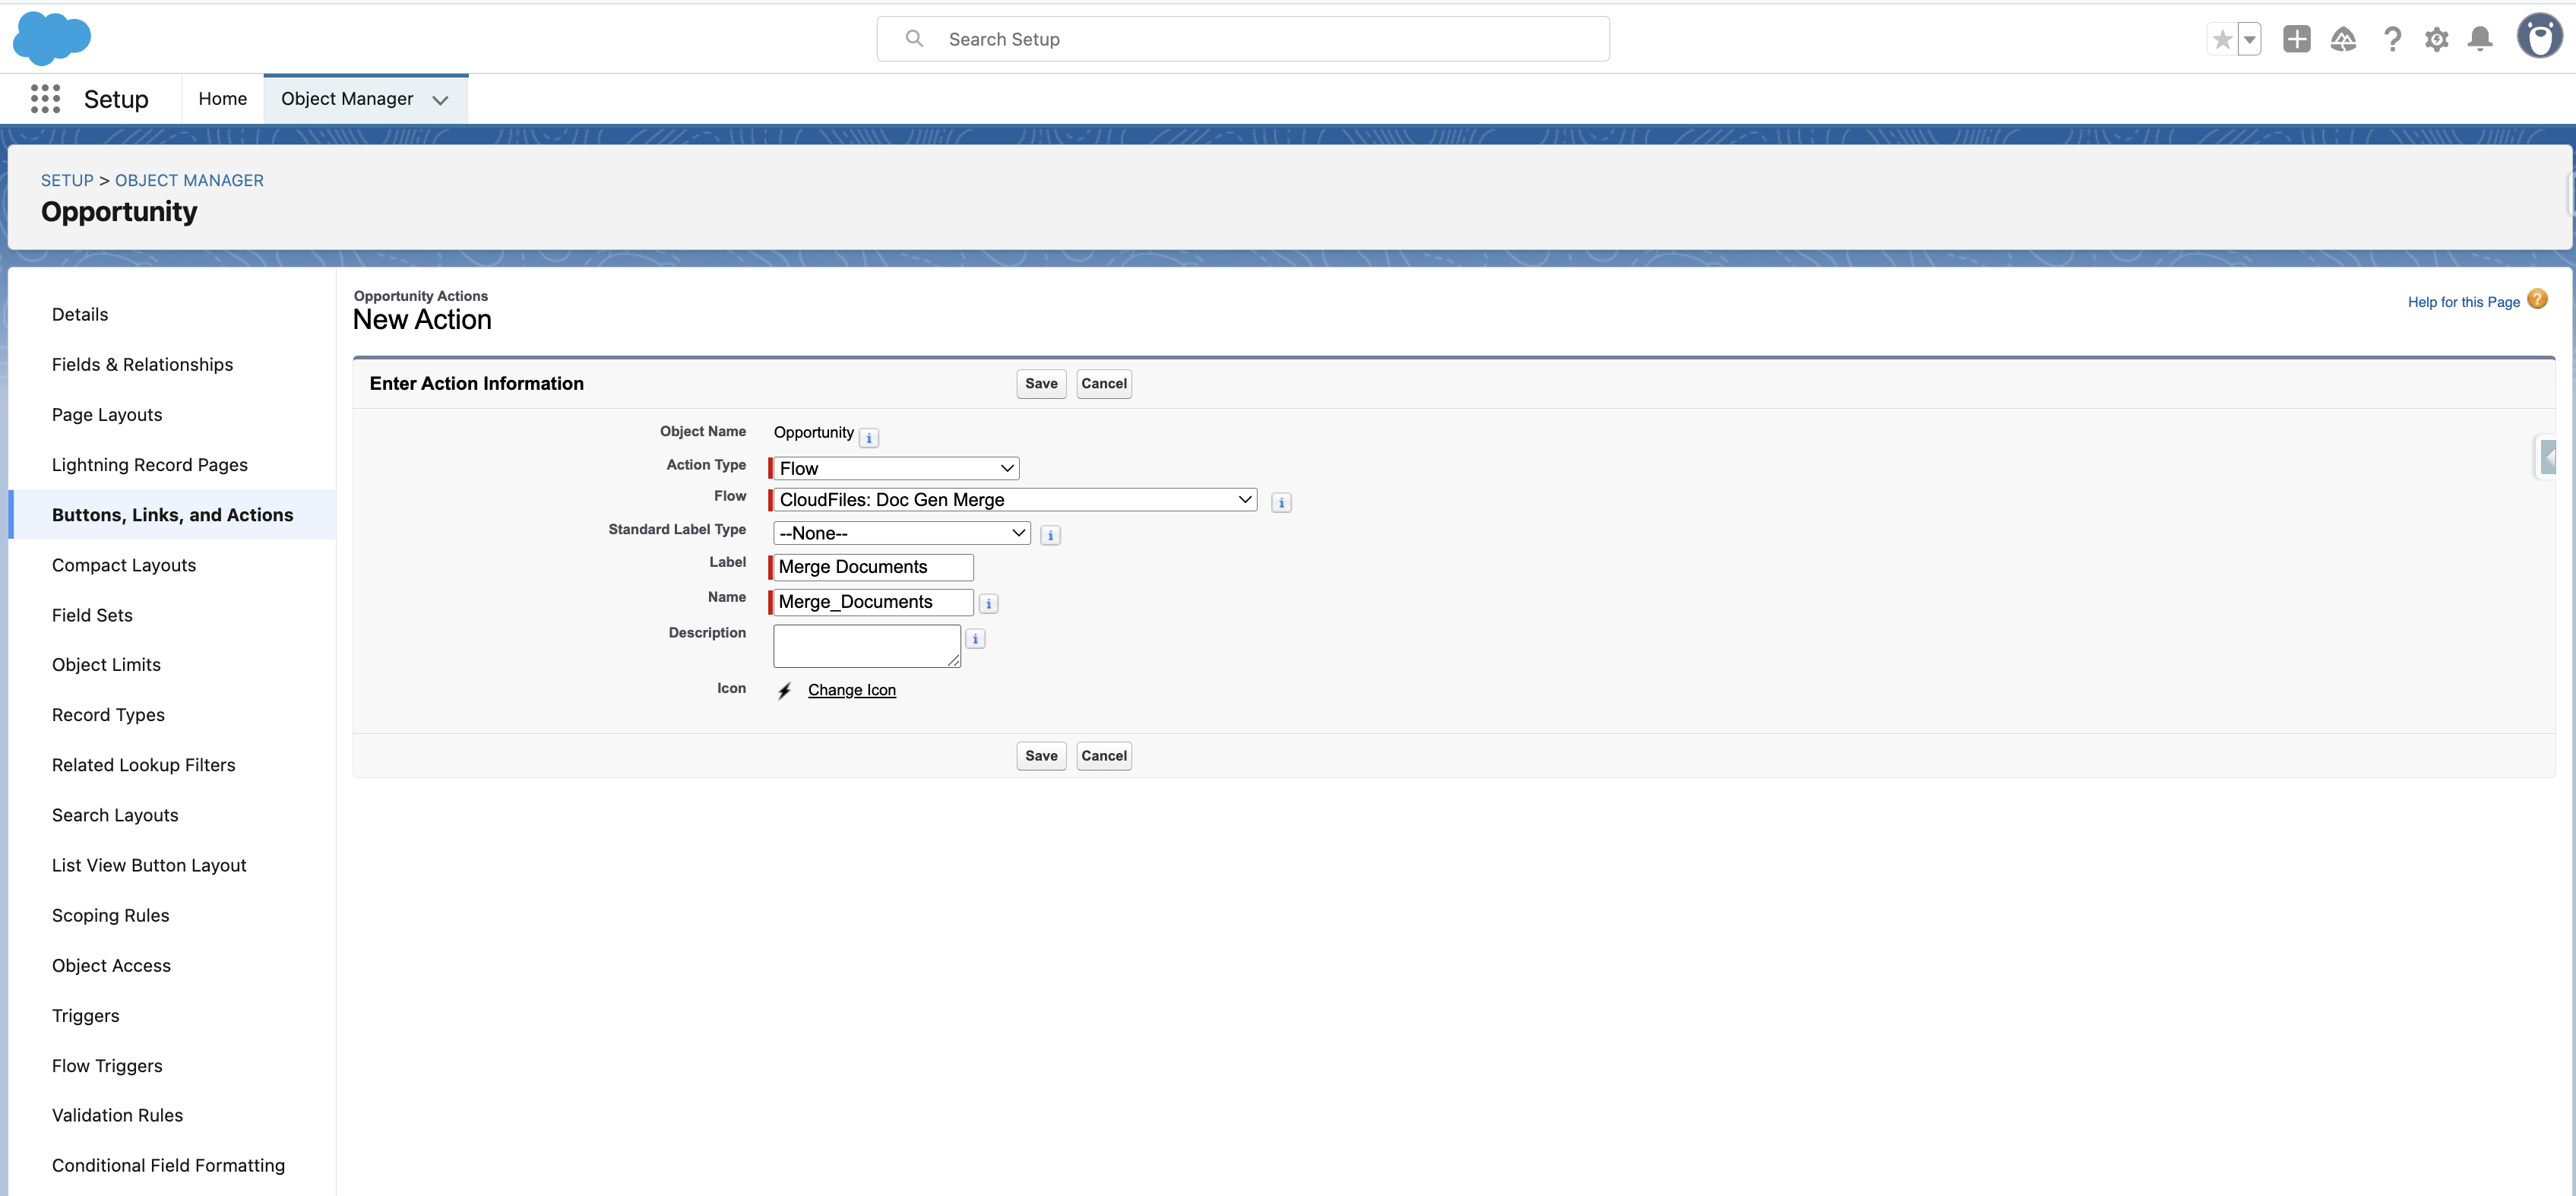
- Go to Setup → Object Manager → Opportunity → Buttons, Links, and Actions, then create a new Action of type Flow and select the Screen Flow you created.
- Give the action a label, such as Merge Documents, and save it.
- Add the button to the Opportunity Page Layout
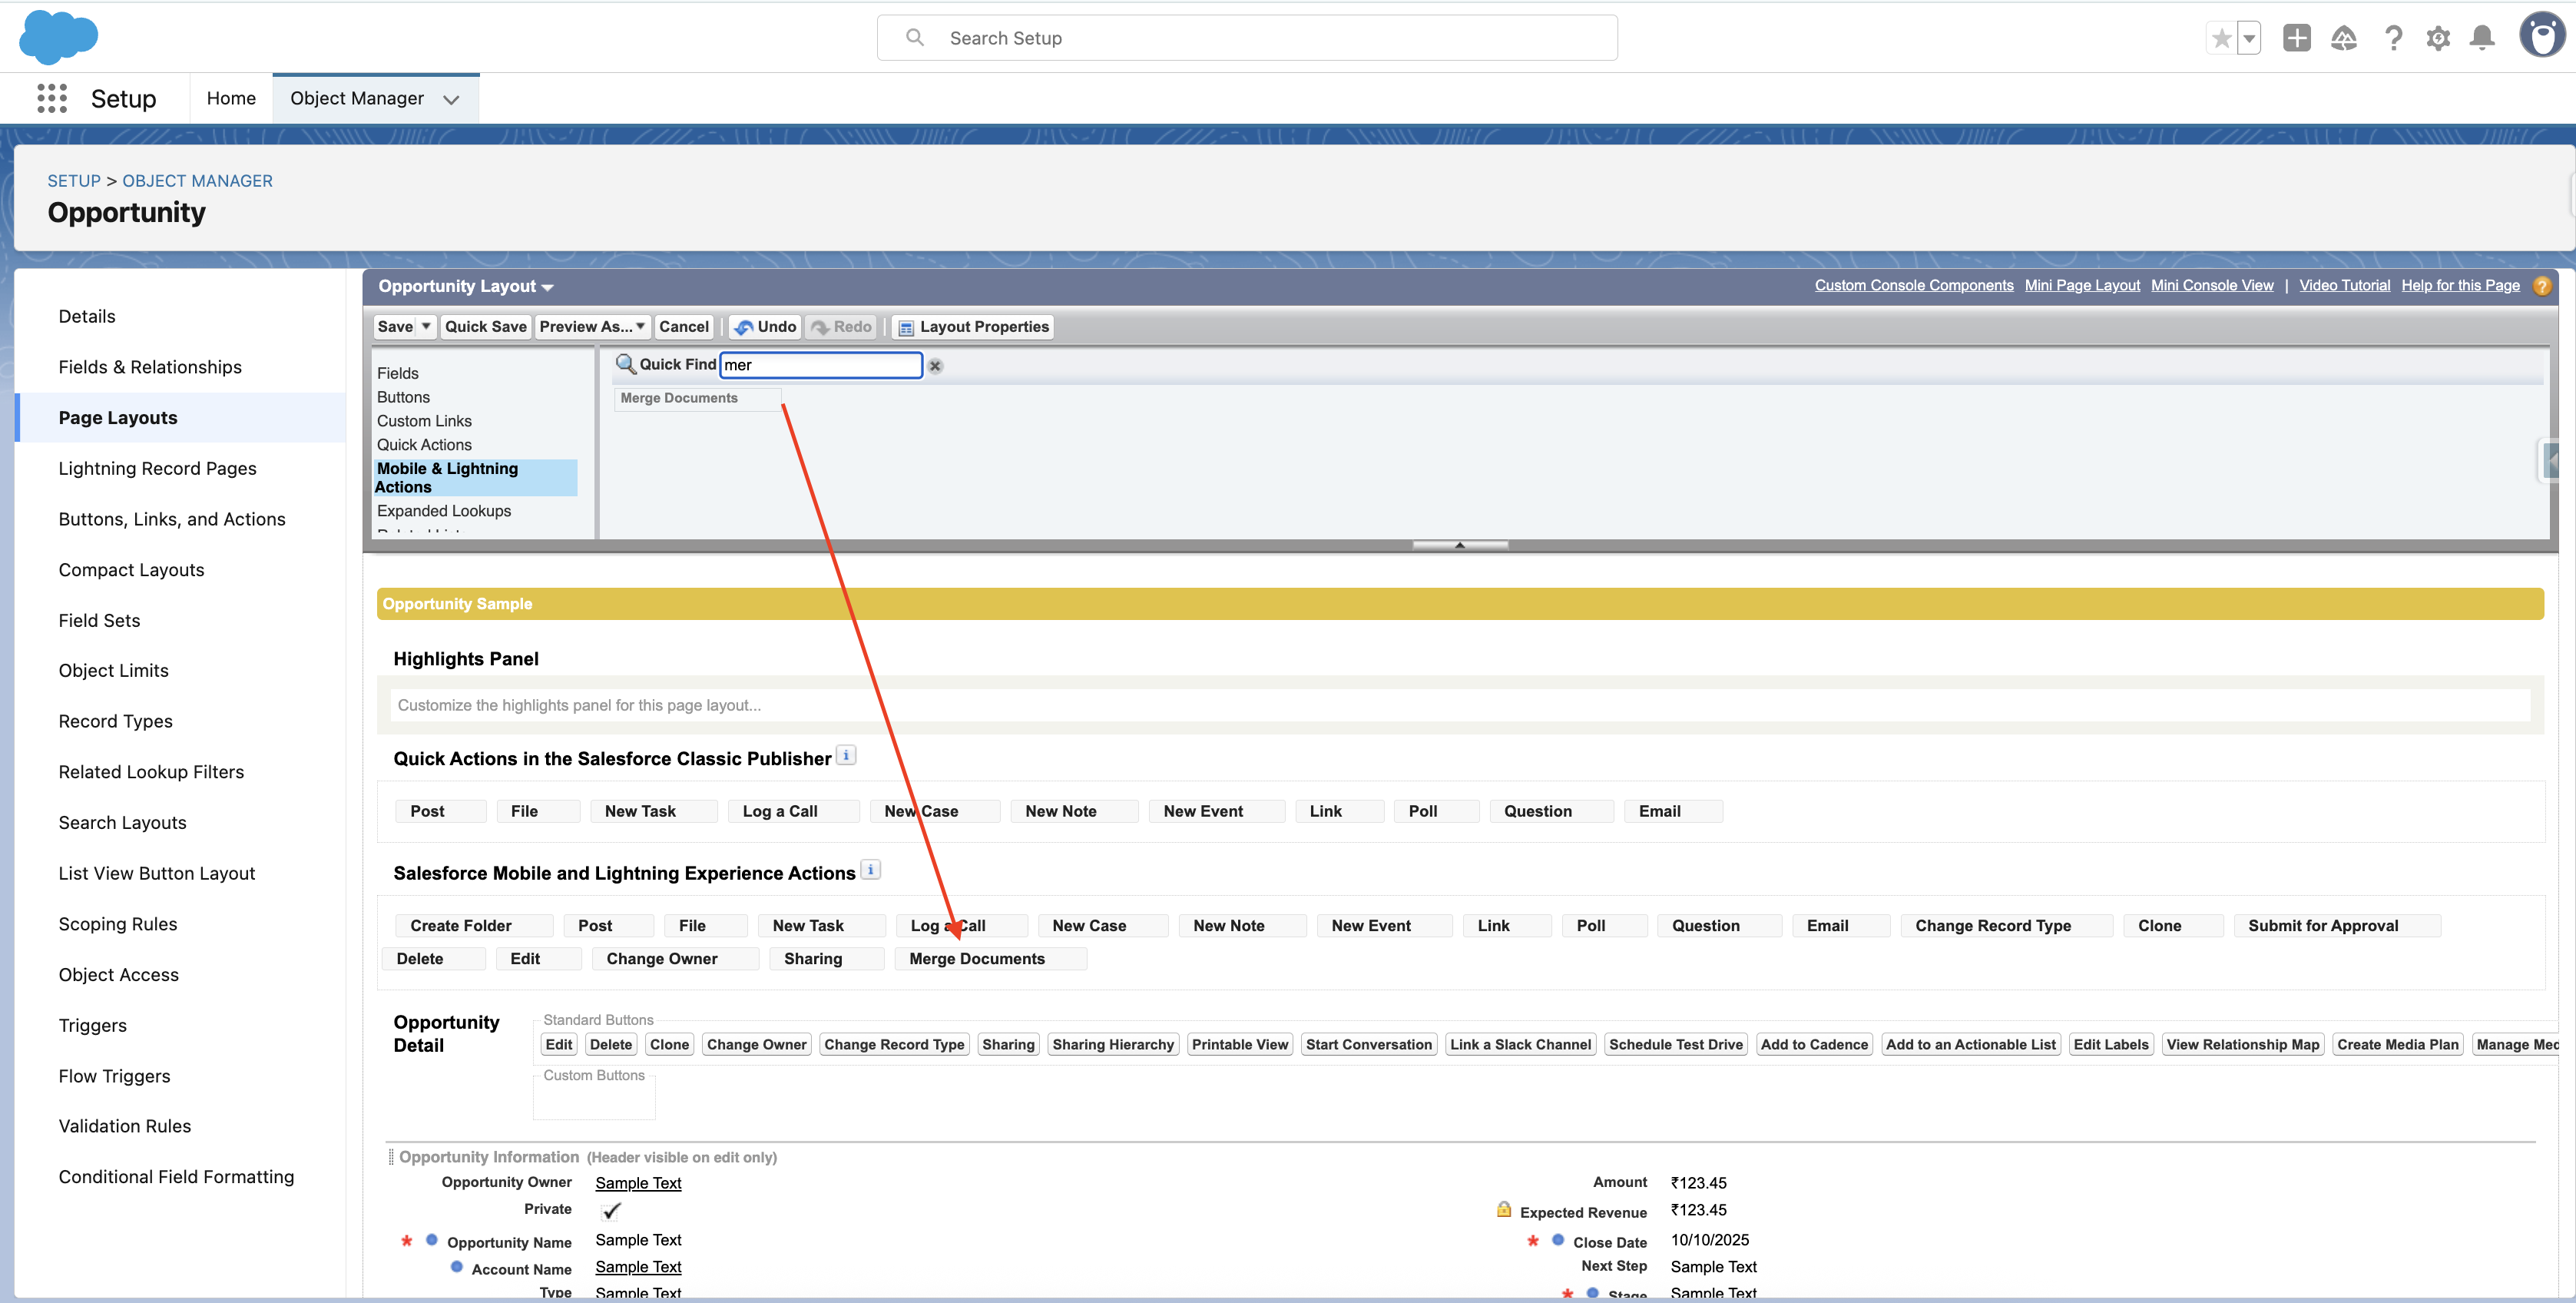
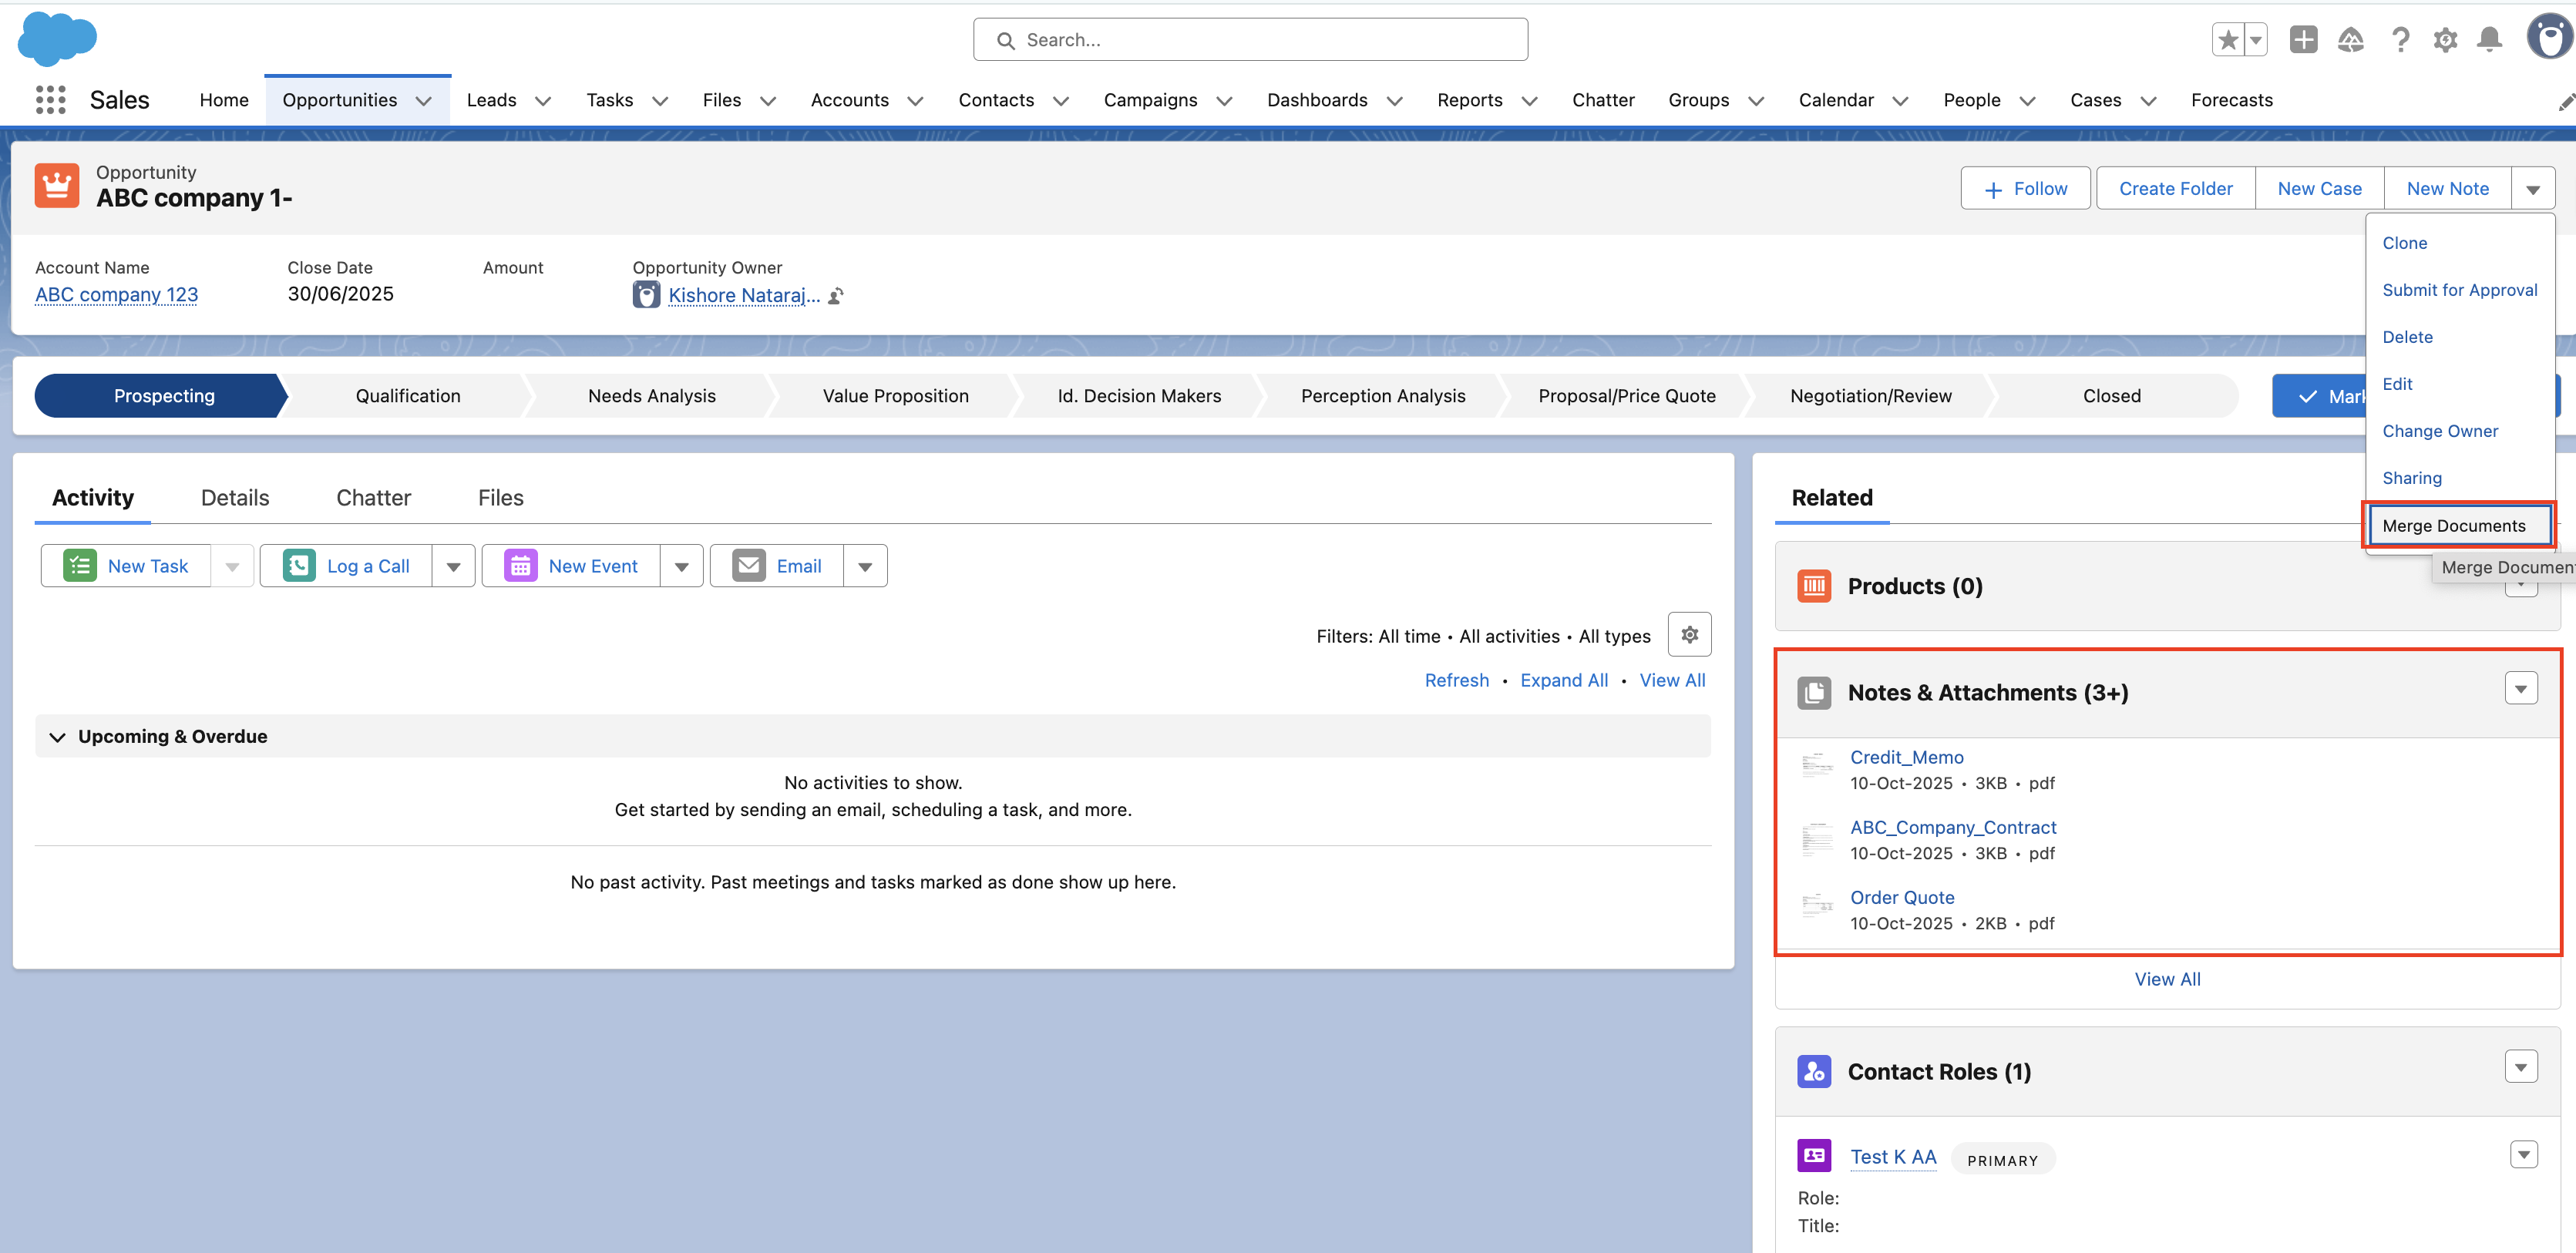
Users will now see the Merge Documents button on the Opportunity record, allowing them to select and merge files directly from the record.
NOTE: You can repeat the same setup for other Salesforce objects such as Accounts, Cases, or custom objects where users upload files, making the merge functionality available across different processes.
2 - Execute the Action
- Go to an Opportunity record.
- Upload files (e.g., invoices, contracts, images) to the record.
- Click the Merge Documents button.
- Select the files you want to merge
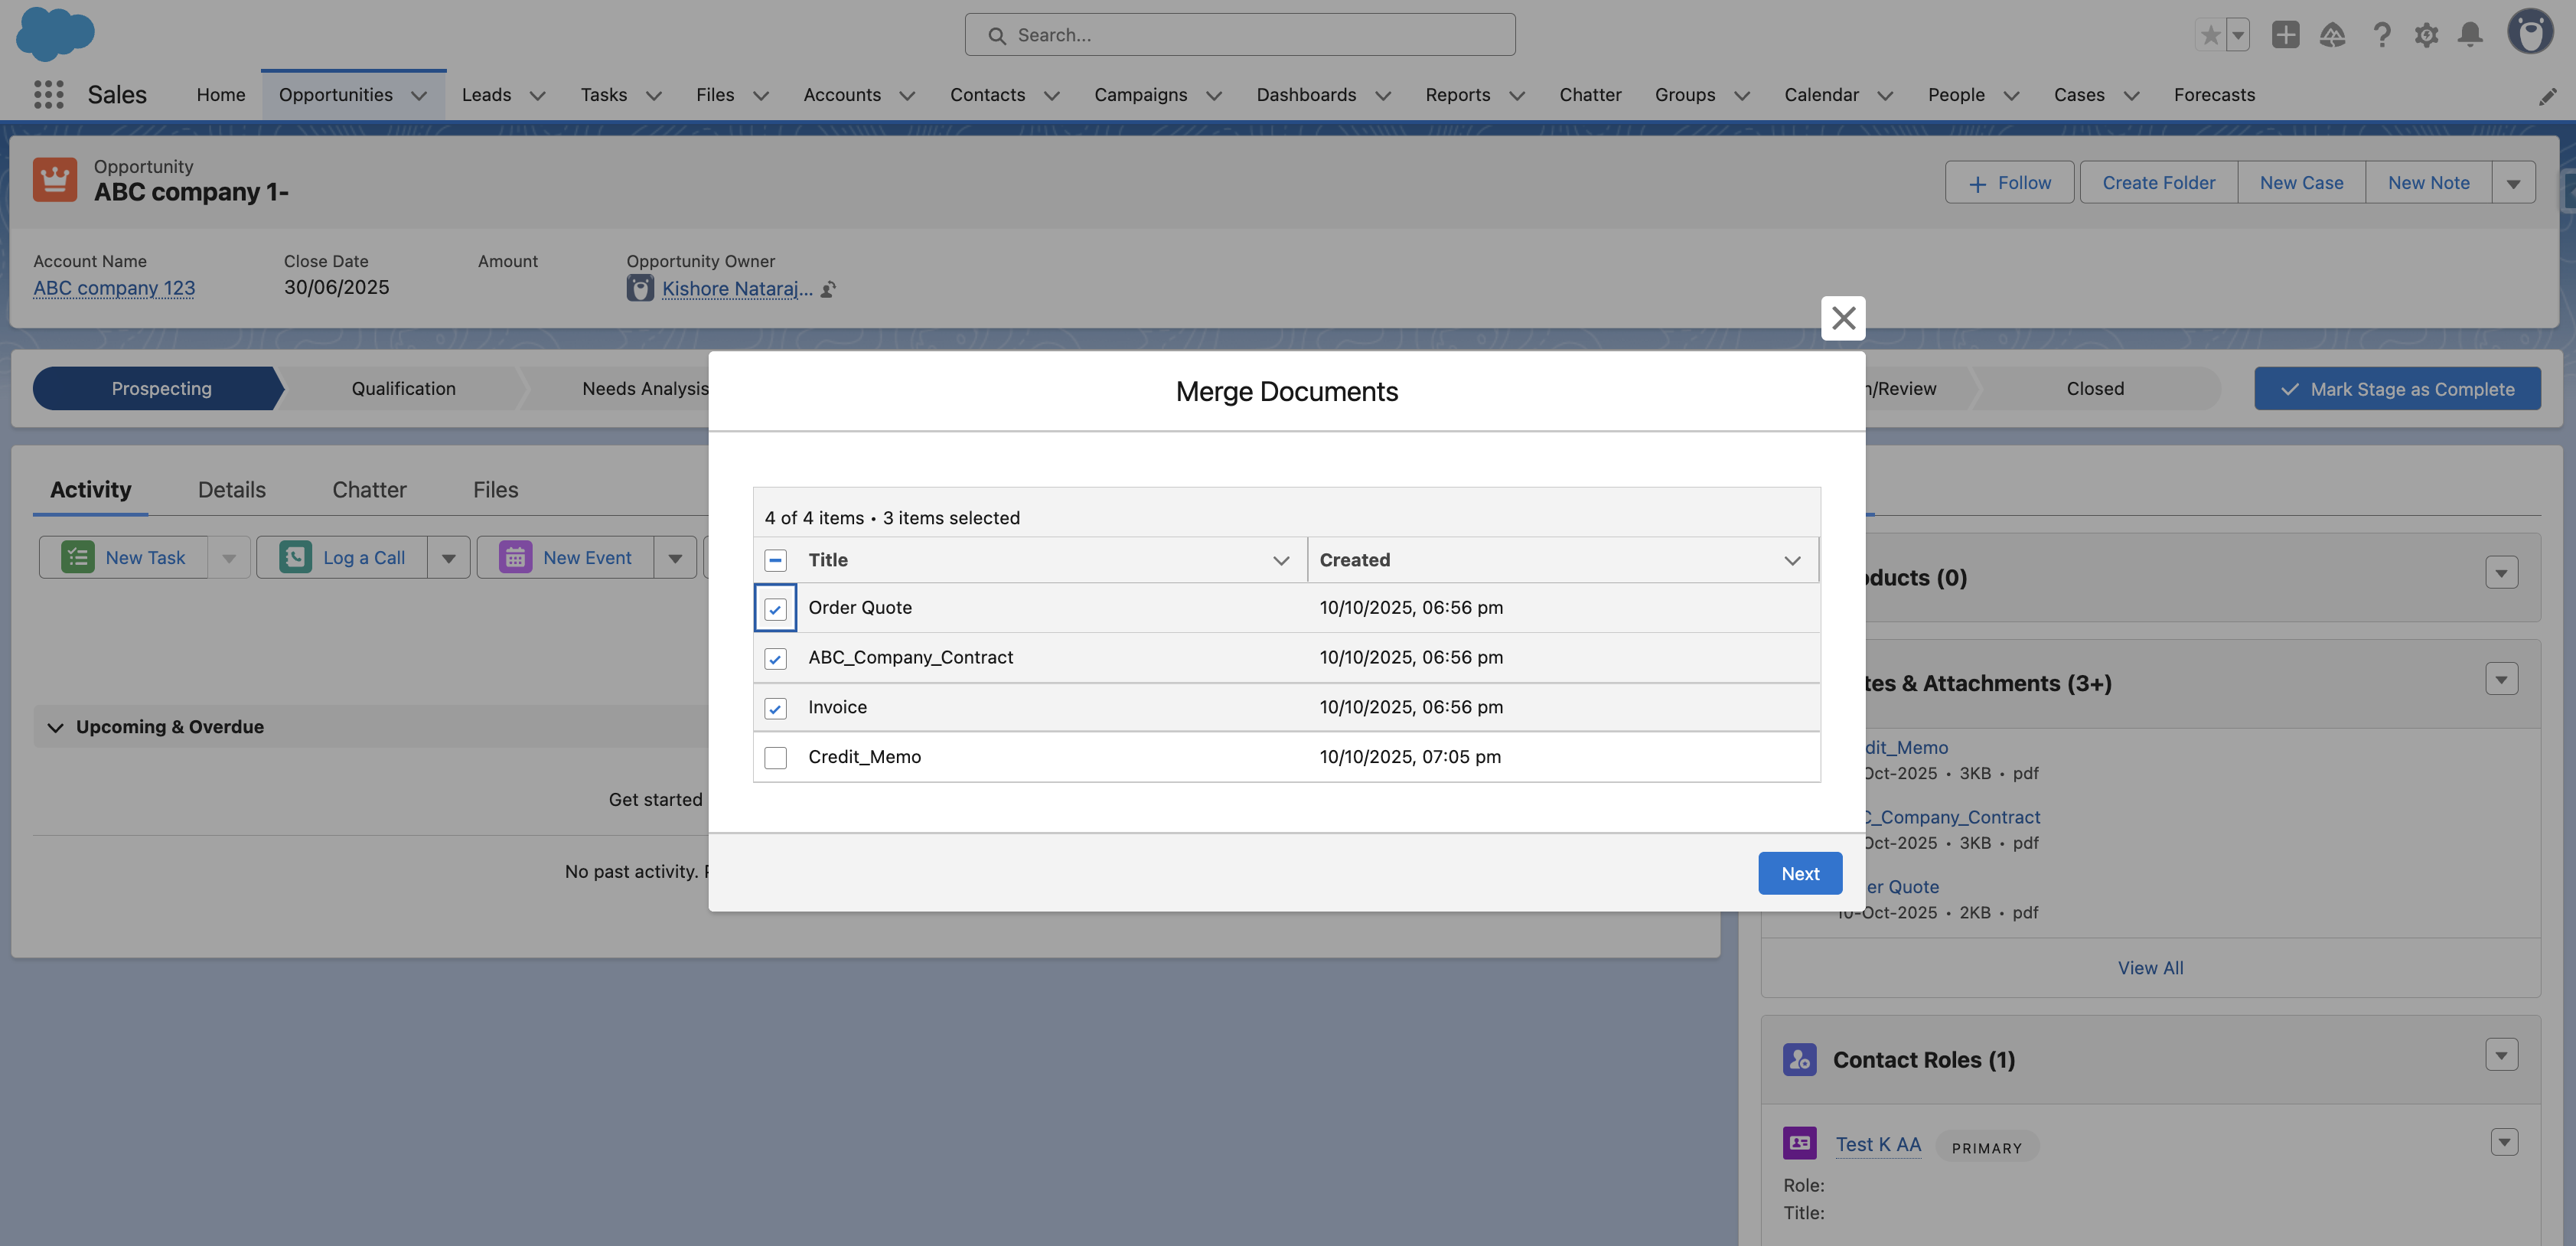
- Click Next → wait for the merge to complete.
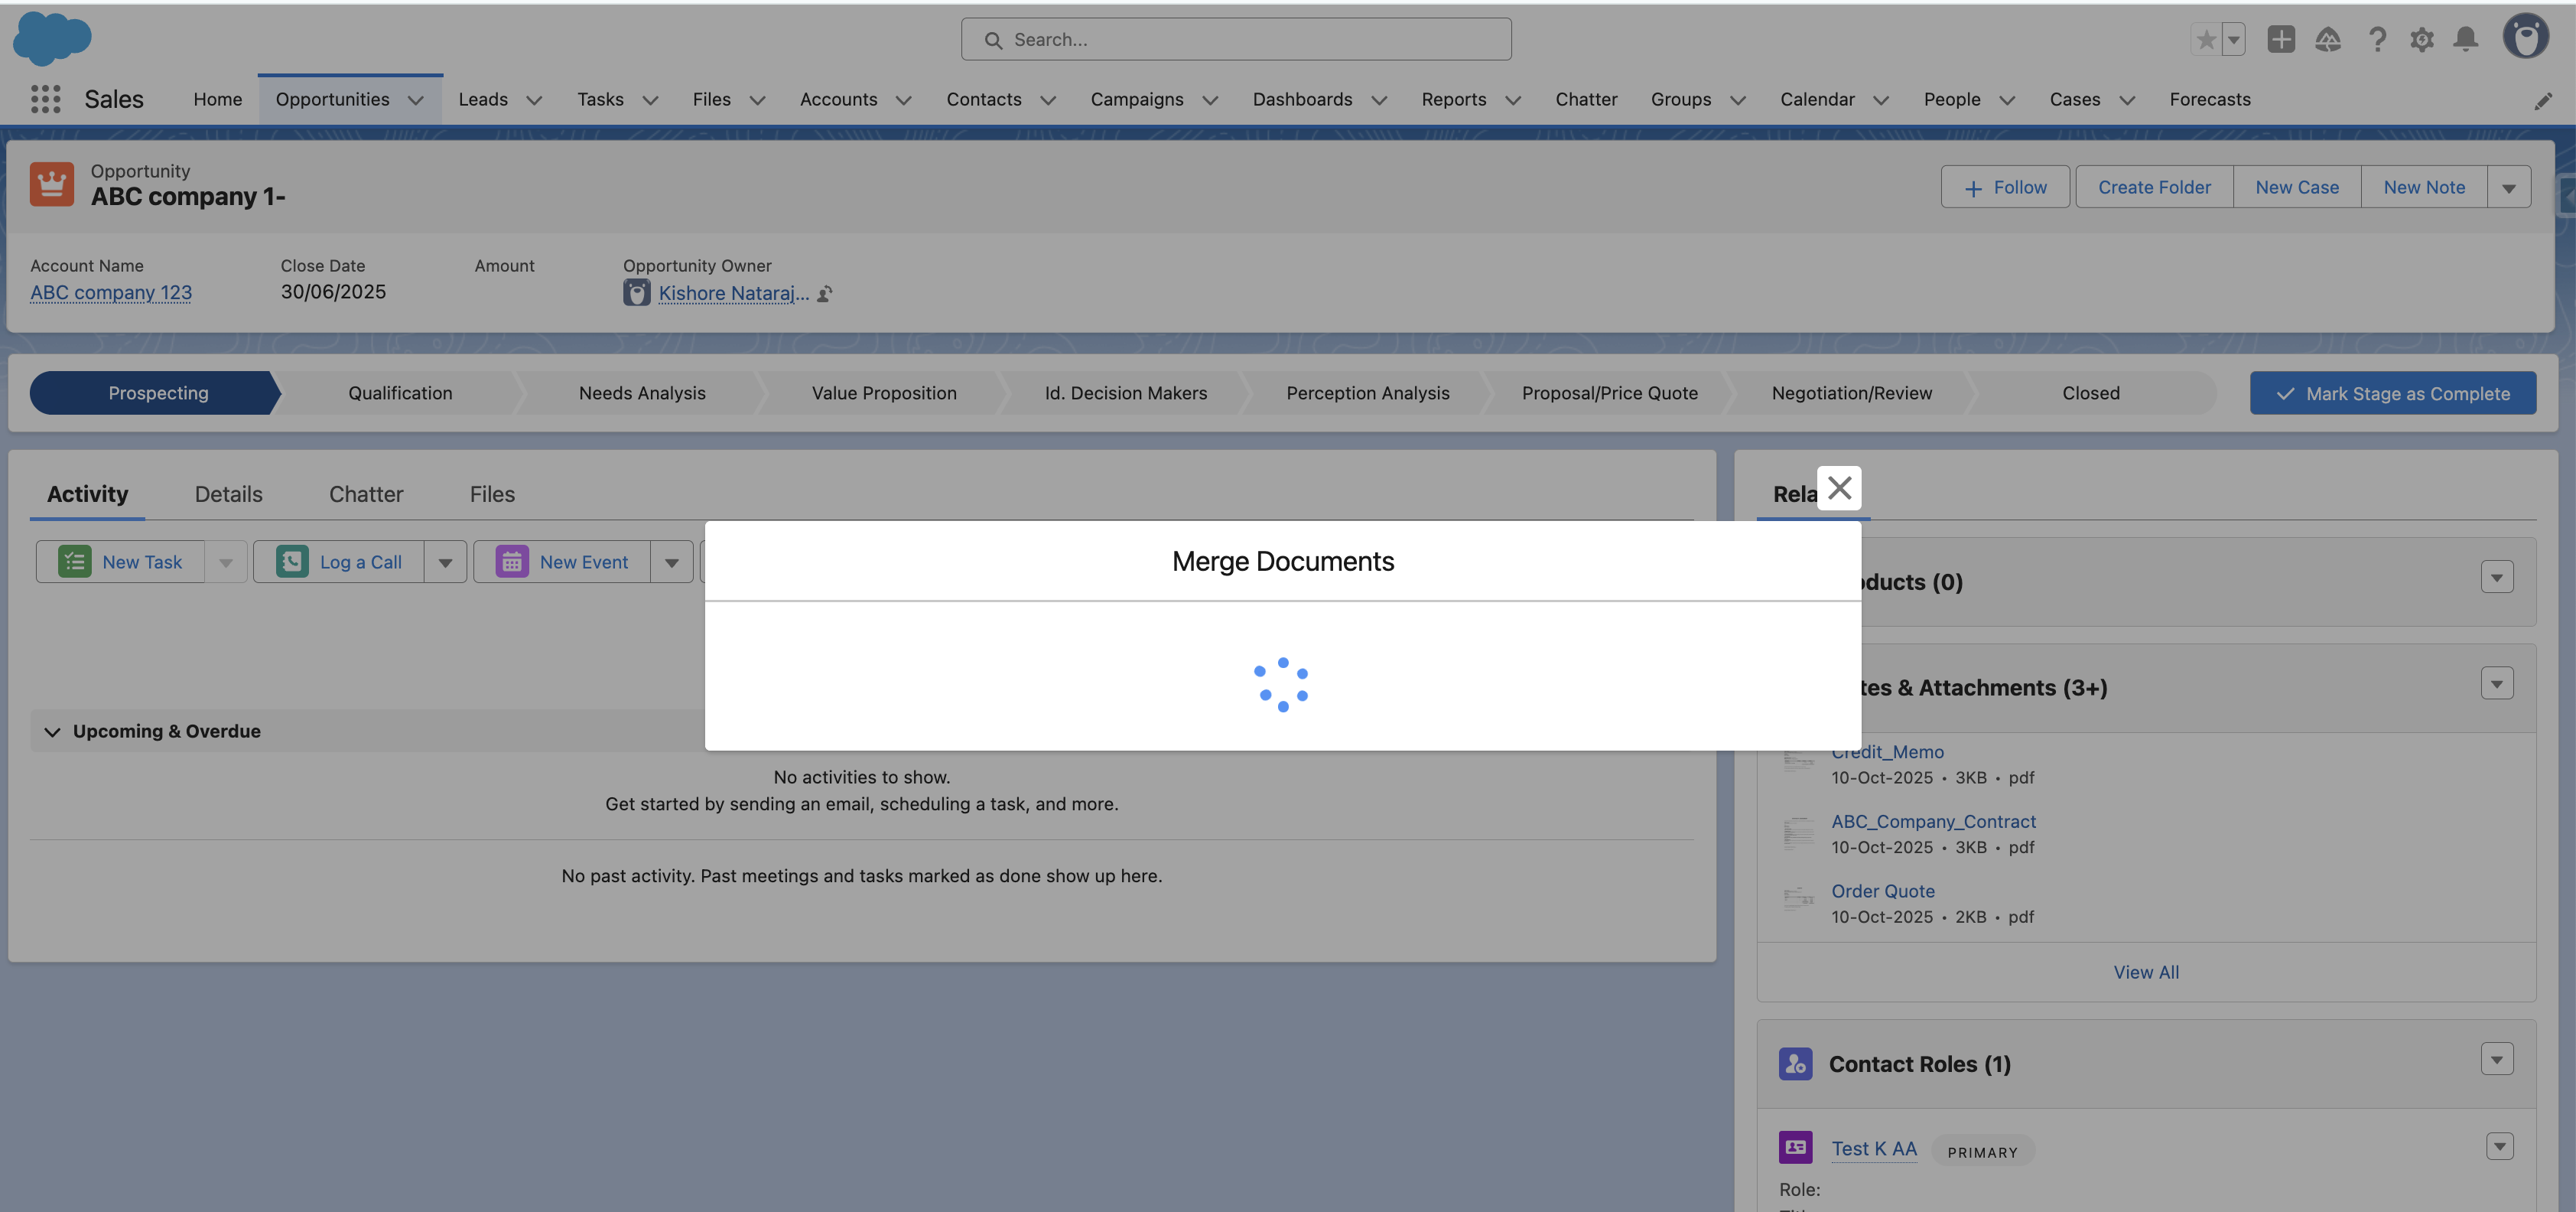
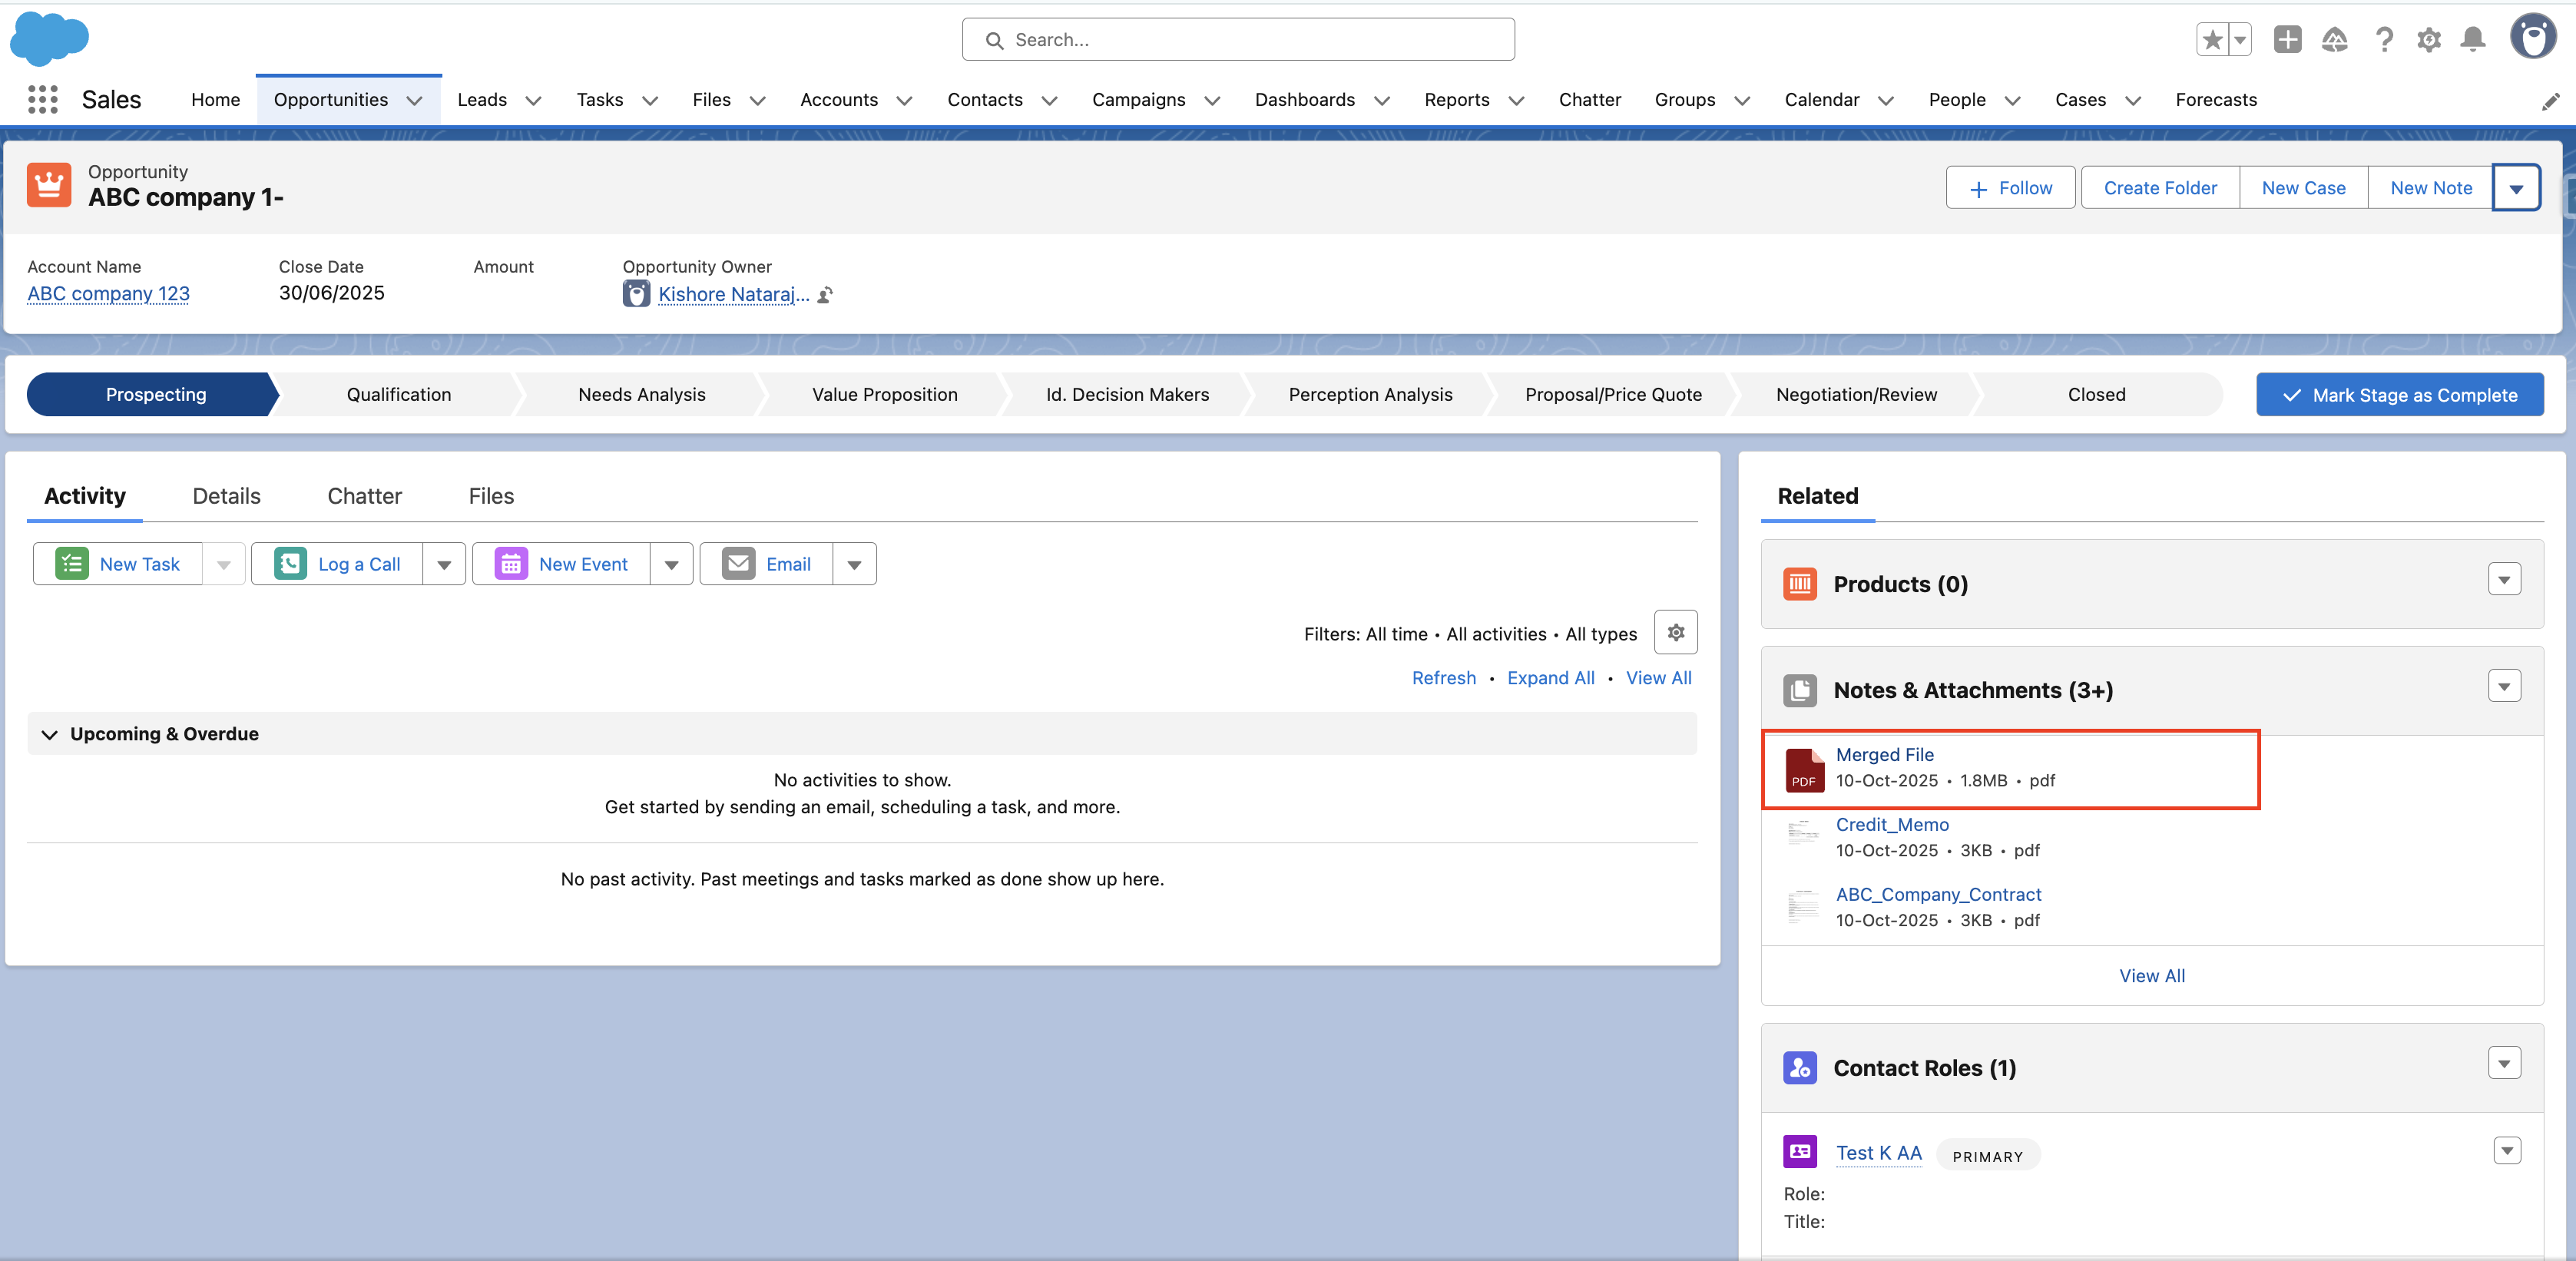
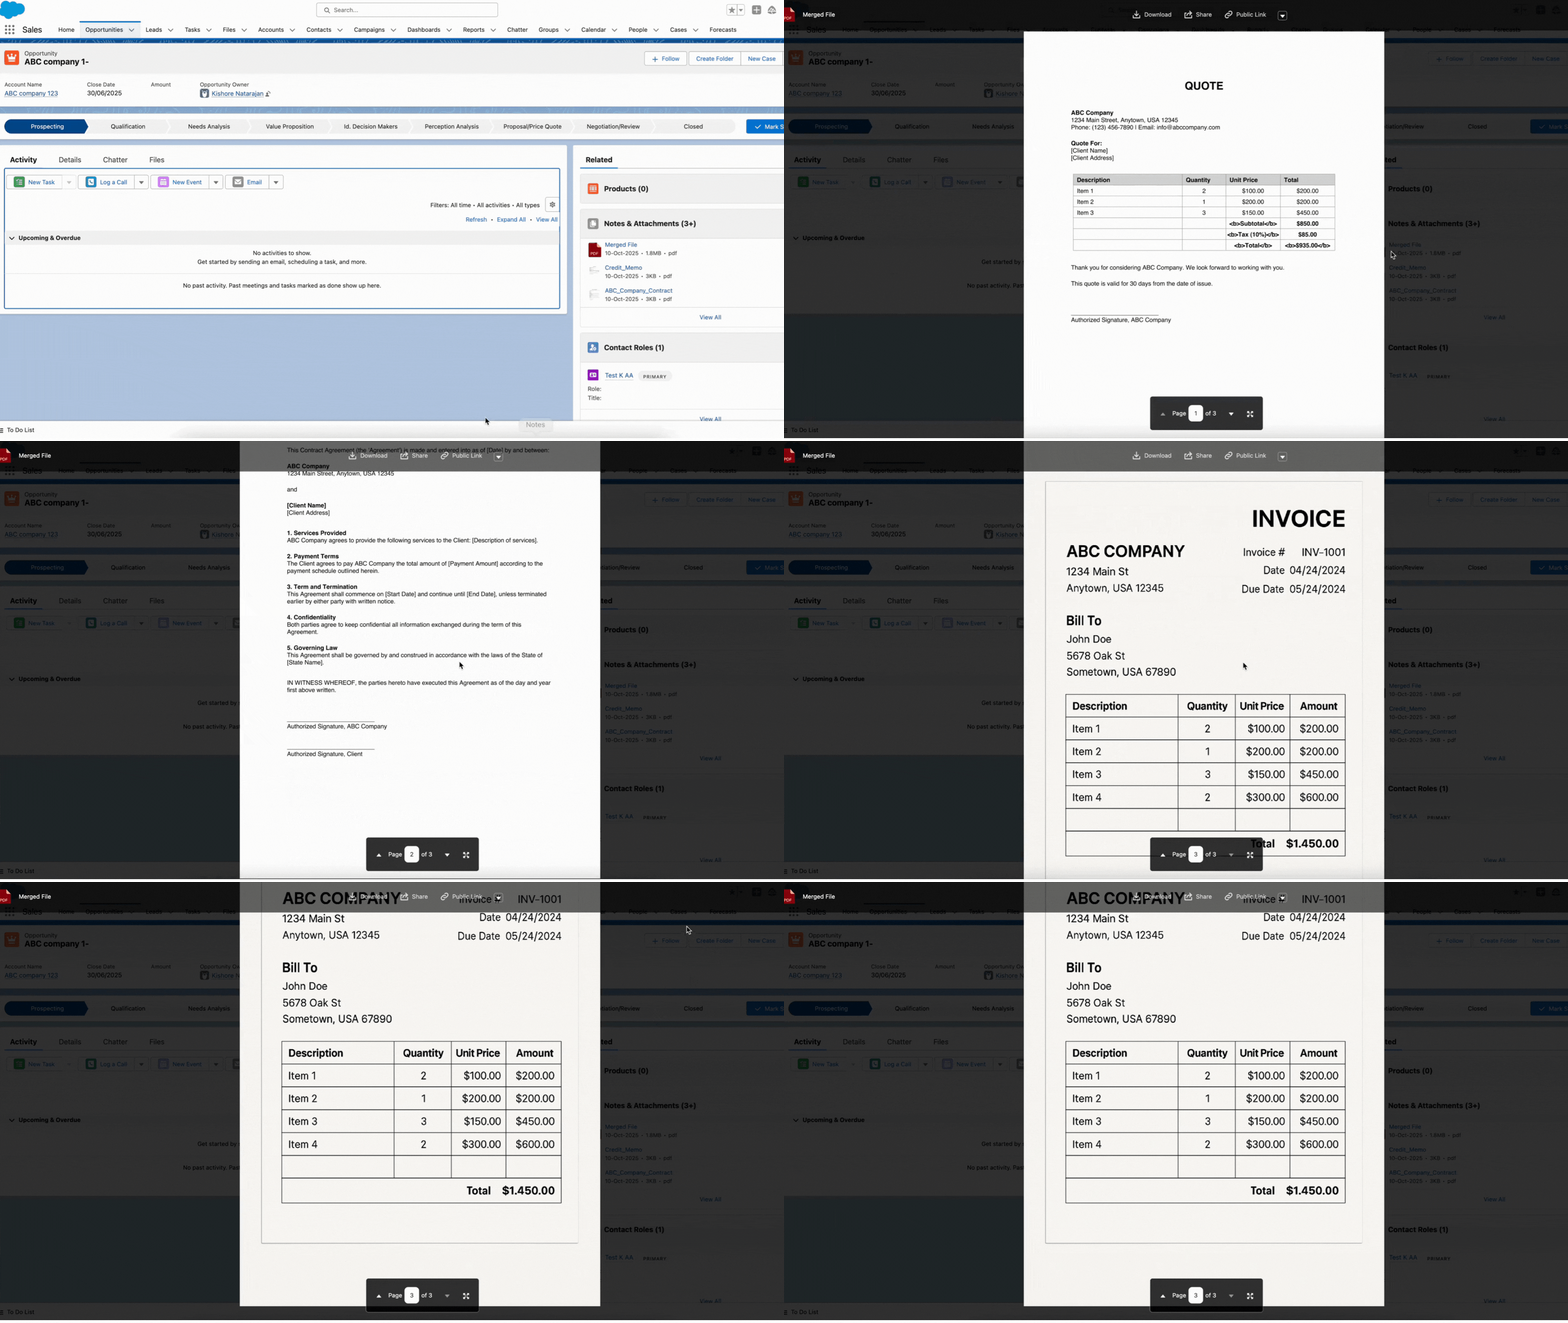
- The merged PDF will be created and added to the Opportunity record
Output Parameters:
The Merge Documents (Sync) action returns immediate outputs:
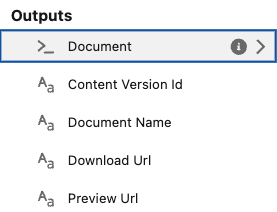
- Document - Metadata details of the generated file.
- If saved in Salesforce: includes the file’s Content Document Id and library (salesforce).
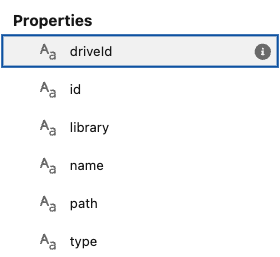
- If saved externally: includes metadata (Id, Library, DriveId, Type, Path of the file in external storage.
- Content Version Id
- The Content Version Id of the generated file (when saved in Salesforce).
- Document Name
- The name of the merged file.
- Download URL
- A dynamic link to download the generated file.
- Preview URL
- A dynamic link to preview the file. This can be displayed as a clickable hyperlink in a Screen or embedded in a custom screen component.