- Using a URL – Add a direct link to a public image. The link can come from a field in your records, a resource, or be entered manually.
- Using a Salesforce Content Version ID – Use the unique ContentVersionId of an image stored in Salesforce. This allows you to insert images securely from your Salesforce library.
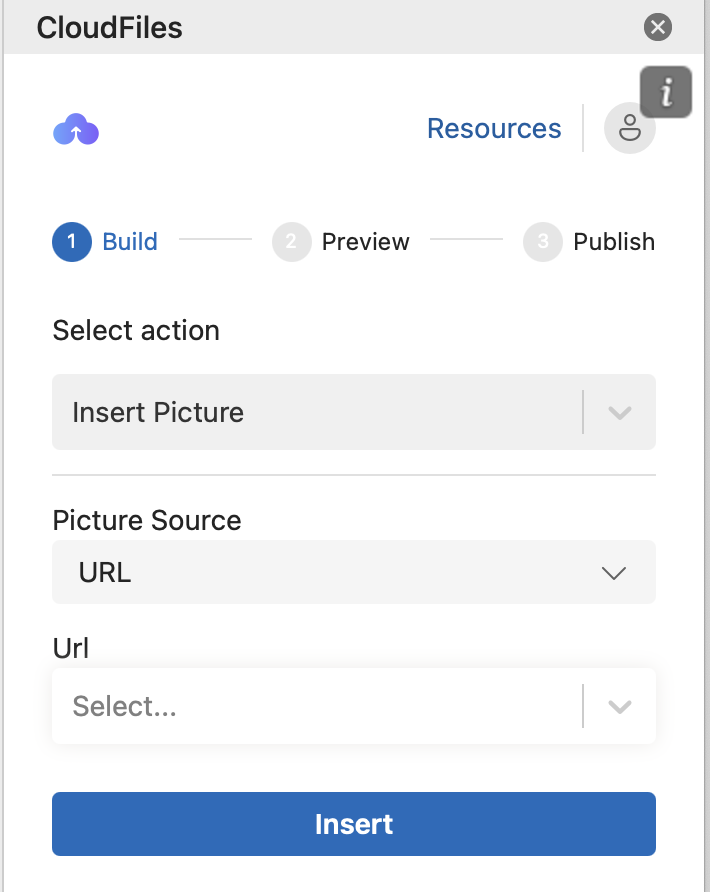
Inserting an Image Using a URL
- Select "Insert Picture"
- From the Select Action drop-down menu, choose Insert Picture.
- Choose the Picture Source
- In the Picture Source drop-down, select URL.
- Select the URL Field
- In the URL drop-down, choose the field that contains the public link to the image.
- This field can dynamically insert images based on URLs retrieved from record fields or other variable resources.
- Insert the Image
- Click Insert to place the image at the desired location.
- Adjust the Image
- Resize or reposition the image as needed.
- Apply formatting options, such as adding a border, for a polished appearance.
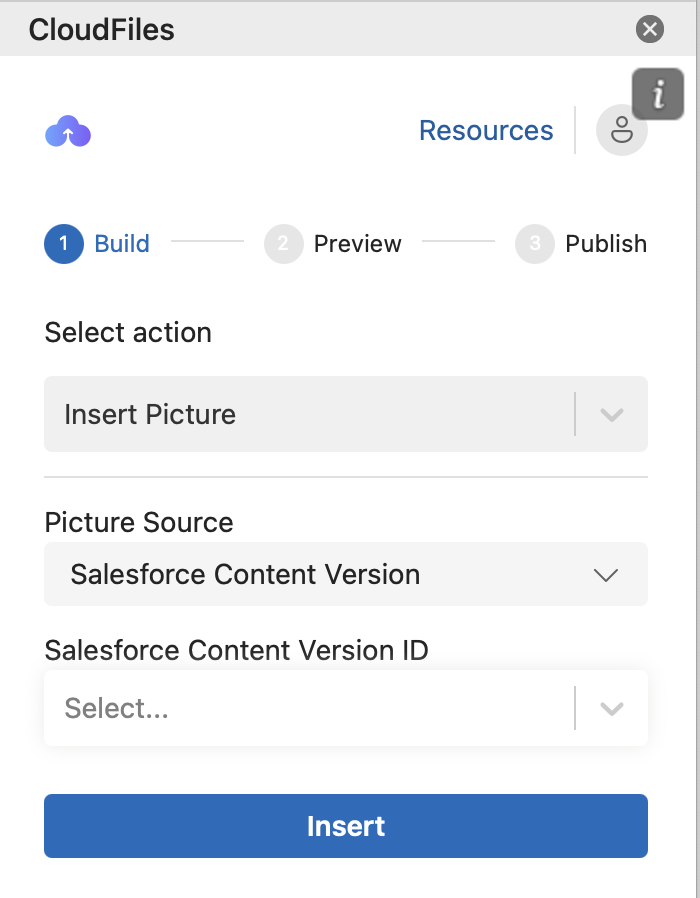
Inserting an Image Using a Salesforce Content Version ID
- Select "Insert Picture"
- From the Select Action drop-down menu, choose Insert Picture.
- Choose the Picture Source
- In the Picture Source drop-down, select Salesforce Content Version.
- Select the Content Version ID Field
- In the Salesforce Content Version ID drop-down, choose the field containing the ContentVersionId of the image you want to insert, or enter a static ContentVersionId.
- Insert the Image
- Click Insert to place the image at the desired location.
- Adjust the Image
- Resize or reposition the image as needed.
- Apply formatting options, such as adding a border, for a polished appearance.
Go to 0:17 to see the Insert Picture action being used to create a sample receipt in Microsoft Word.