If your org already has containers connected with the CloudFiles app, Add New Container shows the setup in Azure Blob instead. To use a federated credential, switch those containers first: see How to switch an Azure Blob container to a federated credential.
Before you start
- A storage account and a container in Azure. To create them, follow steps 2 and 3 of Azure Blob.
- Someone who can create apps and give permissions in your Azure account, to run a short setup script.
1 - Enter the container
- In Salesforce, open the Document Management app, go to Libraries, and select Azure Blob.
- Click Add New Container.
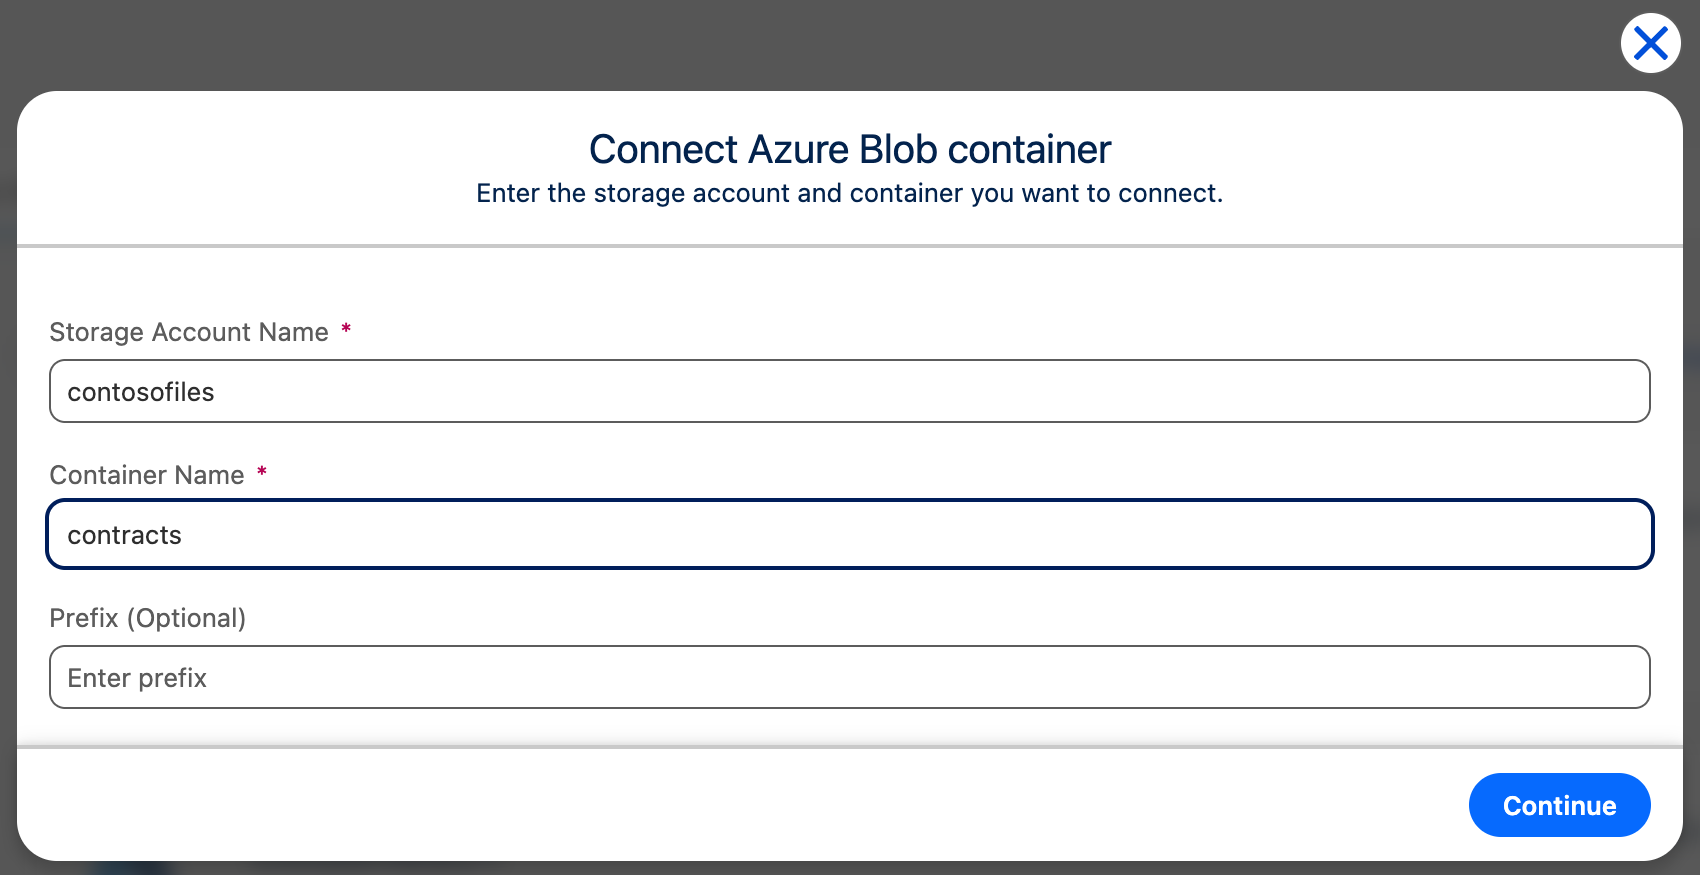
- Enter the Storage Account Name and Container Name. Add a Prefix if CloudFiles should use only one folder of the container. A prefix is also required when this container is already connected, in this org or another: each connection needs its own prefix, the prefixes can't overlap, and a container connected without a prefix can't be connected again.
- Click Continue.
2 - Run the setup script in Azure
- Click Copy setup script.
- In the Azure portal, open Cloud Shell (the >_ icon at the top of the page) and choose Bash.
- Paste the script and press Enter.
- When it finishes, it shows a Tenant ID and a Client ID. Keep these for the next step.
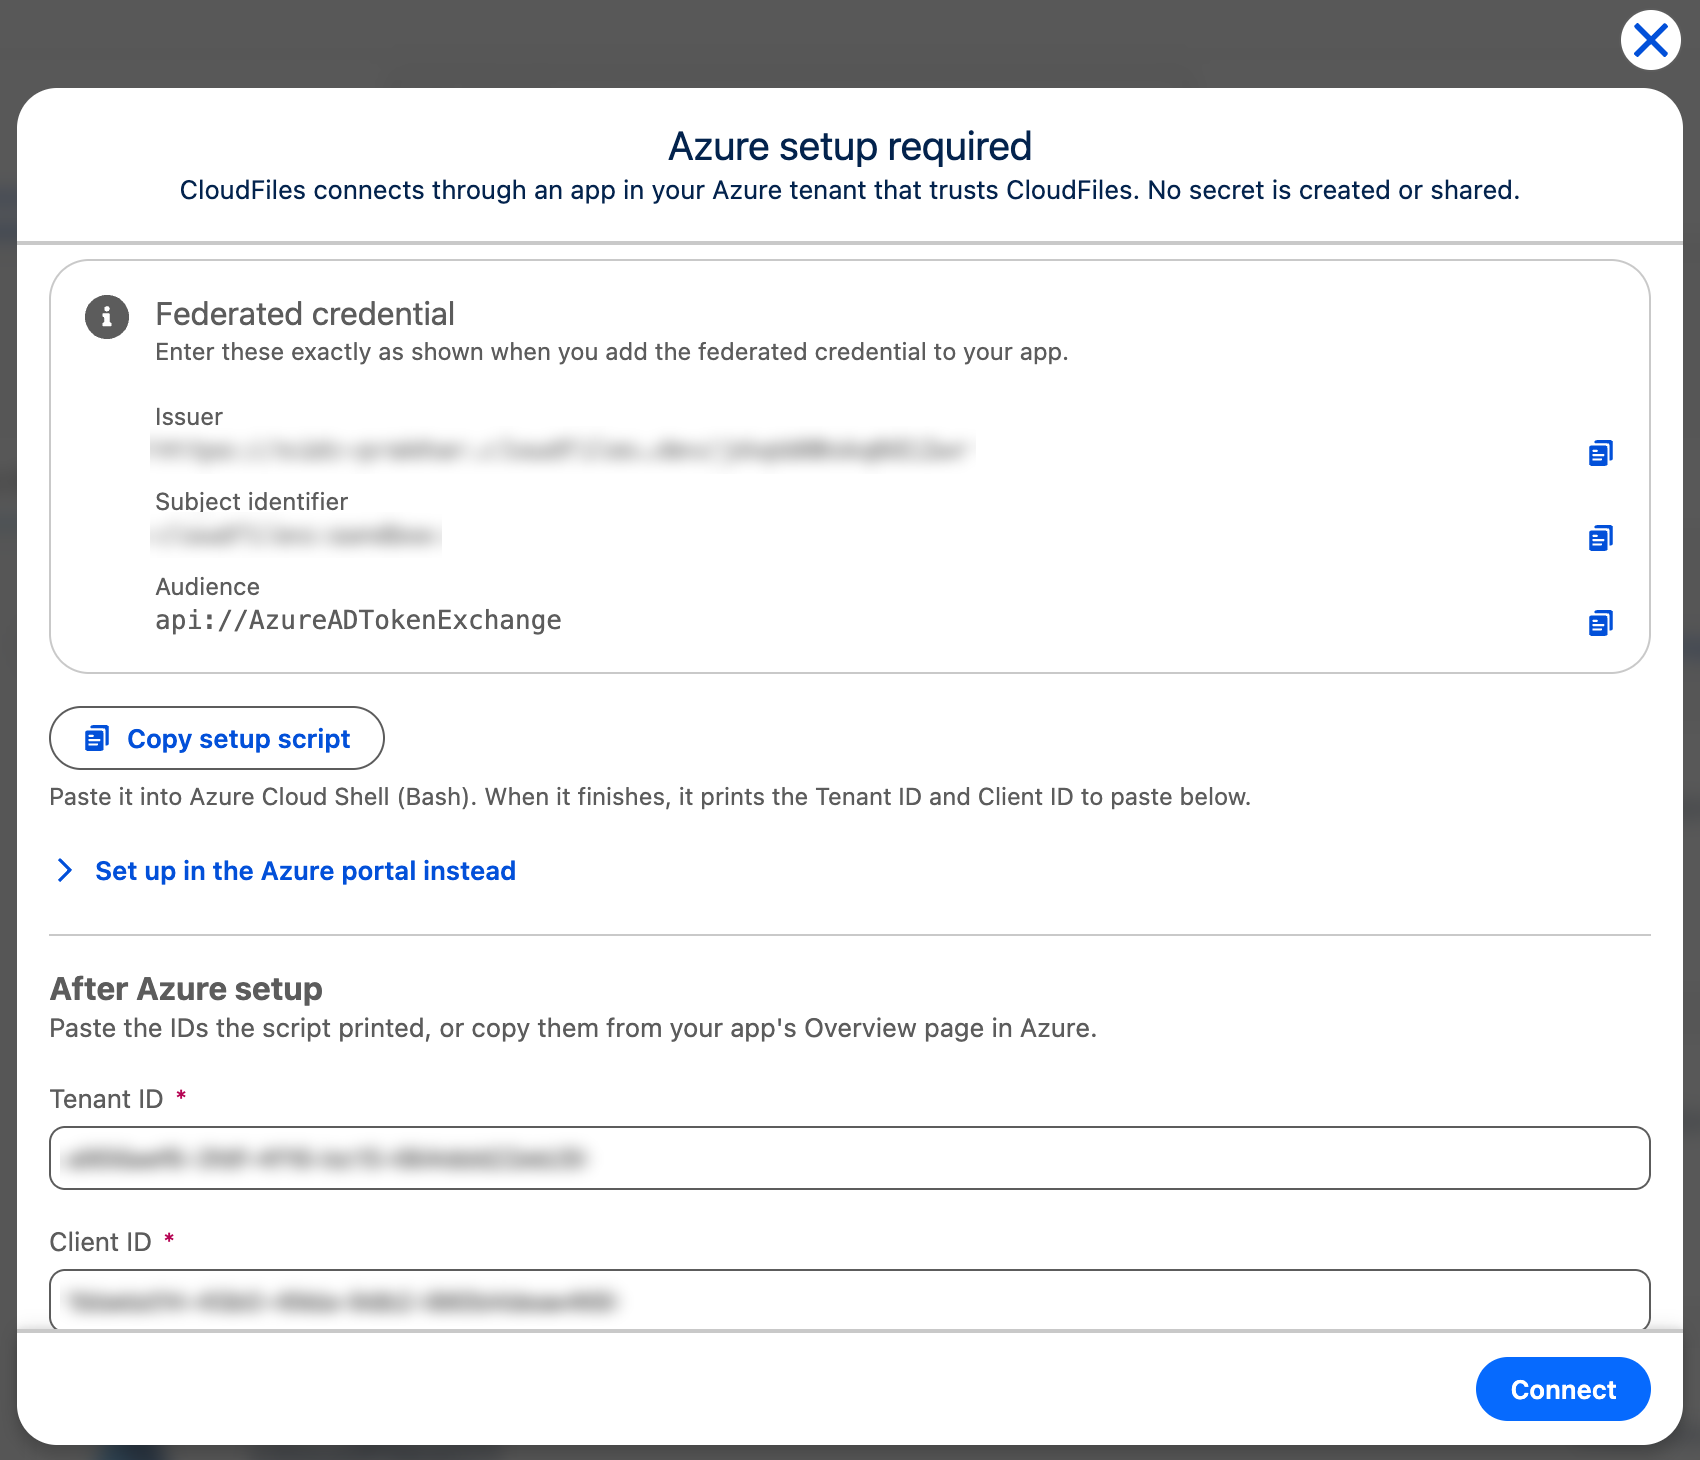
The script creates an app called CloudFiles Storage in your Azure account and gives it access to this container. It is safe to run more than once.
It tells you which step stopped it. Fix that and run the script again.
3 - Paste the IDs and connect
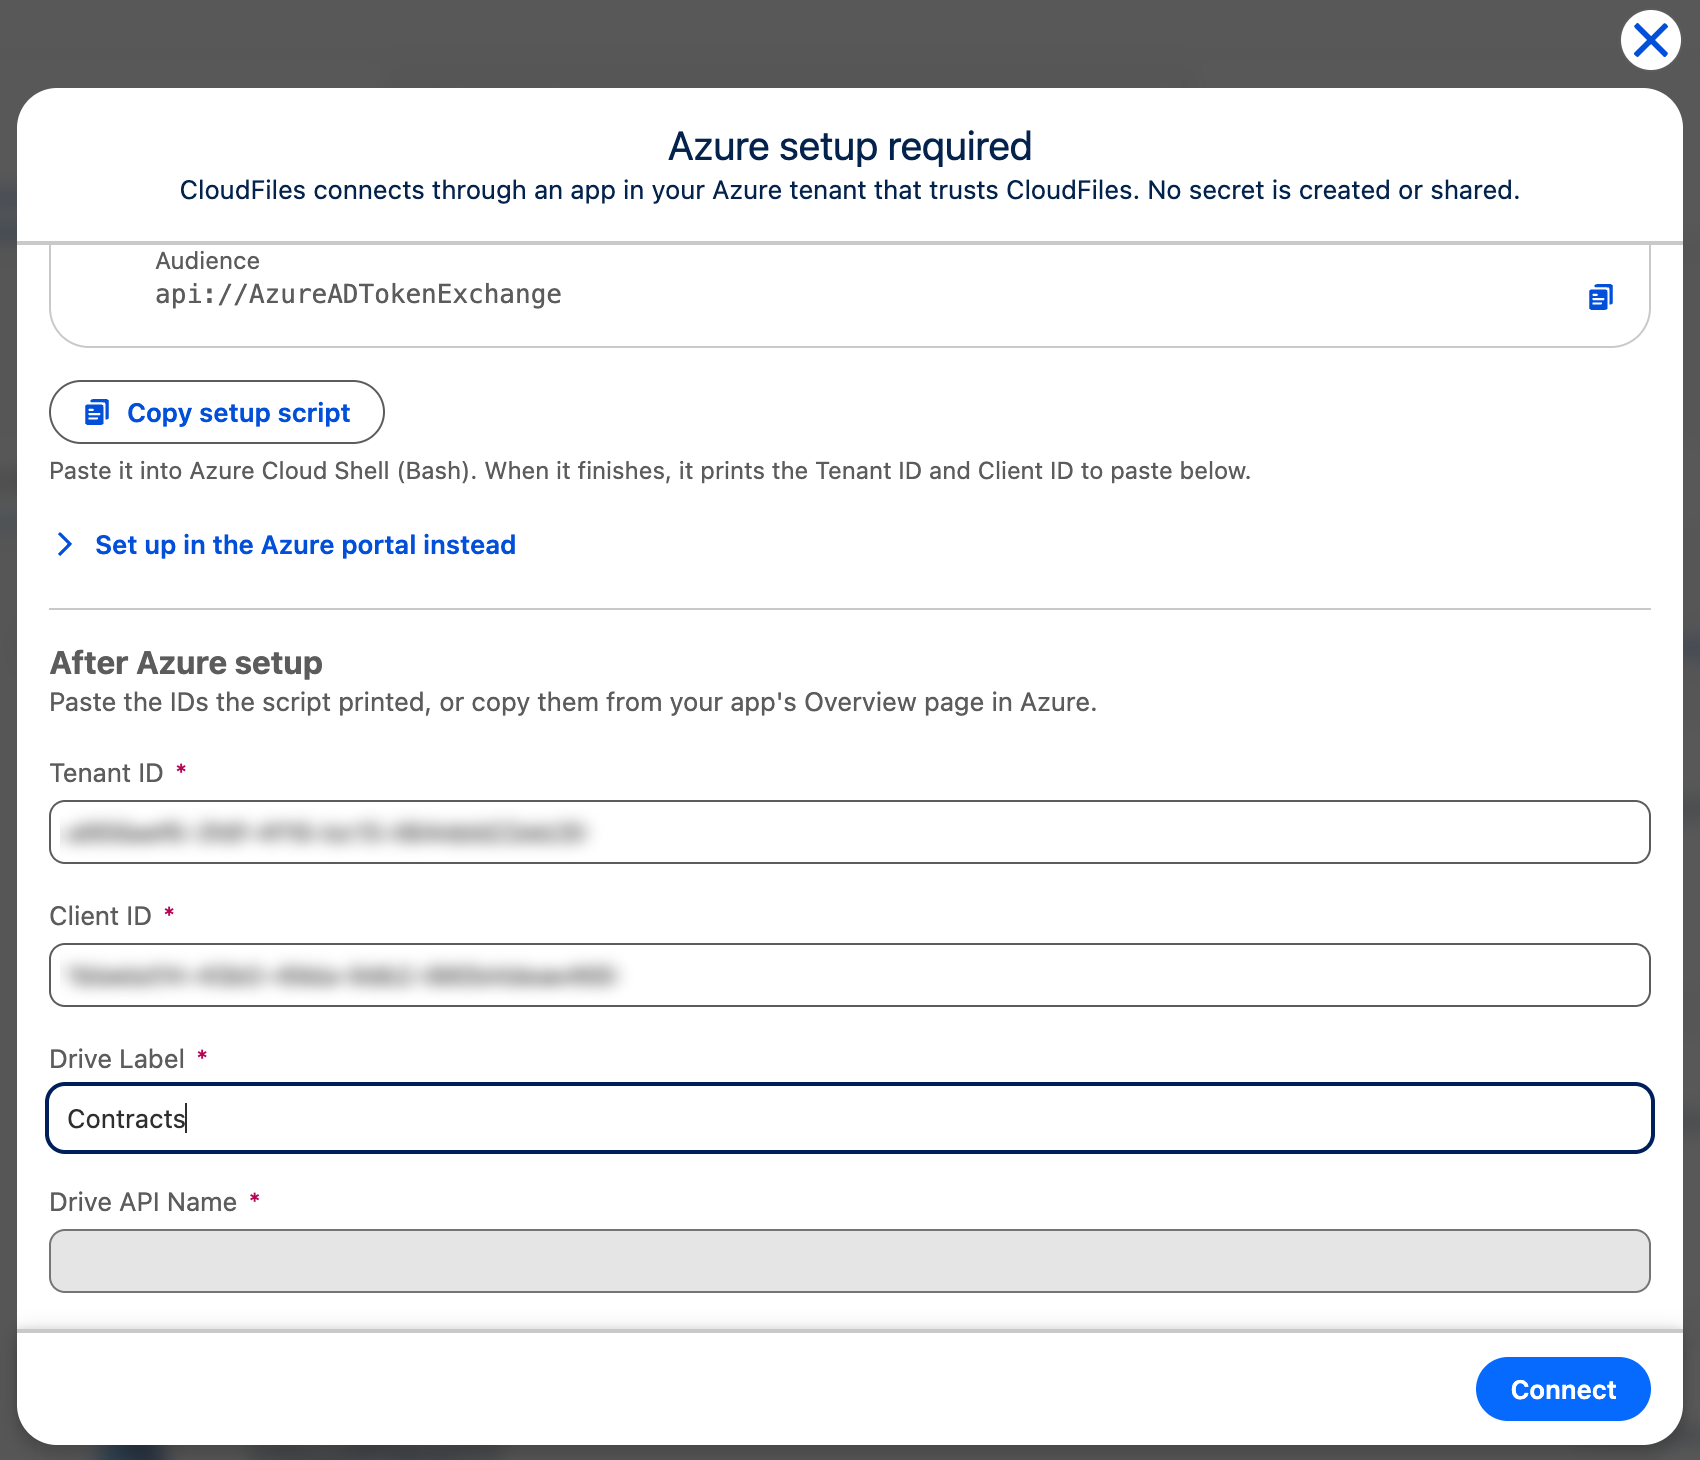
- Paste the Tenant ID and Client ID into CloudFiles.
- Enter a Drive Label if CloudFiles asks for one.
- Click Connect.
Azure can take a minute or two to finish. CloudFiles keeps checking while it does, so you don't need to click again. When it is done, your container appears under Connected Containers.
Prefer the Azure portal?
If you can't use Cloud Shell, click Set up in the Azure portal instead on the setup screen. CloudFiles shows the same steps with your details filled in:
- In Microsoft Entra ID > App registrations, create an app named CloudFiles Storage (or open it if you already have one).
- On the app, open Certificates & secrets > Federated credentials > Add credential, and choose Other issuer.
- Copy the Issuer, Subject identifier and Audience from CloudFiles into the credential.
- On the storage account, add the role Storage Blob Delegator for the app.
- On the container, add the role Storage Blob Data Contributor for the app.
- Copy the Directory (tenant) ID and Application (client) ID from the app's Overview page into CloudFiles.
Connecting more containers
Add each new container in CloudFiles and run the script it gives you. The script uses the same app every time, so the Tenant ID and Client ID stay the same. Sandboxes get their own app, CloudFiles Storage (sandboxes).
If the connection doesn't go through
| If CloudFiles says | What to do |
|---|---|
| The federated credential doesn't match | Run the setup script again, then click Connect. |
| A storage permission is missing | Wait a few minutes for Azure to finish, or run the setup script again, then click Connect. |
| Your Azure account doesn't allow this kind of connection | Ask your Azure administrator, or contact support@cloudfiles.io. |
| Only a Close button, in a sandbox | The sandbox is still being set up. Try again in a few minutes. |