What to Expect
By the end of this tutorial, you will know how to:
- Allow users to select document templates directly from a Salesforce record page using a screen flow.
- Generate documents from one or more templates in a single process.
- Decide where generated documents are stored, either in Salesforce or external storage.
Tutorial Video
Refer to the quick video if you would like to have a visual guide for this tutorial. Read on if you prefer textual content.
Video will be added soon
Prerequisites
Install CloudFiles in Salesforce
CloudFiles is available on the Salesforce AppExchange and can be installed using the standard app installation process. Check out Installation and Configuration guides to set up your account and user access.
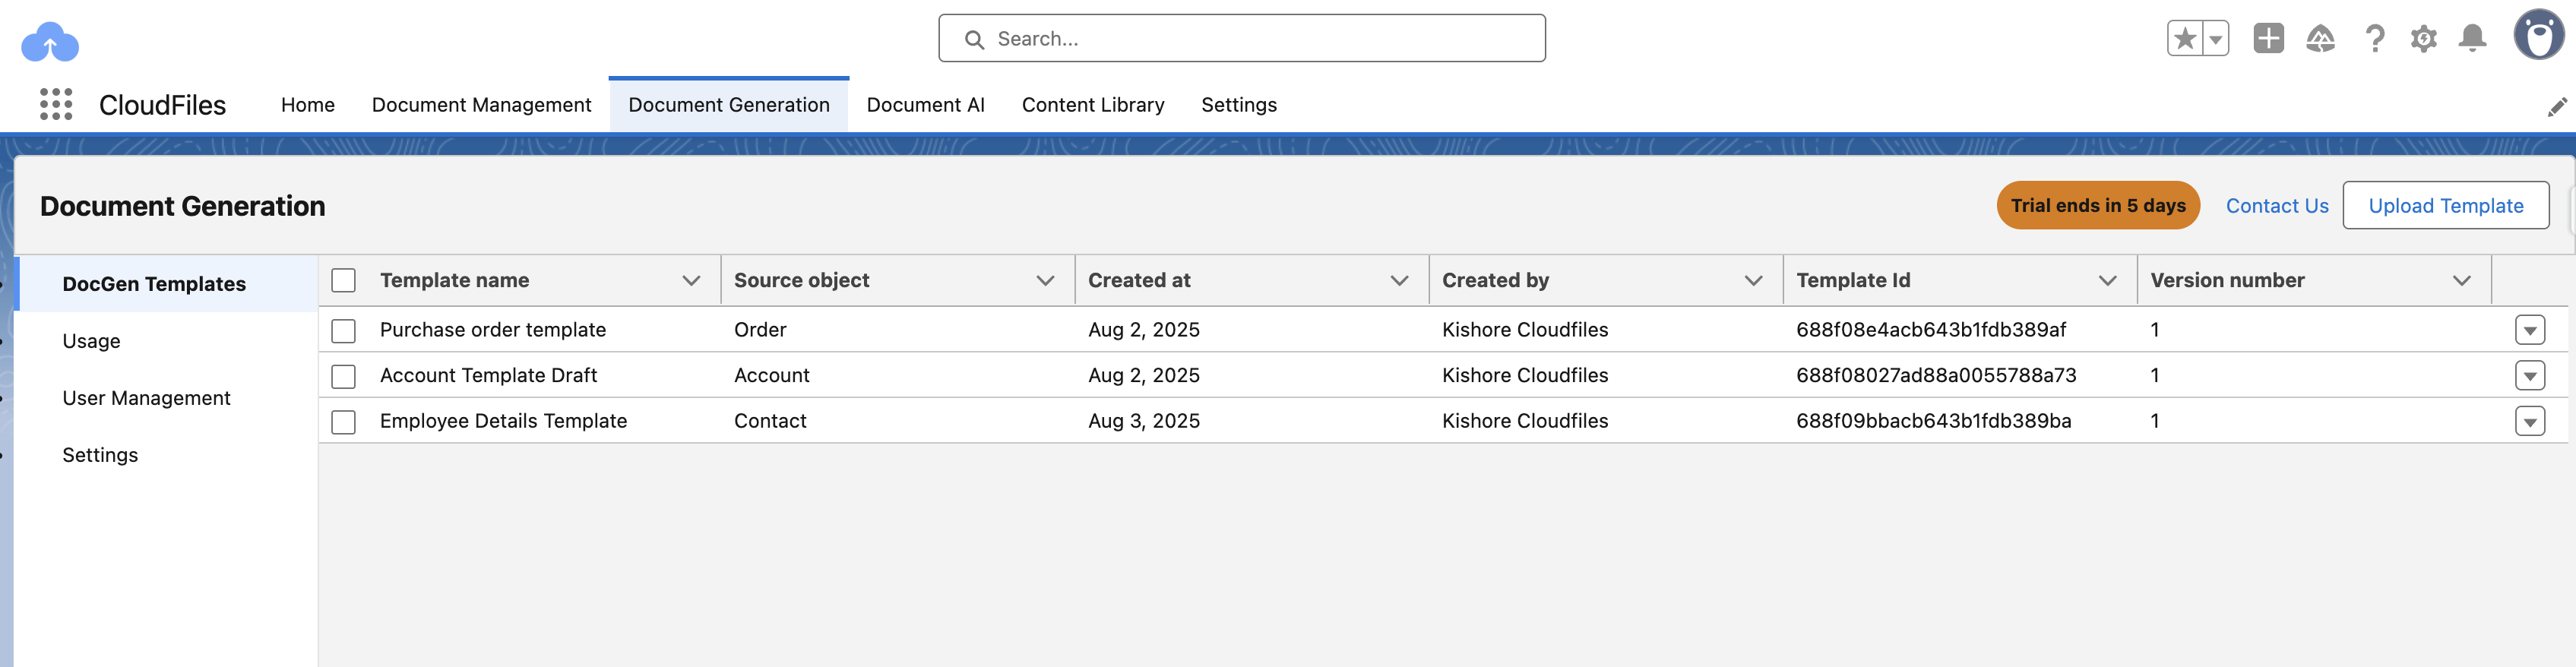
Doc-Gen Templates
Ensure that the templates published for the object are listed under the Document Generation tab → DocGen Templates. Locate the Template Id for the template you want to use and note it down, as you’ll need it as an input in your flow action.
Create Custom Metadata Types
To make document generation in Flows more flexible, you first need a way to store and reference your template details. Custom Metadata Types provide a structured place in Salesforce to keep this information, so flows can dynamically fetch the right templates instead of relying on hardcoded values.
Define the following fields in your Custom Metadata Type to capture key template information:
- Template Name
- Object
- Template Id
- Type
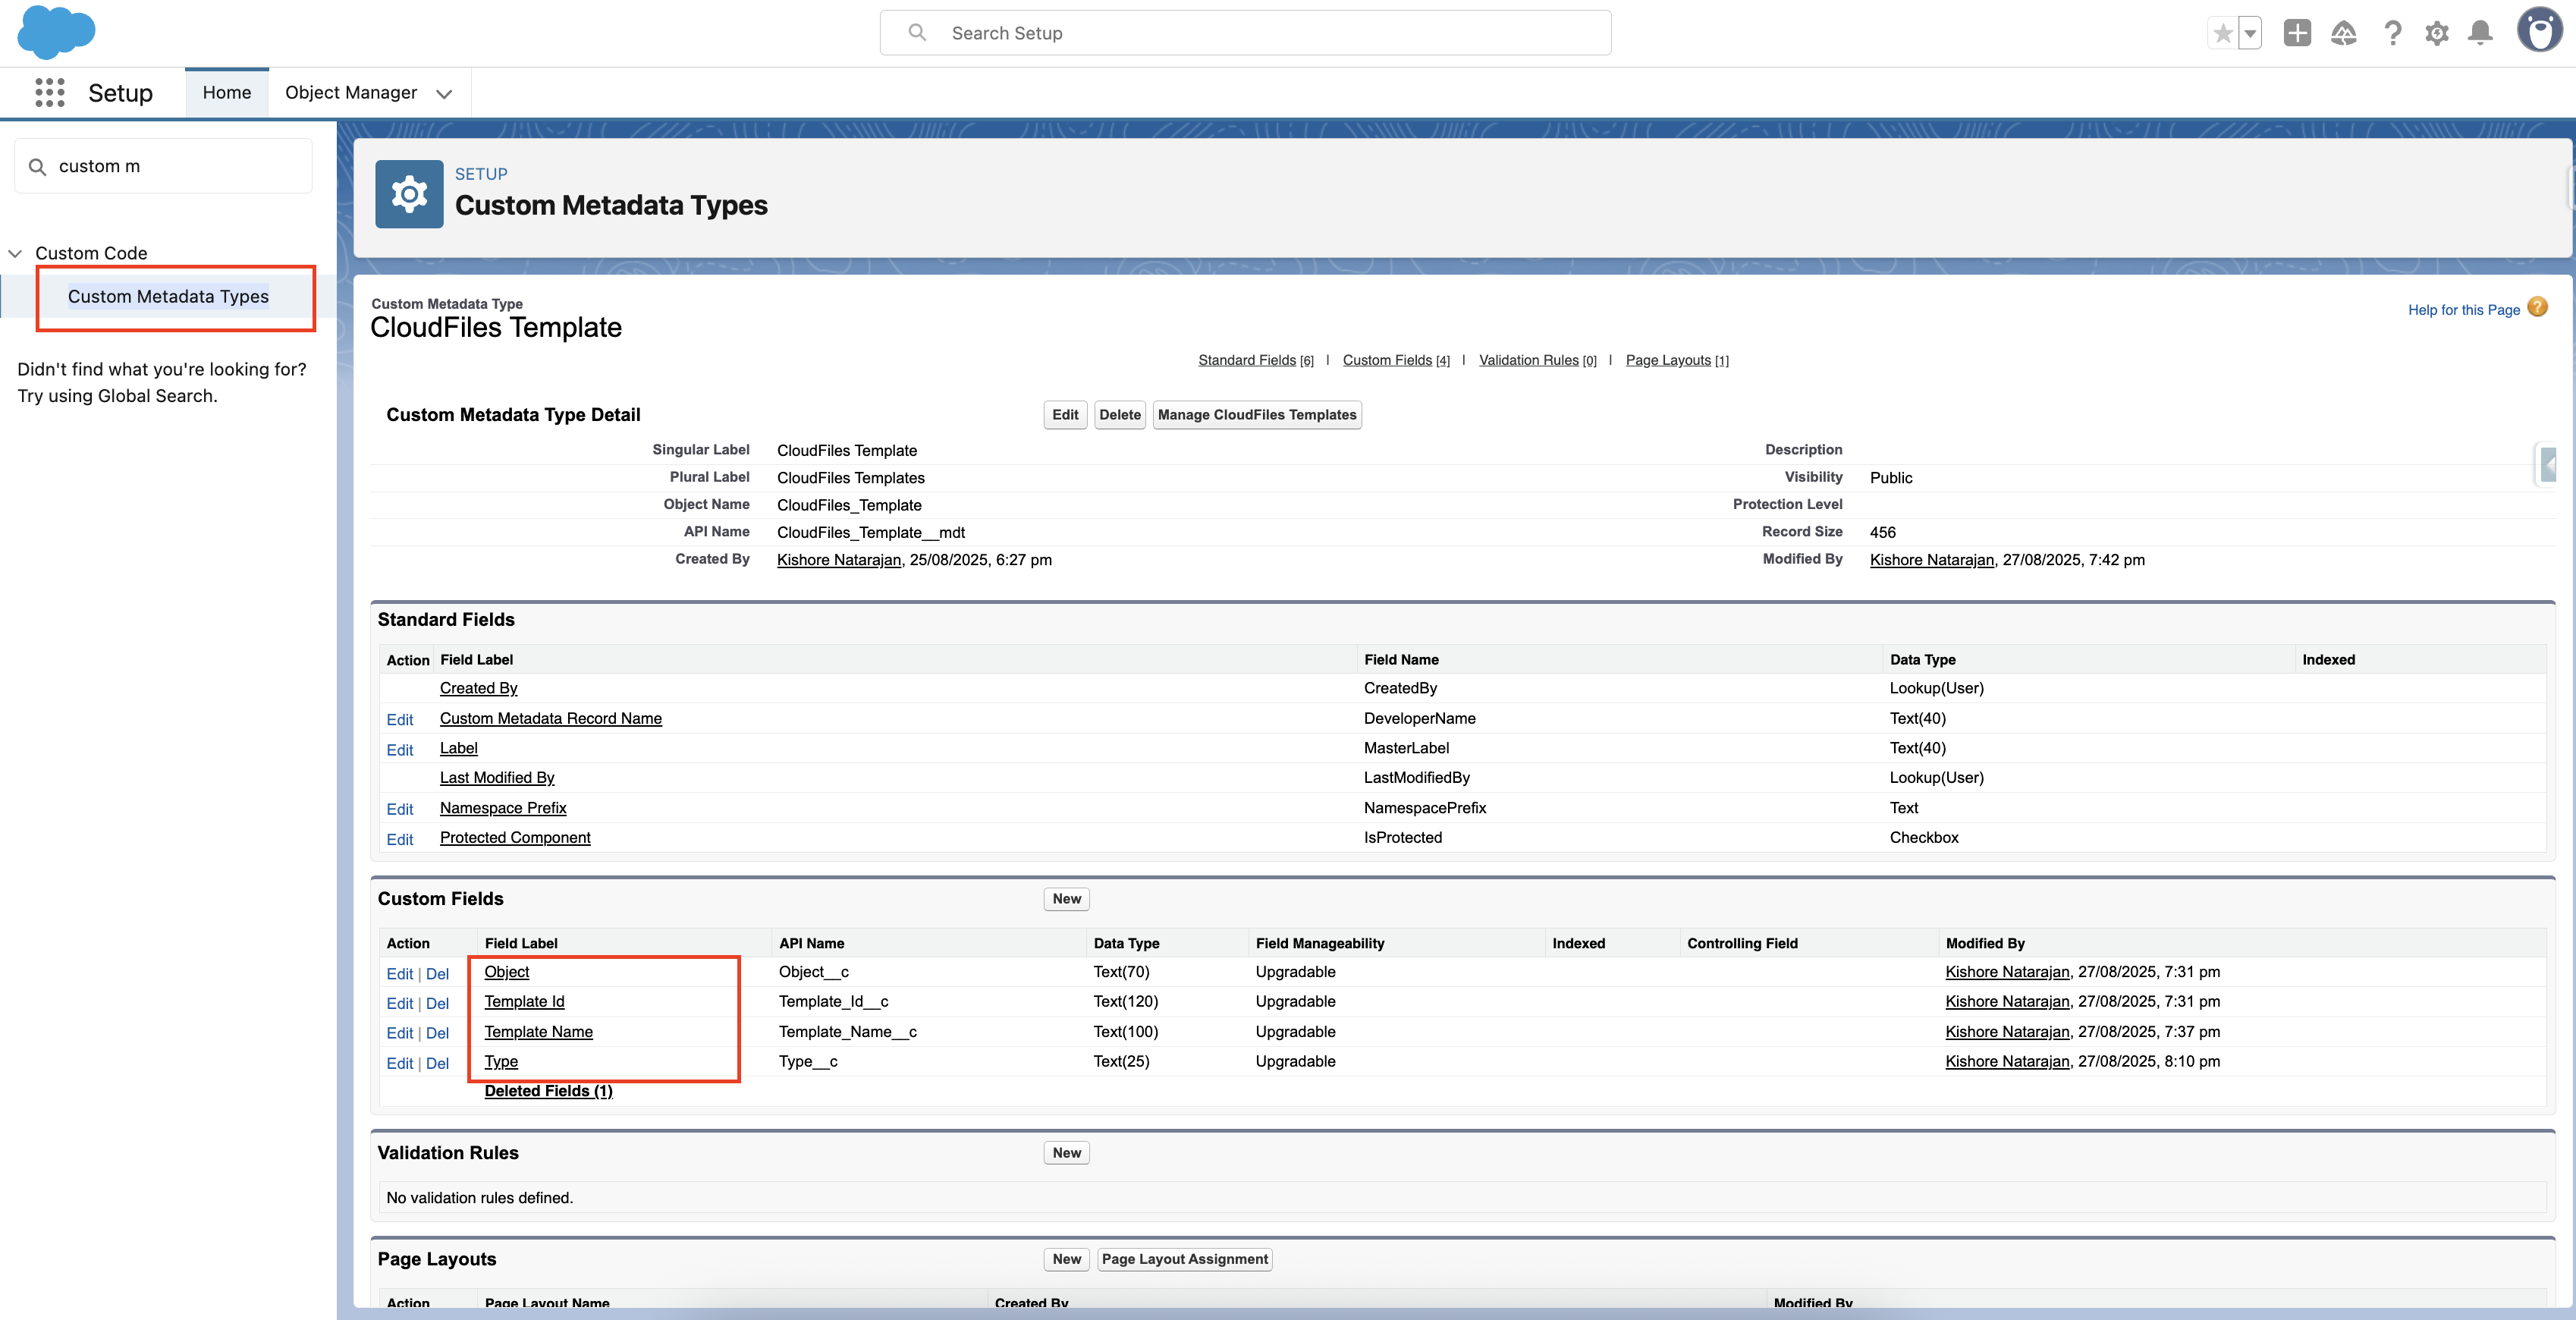
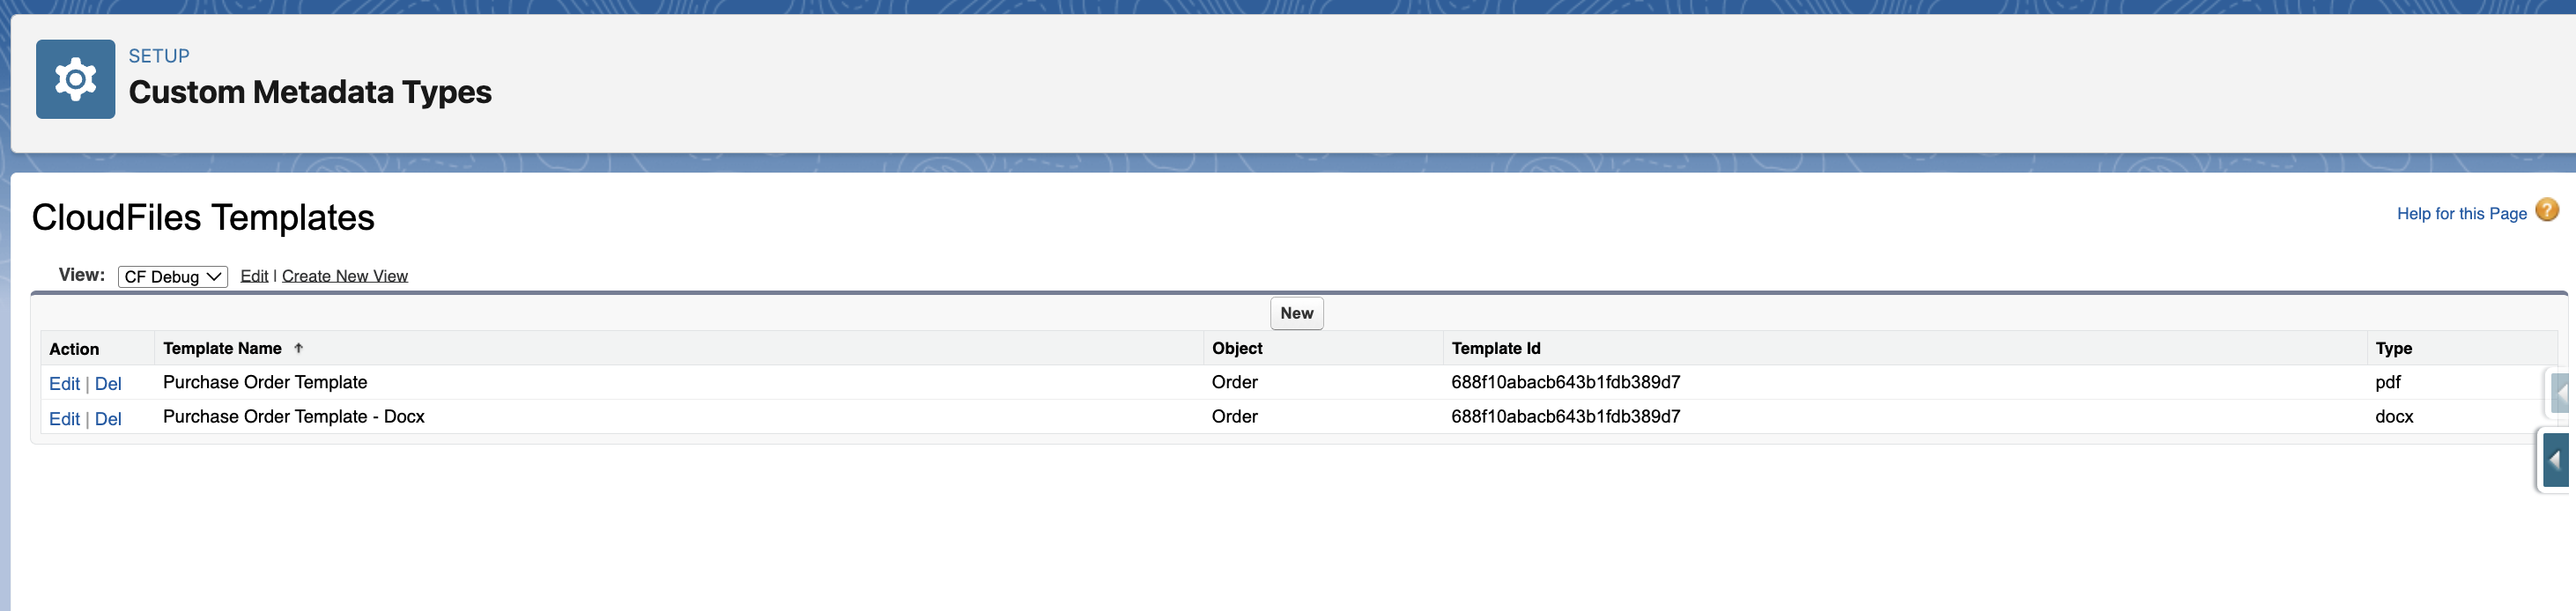
You can copy the Template Id from the Doc-Gen Templates tab (of the CloudFiles app) and configure metadata types. The Type field is used to store the file extension (pdf, docx, xlsx). This value will be passed into the flow action to define the output document type, ensuring that the generated file matches the required format.
Building the Flow
To generate documents dynamically, we use a Screen Flow in Salesforce. The flow allows user select the template(s) in the screen.
- Navigate to Setup → Flows in Salesforce.
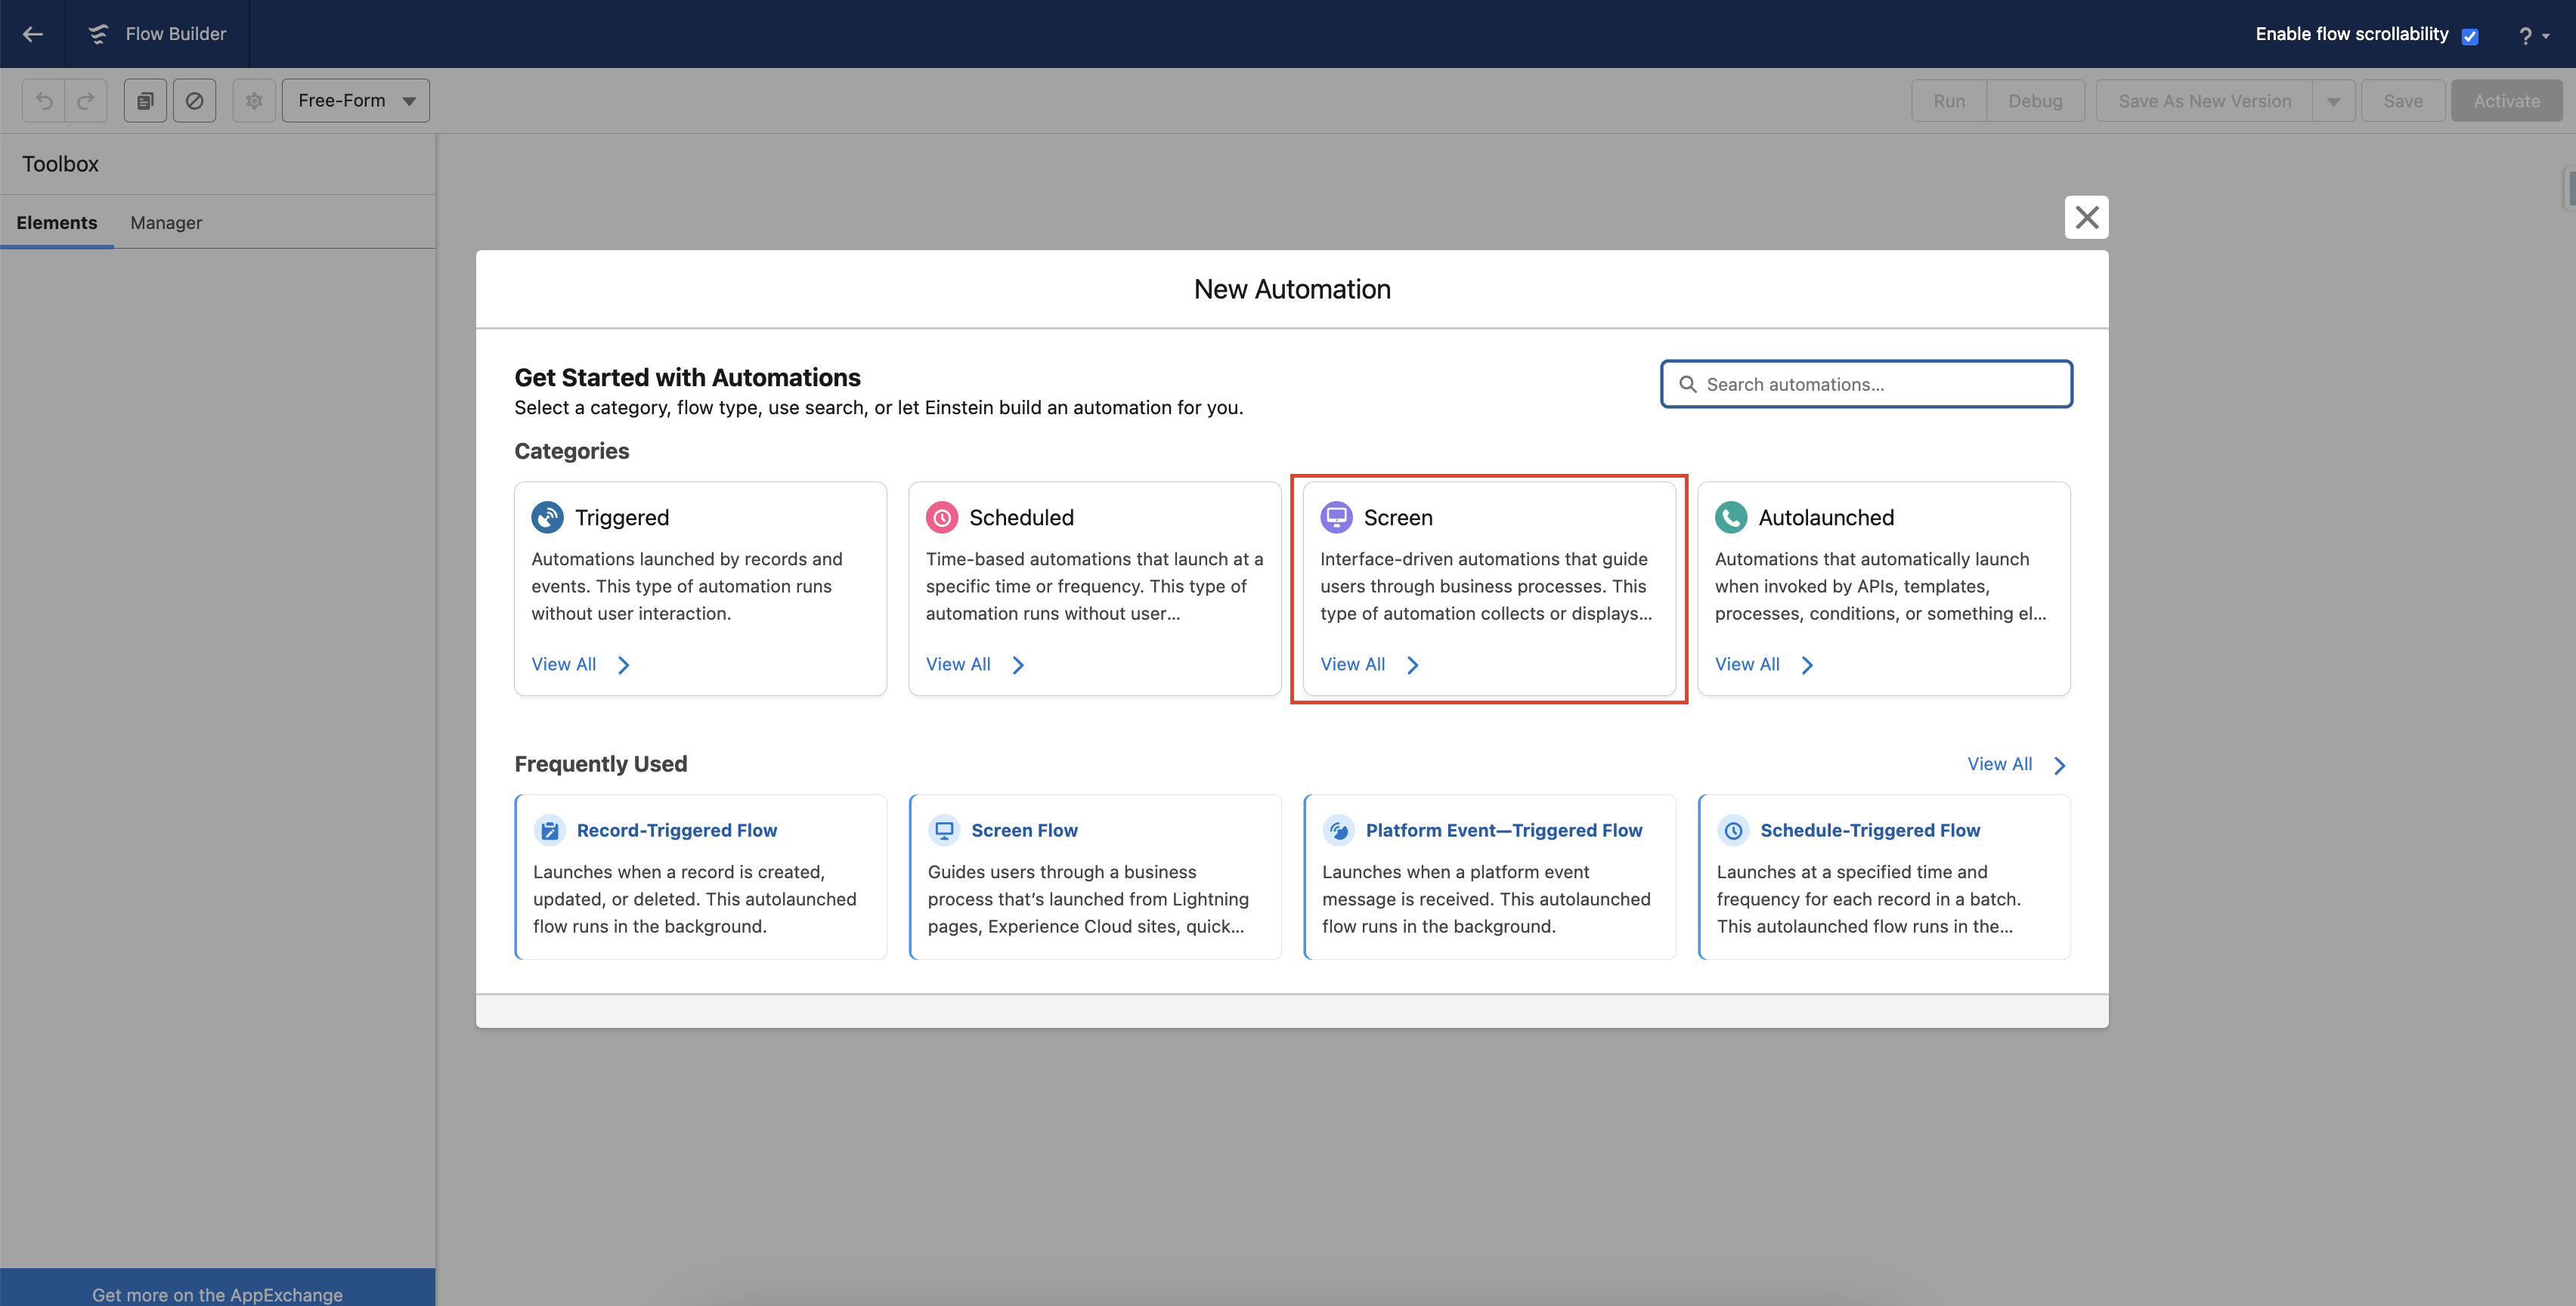
- Click New Flow → Select Screen Flow.
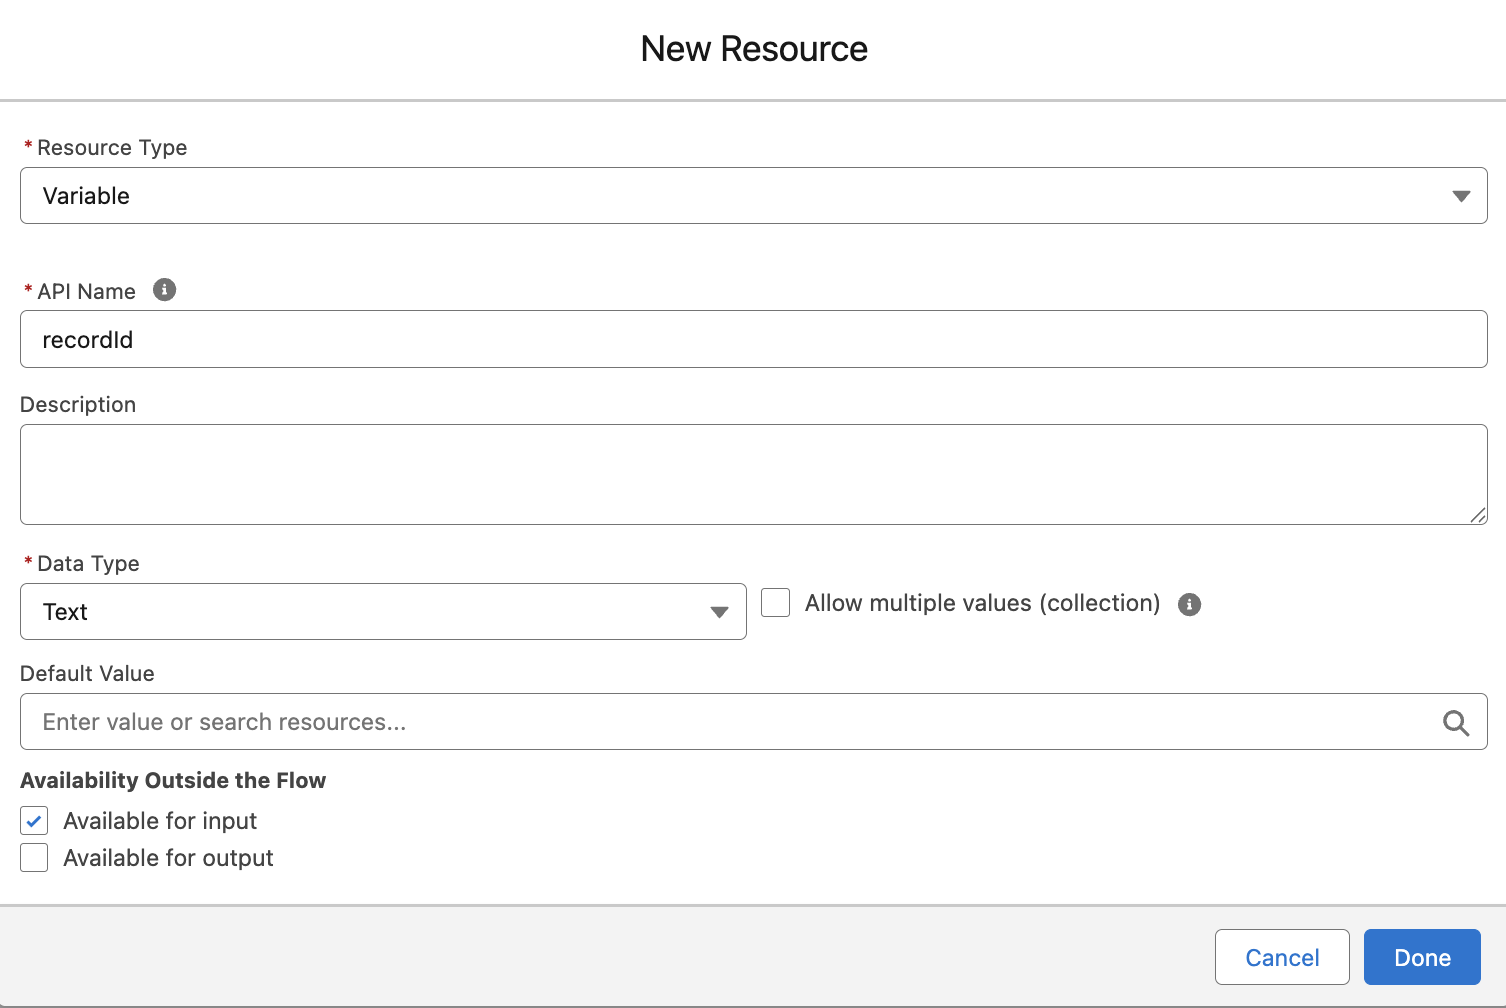
1 - Create a 'recordId' input
Create a recordId variable to capture the Salesforce record ID (Order record) from which the flow is launched. Set its data type to Text and mark it as Available for input so the record ID is automatically passed when the flow runs from a record page.
2 - Add a 'Decision' element
Add a Decision element to check the object type before continuing in the flow.
In this example, configure the condition to check for the Order object using the first 3 digits of the recordId. This ensures that only logic related to Purchase Orders is processed in this branch of the flow.
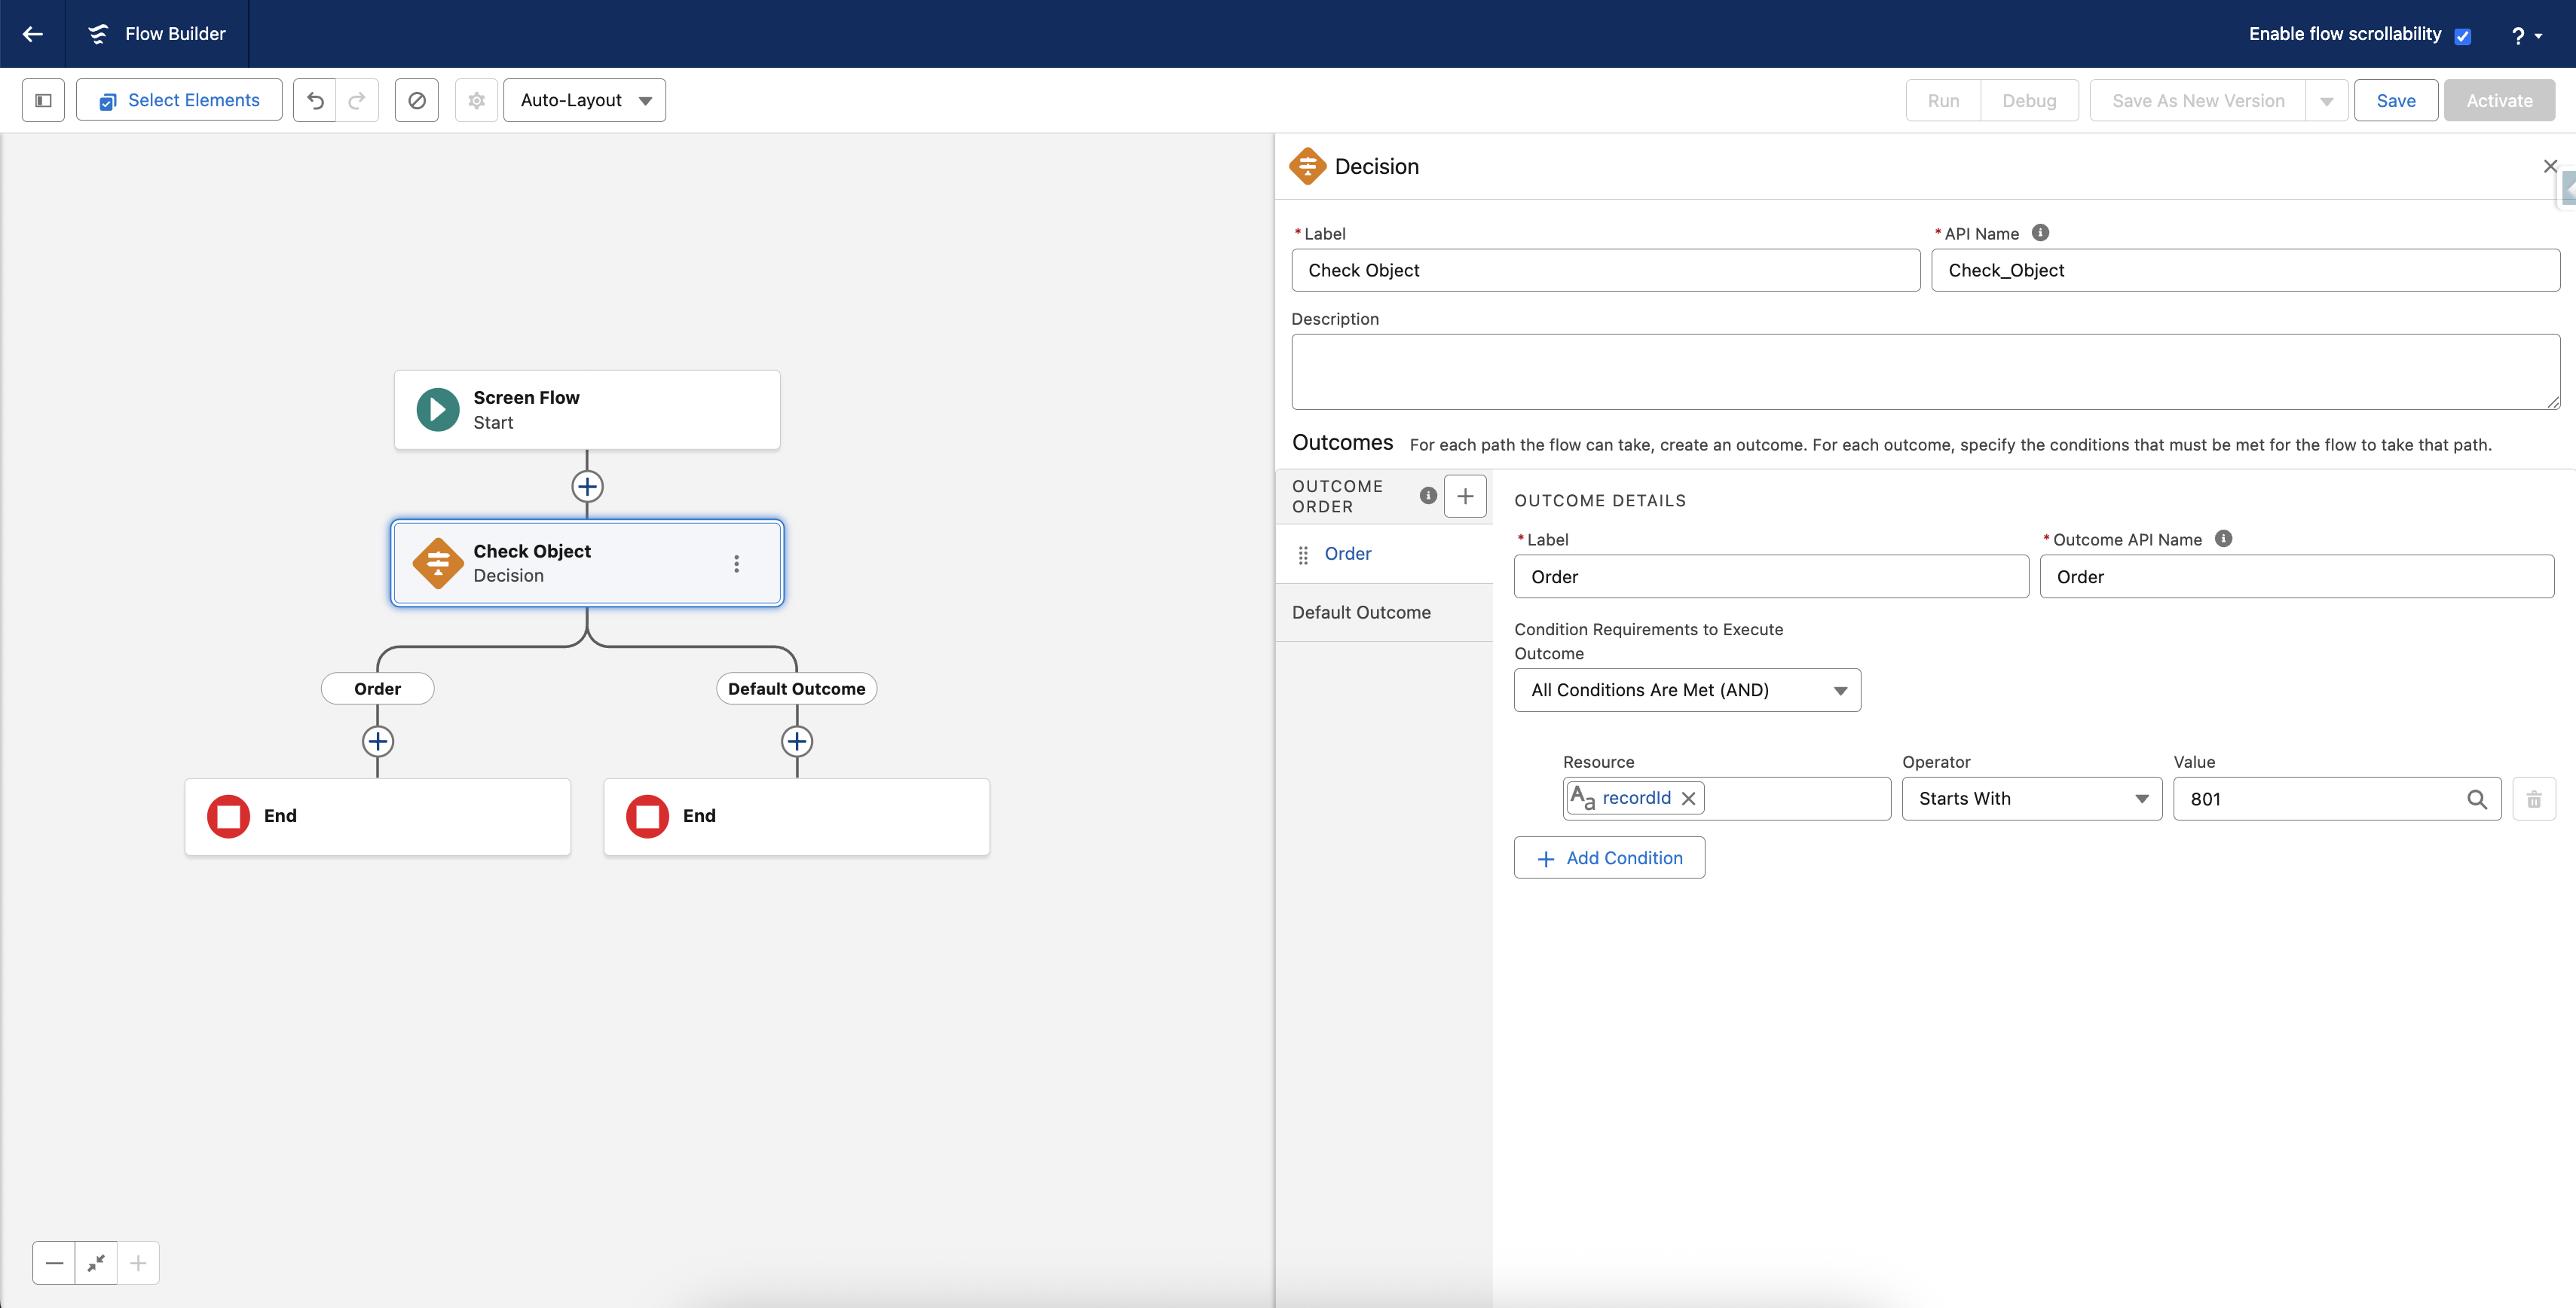
For other objects (like Account or Contract), you can add additional outcomes to handle their templates separately.
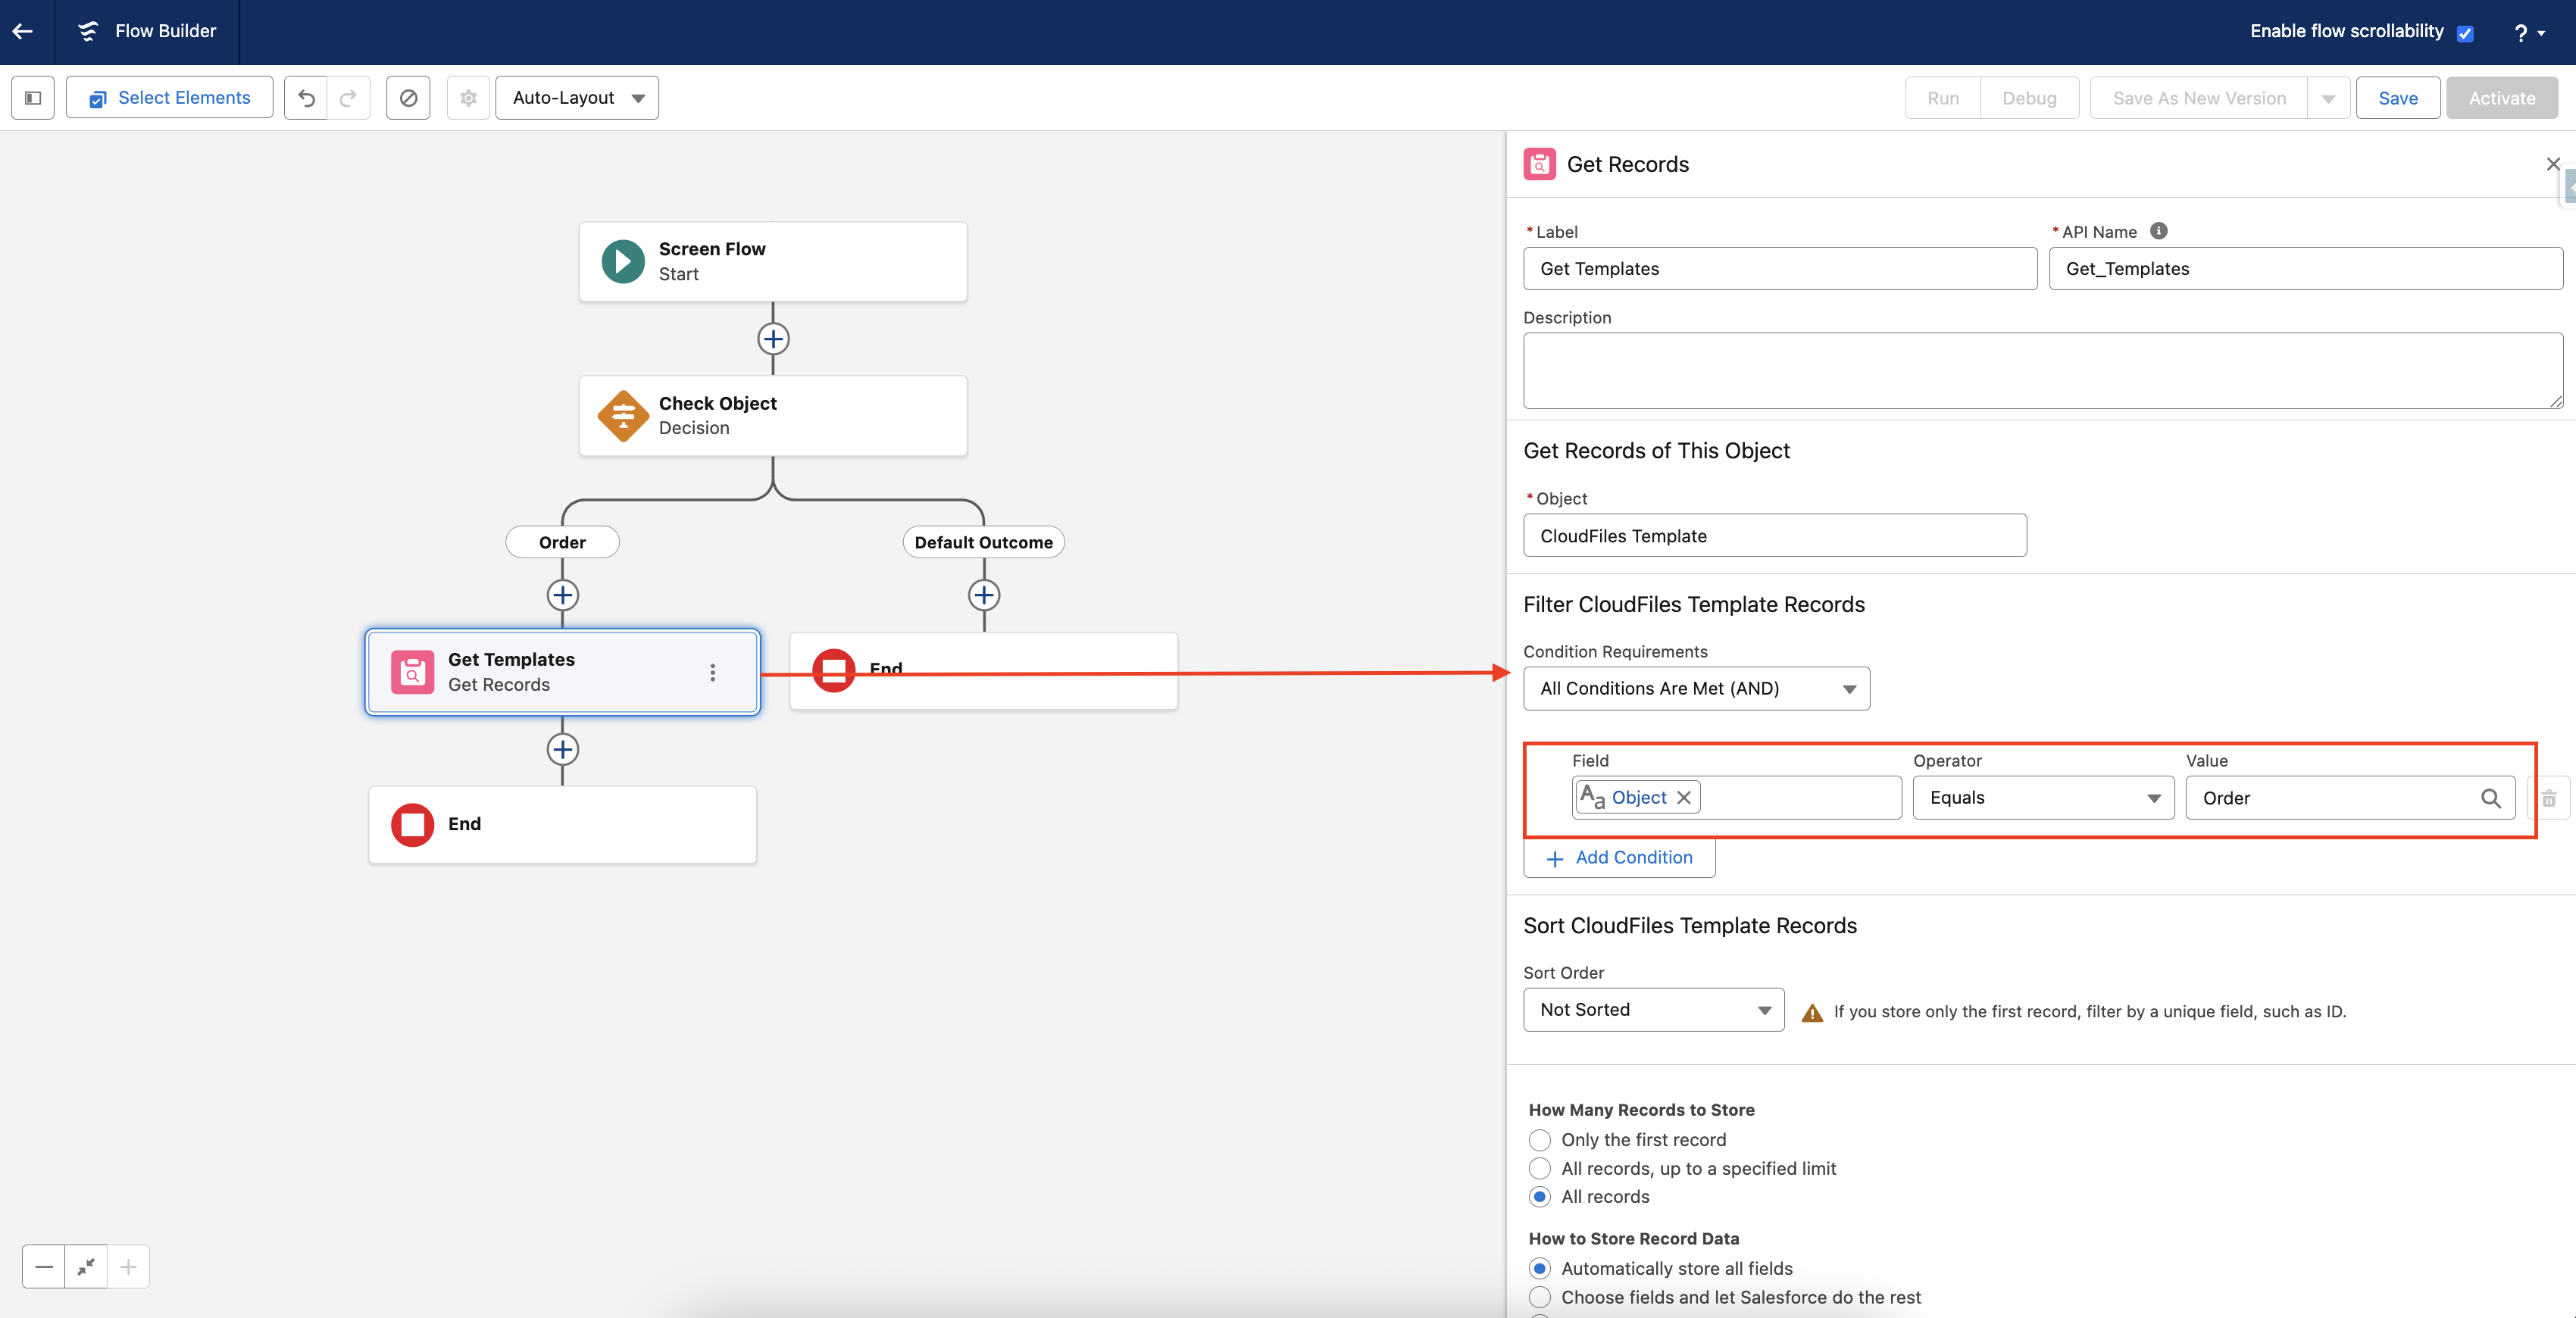
3 - Add a 'Get Records' element
Add a Get Records element to fetch available templates stored in Custom Metadata Types, filtered by object type. This ensures only the relevant templates are fetched for display on the screen.
4 - Include 'Screen'
Include a Screen element to present the fetched templates to users and the destination selection for storing the file.
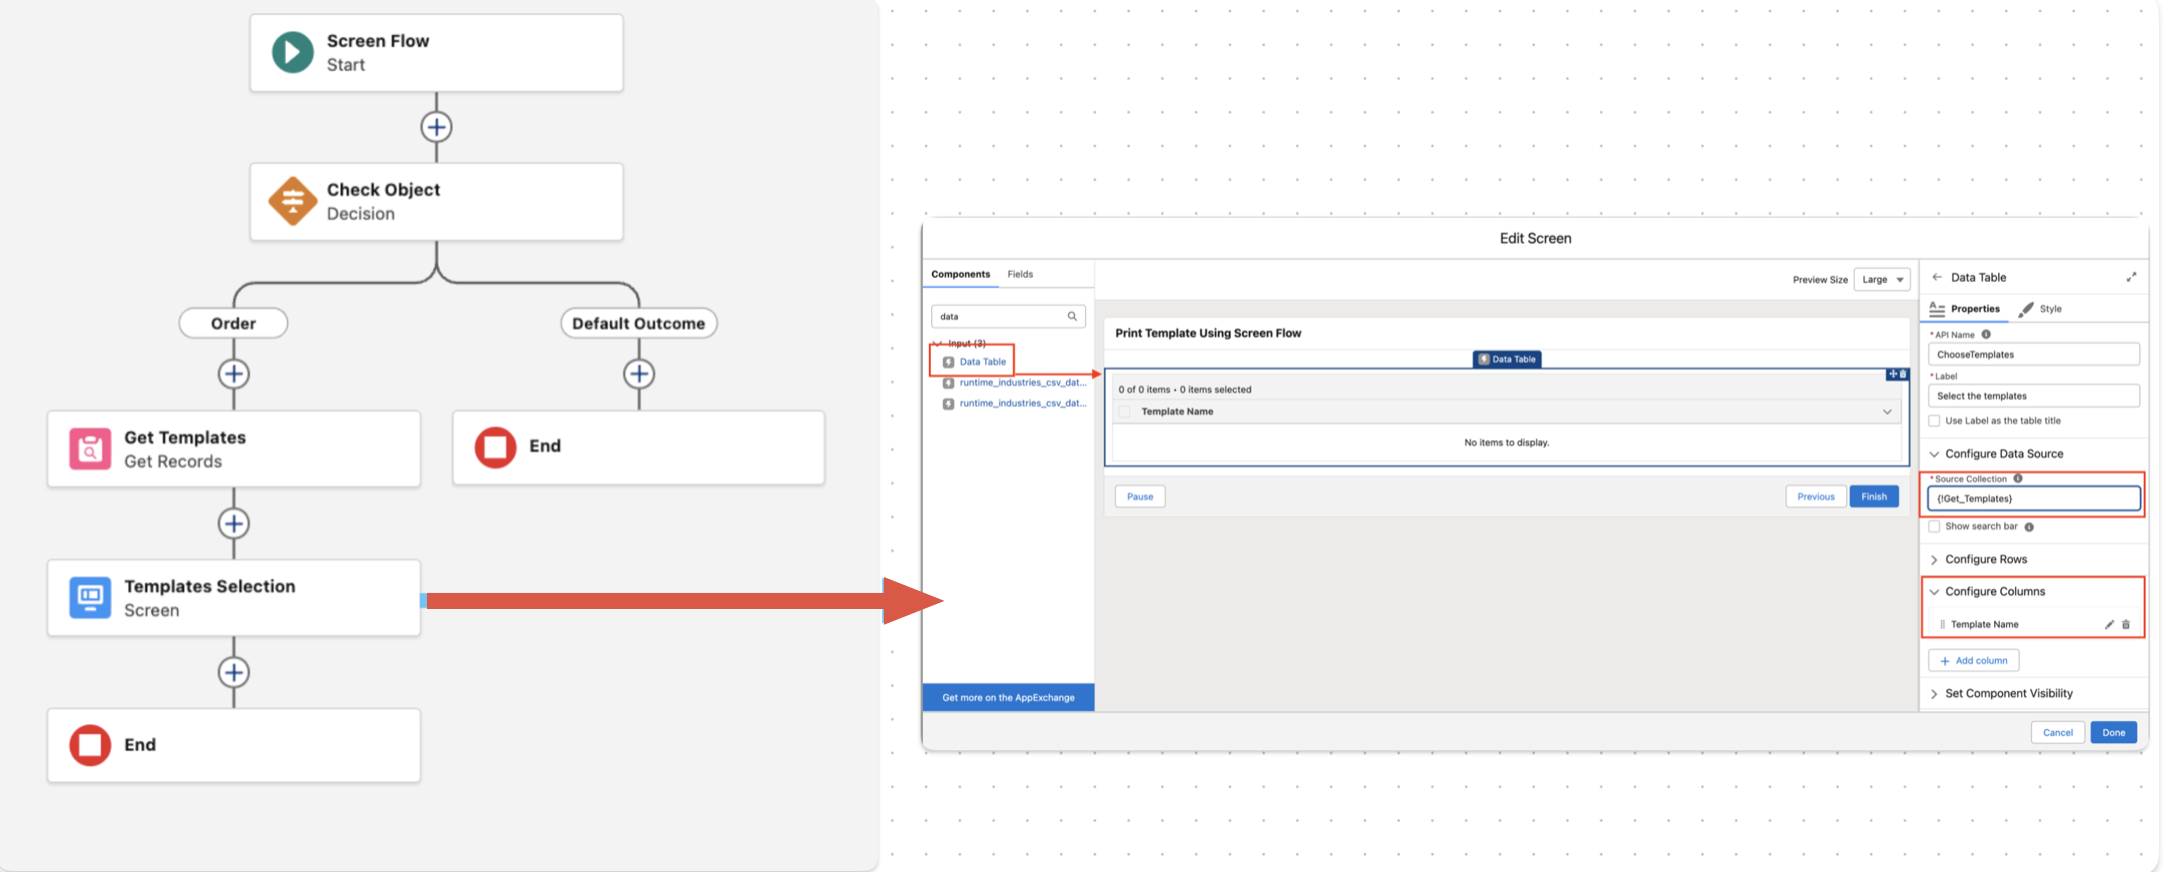
Add a Data Table
Add a Data Table component to the screen, so users can view and select one or more templates.
- Source Collection → Set the Data Table’s Source Collection to the output of your Get Records element {Get_Templates}. This ensures the table is populated with templates retrieved from Salesforce.
- Columns → Add relevant fields such as Template Name to clearly identify templates.
- Row Selection Mode -> Set to Multiple
Add Radio Buttons
Add Radio Buttons to allow users to choose the destination where the generated document should be stored.
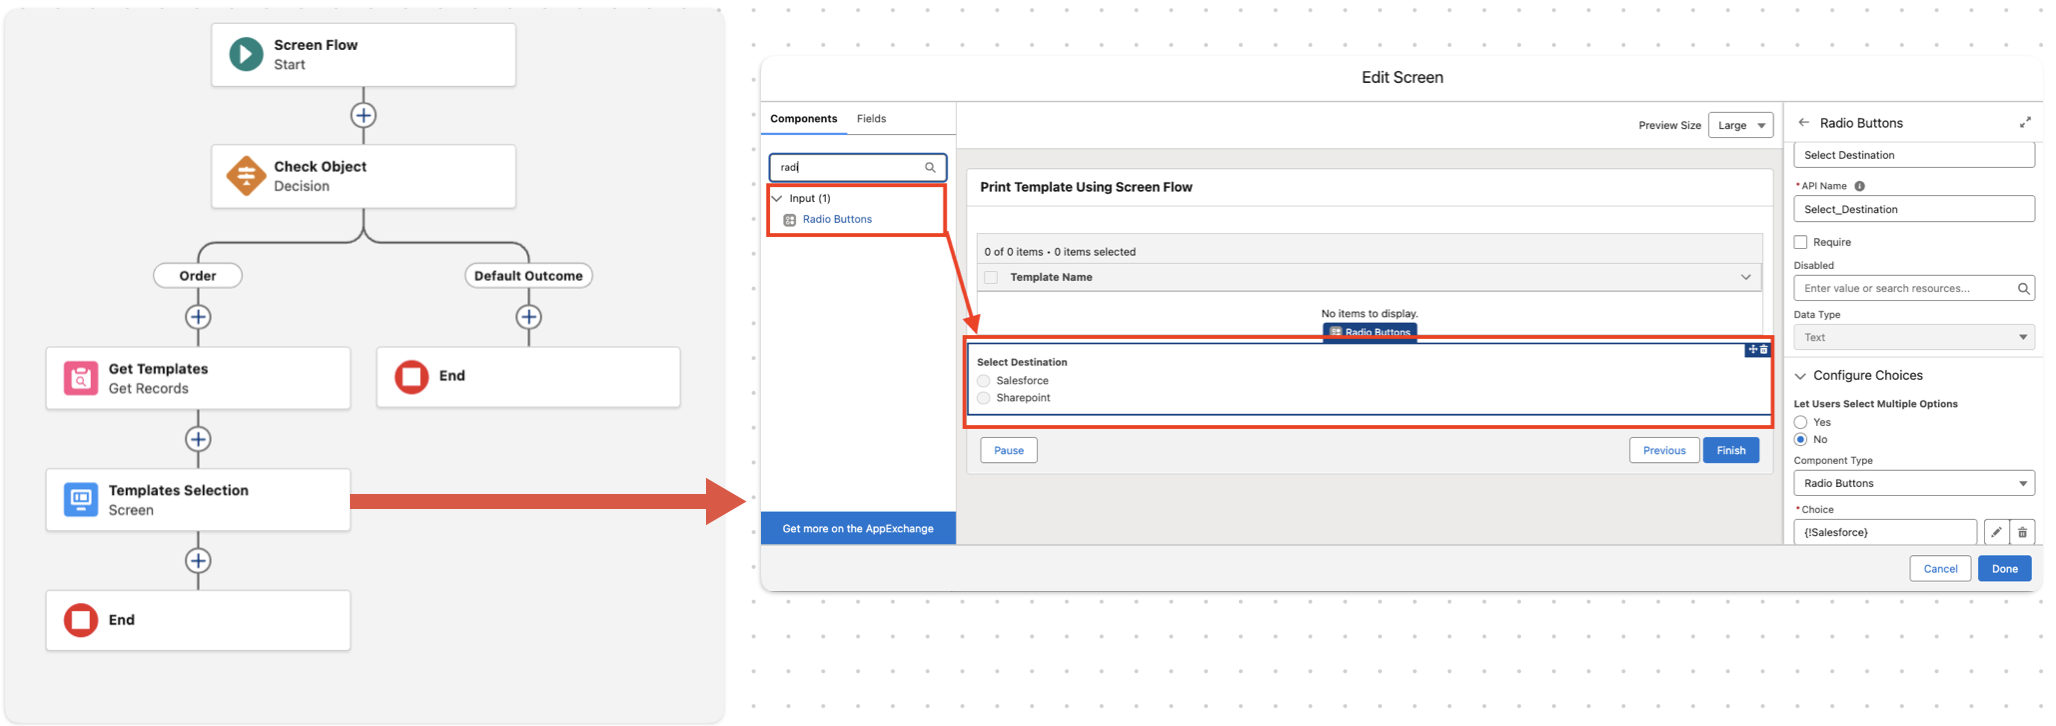
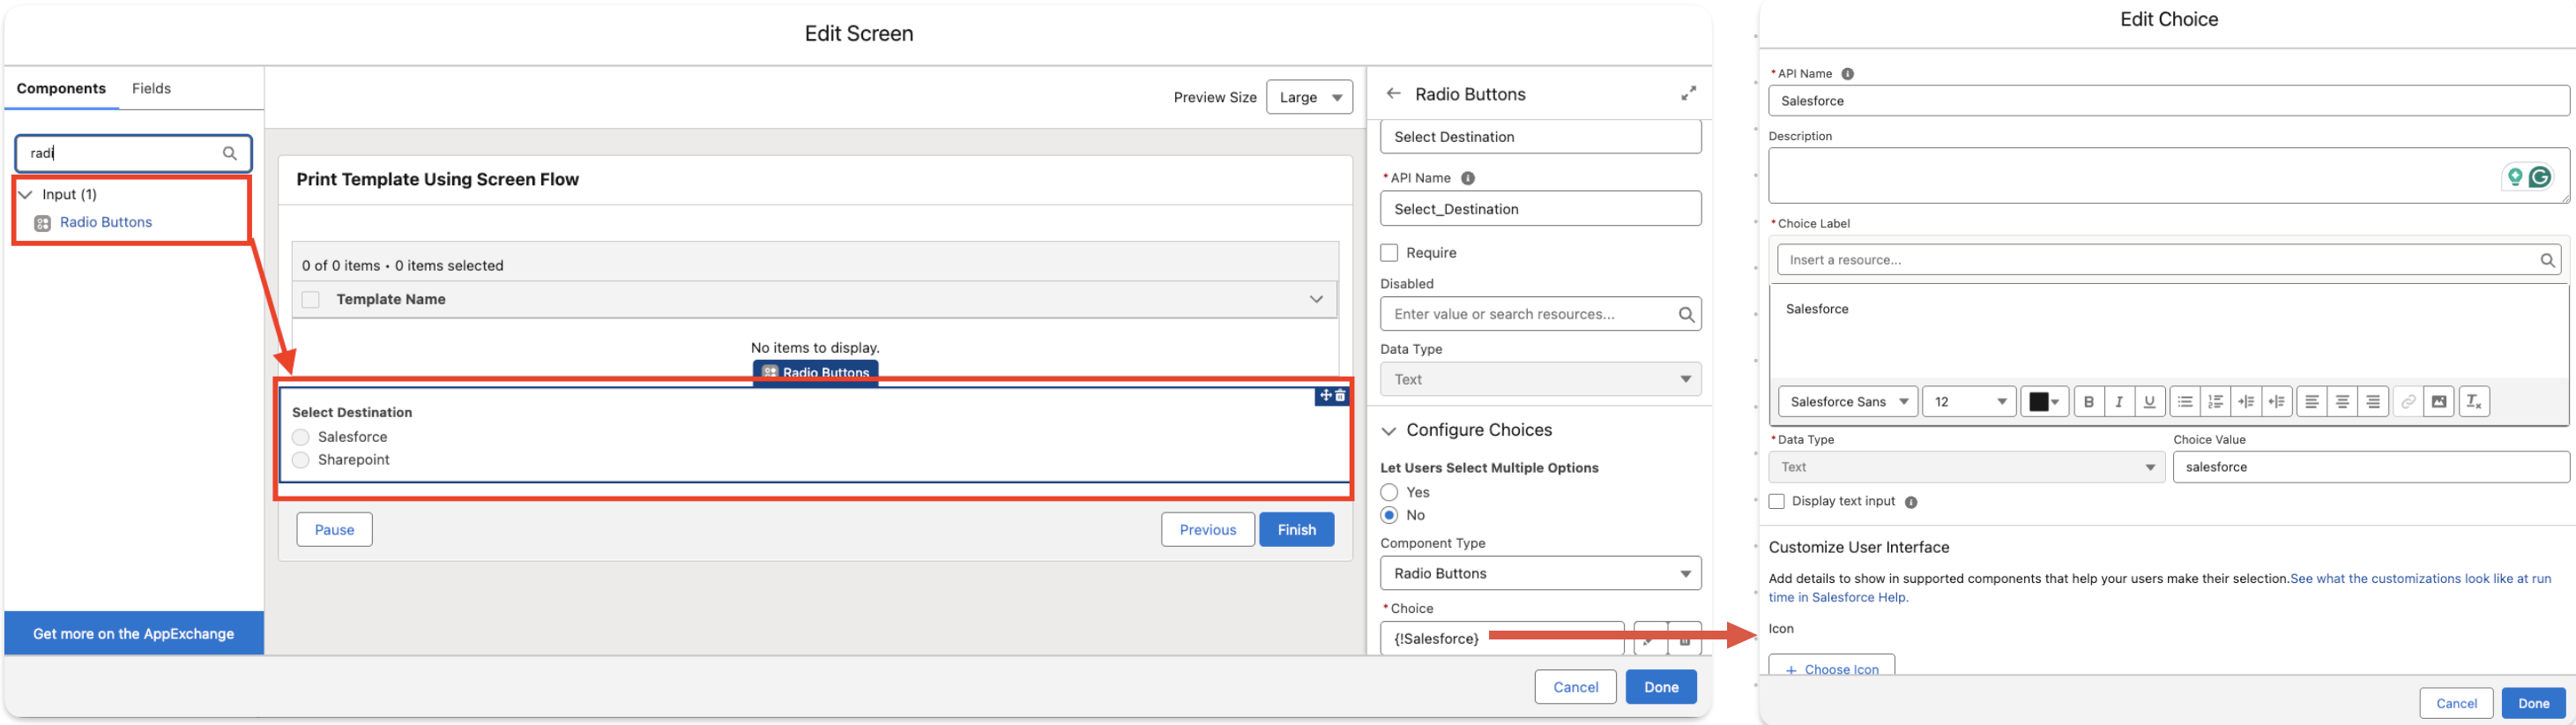
- Options → Provide values such as:
- Salesforce → Store the document in the Notes & Attachments section of the related record.
- SharePoint / Google Drive → Store the document in an external storage system.
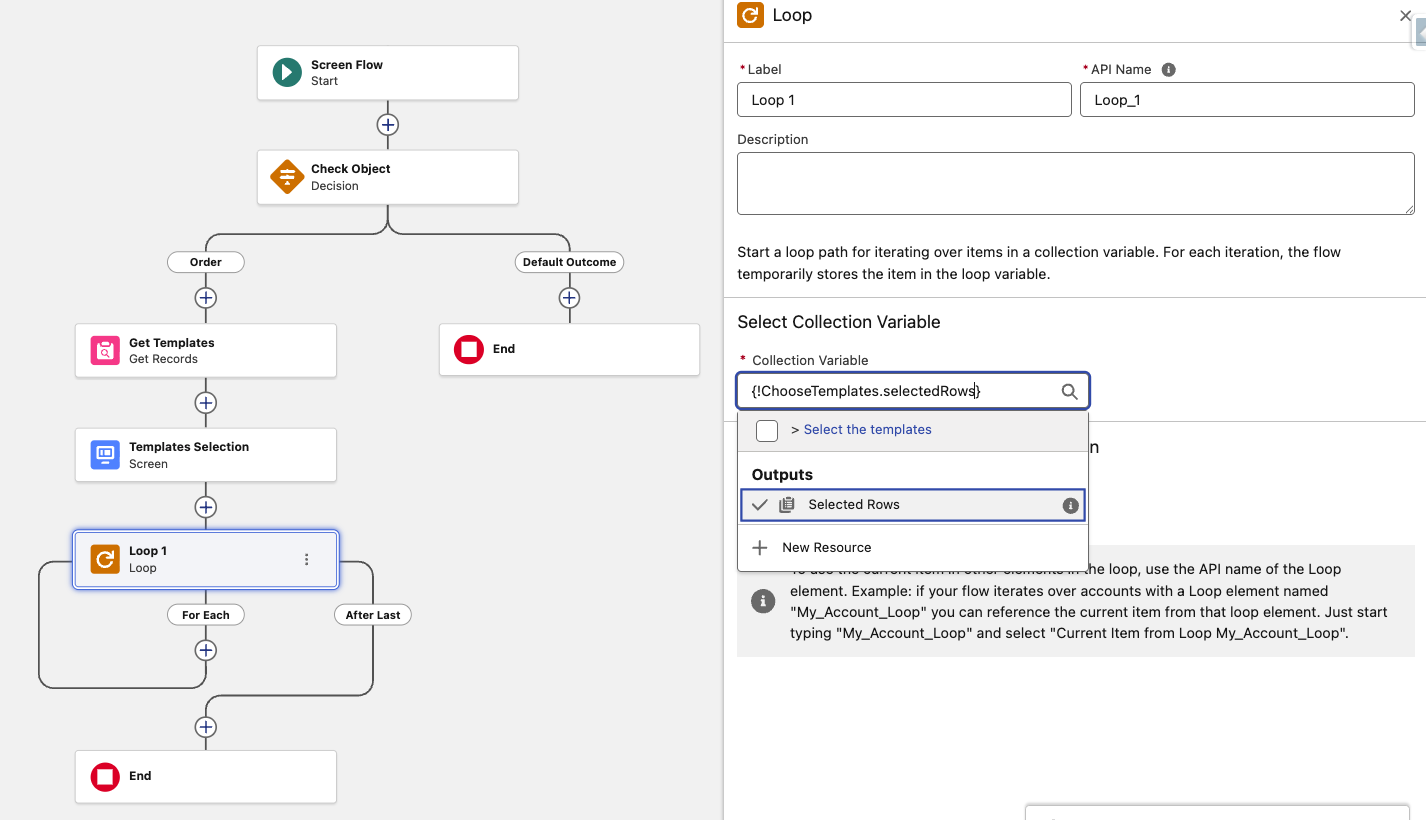
Loop the templates
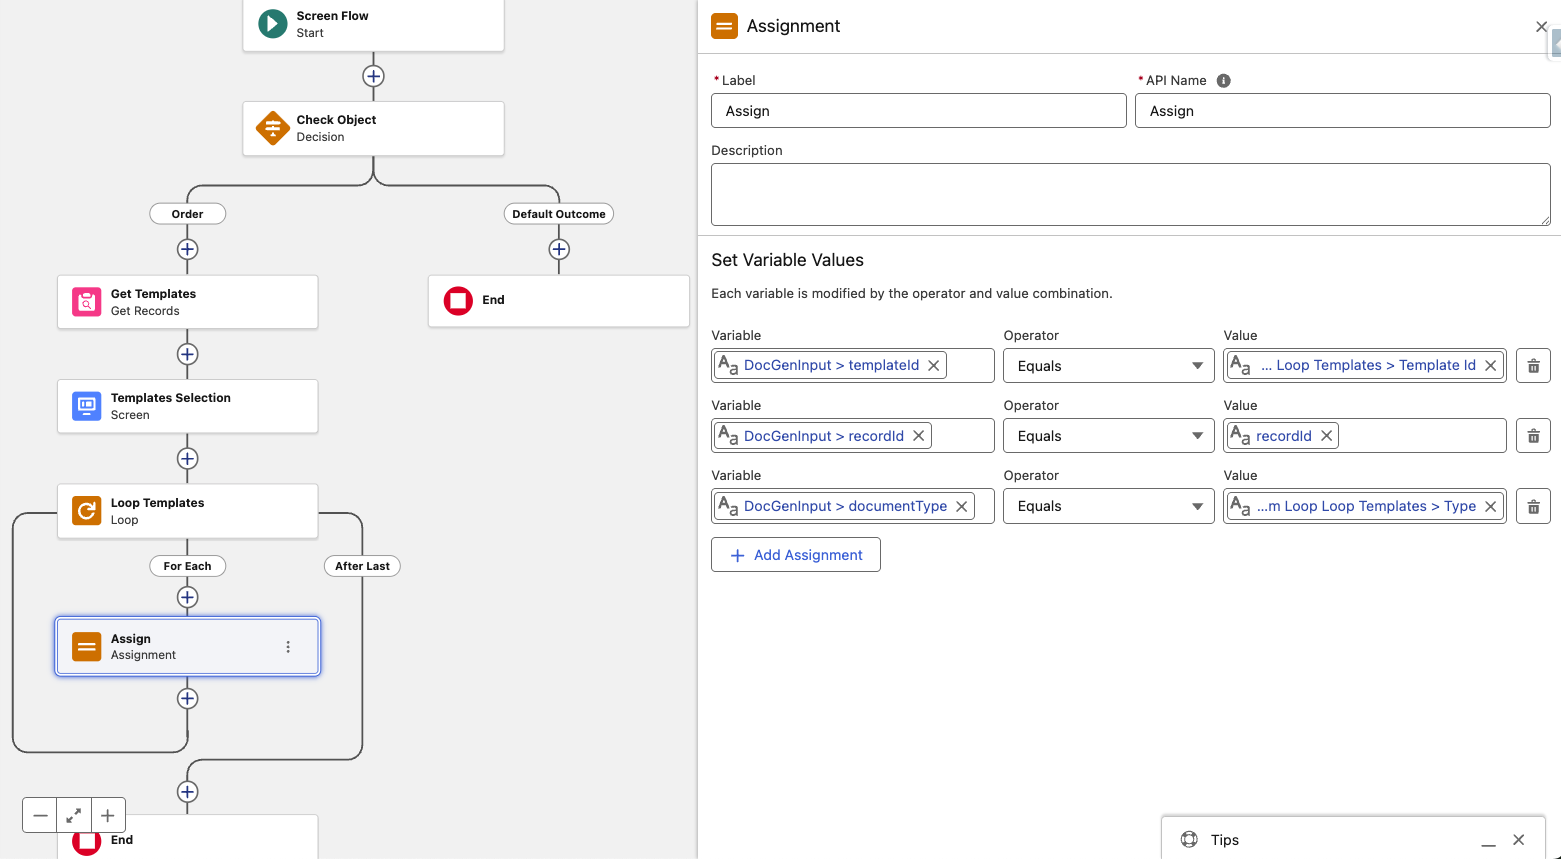
Loop the Selected Templates of the Data Table.
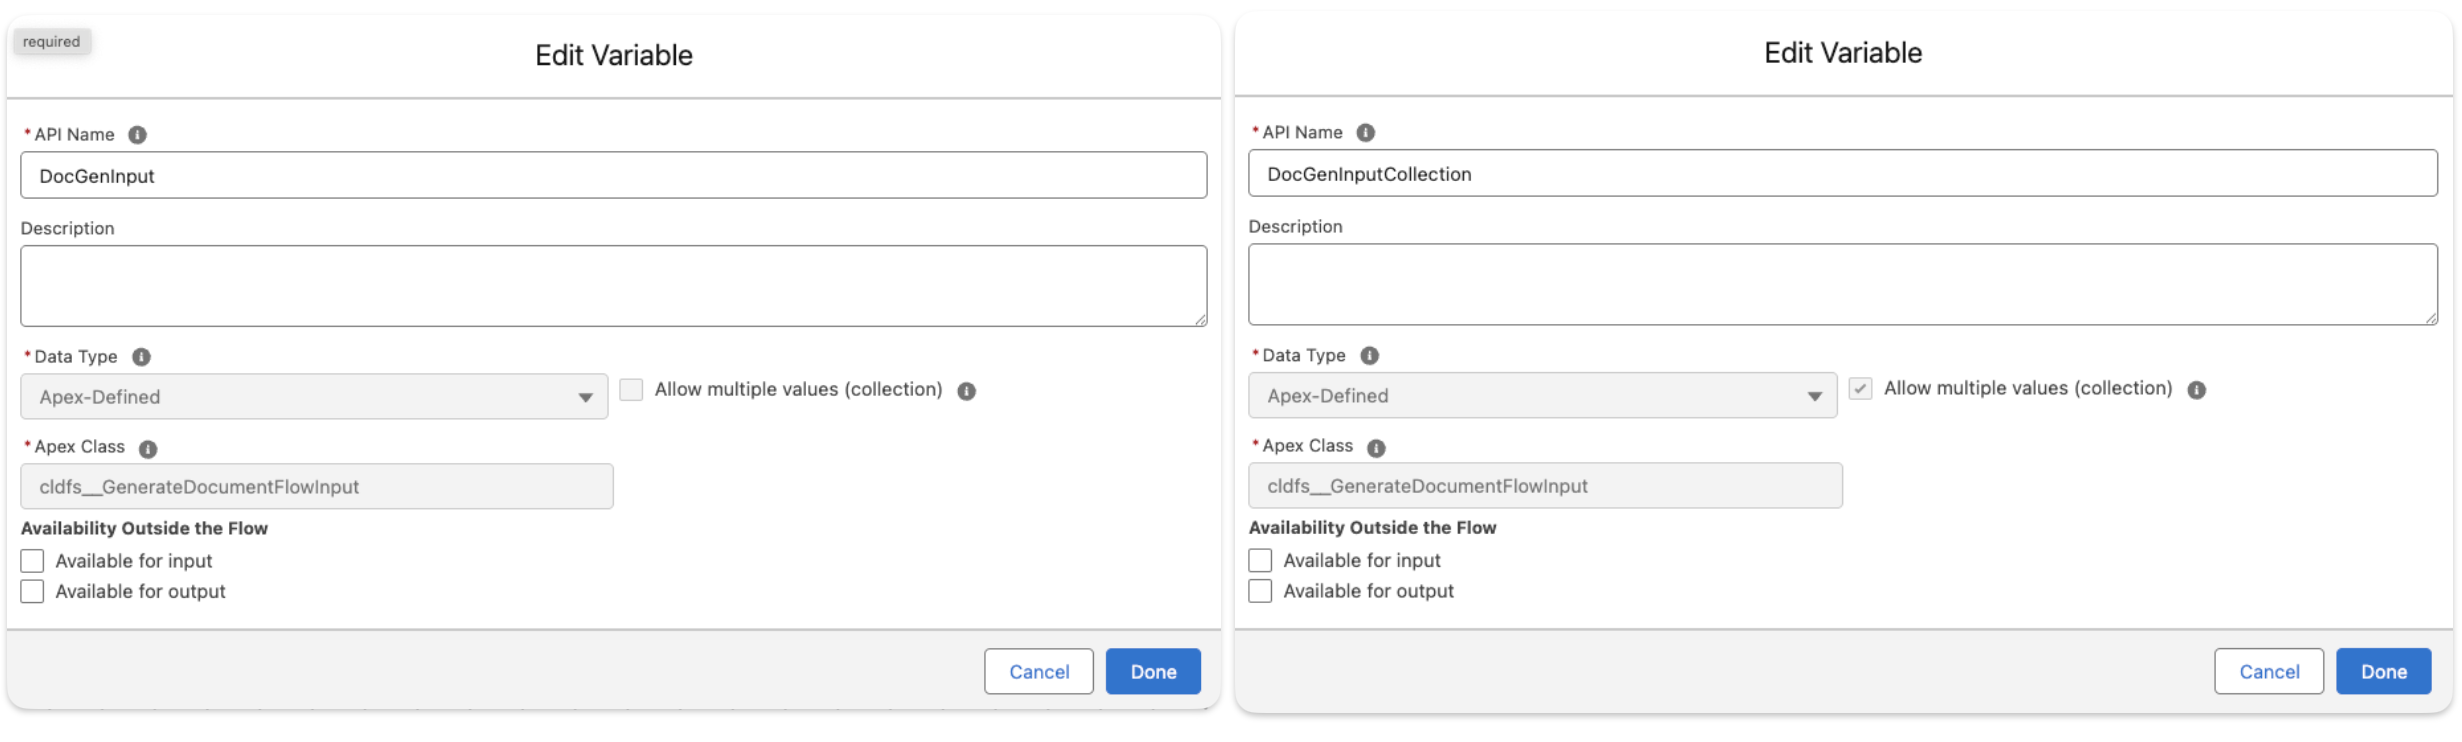
Create both individual and collection Apex-Defined Variables of the class cldfs__GenerateDocumentFlowInput inside the flow.
For each selected template, populate the required configuration values such as templateId, recordId, and documentType using an Assignment element within the current loop iteration.
5 - Add Destination
Include a Decision element to configure destination parameters based on the user’s selection in the screen.
- Salesforce → Assign values so the generated document is stored in the Notes & Attachments section of the record.
- External Storage (SharePoint, Google Drive, etc.) → Assign the corresponding library, driveId, and folder Id parameters.
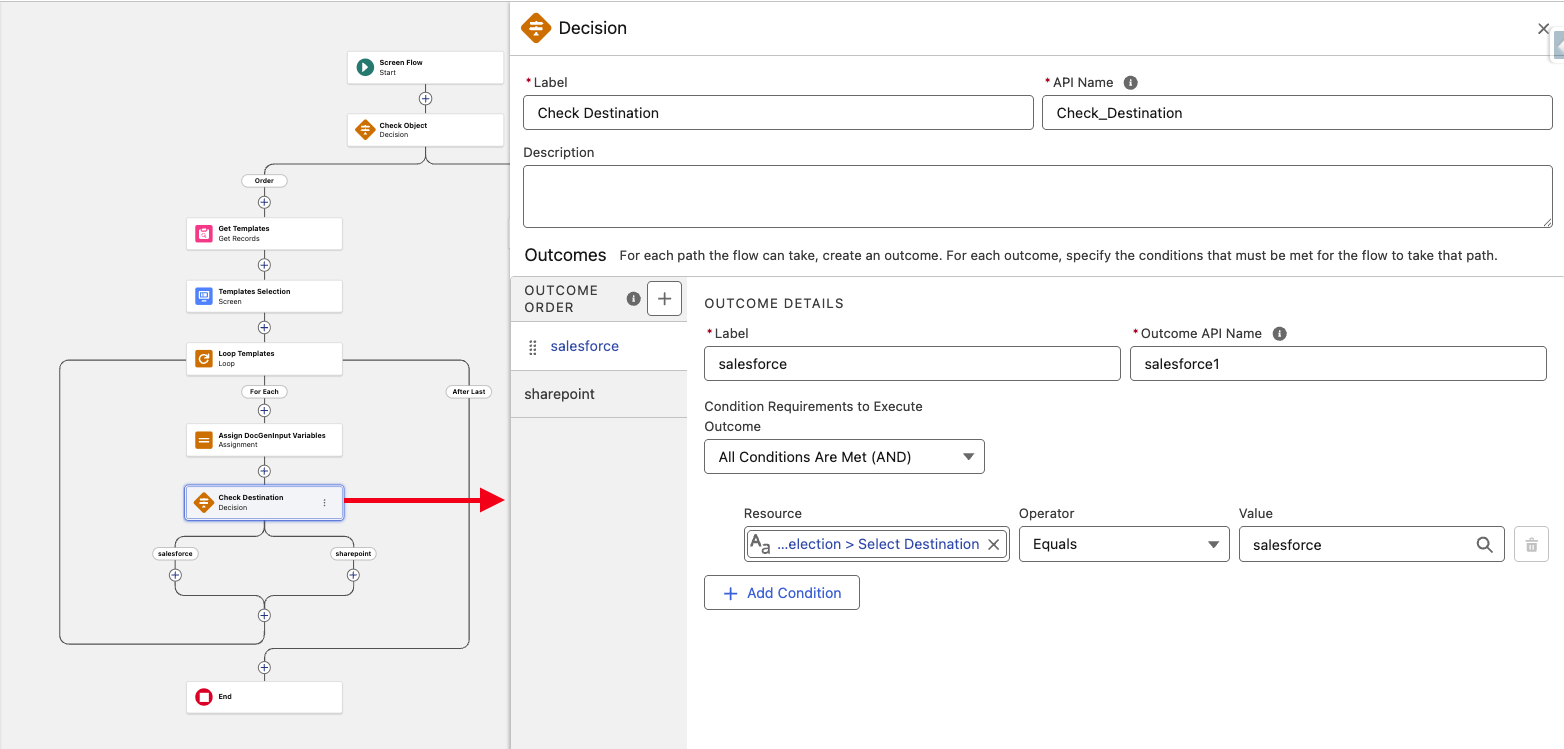
Use Assignment elements for each outcome to map the correct destination details. Refer to the Destination section in Generate Document for more details.
Assign library, id, driveId parameters for external storage:
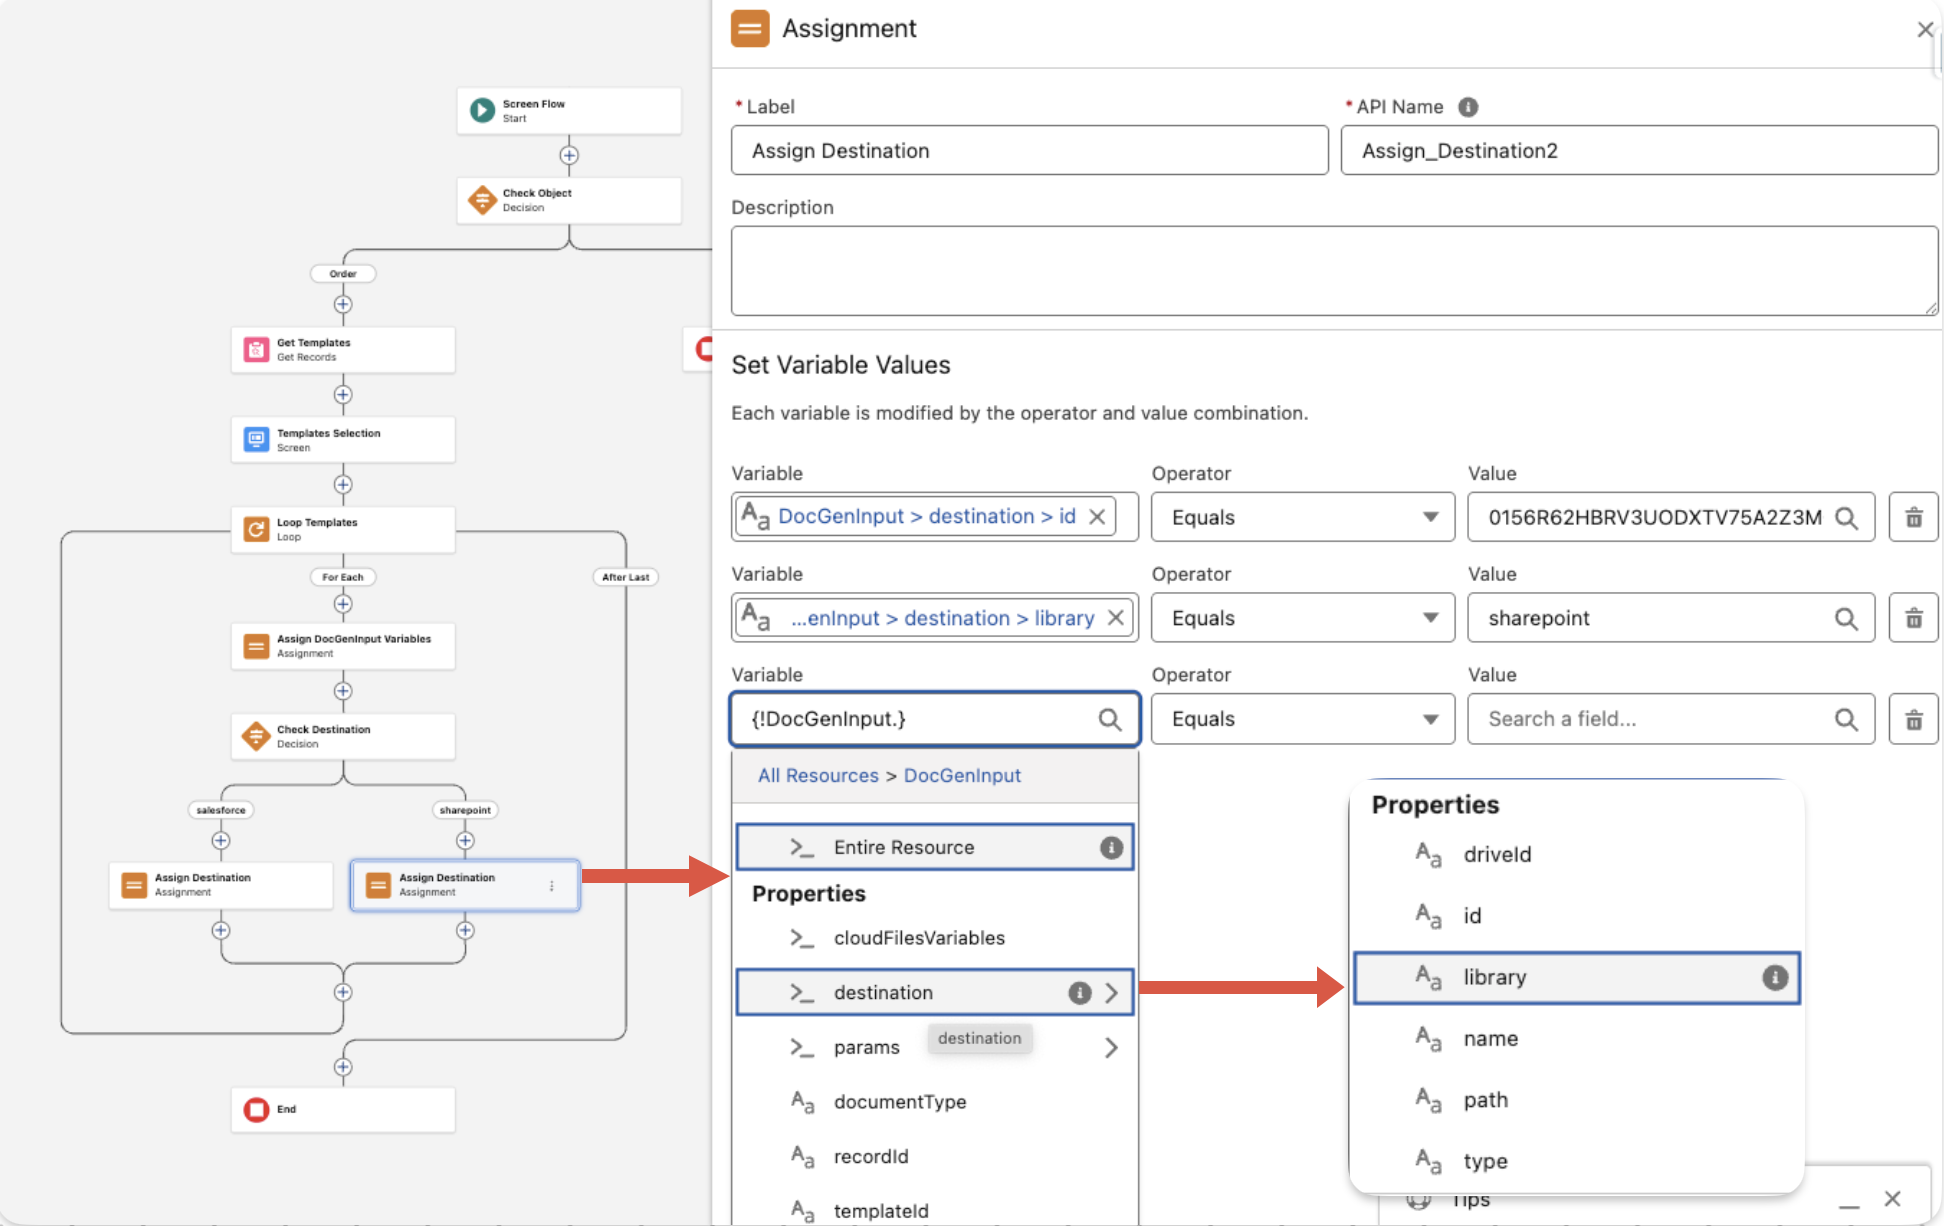
Add the single variable {!DocGenInput} to collection variable {!DocGenInputCollection}
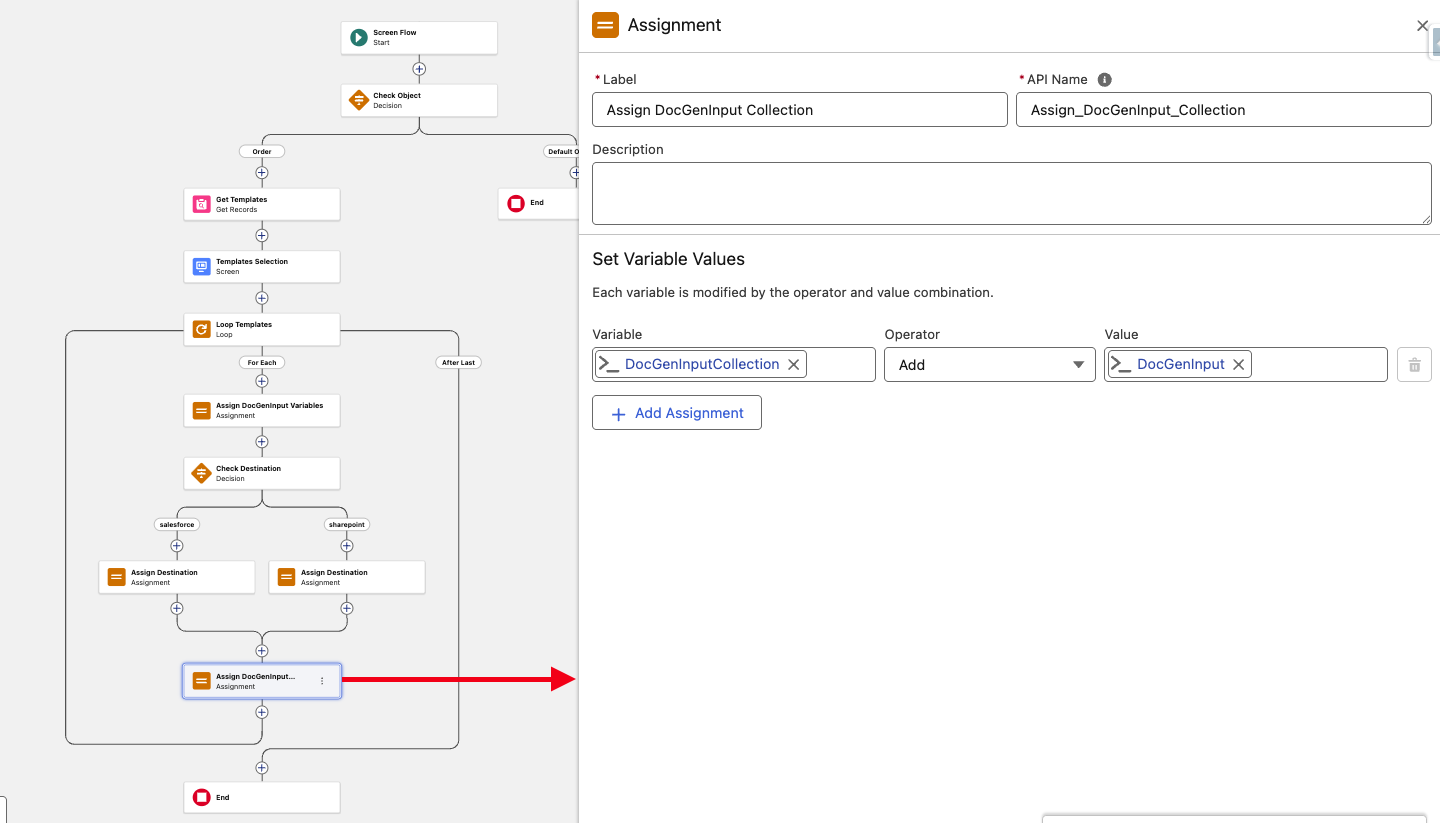
6 - Add the 'Generate Document' Action
Finally, add the Generate Document (Batch) action to your flow. Pass the collection variable {!DocGenInputCollection} into the Inputs parameter.
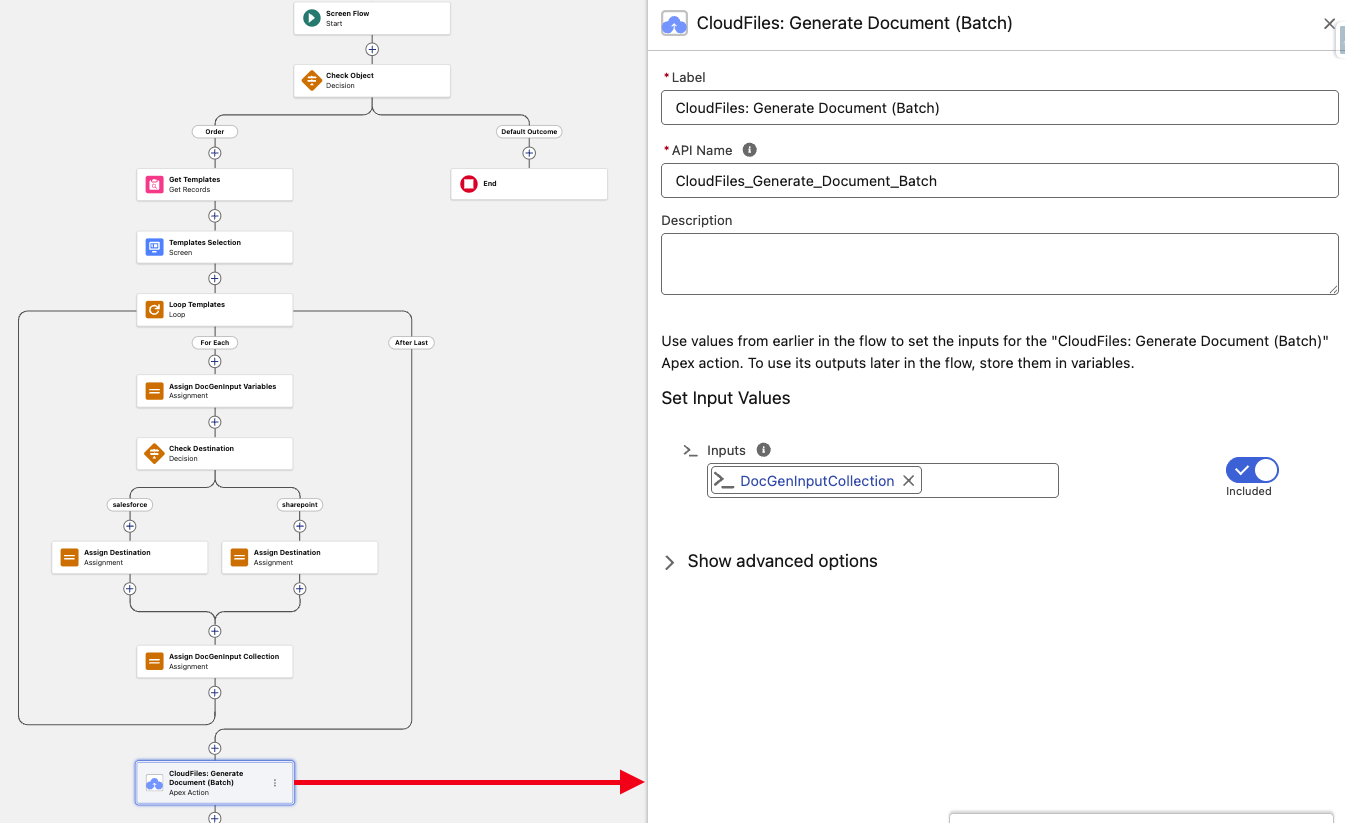
This allows Salesforce to generate documents for all selected templates in one go. The action ensures that each template, along with its recordId, type, and destination, is processed together.
Test the Setup
Save and activate the flow.
Add Flow to Record Page
To allow users to generate documents directly from a record page, add the flow as a component:
- Navigate to the Object Manager in Salesforce Setup.
- Select the Order object.
- Go to Lightning Record Pages → Edit the desired page.
- Drag the Flow component onto the page layout.
- In the properties panel, select your newly activated flow.
- Save and Activate the page.
Users will now see a flow section on the record page to generate documents by selecting templates and destination.
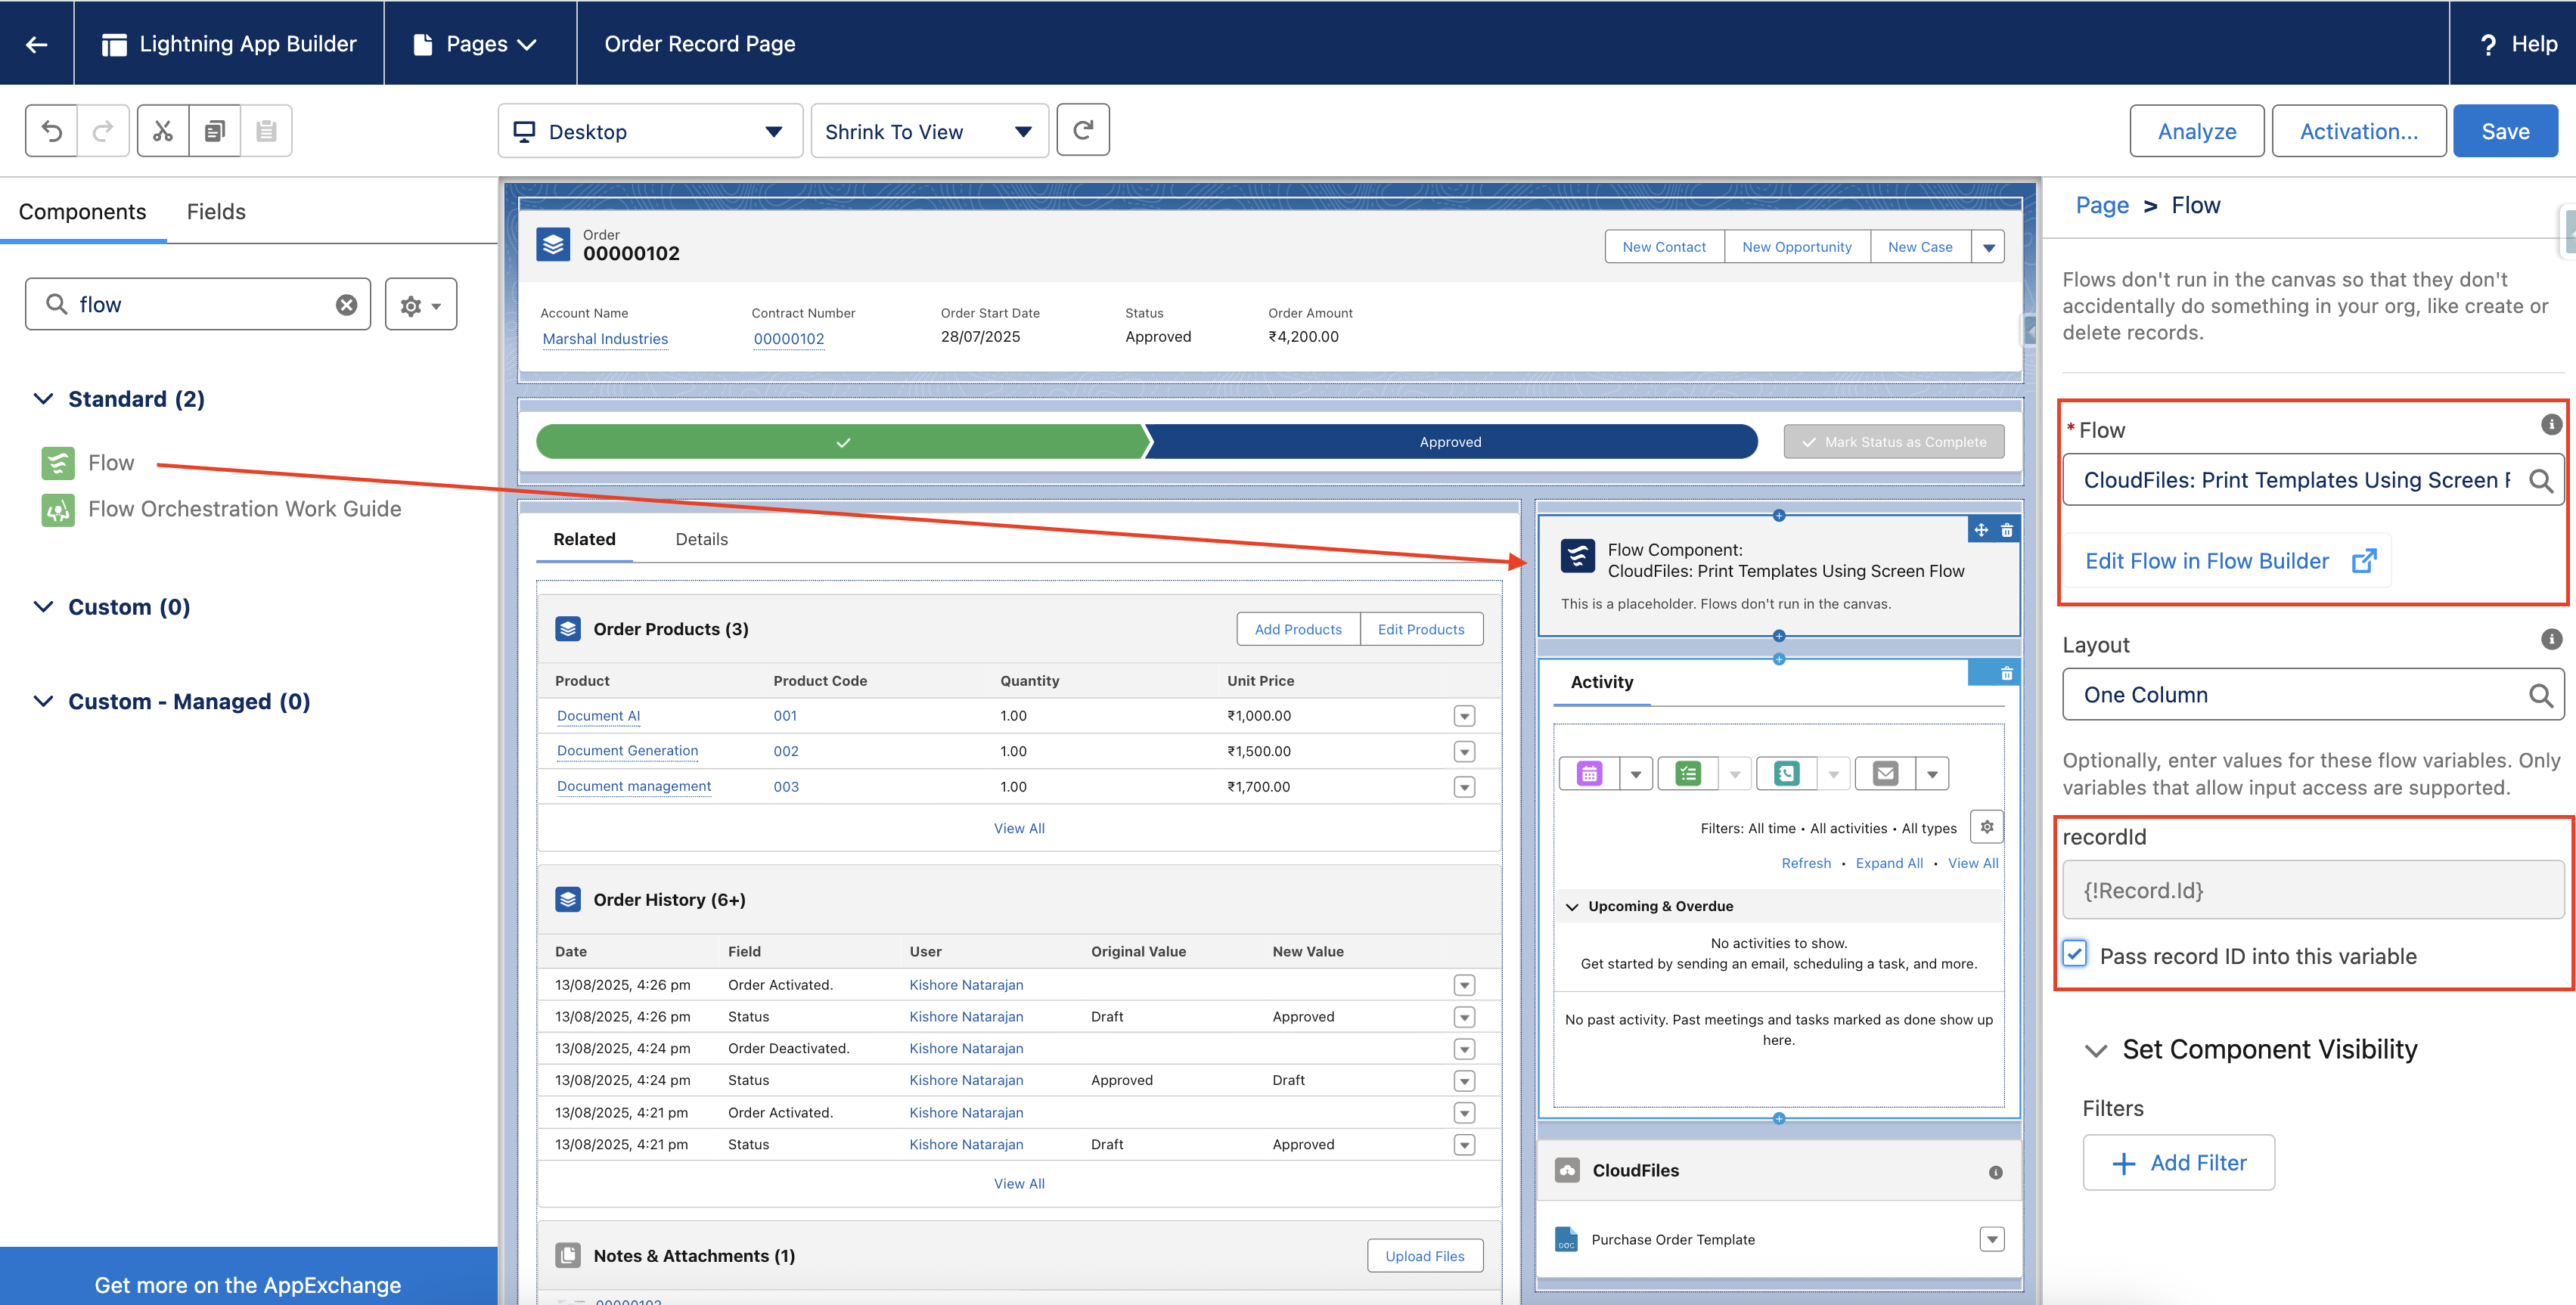
Once the flow is added to the Order record page, it will now display the screen with available templates.
- Select the required templates
- Choose a destination (Salesforce)
- Run the flow
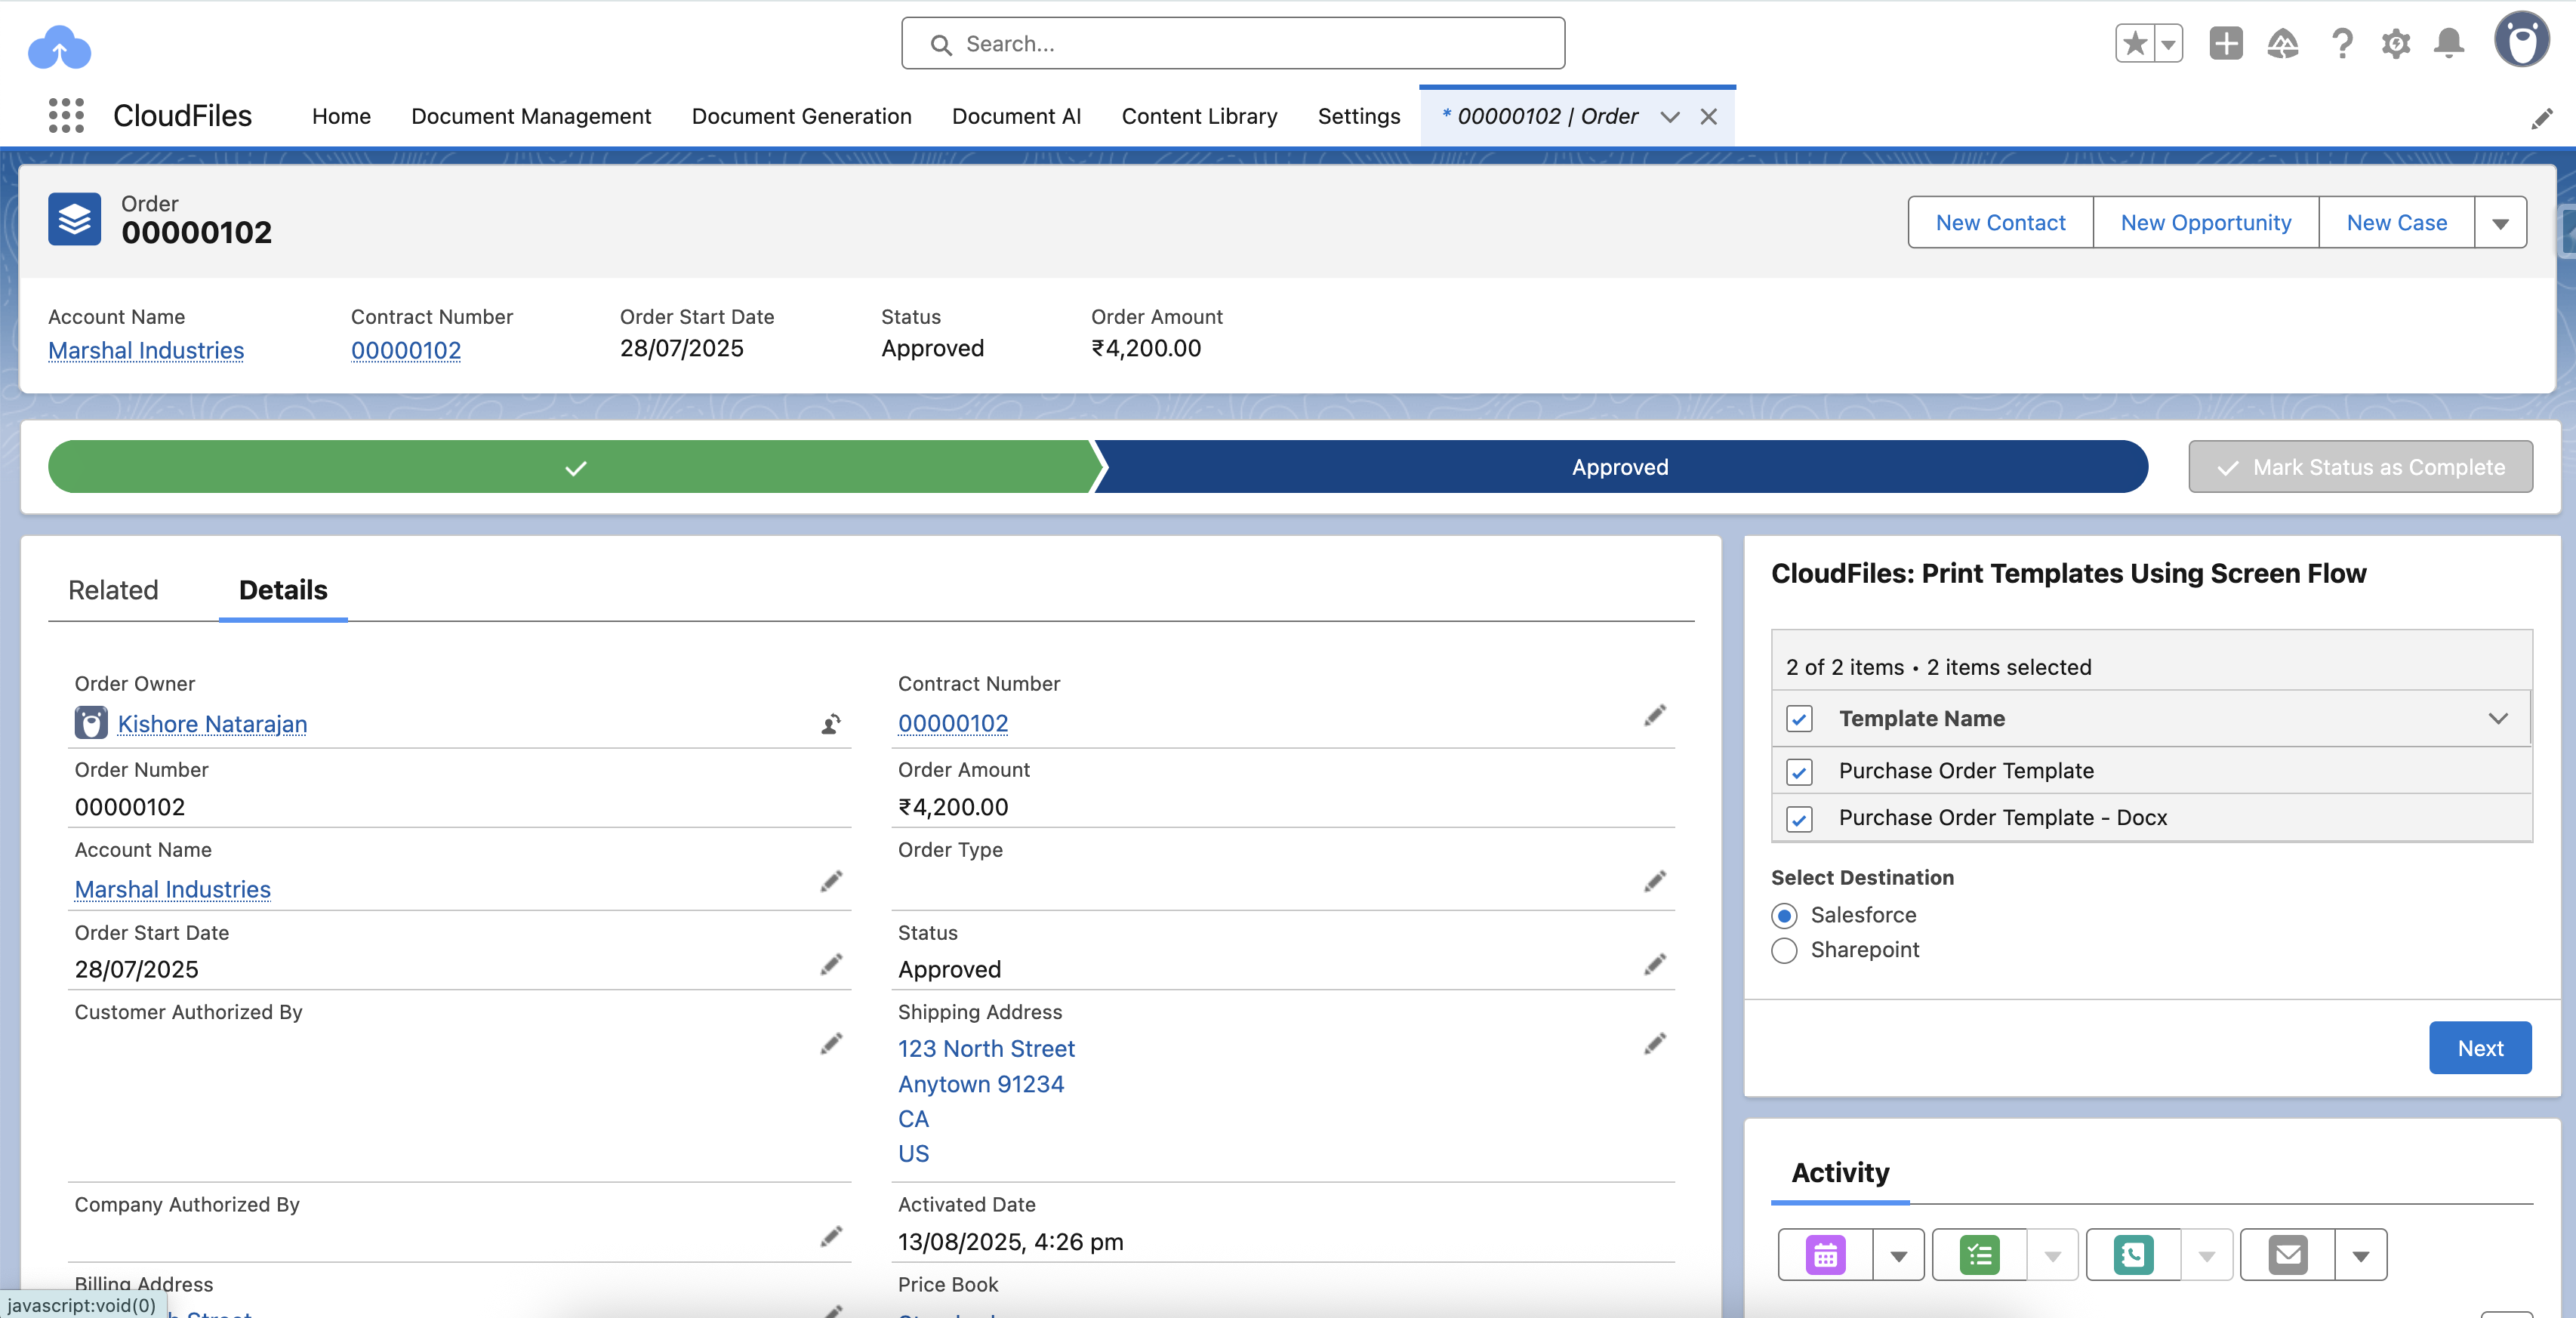
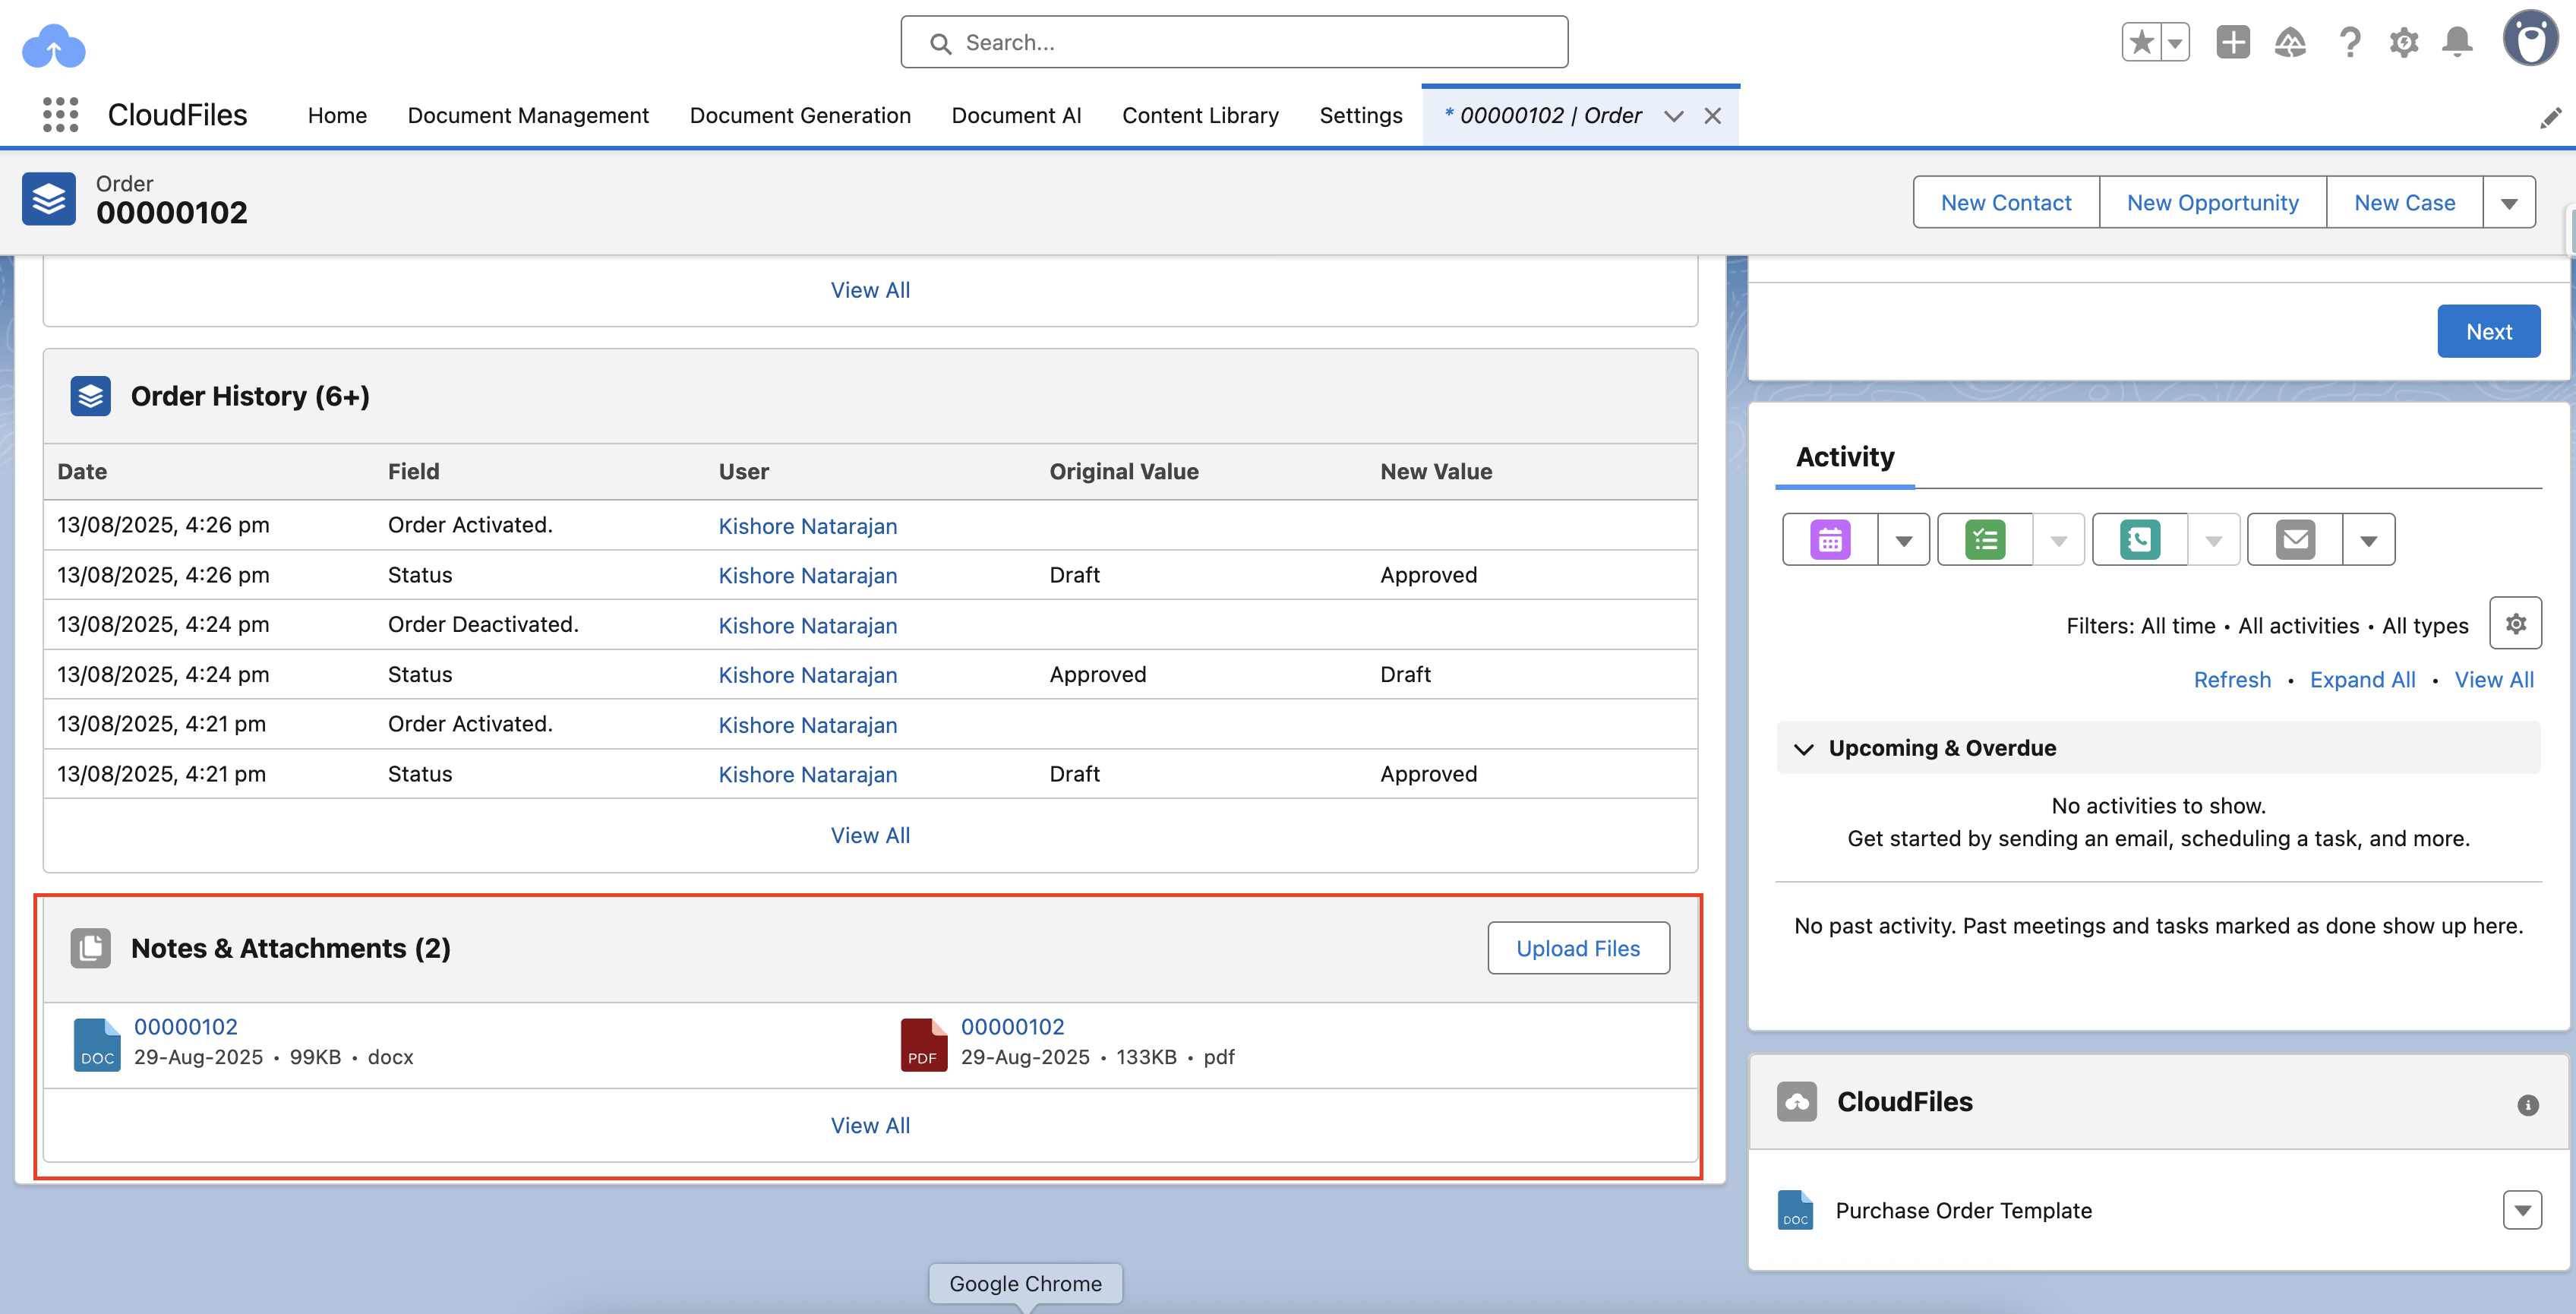
The generated document(s) will then be saved in the order's Notes & Attachments.
Output Parameters
Asynchronous Document Generation: Each document generation request (individual input) publishes a Document Generated event upon successful processing. Use these events to trigger downstream automations or flows, such as notifications or additional processing.
Adapting the Flow for Other Objects:
This flow can also be adapted for other records by configuring Step 3 – Add a Decision element. Update the Decision outcomes to match the specific object (similar to how it was done for Order), ensuring that each object routes to its relevant set of templates.