What to Expect
By the end of this tutorial, you will know how to:
- Set up a record-triggered flow in Salesforce to automate document generation.
- Optionally define a destination for storing the generated document.
- Add and configure the Generate Document action in the flow.
- Test and validate that documents are generated automatically when a record is updated.
Tutorial Video
Refer to the quick video if you would like to have a visual guide for this tutorial. Read on if you prefer textual content.
Video will be added soon
Prerequisites
Install CloudFiles in Salesforce
CloudFiles is available on the Salesforce AppExchange and can be installed using the standard app installation process. Check out Installation and Configuration guides to set up your account and user access.
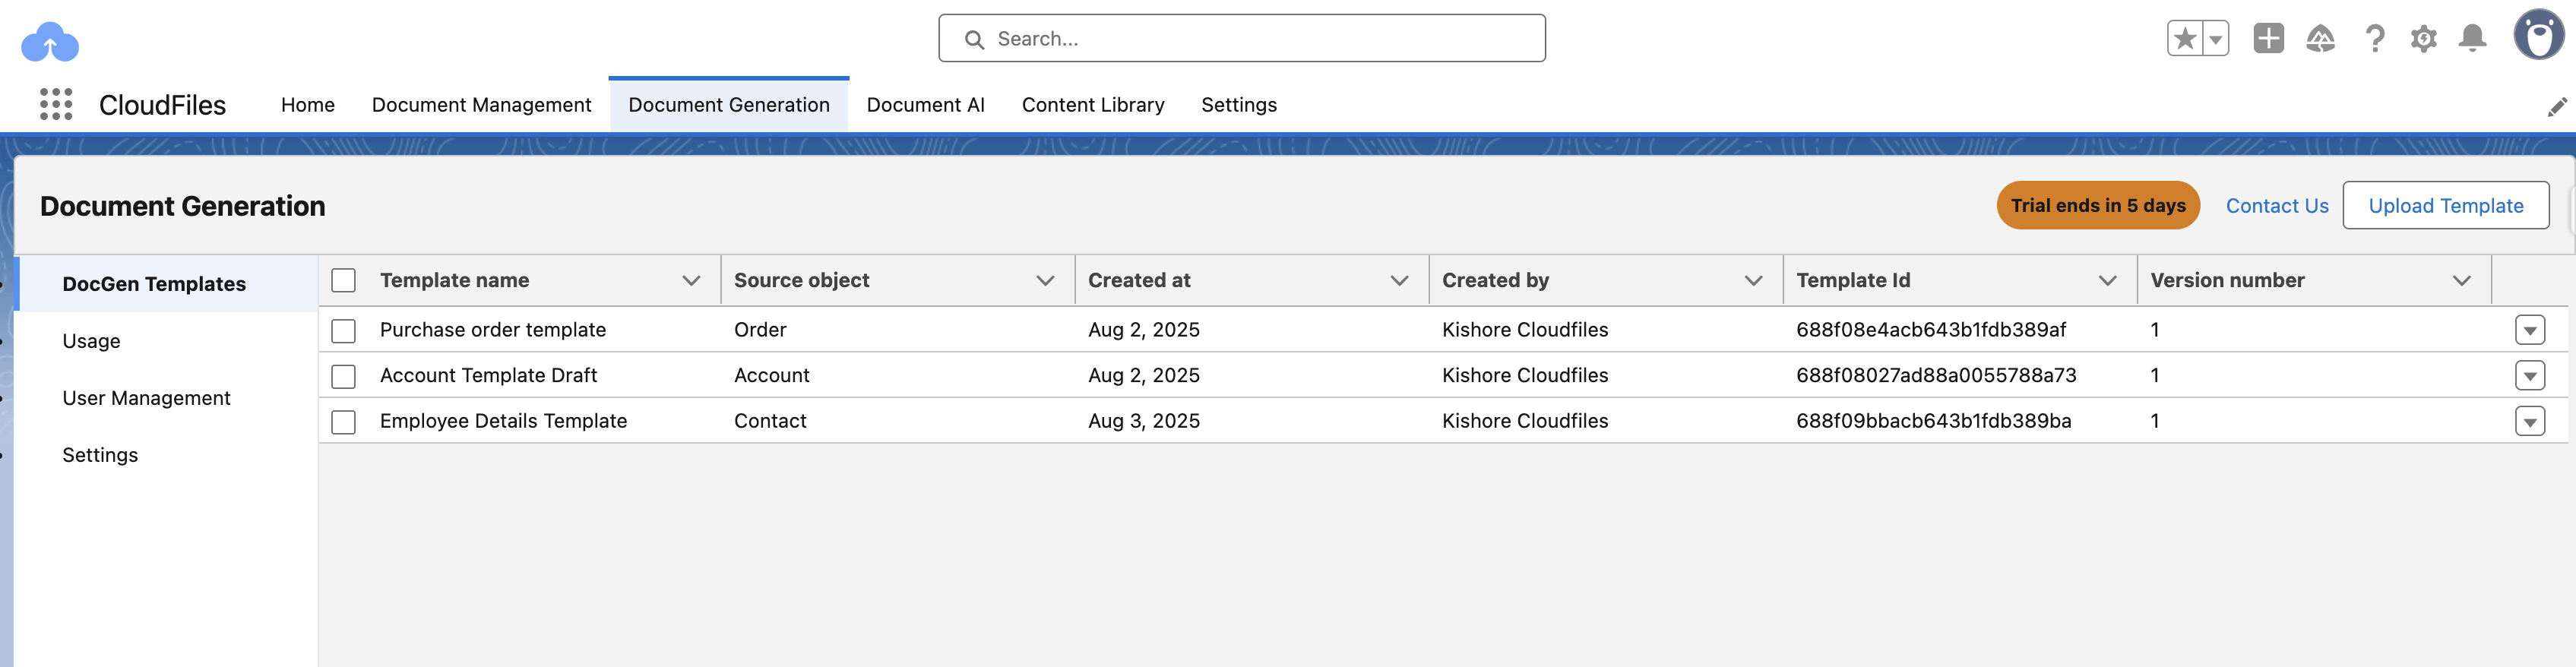
Doc-Gen Templates
Ensure that the templates published for the object are listed under the Document Generation tab → DocGen Templates. Locate the Template Id for the template you want to use and note it down, as you’ll need it as an input in your flow action.
Building the Flow
1 - Create a Record-Triggered Flow
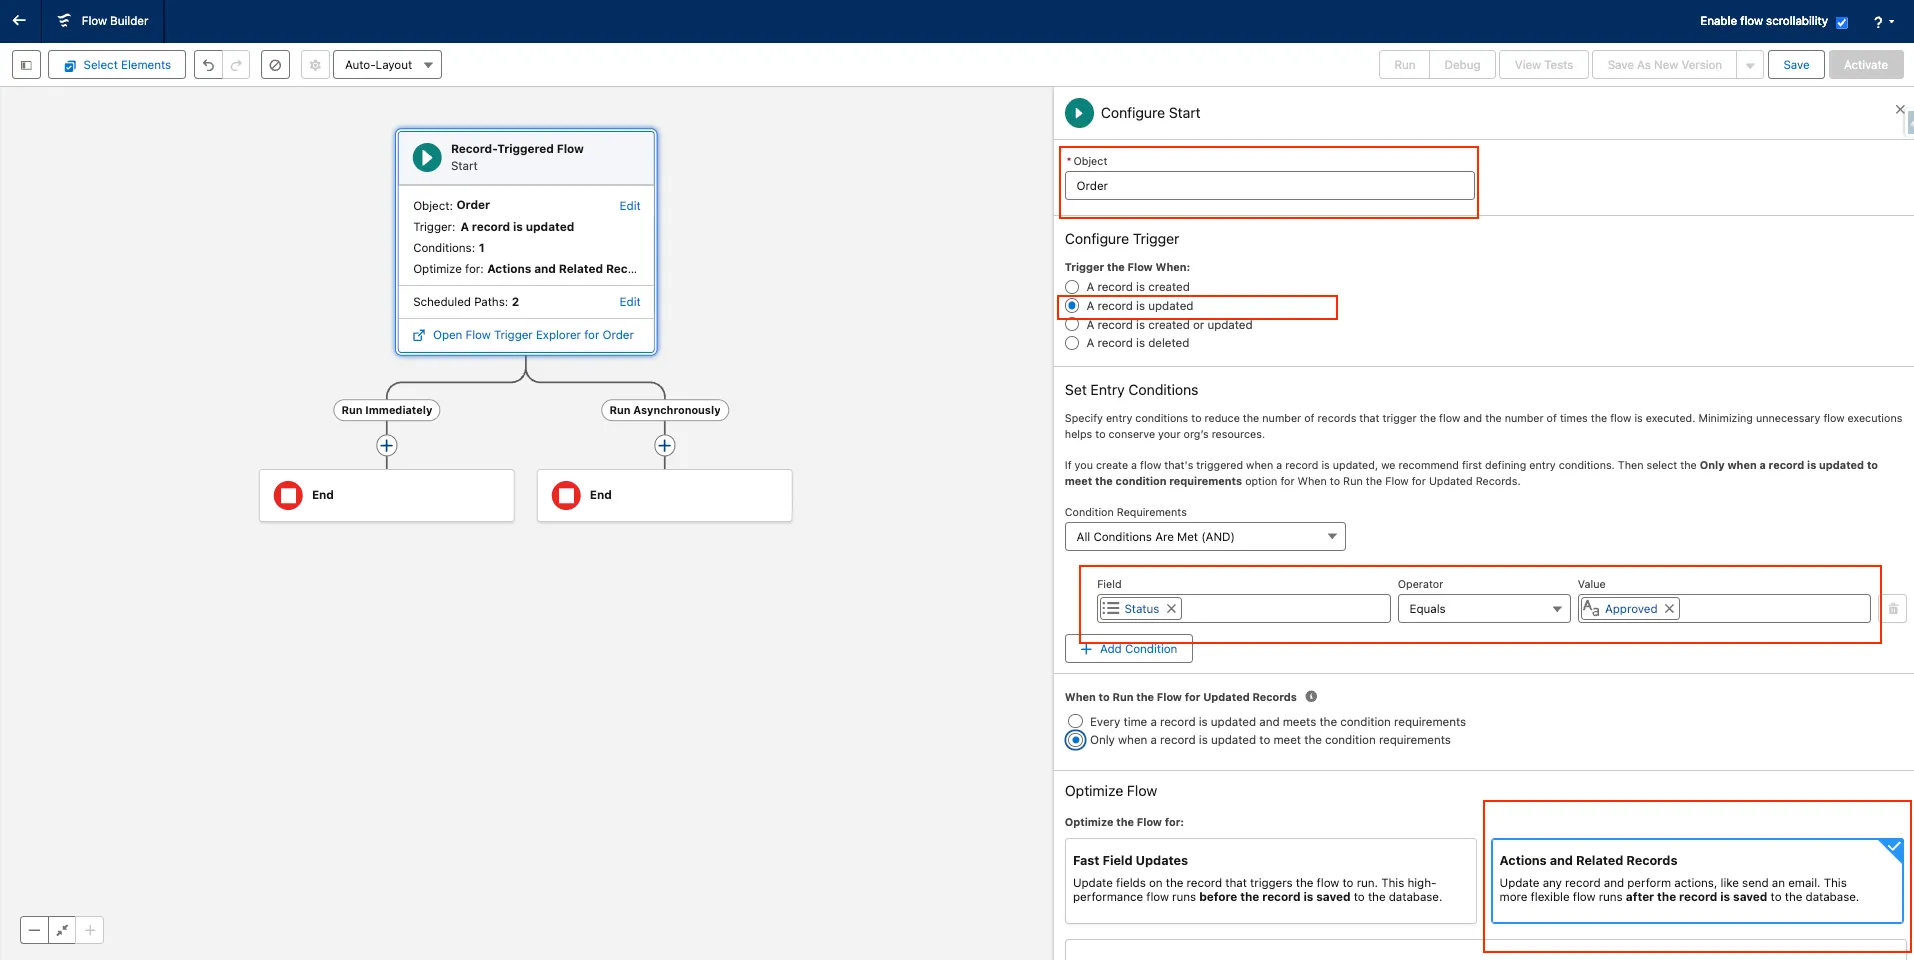
Since we’re using a Purchase Order template that is published for the Order object, set the Order object as the trigger for the flow. Use the Status field as the triggering criterion, so the document generation starts automatically whenever an order’s status changes to Purchased.
This is how the final flow looks like -
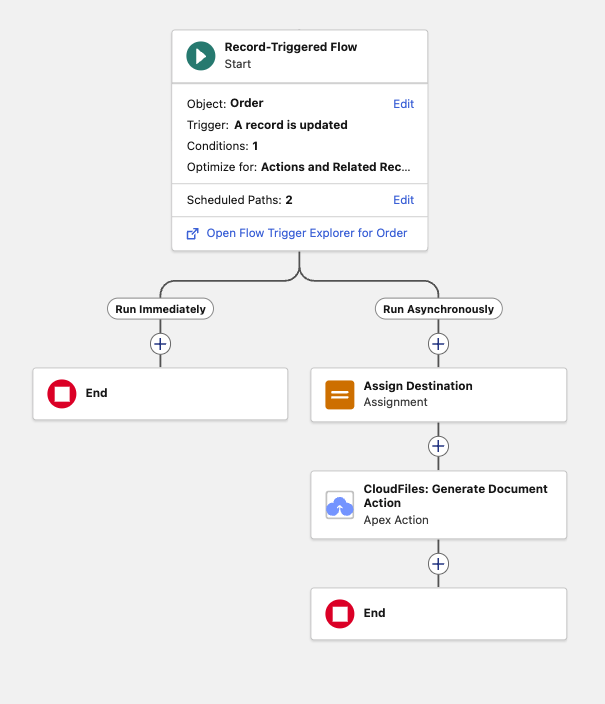
The details of the flow are given below -
- Navigate to Setup → Flows in Salesforce.
- Click New Flow → Select Record-Triggered Flow.
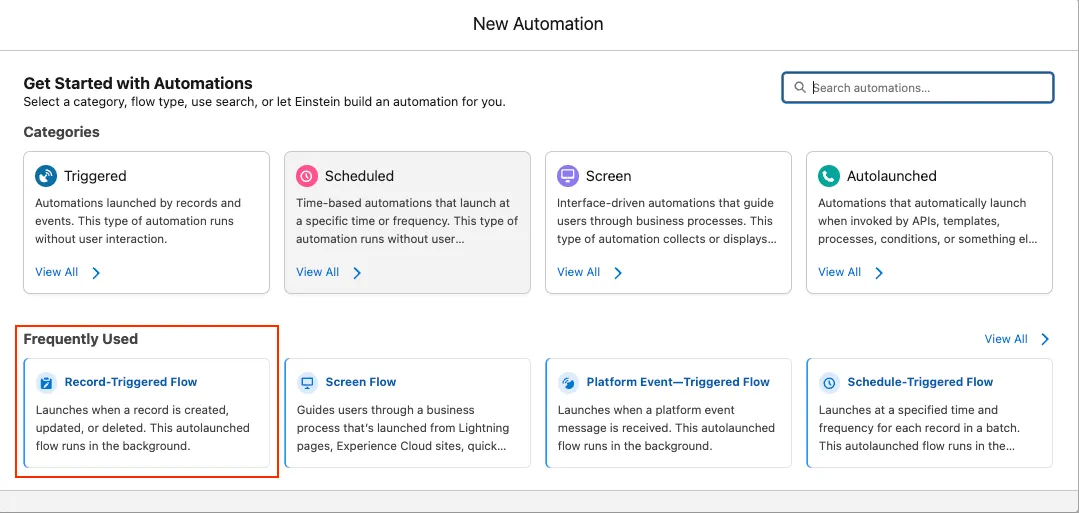
- Set the Object to Order.
- Define the triggering criteria when Status is marked as Purchased.
- Select Optimize Flow as Actions and Related Records.
- Add Asynchronous Path.
2 - Adding Destination (Optional)
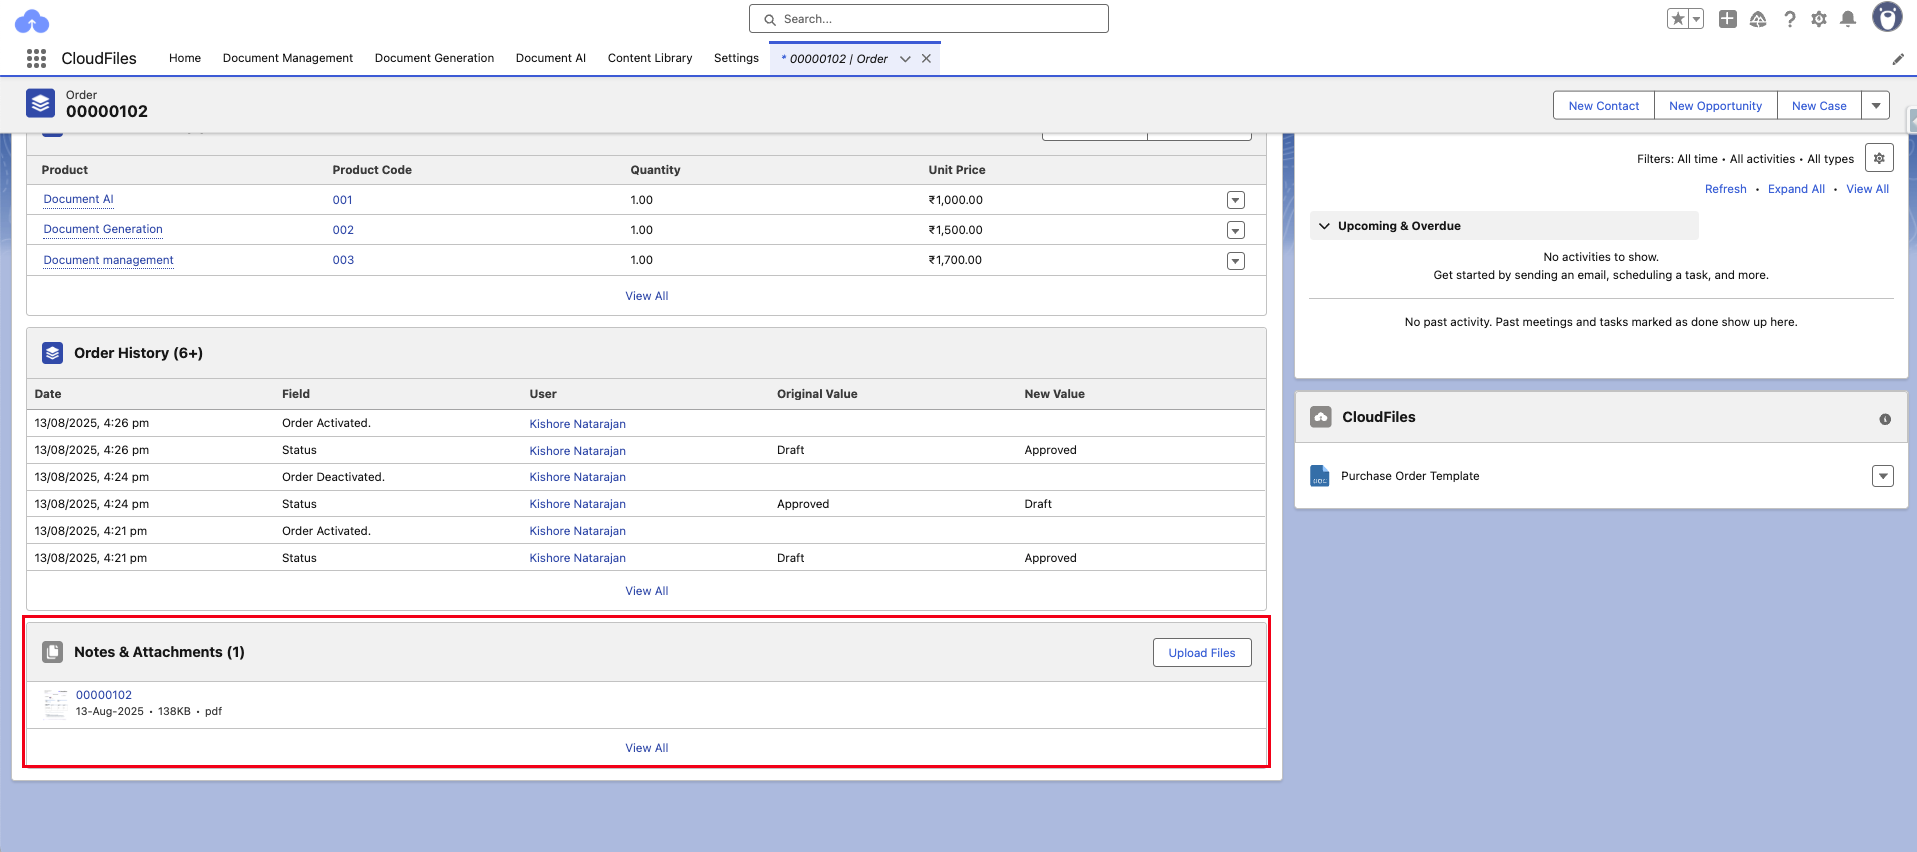
The Generate Document flow action requires destination parameters if you want to attach the generated document to a specific Salesforce record or store it in external storage. Let's store the document in the Notes & Attachments section of the Order record. If you don’t define a destination, the generated document will be stored by default in the Salesforce Content Library.
Steps to Configure Destination:
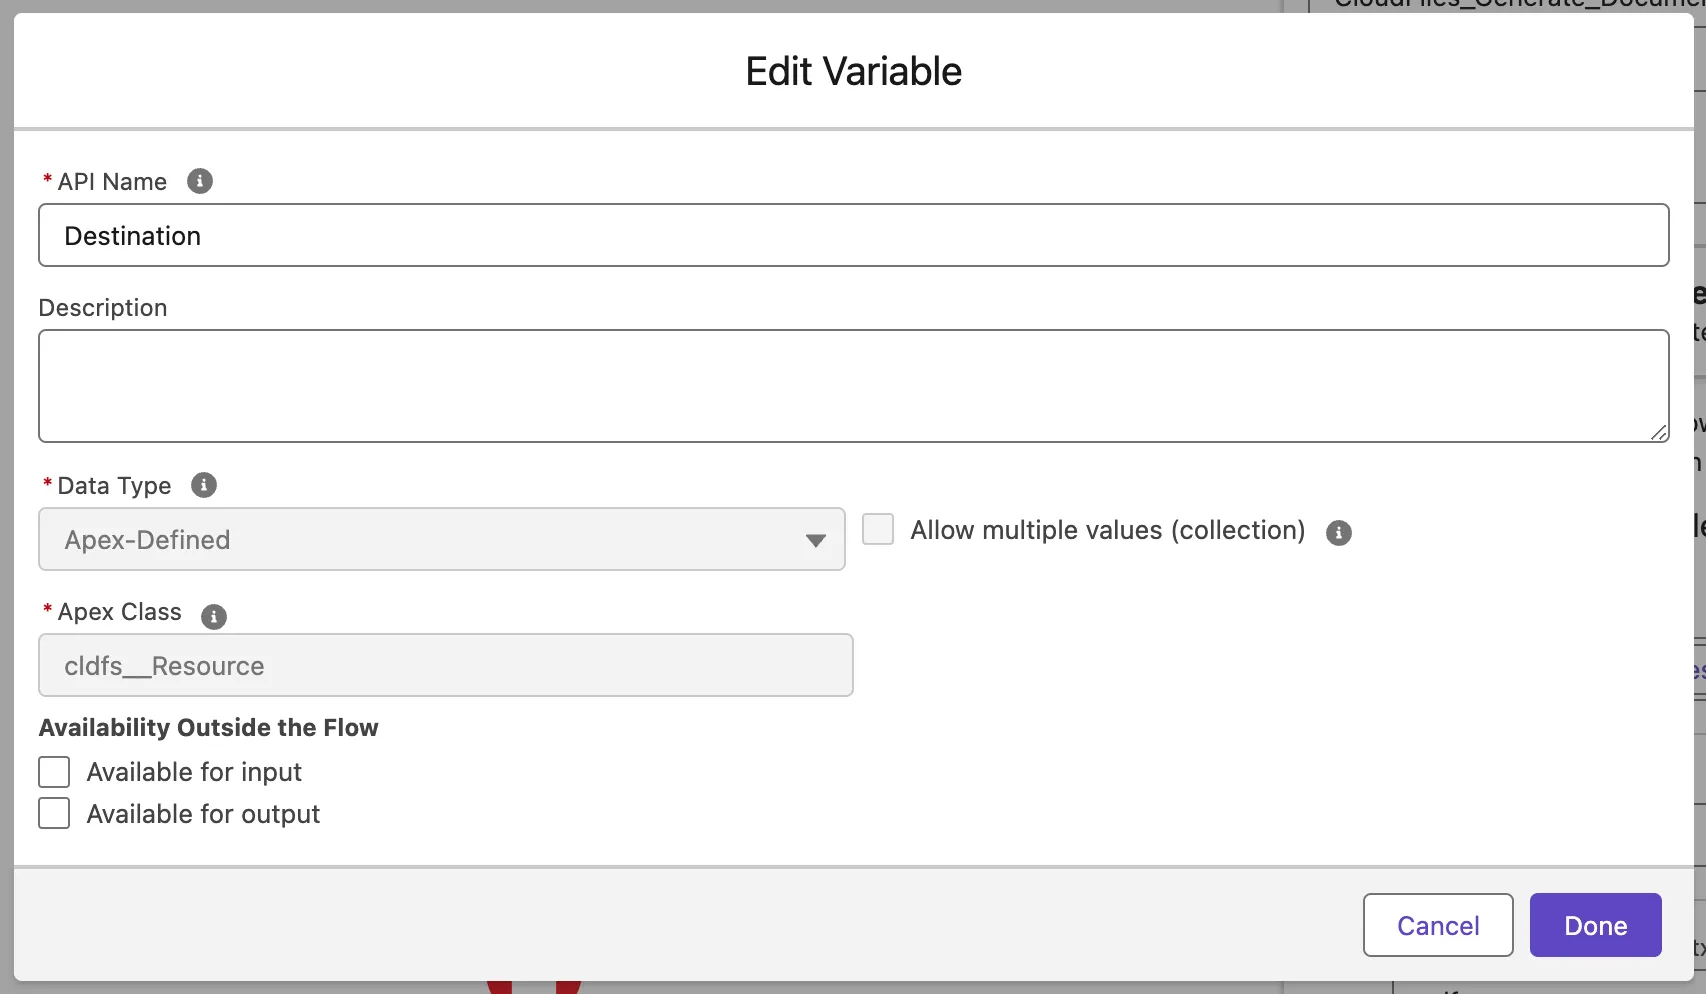
- Create an Apex-Defined Variable of Apex Class cldfs__Resource
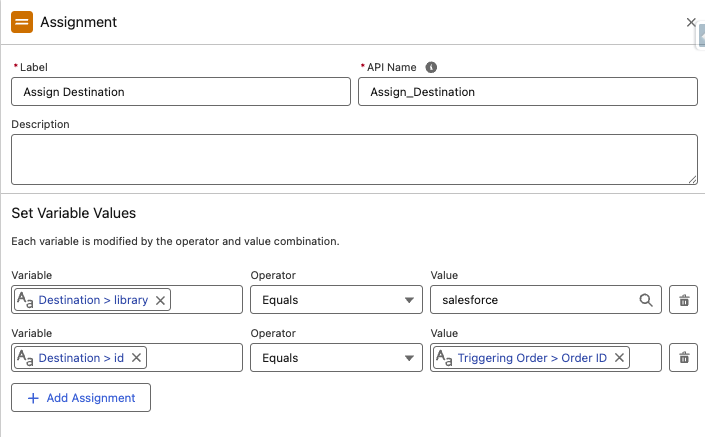
- To Save in Order's Notes & Attachments,
- Assign the following fields:
- Library: Set to salesforce.
- Id: Set to the Record Id of the Order record
- Assign the following fields:
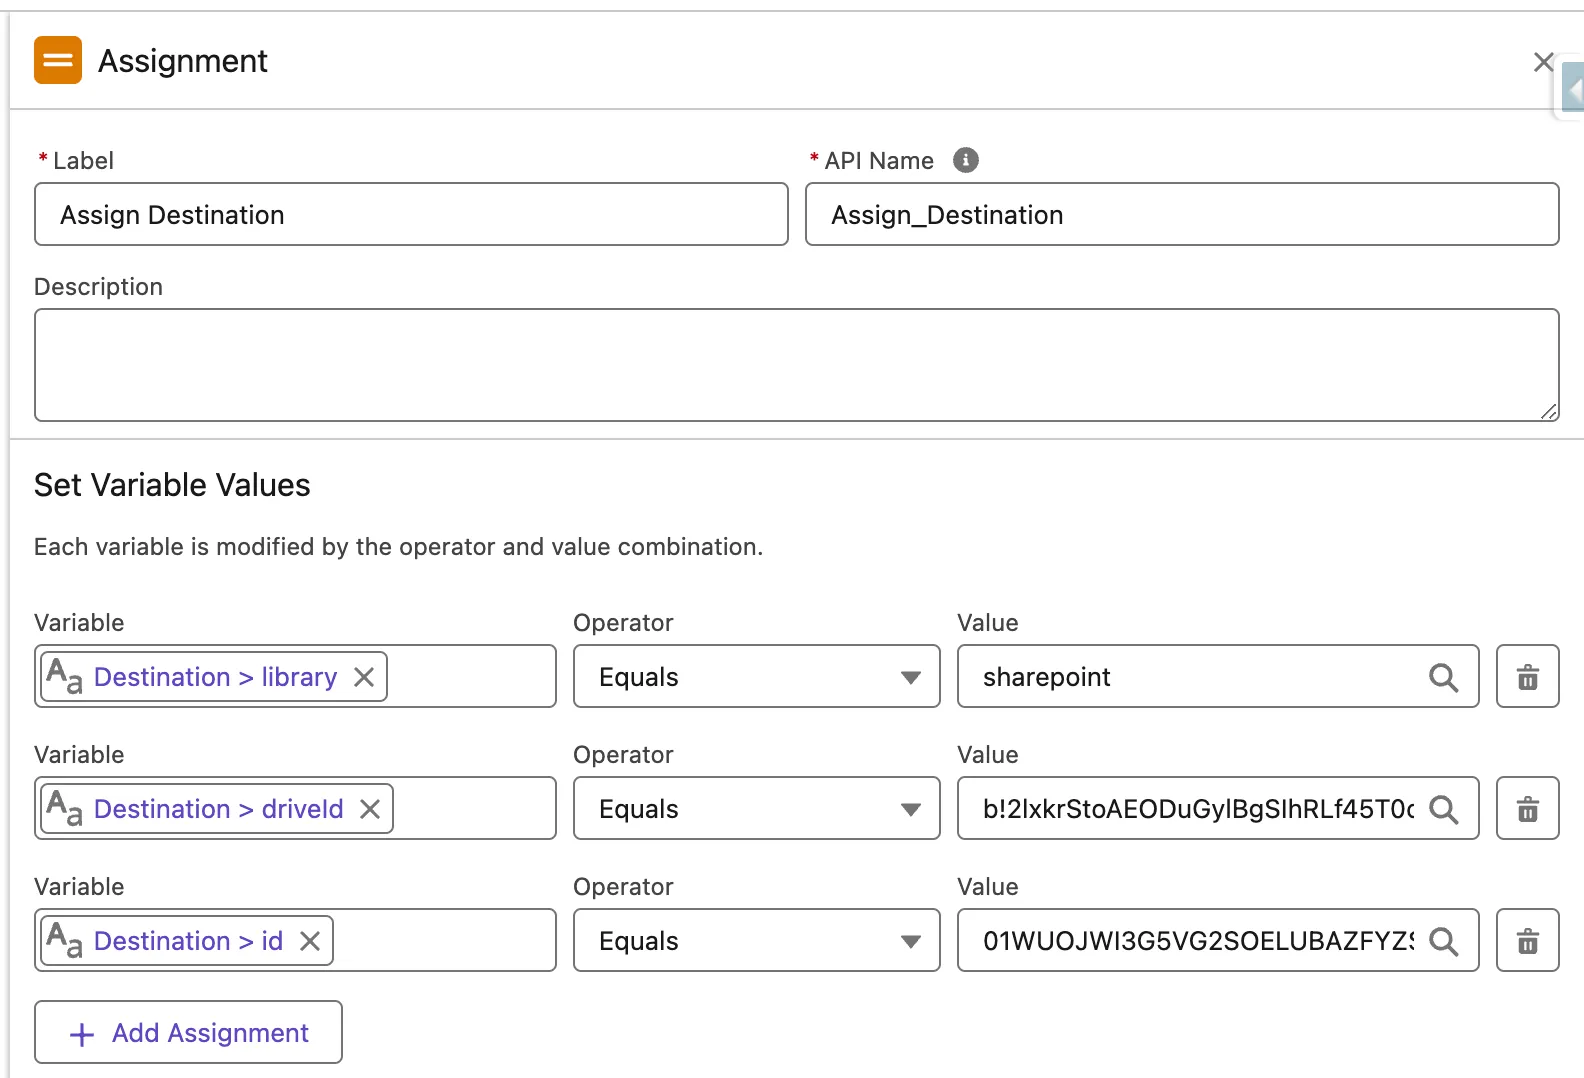
To Store in External Storage such as SharePoint, GDrive, etc
When using CloudFiles with the CloudFiles | Document Management & Sharing Platform:
Assign the following fields to define the external storage location:
- Library: Specify the library name.
- Drive Id: Specify the Id of the connected drive.
- Id: Specify the Id of the folder or location within the drive.
You can assign the above fields either manually (by referring to the Metadata details from Content Library) or by using the Get Connected Folder action to populate the fields from the action output.
3 - Add the 'Generate Document' Action
- In the flow, click + and select Action.
- Search for and choose CloudFiles: Generate Document.
- Fill in the following input parameters:
Destination → Provide the previously created Destination variable to specify where the generated file will be stored, either in a Salesforce record or in an external storage location. If left blank, the file will be saved to the Salesforce Content Library by default.
Document Type → Select the format for your output file, such as docx, or pdf. For example, choose pdf for finalized, non-editable documents, or docx if the document will need further editing.
Record ID → Pass the {!$Record.Id} from the triggered record. This tells the action which Salesforce record to use as the data source for generating the document.
Template ID → Enter the 24-digit CloudFiles Template ID of a published template. This ensures the correct template is used for document generation, so that the output is formatted and populated as intended. In this example, a variable (TemplateId) is created to store the Template ID.
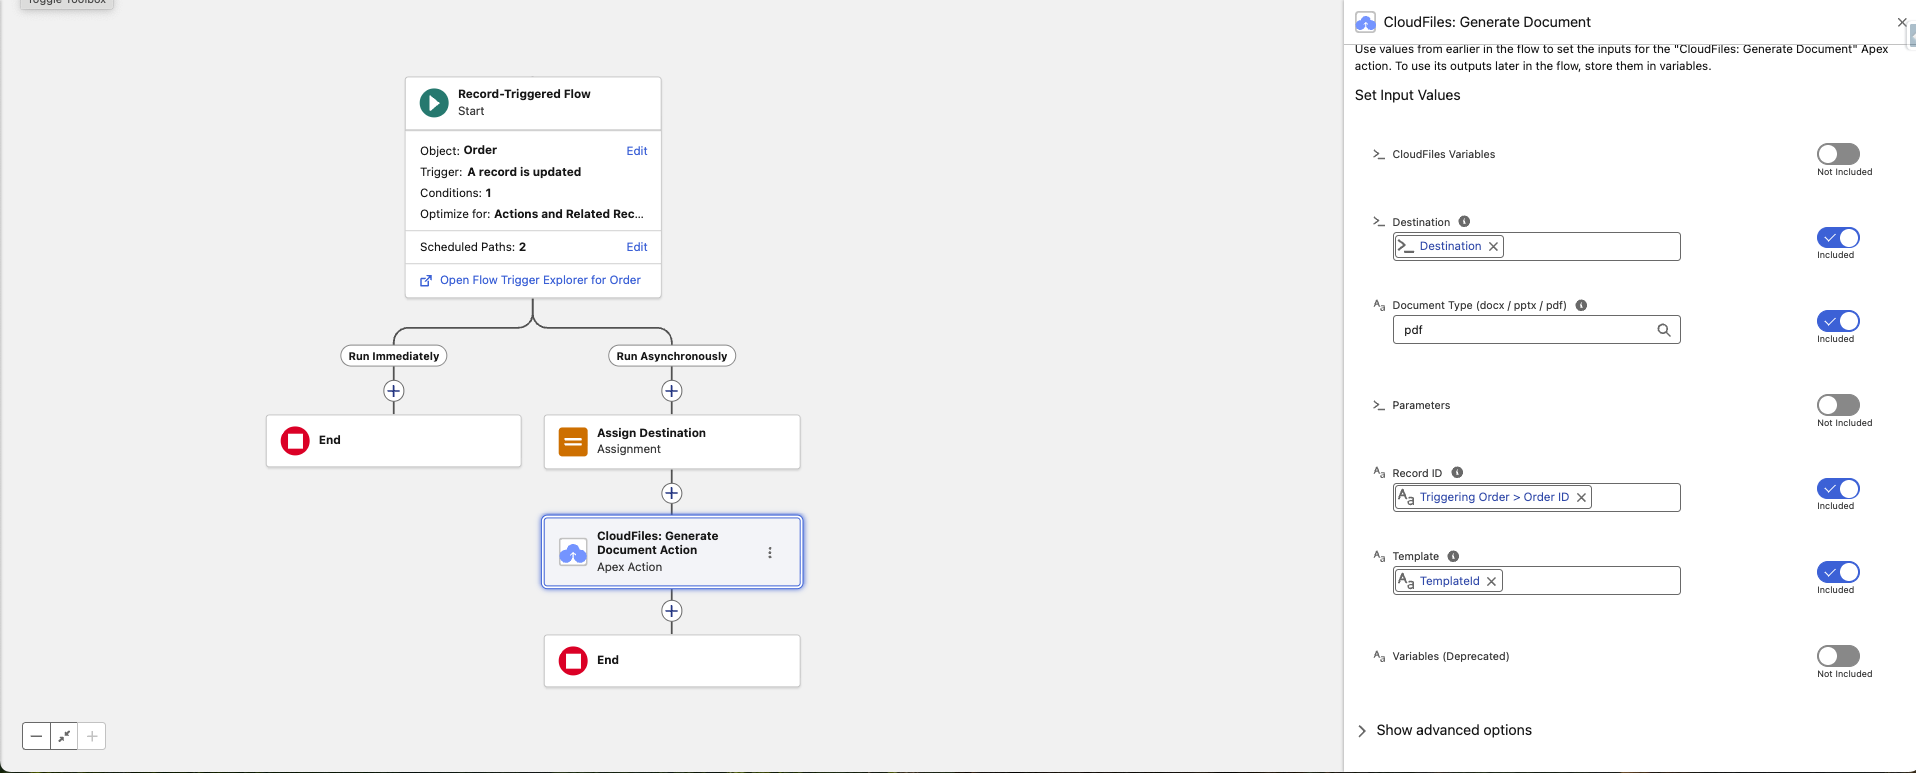
You can also use the Parameters input to configure additional settings for the document, such as password protection, locking, or printing permissions. To know more, refer to the Input Parameters section of Generate Document.
To have someone review the document before it is sent for signature, fill in the Packet Settings (optional) input. See Document Packets.
Generate Multiple Documents with Batch Action
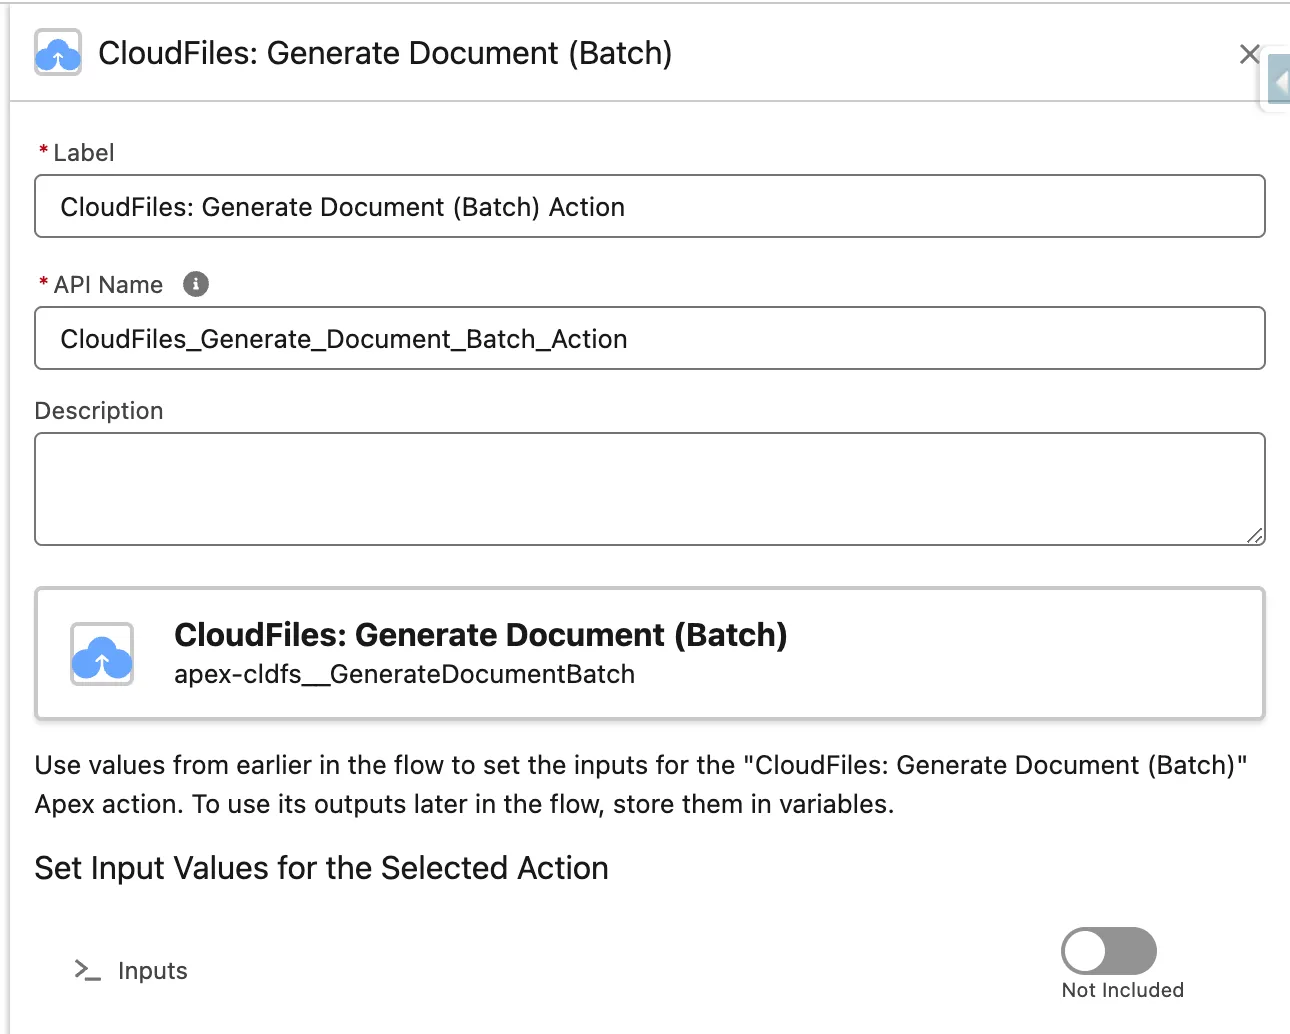
You can also generate multiple documents with different templates using the Generate Document (Batch) action.
To do this, you’ll need to create both individual and collection Apex-Defined Variables of the class cldfs__GenerateDocumentFlowInput within the flow.
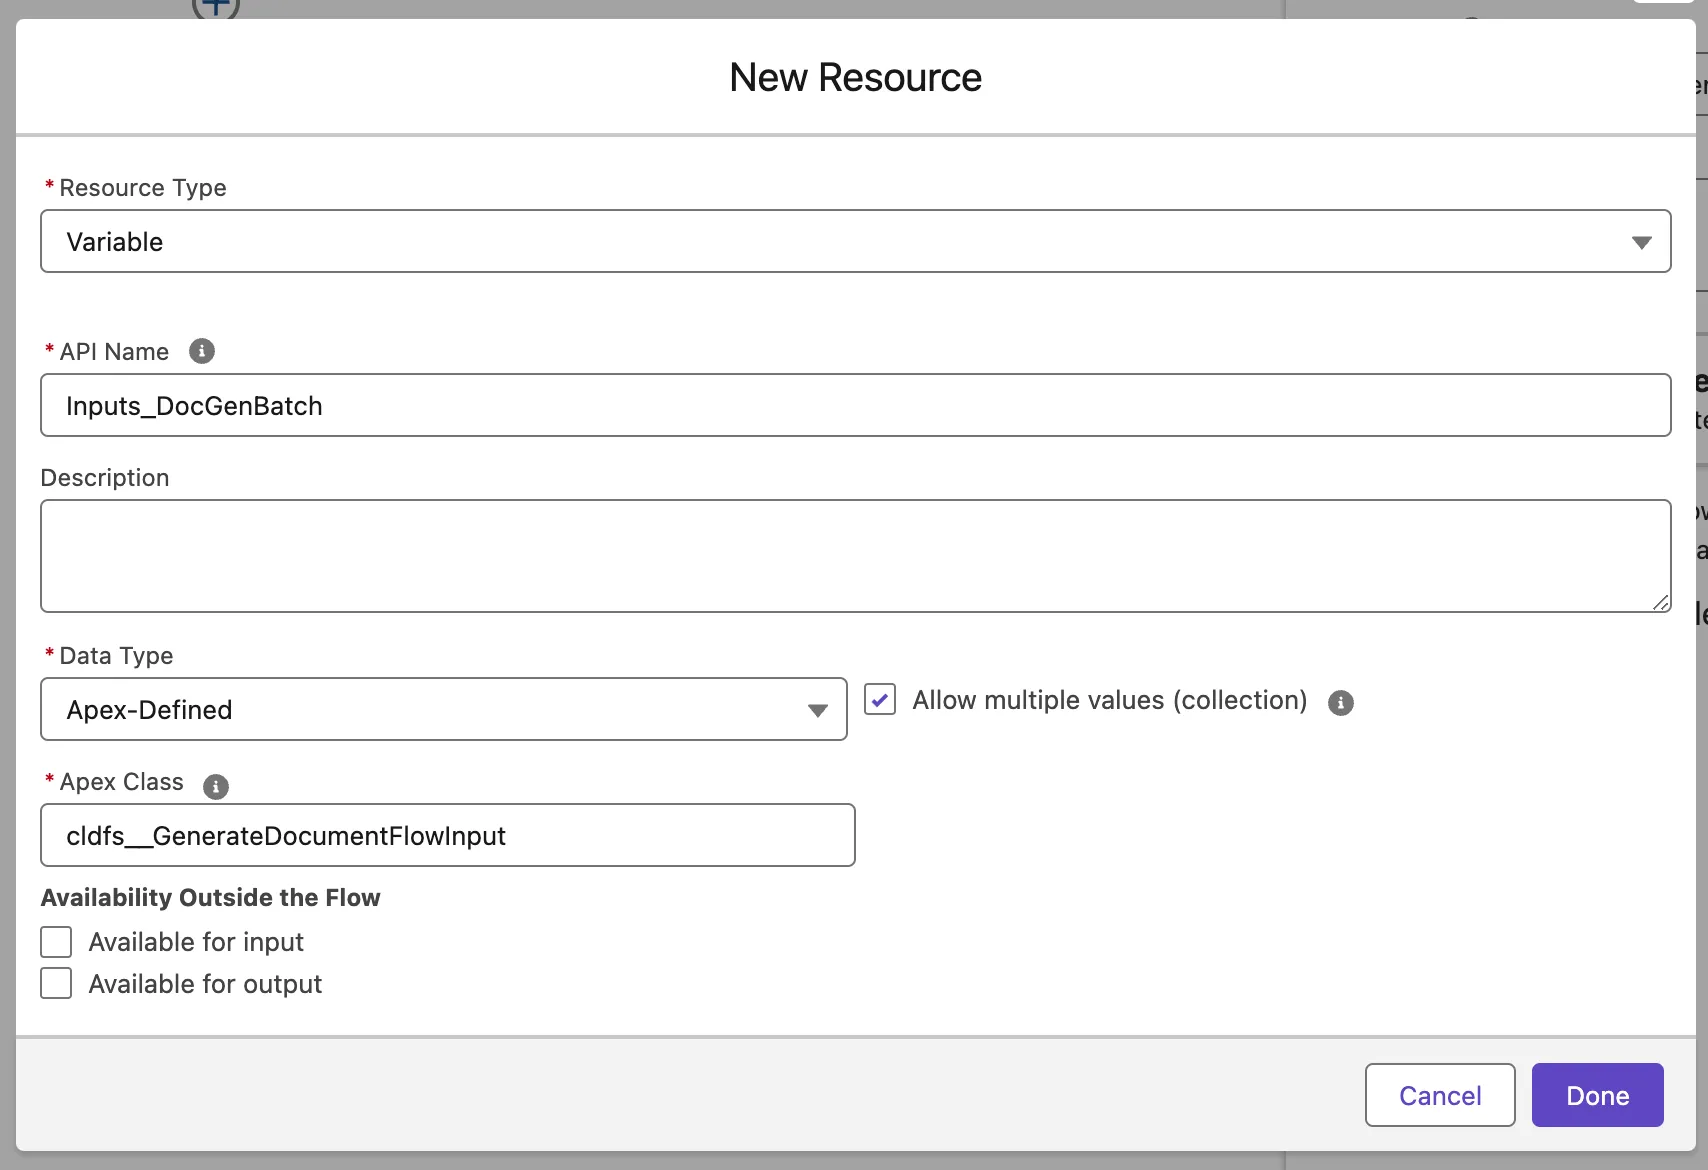
Configure each variable’s fields with the required configuration values (e.g., Template ID, Destination, and Record ID) just as you would for a single Generate Document action.
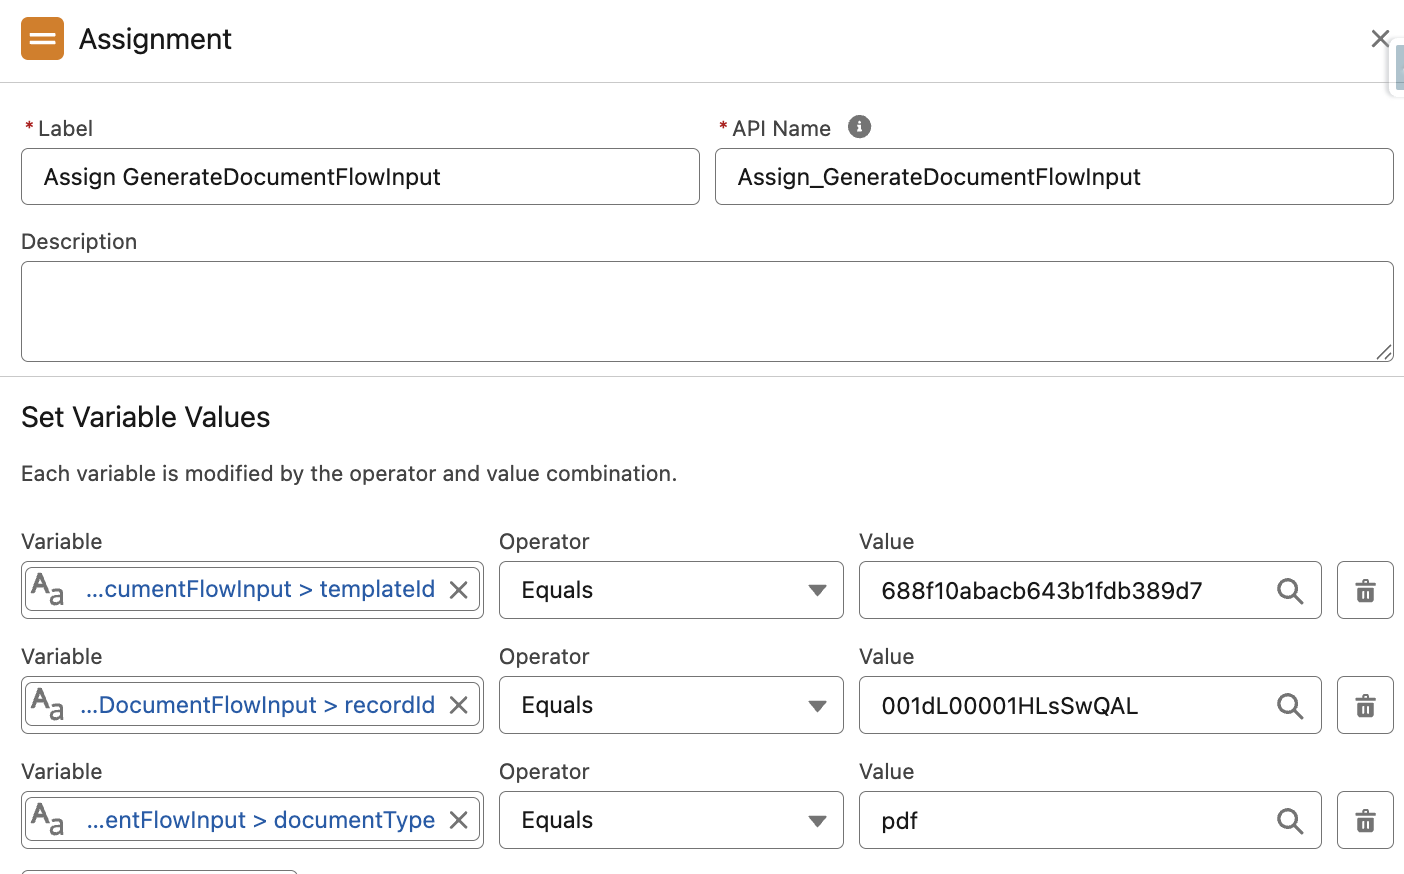
Next, add all the individual variables to the Collection Variable. Finally, pass this Collection Variable into the action’s Inputs parameter.
Test the setup
Save the flow and activate it.
Test the flow by navigating to an Order record that contains a list of Order Items. Update the Status field to Approved.
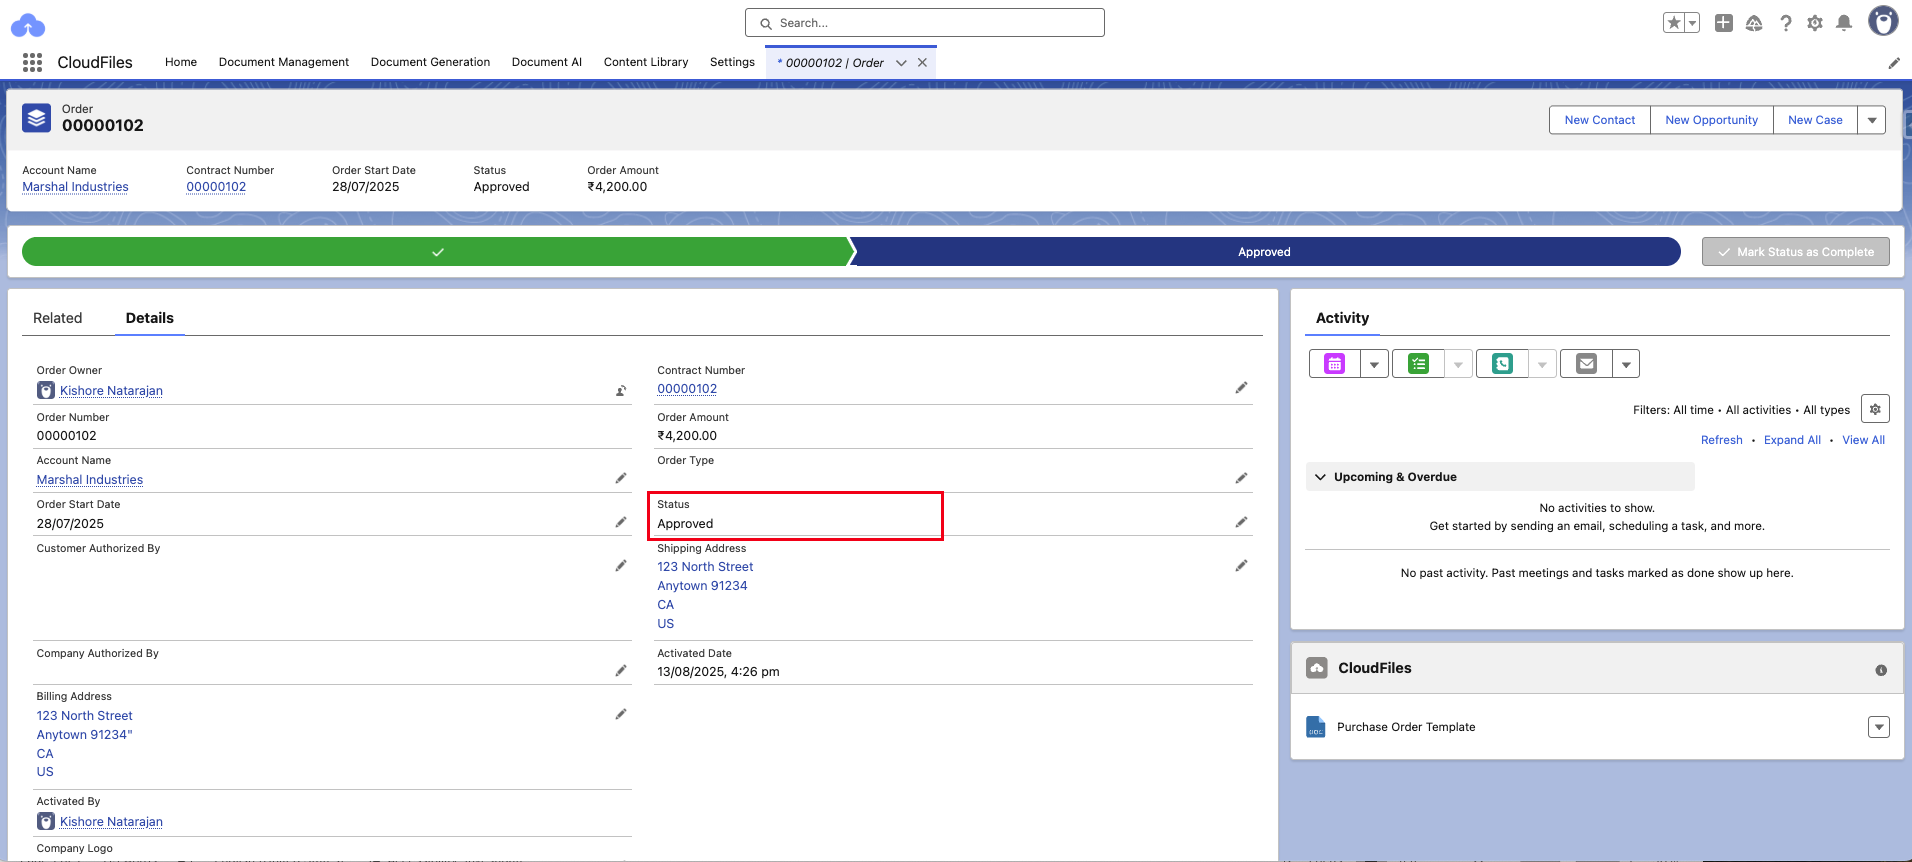
The document will then be generated in the backend and stored in the Notes & Attachments section. Refresh the page to view the generated document.
Output Parameters
The CloudFiles: Generate Document action operates asynchronously, meaning it does not provide immediate outputs after execution.
Asynchronous Document Generation: After the action runs, a Document Generated CloudFiles event is published. There is no direct confirmation or result data immediately available. You can use the Document Generated event to initiate other flows or automate additional actions.