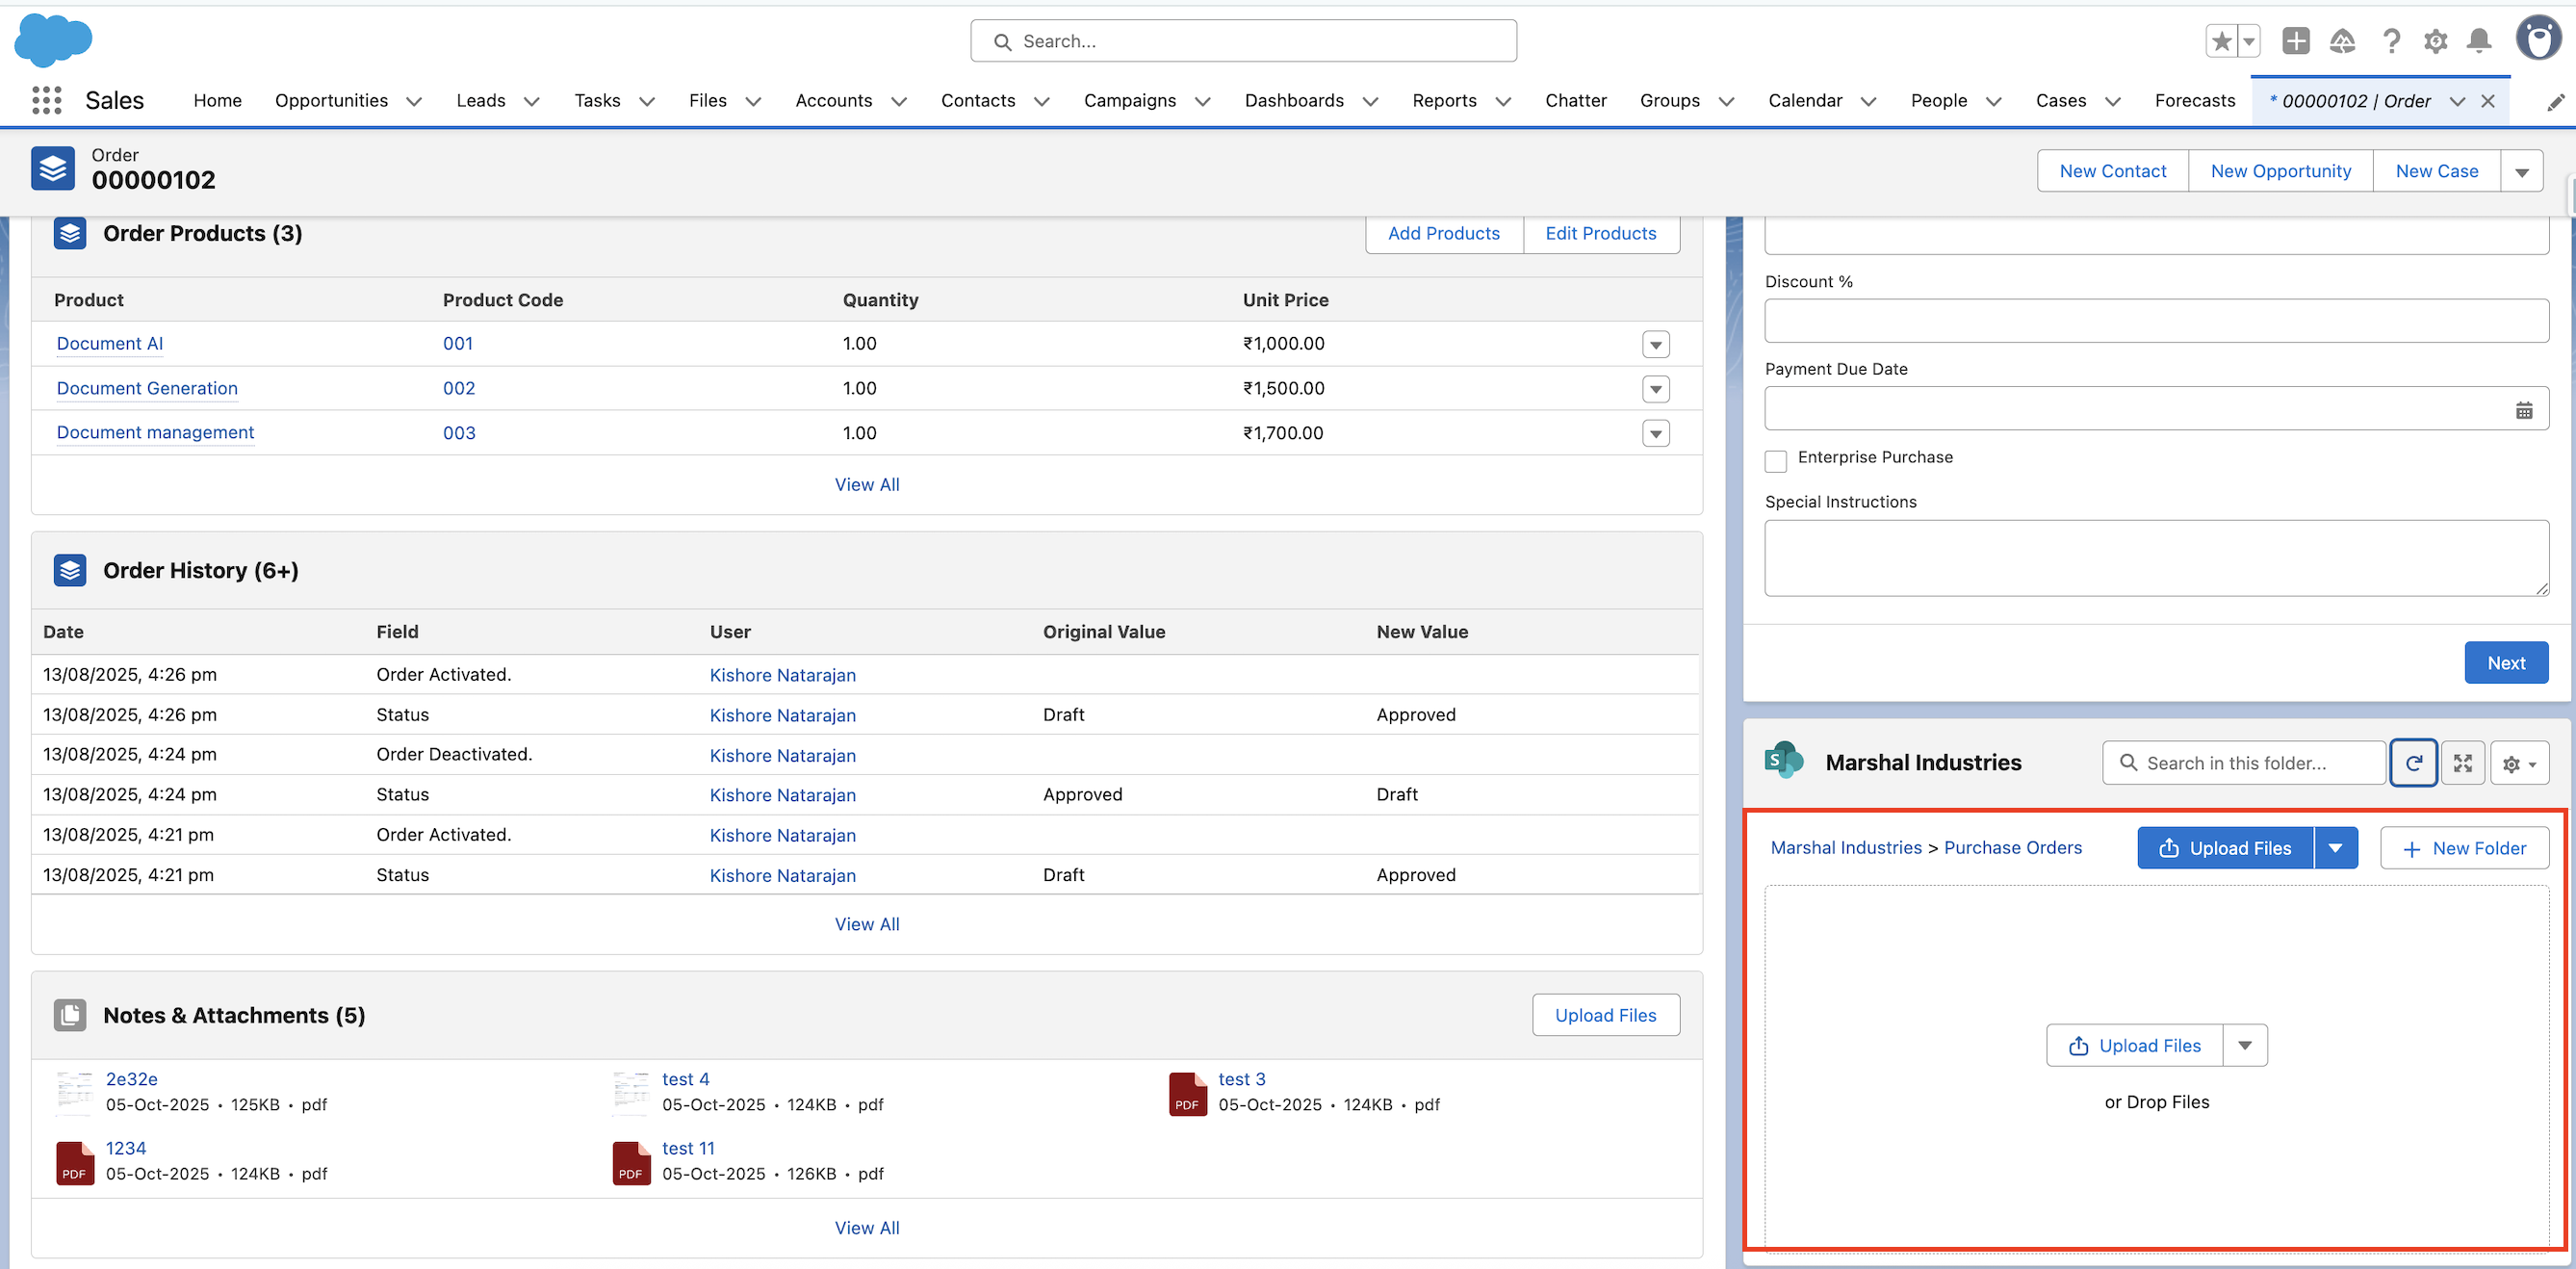
You can secure a PDF during generation for the following options:
- Printing – (AllowPdfPrinting)
- Locking the file – (LockPdf)
- Password for edit access – (PdfOwnerPassword)
- Password for viewing – (PdfViewPassword)
- File retention duration at the destination – (Retention)
- Allow filling fields if the generated PDF includes form fields – (AllowFillingPdfFormFields)
What to Expect
By the end of this tutorial, you’ll be able to:
- Add security options such as passwords, printing, and edit restrictions to generated PDFs.
- Control how long your documents remain accessible to recipients.
Prerequisites
Install CloudFiles in Salesforce
CloudFiles is available on the Salesforce AppExchange and can be installed using the standard app installation process. Check out Installation and Configuration guides to set up your account and user access.
Building the Flow:
Before adding PDF security options, make sure you already have a basic screen flow ready. You can follow the tutorial Generate a document with runtime variables to set up your flow up to the point where a document is generated. This tutorial is based on a Purchase Order (PO) example, where the PO document built using a template based on the Order object and is printed with runtime values entered through a Screen Flow.
Your flow should at least include:
- A Screen where users can enter input values.
- The Generate Document (Sync) action to create the file.
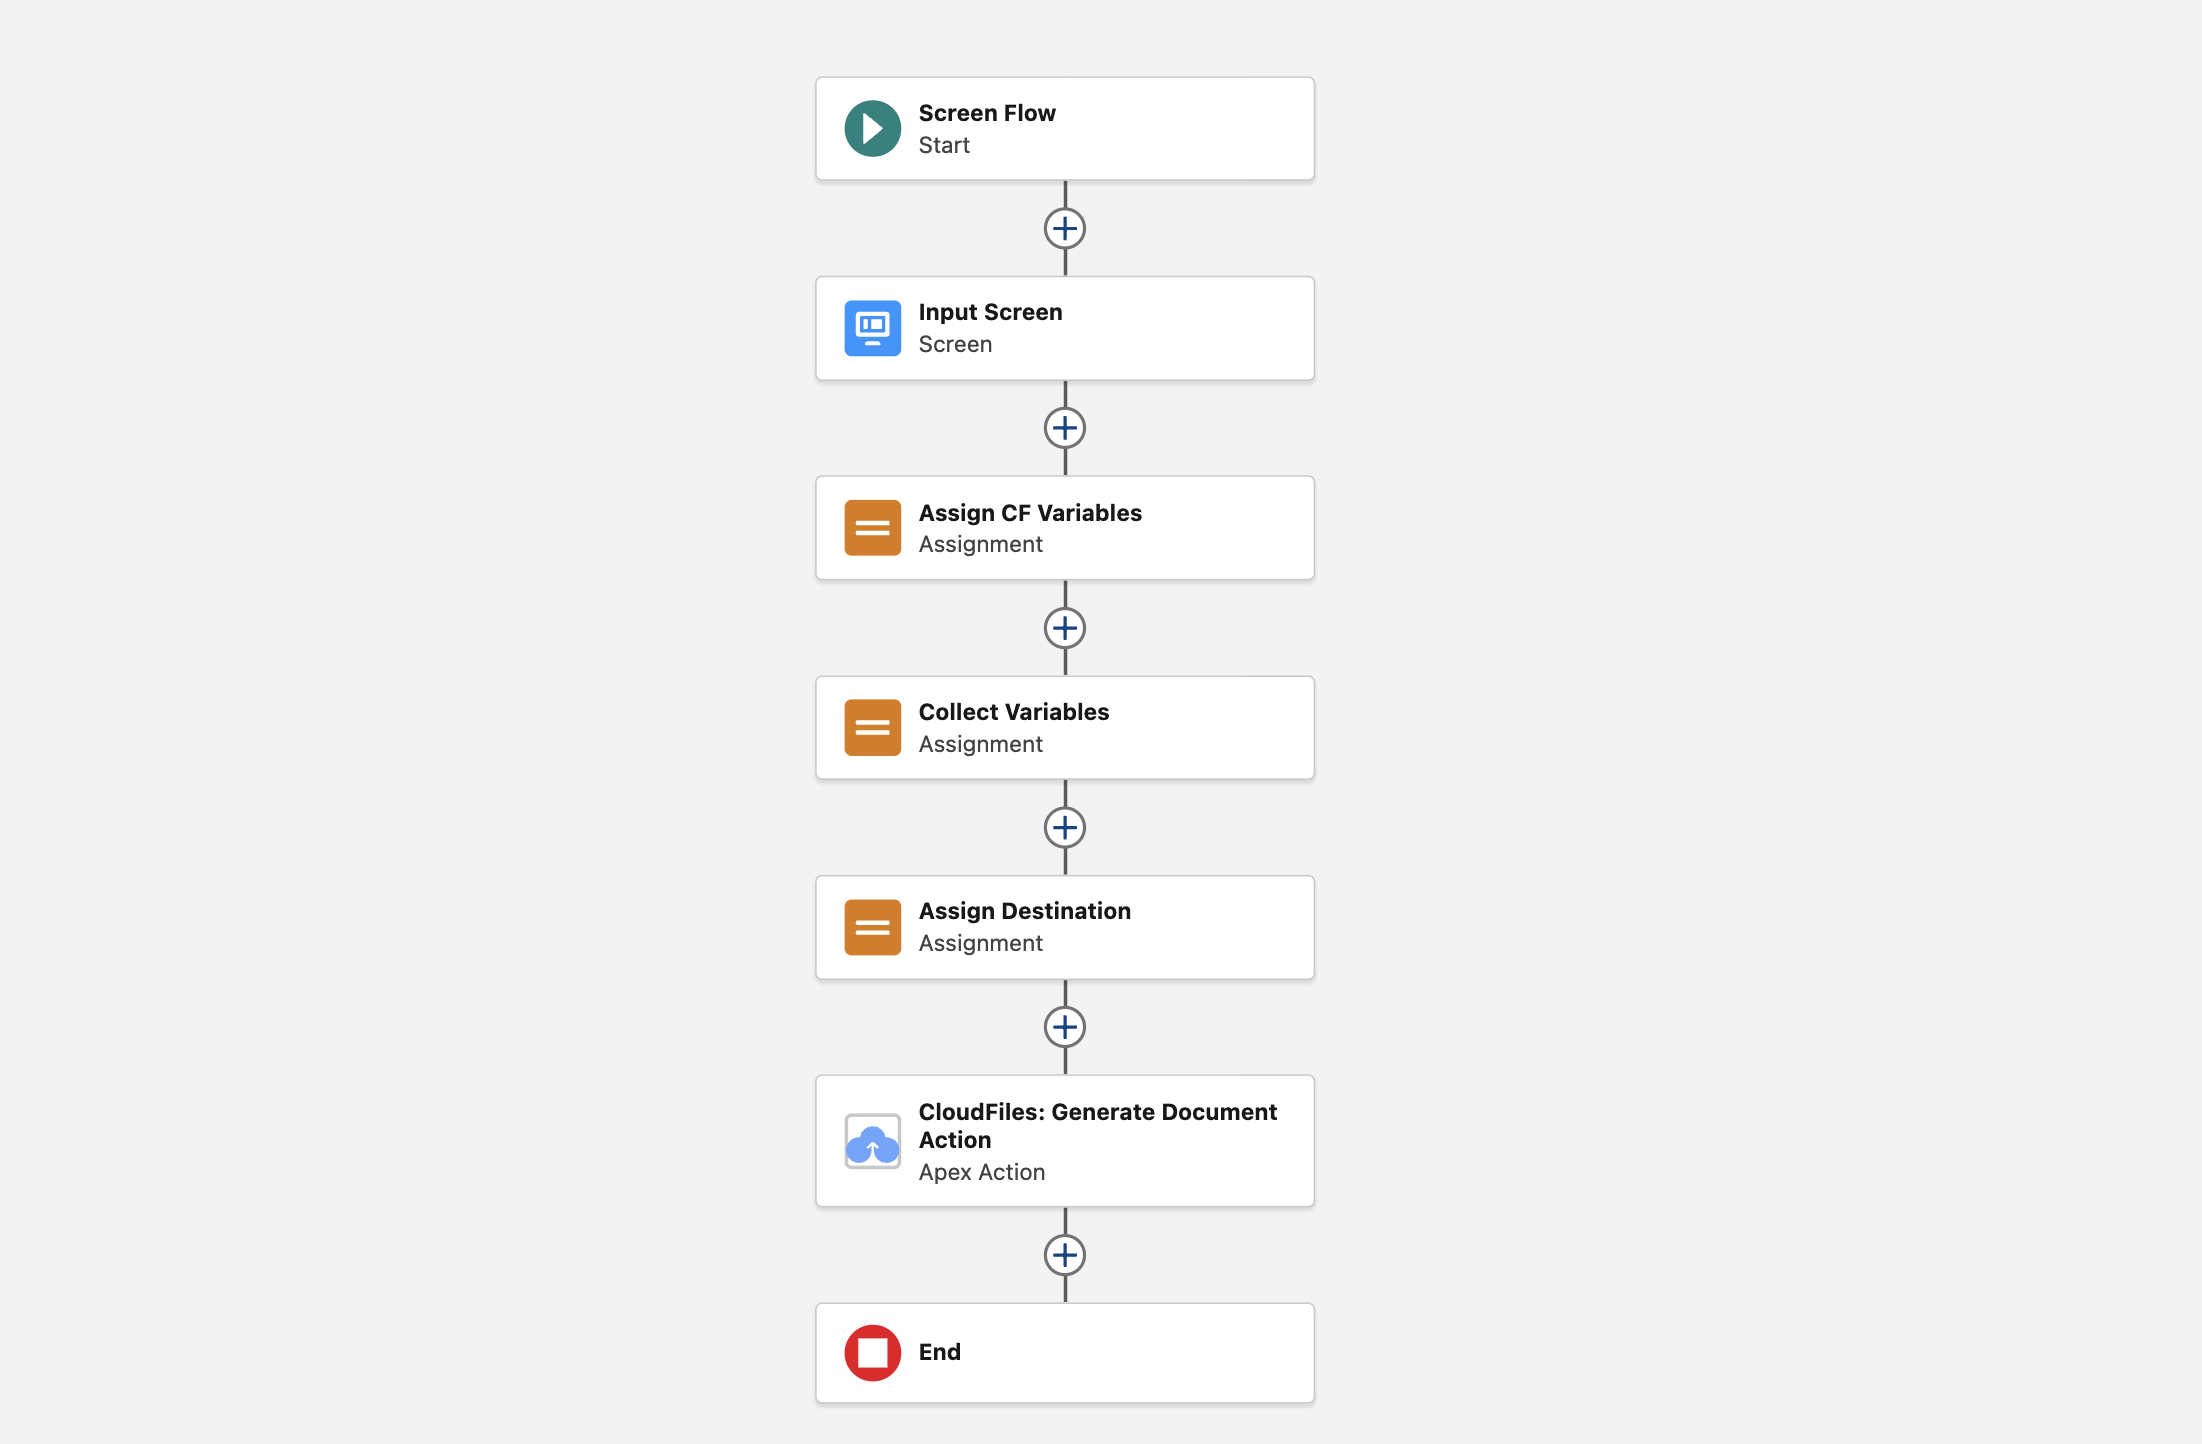
NOTE: You can also create a screen flow without using runtime variables if your template is predefined. In this tutorial, we’ll focus specifically on how to secure generated PDFs using the Generate Document (Sync) action.
The Parameters input we’ll use here can also be applied to other document generation actions. For more details, check out Doc Generation Flow Actions.
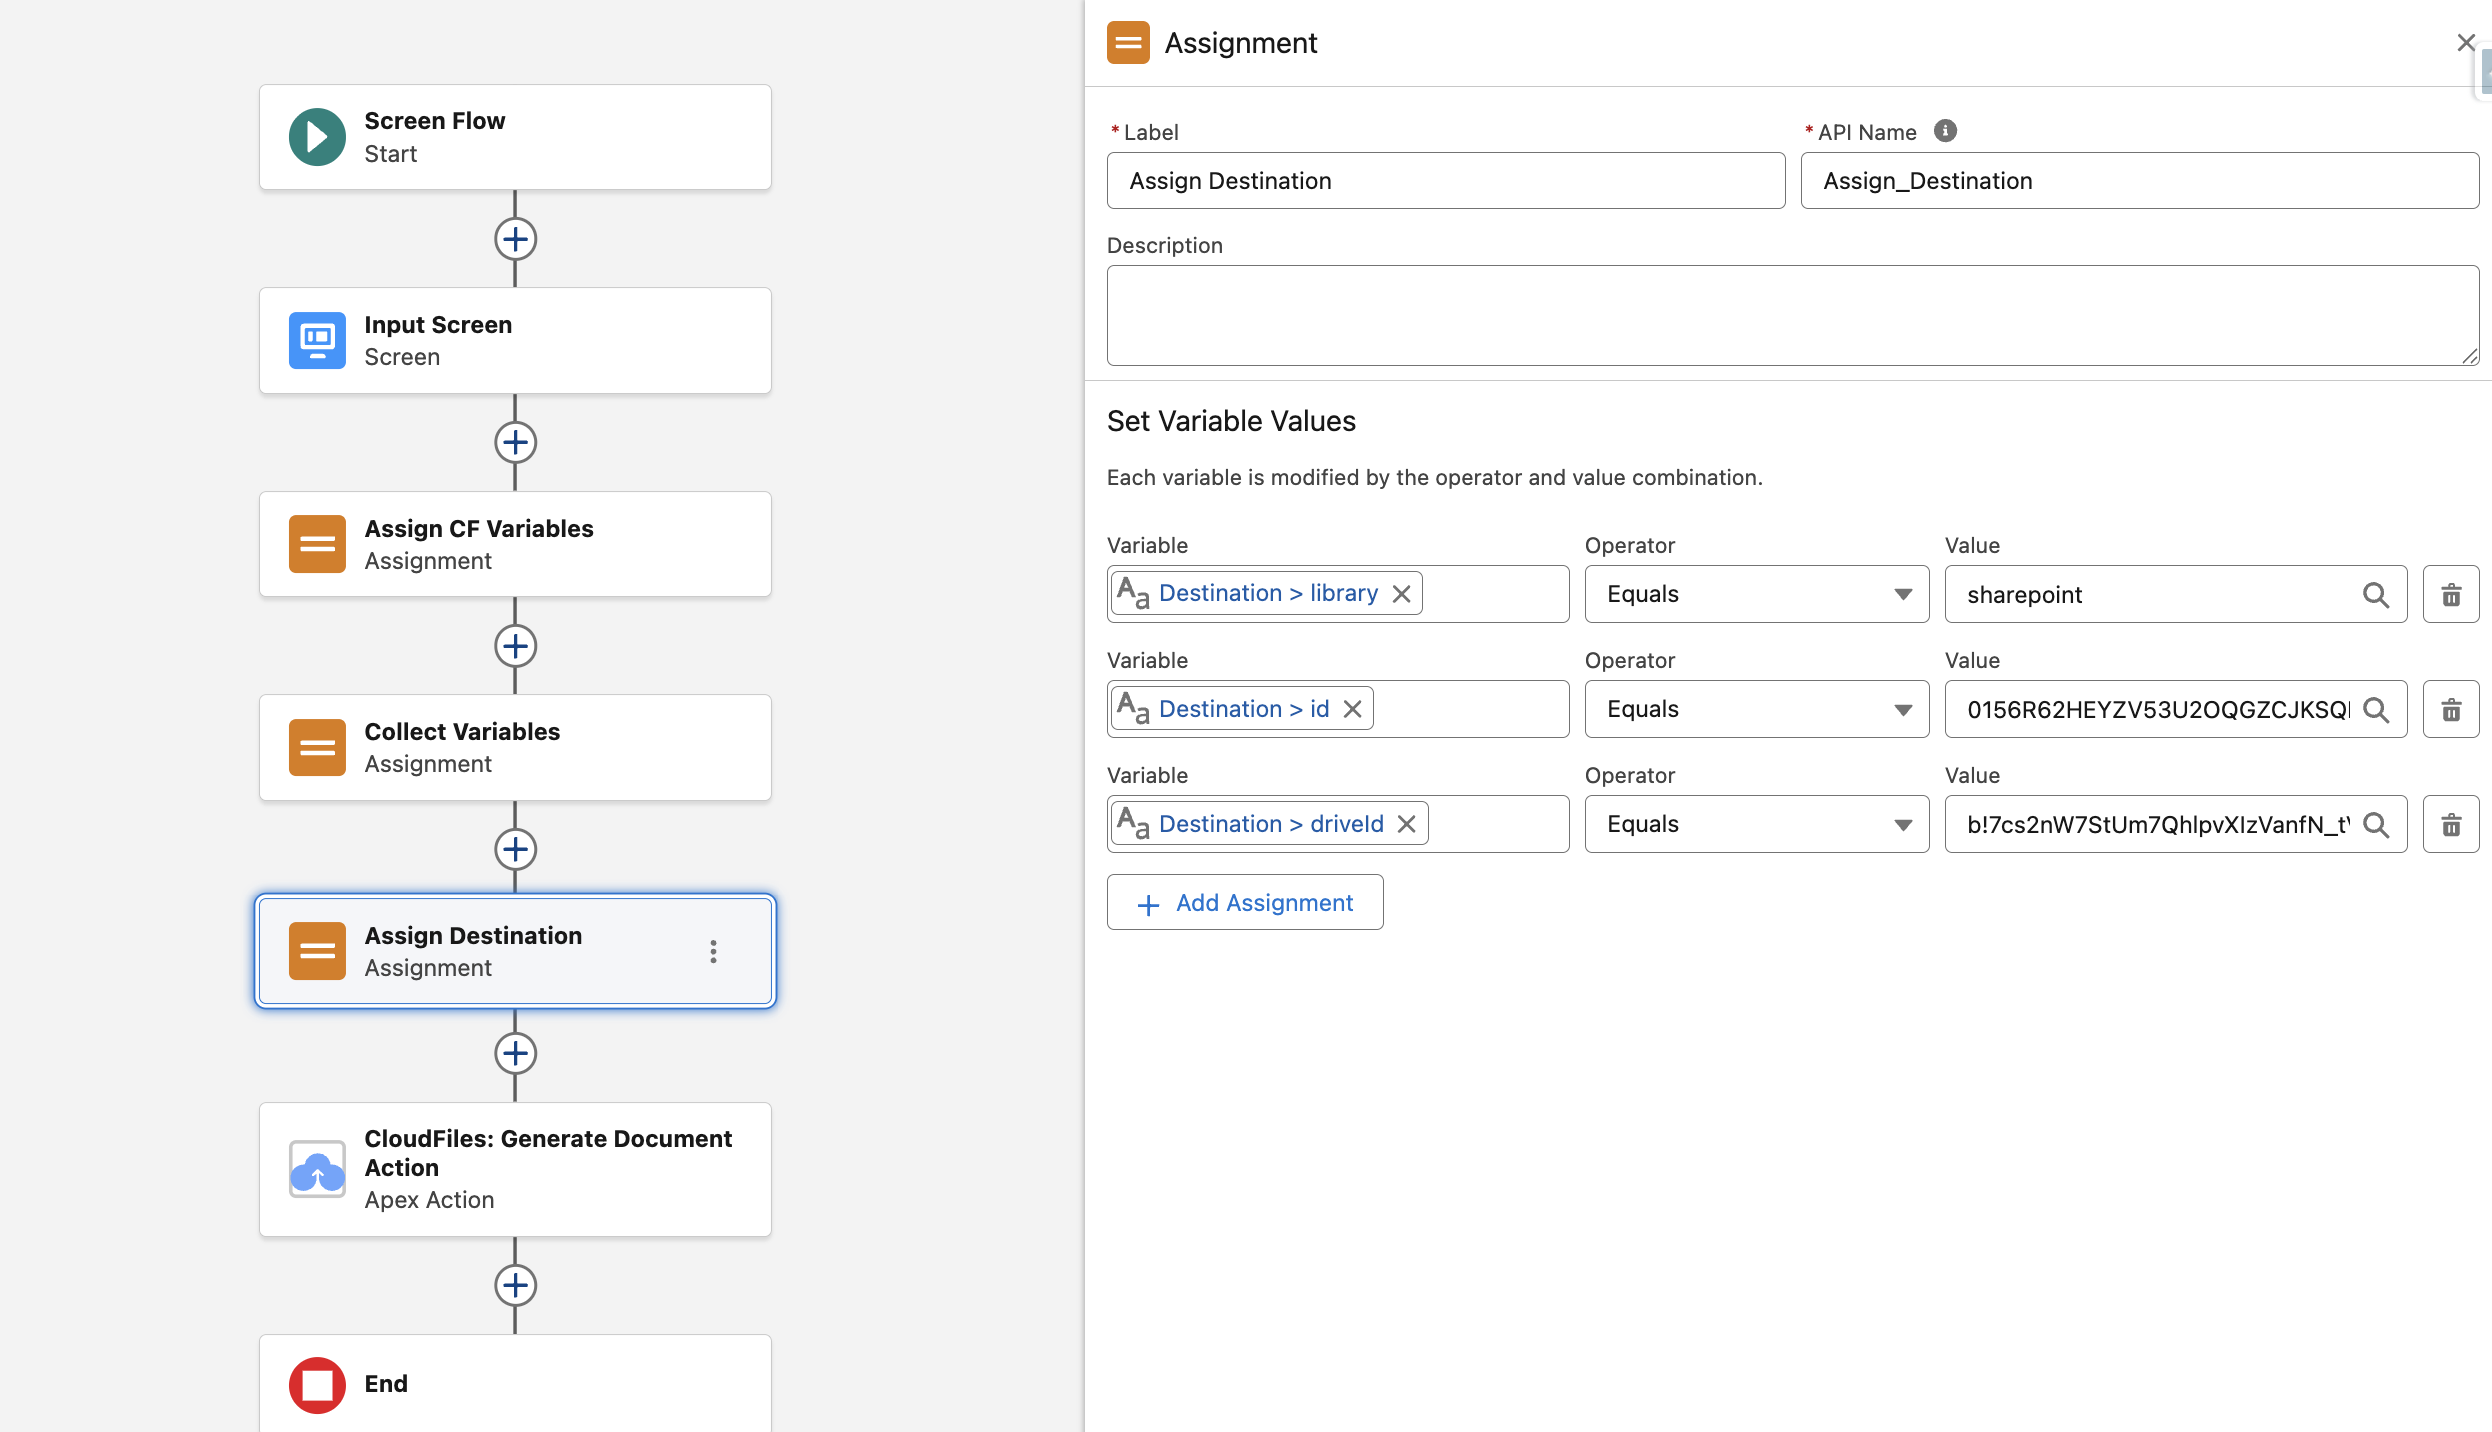
1 - Update Destination
The Retention parameter only works when the generated document is saved to an external destination, such as SharePoint, OneDrive, CloudFiles, etc.
To enable this, you’ll need to define the Destination (Apex-Defined variable), including fields like Id, DriveId, and Library that specify where the file should be stored externally.
In this example, we’ll use a folder from SharePoint as the destination.
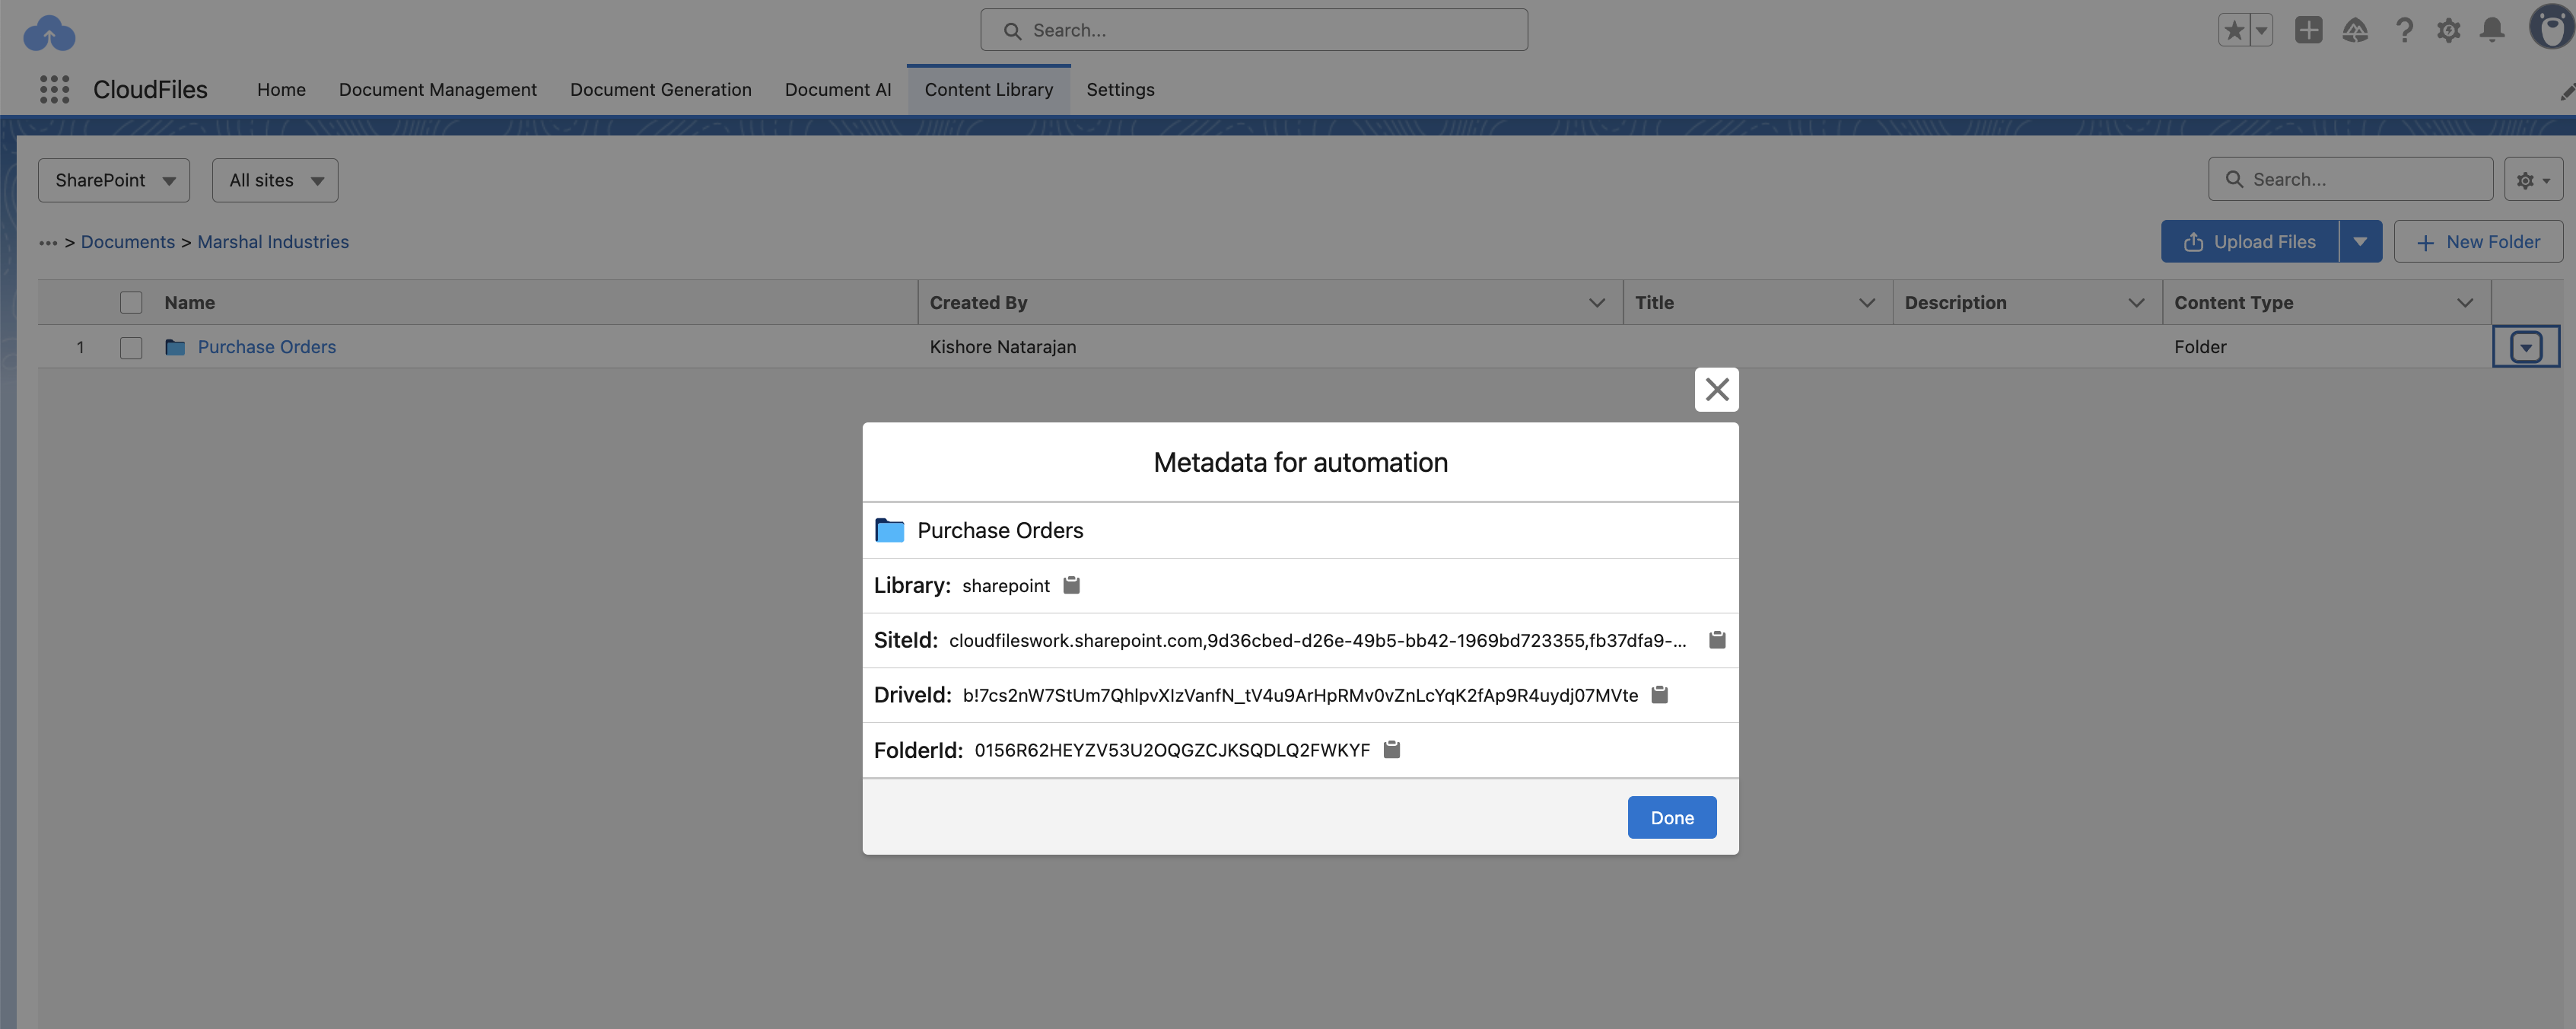
Make sure to configure the SharePoint folder details properly in your flow for Destination variable, so that the generated Purchase Order (PO) PDF is stored there and the retention settings (like file auto-deletion or expiry) can take effect.
2 - Screen for Security Inputs
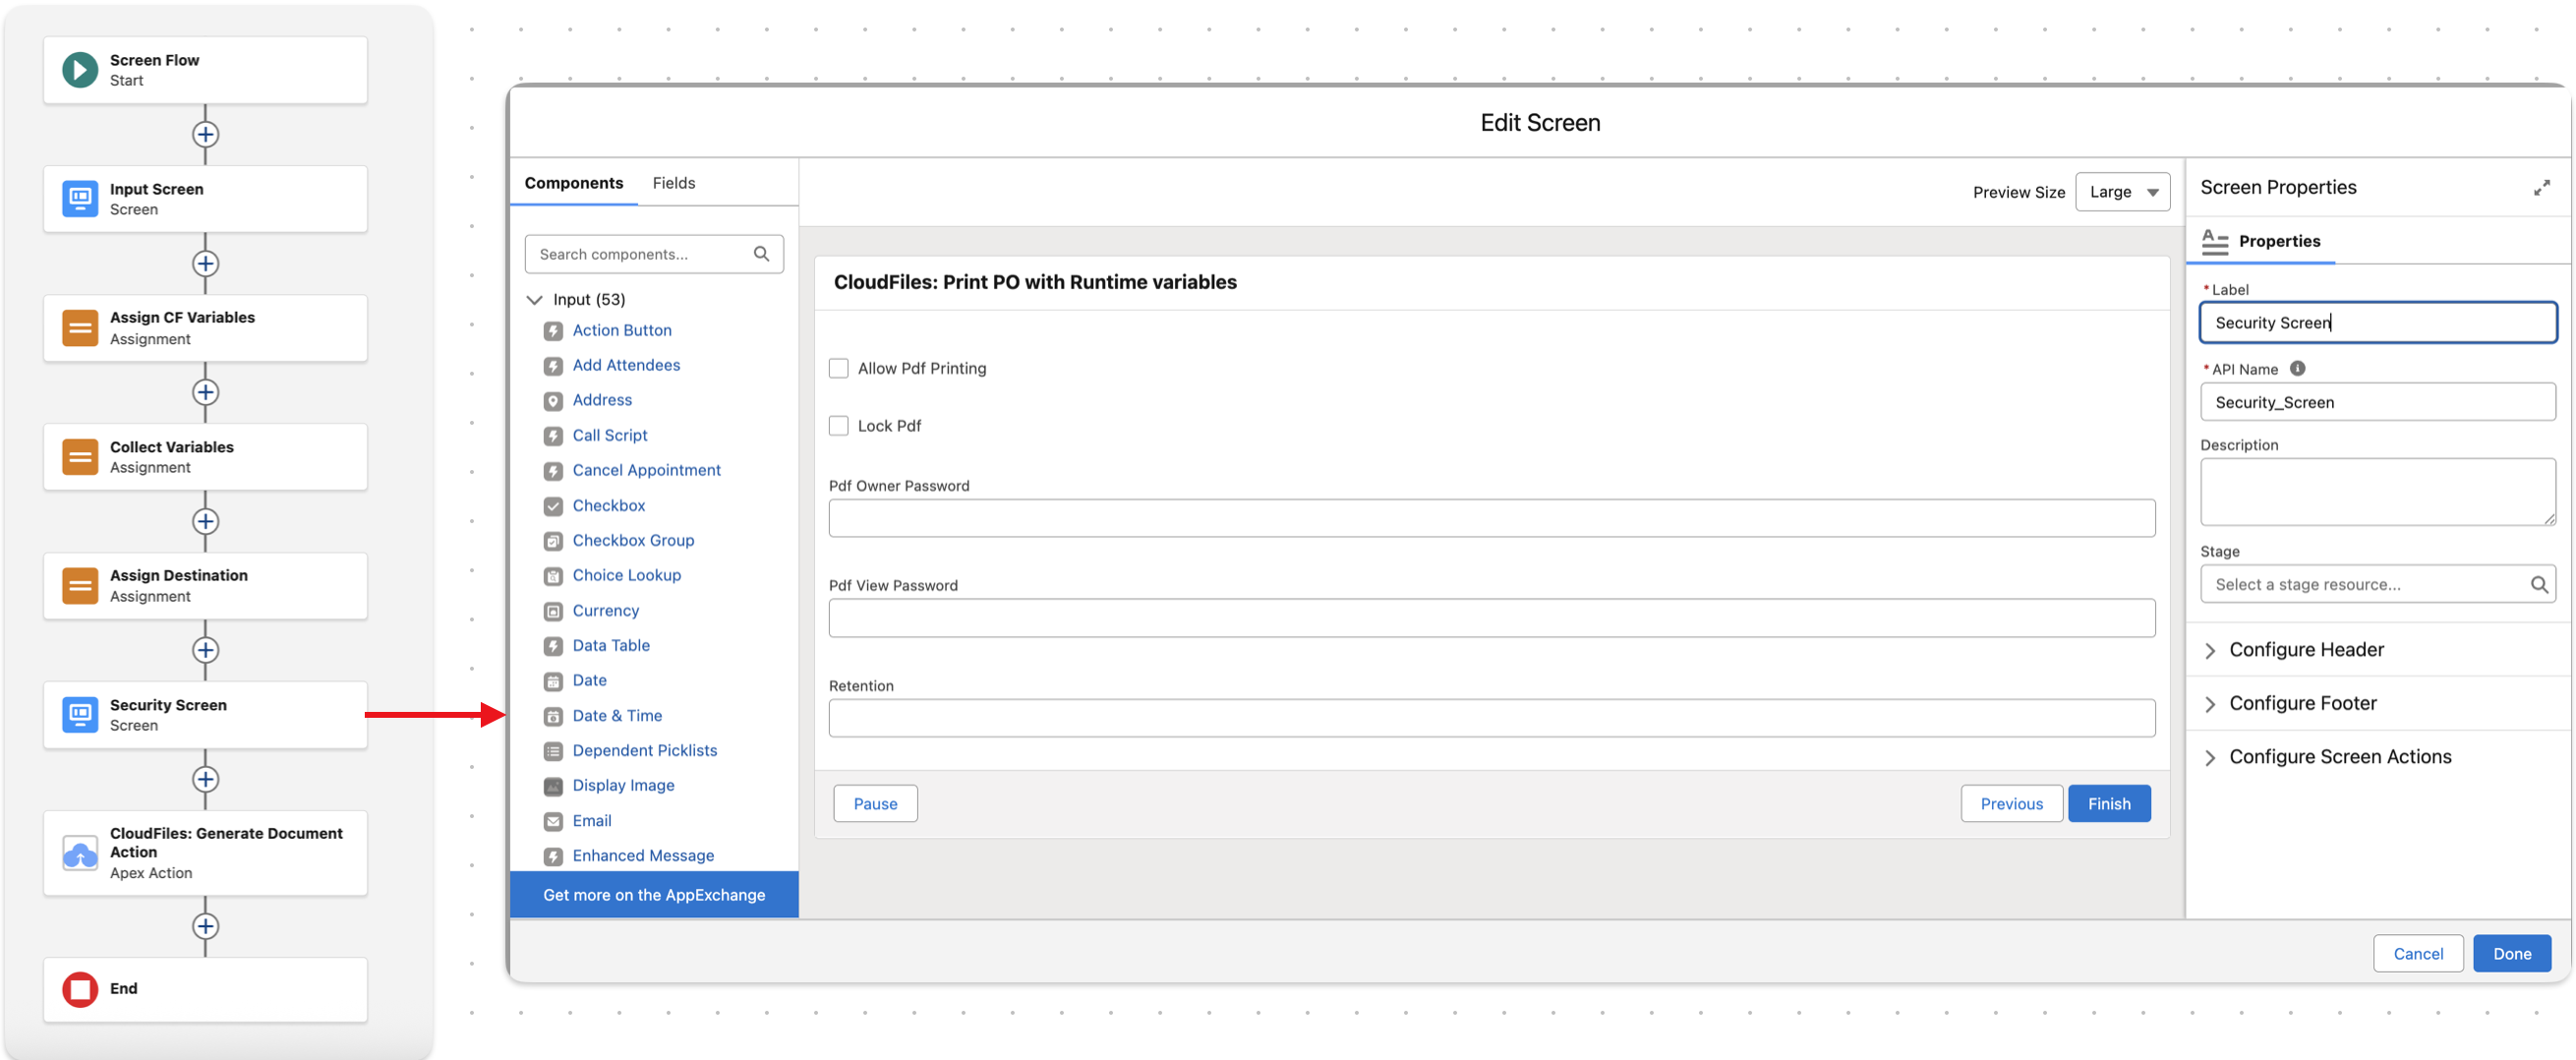
Add a new screen element in the flow before the document generation step.
This screen will collect user inputs for the following security settings:
- Allow Pdf Printing (TRUE/FALSE) – permits or restricts printing.
- Lock Pdf (TRUE/FALSE) – locks PDF from edits.
- Pdf Owner Password – owner password to restrict editing access.
- Pdf View Password – view password to restrict viewing access.
- Retention – retention duration in minutes for how long the file remains at the external destination.
Drag Checkboxes for booleans and Text input for passwords into the screen.
3 - Assign Security Parameters
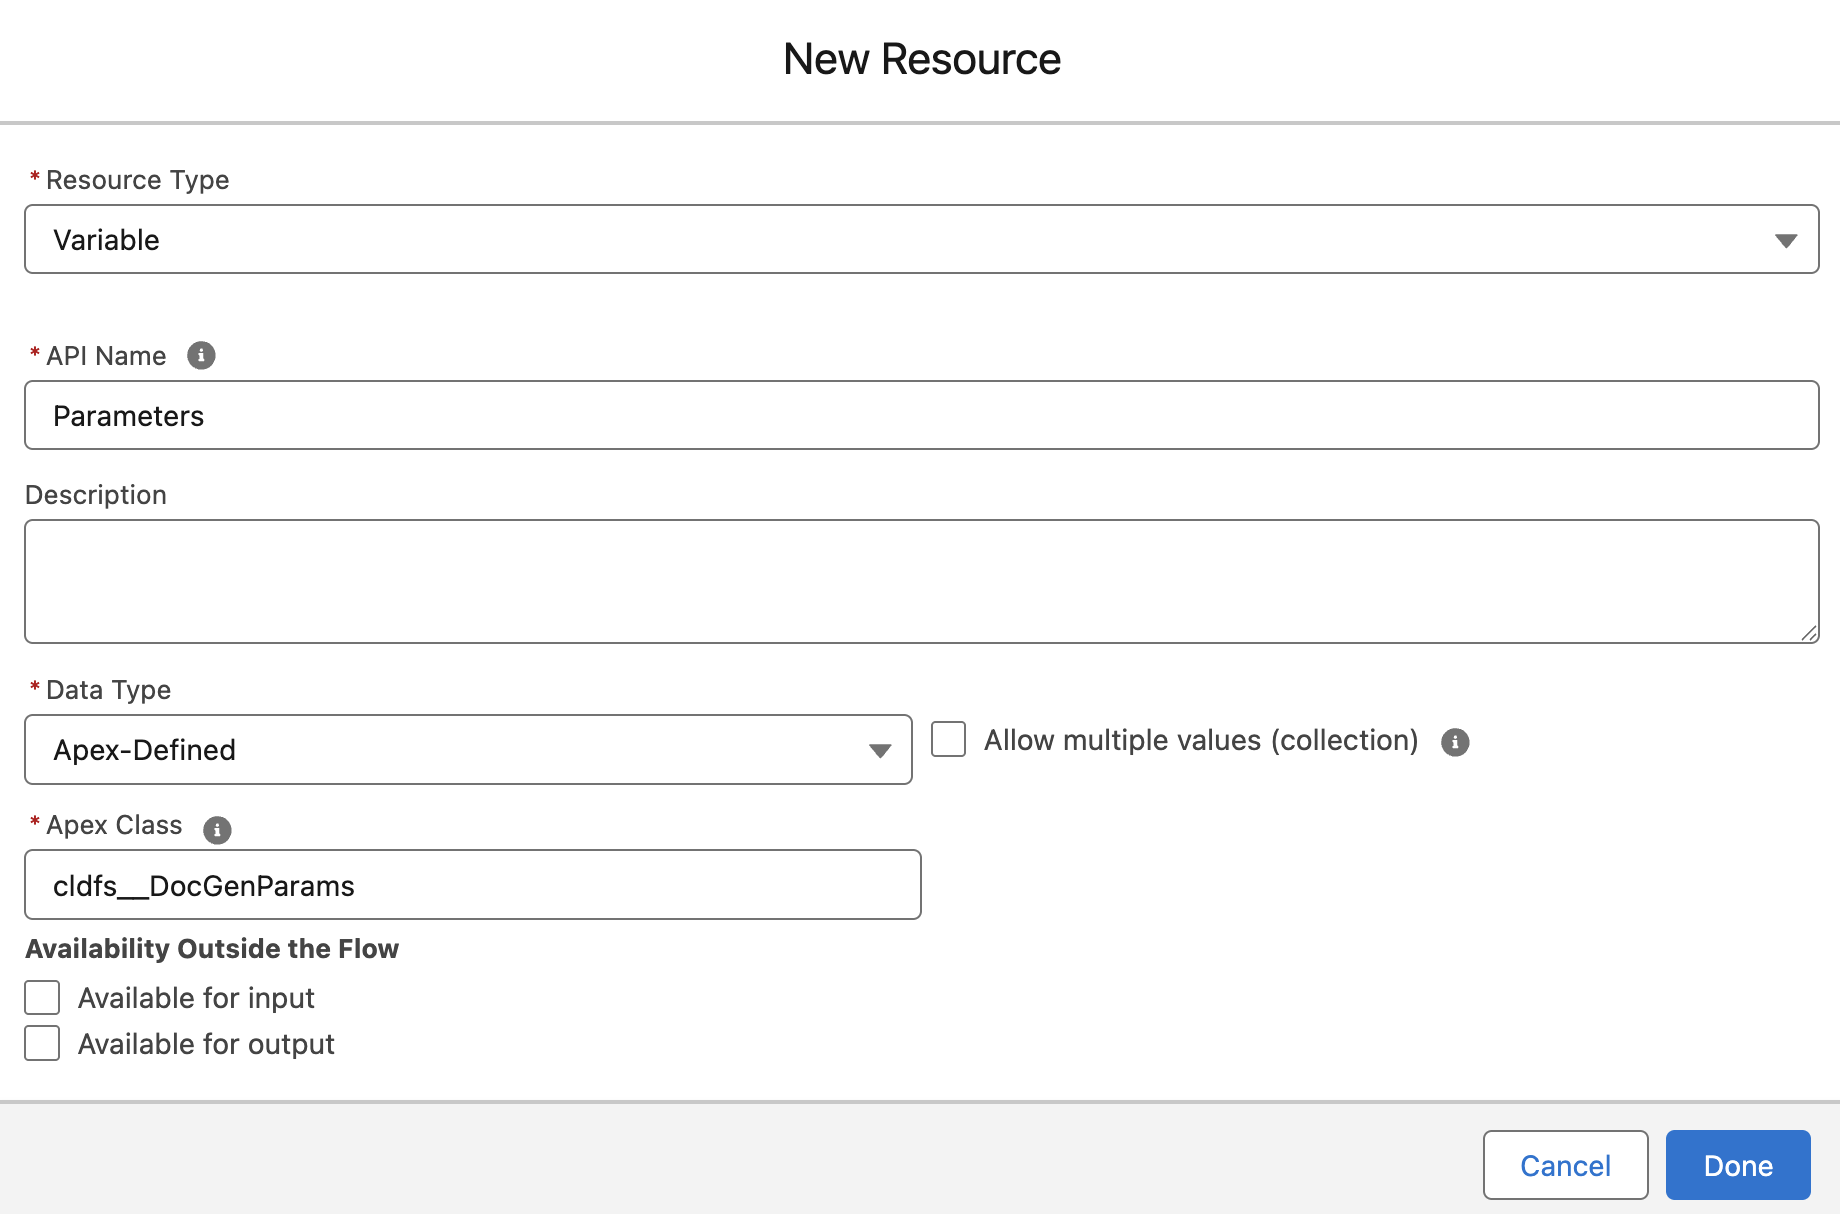
Now, create an Apex-defined variable of type cldfs__DocGenParams to hold the inputs.
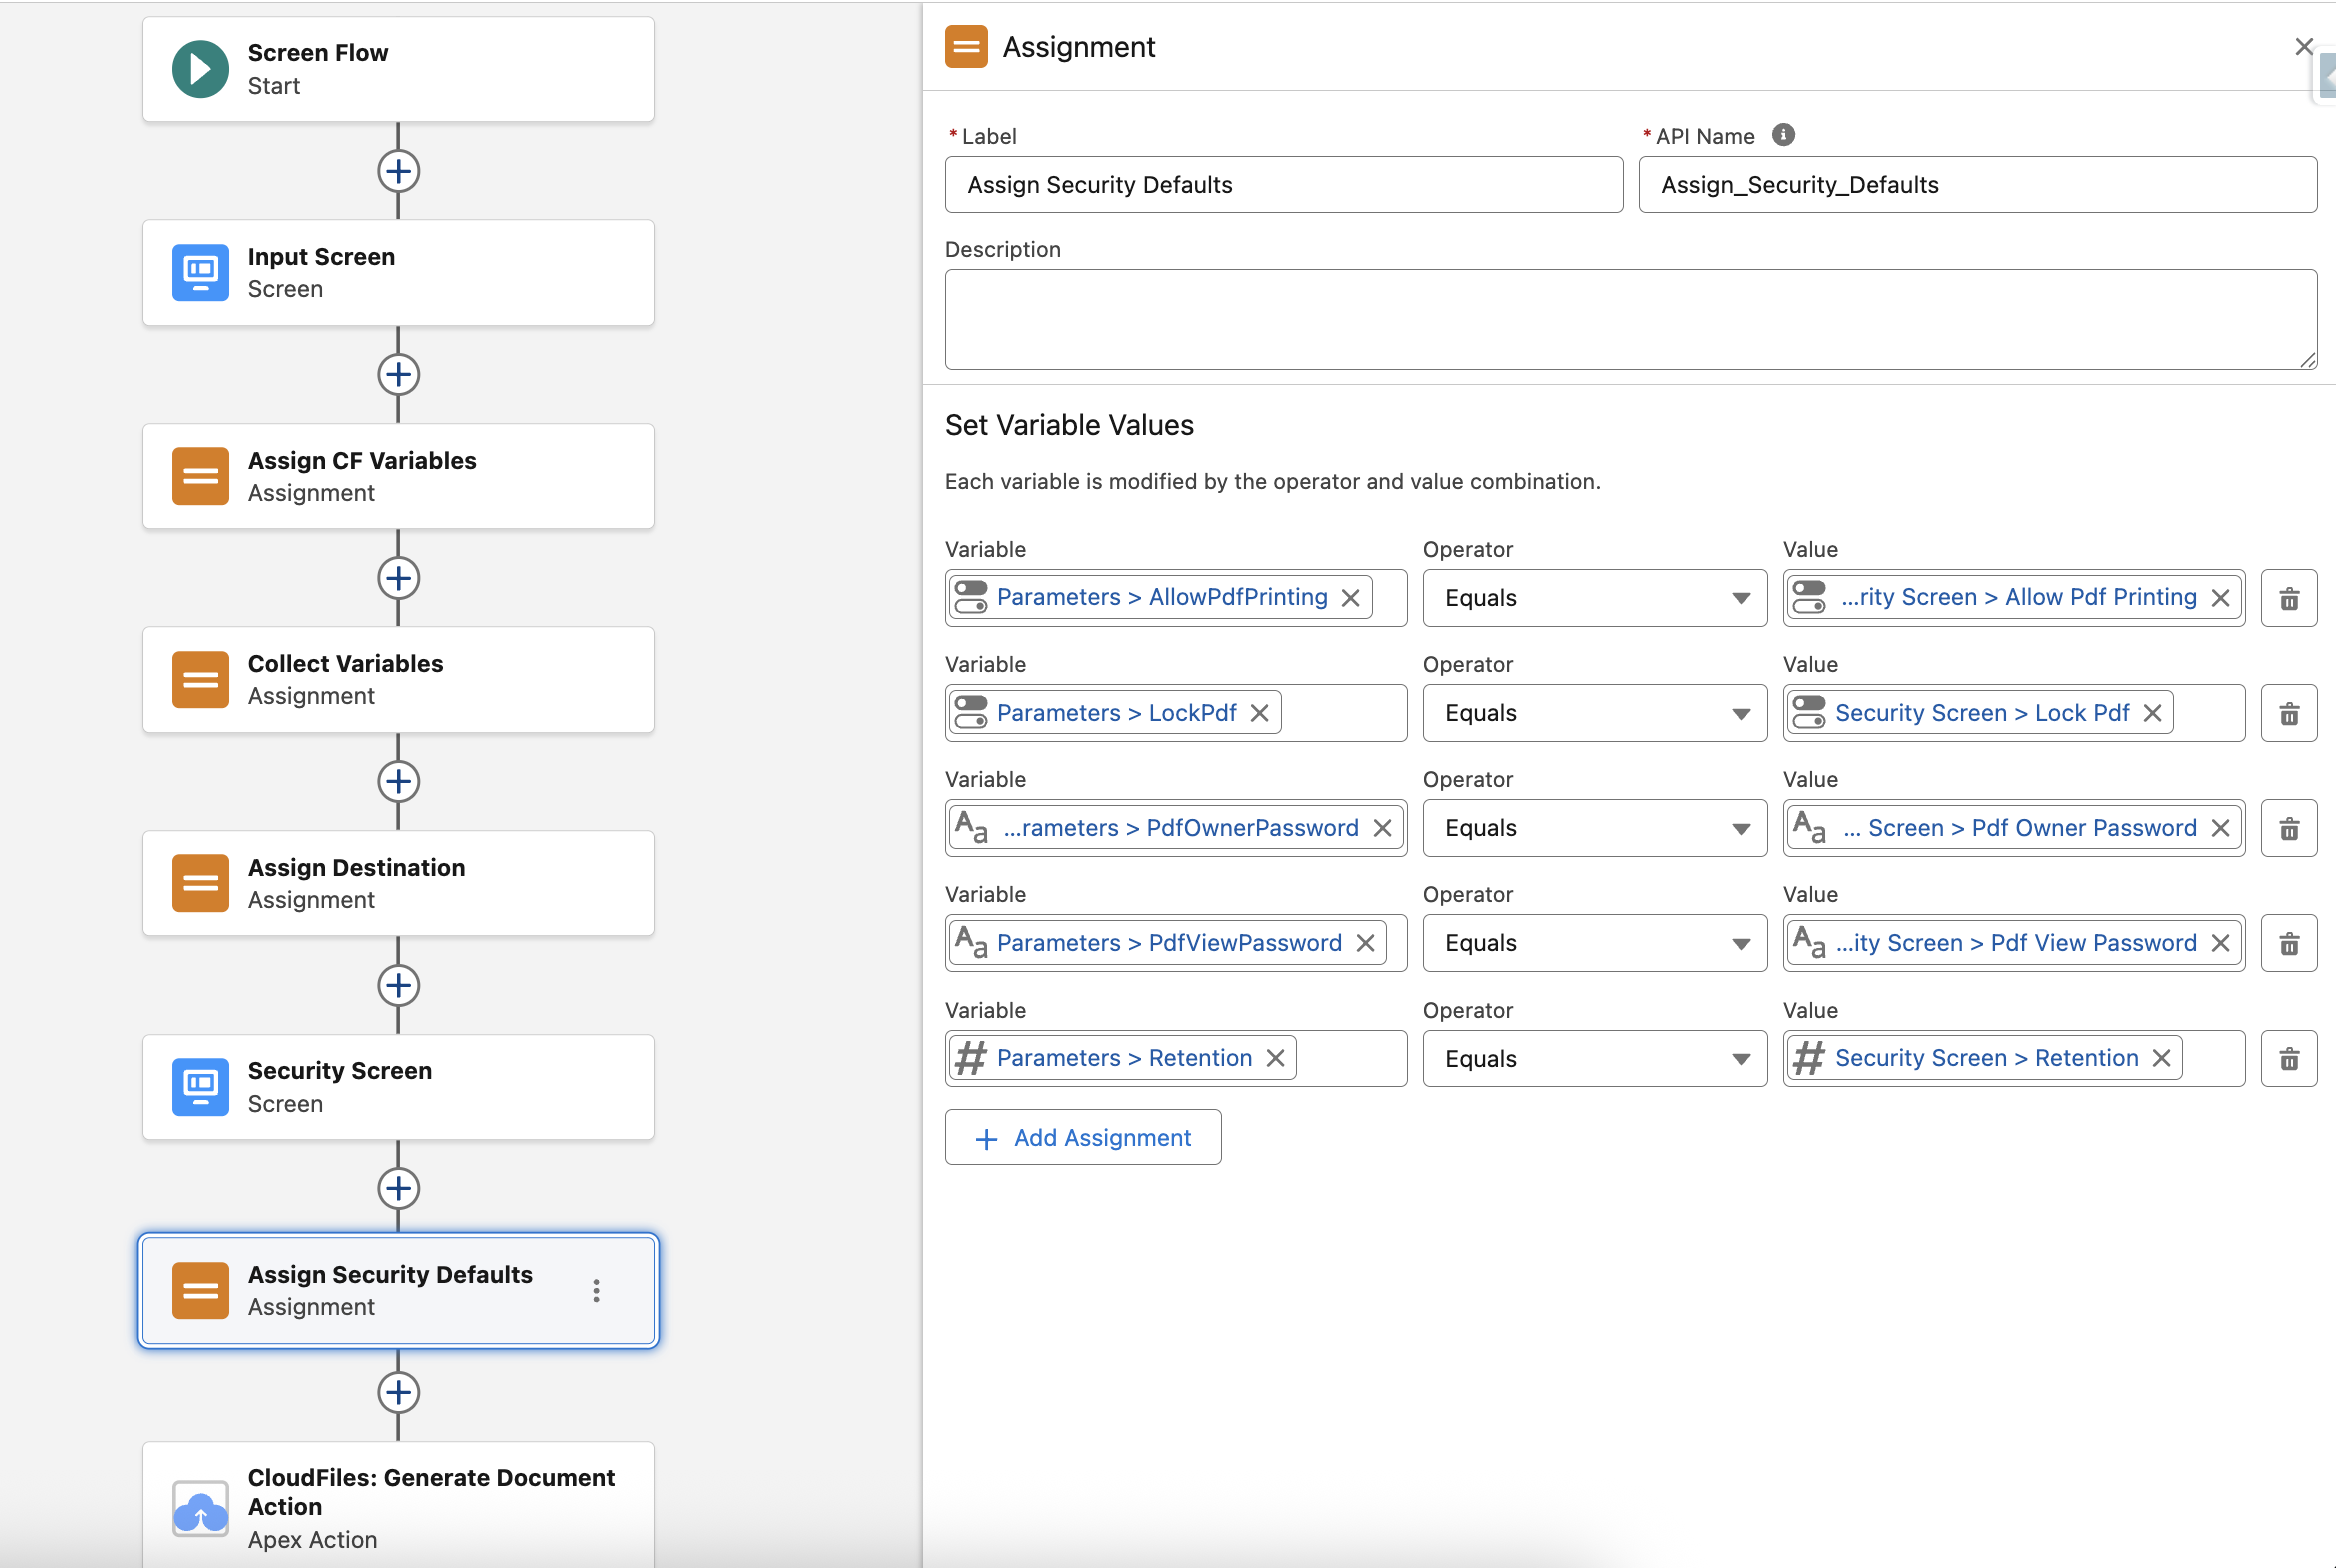
Add an Assignment element that assigns the values from the screen to this variable. This ensures all user-entered values are passed into the variable.
Eg:
- Parameter.AllowPdfPrinting = {!Screen.AllowPdfPrinting}
- Parameter.PdfOwnerPassword = {!Screen.PdfOwnerPassword}
4 - Update Flow Action
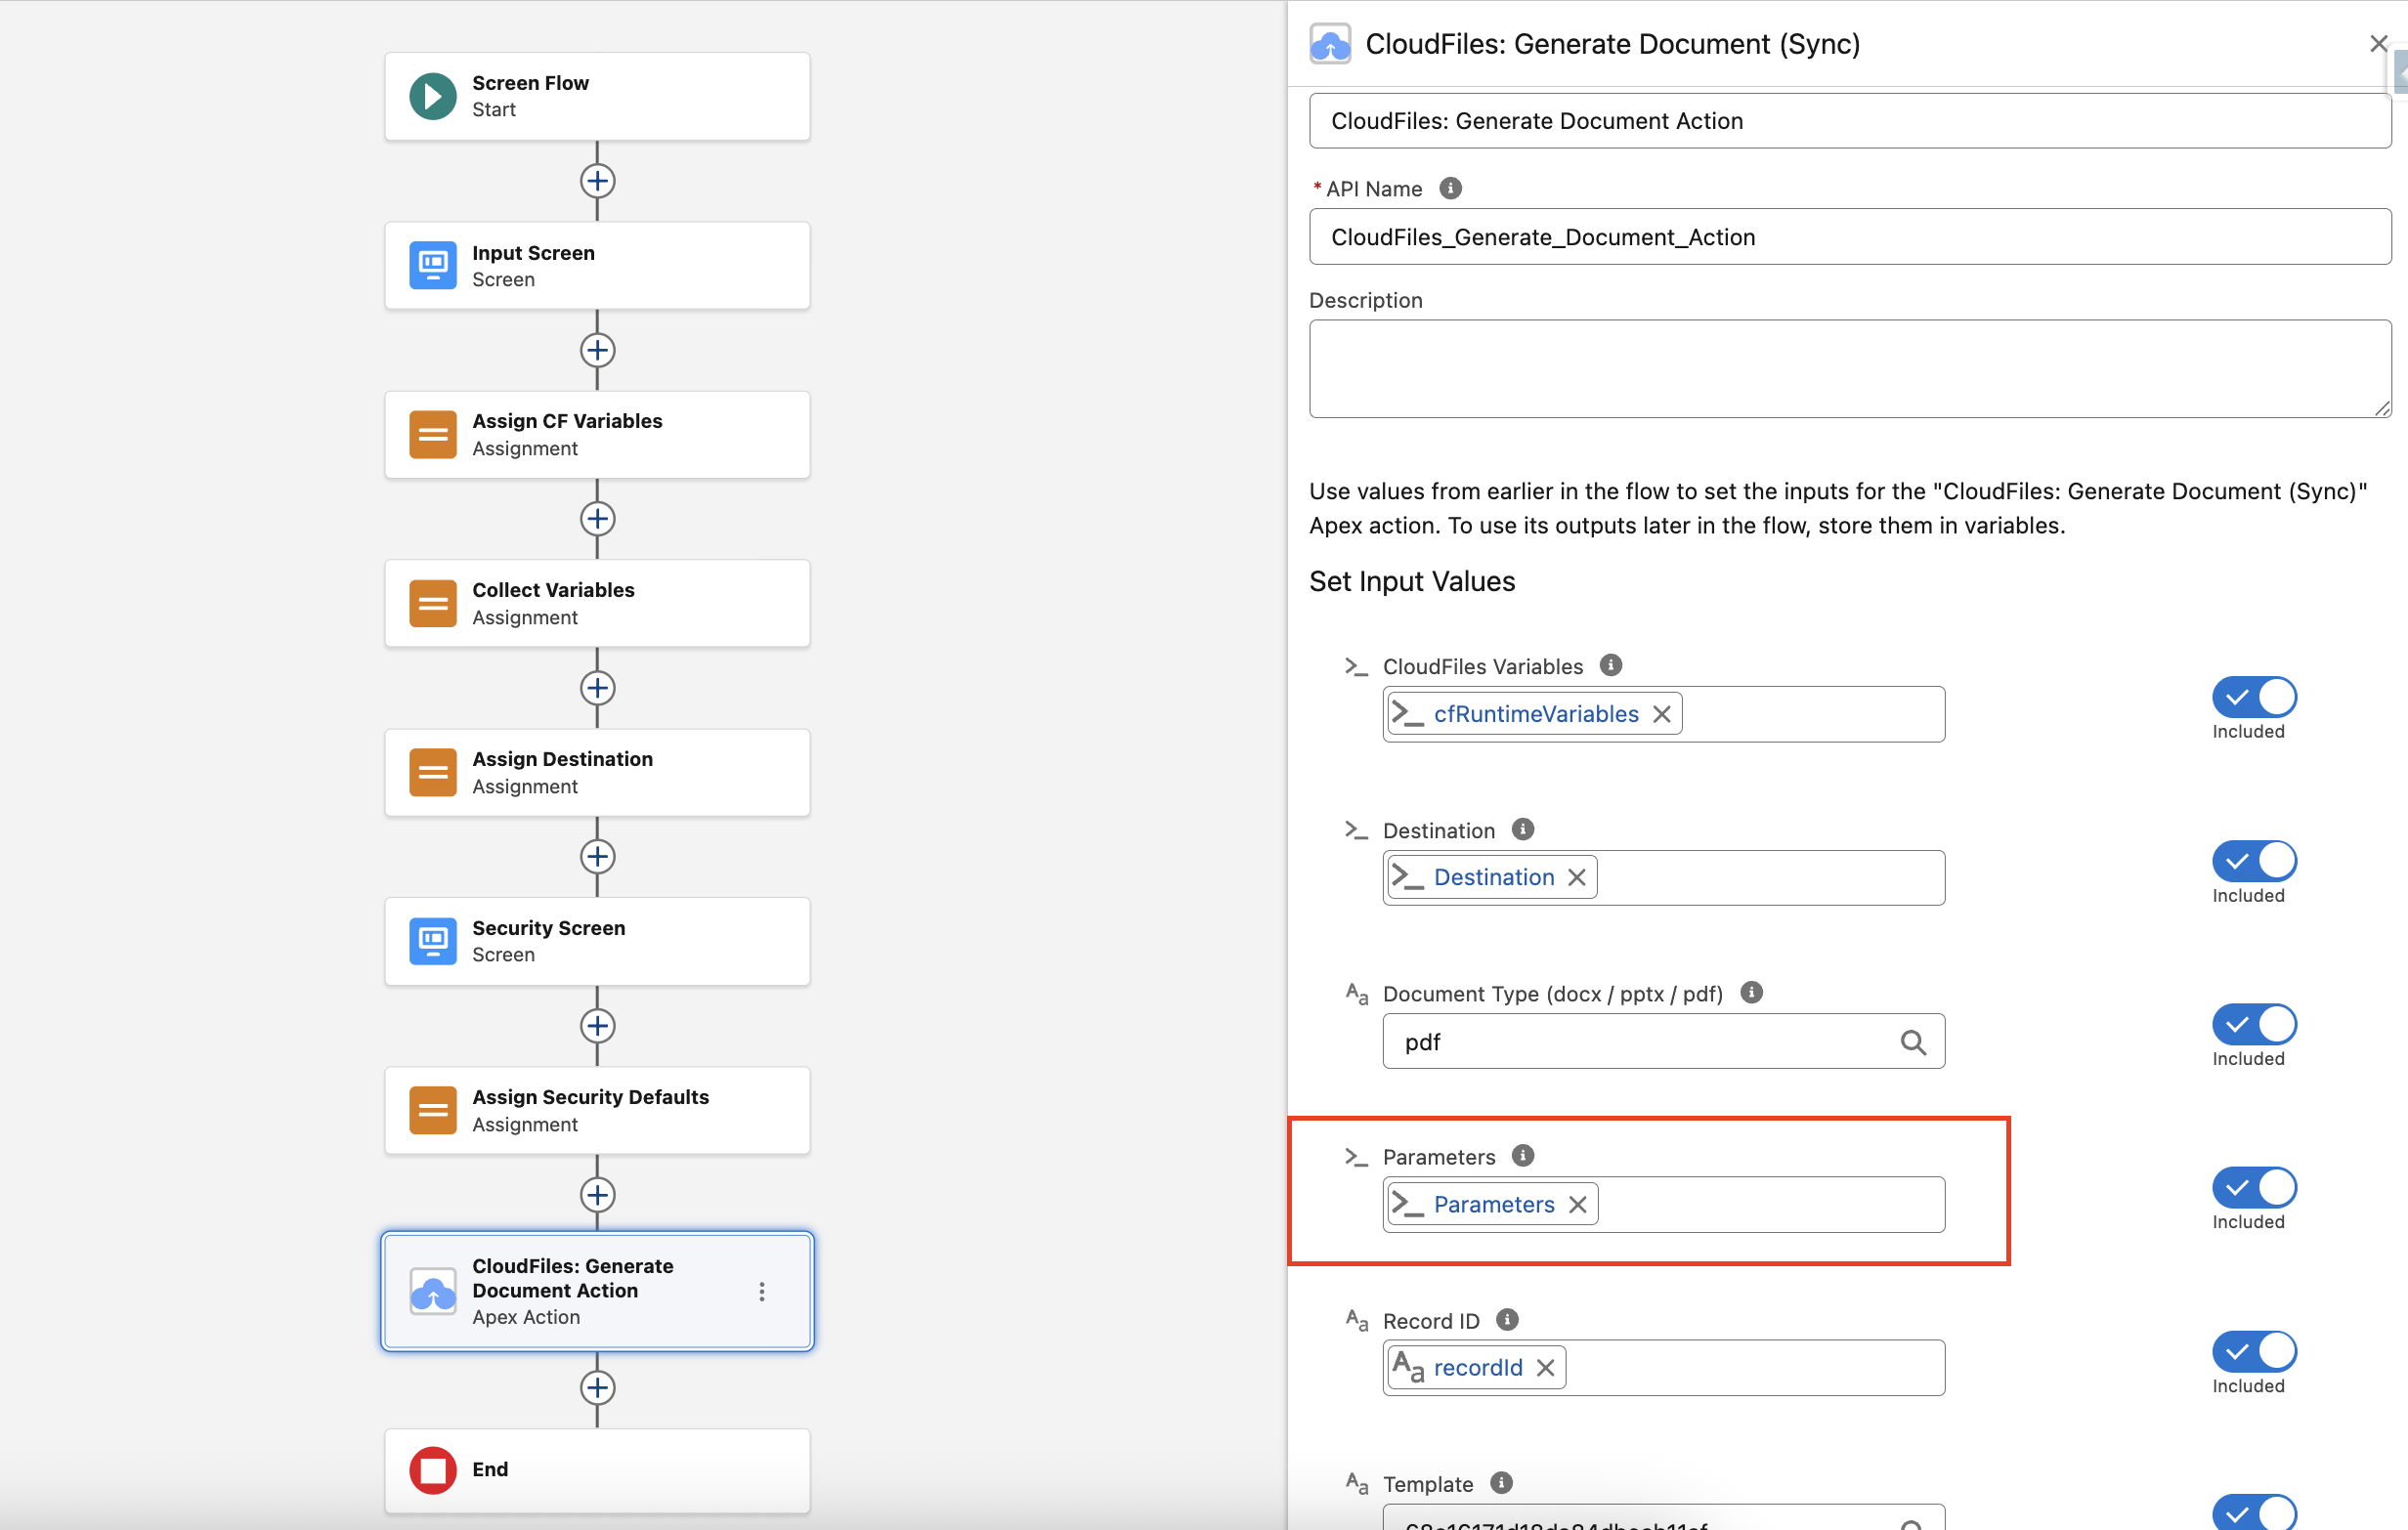
Edit the Generate Document (Sync) flow action. For the Parameters field, select and map the Apex variable you created earlier.
Test the setup
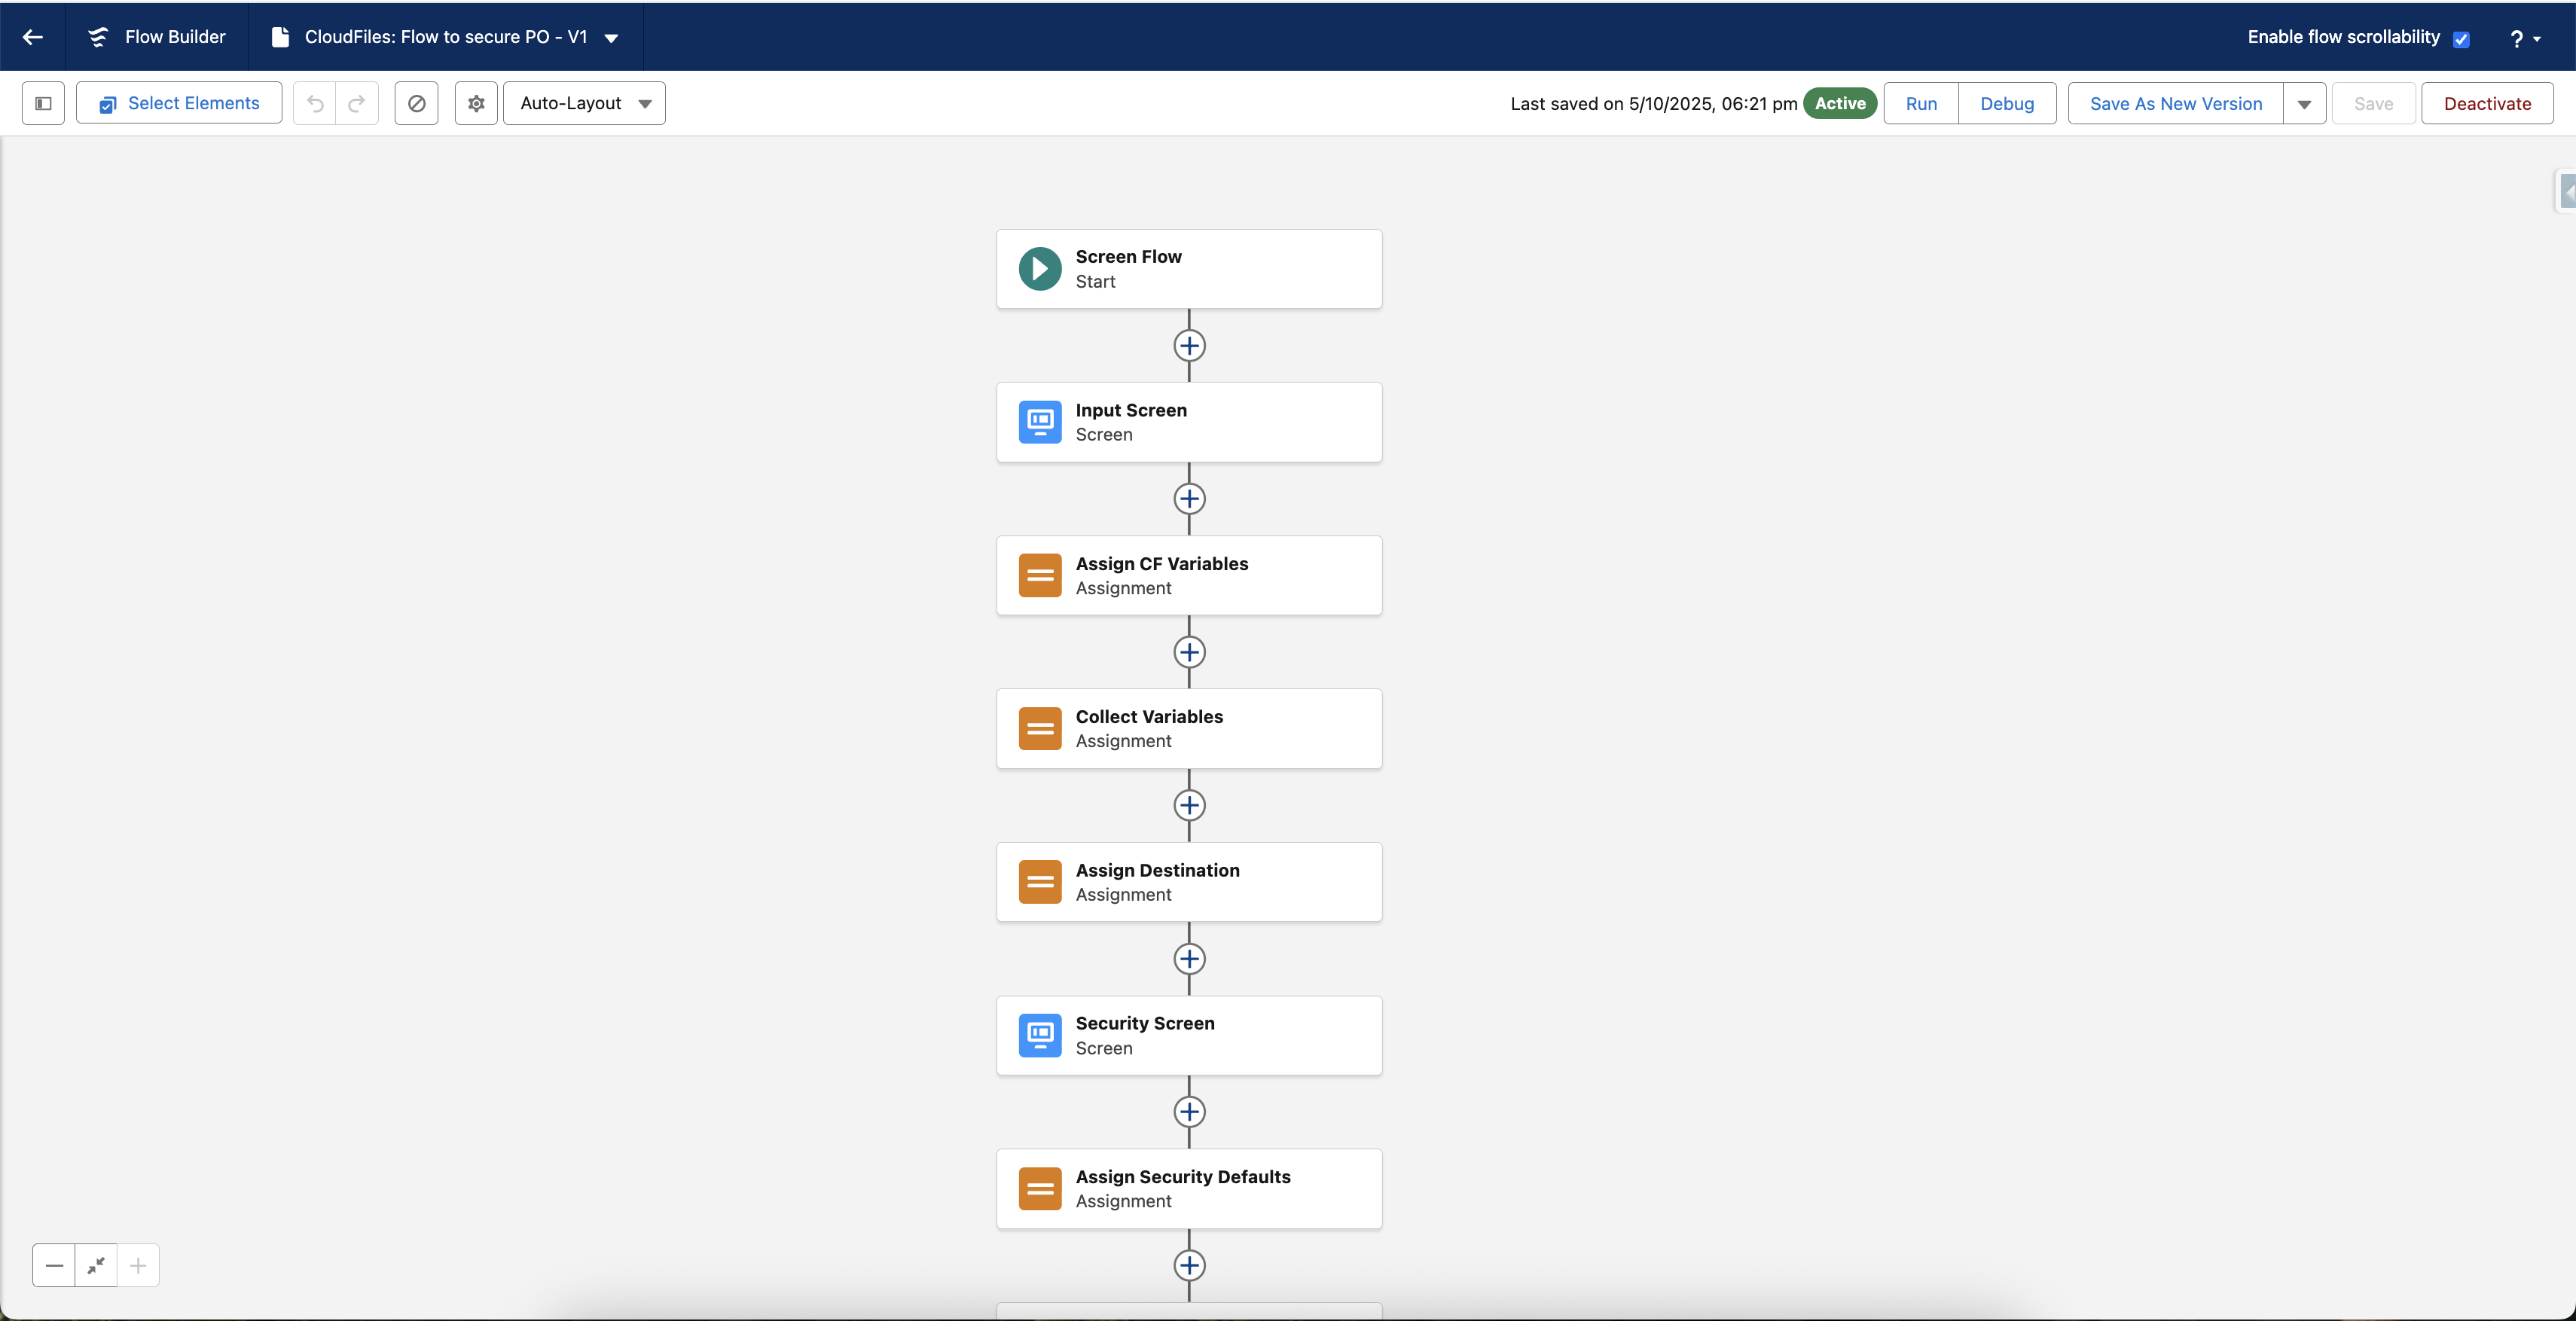
1 - Activate the Flow
After saving all your changes, activate the flow to make it available for use.
Add the Flow to the Record Page
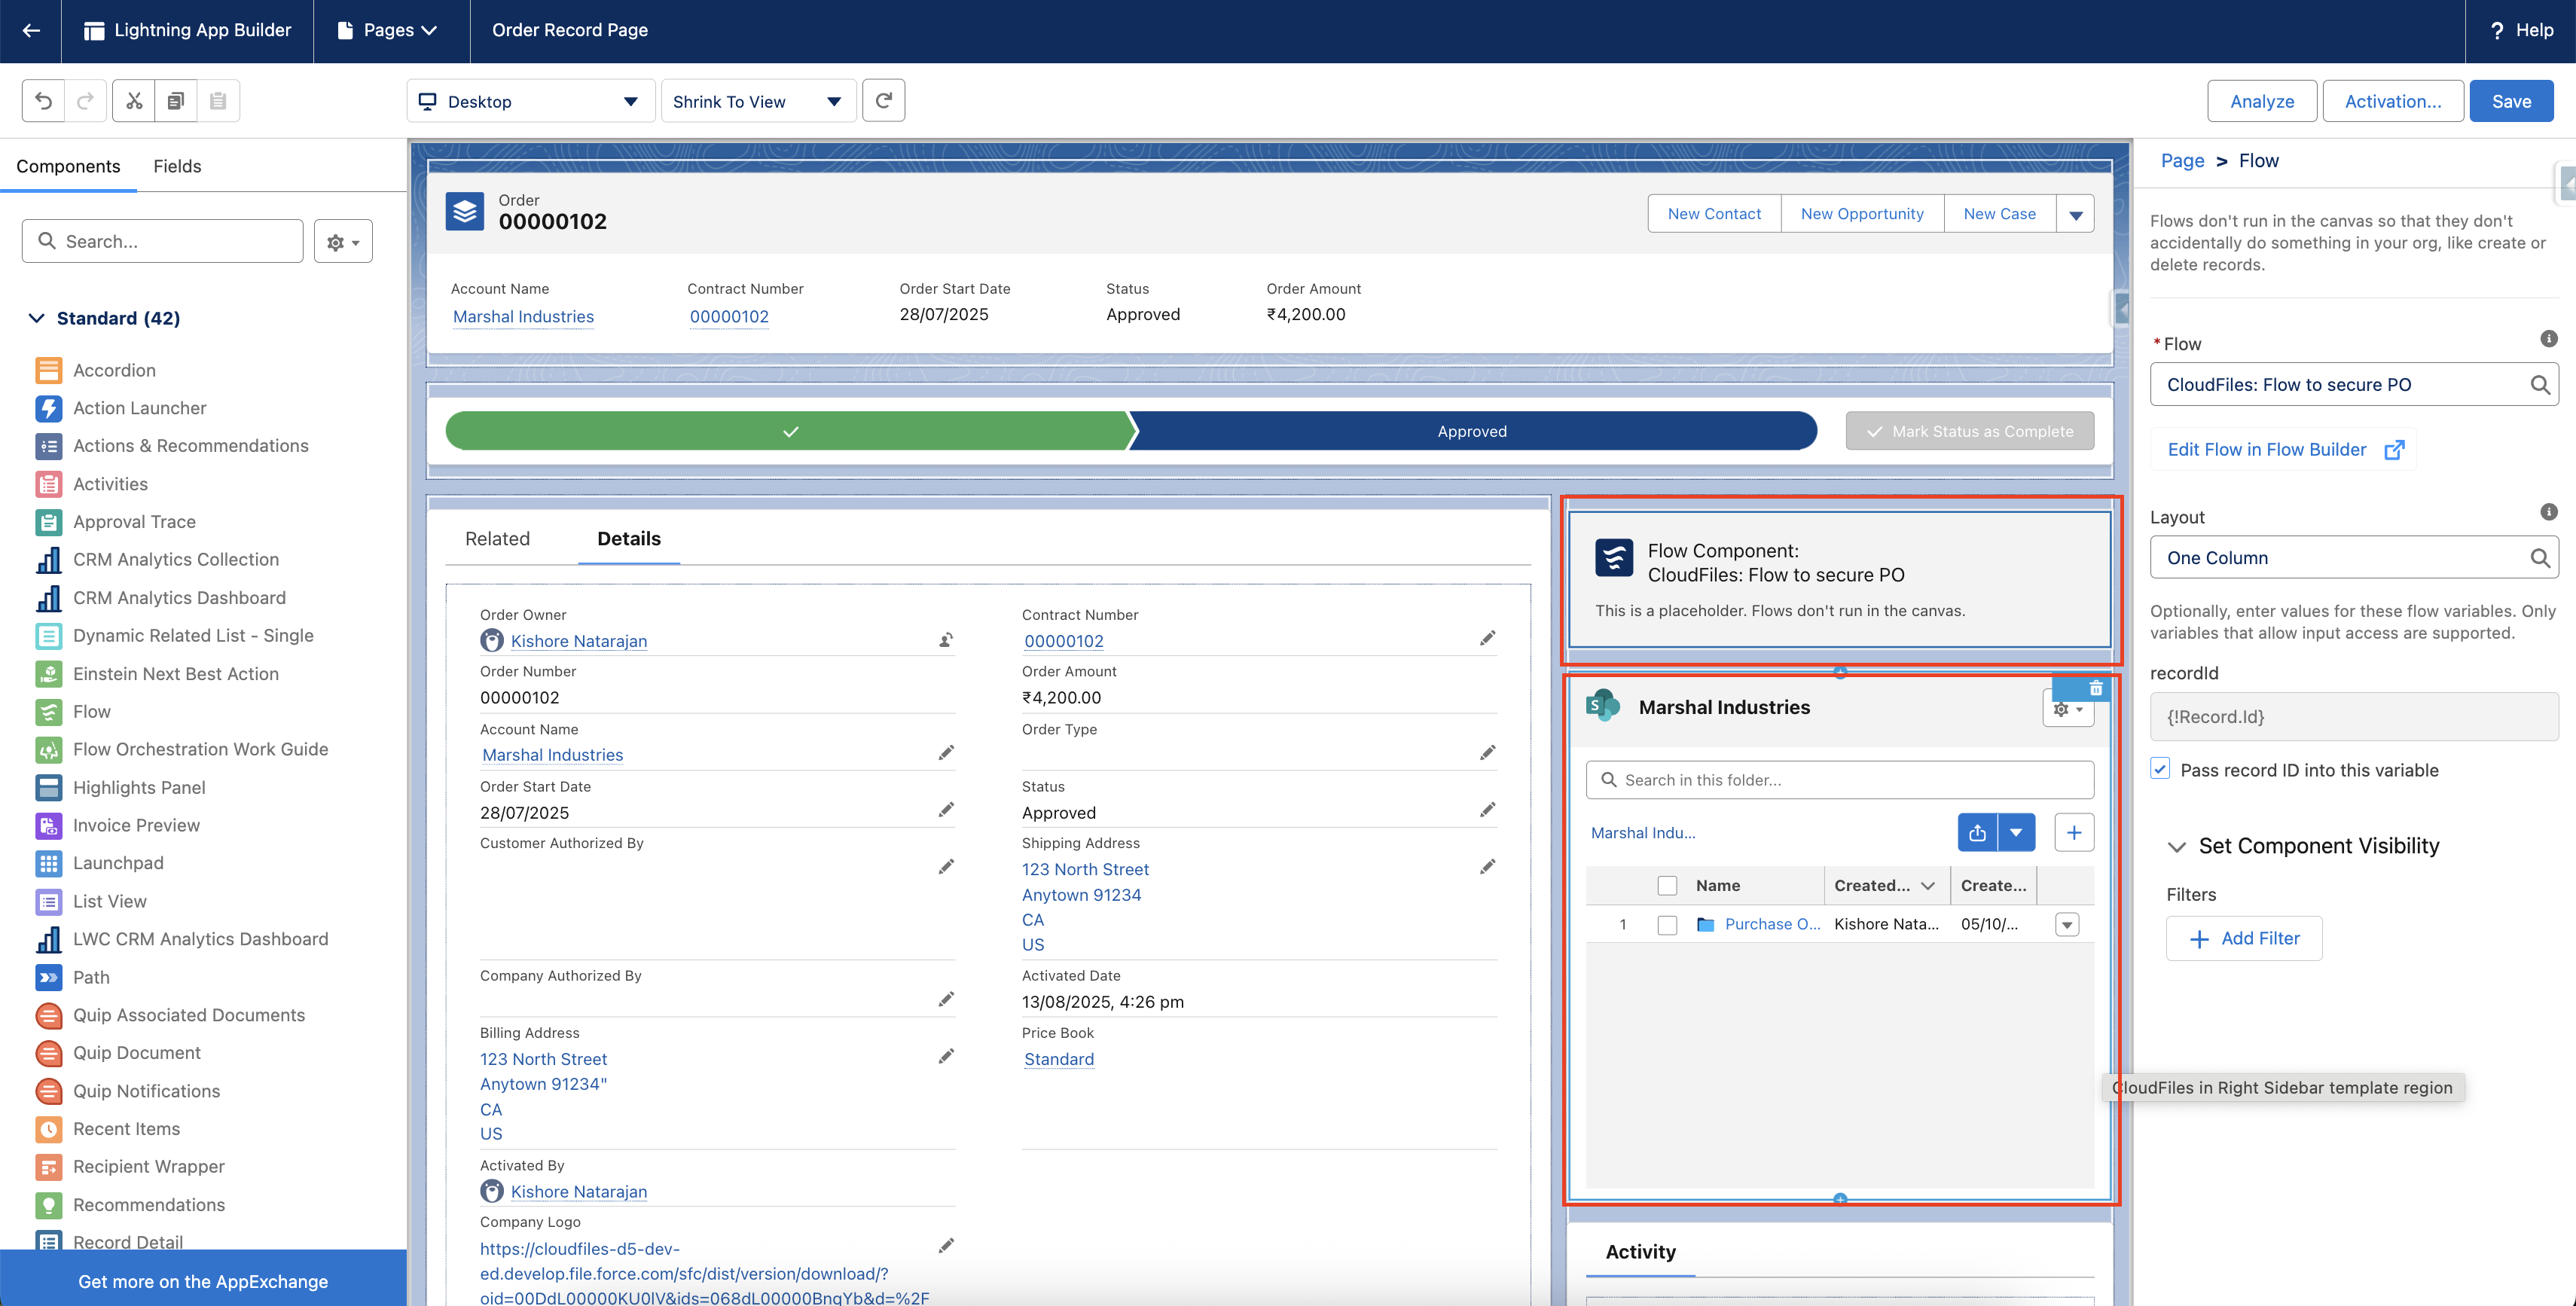
Ensure the flow is added to the Order record page and attach the folder from the drive where the generated document will be stored to the record's CloudFiles widget.
2 - Execute the Flow
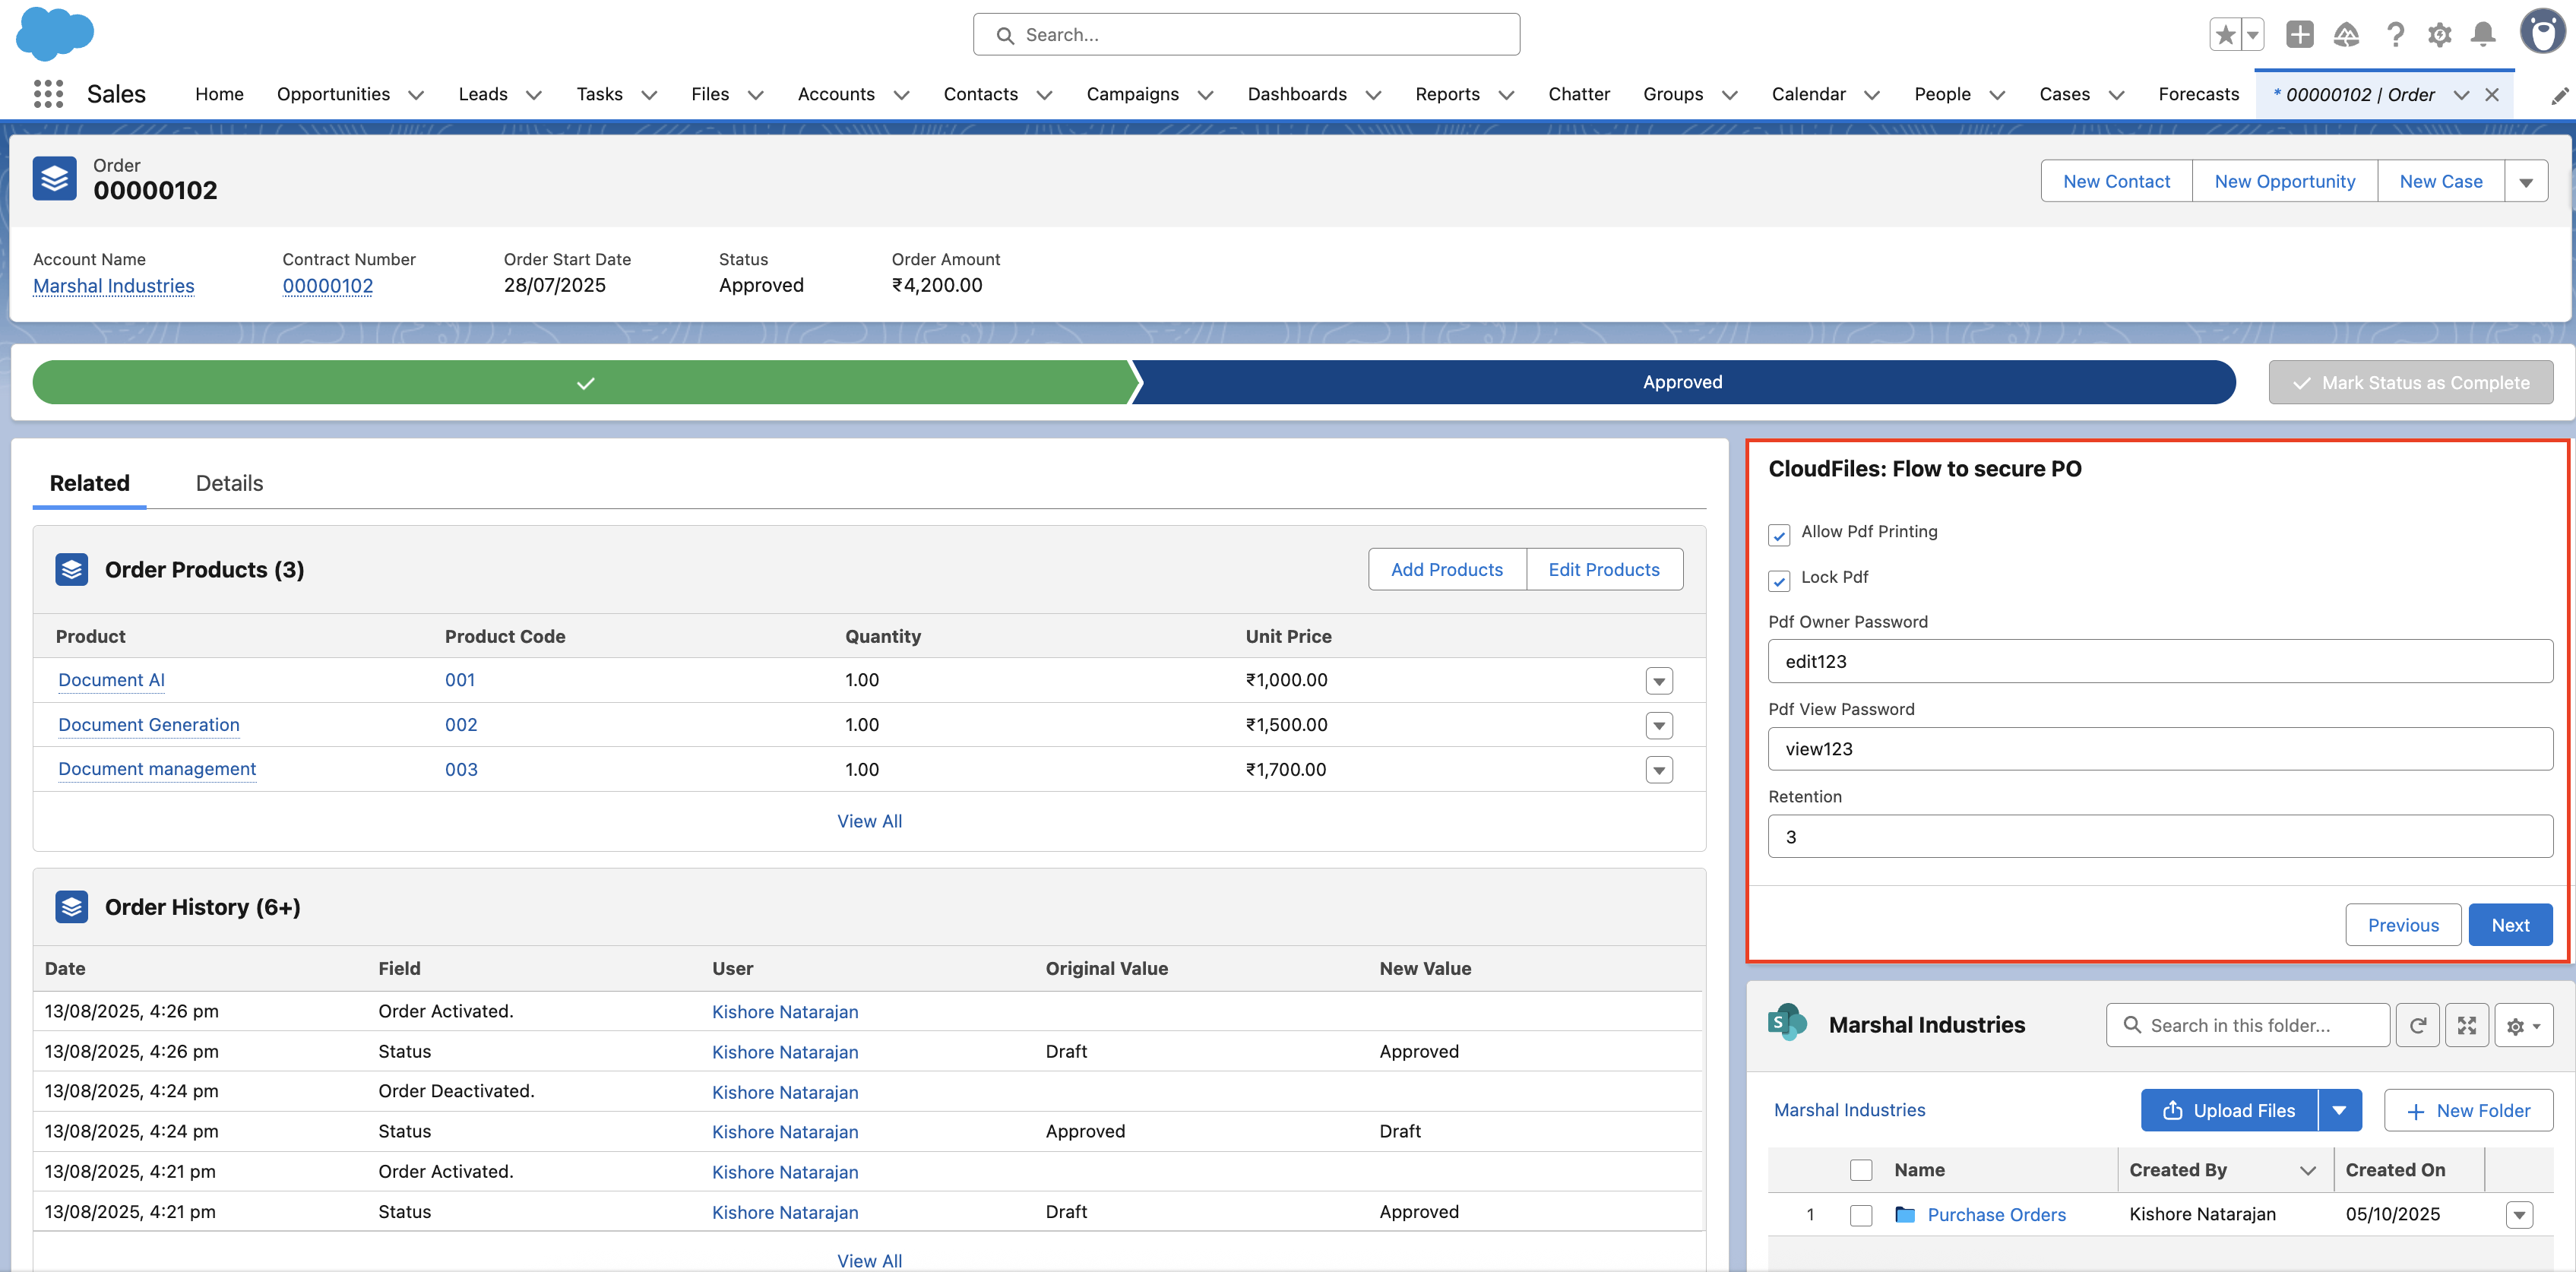
- Navigate to the Order record you want to print the Purchase Order (PO) for and enter the inputs.
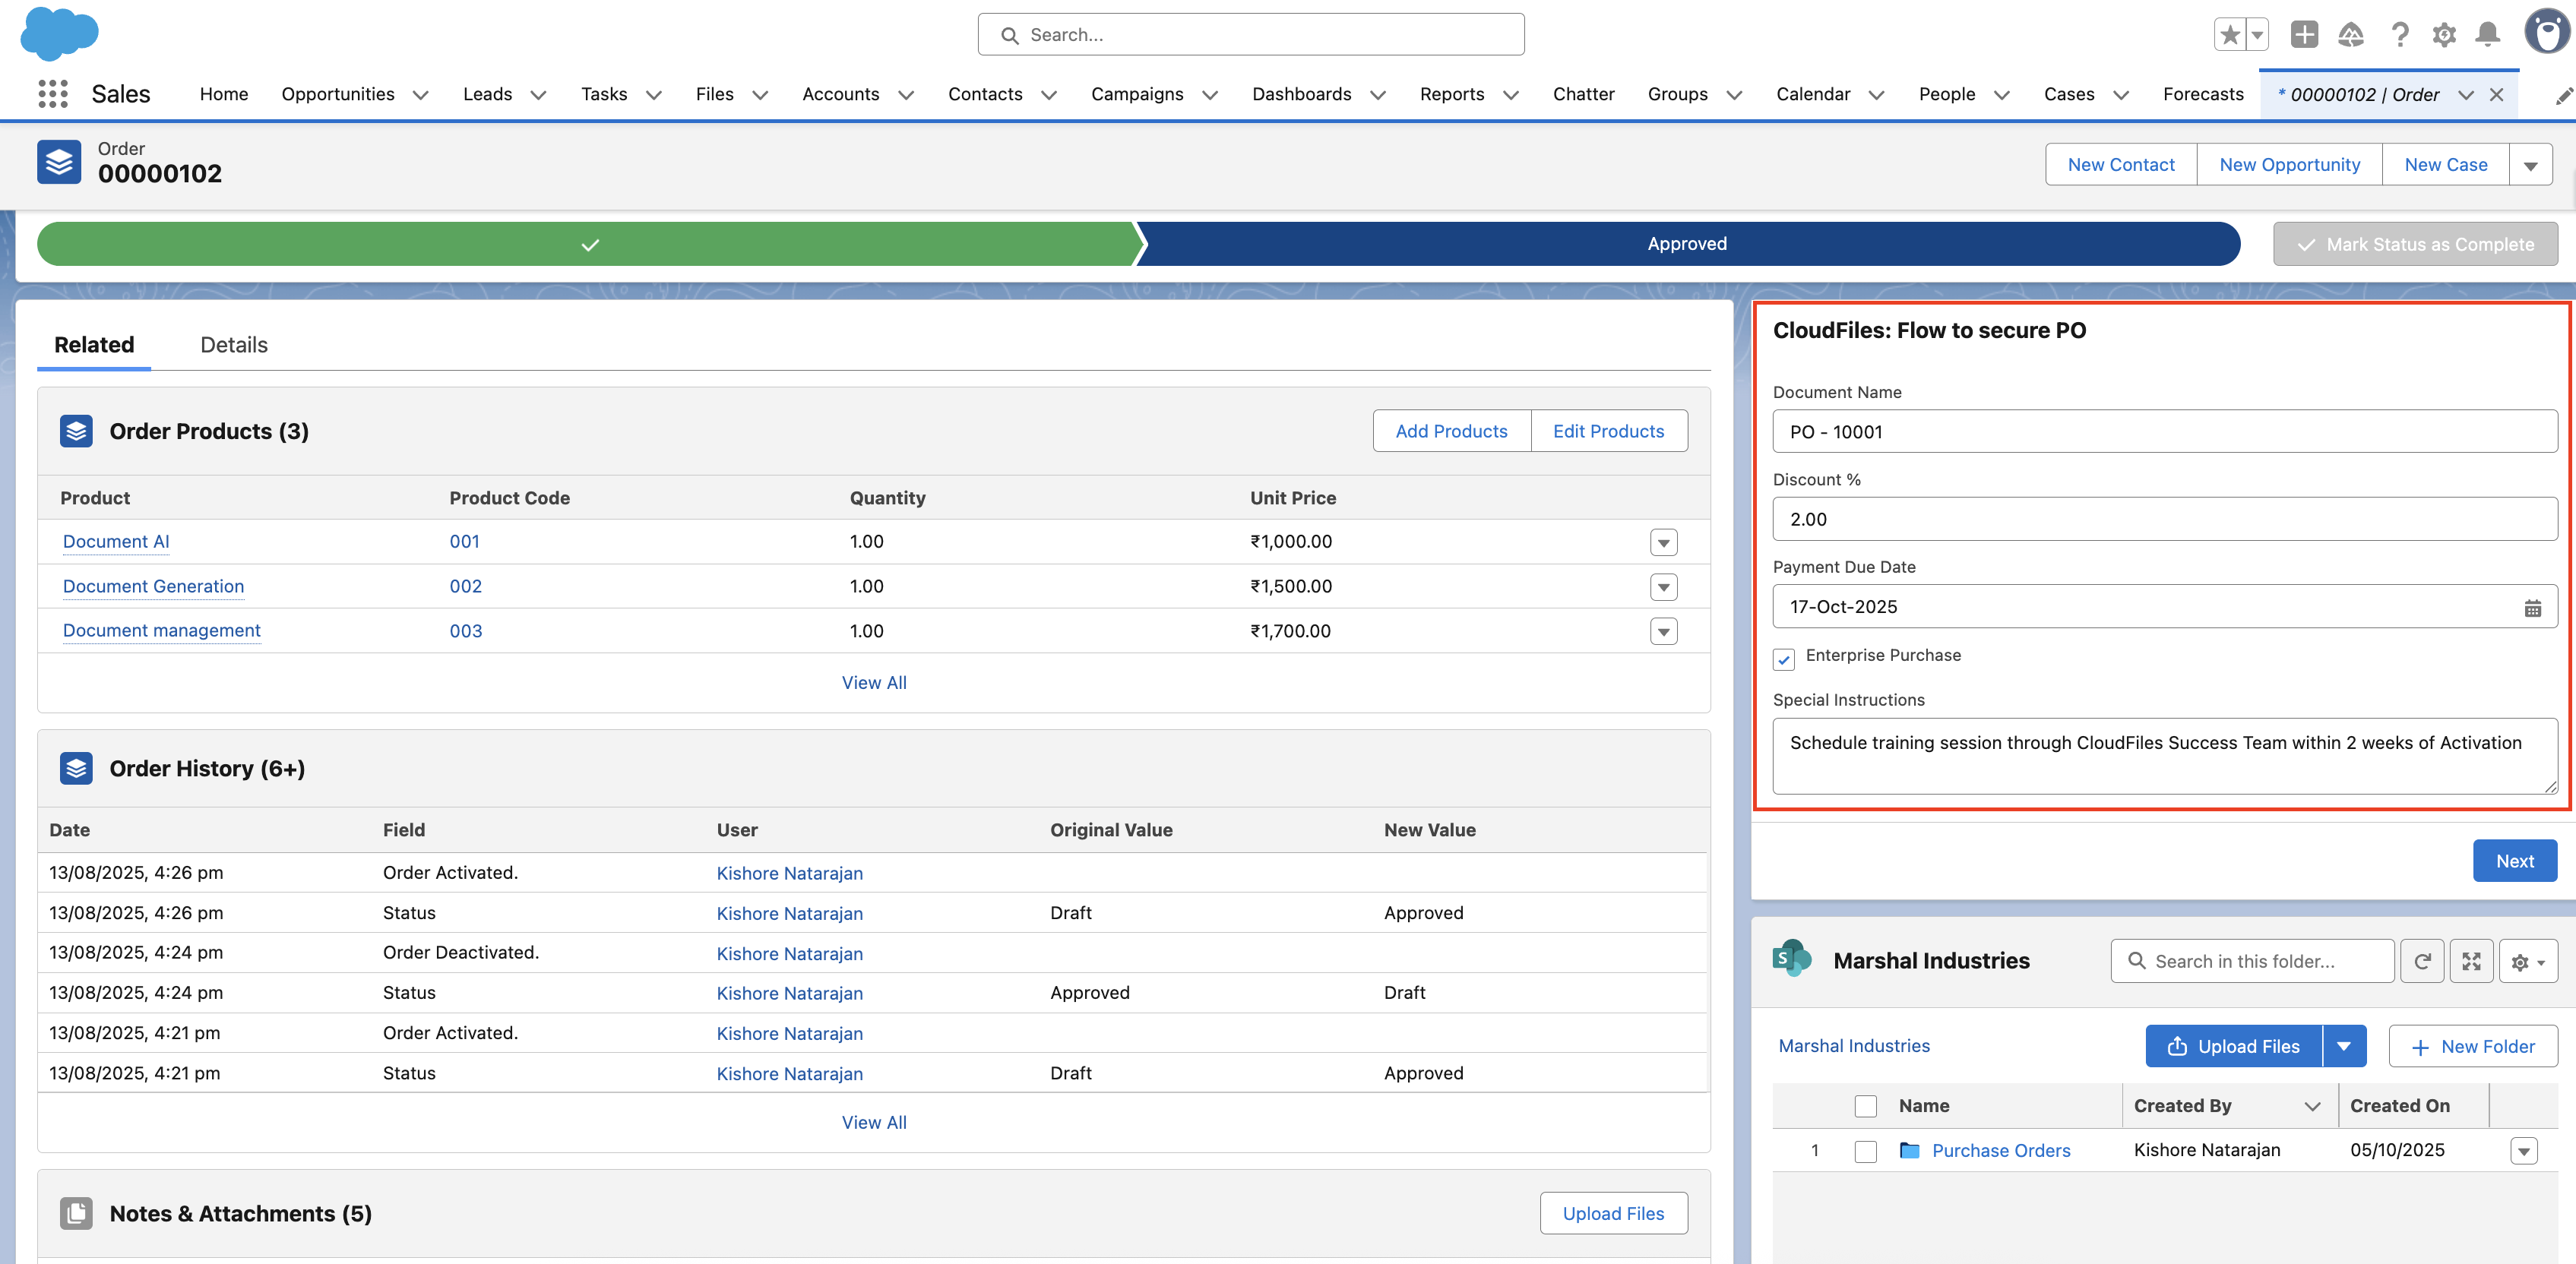
- In the flow’s security input screen, provide values for your PDF restrictions:
- Example: Set AllowPdfPrinting = TRUE, enter a View Password, and define Retention = 3 minutes.
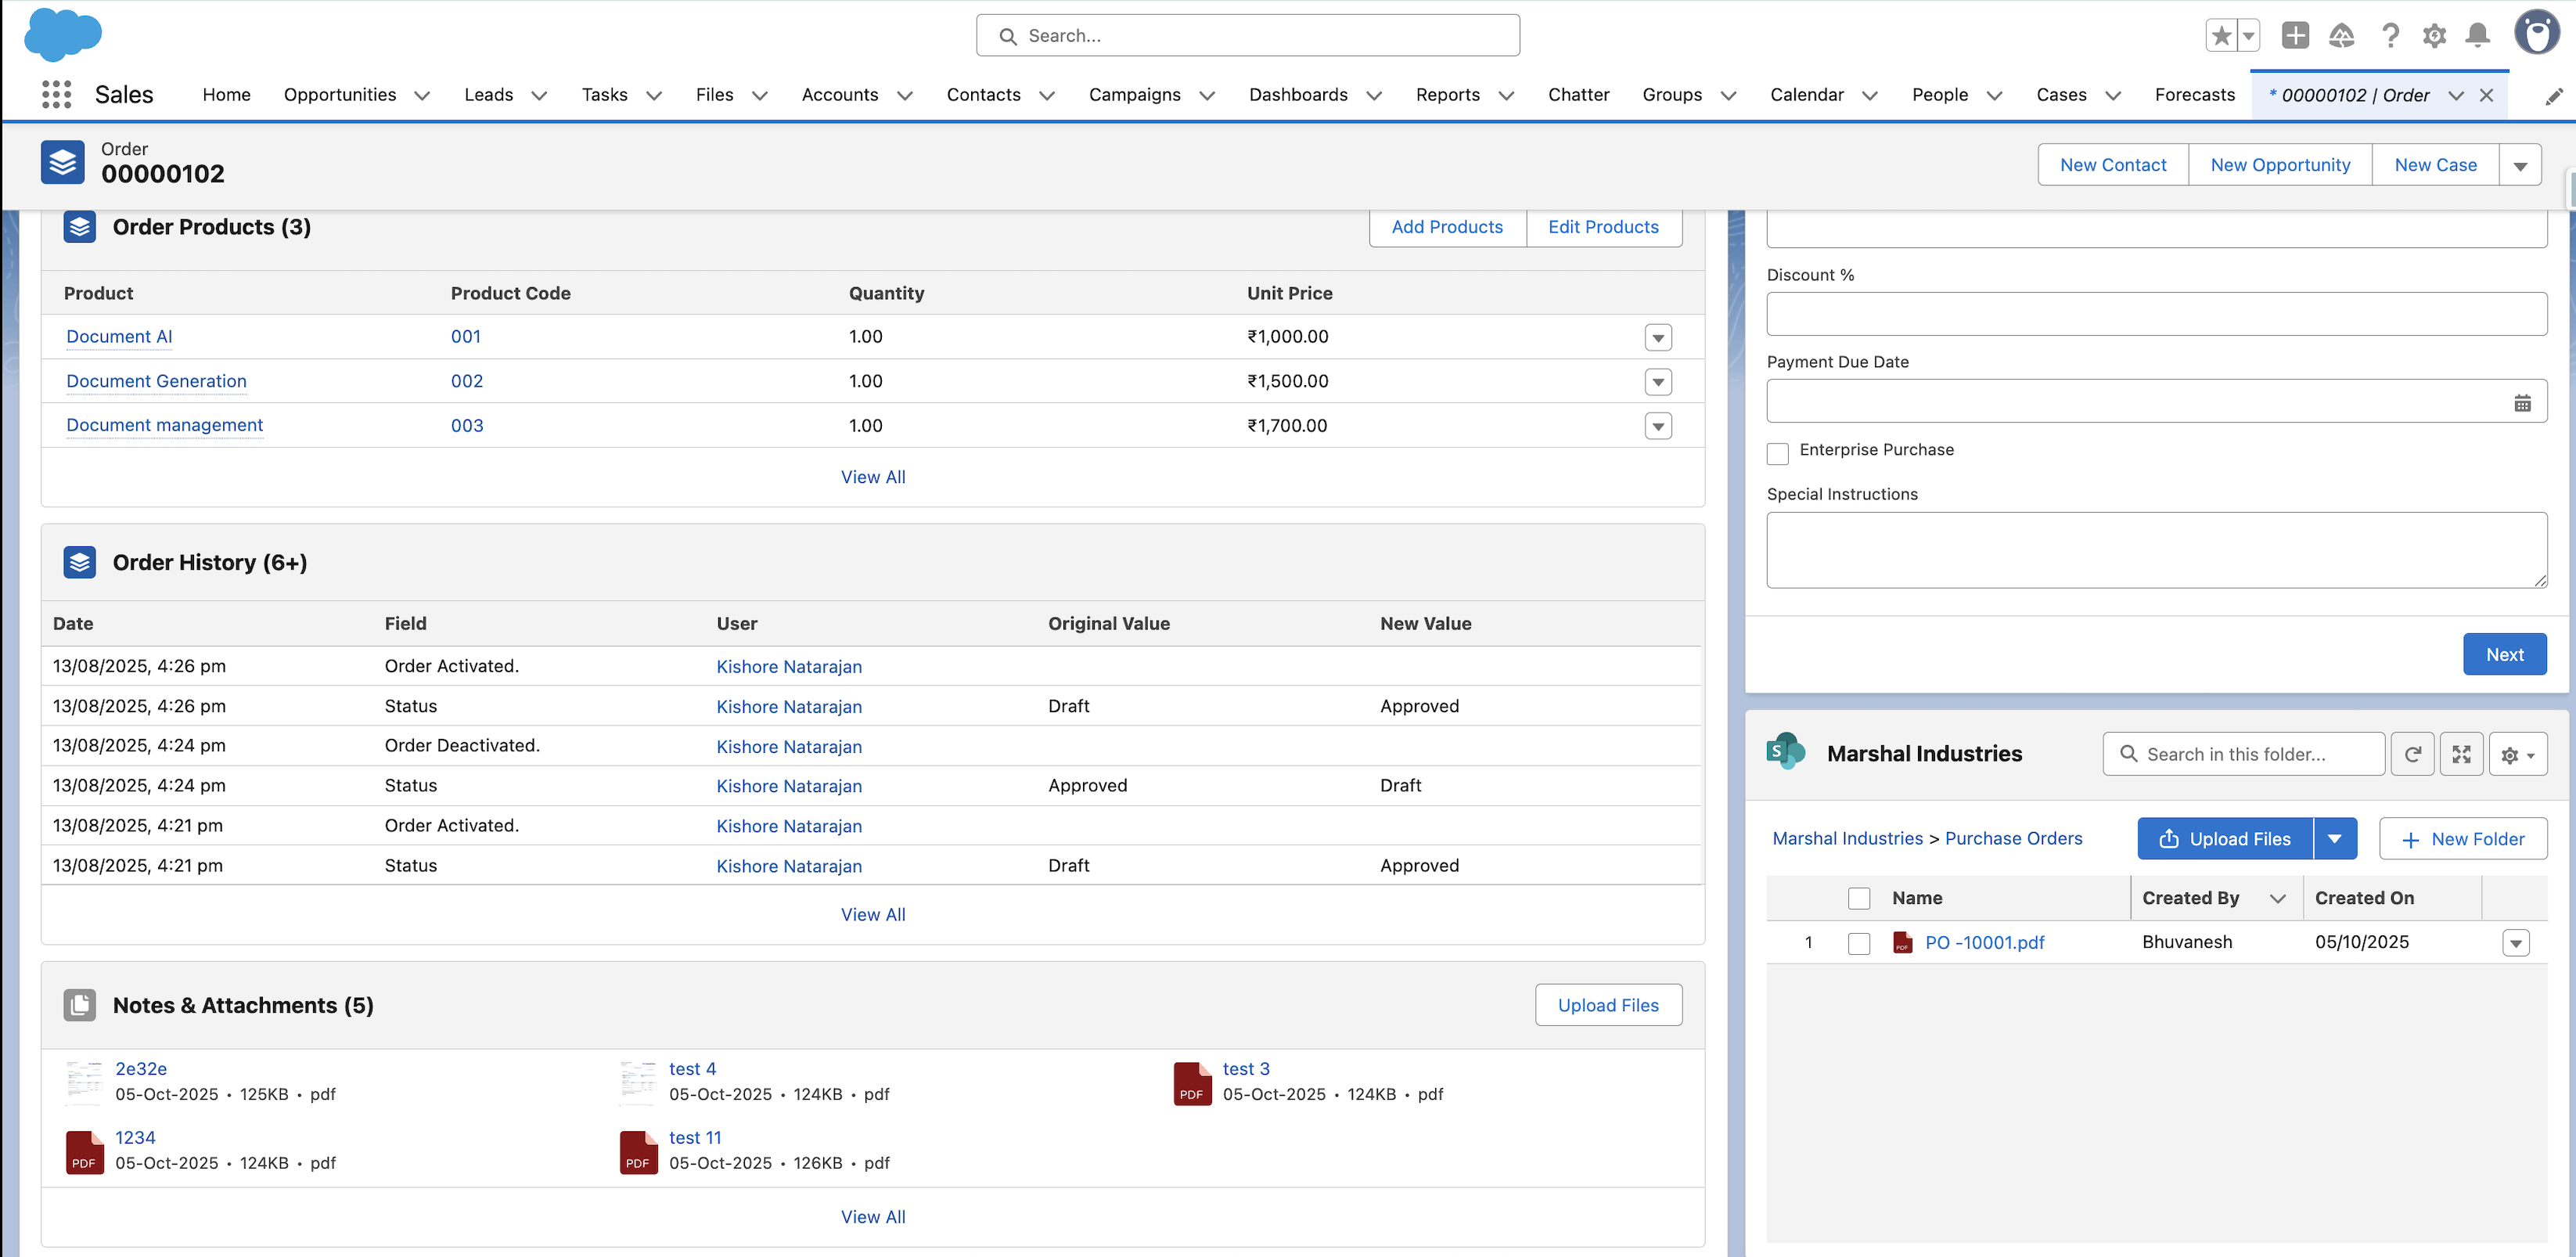
- Once the flow completes, locate the generated file in the destination folder (e.g., SharePoint, OneDrive)
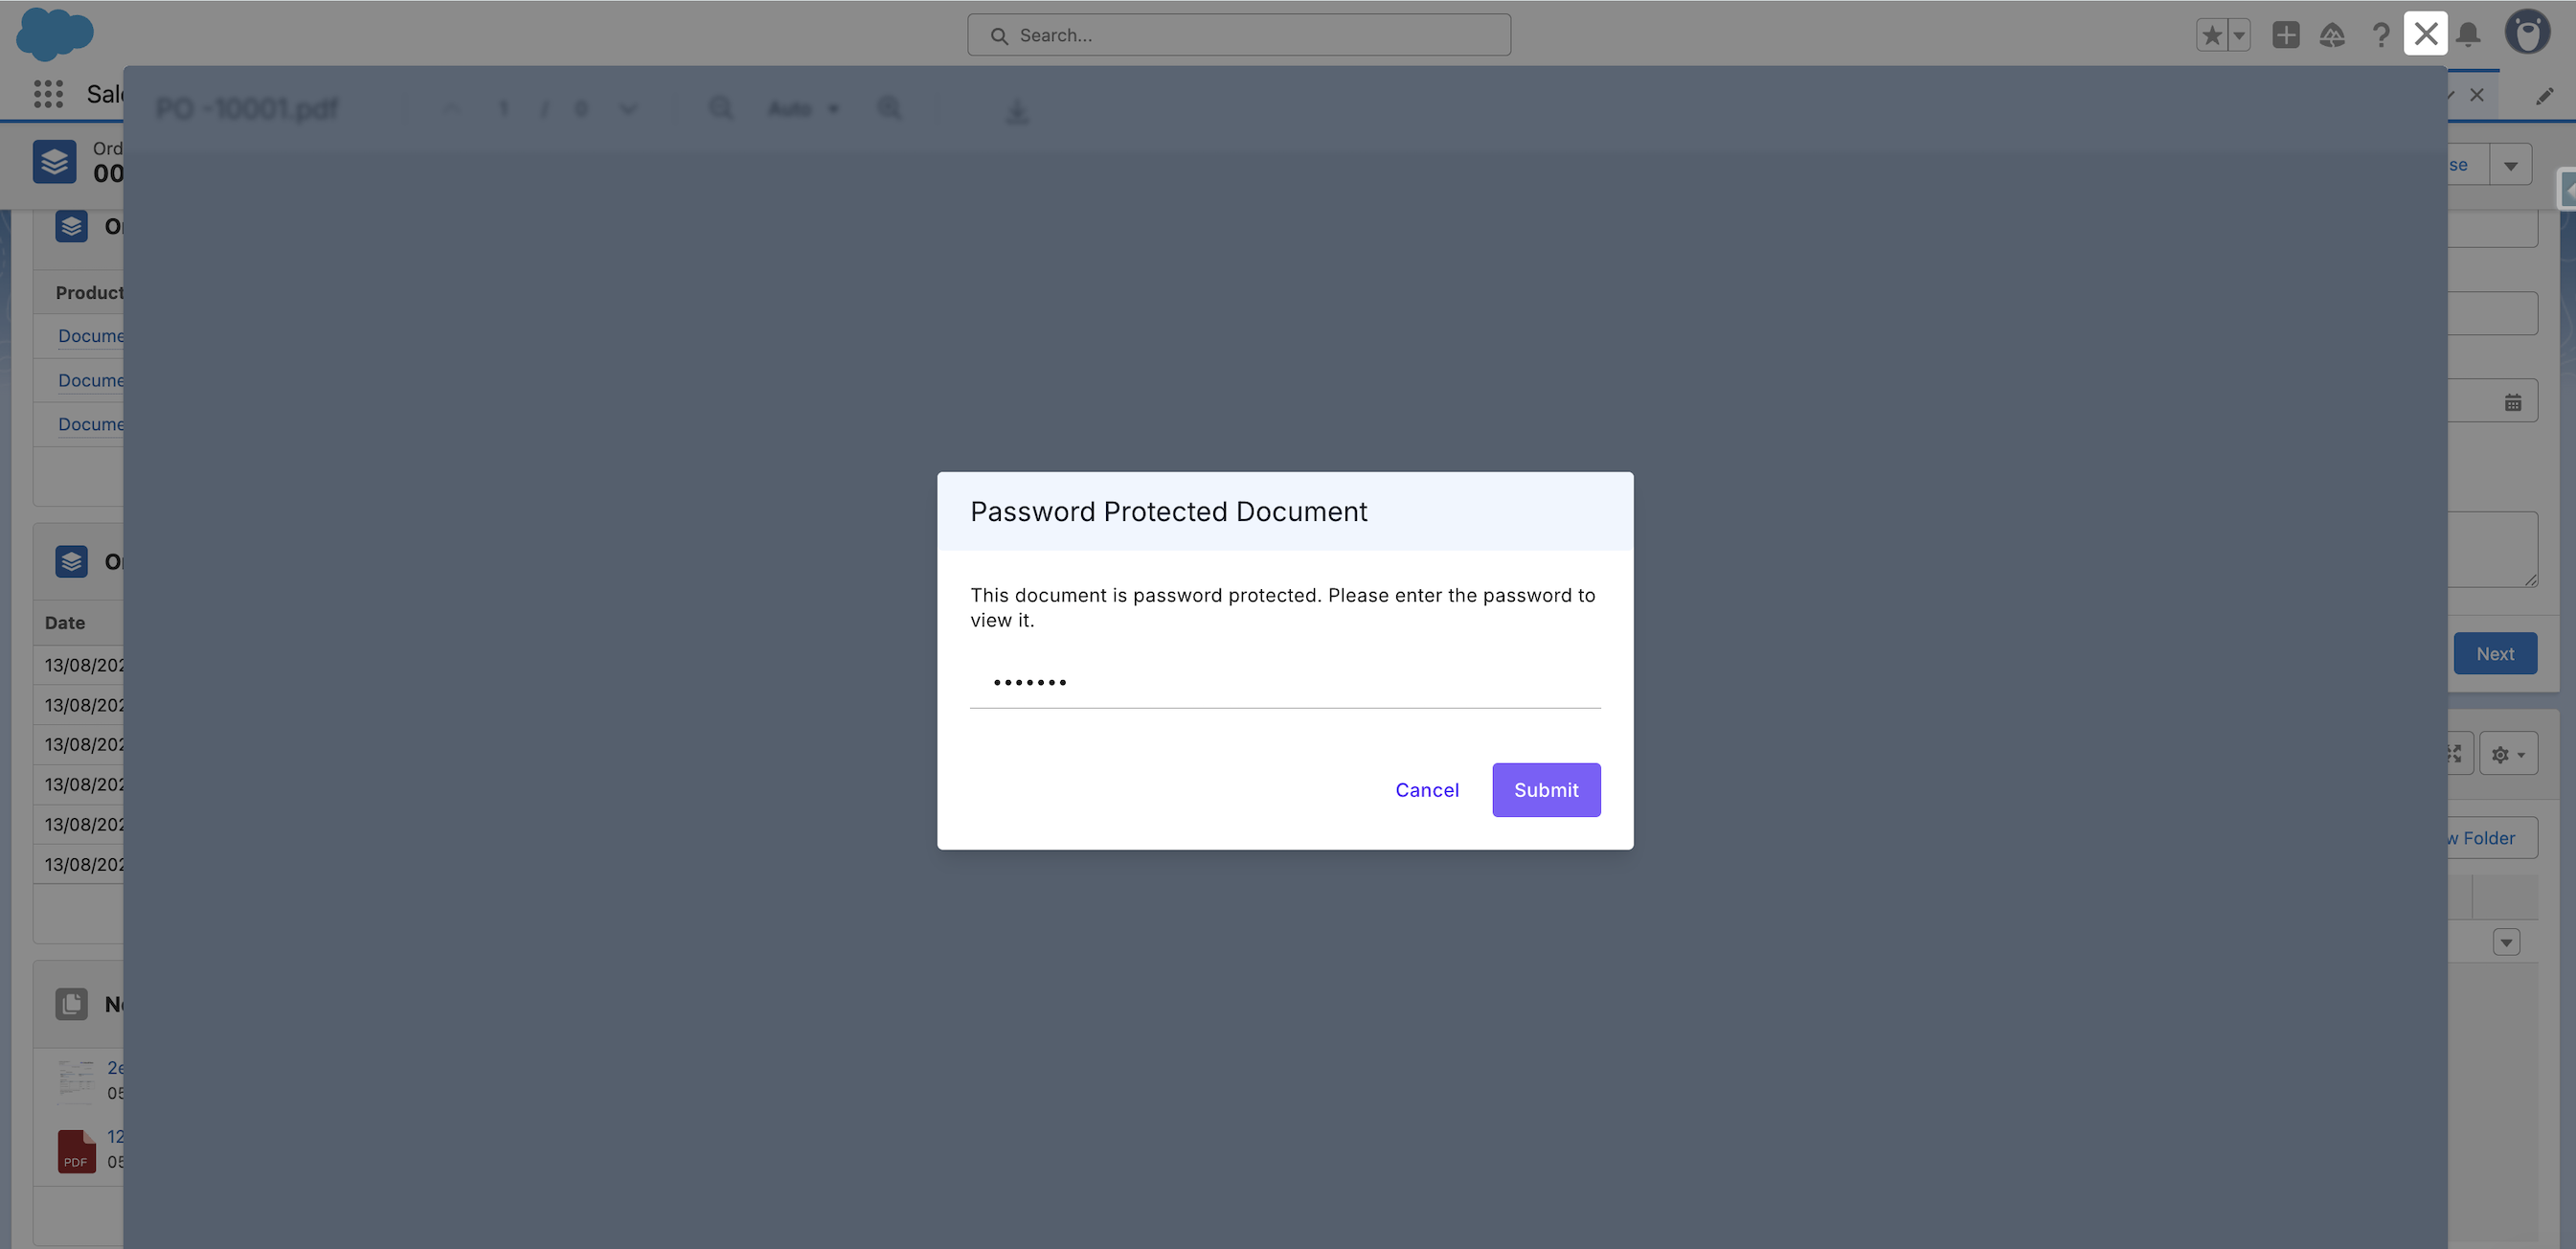
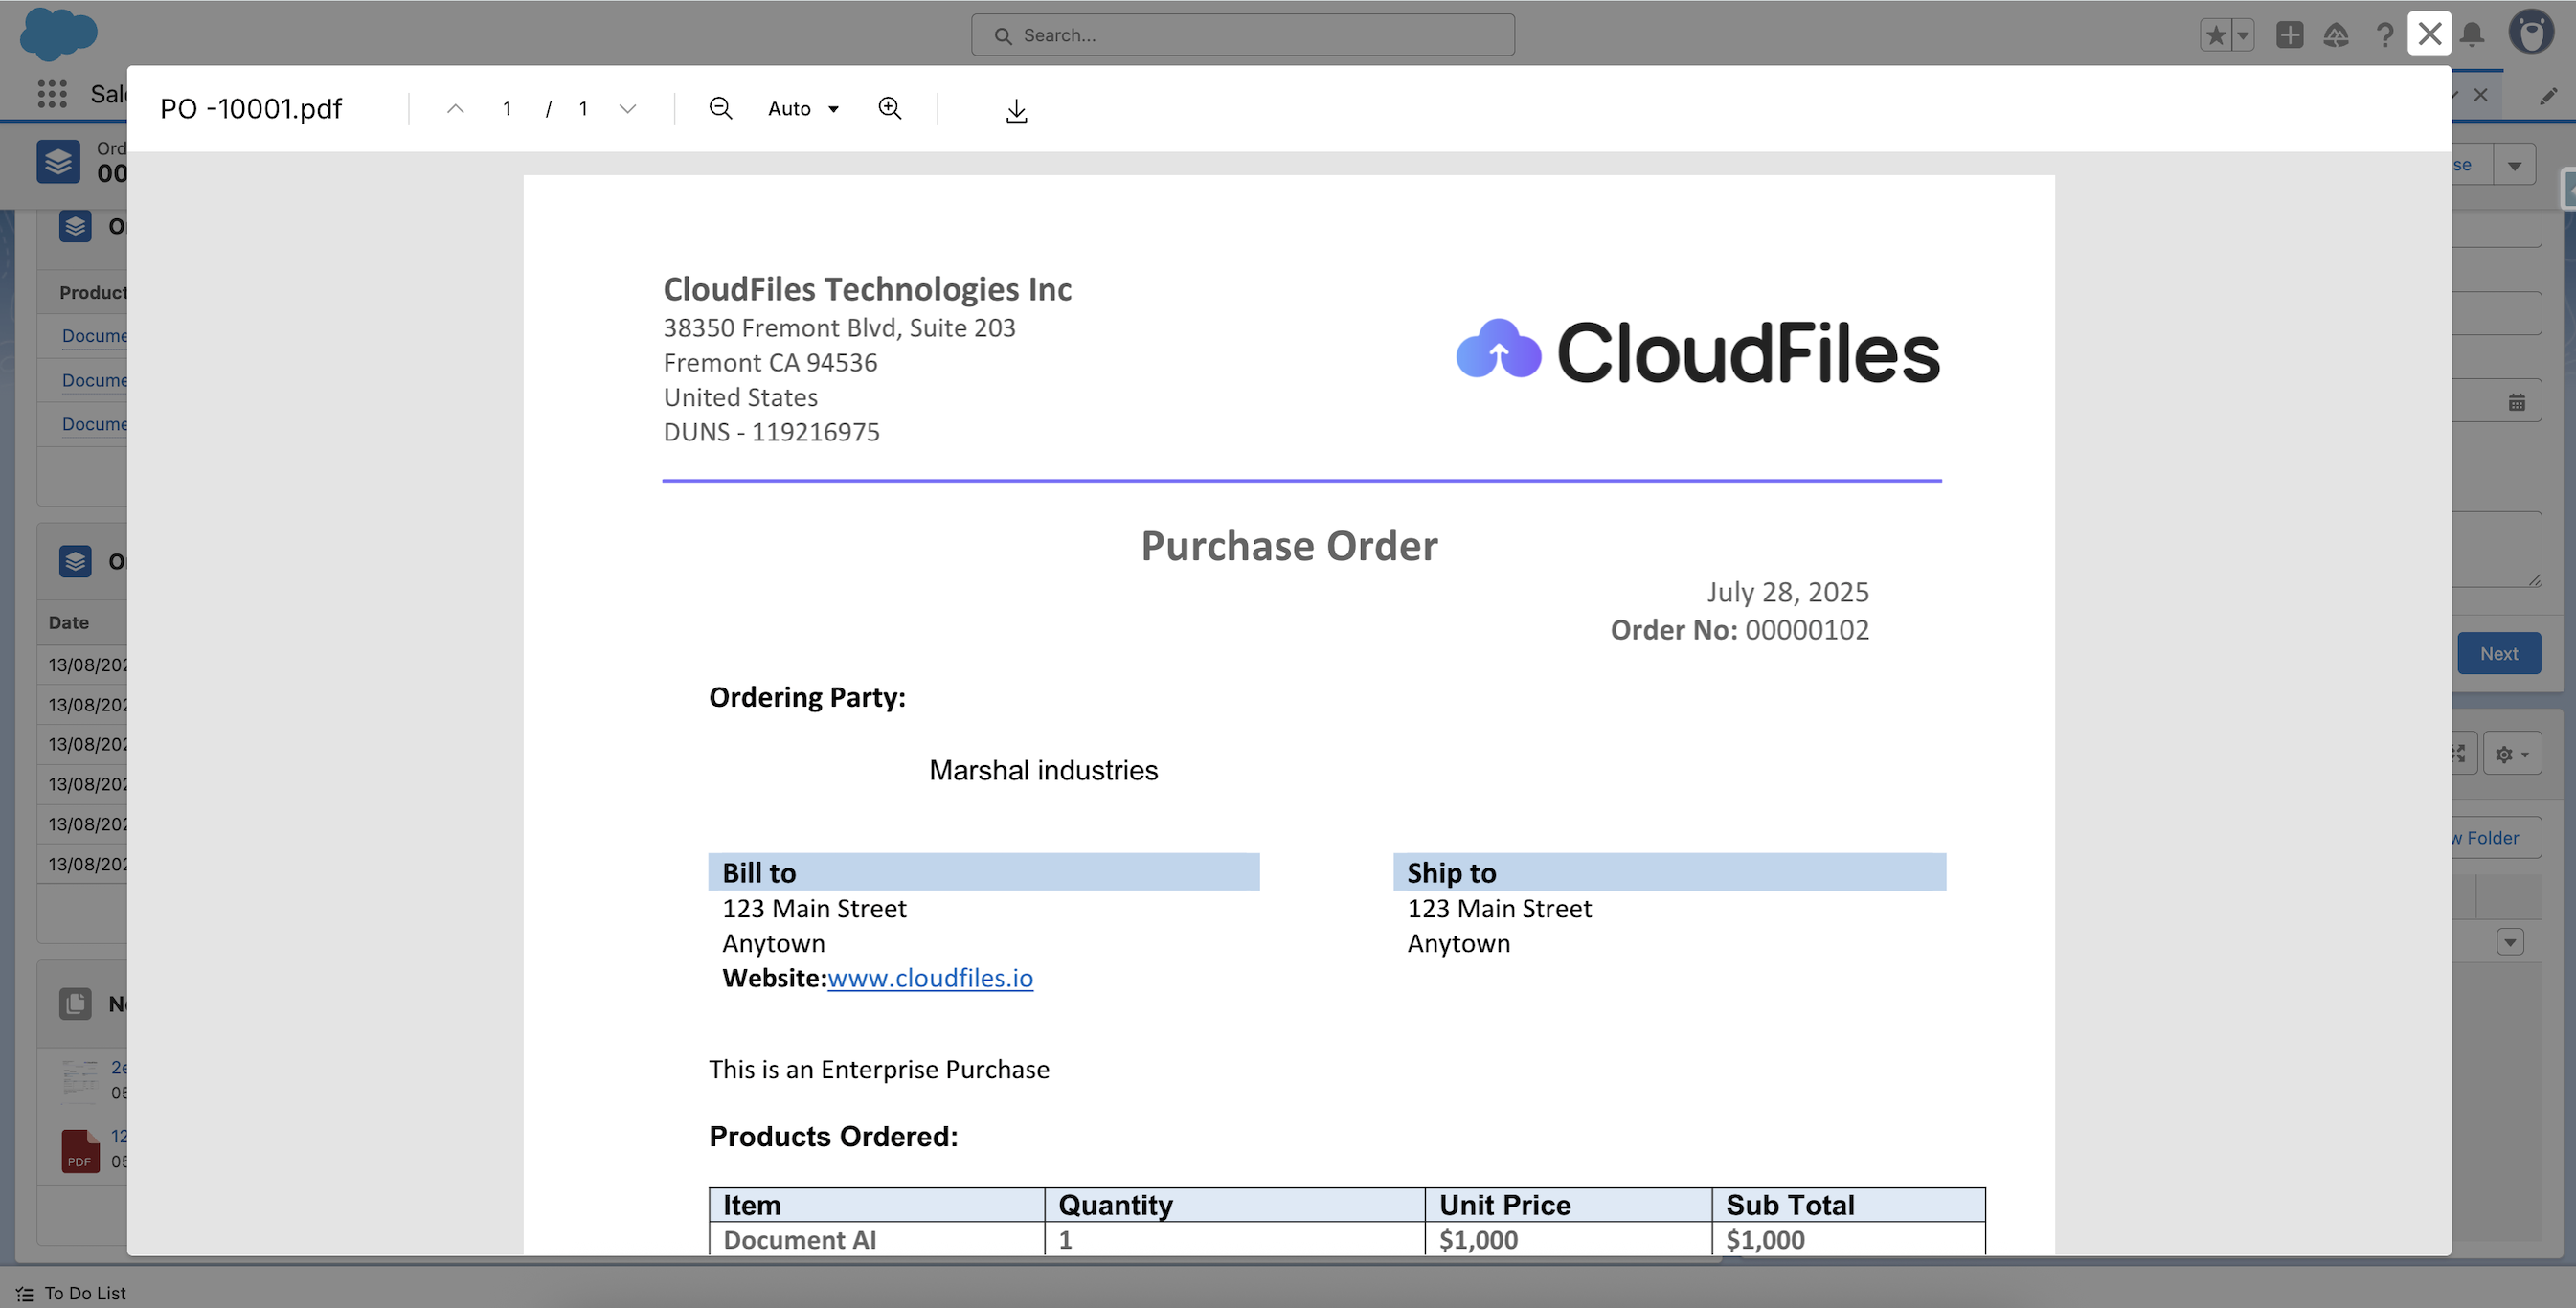
- Open the PDF and verify that:
- Printing is enabled if AllowPdfPrinting = TRUE.
- The file requires the set password(s) for viewing or editing.
- Check whether the file remains available only for the specified duration. For example, if Retention = 3, confirm that the file is automatically removed after 3 minutes.